
Having a Secure Socket Layer (SSL) certificate in your web site will supply an additional safety layer to it. The SSL certificates will allow encryption of knowledge switch between the customers and your server which is particularly vital when your web site is processing delicate knowledge equivalent to person login credentials, private knowledge, and bank cards quantity.
On most sensible of that, with SSL certificates your web site will have a possibility to rank better on Google SERP, keep away from “Not Secure” mark in Google Chrome and other browser since your web site would be capable of load from the HTTPS protocol, leverage HTTP/2 which calls for using HTTPS, and give protection to the web site for different form of malicious movements equivalent to code injection from your ISP.
Given a lot of these advantages, putting in SSL certificates and loading your web site with HTTPS must now not be unnoticed. So, on this instructional, we’ll display you tips on how to deploy an SSL certificates on your web site operating with Apache and cPanel. We can get started via acquiring an SSL certificates from an expert dealer, then putting in and verifying set up. Let’s get began.
Shortcut to:
- Purchase SSL Cert
- Generate CSR
- Activate SSL Cert
- Validate SSL Cert
- Download SSL Cert
- Install SSL Cert
- Test SSL Cert Installation
Learn Additionally: How to Deploy SSL & HTTPS in WordPress for Free
Contents
1. Acquire SSL Certificates
As a way to arrange the SSL certificates to your website online, you first wish to acquire it. You’ll be able to accomplish that via following the stairs under.
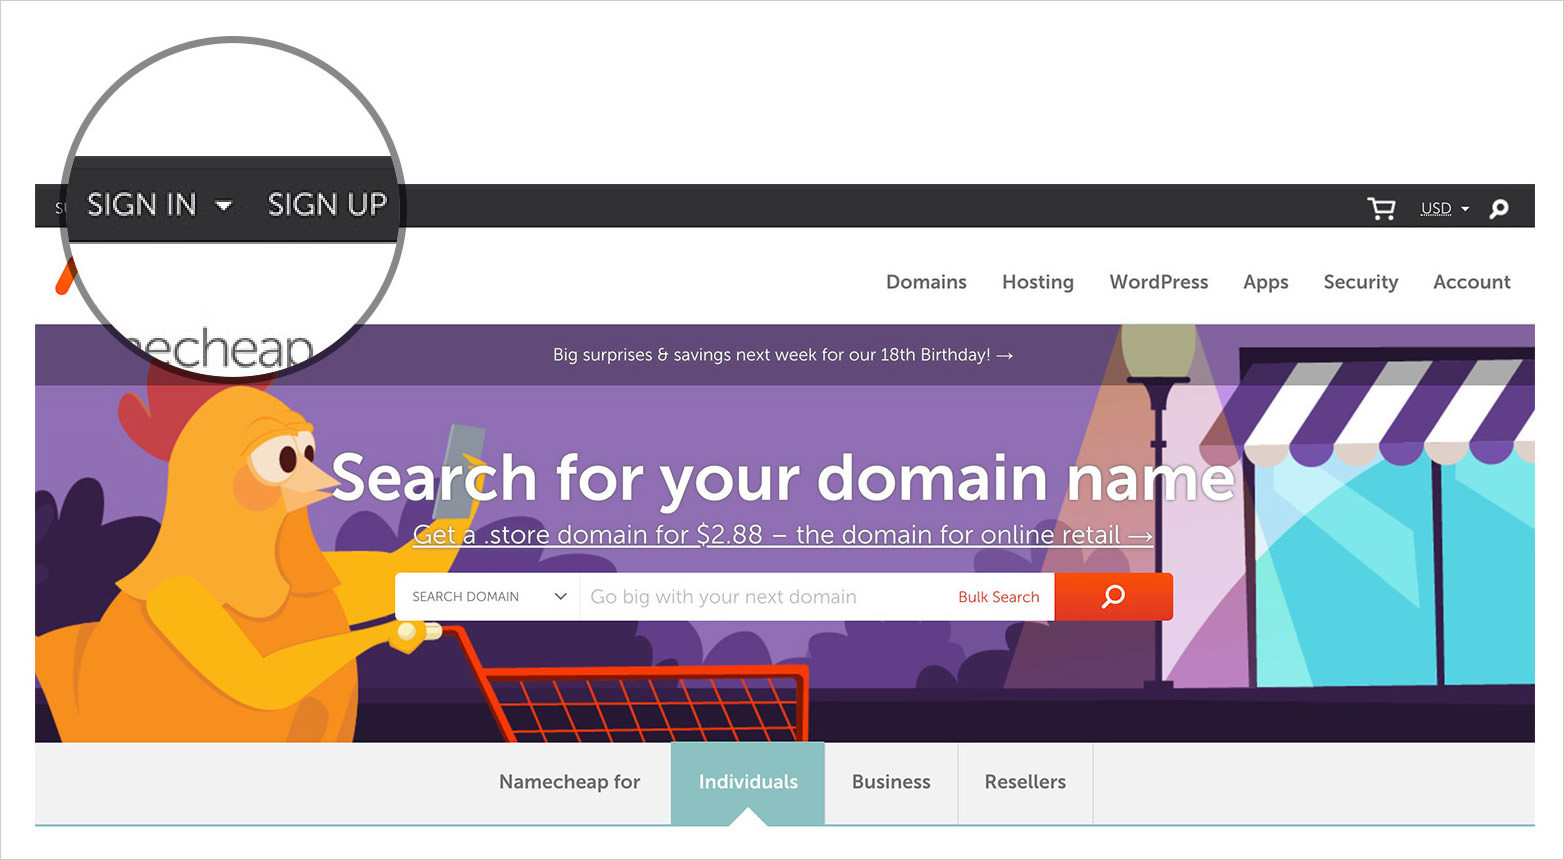
- Join a namecheap.com account or check in if you have already got one.
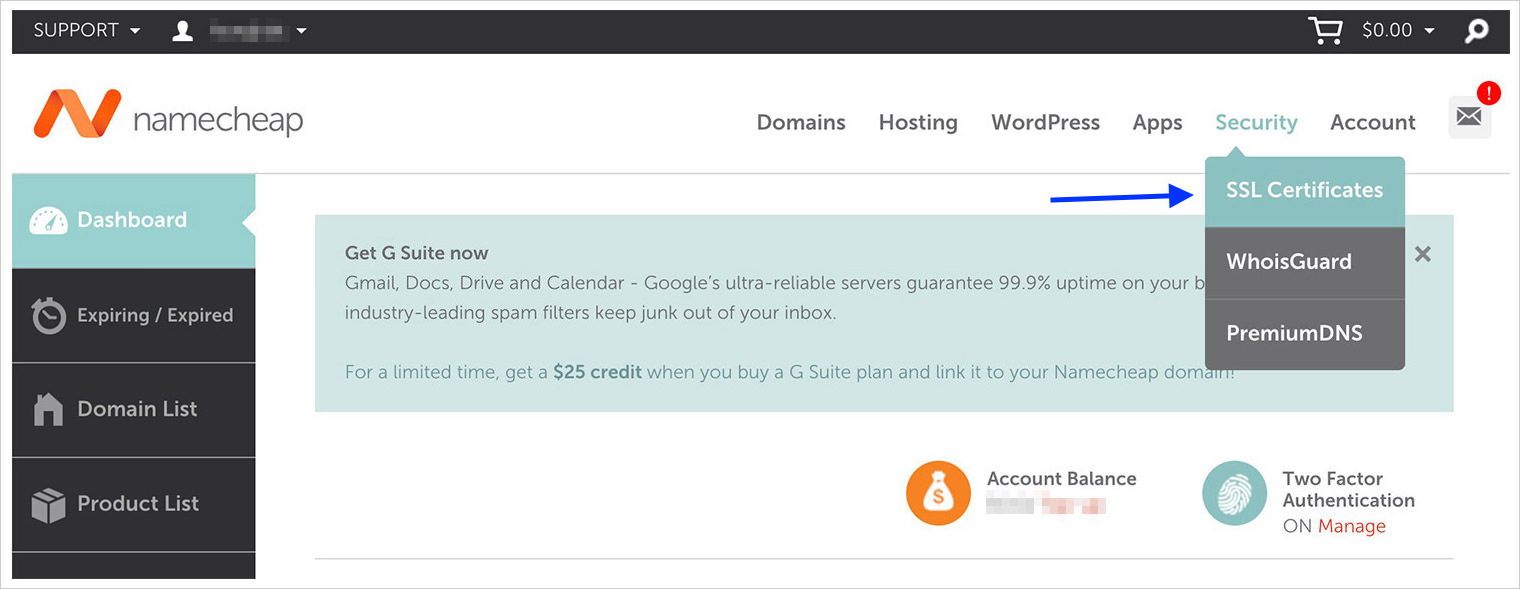
- Whenever you check in, hover at the Safety tab at the most sensible proper nook, and click on SSL Certificate.
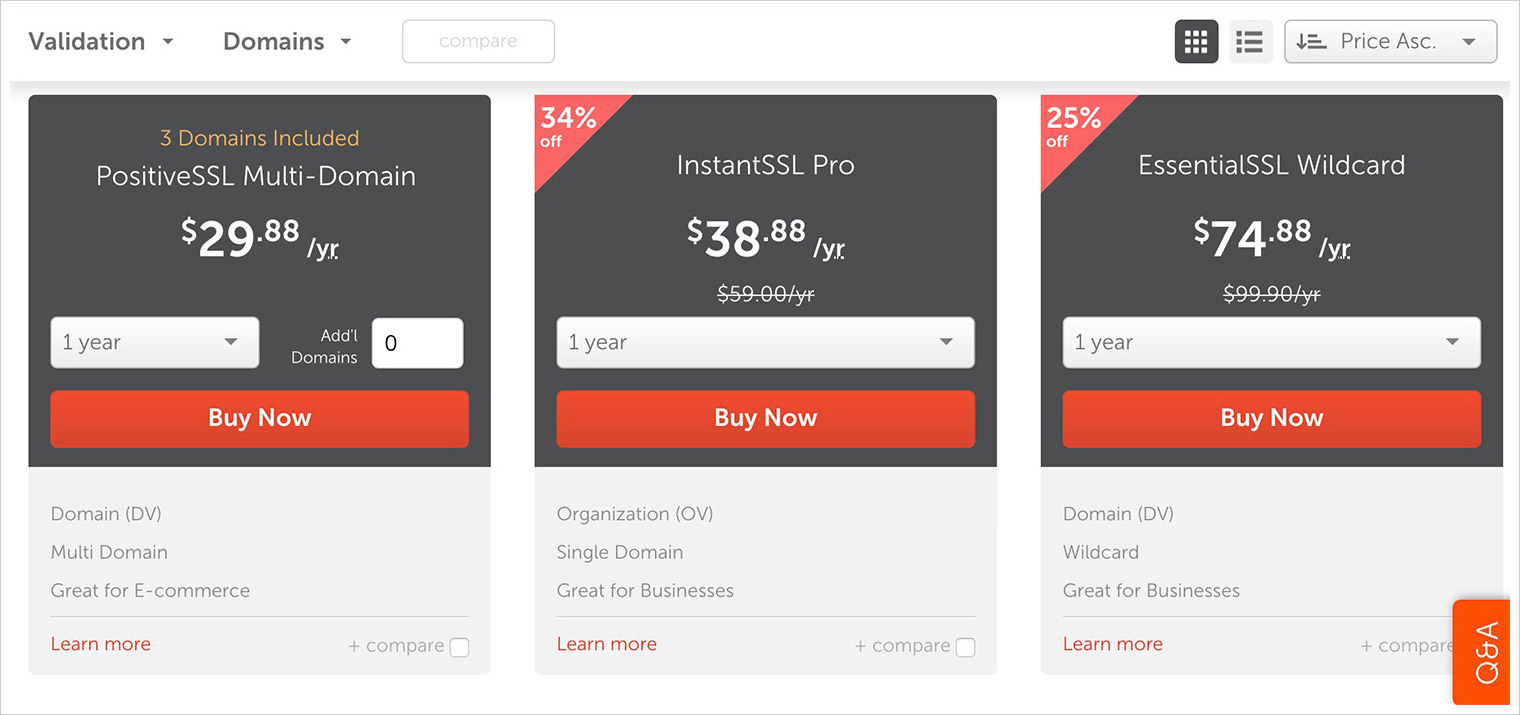
- Discover the to be had SSL certificates choices. You’ll be able to be informed extra about each and every choice or evaluate them with eachother to make a decision which one would fit you. As soon as you make a decision which solution to opt for, click on Purchase Now.
- Continue to shopping for your SSL certificates via clicking the Ascertain Order, then click on Pay Now at the subsequent web page to pay for the certificates.
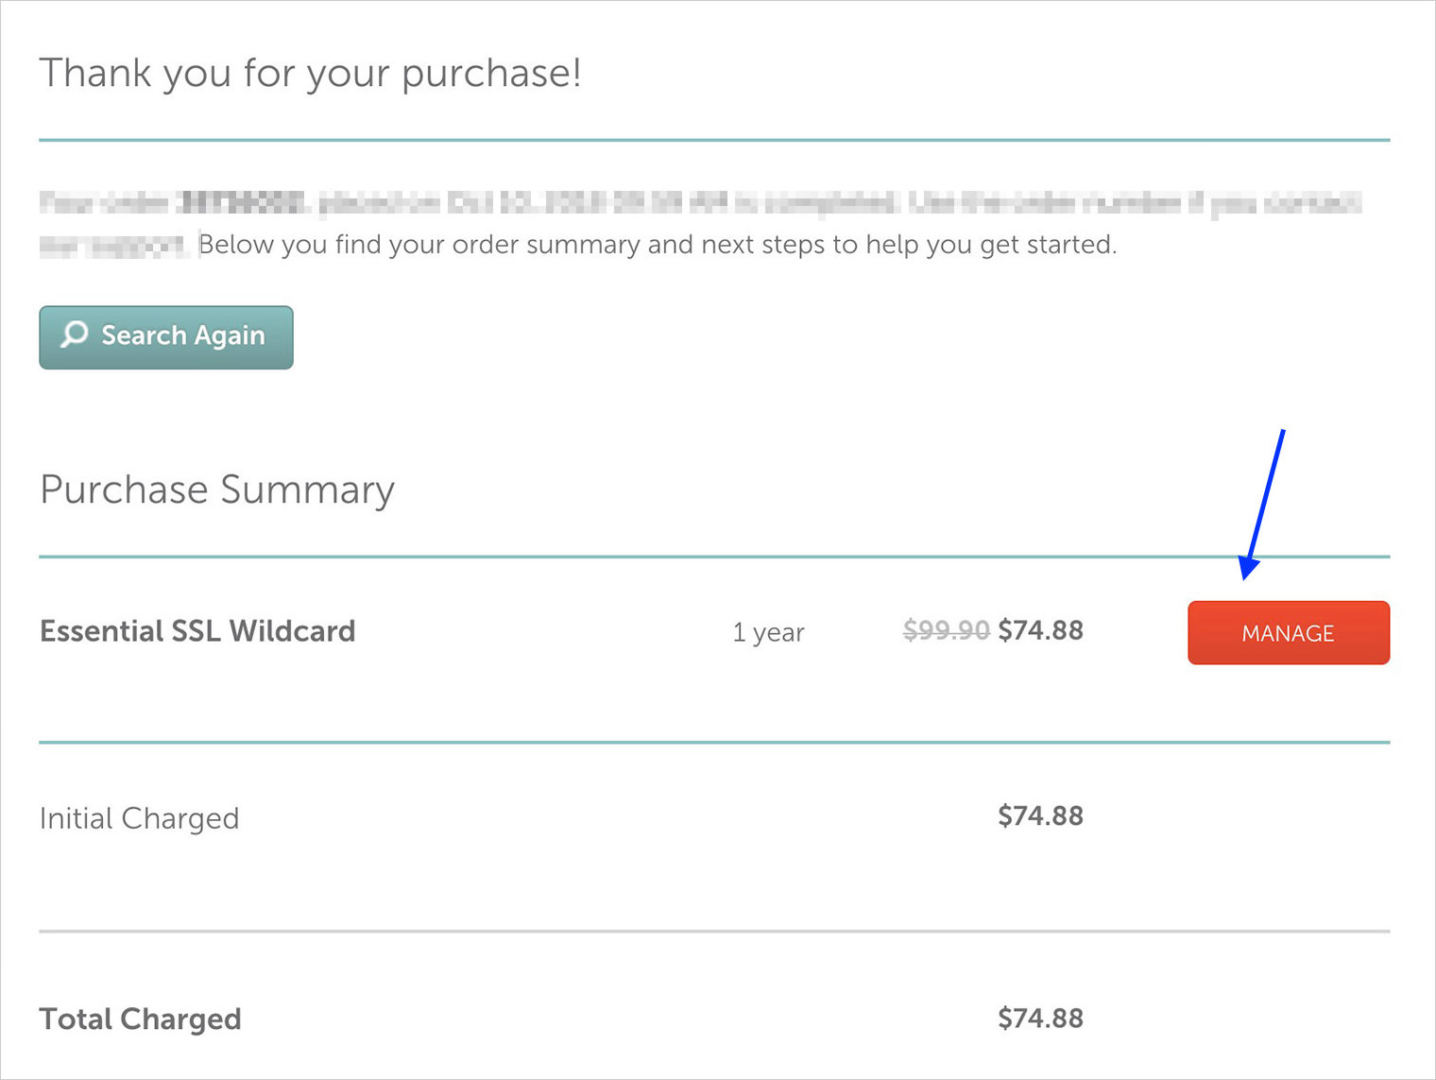
- As soon as this is carried out, you’ll be directed to the next web page that claims “Thanks to your acquire!” Click on Arrange button to start out putting in the certificates.
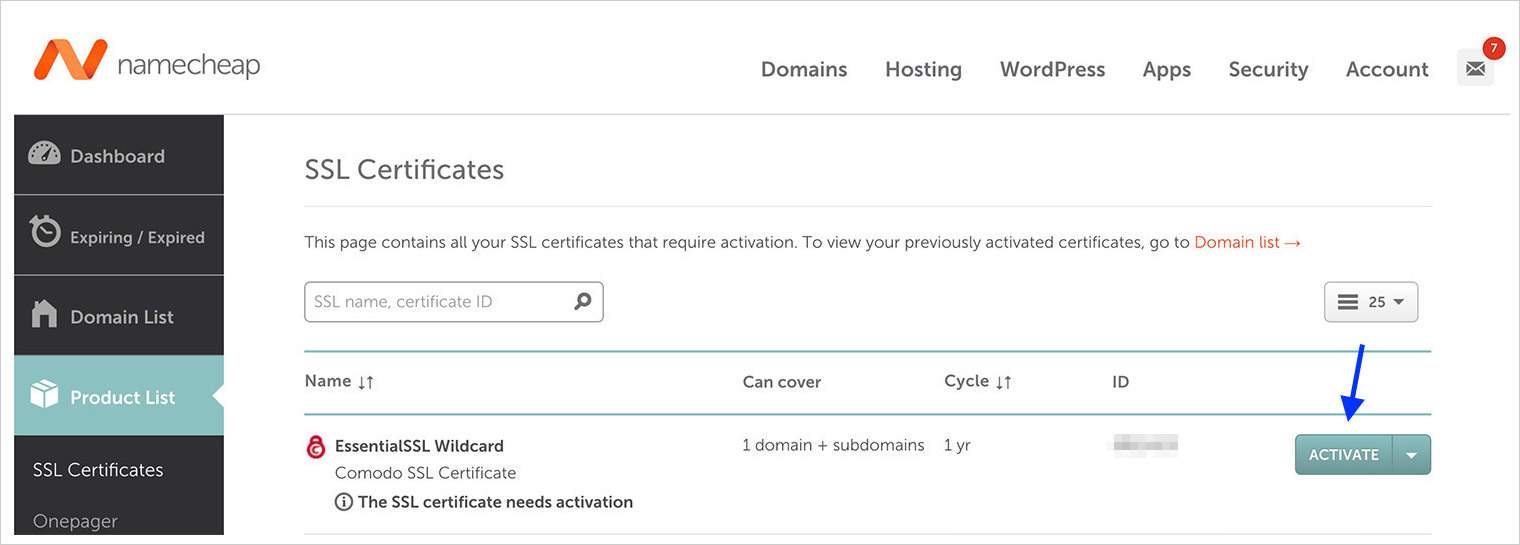
- Your newly purchased SSL certificates will likely be indexed right here. Now click on Turn on to turn on your SSL certificates.


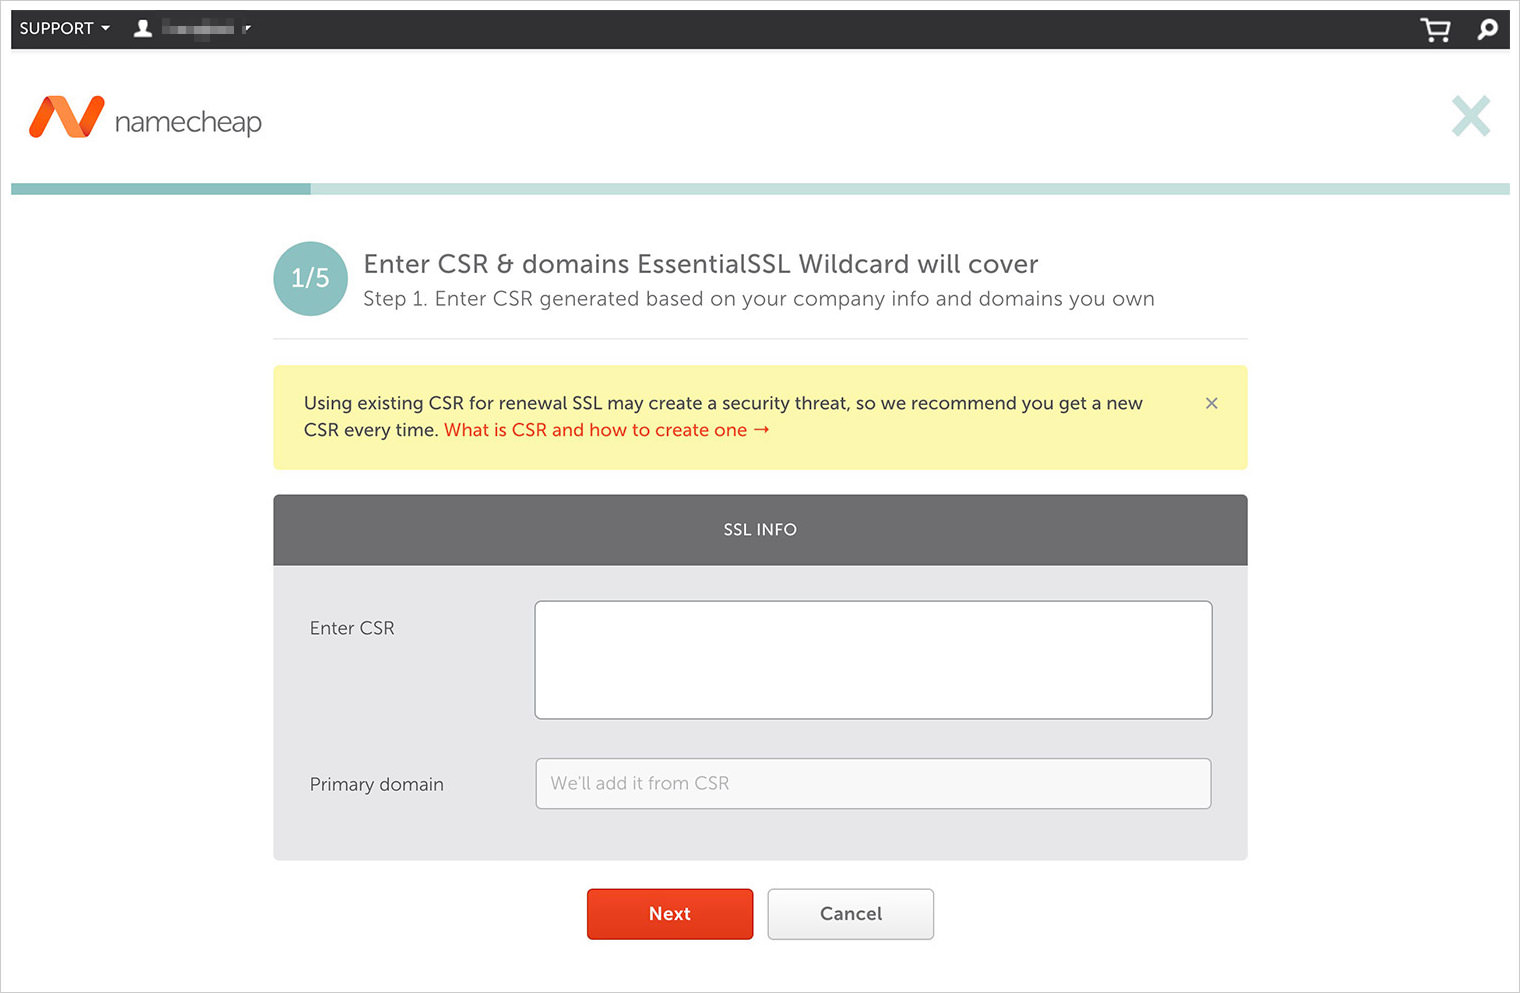
Subsequent, I can take you via a 5-steps procedure to turn on your certificates, beginning with getting into the CSR.
Let’s depart this browser window open for now.

2. Generate CSR
There are lots of techniques to generate CSR, then again, on this information, I can stroll you via producing CSR by the use of cPanel and WHM, and we will be able to get started with the previous.
Click here to skip to how to generate CSR with WHM.
Generate CSR by the use of cPanel
- Open a brand new browser window, move to the cPanel of your website online, and login. Your cPanel URL must be both cpanel.area.com or area.com/cpanel.
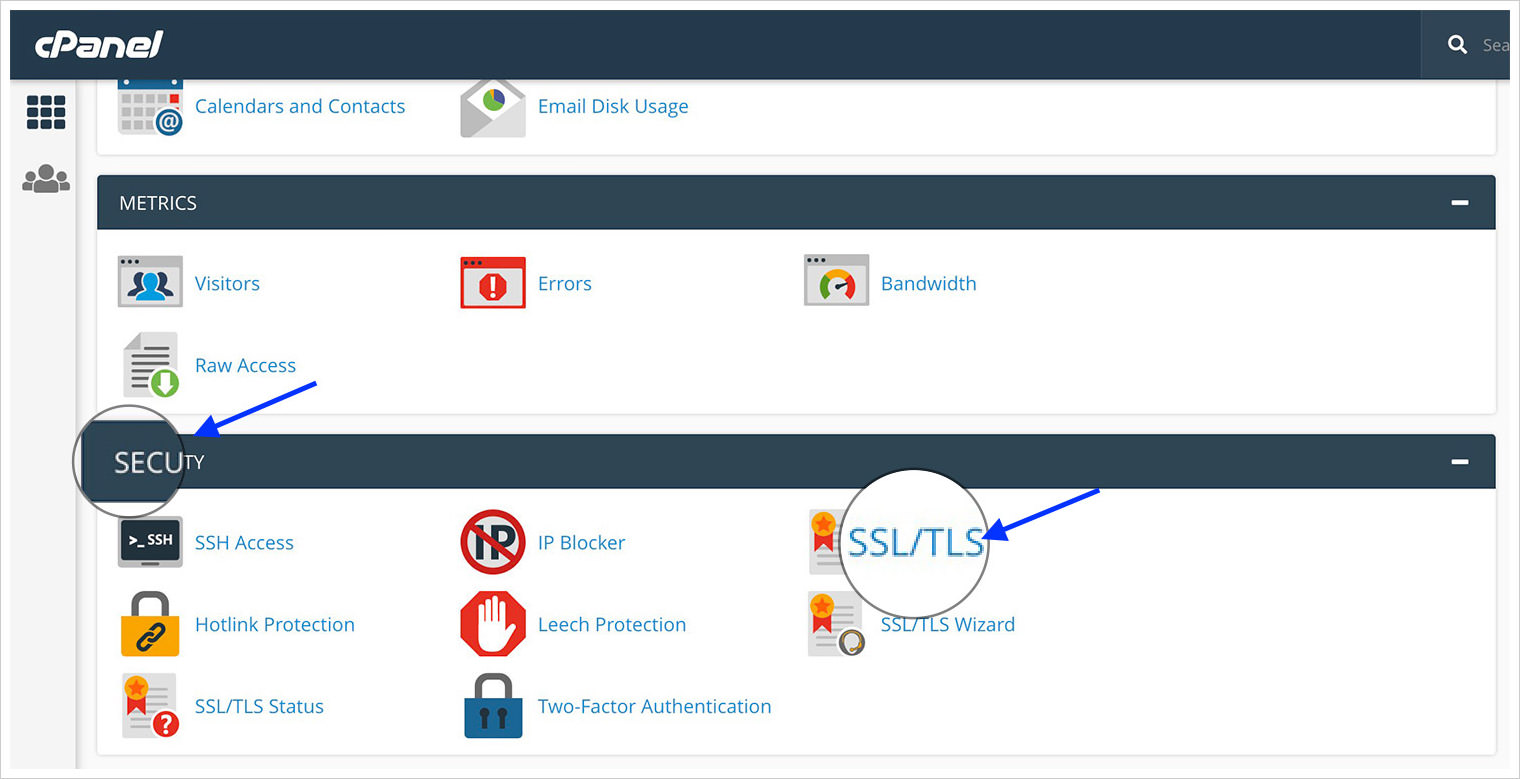
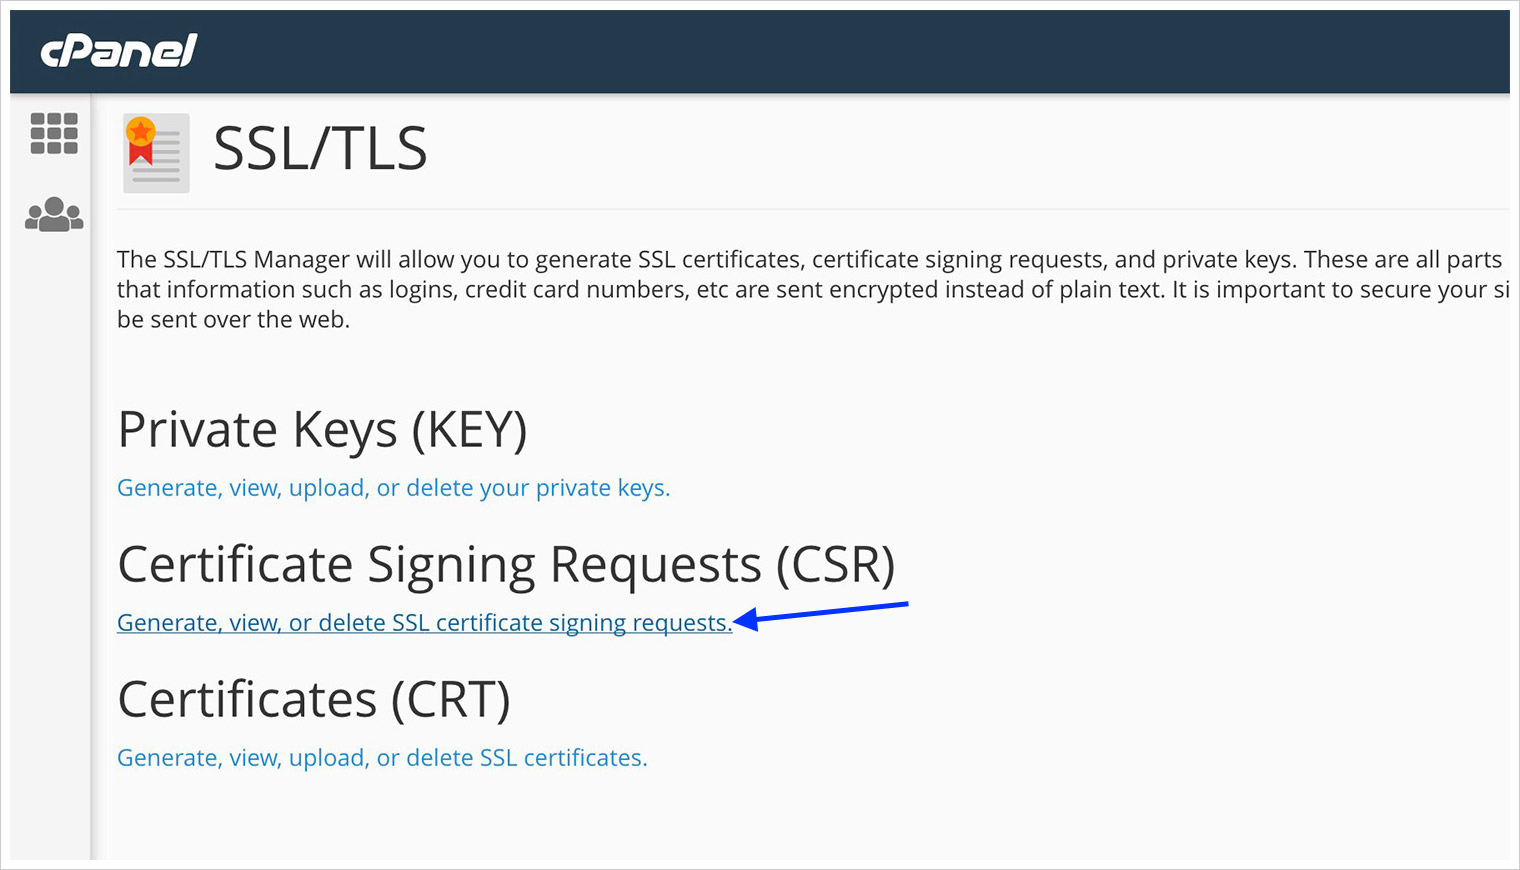
- After logging in, search for Safety and beneath this selection click on on SSL/TLS.
- The SSL/TLS web page will display other choices. Right here click on “Generate, view, or delete SSL certificates signing requests.” to generate a brand new CSR.
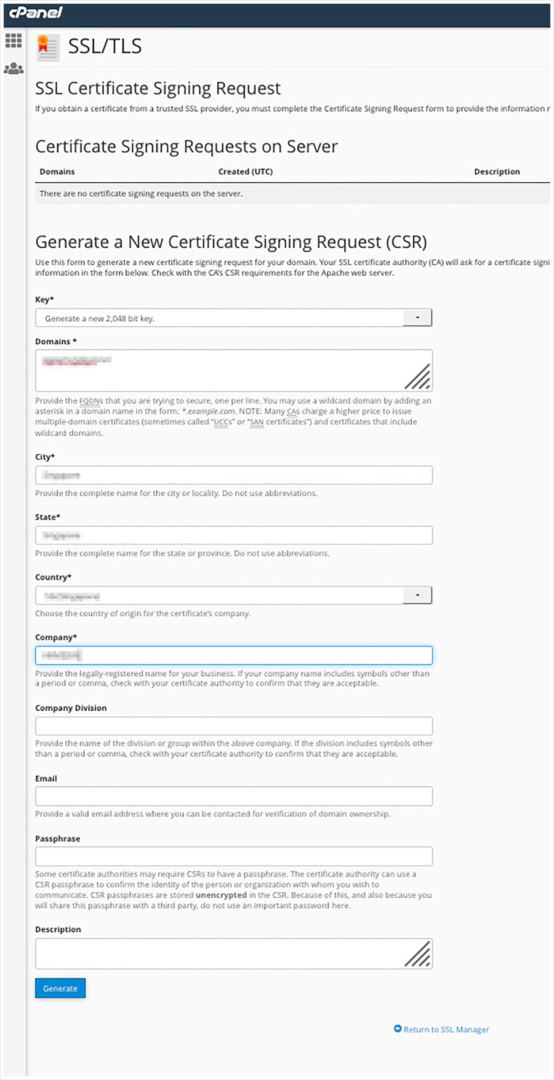
- At the subsequent web page, refill all required data:


- Key – Go away this to its default.
- Area – Input the area identify of website online for which you wish to have to put in the SSL certificates.
- Town, State, Nation, and Corporate – Upload all of the respective data – those are obligatory.
- Corporate department, E-mail, Passphrase, and Description – Upload this data if you wish to have – those are optionals.
Now click on Generate to get your CSR code.

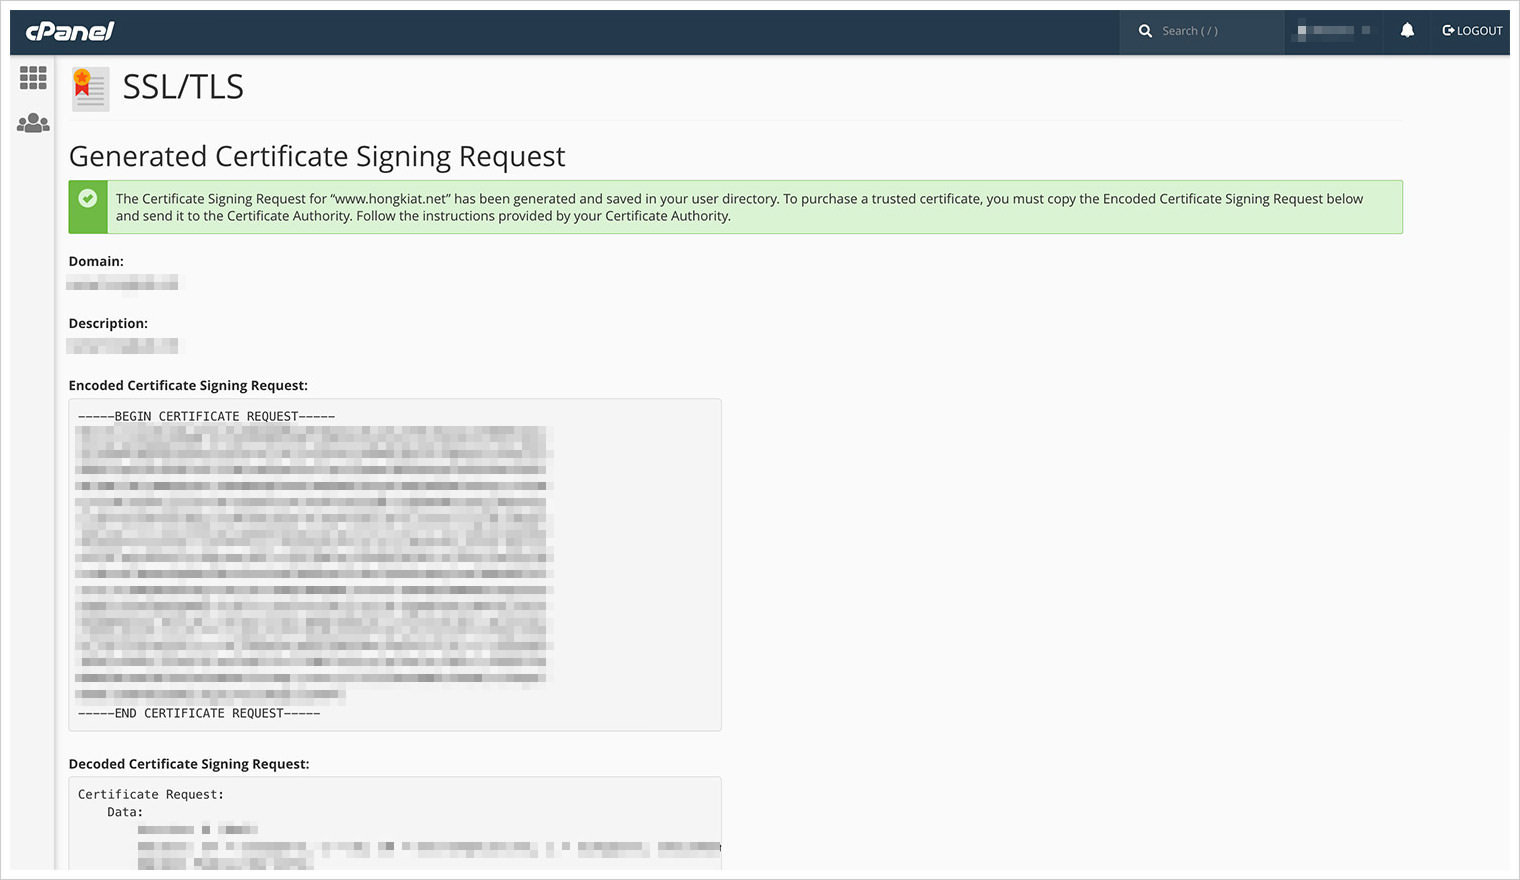
- Encoded Certificates Signing Request.
- Decoded Certificates Signing Request
- Encoded Key.
- Decoded Key.
Stay this browser window open as we will be able to be desiring it within the later step.

Generate CSR by the use of WHM
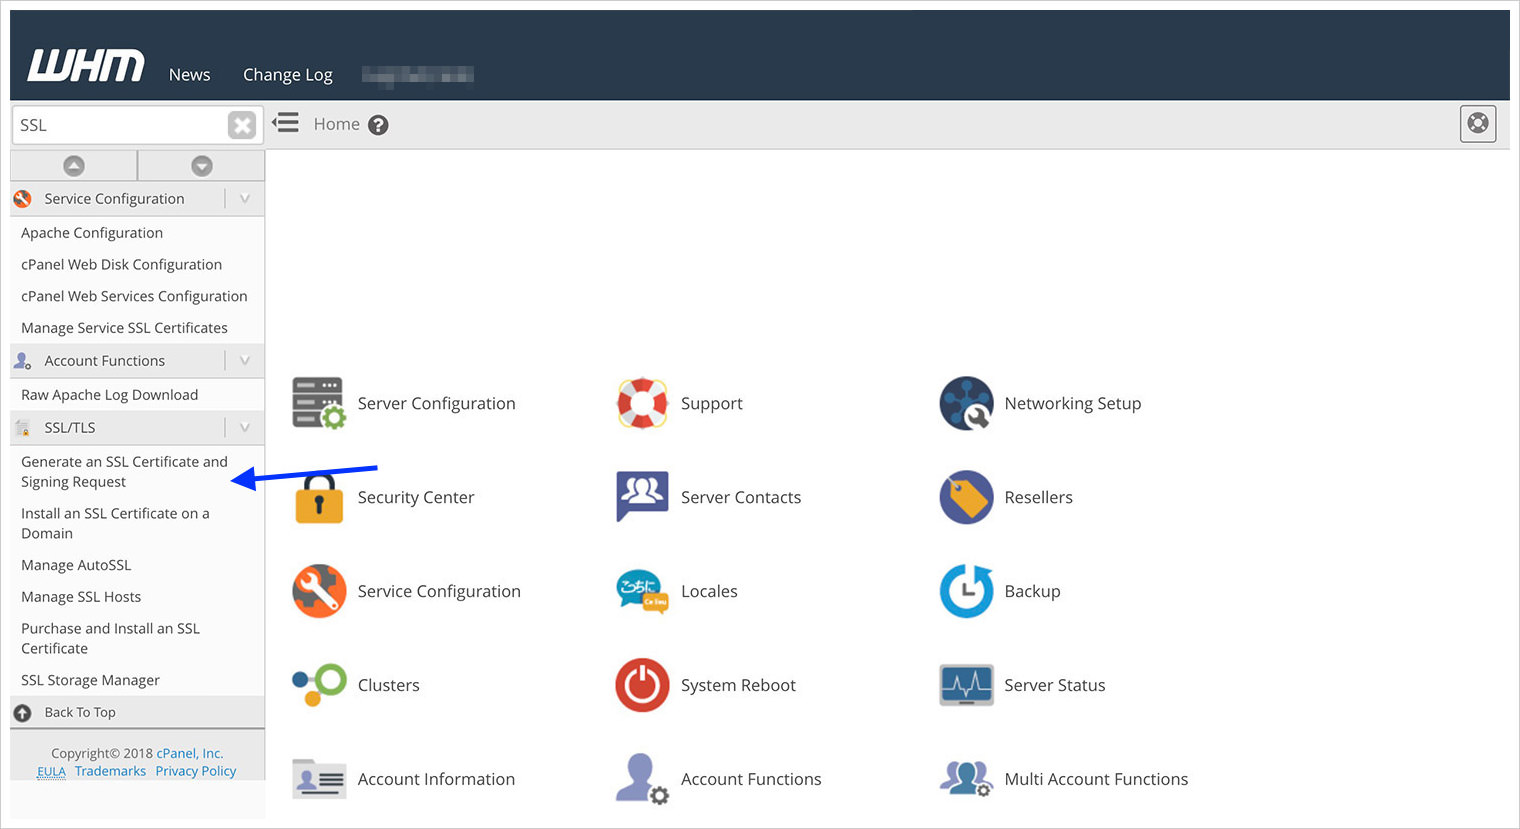
If you’re operating your website online from a devoted server, likelihood is that you’ll have get right of entry to to WHM. Subsequently you’ll be able to additionally generate CSR by the use of WHM.
Click here to learn how to generate CSR via cPanel.
- Open a brand new browser window and login to WHM.
Observe: Should you don’t already know the URL on your WHM login, it could in all probability be ipaddress/whm, or area.com/whm. If those don’t paintings, touch your internet host.
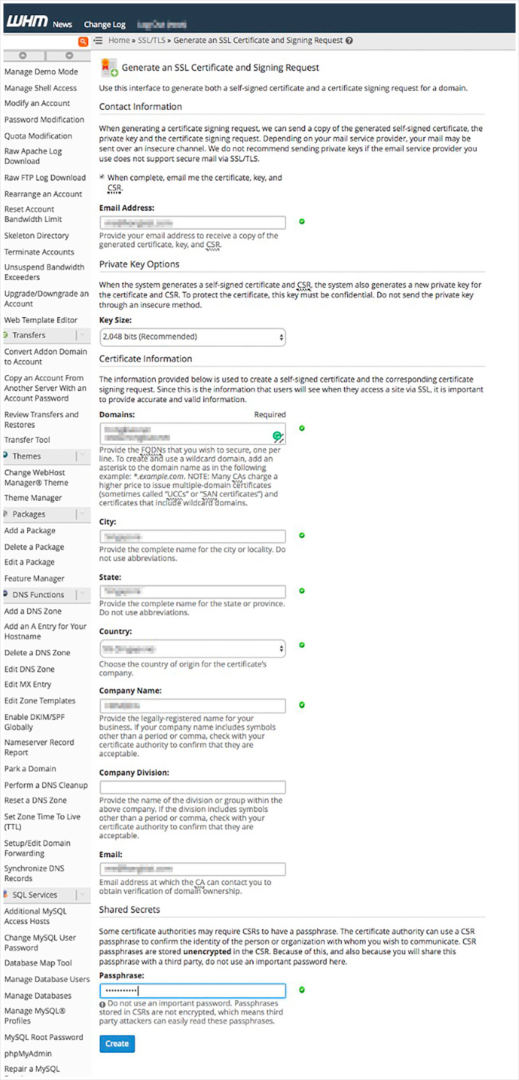
- After logging in, search for “Generate an SSL Certificates and Signing Request” beneath SSL/TLS at the left panel.
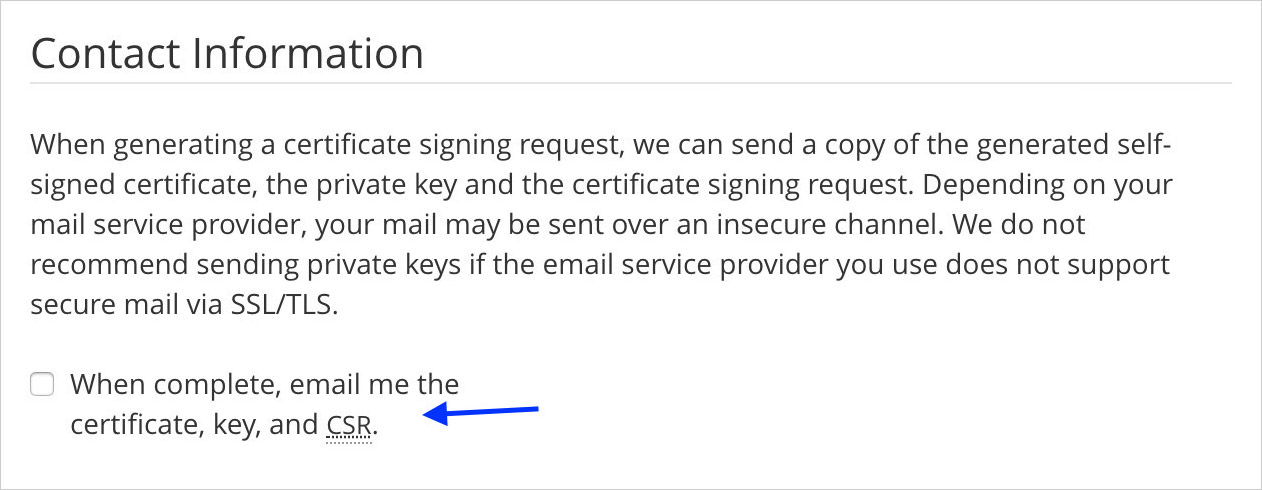
- First, examine the field that claims “When whole, electronic mail me the certificates, key and CSR” after which input your electronic mail deal with to get a replica of the generated CSR later.
- Subsequent, refill all of the required data as follows:


- Key Dimension – Go away it to its default.
- Domain names – Input the area you’ll set up your SSL certificates.
- Town, State, Nation, and Corporate – Upload all of the respective data – those are obligatory.
- Corporate Department, E-mail and Passphrase – those are not obligatory.
As soon as carried out, click on the Create button.

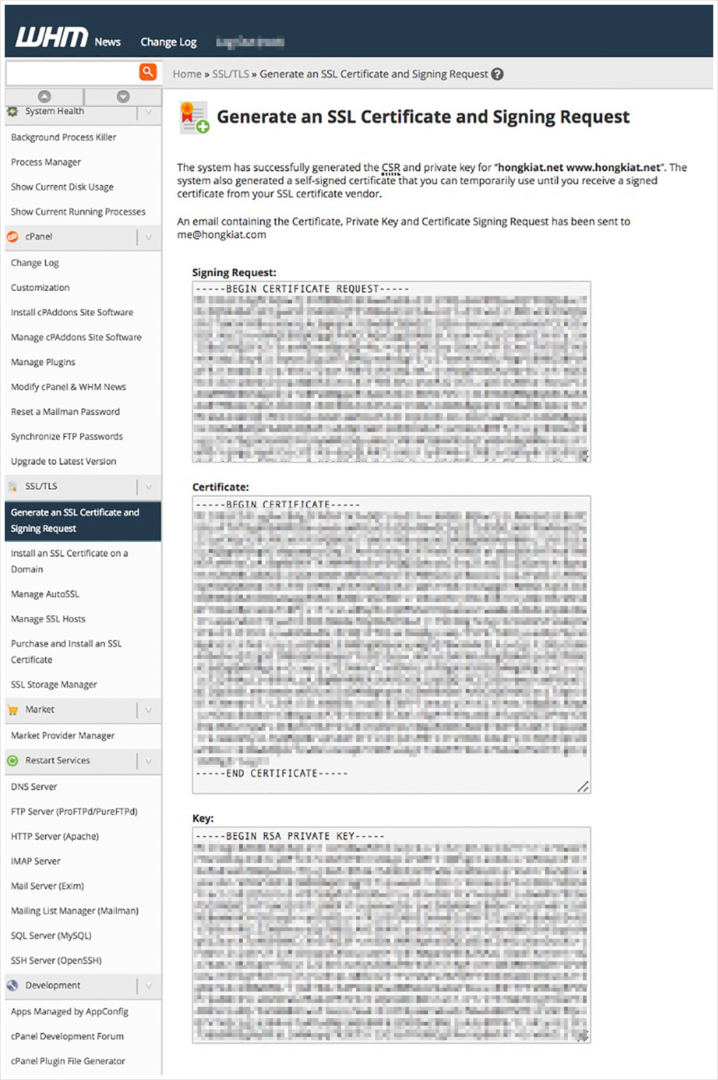
- Signing Request.
- Certificates.
- Key.
After those steps, stay this browser window open, you’ll want it within the later step.

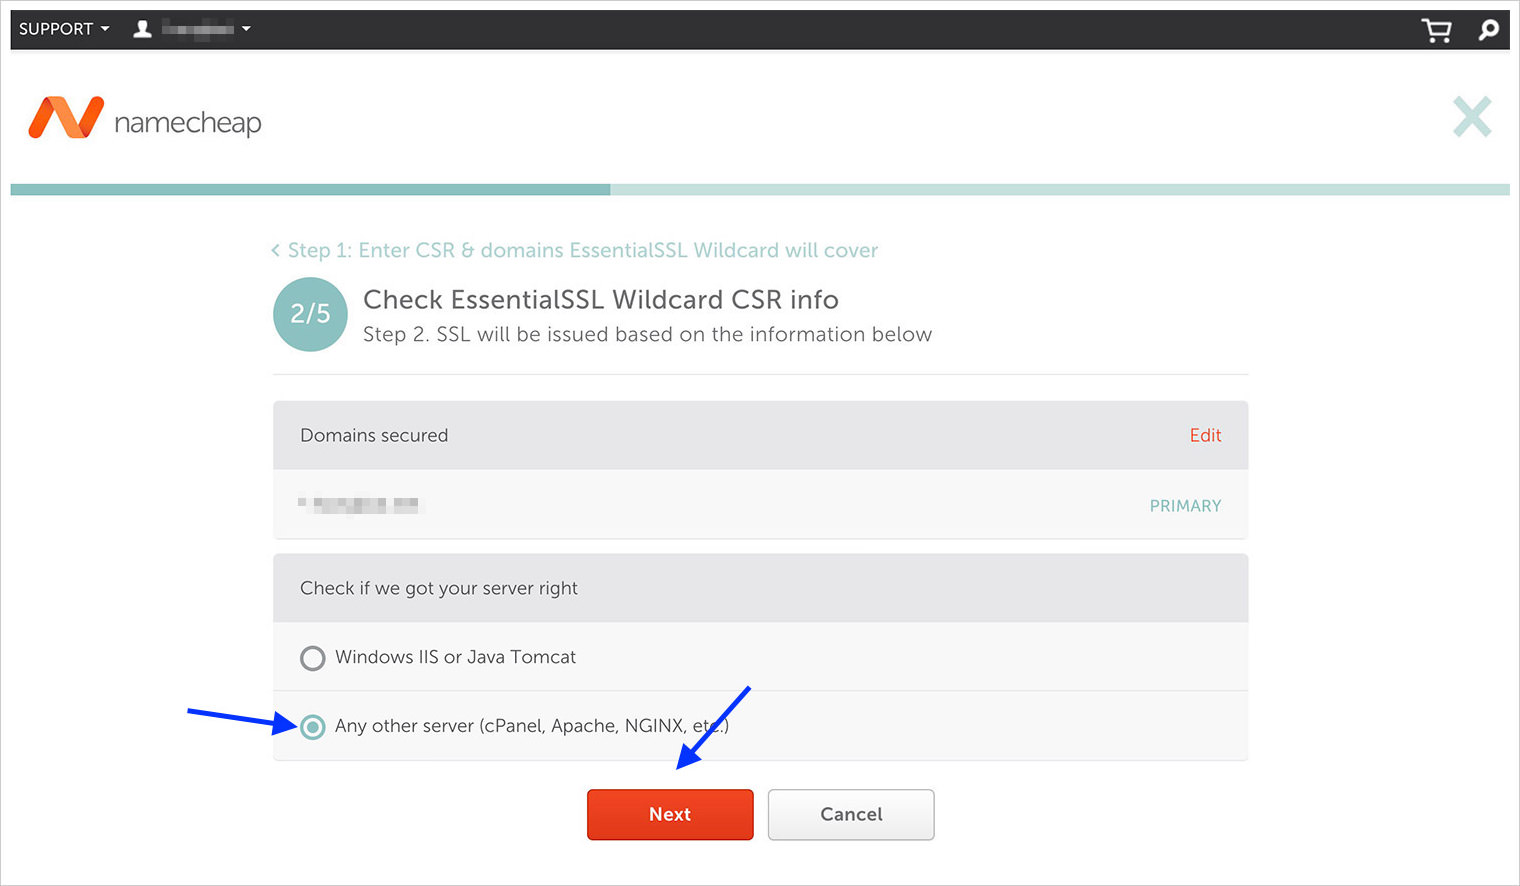
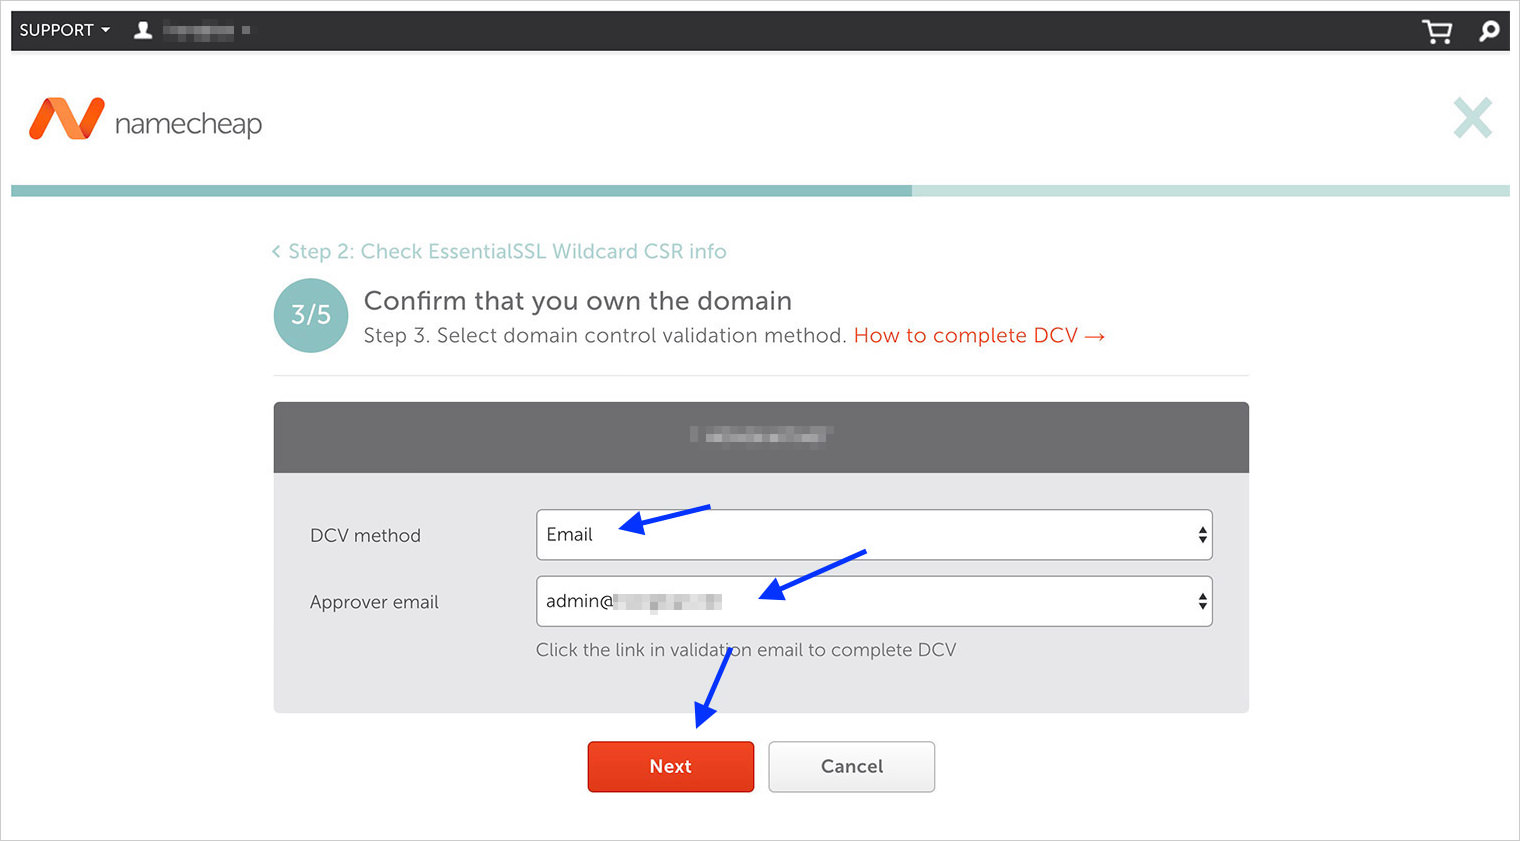
3. Turn on Certificates
Should you’ve reached this some distance, that suggests you’ve both generated your CSR by the use of cPanel or WHM. Now let’s continue to activating your SSL certificates.
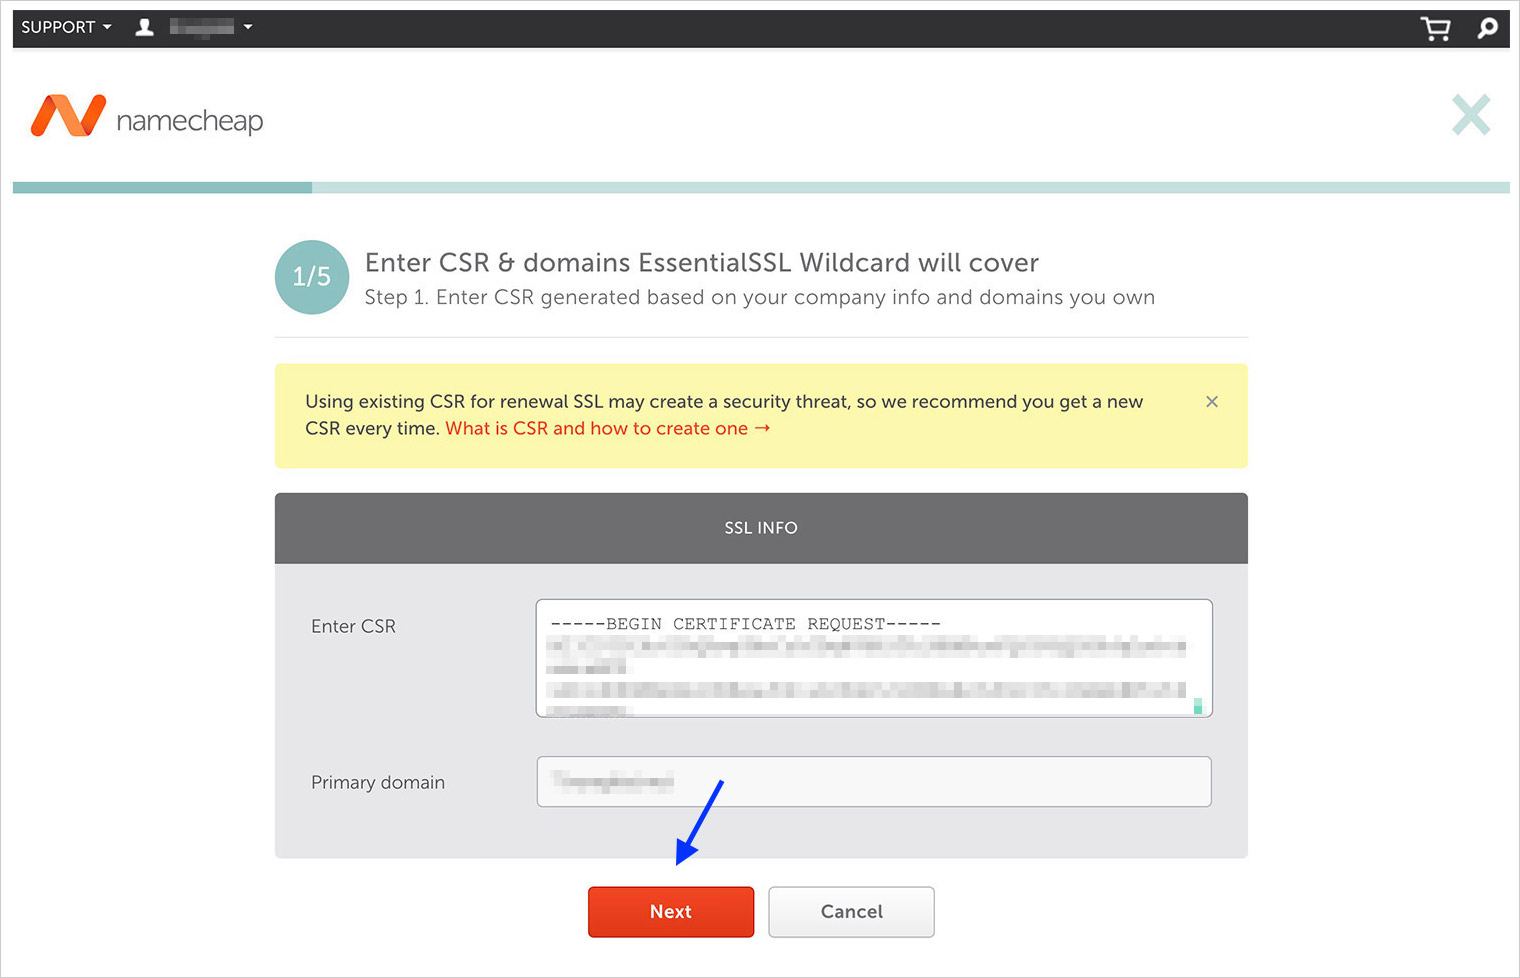
- Reproduction all codes from Encoded Certificate Signing Request (cPanel) or Signing Request (WHM) from the former browser window into Input CSR. The Number one area will likely be auto-retrieved out of your CSR. As soon as that is carried out, click on Subsequent.
- Subsequent, double-check to ensure the right kind internet web hosting server is chosen after which click on Subsequent.
- Now make a selection one way to ensure your area. One of the best ways could be to ensure by the use of electronic mail.
Observe: Remember to have get right of entry to to [email protected], [email protected], or any electronic mail addresses beneath Approver electronic mail dropdown.
- In the end, re-check your submitted data sooner than clicking the Put up button.


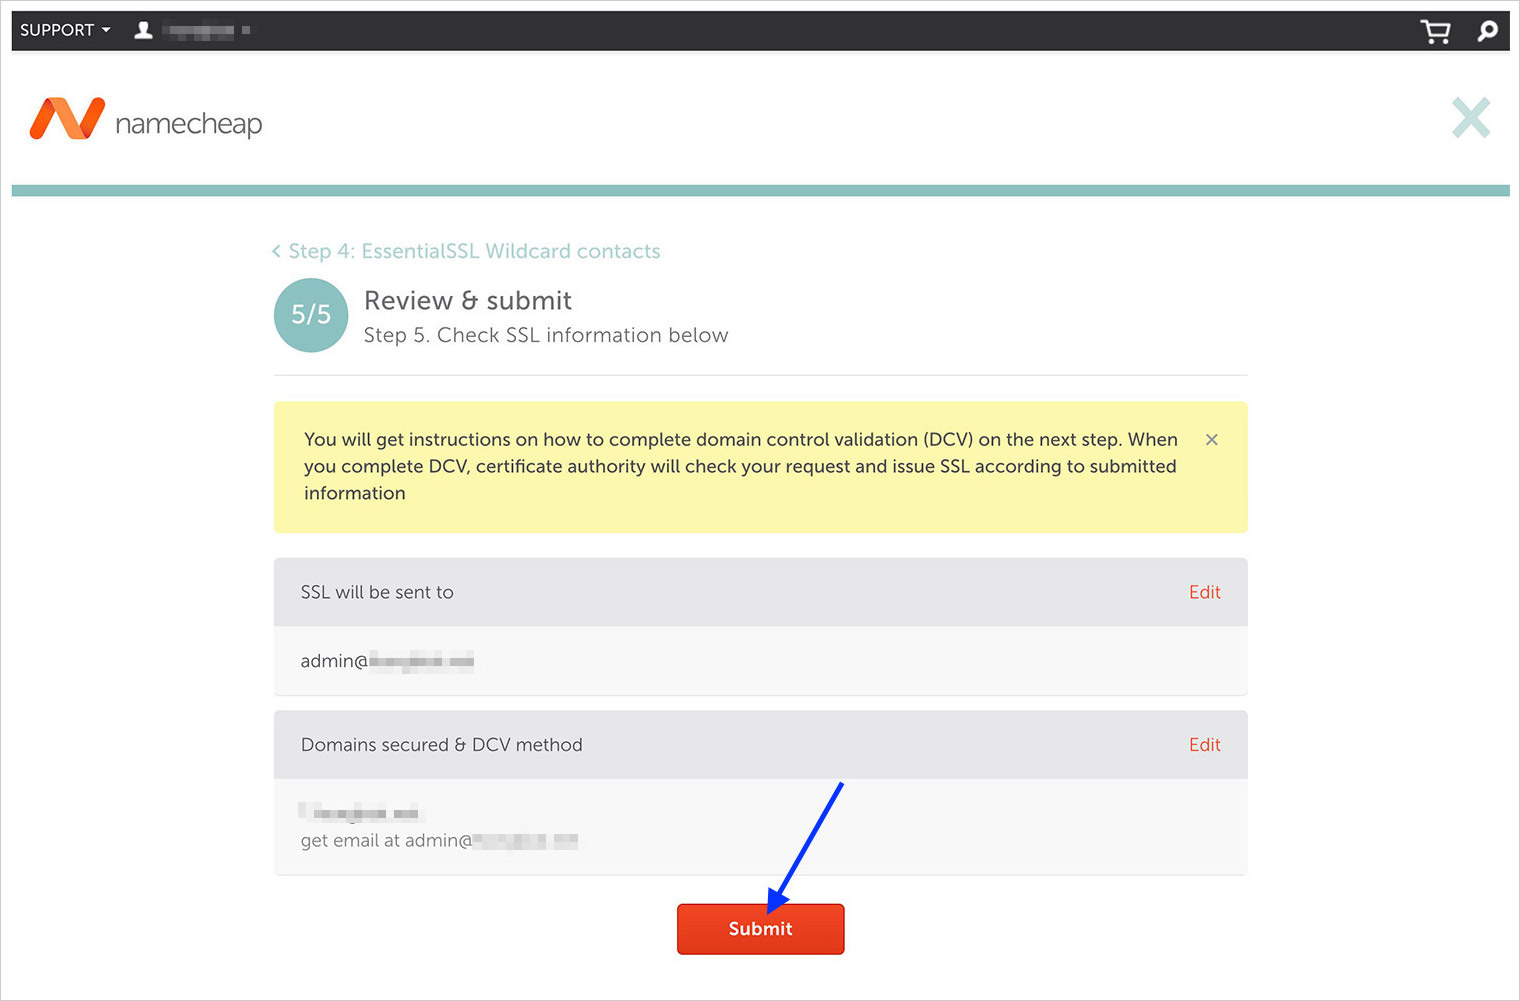
4. Validate Certificates
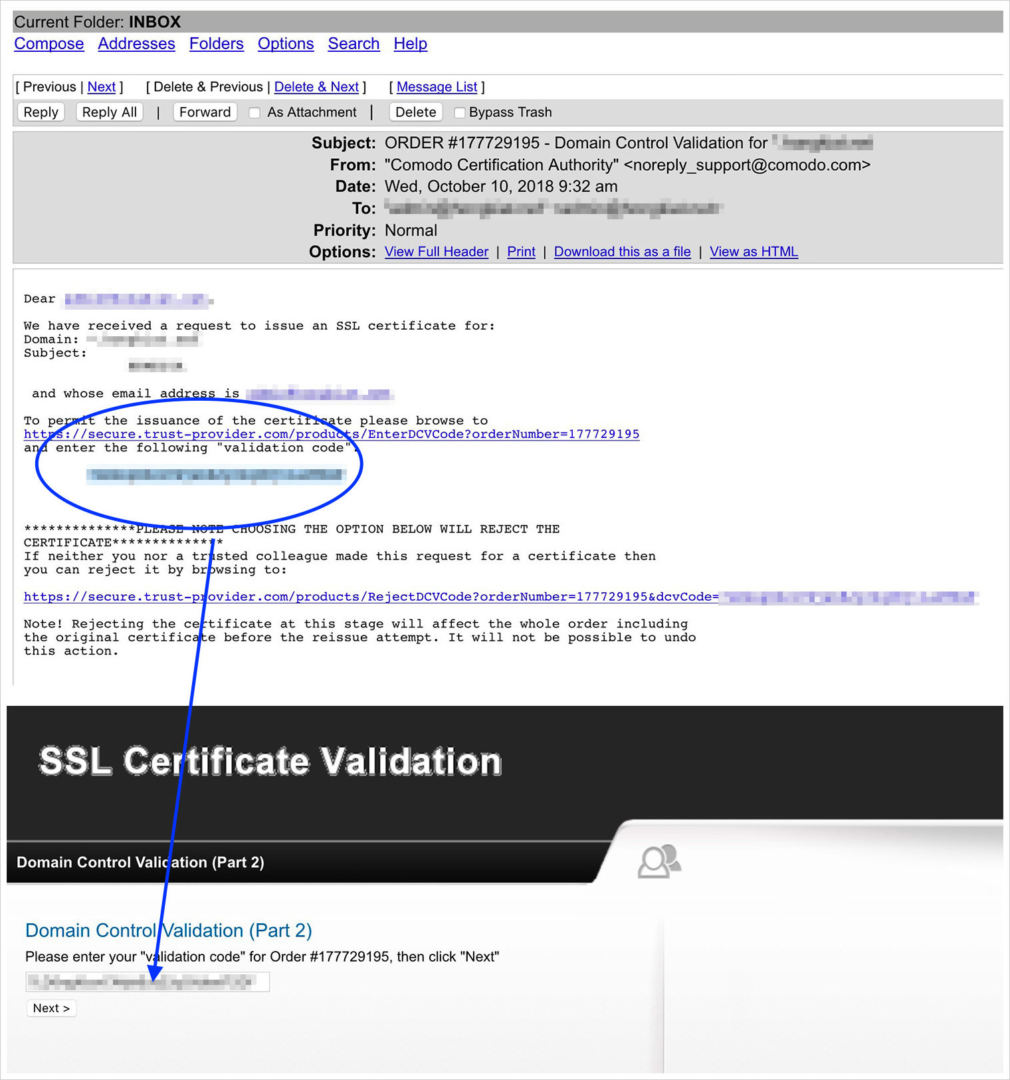
Since we make a selection the e-mail for DCV manner, we’ll be anticipating an electronic mail asking us to ensure that we’re the proprietor of the area we intend to put in the SSL certificates. Right here’s how you’ll be able to validate the SSL certificates by the use of electronic mail.
- Take a look at your inbox for an electronic mail despatched via the SSL supplier. It must glance one thing just like the screenshot under.
- Cross into that electronic mail and practice the directions to ensure your area.


5. Obtain SSL Certificates
You’re going to examine the certificates by the use of electronic mail, you’ll be despatched the certificates to be downloaded. Right here’s how you’ll be able to do it.
- The emails you’ll obtain, of which certainly one of them will comprise the certificates, would appear to be the screenshot under.
- You’ll need to search for the e-mail from SSL supplier with an attachment in .zip layout.
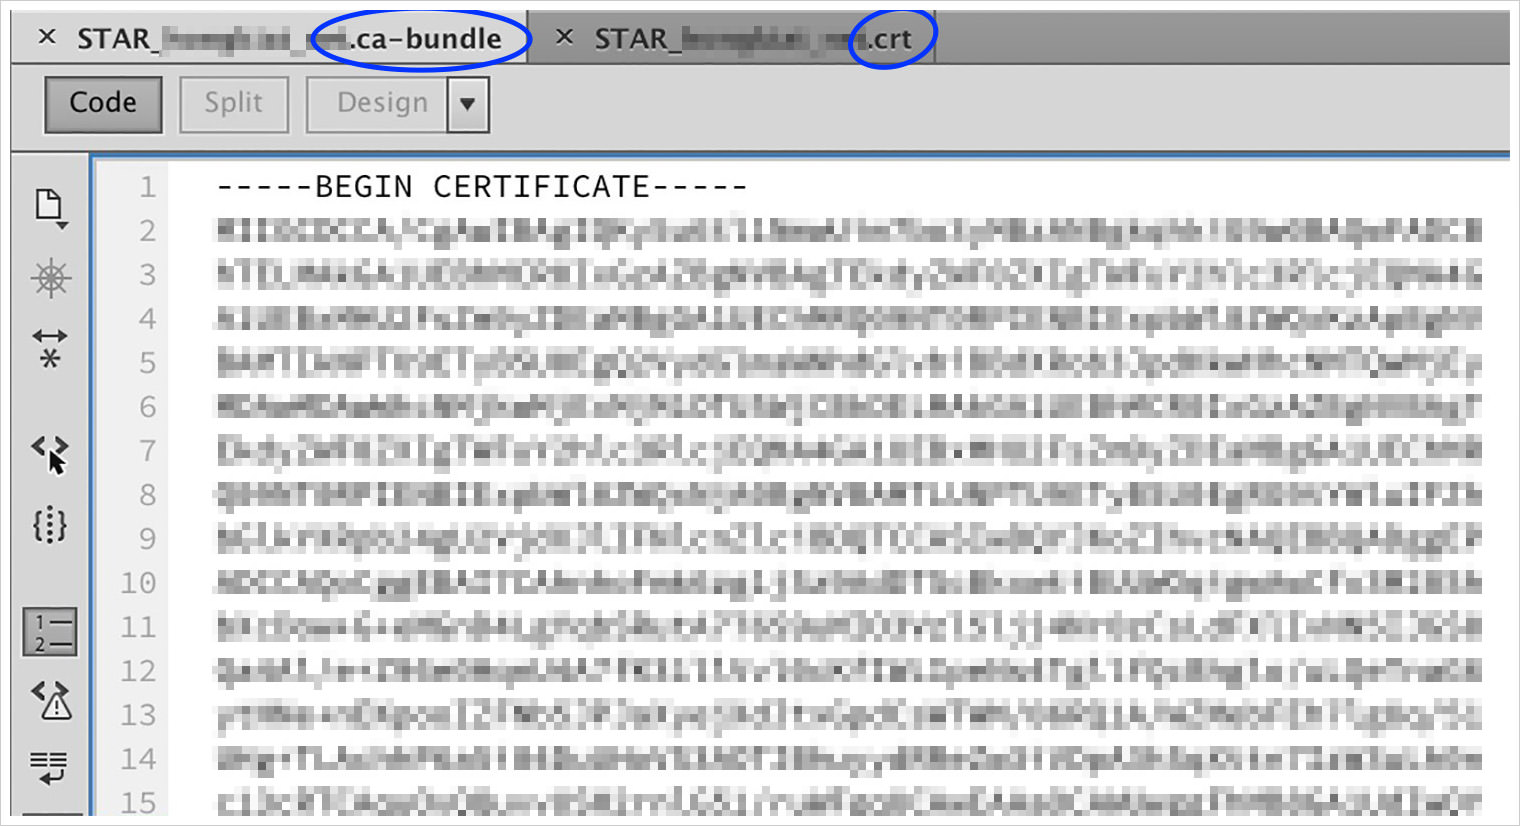
- Obtain and extract the attachment. It must is composed two textual content recordsdata; one finishing with .ca-bundle extension and the opposite finishing with .crt. Open them up to your most popular textual content editor.


6. Set up SSL Certificates
Earlier than we move on to put in the SSL certificates, let’s do a recap. First we purchased an SSL certificate, generated CSR (by the use of cPanel, or WHM) to activate the certificate. Then we’ve additionally validated, downloaded the certificate and in spite of everything have it opened in a textual content editor. And now, we’re going to put in the certificates.
We can get started with the information on tips on how to set up the certificates by the use of cPanel.
Click here to skip to installing via WHM.
Set up Certificates by the use of cPanel
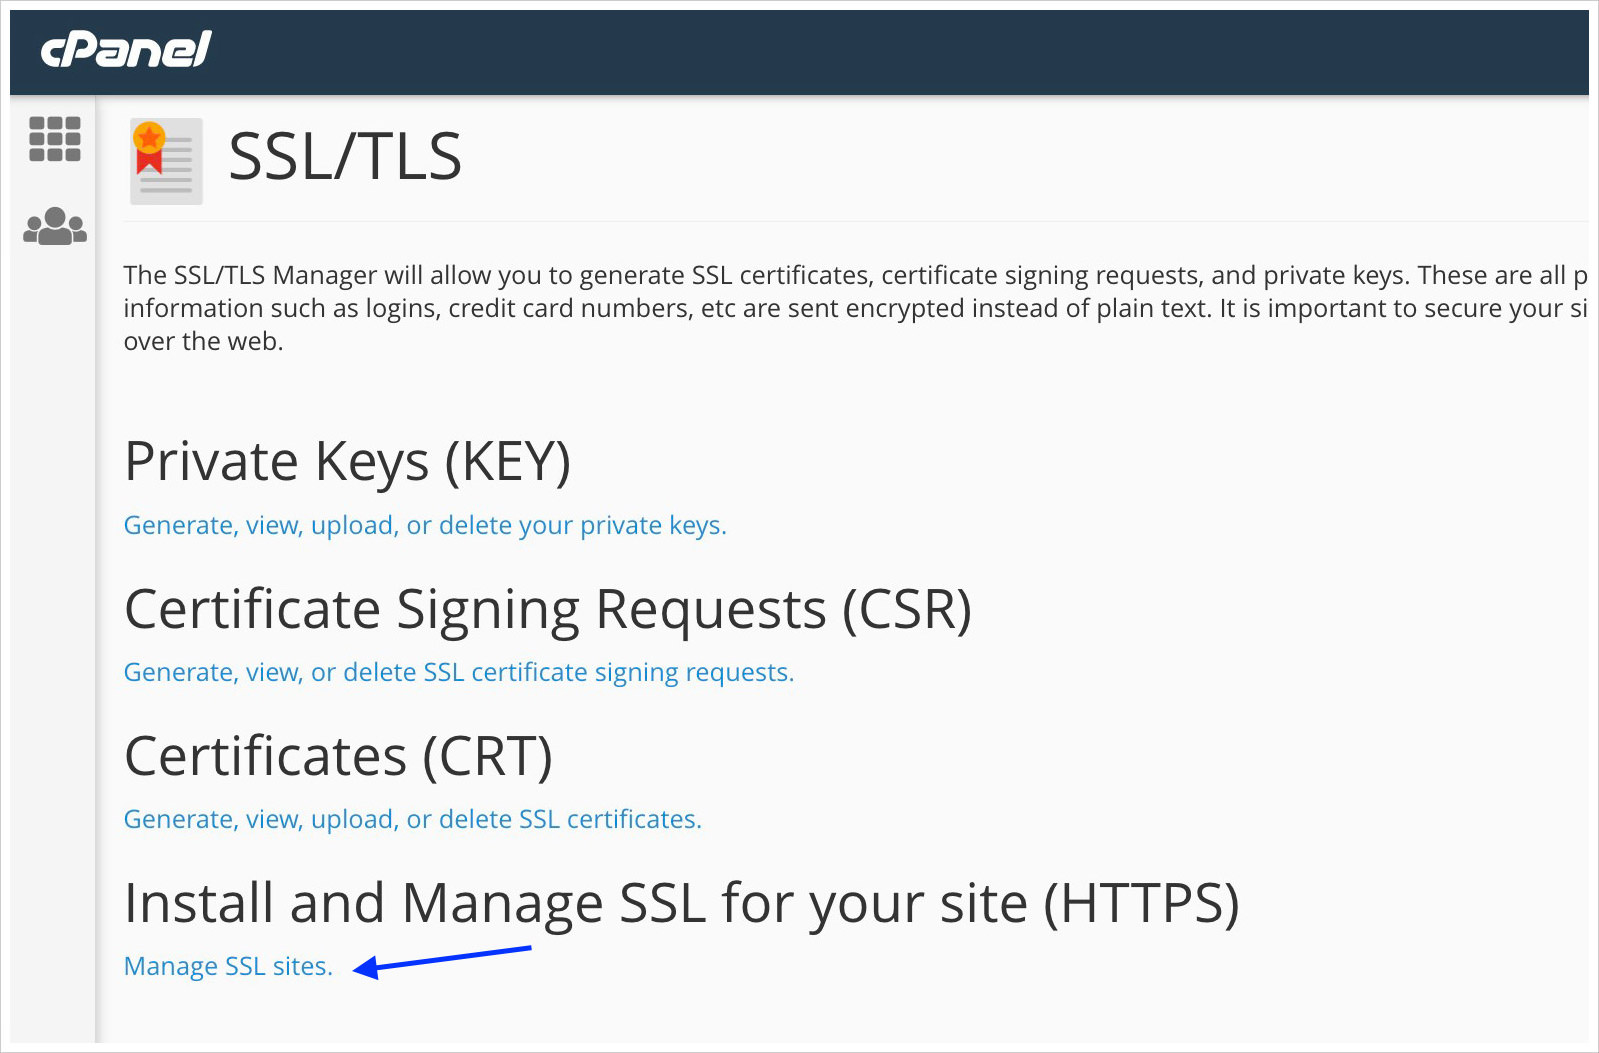
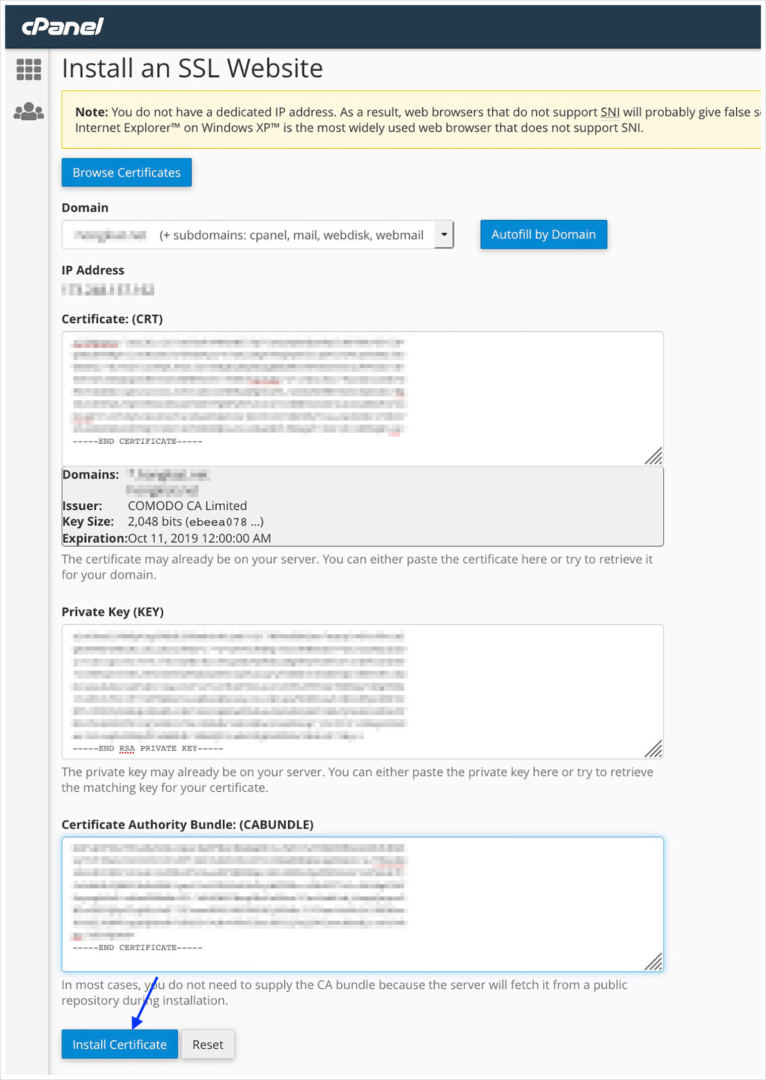
- Again in cPanel, navigate to Safety > SSL/TLS and click on on “Arrange SSL Websites” beneath Set up and Arrange SSL to your web site (HTTPS).
- Knowledge in this subsequent web page must be in moderation and appropriately entered to make sure a hit set up of the SSL certificates. Let’s undergo each and every of the fields one after the other.
- Do a last examine, after which click on the Set up Certificates button.
- If the whole thing had long gone neatly, you’ll see a advised informing you that your SSL certificates has been effectively put in.


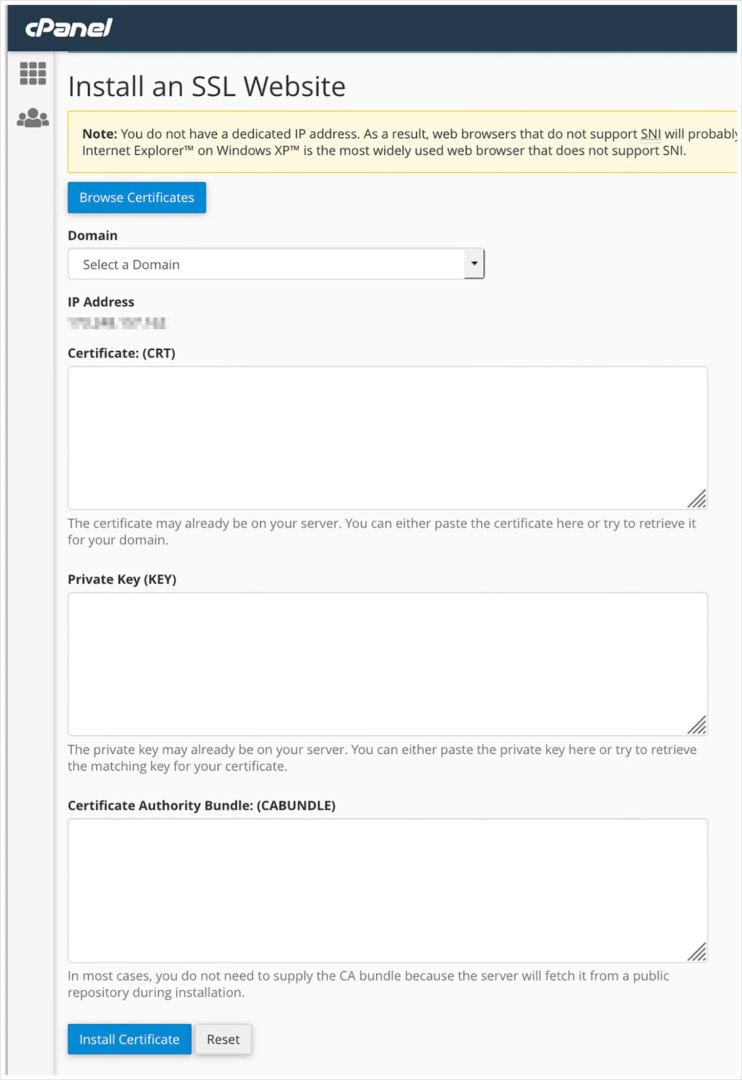
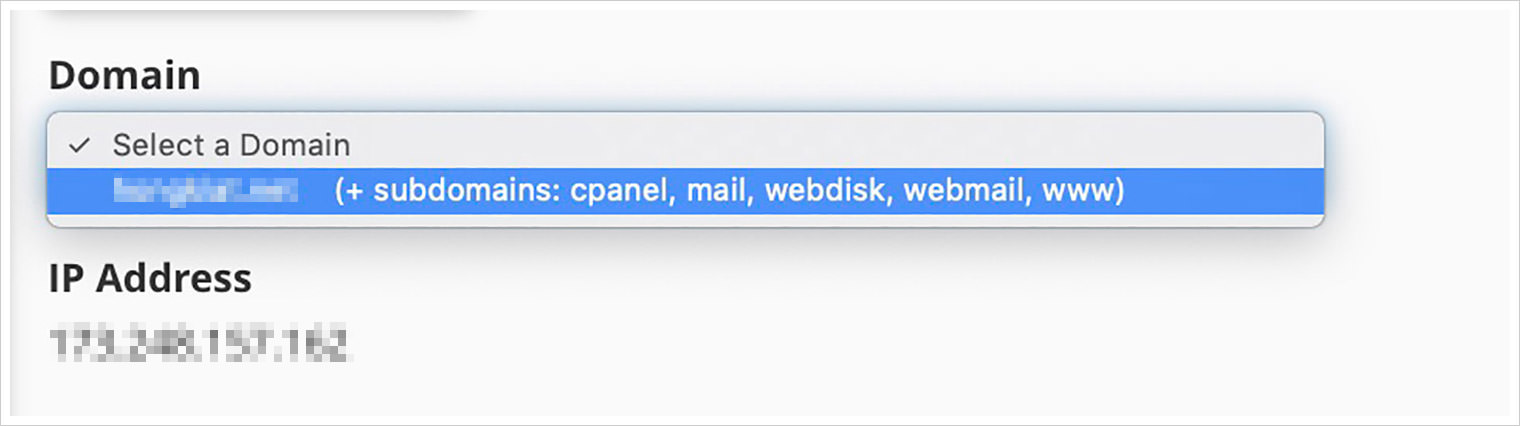
“Area” – Click on the drop-down and with a bit of luck chances are you’ll in finding the area identify is already in there. Right here choose the area identify.

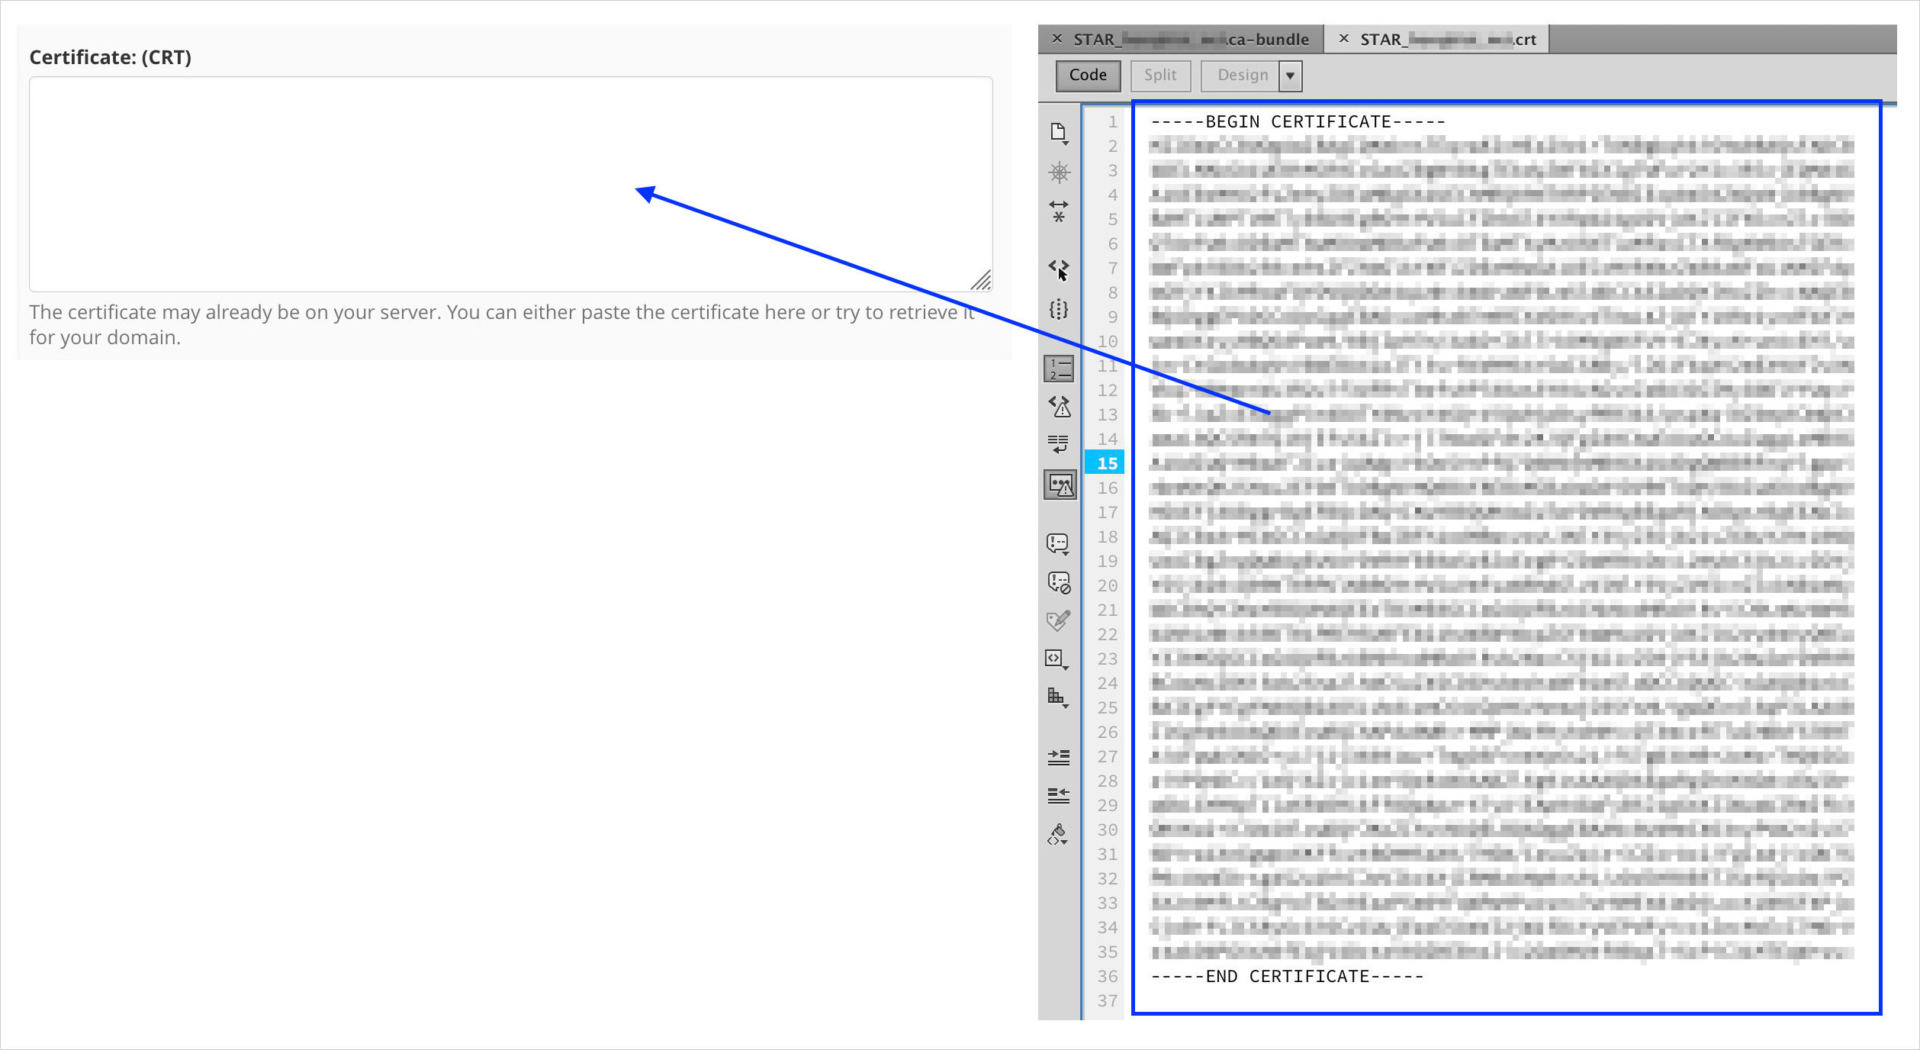
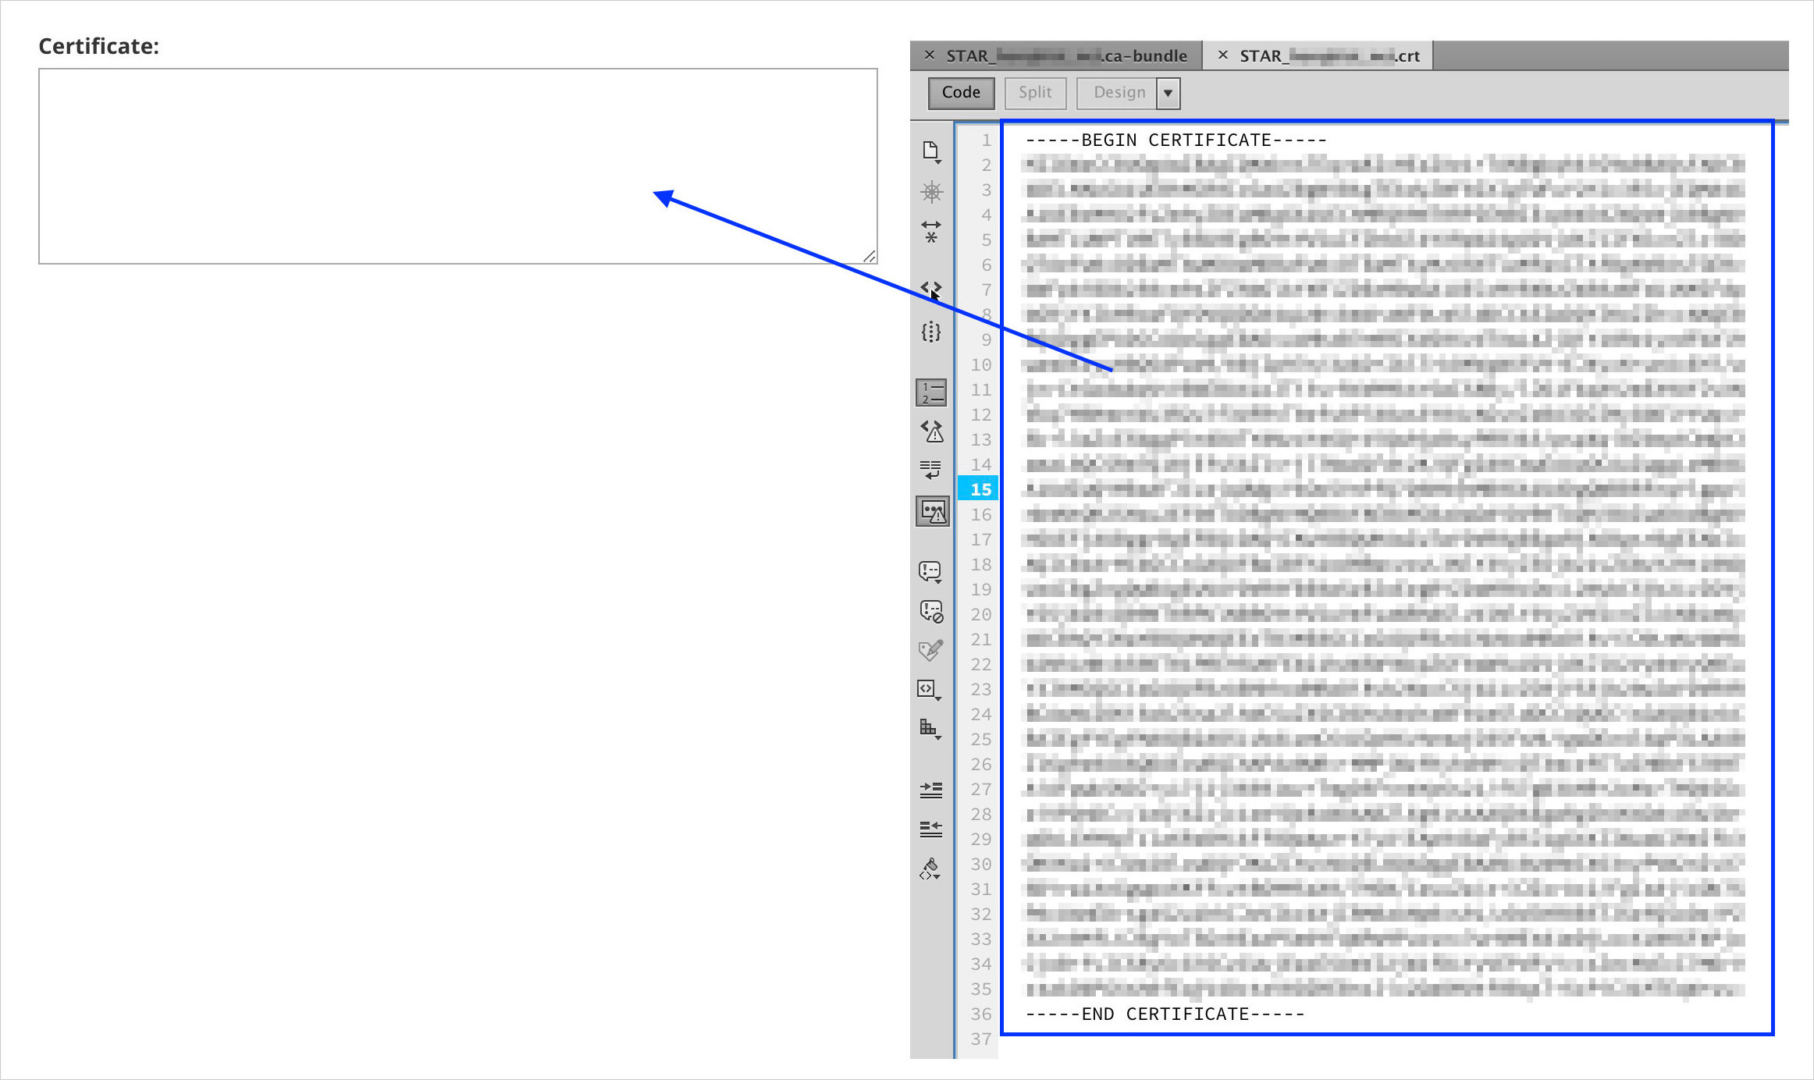
“Certificates: (CRT)” – Reproduction all of the codes within the file finishing with .crt extension, and paste it within right here.

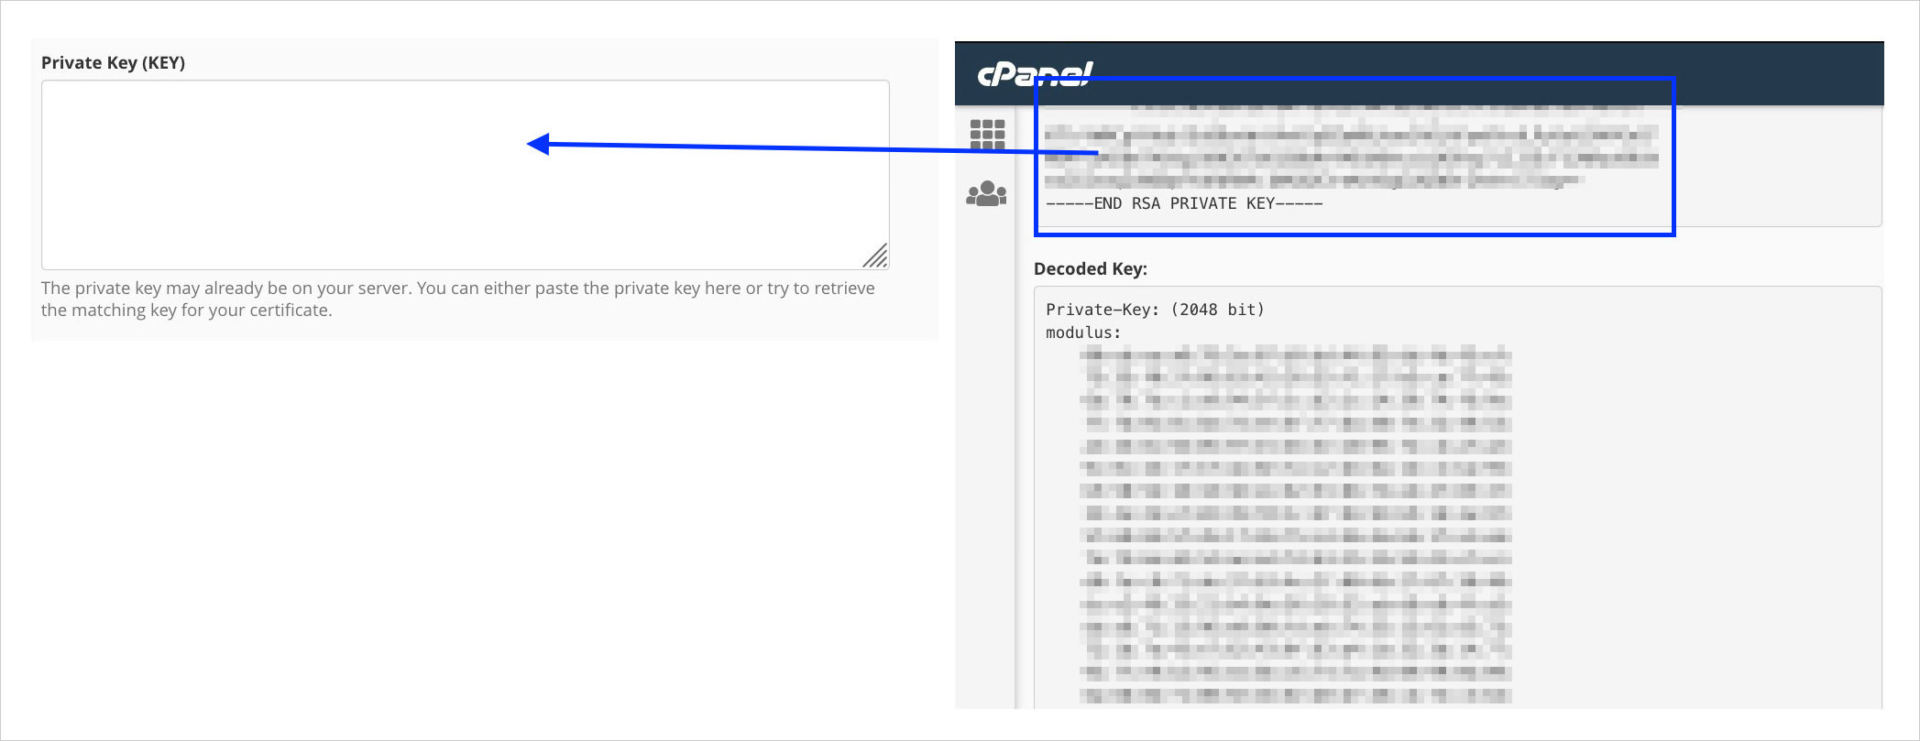
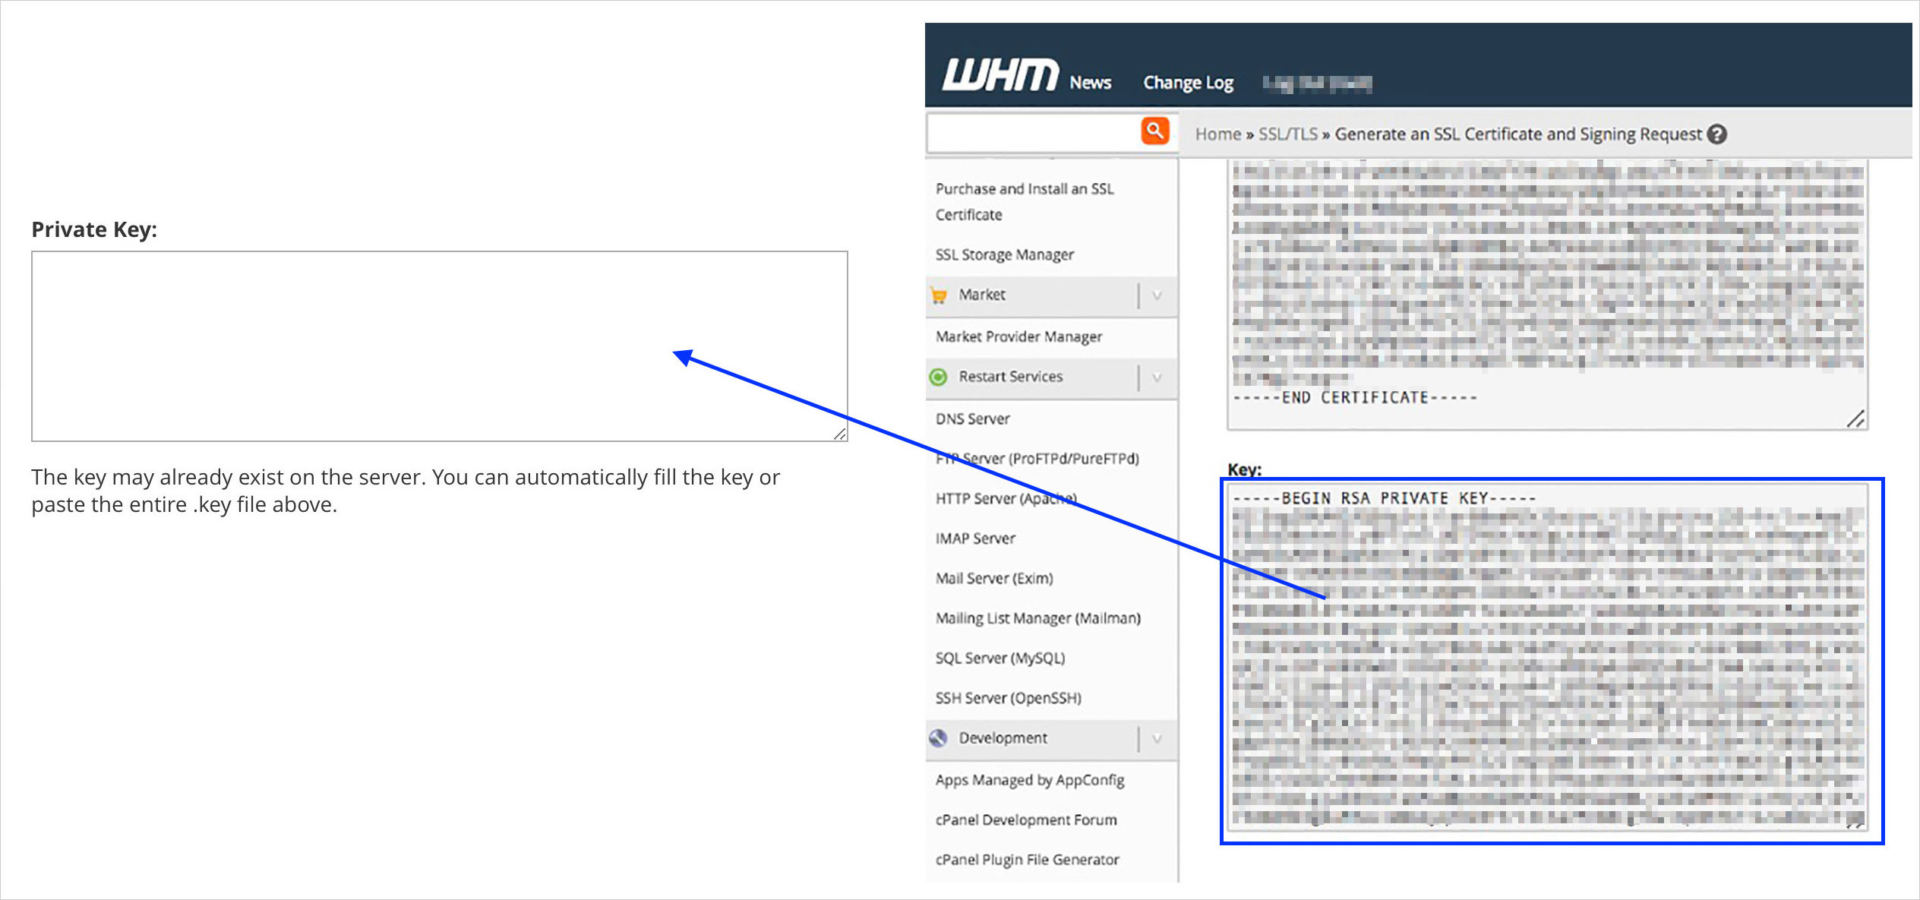
“Non-public Key (KEY):” – There used to be a browser windows we left opened whilst producing the CSR key previous on. Return there, replica all codes within “Encoded Key:” and paste it right here.

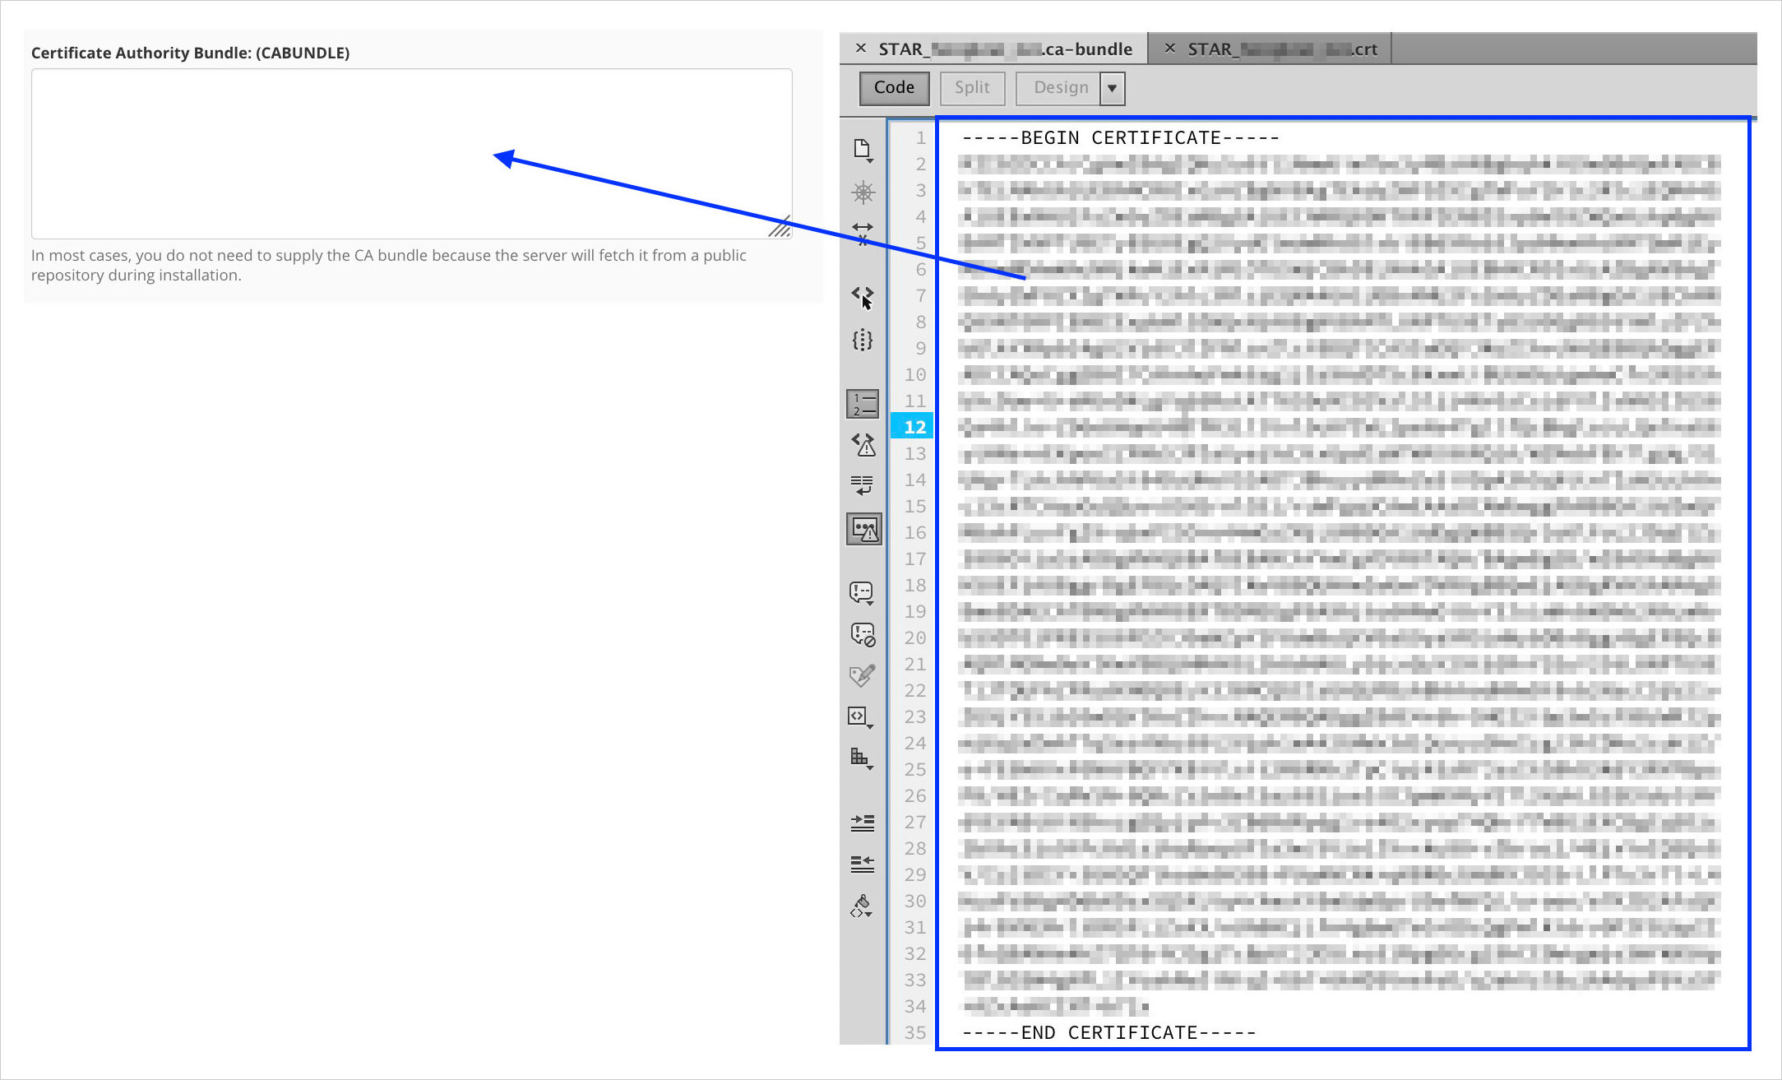
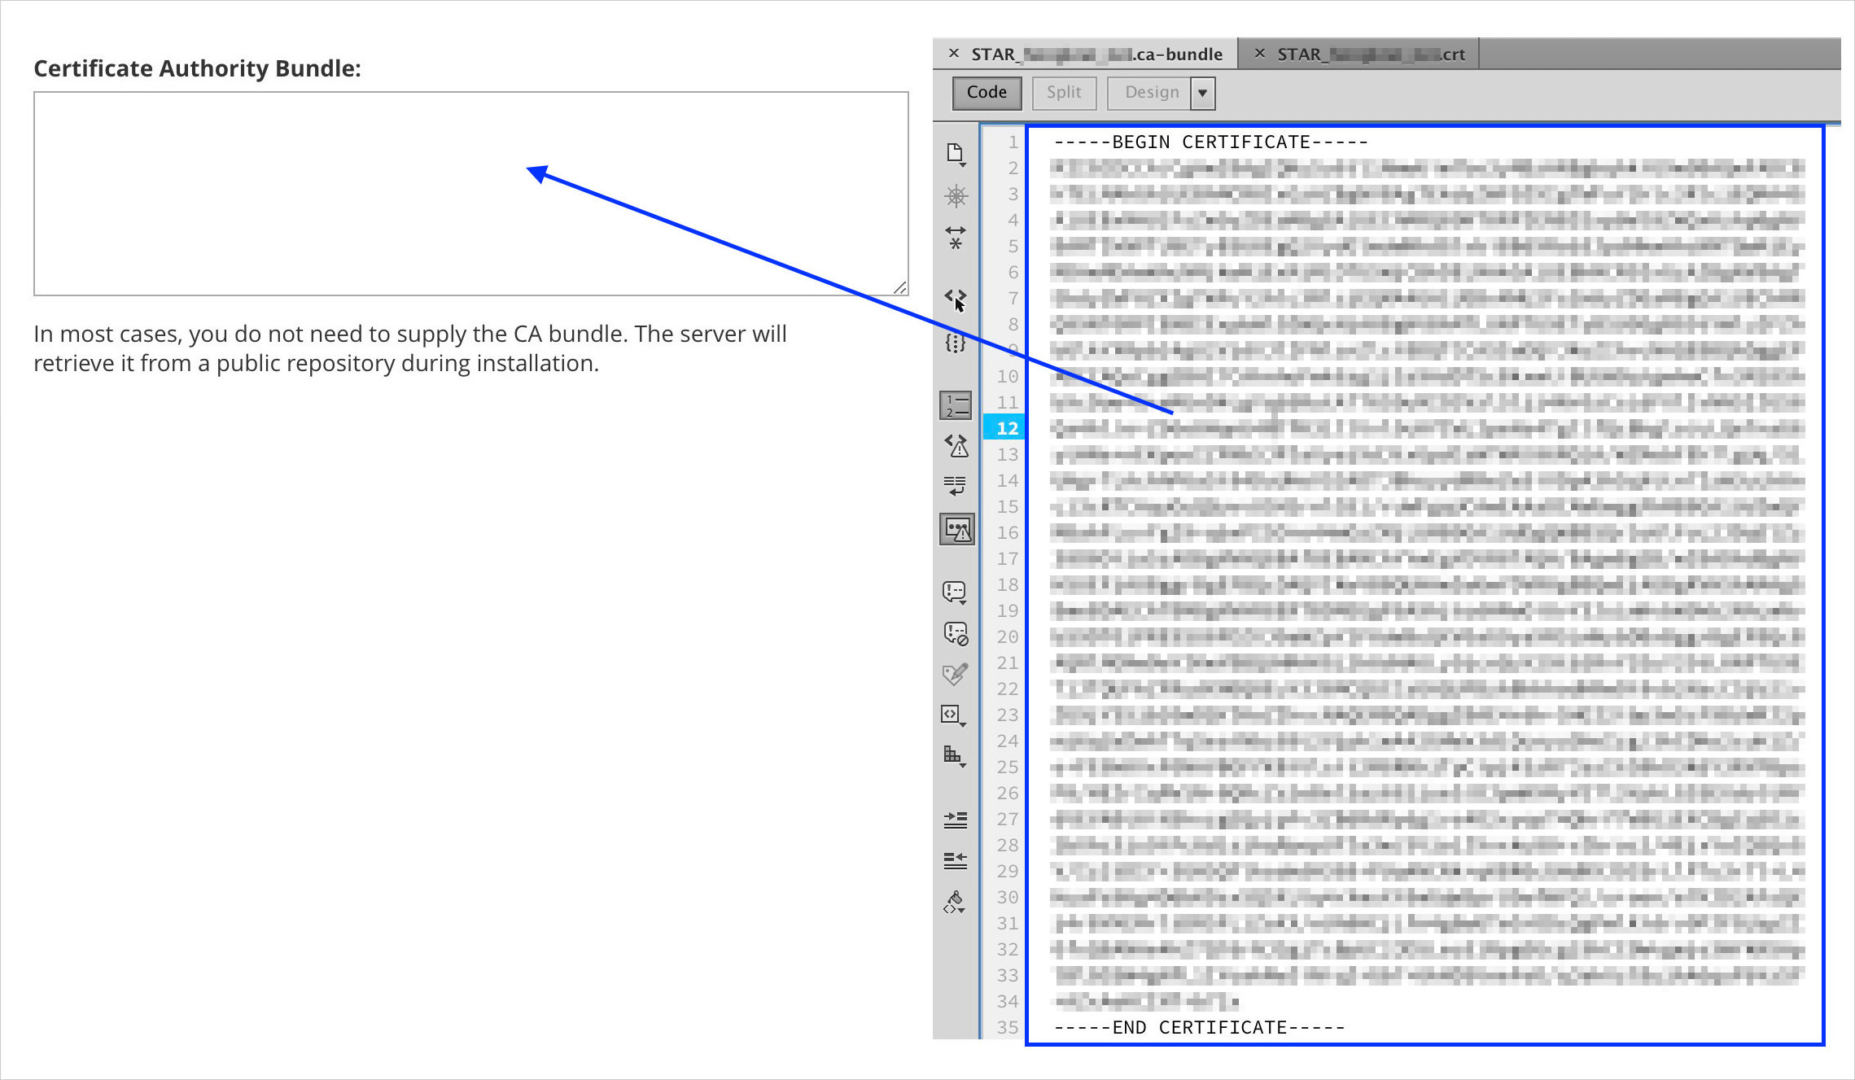
“Certificates Authority Package deal: (CABUNDLE)” – Reproduction all codes from the file finishing with .ca-bundle extension, pate it within right here.


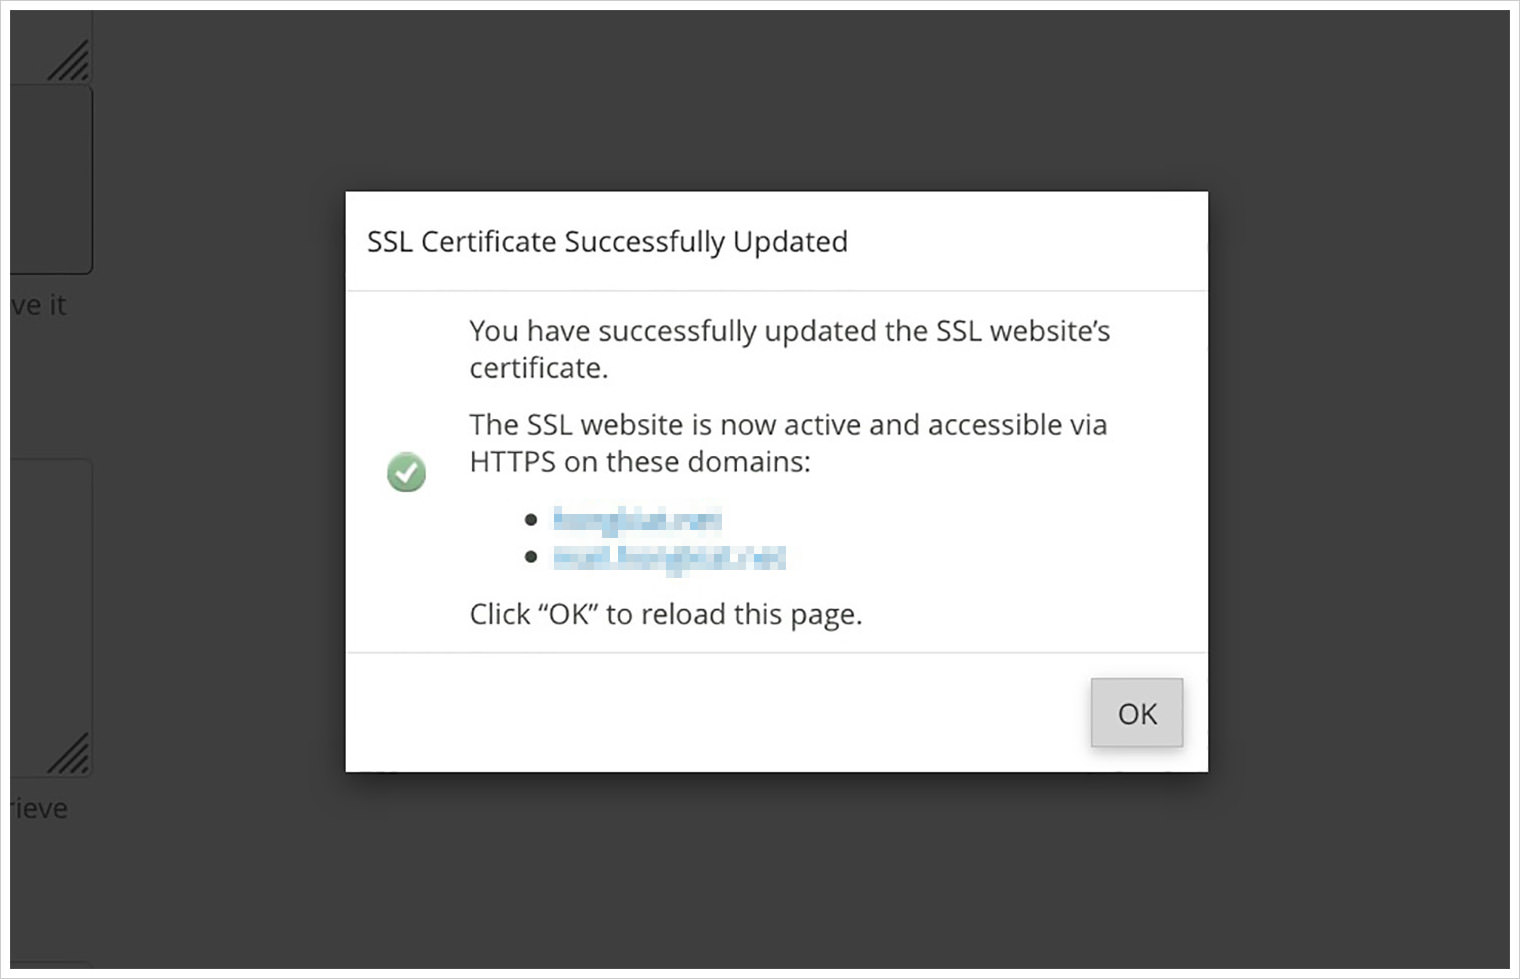
Set up Certificates by the use of WHM
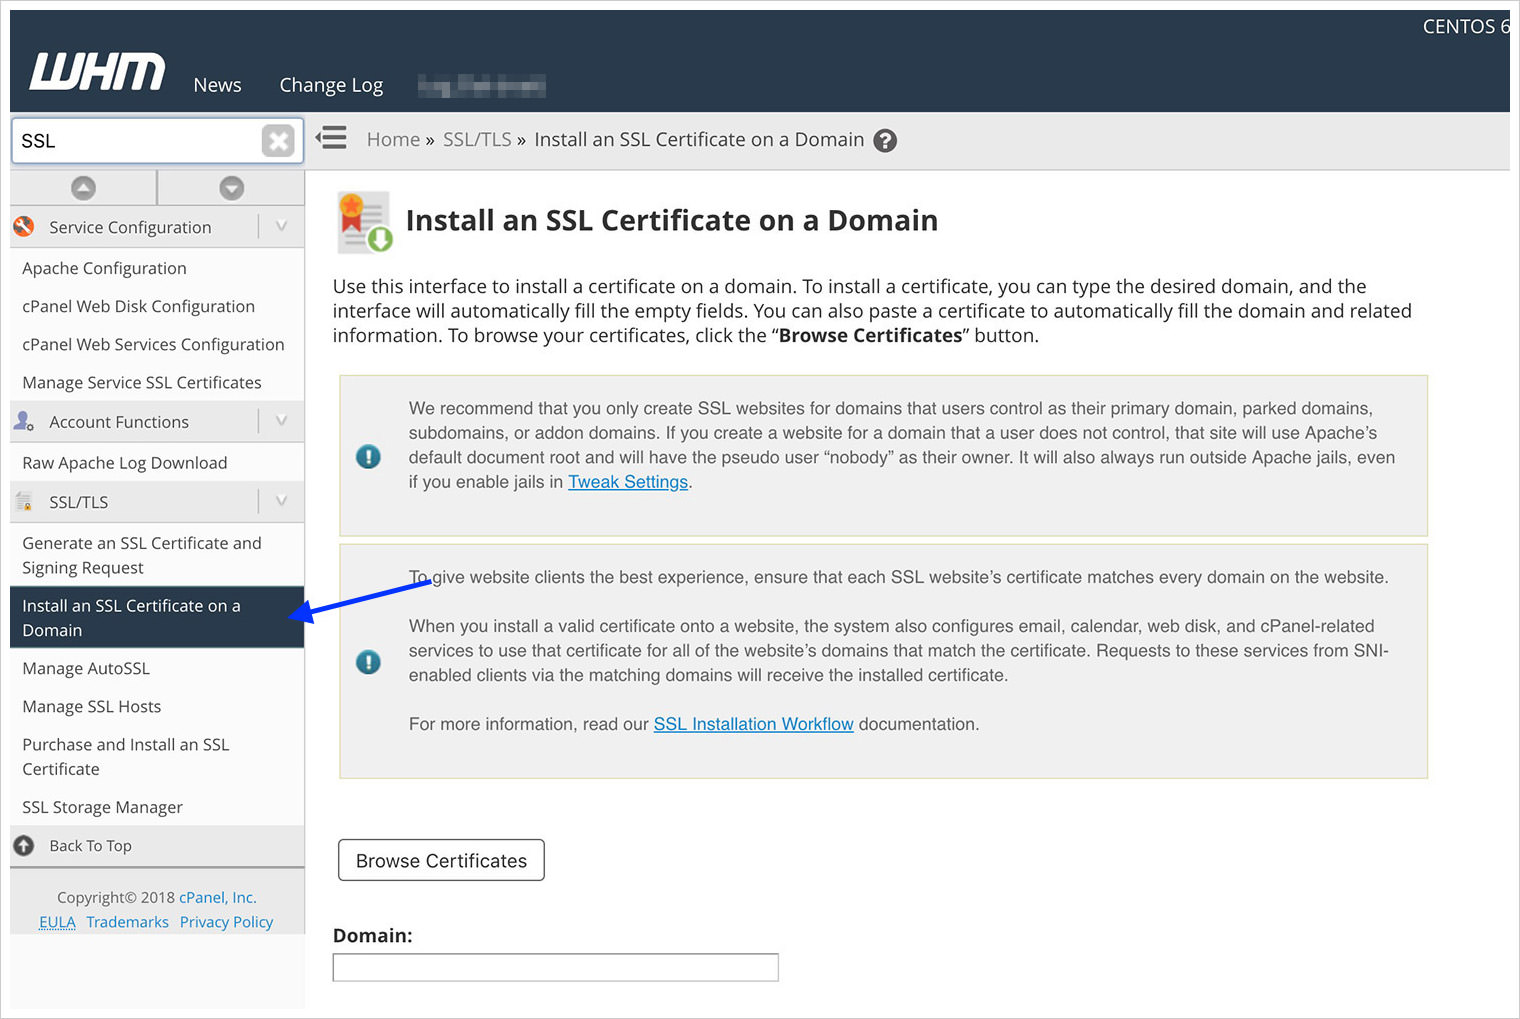
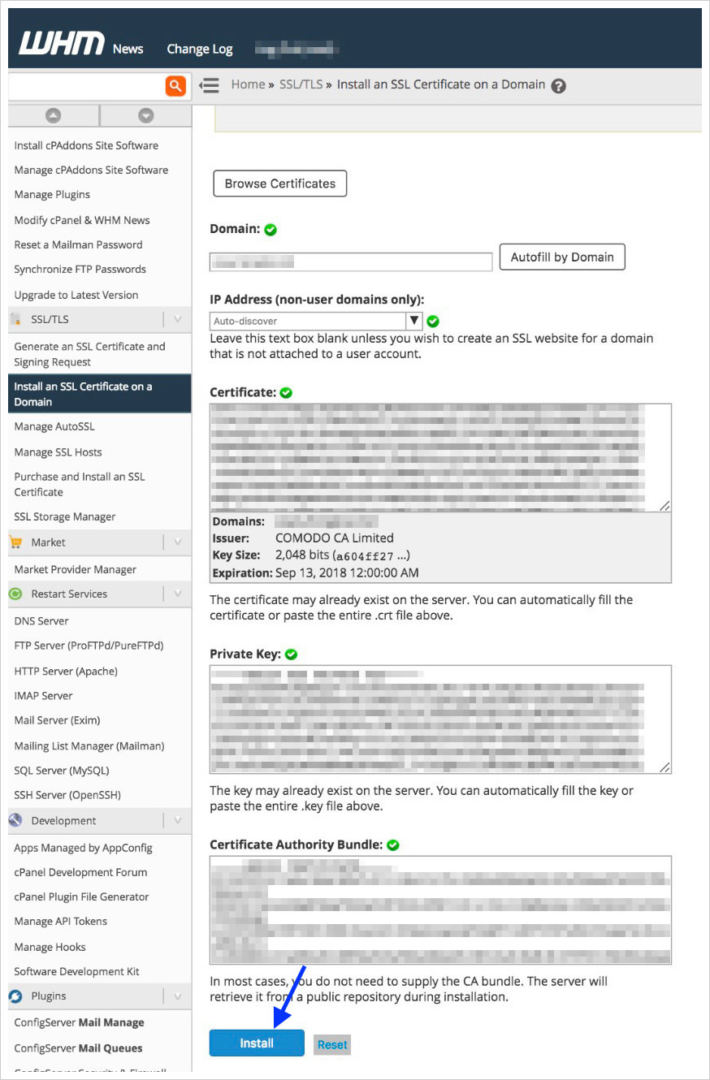
- To put in SSL certificates by the use of WHM, search for “Set up an SSL Certificates on a site” beneath SSL/TLS at the left panel and click on on it.
- You’ll wish to supply all data in moderation to ensure that the certificates to be put in effectively. Let’s undergo each and every of them one after the other.
- Take a last re-check to ensure all of the data is stuffed accurately after which hit the Set up button.
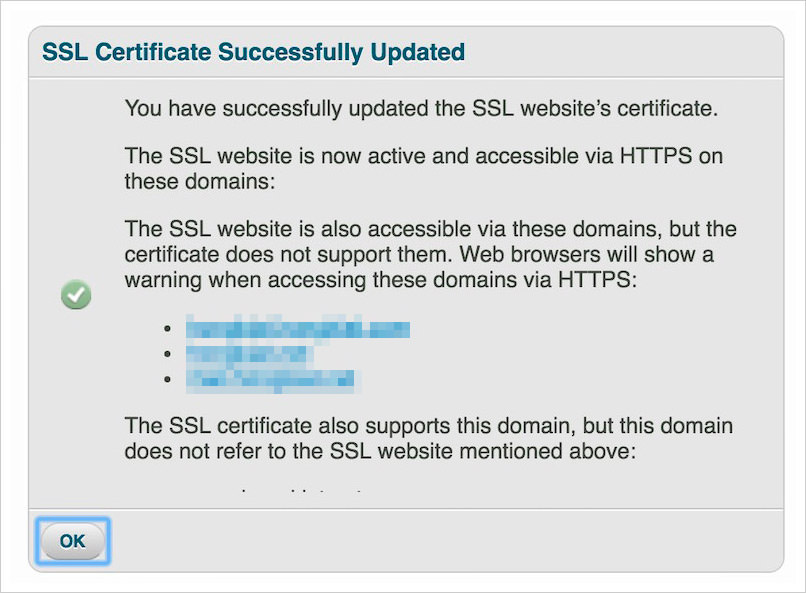
- Right here’s what you’ll see if the certificates is put in effectively.


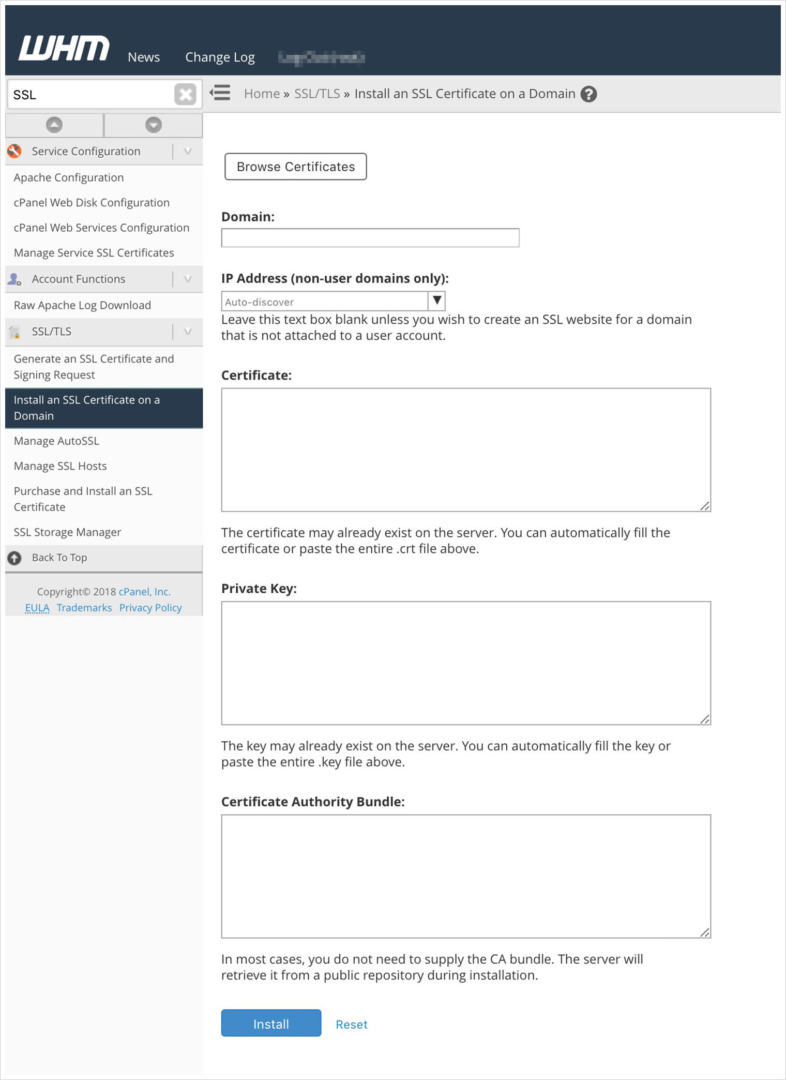
“Area:” – Input the area identify for which you wish to have to put in this certificates.


“Certificates:” – Reproduction all codes from the file finishing in .crt extention, paste it right here.

“Non-public Key:” – Revisit the browser window we left opened when producing CSR. Reproduction all codes in “Key” and paste it right here.

“Certificates Authority Package deal:” – Finally, replica all codes within the file finishing with .ca-bundle and paste it within right here.


7. Trying out Certificates Set up
Should you’ve succeed in this some distance, congratulation, that suggests your SSL certificates has been put in. Now for the overall step, let’s ensure that if the SSL certification is operating correctly.
Including HTTPS sooner than area identify
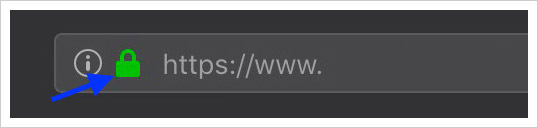
One of the best ways to peer if the SSL certificates is operating is via opening a brand new browser, upload https:// sooner than area identify, or changing http:// with https:// after which hit Input.
Should you see a lock (most likely in inexperienced color), that suggests the SSL certificates is up and operating.

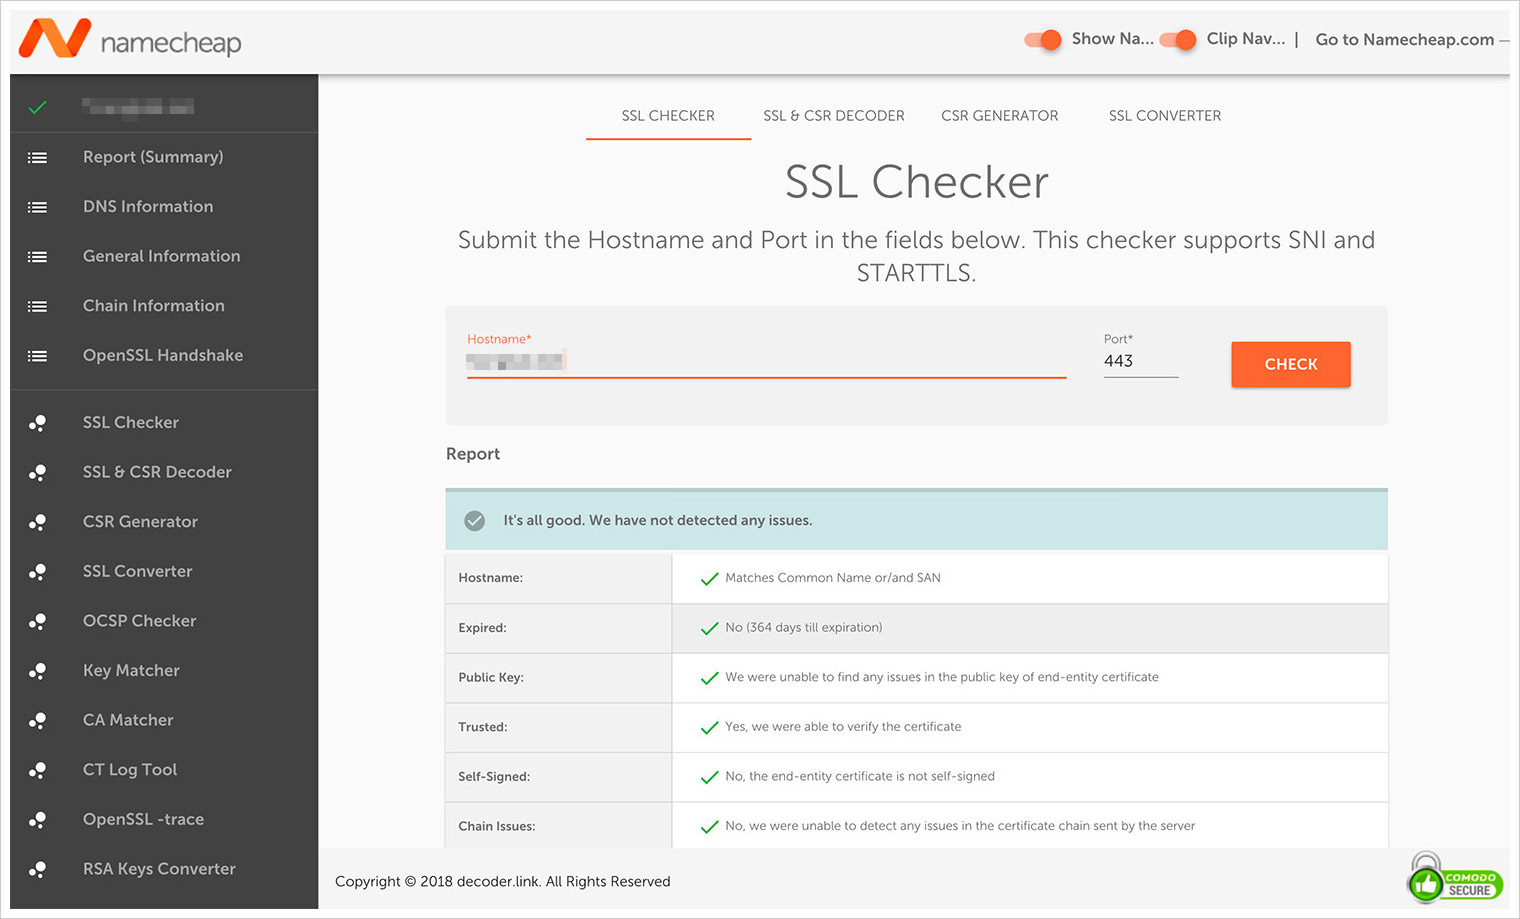
Take a look at with internet instrument
This, for my part, The usage of an SSL Cheker instrument is a greater strategy to examine if SSL certificates is put in correctly because it components our browser cache which might result in inaccuracy.
Cross to https://decoder.link/sslchecker/, input your area identify and click on the Take a look at button. It is going to go back you all details about the area and its SSL certificates put in.

The submit How to Install SSL Certificate for Your Website – Ultimate Guide gave the impression first on Hongkiat.
WordPress Website Development Source: https://www.hongkiat.com/blog/setting-up-ssl-for-your-website/