Hugo is a static web site generator (SSG) written in Go (aka Golang), a high-performance compiled programming language incessantly used for creating backend packages and products and services.
As of late, Hugo is in a position to producing maximum internet sites inside seconds (<1 ms according to web page). That explains why Hugo expenses itself as “the sector’s quickest framework for development internet sites.”
On this article, we’ll check out the historical past of Hugo, what makes it so rapid, and the way you’ll get started development your personal Hugo static web site.
Steve Francia firstly evolved the Hugo static site generator in 2013, and Bjørn Erik Pedersen took over because the venture’s lead developer in 2015. Hugo is an open-source venture, which means that its code will also be considered and stepped forward on via any person.
As a static web site generator, Hugo takes Markdown content material information, runs them via theme templates, and spits out HTML files that you’ll simply deploy on-line – and it does all of this extraordinarily temporarily.
In 2021, there are dozens, if no longer loads, of static turbines. Each static web site generator has its attraction. Jekyll is widespread amongst Ruby builders, and whilst it’s no longer as rapid as different choices, it was once probably the most first static web site turbines to peer common adoption. Gatsby is some other widespread SSG that’s well-suited for creating statically deployable websites which might be dynamic in capability.
So, with such a lot of SSGs in the market, what makes Hugo stand out?
In relation to uncooked functionality, Hugo is the most efficient static web site generator on the planet. In comparison to Jekyll, Hugo was once proven to be 35x faster via Forestry. In a similar fashion, Hugo can render a ten,000-page web site in 10 seconds, a role that will take Gatsby over part an hour to finish. No longer most effective is Hugo the quickest SSG in relation to construct occasions, but it surely’s additionally fast to put in.
Hugo ships as a self-contained executable, in contrast to Jekyll, Gatsby, and different SSGs requiring putting in dependencies with a package deal supervisor. This implies you’ll obtain and use Hugo instantly with no need to fret about device dependencies.
Templating Is Simple in Hugo
In SSG lingo, “templating” refers back to the means of including placeholders for dynamic content material insertion inside an HTML web page. To get admission to the name of a web page, you’ll use the {{ .Identify }} variable. Thus, inside a Hugo HTML template, it’s commonplace to peer the {{ .Identify }} wrapped in H1 tags like so:
{{ .Identify }}
At construct time, Hugo will robotically take hold of the name inside a content material record and insert the name between the 2
tags. Hugo has a number of integrated templating variables, and you’ll even write customized purposes to procedure knowledge at construct time. For templating, Hugo makes use of Pass’s integrated html/template and textual content/template libraries. This is helping minimize down on utility bloat as a result of Hugo doesn’t want to set up third-party libraries for templating.
Right here’s an instance of an index.html homepage template from the preferred Ananke theme. As you’ll see, it resembles a regular HTML record with some further templating code:
Hugo ships as a compiled executable, which means that you gained’t need to obtain and arrange many dependencies simply to get began. It’s to be had for macOS, Home windows, and Linux.
How you can Set up Hugo on macOS and Linux
The really useful set up approach for macOS and Linux calls for Homebrew, a package deal supervisor for set up and updating packages. In case you don’t have already got Homebrew put in, you’ll set up it via working the command under in Terminal:
After Homebrew has been put in, run the command under to put in Hugo:
brew set up hugo
How you can Set up Hugo on Home windows
For Home windows customers, Hugo will also be put in the use of both the Chocolatey or Scoop package deal managers. Because the directions for putting in Chocolatey and Scoop are slightly extra advanced than Homebrew, we propose regarding their reliable documentation pages here and here.
After putting in both Chocolatey or Scoop, you’ll set up Hugo the use of probably the most following instructions (relying to your package deal supervisor):
choco set up hugo-extended -confirm
scoop set up hugo-extended
How you can Examine that Hugo Is Put in As it should be
To ensure that Hugo has been appropriately put in, run the next command:
hugo model
This Terminal command must output data in regards to the these days put in model of Hugo like so:
hugo v0.85.0+prolonged darwin/arm64 BuildDate=unknown
Hugo Instructions and Configuration
Ahead of we dive into making a static web site with Hugo, let’s get accustomed to its quite a lot of CLI instructions and configuration record parameters.
Hugo CLI Instructions
hugo take a look at – runs quite a lot of verification exams
hugo config – shows the configuration for a Hugo web site
hugo convert – converts content material to other codecs
hugo deploy – deploys your web site to a cloud supplier
hugo env – shows the Hugo model and surroundings data
hugo gen – supplies get admission to to quite a lot of turbines
hugo lend a hand – shows details about a command
hugo import – permits you to import a web site from some other location
hugo listing – shows a listing of quite a lot of content material varieties
hugo mod – supplies get admission to to quite a lot of module helpers
hugo new – permits you to create new content material to your web site
hugo server – begins a neighborhood construction server
hugo model – shows the present Hugo model
The Hugo CLI additionally has a number of flags to specify further choices for some instructions. To view a whole listing of Hugo flags (there are numerous them), we propose the use of the hugo lend a hand command to show a listing of the entire to be had flags.
The Hugo Configuration Report
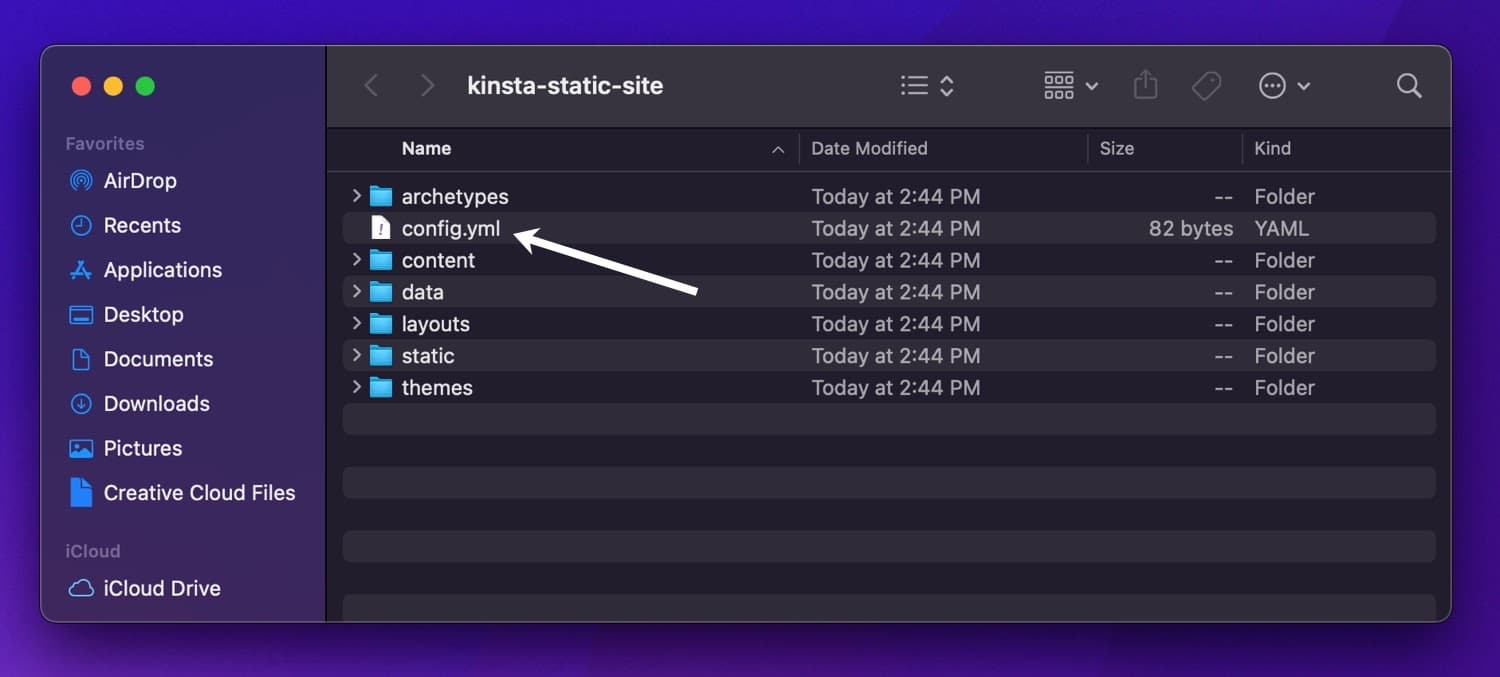
Hugo’s configuration record helps 3 codecs: YAML, TOML, and JSON. Likewise, the Hugo configuration record is config.yml, config.toml, or config.json, and you’ll to find it within the root listing of a Hugo venture.
Hugo configuration record.
Right here’s what a standard Hugo configuration record in YAML structure looks as if:
DefaultContentLanguage: en

theme:

- kinsta-static-site

contentdir: content material

layoutdir: layouts

publishdir: public

paginate: 5

name: Kinsta Static Website online

description: "This can be a static web site generated with Hugo!"

permalinks:

publish: :slug/

web page: :slug/

tags: "tag/:slug/"

creator: "creator/:slug/"
In case you’ve used WordPress or another CMS earlier than, one of the vital configuration choices might glance acquainted to you. As an example, kinsta-static-site is the identify of the web site’s theme, Kinsta Static Website online is the search engine optimization meta name, and paginate (the selection of posts according to web page) is 5.
Hugo has dozens of configuration choices, all of which you’ll discover within the official Hugo documentation. If you wish to have to make any world configuration trade whilst creating a Hugo web site, chances are high that you’ll want to edit this configuration record.
How you can Create a Hugo Website online
Now that we’ve long past via tips on how to set up and use the Hugo CLI and the fundamentals of the Hugo configuration record, let’s create a brand new Hugo web site.
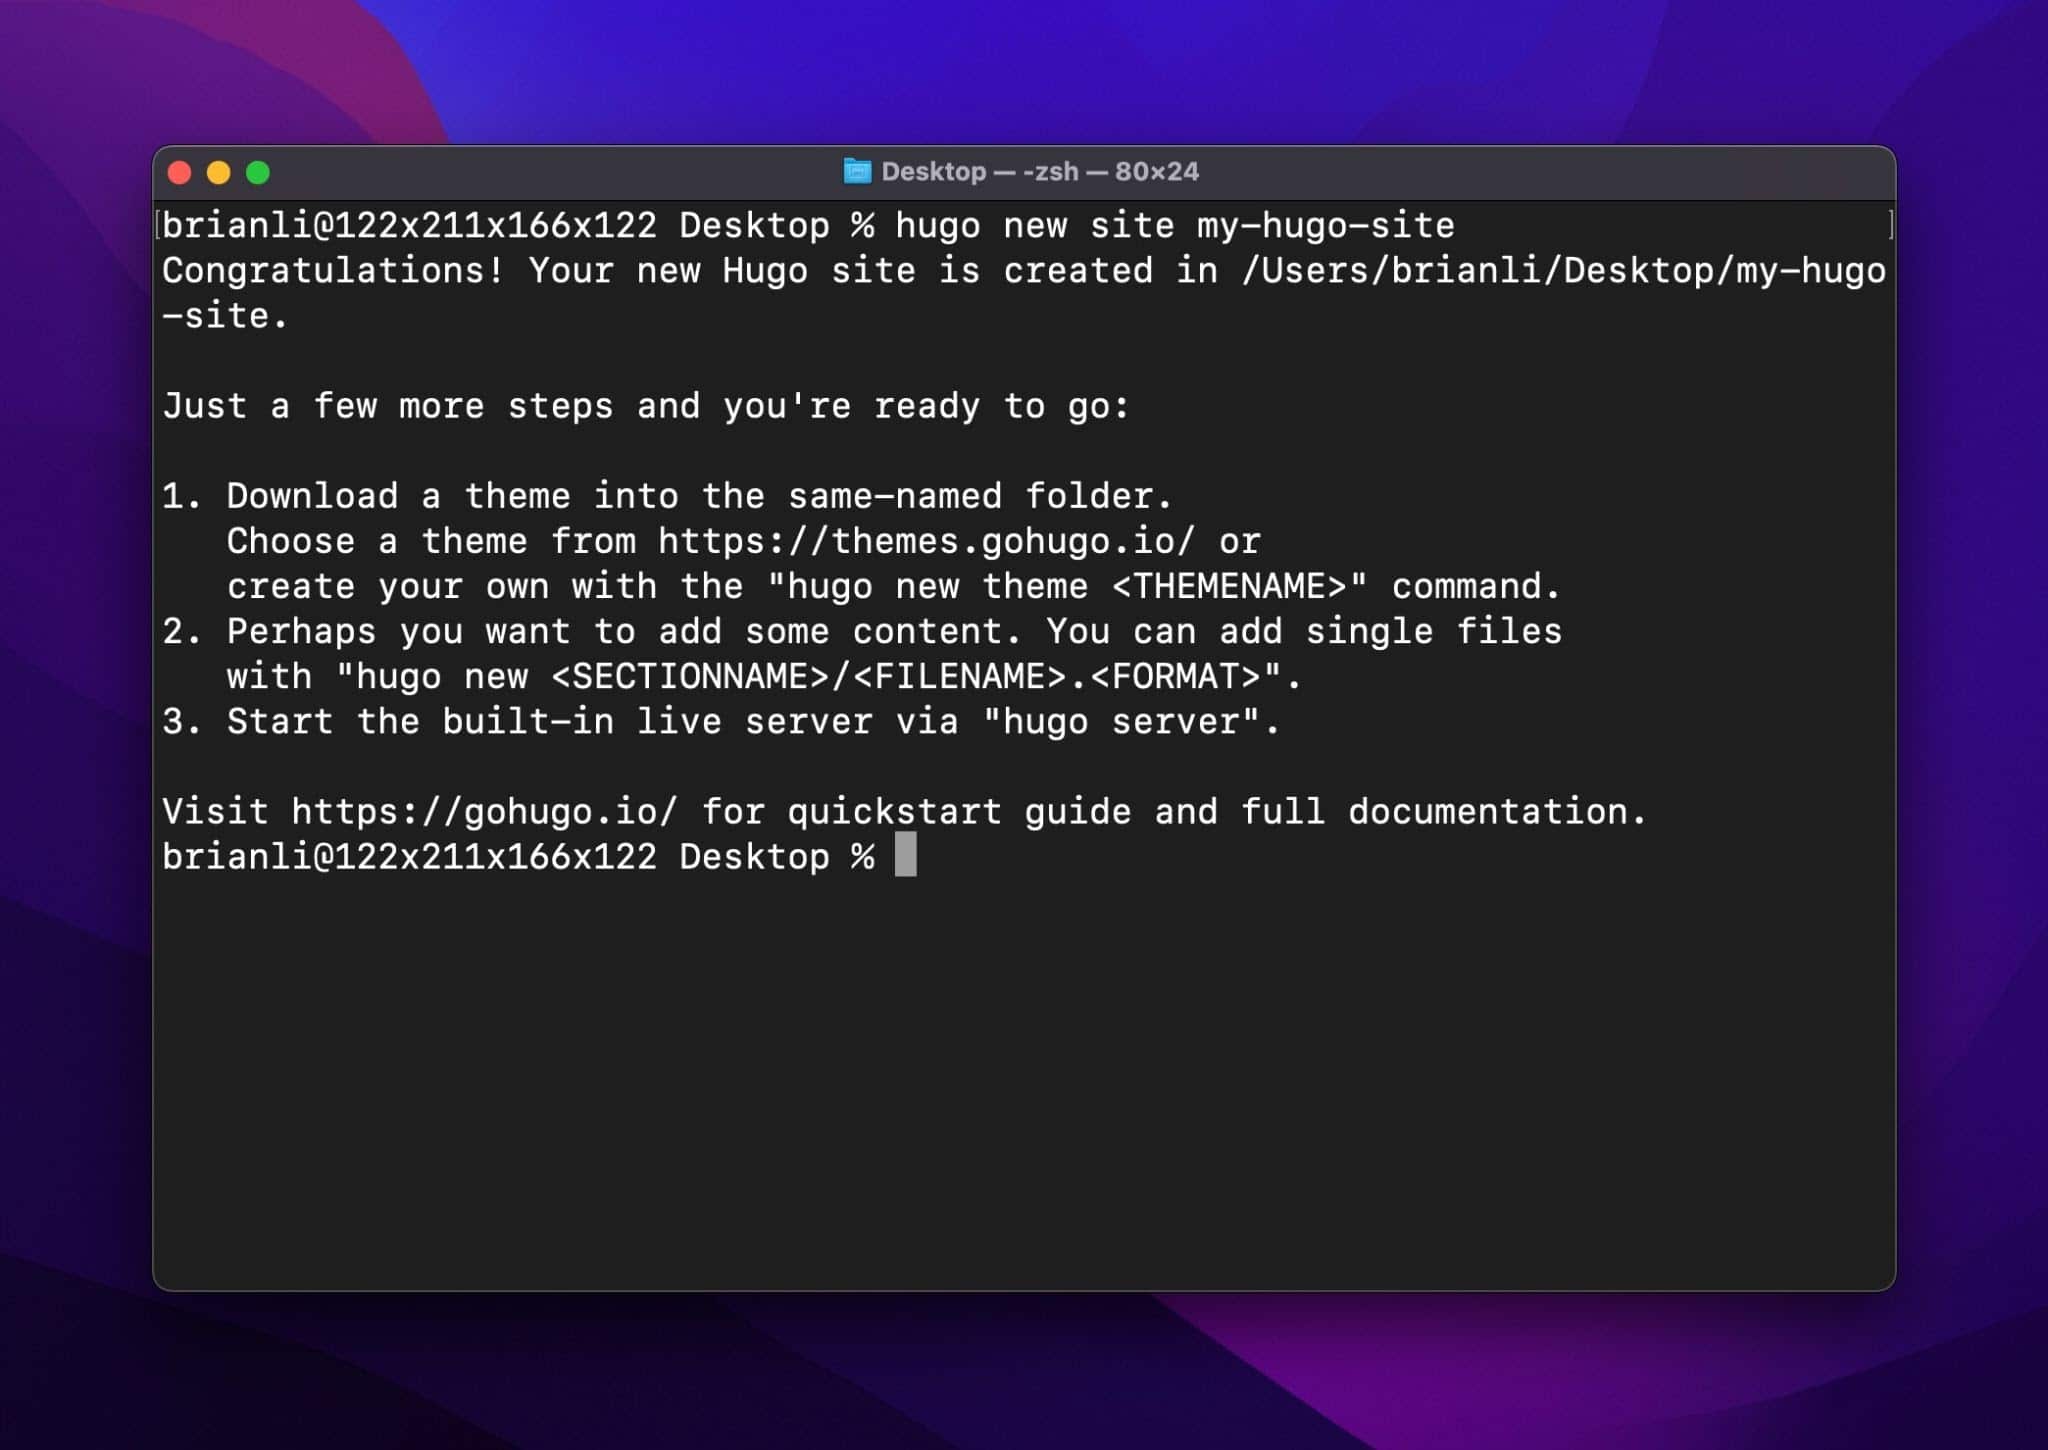
To create a Hugo web site, use the command under (be at liberty to switch my-hugo-site to one thing else in case you’d like):
hugo new web site my-hugo-site
Create a brand new Hugo web site.
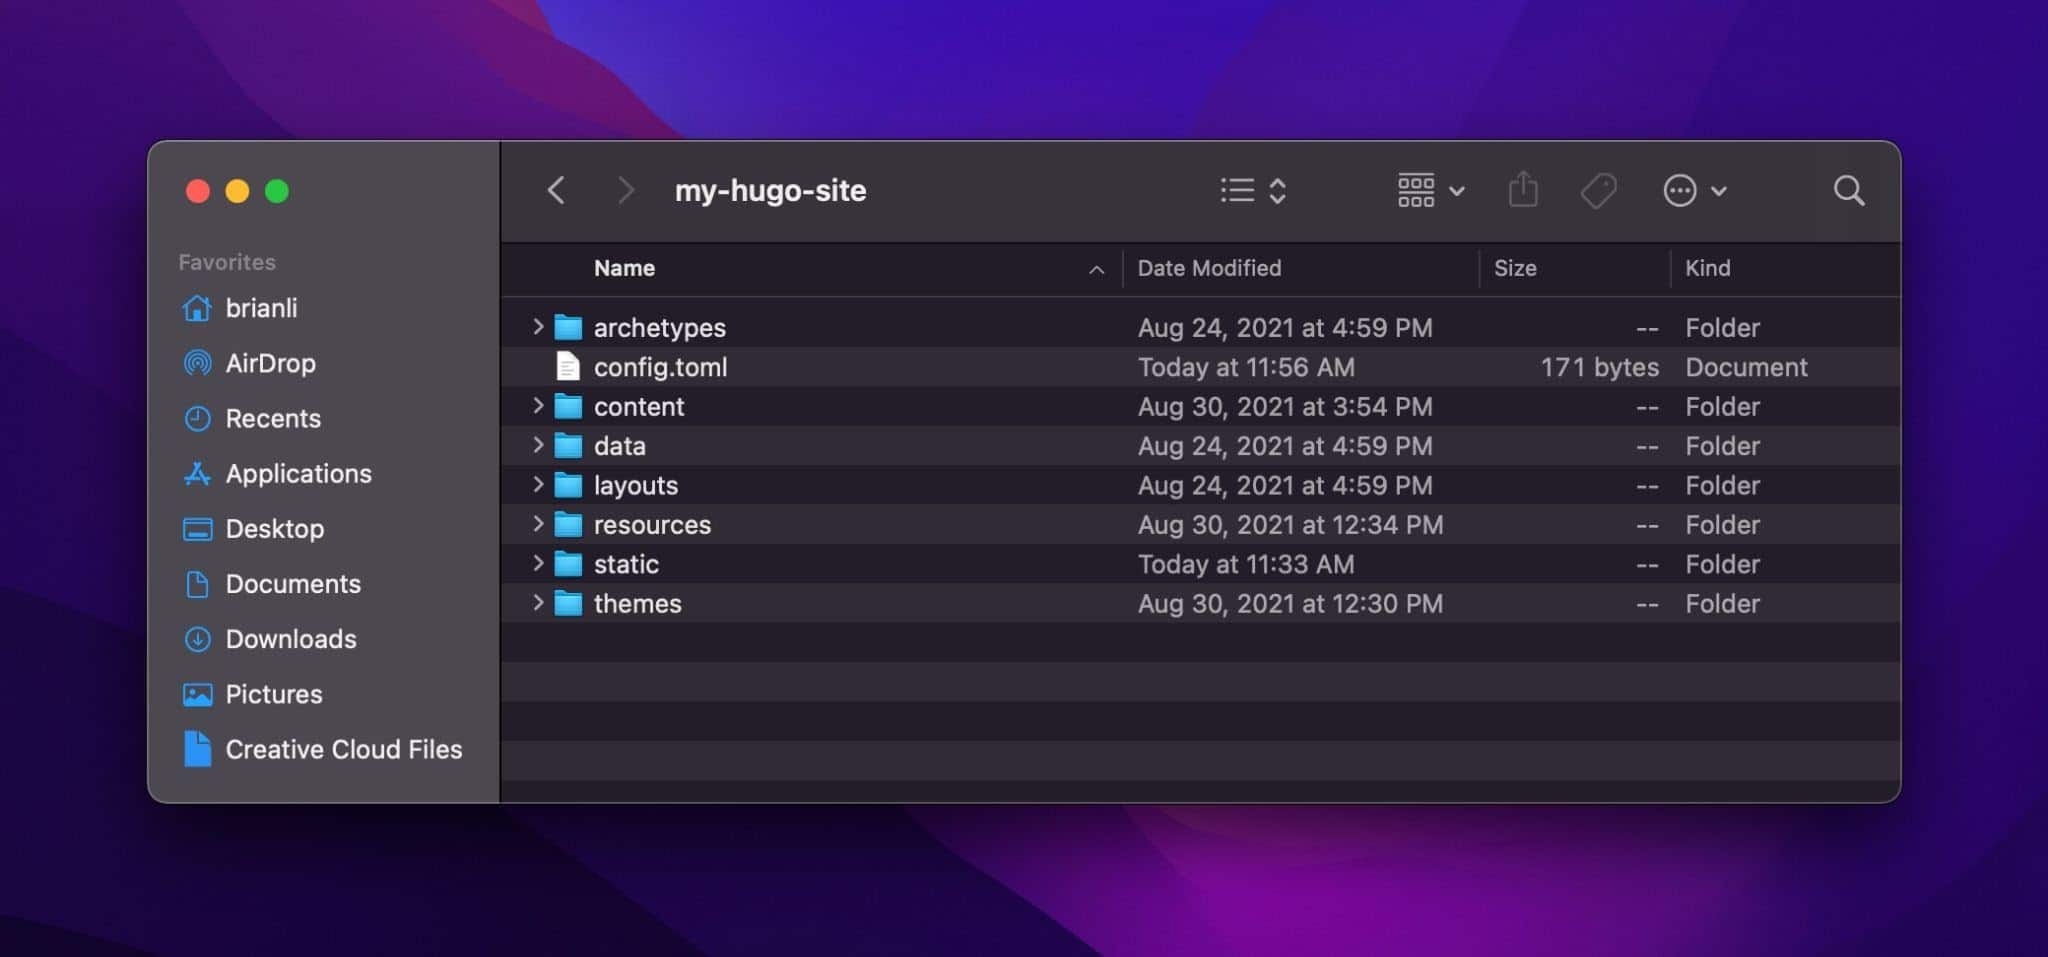
Subsequent, navigate to the web site folder, and also you must see the next information and folders: config.toml record, archetypes folder, content material folder, layouts folder, subject matters folder, knowledge folder, and static folder. Let’s temporarily move over what every of those information and folders is.
Hugo’s config.toml Report
As we highlighted above, Hugo’s number one configuration record accommodates world settings to your web site.
Hugo’s Archetypes Folder
The archetypes folder is the place you retailer content material templates formatted in Markdown. Archetypes are particularly helpful in case your web site has a couple of content material codecs. With Hugo archetypes, you’ll create a template for every content material kind to your web site. This allows you to pre-populate generated Markdown information with the entire vital configuration settings.
As an example, if in case you have a podcast content material kind for showing your podcast episodes, you’ll create a brand new archetype in archetypes/podcast.md with the contents under:
With out archetypes, you would need to manually specify the entrance topic parameters for each and every new publish you create. Whilst archetypes might appear advanced and needless to start with, they may be able to finally end up saving you numerous time ultimately.
Hugo’s Content material Folder
The content material folder is the place your precise publish content material is going. Hugo helps each Markdown and HTML formats, with Markdown being the extra widespread possibility because of its ease of use. Along with being the overall space for storing for posts, you’ll use the content material folder to arrange publish content material additional.
Hugo treats every top-level listing within the content material folder as a content material part. Content material sections in Hugo are very similar to custom post types in WordPress. As an example, in case your web site has posts, pages, and podcasts, your content material folder would have posts, pages, and podcasts directories the place content material information for those other publish varieties would are living.
Hugo’s Layouts Folder
The layouts folder accommodates HTML information that outline the construction of your web site. In some circumstances, you might even see a Hugo web site with out a layouts folder as it doesn’t must be within the venture’s root listing and will are living inside a theme folder as a substitute.
Very similar to WordPress subject matters which use PHP for templating, Hugo templates encompass base HTML with further dynamic templating powered via Golang’s integrated html/template and textual content/template libraries. The quite a lot of HTML template information required for producing your web site’s HTML markup are within the layouts folder.
Hugo’s Issues Folder
For websites that desire a extra self-contained approach of storing template information and belongings, Hugo helps a subject matters folder. Hugo subject matters are very similar to WordPress themes in that they’re saved in a subject matters listing and comprise the entire vital templates for a theme to serve as.
Whilst some Hugo customers desire holding theme-related information within the venture’s root listing, storing those information inside the subject matters folder lets in for more uncomplicated control and sharing.
Hugo Information Folder
Hugo’s knowledge folder is the place you’ll retailer supplemental knowledge (in JSON, YAML, or TOML structure) this is had to generate your web site’s pages. Information information are really useful for better knowledge units that can be bulky to retailer immediately in a content material or template record.
As an example, in case you sought after to create a listing of USD inflation charges from 1960 to 2020, it will take round 80 traces to constitute the information (one line for every yr). As a substitute of placing this information immediately in a content material or template record, you’ll create it within the knowledge folder and populate it with the vital data.
Hugo Static Folder
Hugo’s static folder is the place you retailer static belongings that don’t require any further processing. The static folder is in most cases the place Hugo customers retailer photographs, fonts, DNS verification information, and extra. When a Hugo web site is generated and stored to a folder for simple deployment, all information within the static folder are copied as-is.
In case you’re questioning why we didn’t point out JavaScript or CSS information, it’s as a result of they’re incessantly dynamically processed by means of pipelines all the way through web site construction. In Hugo, JavaScript and CSS information are regularly saved inside the theme folder as a result of they require further processing.
How you can Upload a Theme to a Hugo Website online
Downloading and putting in a premade theme is an effective way to get began with Hugo. Hugo subject matters are available all sizes and styles, and plenty of of them are to be had totally free at the reliable Hugo theme repository. Let’s move forward and set up the preferred Hyde theme on our Hugo web site.
First, navigate in your venture’s theme folder in Terminal:
cd /subject matters/
Subsequent, use Git to clone the Hyde theme into your venture’s subject matters listing.
git clone https://github.com/spf13/hyde.git
Subsequent, upload the next line in your config.toml record to turn on the Hyde theme:
theme = "hyde"
At this level, the Hyde theme is put in and configured. The next move is to start out up Hugo’s integrated construction webserver to view the web site on your internet browser.
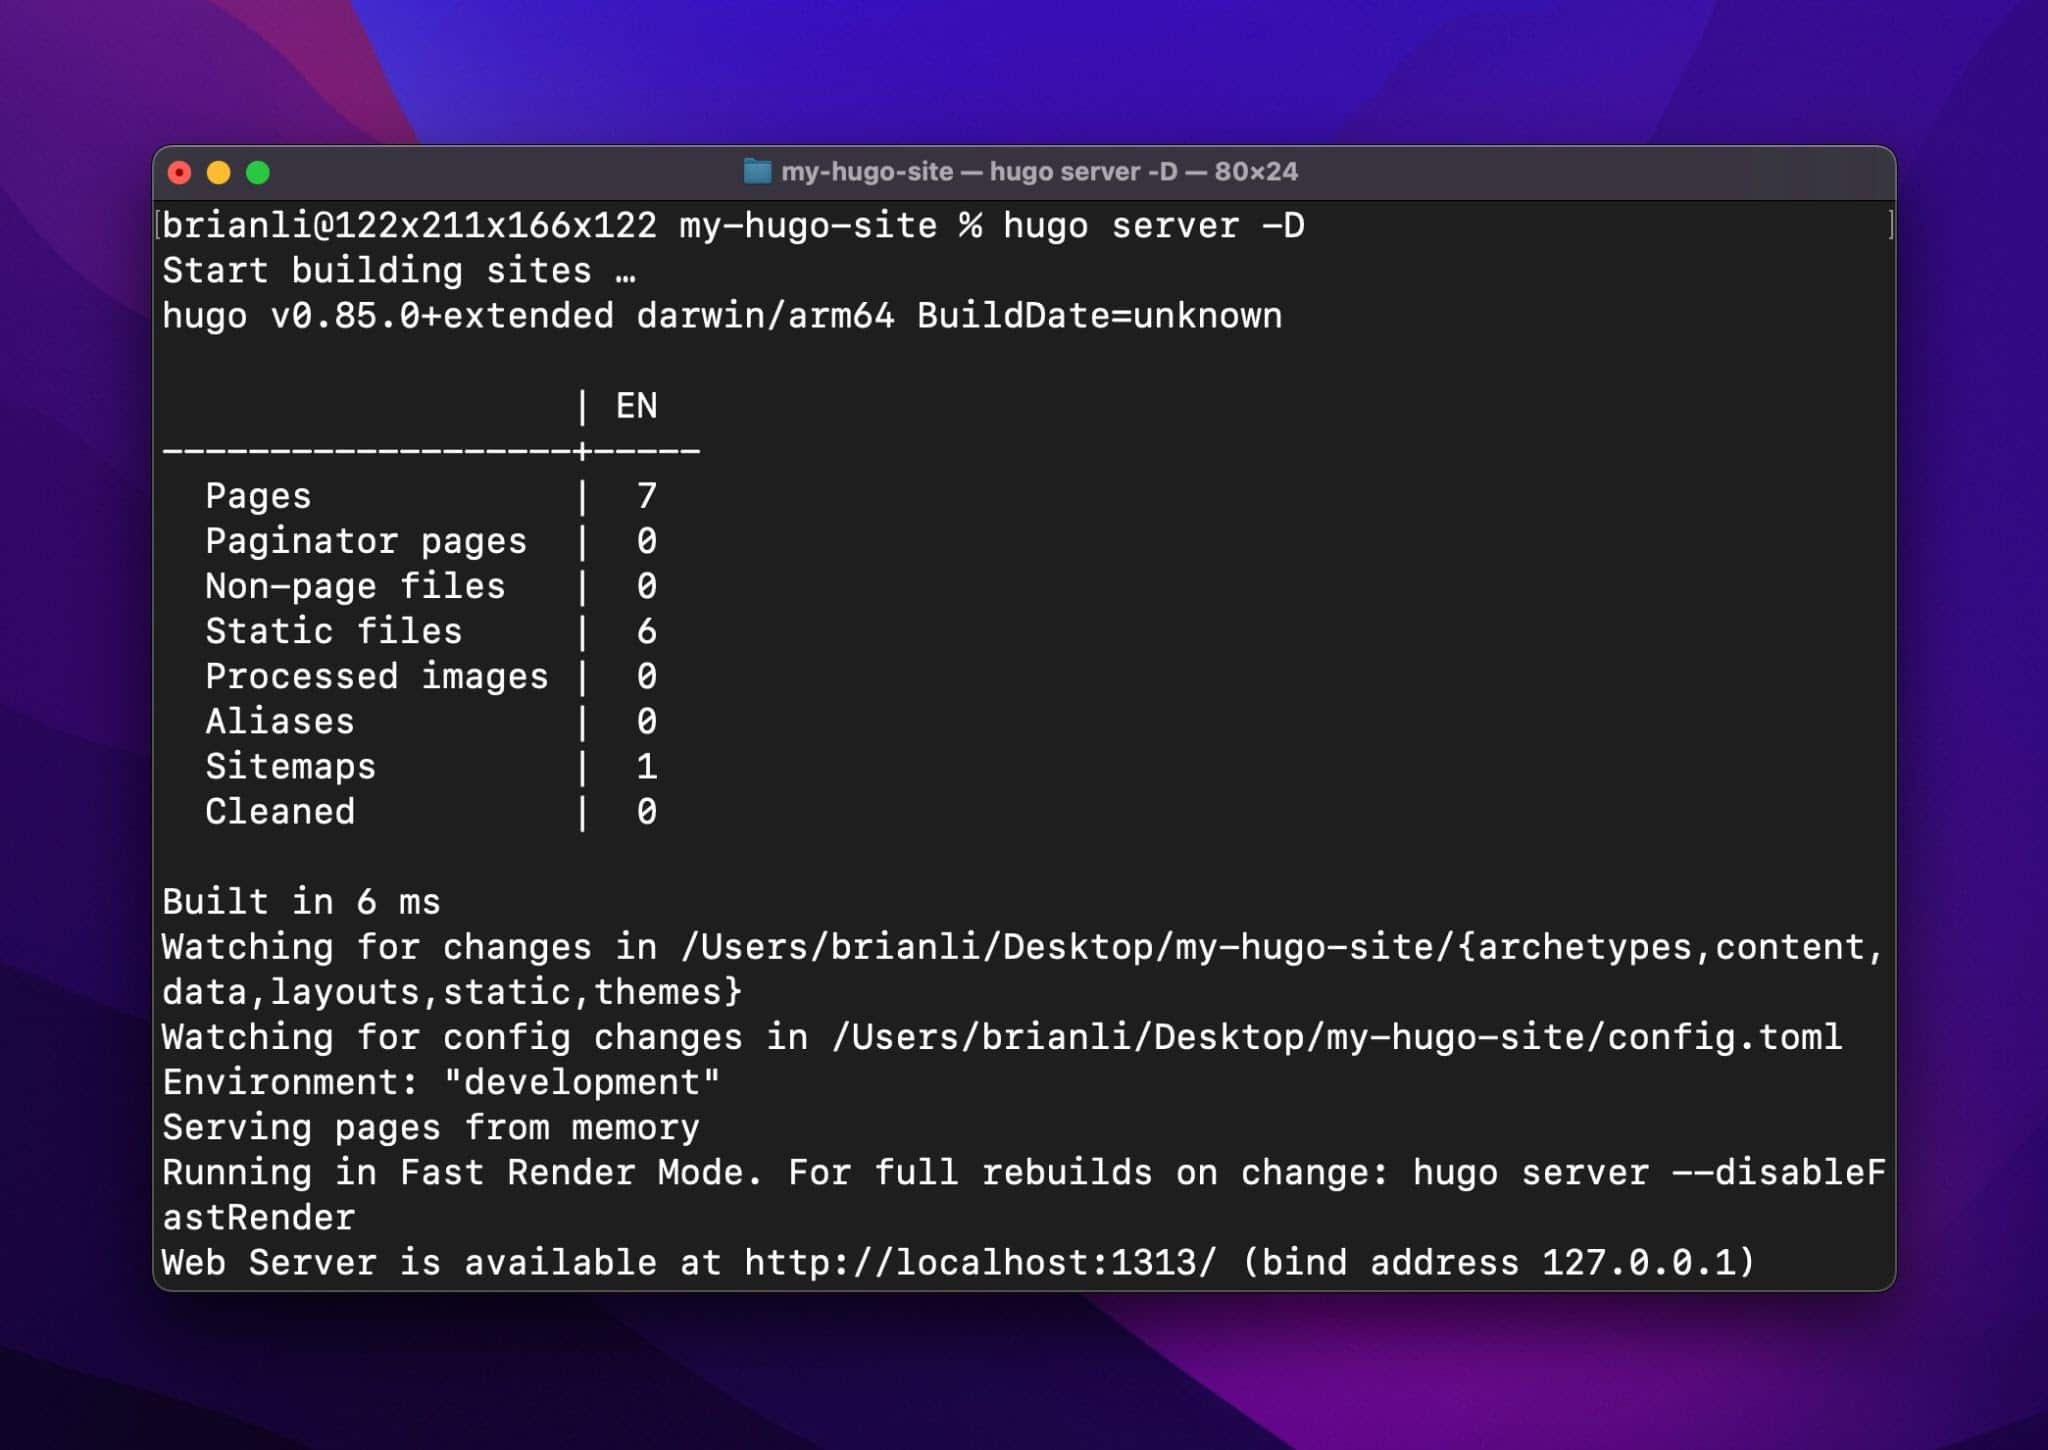
To begin Hugo’s webserver, run the command under within the root listing of your venture:
hugo server -D
Hugo will then construct your web site’s pages and cause them to to be had at http://localhost:1313/:
Hugo native construction server.
In case you talk over with the URL on your internet browser, you must see your Hugo web site with the Hyde theme:
Hugo web site showing with the Hyde theme.
By means of default, Hugo’s native construction server will stay up for adjustments and rebuild the web site robotically. Since Hugo’s construct pace is so rapid, updates in your web site will also be observed in near-real-time – one thing that’s uncommon to peer within the static web site generator global. To show this, let’s create our first actual publish in Hugo.
How you can Upload Content material to a Hugo Website online
Including content material to a Hugo web site could be very other from a full-fledged CMS like WordPress or Ghost. With Hugo, there is not any integrated CMS layer to manage your content. As a substitute, you’re anticipated to regulate and arrange issues as you spot have compatibility.
In different phrases, there’s no explicitly “proper” option to do content material control in Hugo. We’ll percentage one approach of including and managing content material on this part, however be at liberty to switch issues up as you get extra accustomed to Hugo.
Content material Sections in Hugo
In Hugo, the primary content material group software that you’ve at your disposal is the content material part. A content material part in Hugo is very similar to a post type in WordPress – no longer most effective are you able to use it as a content material clear out, however you’ll additionally use it as an identifier when developing customized subject matters.
As an example, if in case you have a weblog content material part folder, you’ll use it to retailer all of your weblog posts and render a selected web page template that most effective applies to weblog posts.
How you can Upload Posts in Hugo
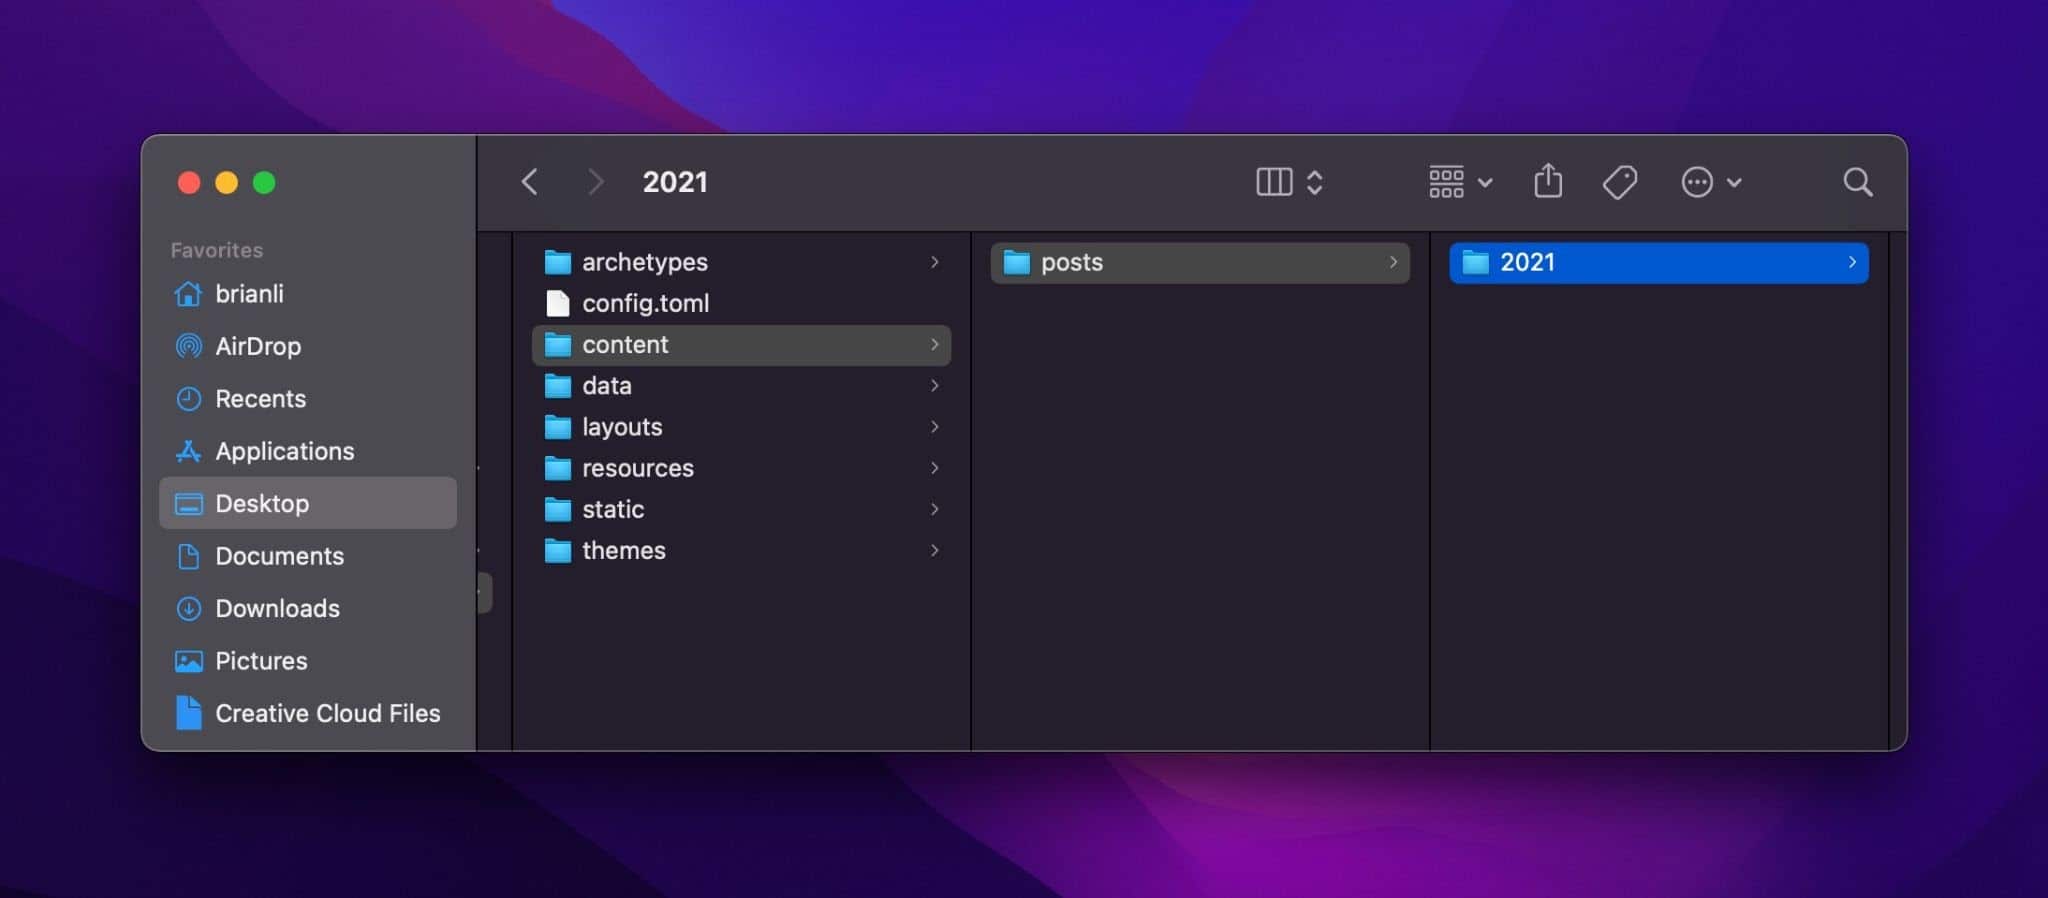
With that during thoughts, let’s create a content material part for weblog posts and upload a couple of items of content material. Create a brand new folder named posts on your venture’s content material folder – that is the content material part.
Let’s create some other organizational layer throughout the posts folder via making a 2021 folder. At this level, your content material listing must appear to be this:
Hugo content material listing.
Now, let’s create our first publish. As we mentioned previous, Hugo helps each Markdown and HTML information for content material. Usually, it’s higher to keep on with Markdown information as a result of they’re more uncomplicated to jot down, structure, and browse.
Within the content material/posts/2021 folder, create a brand new record that leads to .md (the Markdown record extension). You’ll be able to identify the record no matter you wish to have, however the really useful syntax for naming a Hugo content material record is YYYY-MM-DD-a-sample-post.md.
Along with manually making a content material record, you’ll additionally use the Hugo CLI to create a brand new publish with the command under (make sure to run the command out of your venture listing):
hugo new posts/2021/2021-08-30-a-sample-post.md
Understand how the content material folder is lacking from the trail above. It is because Hugo assumes all content material information will move into the content material folder via default.
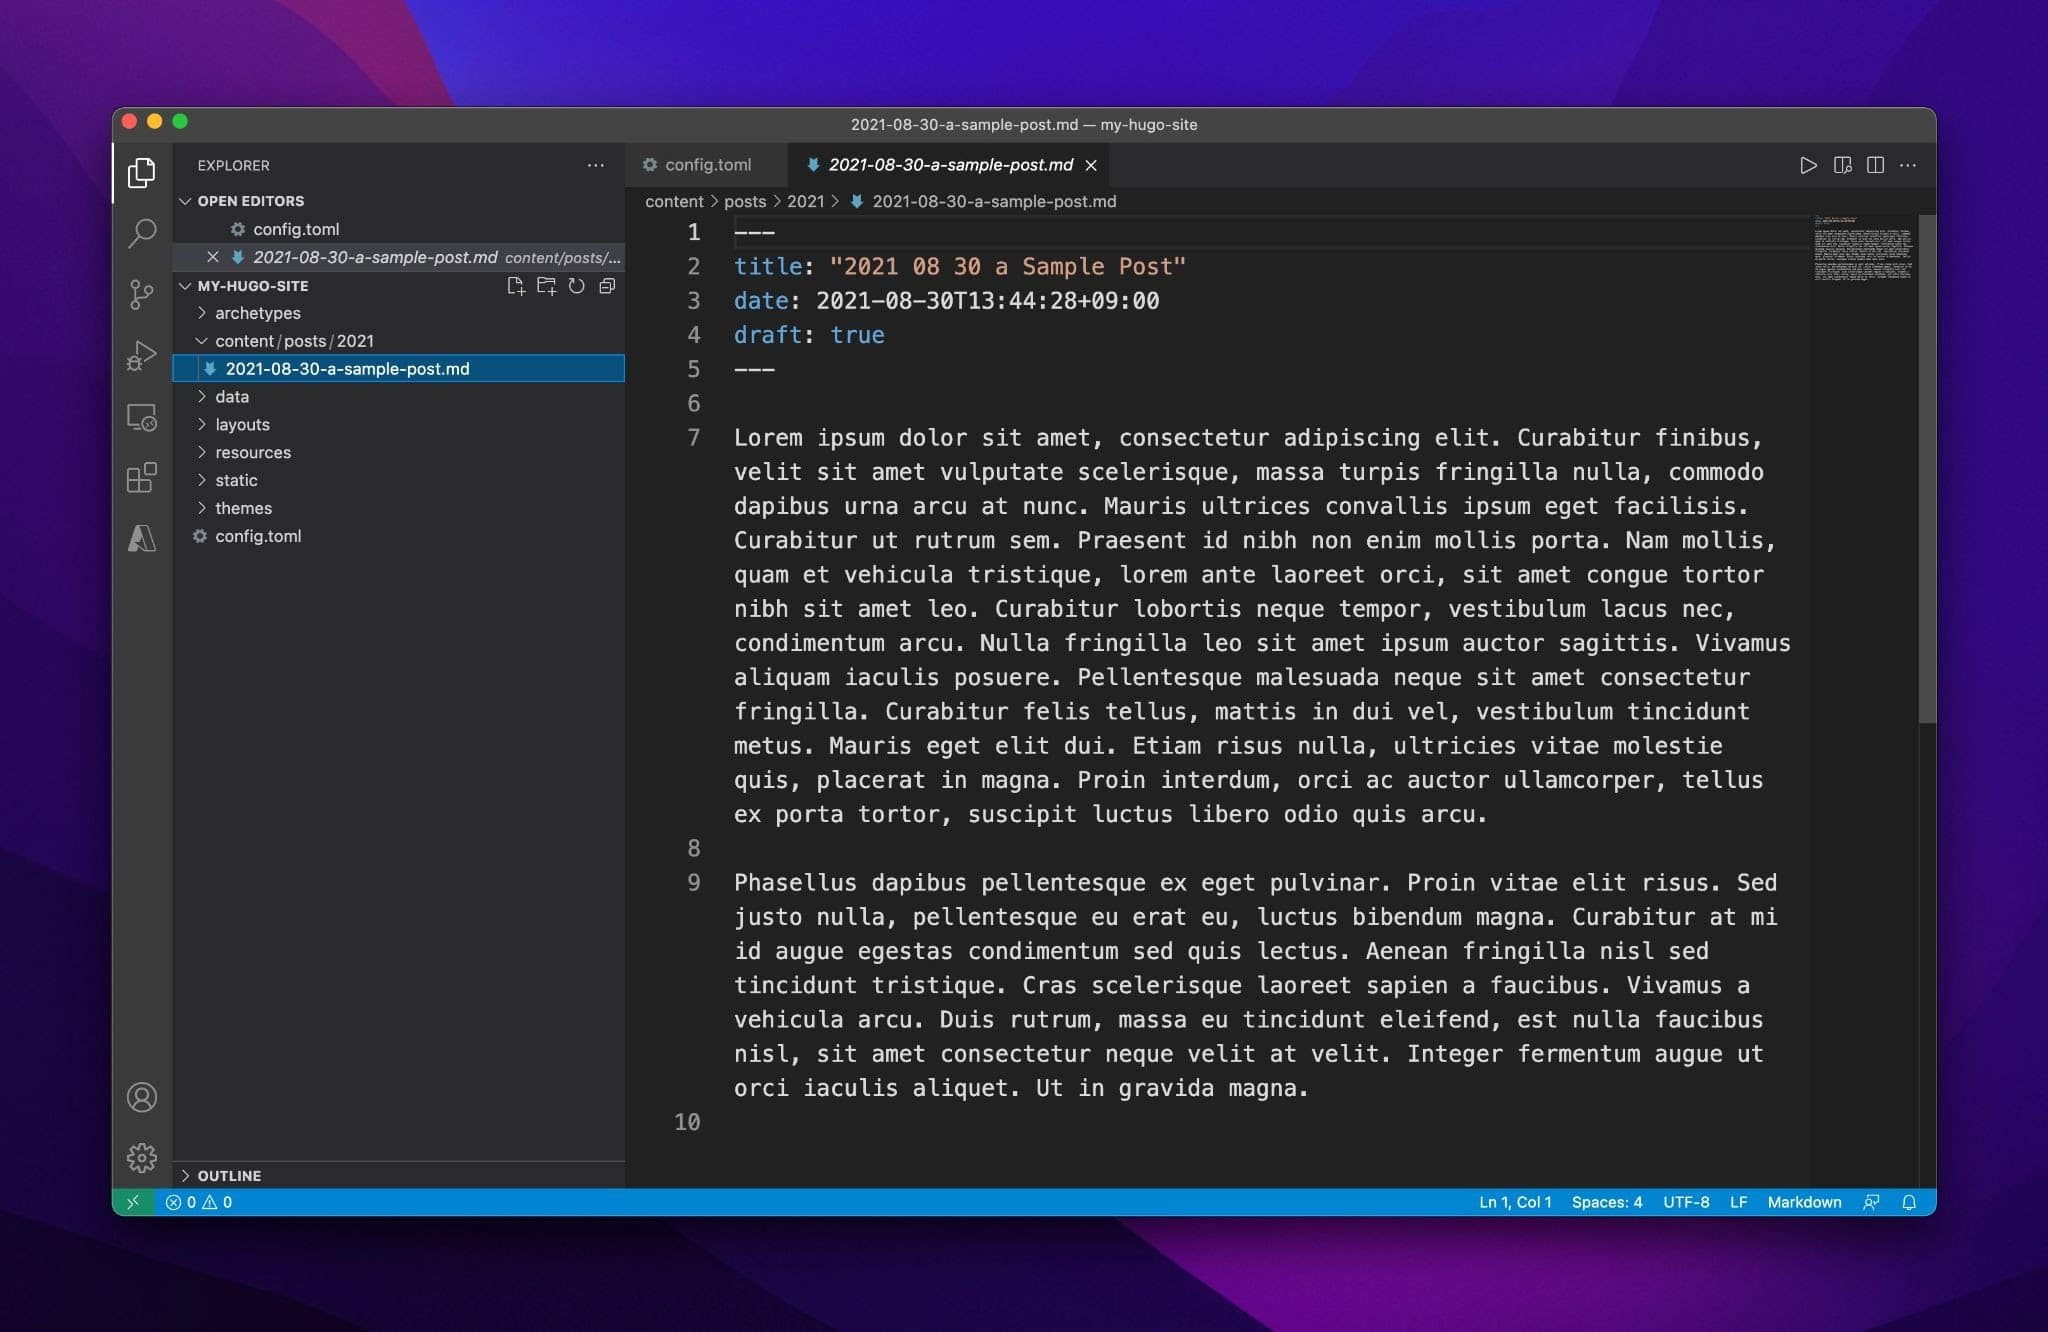
In case you open up the newly created content material record, you must see a couple of traces of metadata on the peak of the record that appears one thing like this:
---

name: "2021 08 30 a Pattern Put up"

date: 2021-08-30T13:44:28+09:00

draft: true

---
This metadata, which is formatted in YAML, is named the “entrance topic.” Auto-generated entrance topic is one important good thing about the use of the Hugo CLI. The entrance topic is the place distinctive knowledge for a publish (publish identify, knowledge, draft standing, tags, classes, and many others.) is saved. The default structure for the entrance topic will also be configured on a per-section foundation the use of archetypes.
Now let’s upload some textual content to the publish. When writing a publish, at all times be sure your content material is under the entrance topic like so:
Weblog publish in Hugo.
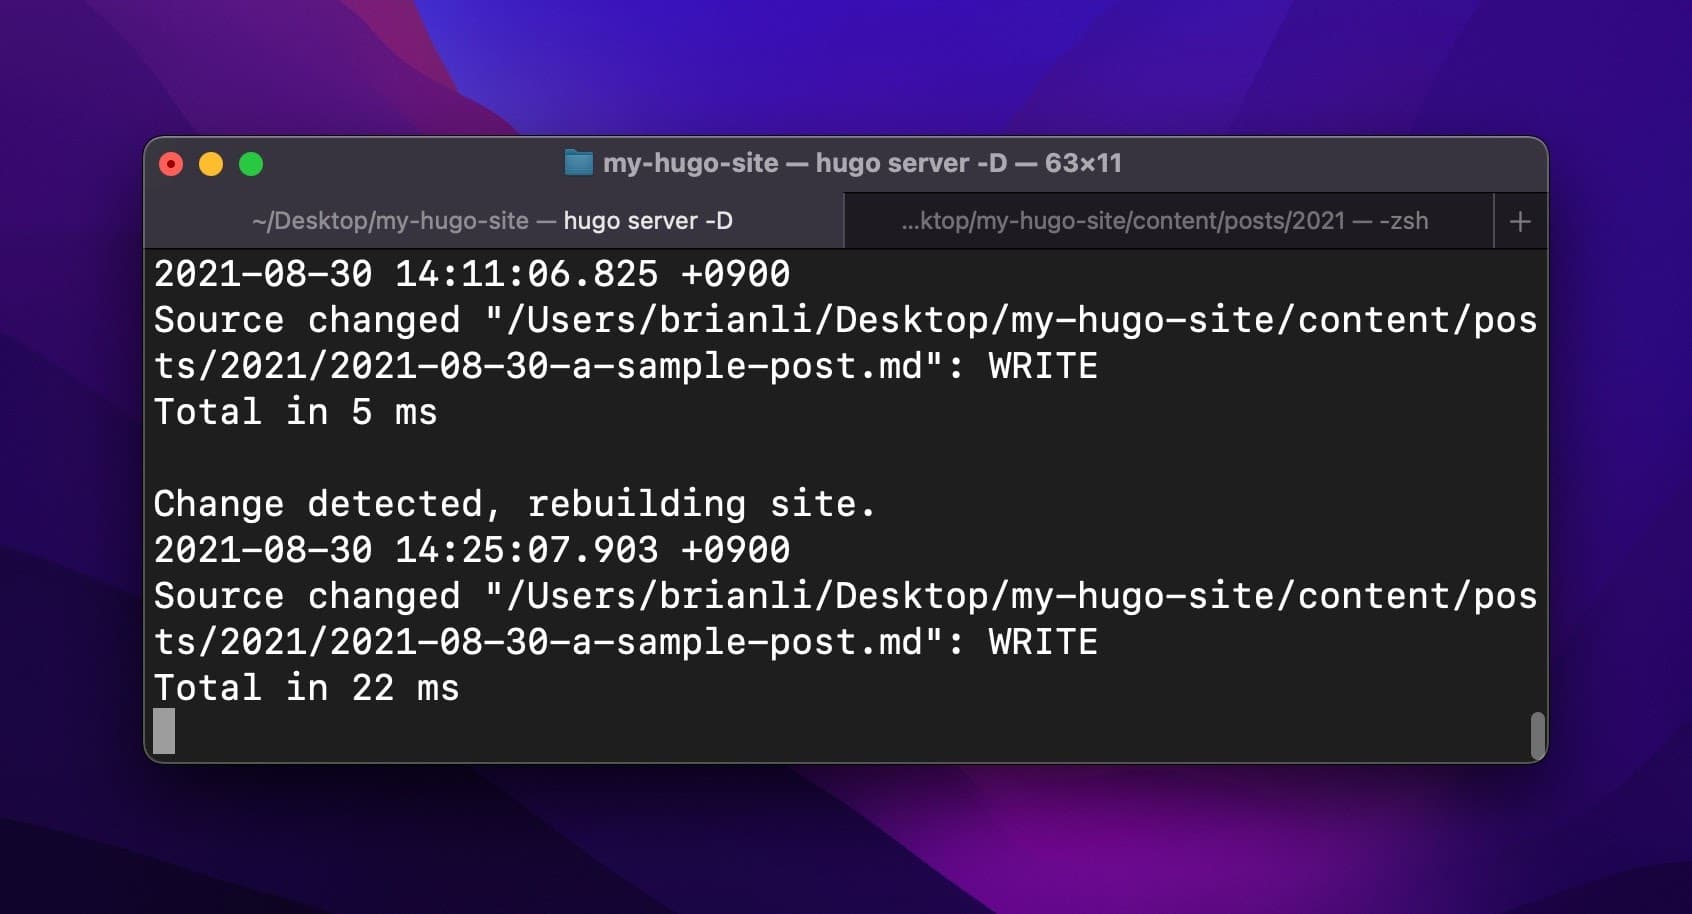
If you save the content material record, you must see Hugo rebuild your web site in Terminal. Within the screenshot under, you’ll see Hugo rebuilt all of the web site in 22 ms!
Signal Up For the Publication
Wish to know the way we greater our site visitors over 1000%?
Sign up for 20,000+ others who get our weekly e-newsletter with insider WordPress pointers!
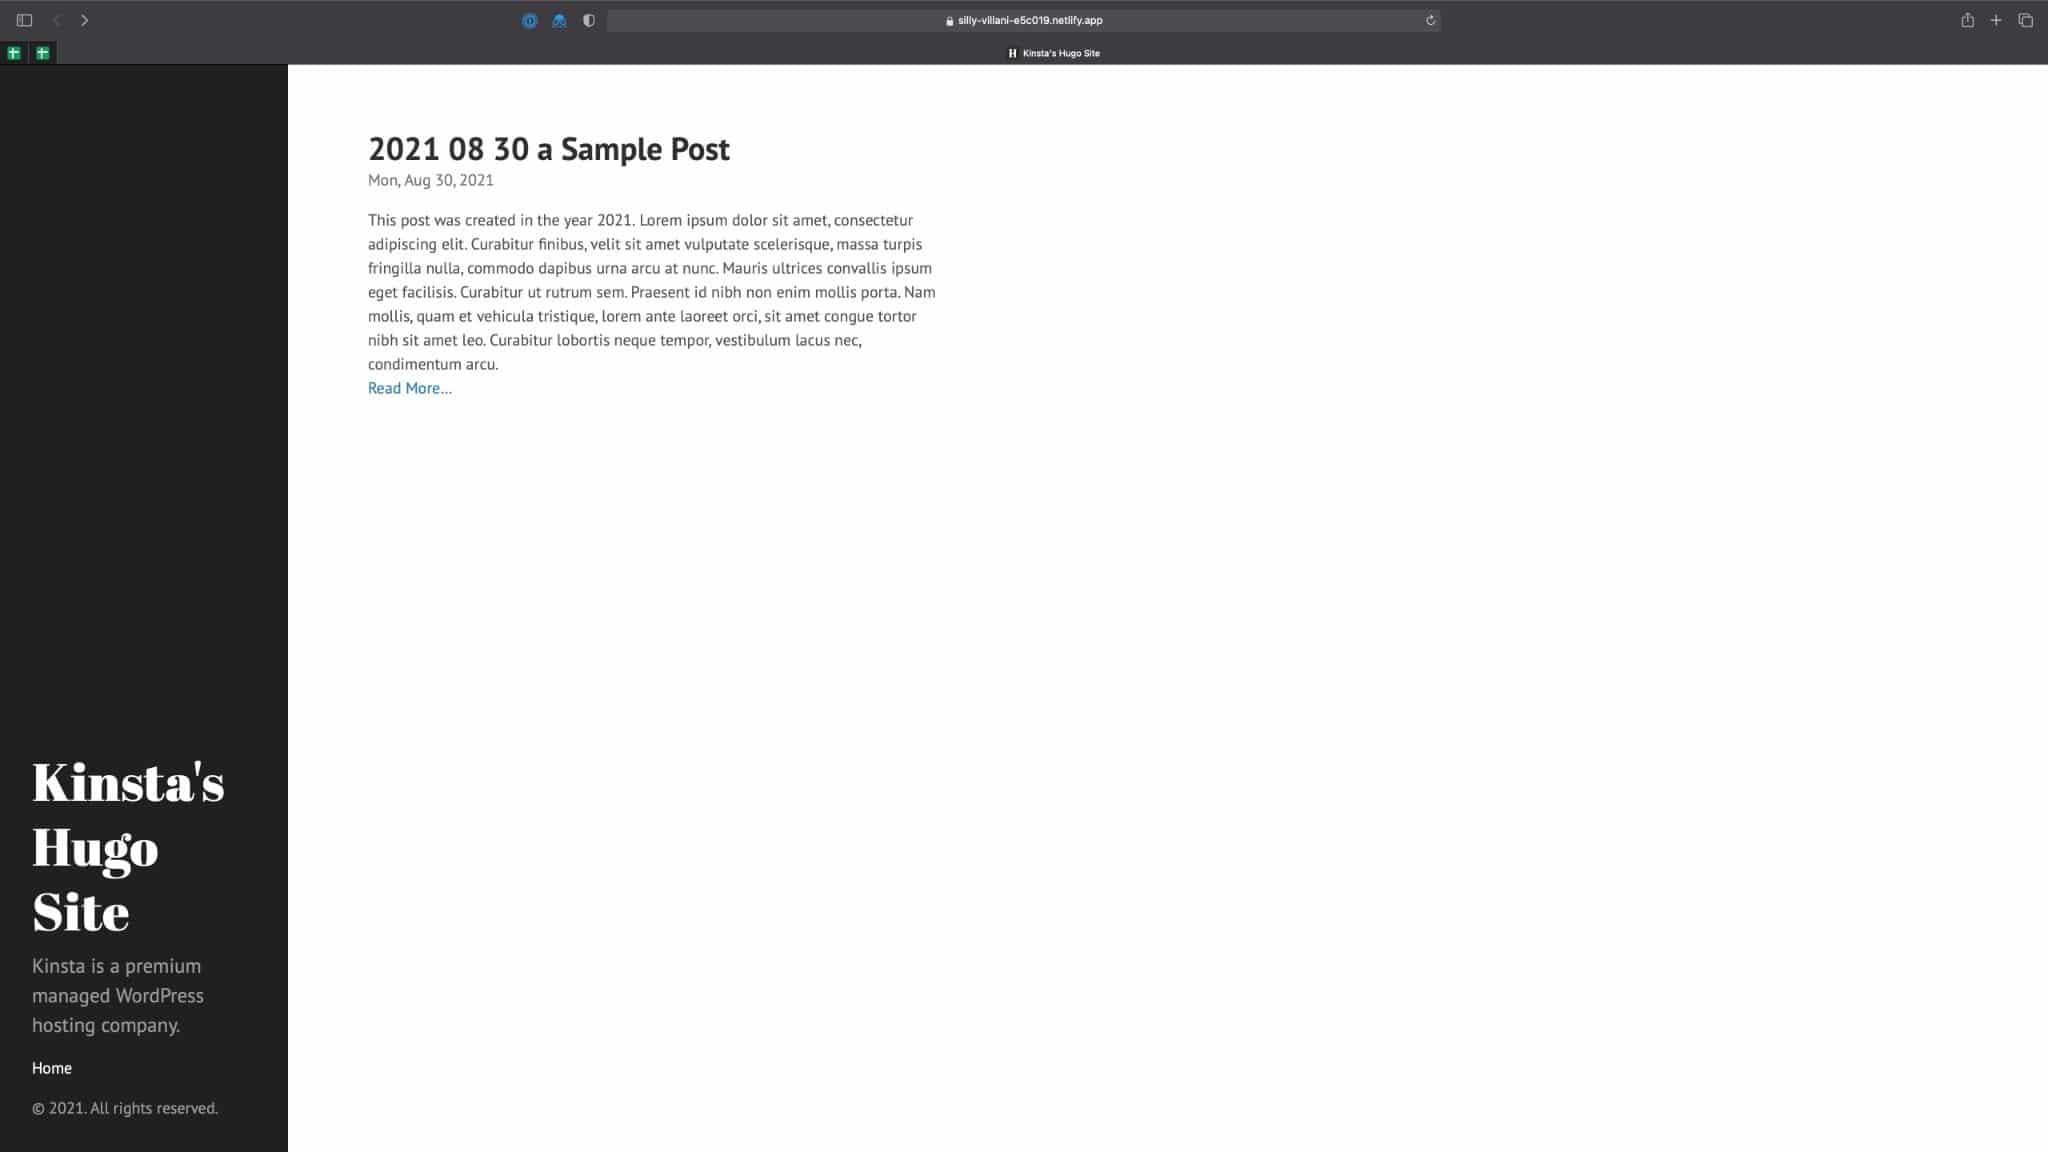
In case you talk over with your Hugo web site on your internet browser, you must see the brand new publish.
Hugo web site with a publish.
How you can Upload a Web page in Hugo
Now that we’ve added a publish to our Hugo web site, let’s upload a web page. Maximum content material control techniques, together with WordPress, distinguish between posts and pages. Normally, a publish is a dated piece of content material, whilst a web page is composed of evergreen or static content material.
To create a web page, we first want a web page content material part. To do that, create a folder named pages in Hugo’s content material folder. Later on, use the command under so as to add a brand new “About” web page in your web site:
hugo new pages/about.md
Understand how the naming conference for pages differs from posts. Not like posts, pages aren’t tied to a selected date, so it’s needless to incorporate the advent date within the record identify.
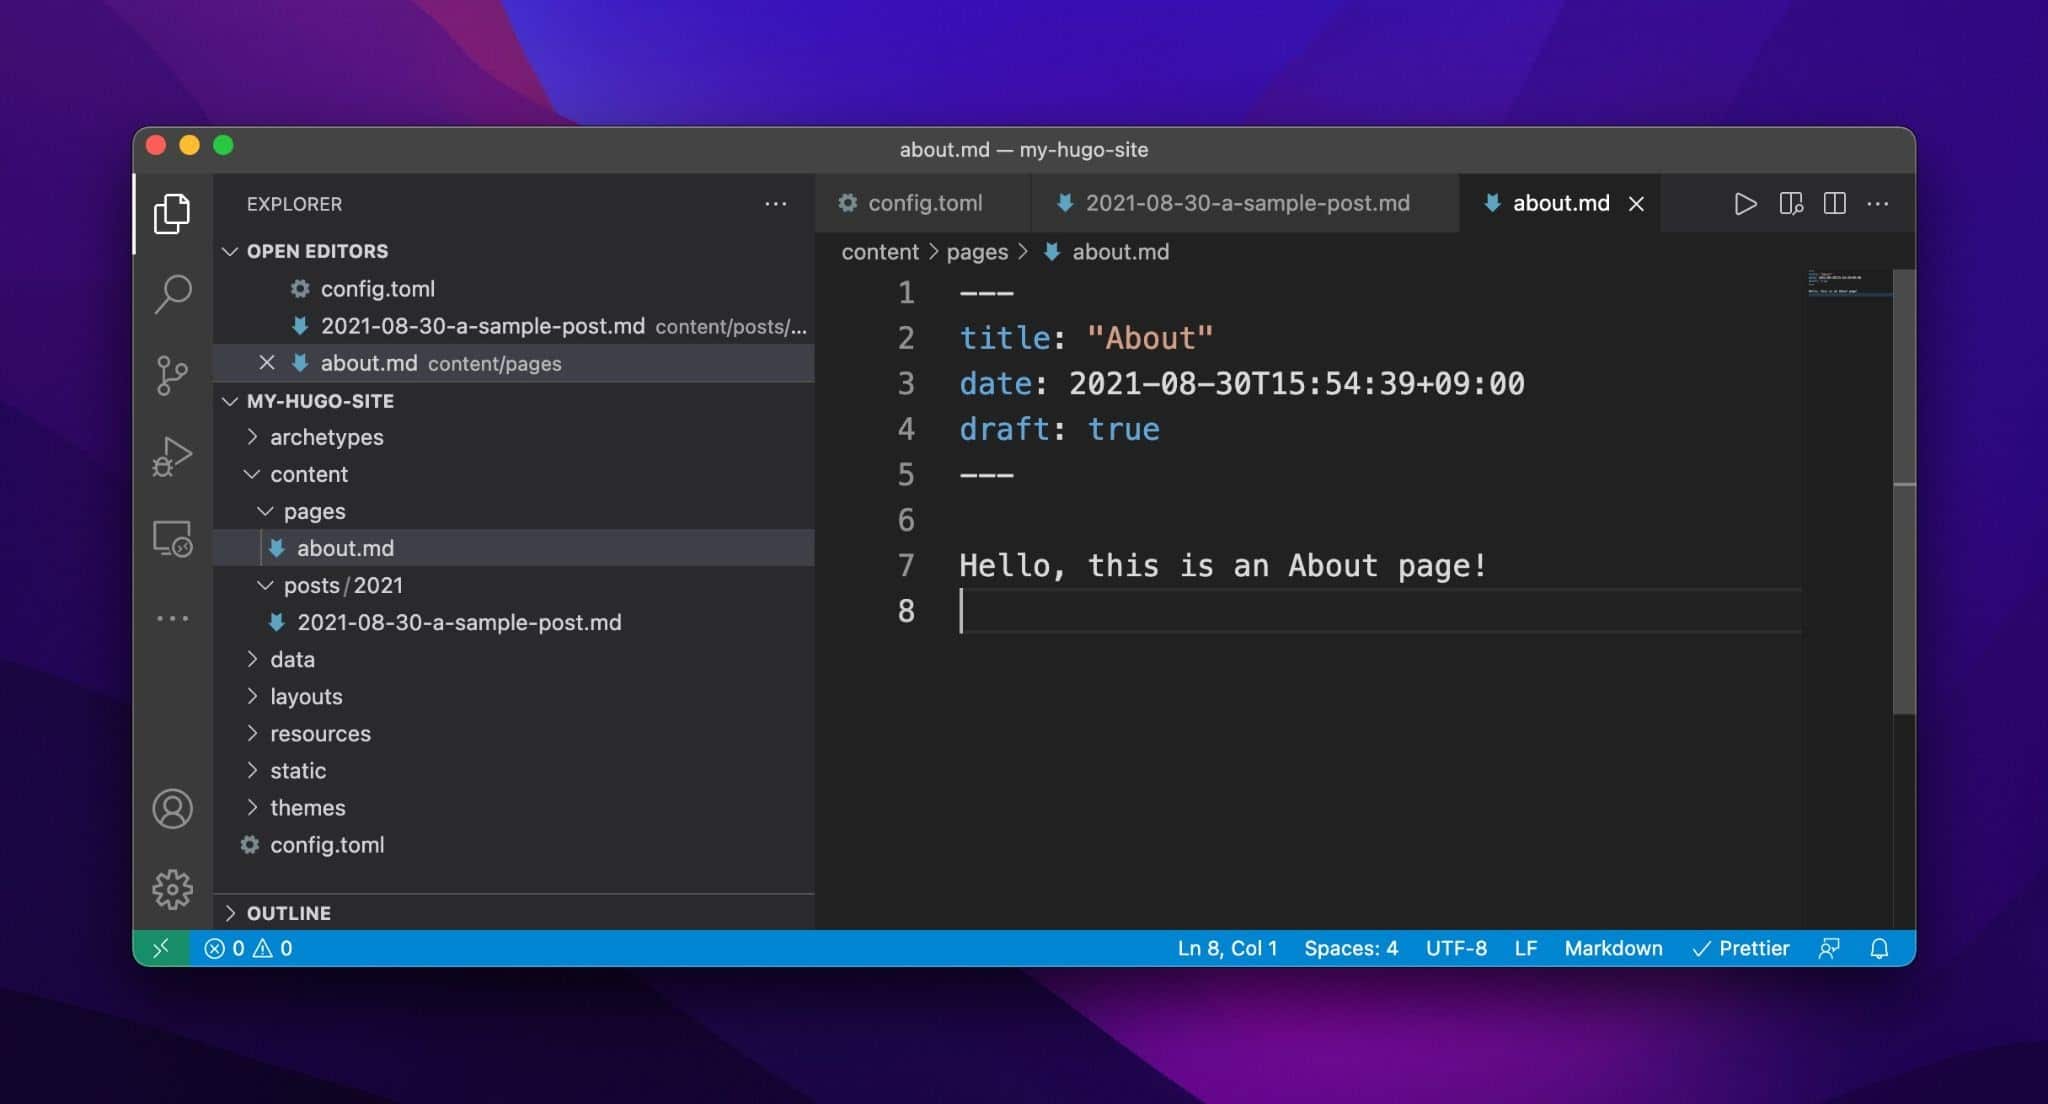
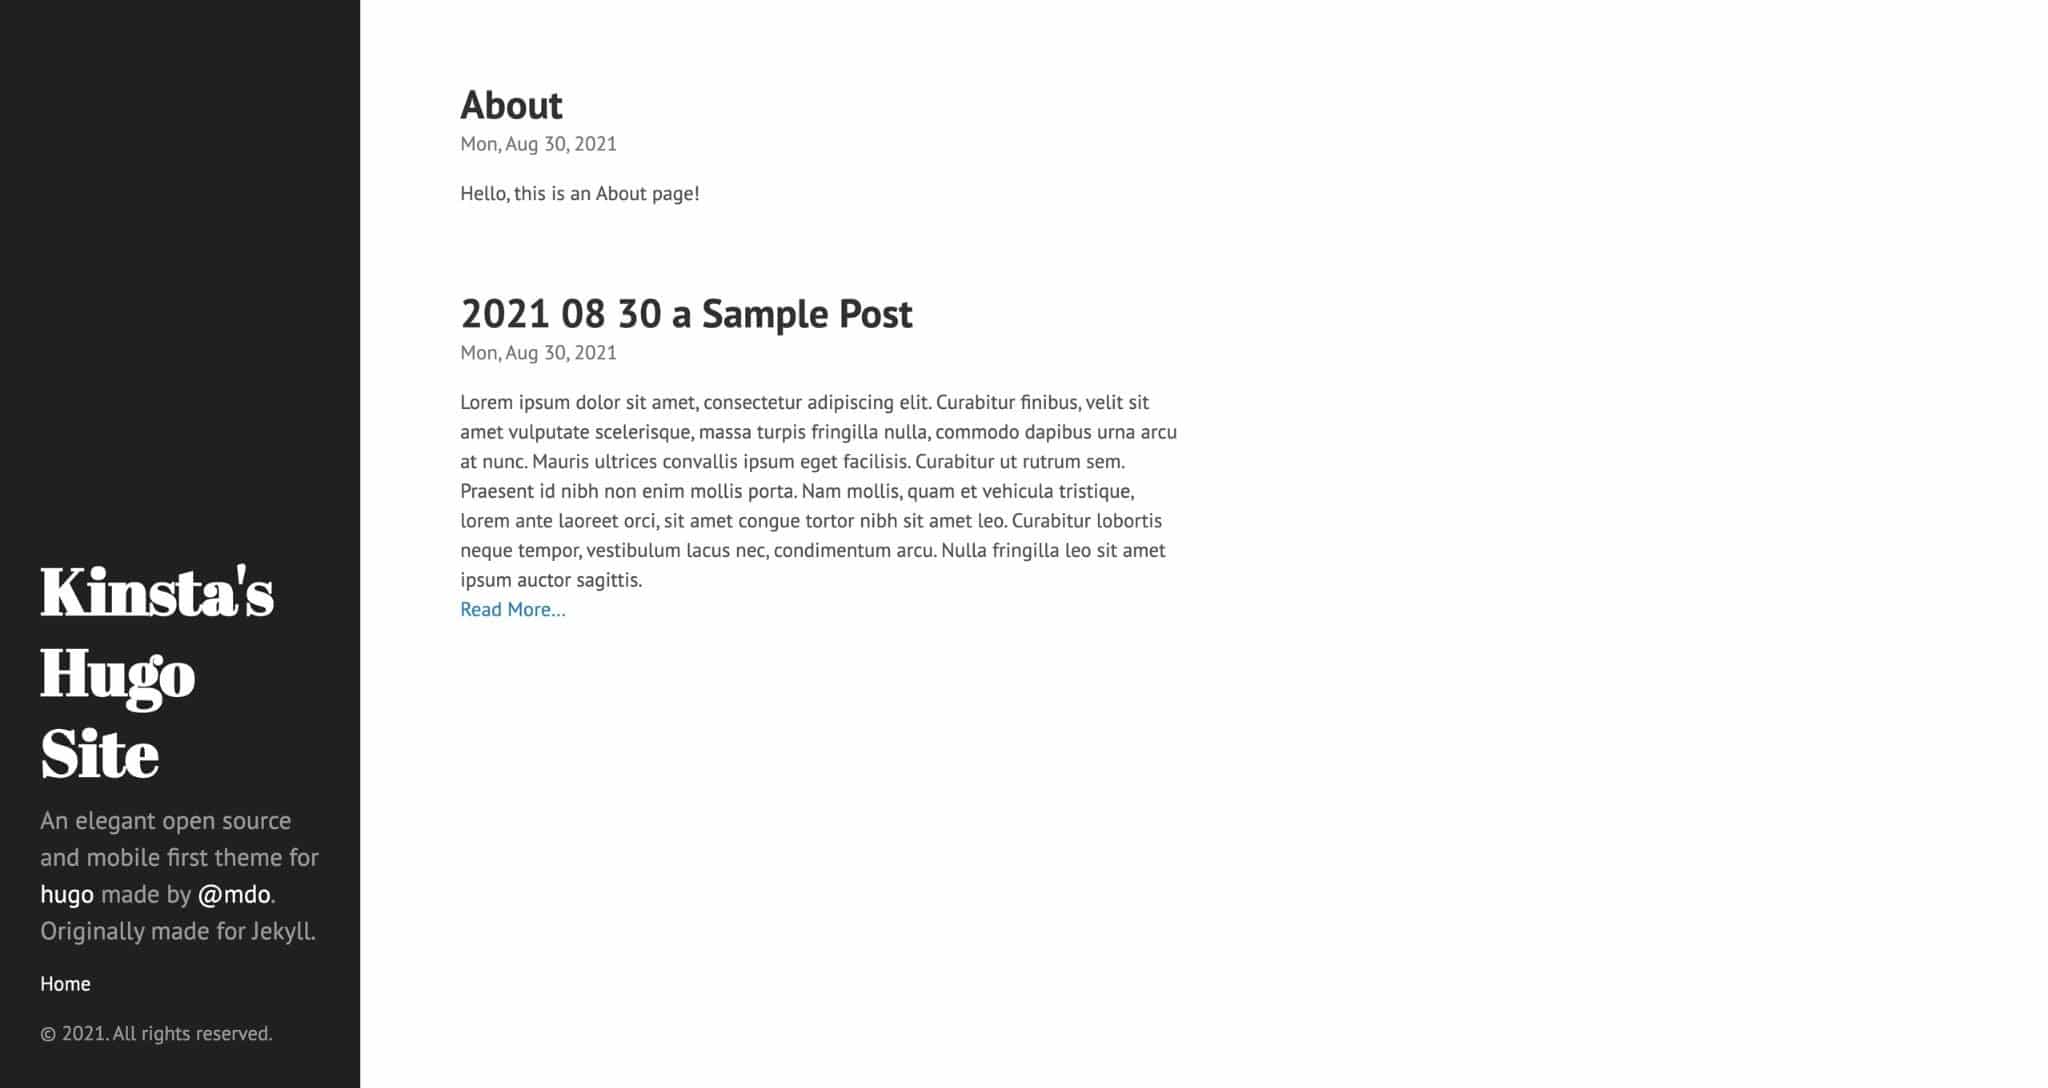
Now, let’s upload some textual content to the “About” web page:
About web page in Hugo.
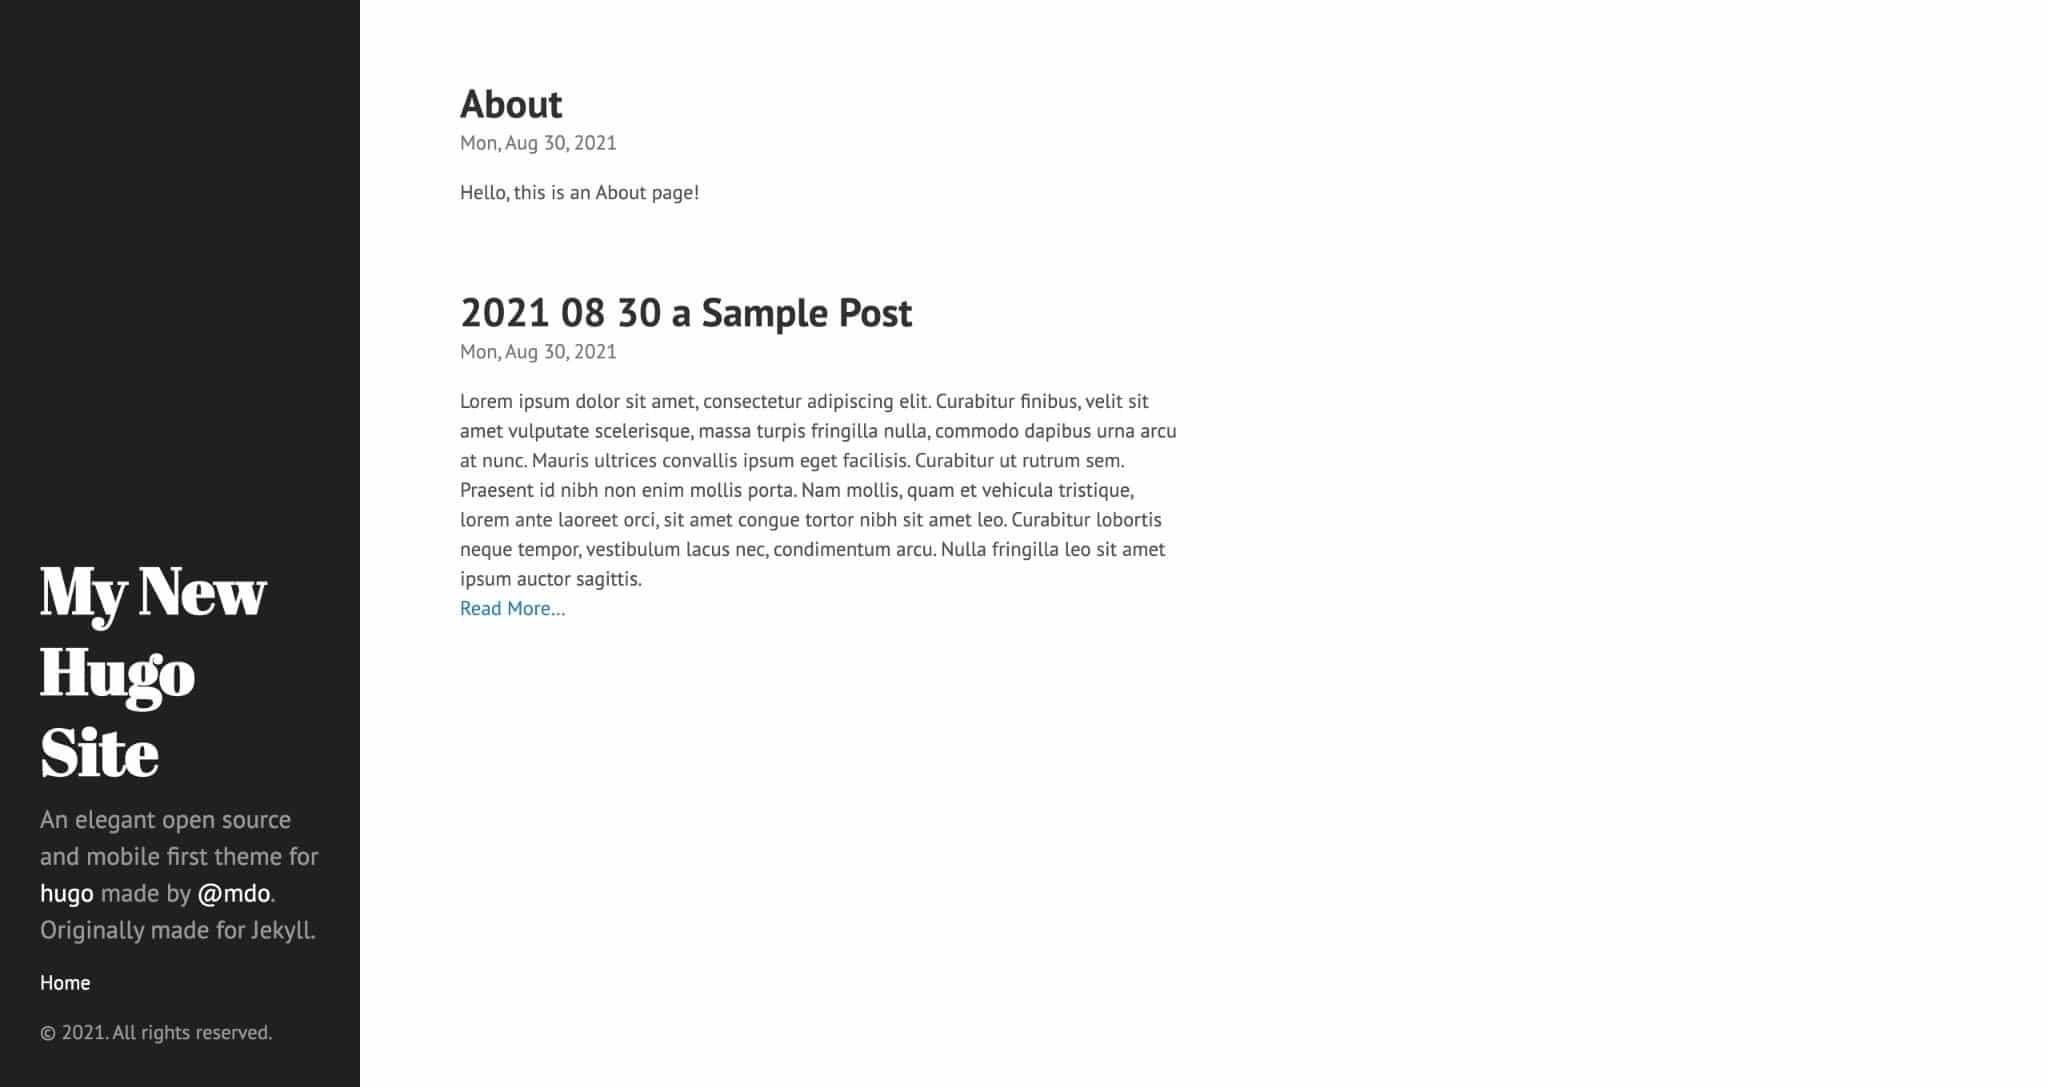
At this level, you must see the About web page on your internet browser:
About web page within the internet browser.
Now that we have got two content material sections — posts and pages — let’s undergo tips on how to make a couple of customizations to the web site, comparable to modifying the name and outline, including the About web page to the sidebar menu, converting the structure of permalinks, and casting off pages from the publish feed.
How you can Alternate the Website online Identify and Description
The precise approach of fixing the web site name and outline is dependent upon your web site configuration and/or lively theme. In relation to the Hyde theme, the web site name and outline will also be modified within the Hugo configuration record (config.toml).
We all know this on account of the next theme code that renders the sidebar:
The 2 portions to concentrate on are:
{{ .Website online.Identify }}
And…
{{ with .Website online.Params.description }} {{.}} {{ else }}A chic open supply and cellular first theme for hugo made via @mdo. Firstly made for Jekyll.{{finish}}
The handlebars {{ }} are a part of Hugo’s templating engine and make allowance for dynamically generated knowledge in rendered pages. For instance, {{ .Website online.Identify }} instructs Hugo to test the config.toml record and fetch the price mapped to the Identify key.
Since Hugo’s default configuration makes use of My New Hugo Website online because the web site name, that’s what the sidebar displays. If we alter the web site name in config.toml to one thing else, the trade may even replicate at the frontend.
Let’s move forward and alter the name parameter within the config.toml from My New Hugo Website online to Kinsta’s Hugo Website online.
Converting the web site name in Hugo.
Shifting directly to the web site description, you’ll see that Hugo’s templating engine helps conditional common sense. Translated to straightforward English, the code under instructs Hugo to test if a Params price is assigned to the description key within the config.toml record. If no longer, right here’s a default string to make use of as a substitute.
{{ with .Website online.Params.description }} {{.}} {{ else }} A chic open supply and cellular first theme for hugo made via @mdo. Firstly made for Jekyll.{{finish}}
Since we don’t have an outline configured within the config.toml record, Hugo defaults to rendering “A chic open supply and mobile-first theme for Hugo made via @mdo. Firstly made for Jekyll.”
Now let’s replace our config.toml record from:
baseURL = "http://instance.org/"

languageCode = "en-us"

name = "Kinsta's Hugo Website online"

theme = "hyde"
To:
baseURL = "http://instance.org/"

languageCode = "en-us"

name = "Kinsta's Hugo Website online"

theme = "hyde"

[params]

description = "Kinsta is a top class controlled WordPress website hosting corporate."
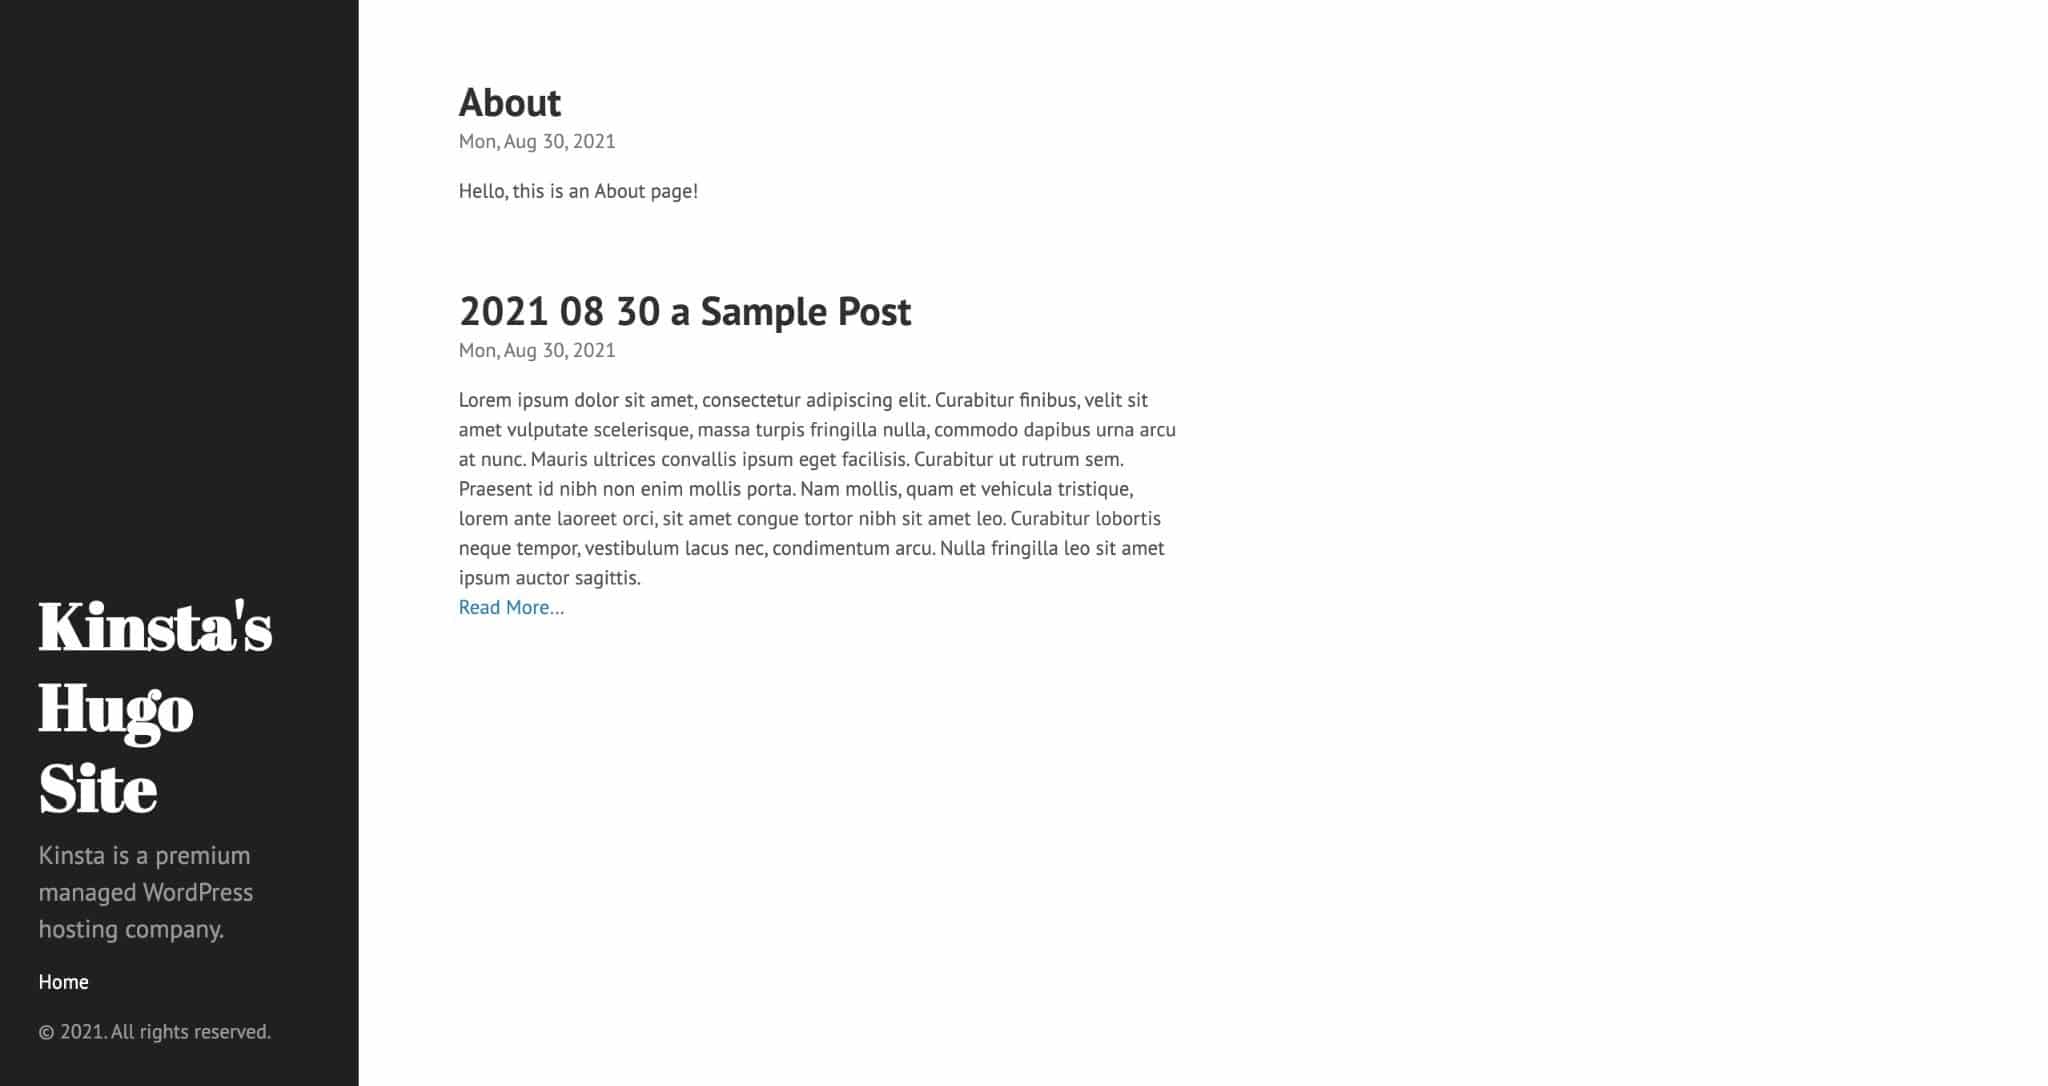
As anticipated, the adjustments at the moment are visual at the frontend as properly:
Alternate the Hugo web site description.
How you can Take away Pages From the Put up Feed
On maximum blogs, it’s commonplace for the publish feed at the homepage to simply show posts. By means of default, the Hyde theme contains all content material information within the publish feed. To modify this habits, you’ll want to edit the vary serve as within the index.html template, which generates the house web page.
Hugo’s vary serve as iterates over an outlined set of things after which does one thing with the information. By means of default, the Hyde theme’s index.html template levels over .Website online.RegularPages and filters out knowledge comparable to permalink, publish name, and publish abstract earlier than rendering the HTML.
Since .Website online.RegularPages contains all common pages on Hugo, together with each posts and pages, the “About” web page is rendered. By means of converting the vary pieces to .Website online.RegularPages "Segment" "posts", we will be able to instruct Hugo to simply clear out via common pages within the posts part – the content material information within the posts folder we created previous.
Want blazing-fast, dependable, and entirely protected website hosting to your WordPress web site? Kinsta supplies all of this and 24/7 world-class make stronger from WordPress mavens. Check out our plans
Let’s make that vary now via modifying the template from this:
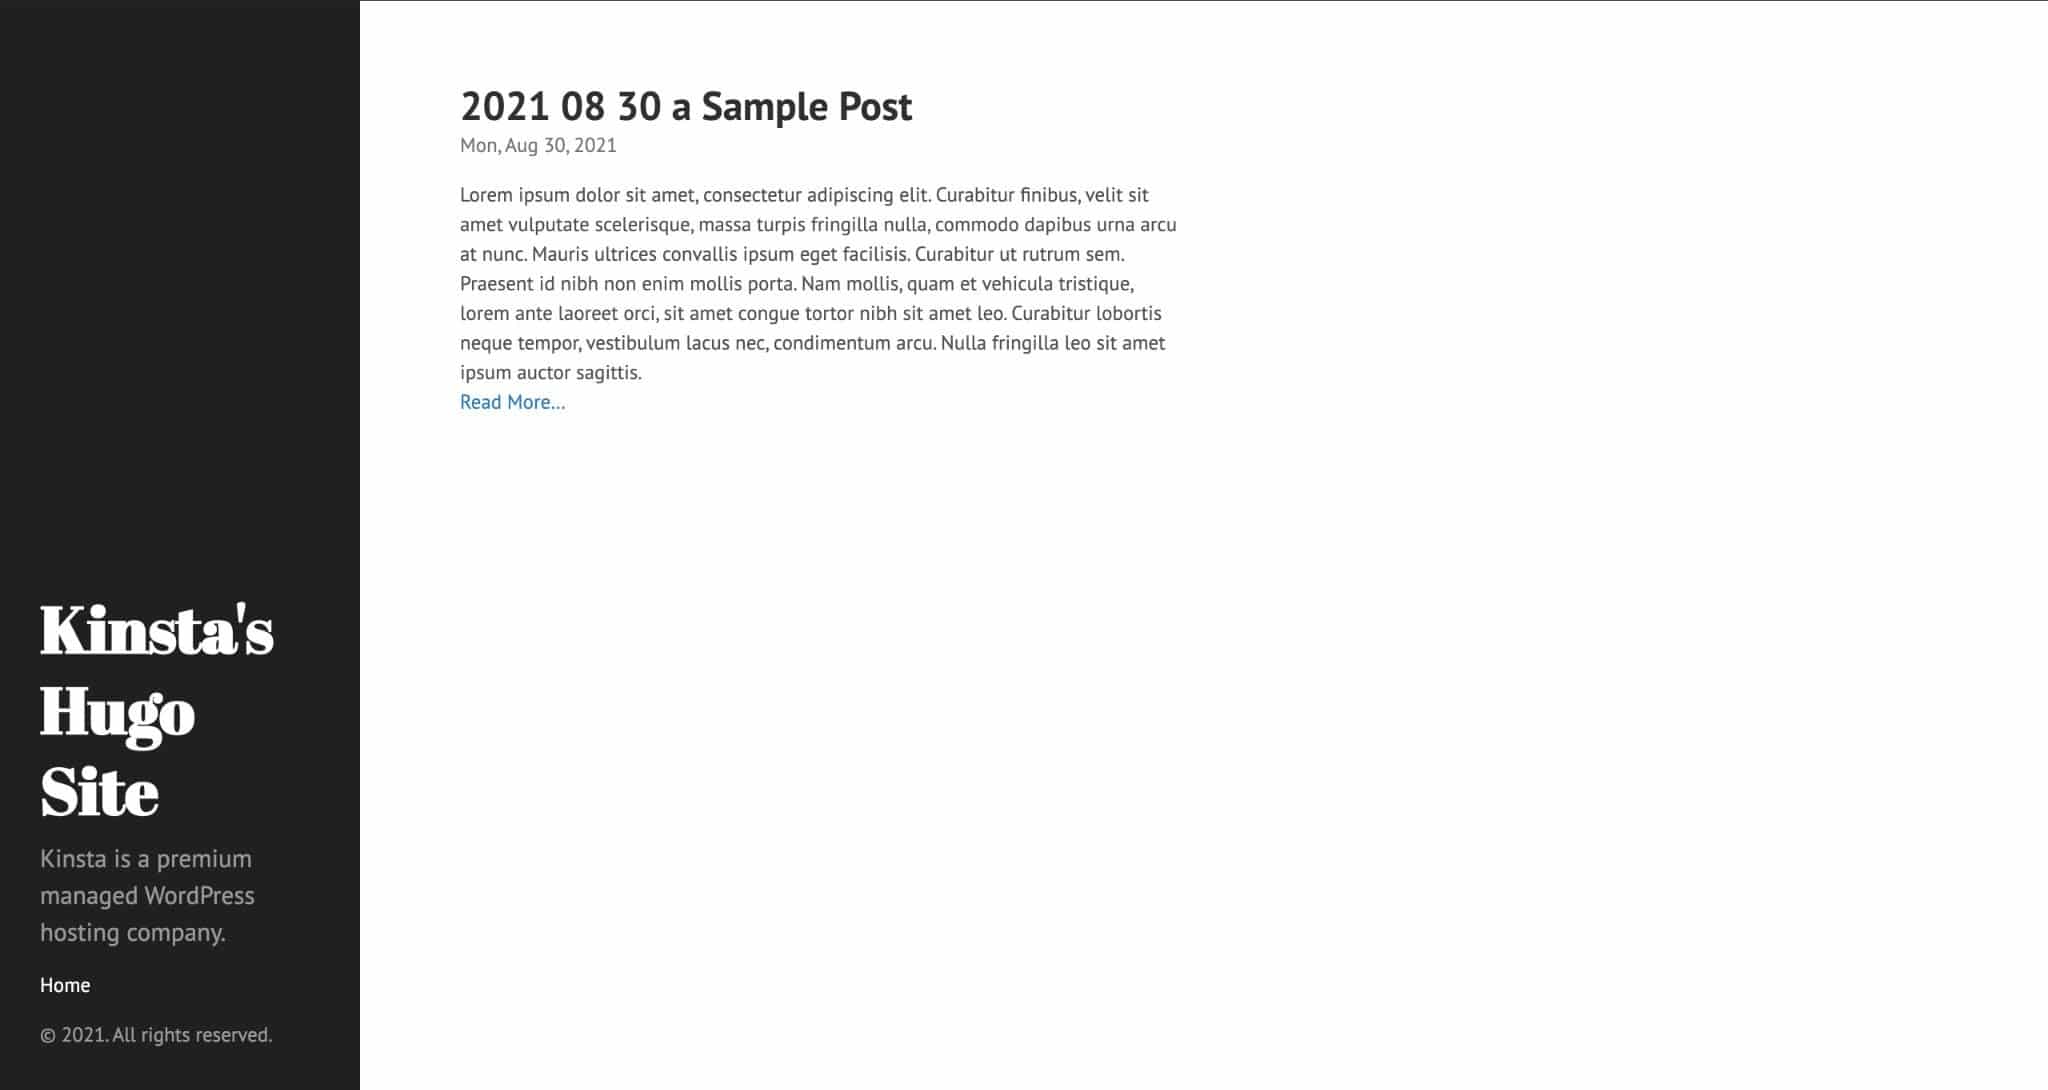
After making this alteration, the house web page will most effective show posts like so:
Show posts most effective at the house web page.
How you can Use Partials in Hugo
Considered one of Hugo’s maximum tough templating options is partials – HTML templates embedded in some other HTML template. Partials permit for the reuse of code throughout other template information with out managing the code in every record.
As an example, it’s commonplace to peer other web page sections (header, footer, and many others.) of their separate partial information, which might be then referred to as inside a theme’s baseof.html template record.
Inside the baseof.html record within the Ananke theme, you’ll see an instance of a partial on Line 18 – {{ partial "site-style.html" . }}.
On this case, {{ partial "site-style.html" . }} instructs Hugo to switch the contents of Line 18 with the site-style.html within the /layouts/partials folder. If we navigate to the /partials/site-style.html, we see the following code:
{{ with partialCached "func/genre/GetMainCSS" "genre/GetMainCSS" }}


{{ finish }}

{{ vary web site.Params.custom_css }}

{{ with partialCached "func/genre/GetResource" . . }}{{ else }}


{{ finish }}

{{ finish }}
By means of offloading this code to a separate record, the baseof.html template record can stay arranged and simple to learn. Whilst partials don’t seem to be vital, particularly for elementary initiatives, they come in useful for better initiatives with extra advanced capability.
How you can Use Shortcodes in Hugo
Hugo shortcodes are very similar to partials in that they enable for the reuse of code throughout a number of pages. Shortcodes are HTML information that are living within the /layouts/shortcodes folder. The primary distinction is that partials follow to HTML templates, whilst shortcodes follow to Markdown content material pages.
In Hugo, shortcodes can help you expand modules of capability that you’ll use in pages throughout your web site with out managing code adjustments for every web page.
In case you run a weblog, chances are high that you’ll want to move during the frame content material of your posts to replace yr references to the present yr. Relying on what number of posts you’ve to your web site, this process can take a very long time!
By means of the use of a Hugo shortcode on your content material information, you gained’t have to fret about updating yr references ever once more!
Let’s get started via making a shortcode in /layouts/shortcodes/current_year.html with the contents under:
{{ now.Layout "2006" }}
Shortcodes will also be embedded into posts with this syntax – {{< shortcode_name >}}. In our case, we will be able to name the current_year.html shortcode with {{< shortcode_name >}} like so:
---

name: "2021 08 30 a Pattern Put up"

date: 2021-08-30T13:44:28+09:00

draft: true

---

This publish was once created within the yr {{< current_year >}}.

Lorem ipsum dolor take a seat amet, consectetur adipiscing elit. Curabitur finibus, velit take a seat amet vulputate scelerisque, massa turpis fringilla nulla, commodo dapibus urna arcu at nunc. Mauris ultrices convallis ipsum eget facilisis. Curabitur ut rutrum sem. Praesent identity nibh non enim mollis porta. Nam mollis, quam et vehicula tristique, lorem ante laoreet orci, take a seat amet congue tortor nibh take a seat amet leo. Curabitur lobortis neque tempor, vestibulum lacus nec, condimentum arcu. Nulla fringilla leo take a seat amet ipsum auctor sagittis. Vivamus aliquam iaculis posuere. Pellentesque malesuada neque take a seat amet consectetur fringilla. Curabitur felis tellus, mattis in dui vel, vestibulum tincidunt metus. Mauris eget elit dui. Etiam risus nulla, ultricies vitae molestie quis, placerat in magna. Proin interdum, orci ac auctor ullamcorper, tellus ex porta tortor, suscipit luctus libero odio quis arcu.

Phasellus dapibus pellentesque ex eget pulvinar. Proin vitae elit risus. Sed justo nulla, pellentesque european erat european, luctus bibendum magna. Curabitur at mi identity augue egestas condimentum sed quis lectus. Aenean fringilla nisl sed tincidunt tristique. Cras scelerisque laoreet sapien a faucibus. Vivamus a vehicula arcu. Duis rutrum, massa european tincidunt eleifend, est nulla faucibus nisl, take a seat amet consectetur neque velit at velit. Integer fermentum augue ut orci iaculis aliquet. Ut in gravida magna.
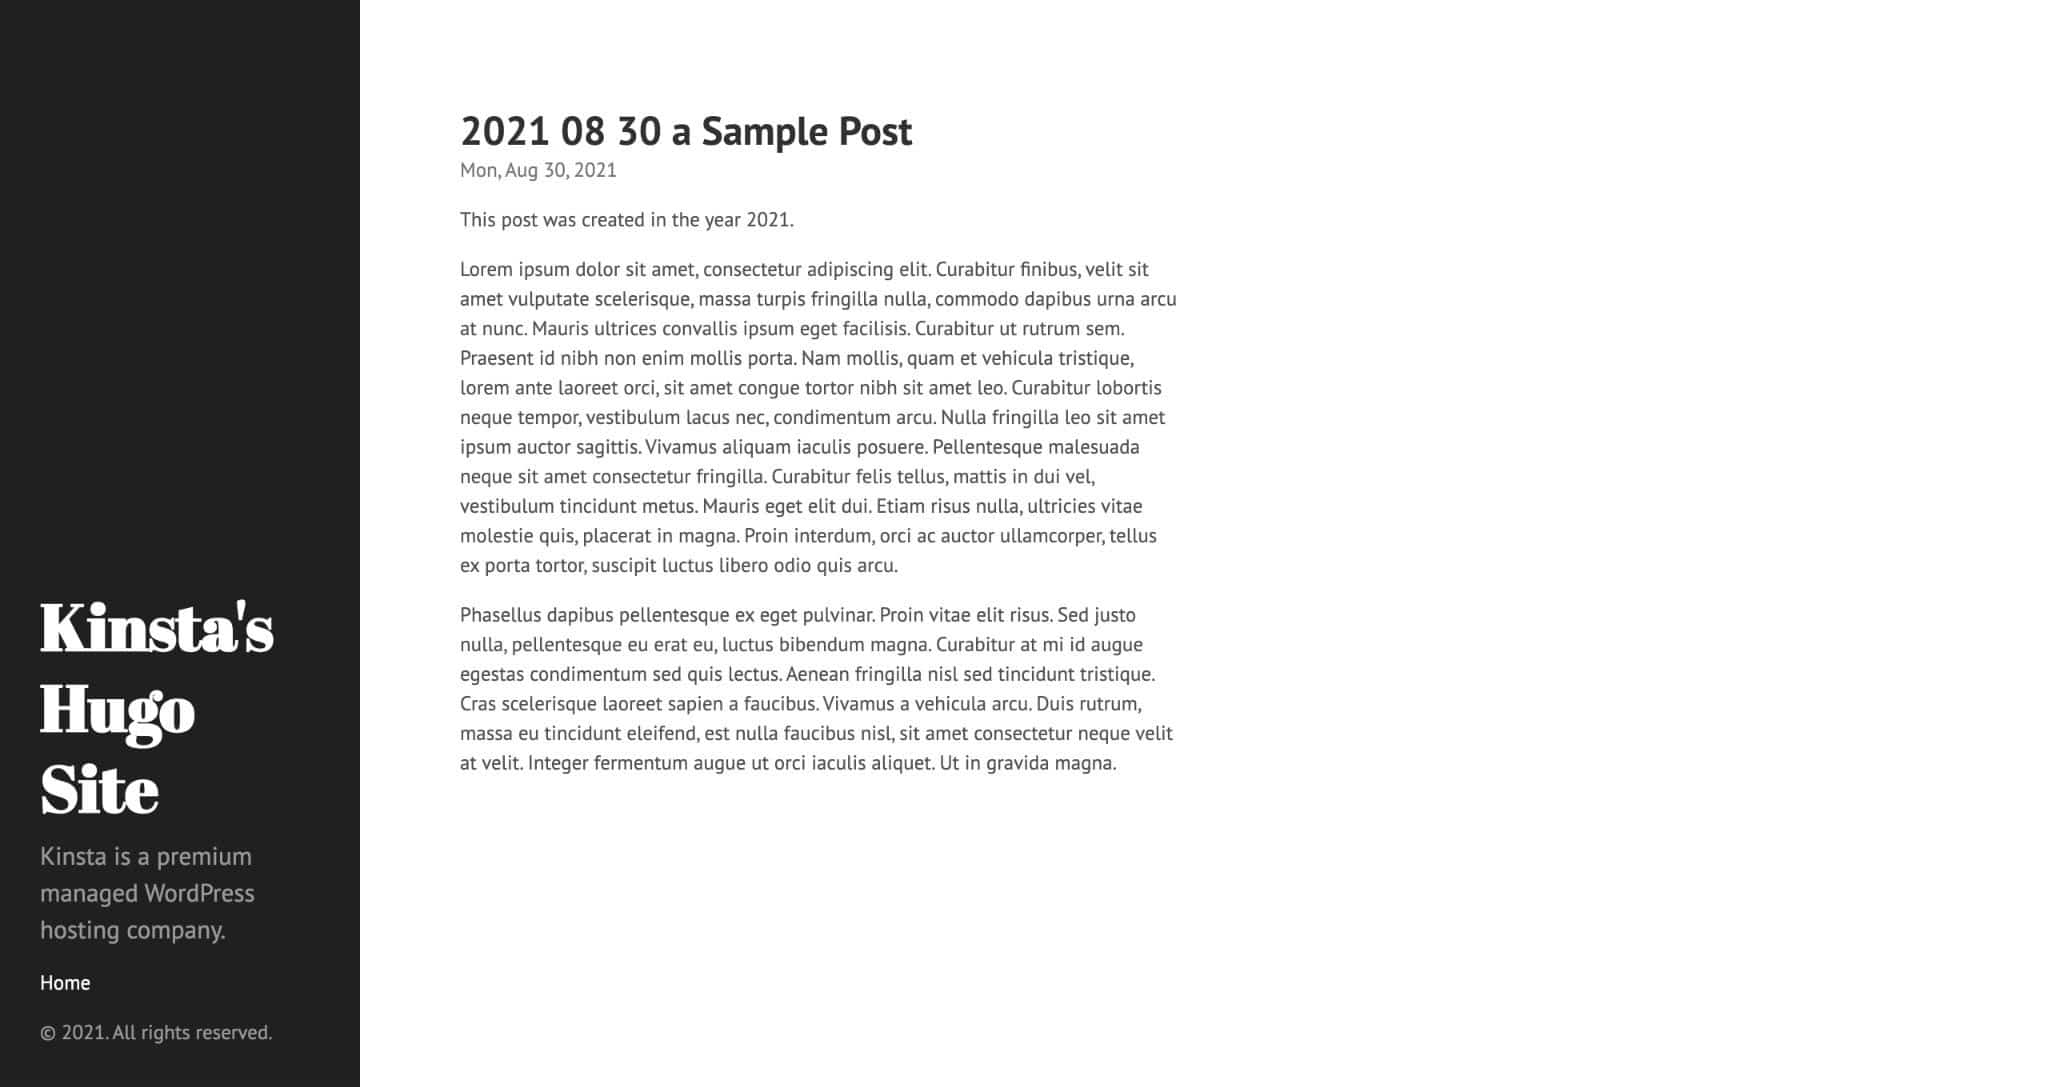
In case you view the publish within the web browser, you must see the present yr within the first line of the publish like so:
Use a Hugo shortcode to auto-generate the present yr.
How you can Upload Photographs to a Put up in Hugo
Not like WordPress and different full-fledged content material control techniques, Hugo doesn’t come with a drag-and-drop machine for managing photographs. Thus, designing a picture control machine is offloaded to the end-user.
Whilst Hugo has no standardized approach of managing images, one widespread approach depends upon storing photographs within the /static folder and referencing them in posts and pages the use of a shortcode. Let’s stroll via how you’ll do elementary symbol group in Hugo.
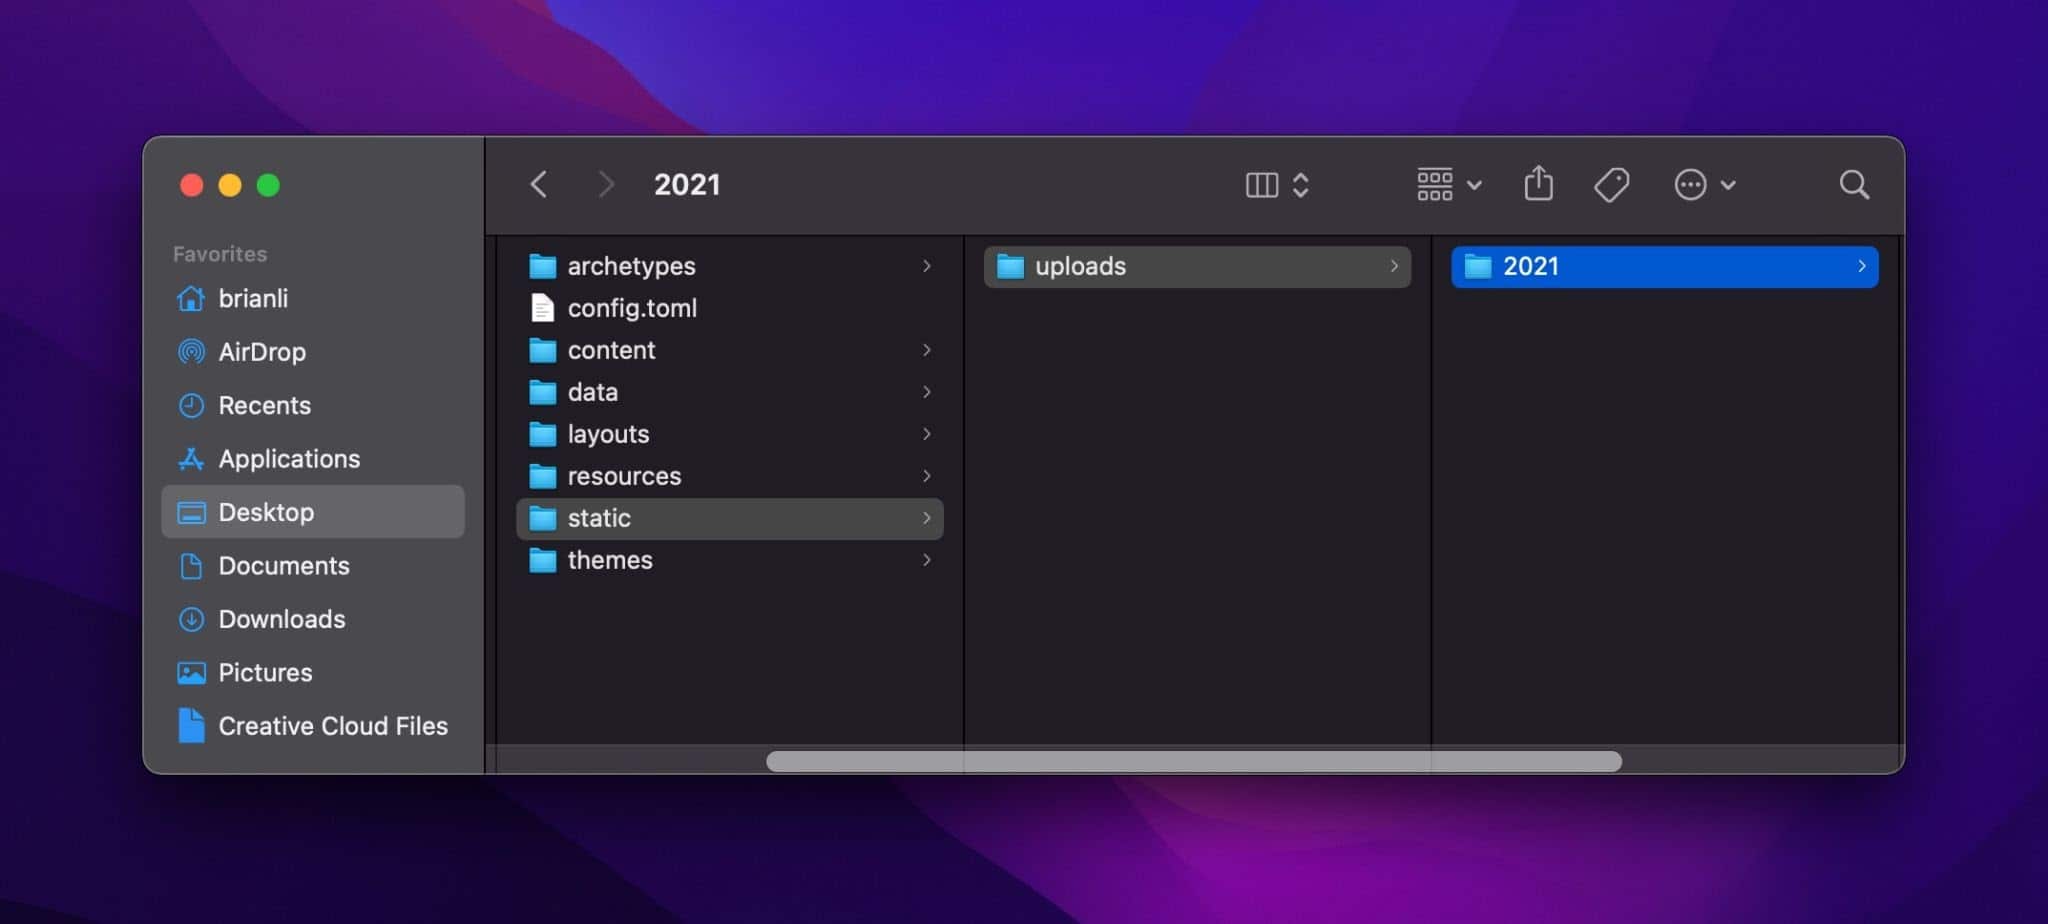
The very first thing we’ll want to do is create an organizational construction for our symbol library. Whilst this sounds advanced, all that’s required is the advent of a couple of further directories inside the /static folder.
Let’s get started via developing an uploads folder in /static. Inside the uploads folder, create a folder named 2021 to carry the entire photographs uploaded in 2021.
Symbol control in Hugo.
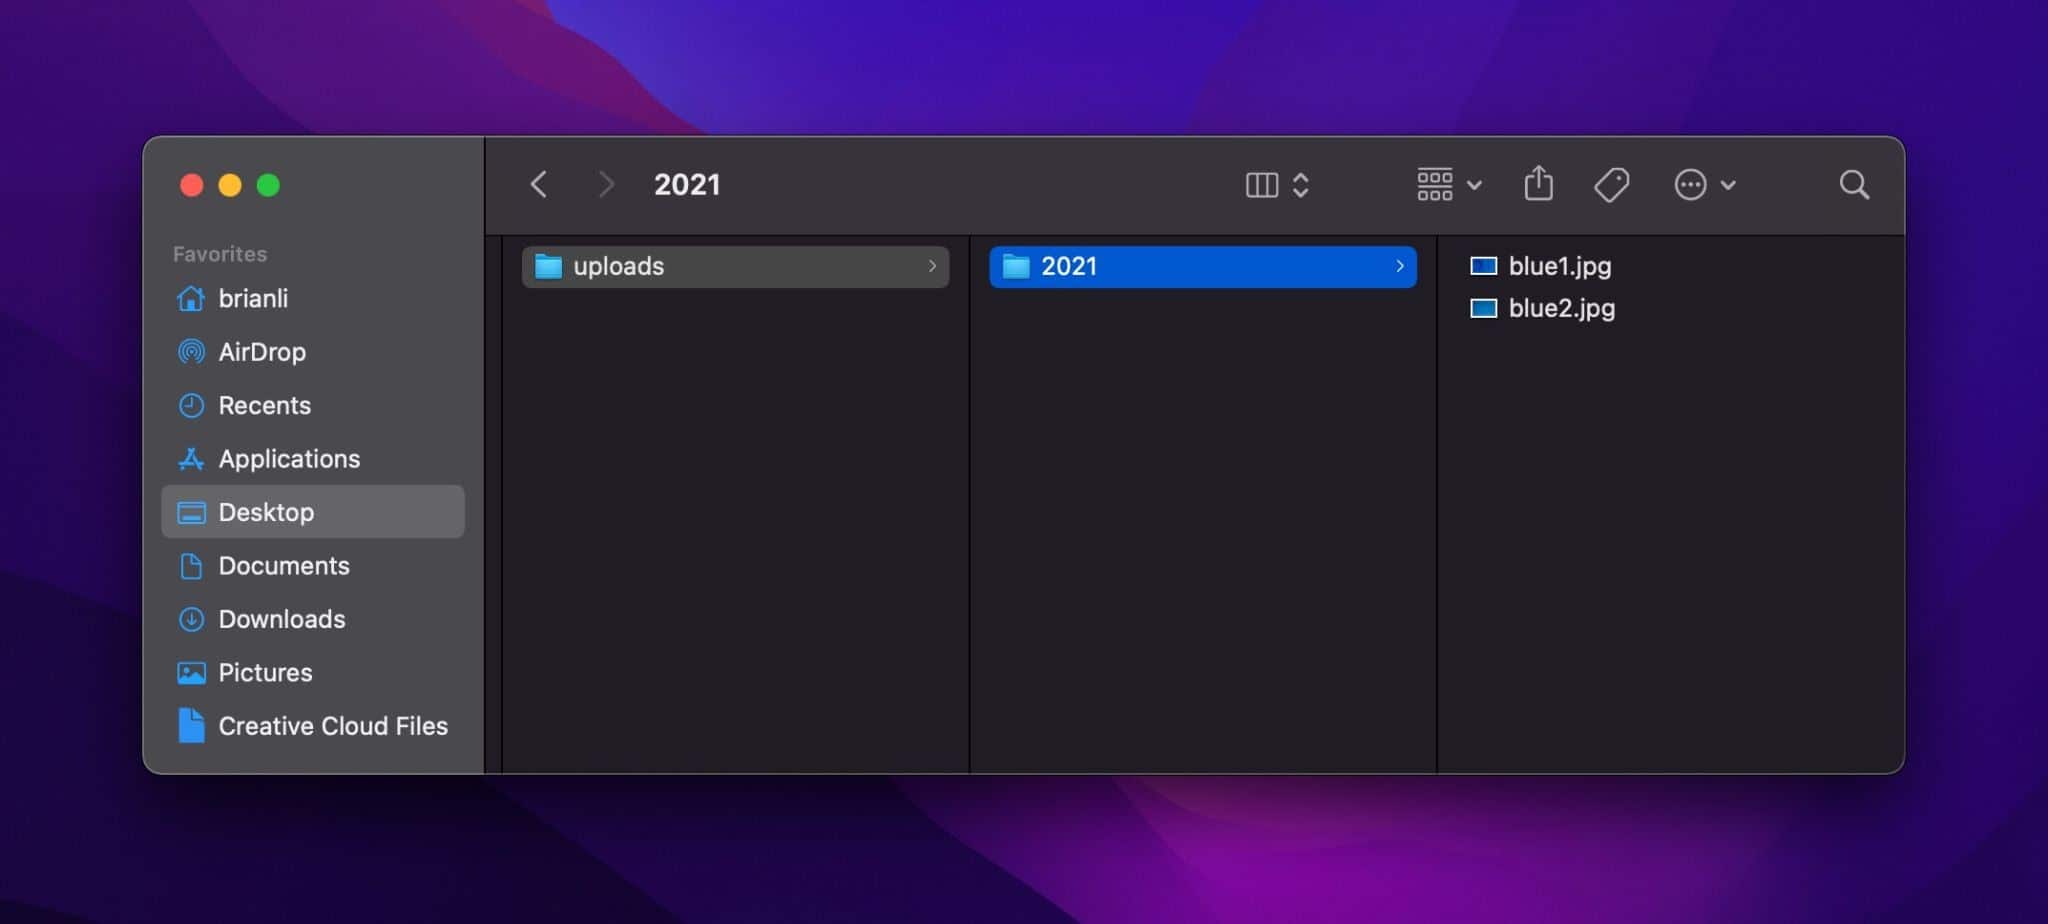
Subsequent, let’s upload two photographs (blue1.jpg and blue2.jpg) into the 2021 folder.
Including photographs to the “2021” folder.
In HTML, photographs are displayed the use of the tag. For example, to show blue1.jpg, we will be able to use the HTML under:
Whilst it’s conceivable so as to add this HTML immediately to the Markdown content material record, it’s higher to create a shortcode that you’ll use to show any symbol from the uploads folder. This fashion, in case you ever want to replace the img tag, you’ll edit the shortcode template with out modifying every example of the img tag.
To create the shortcode template, create a brand new record at /layouts/shortcodes/img.html with the content material under:
Subsequent, upload the shortcode under to a weblog publish:
{{< img src="2021/blue1.jpg" alt="Blue is also the coolest color!">}
Within the shortcode template, {{ .Get "src" }} and {{ .Get "alt" }} instruct Hugo to fetch the contents of the src< and alt< parameters when calling a shortcode.
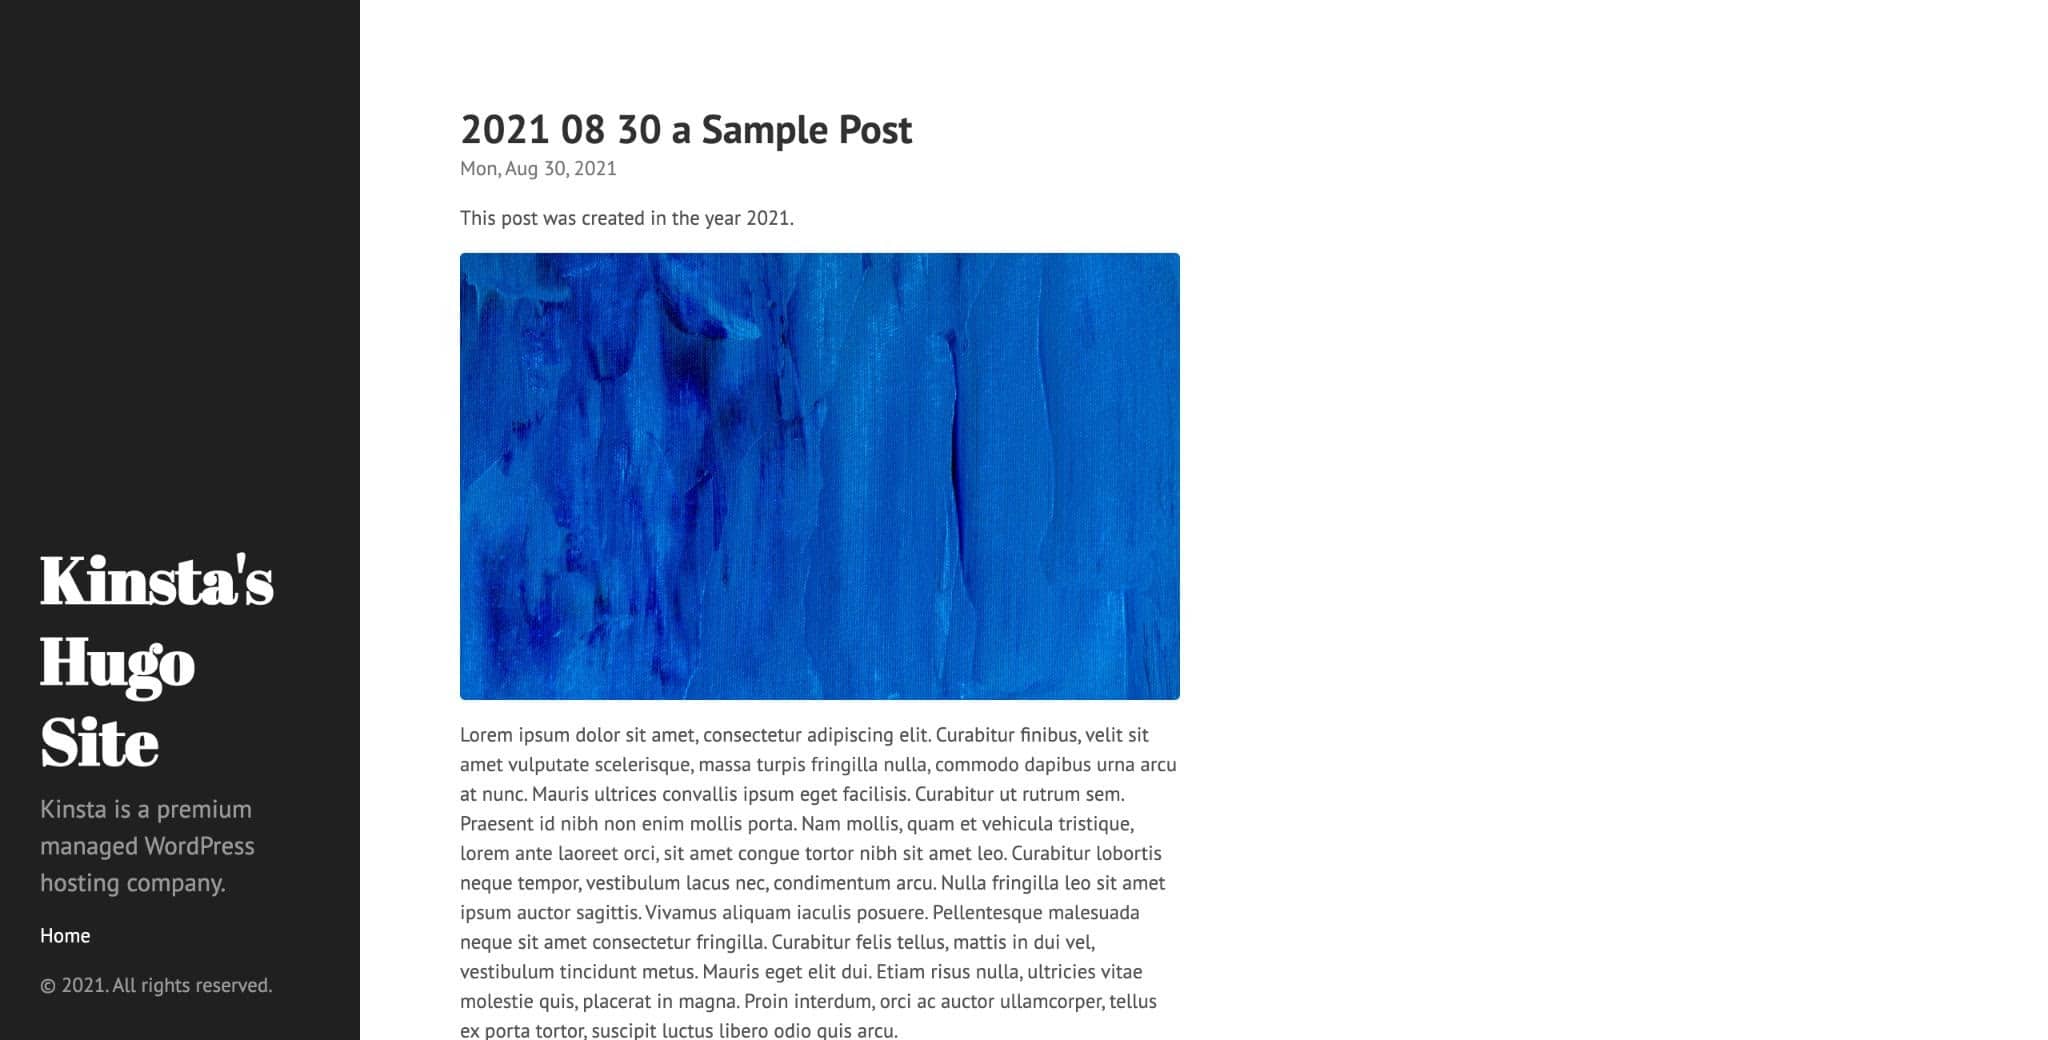
Now, in case you reload the weblog publish, you must see the picture like so:
Symbol shortcode in Hugo.
How you can Deploy a Hugo Website online
As much as this publish, you realized tips on how to set up Hugo, create a web site, upload a theme, make elementary edits to configuration information, and make bigger the capability of your web site with partials and shortcodes. At this level, you will have a useful web site that is able to be deployed on-line.
Since Hugo is a static web site generator, you'll deploy the HTML, CSS, and JS it generates any place with a webserver. Because the technical necessities for serving static websites are so low, you'll host them totally free throughout quite a lot of suppliers like Netlify, Vercel, Cloudflare Pages, and extra.
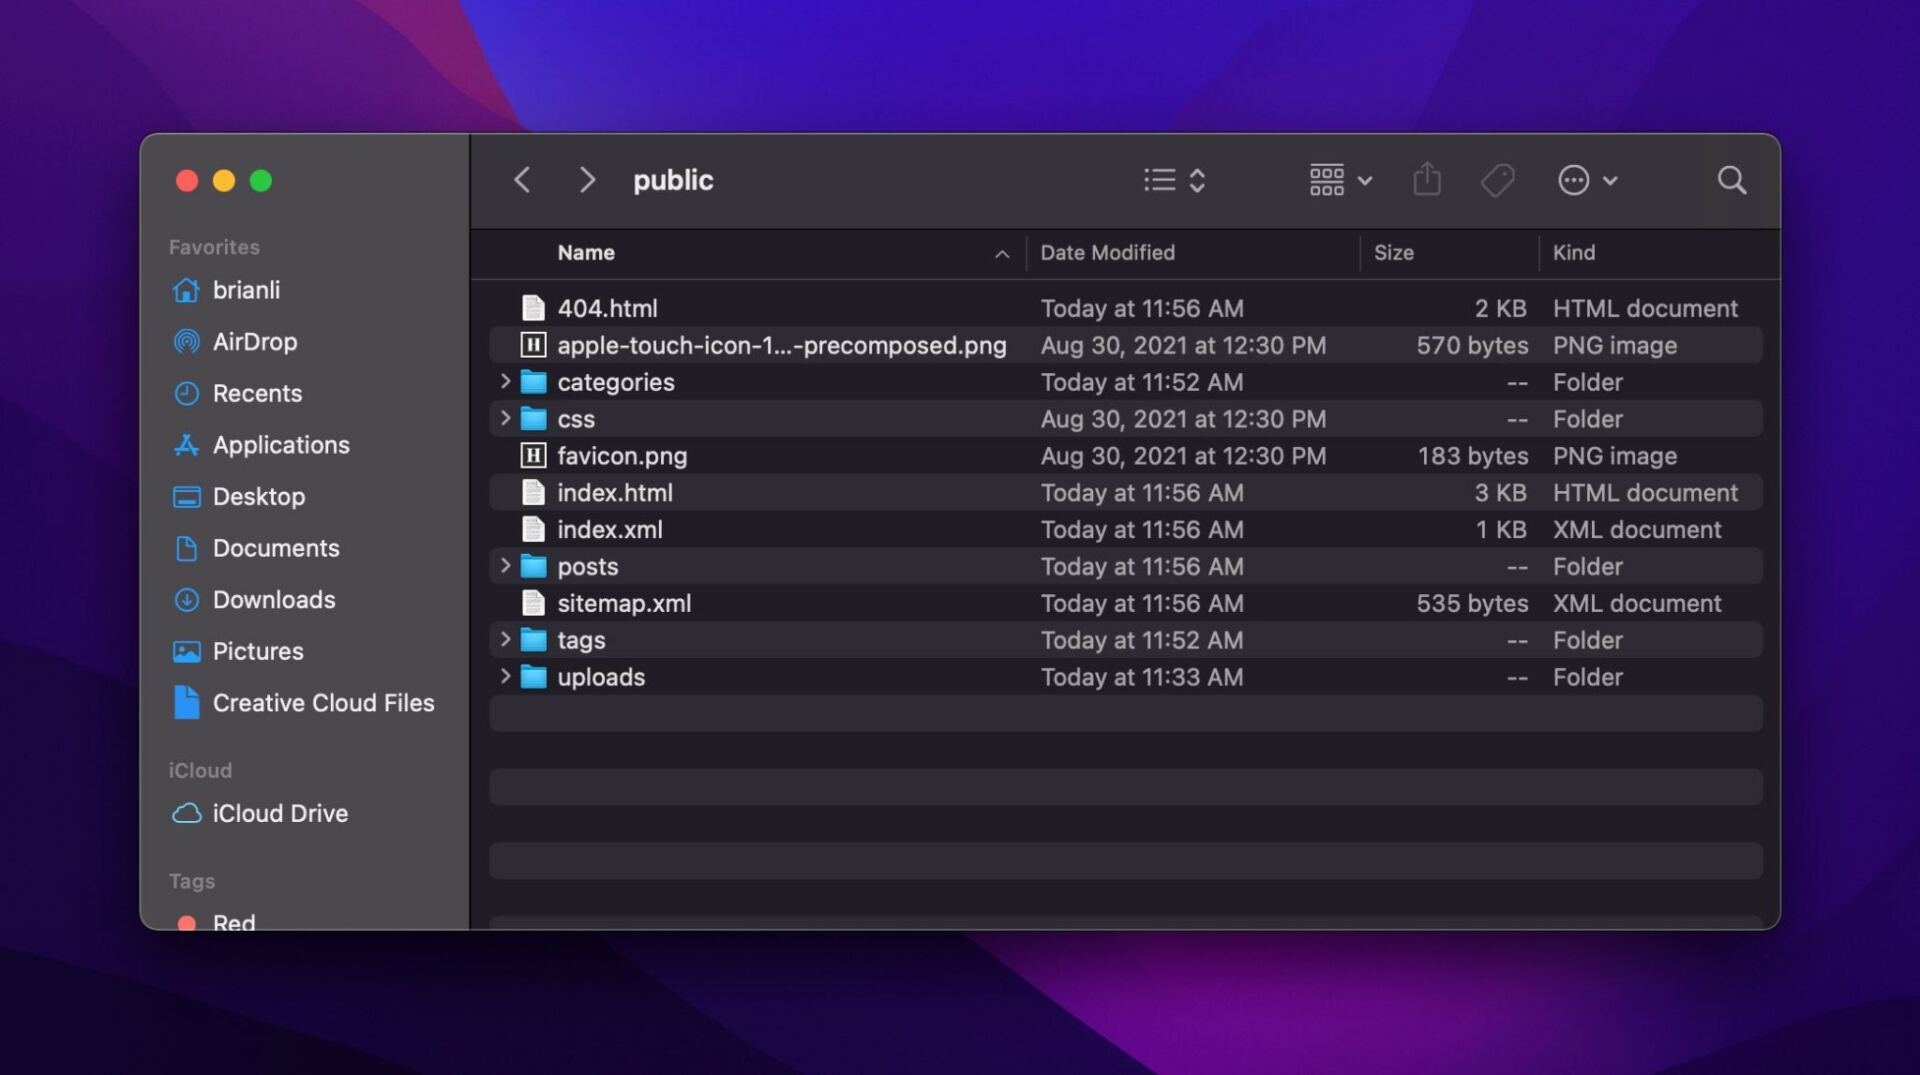
Prior to now, we used the hugo server -D to spin up a neighborhood construction server to preview adjustments to our web site in real-time. To generate the web site in complete, we will be able to use the hugo command within the root listing of our venture. After the web site era is entire, you must see a brand new public folder on your venture listing. Within this folder, you’ll to find the entire information that want to be uploaded to a server or cloud garage carrier like Amazon S3.
Generate your Hugo web site in the neighborhood.
Producing your web site in the neighborhood and manually importing it to Amazon S3 or a server working Nginx is a method of deploying a statically generated web site. Then again, it’s no longer the most productive as it calls for you manually add new information each and every time you are making a metamorphosis.
As a substitute, a better choice is to hyperlink your Hugo venture folder to a GitHub repository and hyperlink the GitHub repository to an automatic deployment carrier like Netlify. With this setup, you'll edit your web site, push the adjustments to GitHub, and cause a brand new construct and deployment on Netlify with none handbook intervention. Now, let’s stroll via tips on how to do all of this!
How you can Add Your Hugo Challenge to GitHub
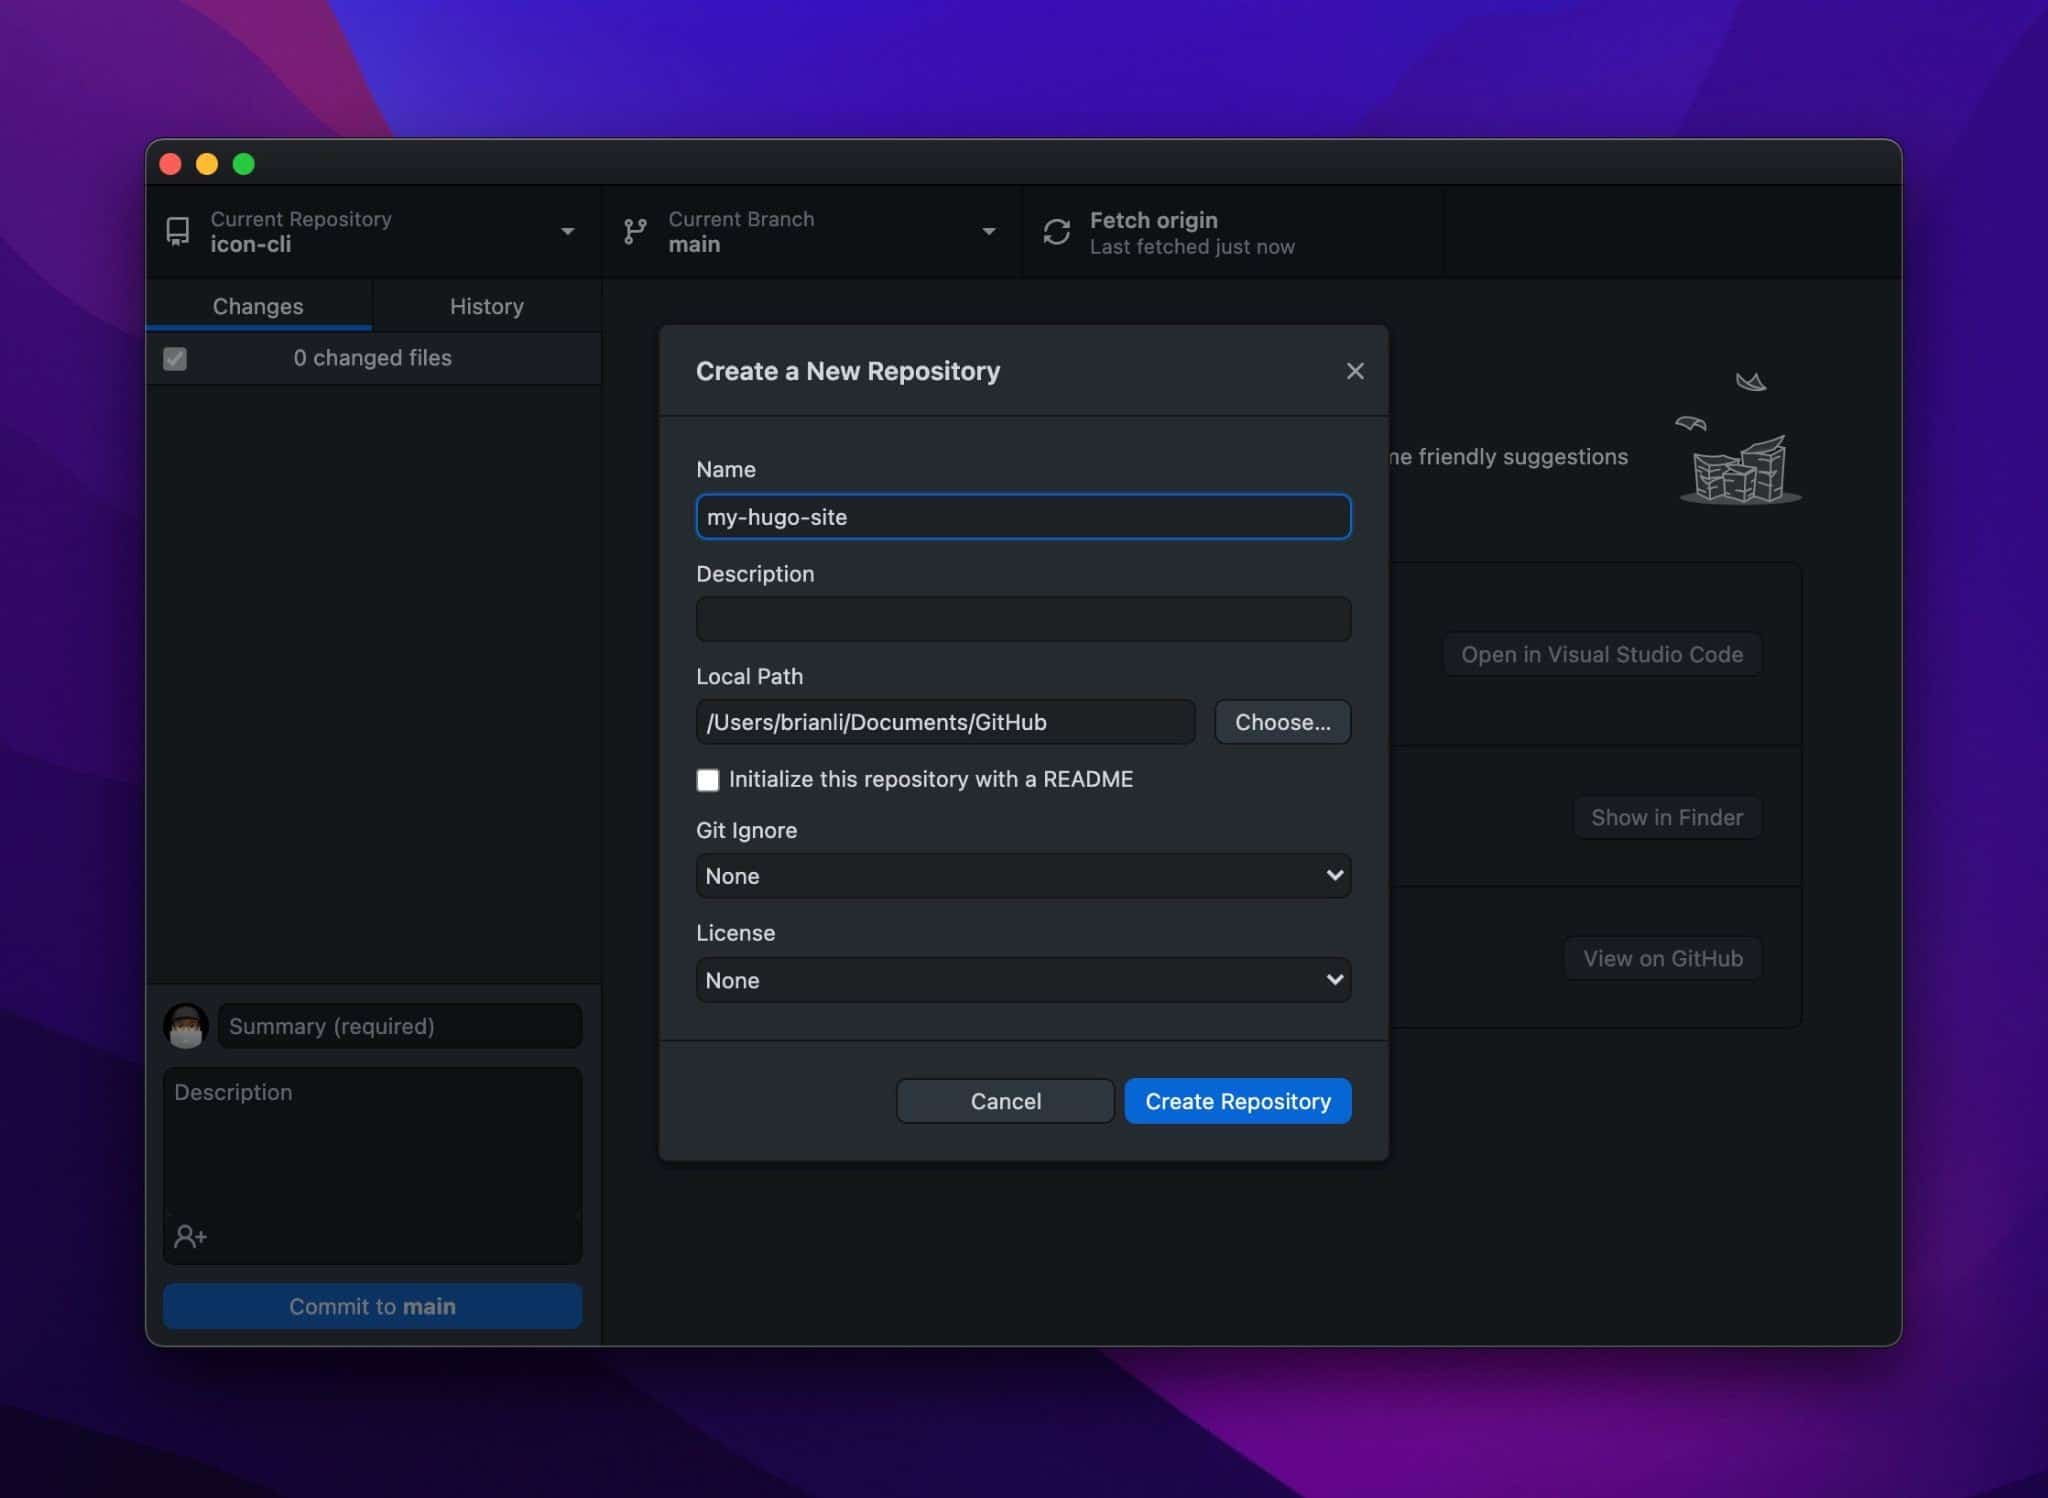
First, you’ll want to create a GitHub repository to your venture. To do that, create a GitHub account (in case you don’t have already got one) and download the official GitHub desktop app. After putting in the GitHub app, click on Report within the menu bar and make a choice New Repository. Give the repository a reputation of your opting for, depart the opposite choices of their default states for now, and click on Create Repository.
Create a GitHub repository.
By means of default (on macOS), the GitHub app creates new repositories in /Customers/username/Paperwork/GitHub. Since we named our repository my-hugo-site, our repository will also be discovered at /Customers/brianli/Paperwork/GitHub/my-hugo-site.
Subsequent, transfer the entire information on your authentic venture folder into the brand new GitHub repository folder. Make sure to delete the public folder as a result of we don’t want to add that folder to GitHub.
Replica venture into GitHub repository folder.
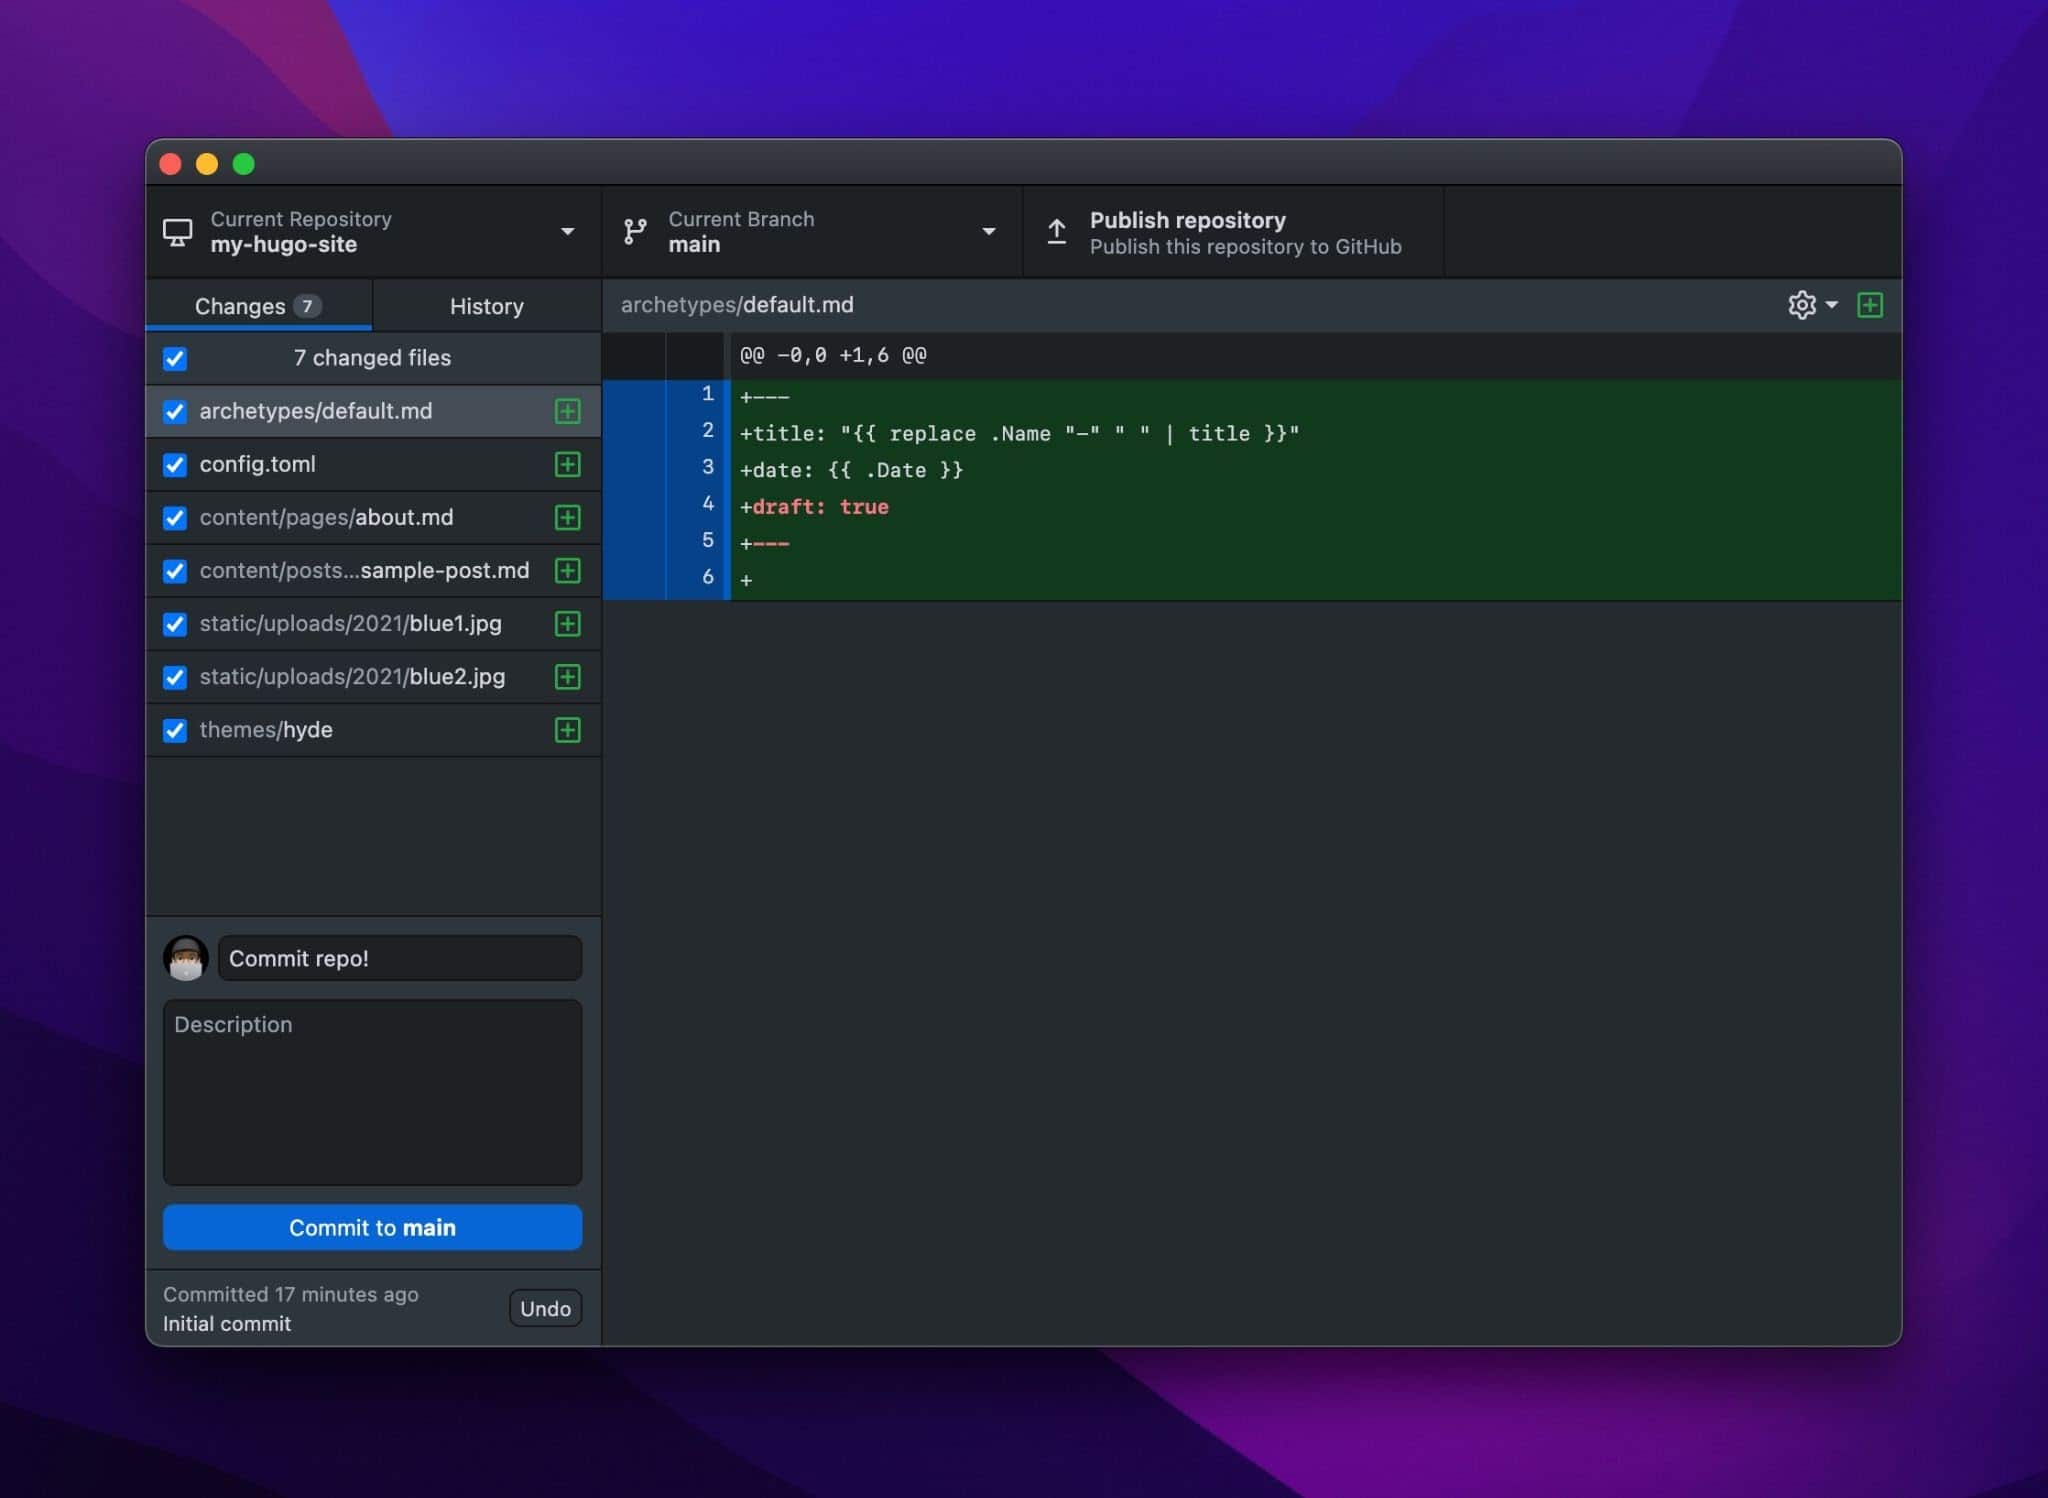
In case you navigate again to the GitHub app, you must now see a listing of modified information. To add the repository to GitHub, upload a abstract, click on Decide to major, and click on Post Repository within the higher proper nook.
Dedicate the repo, and add it to GitHub.
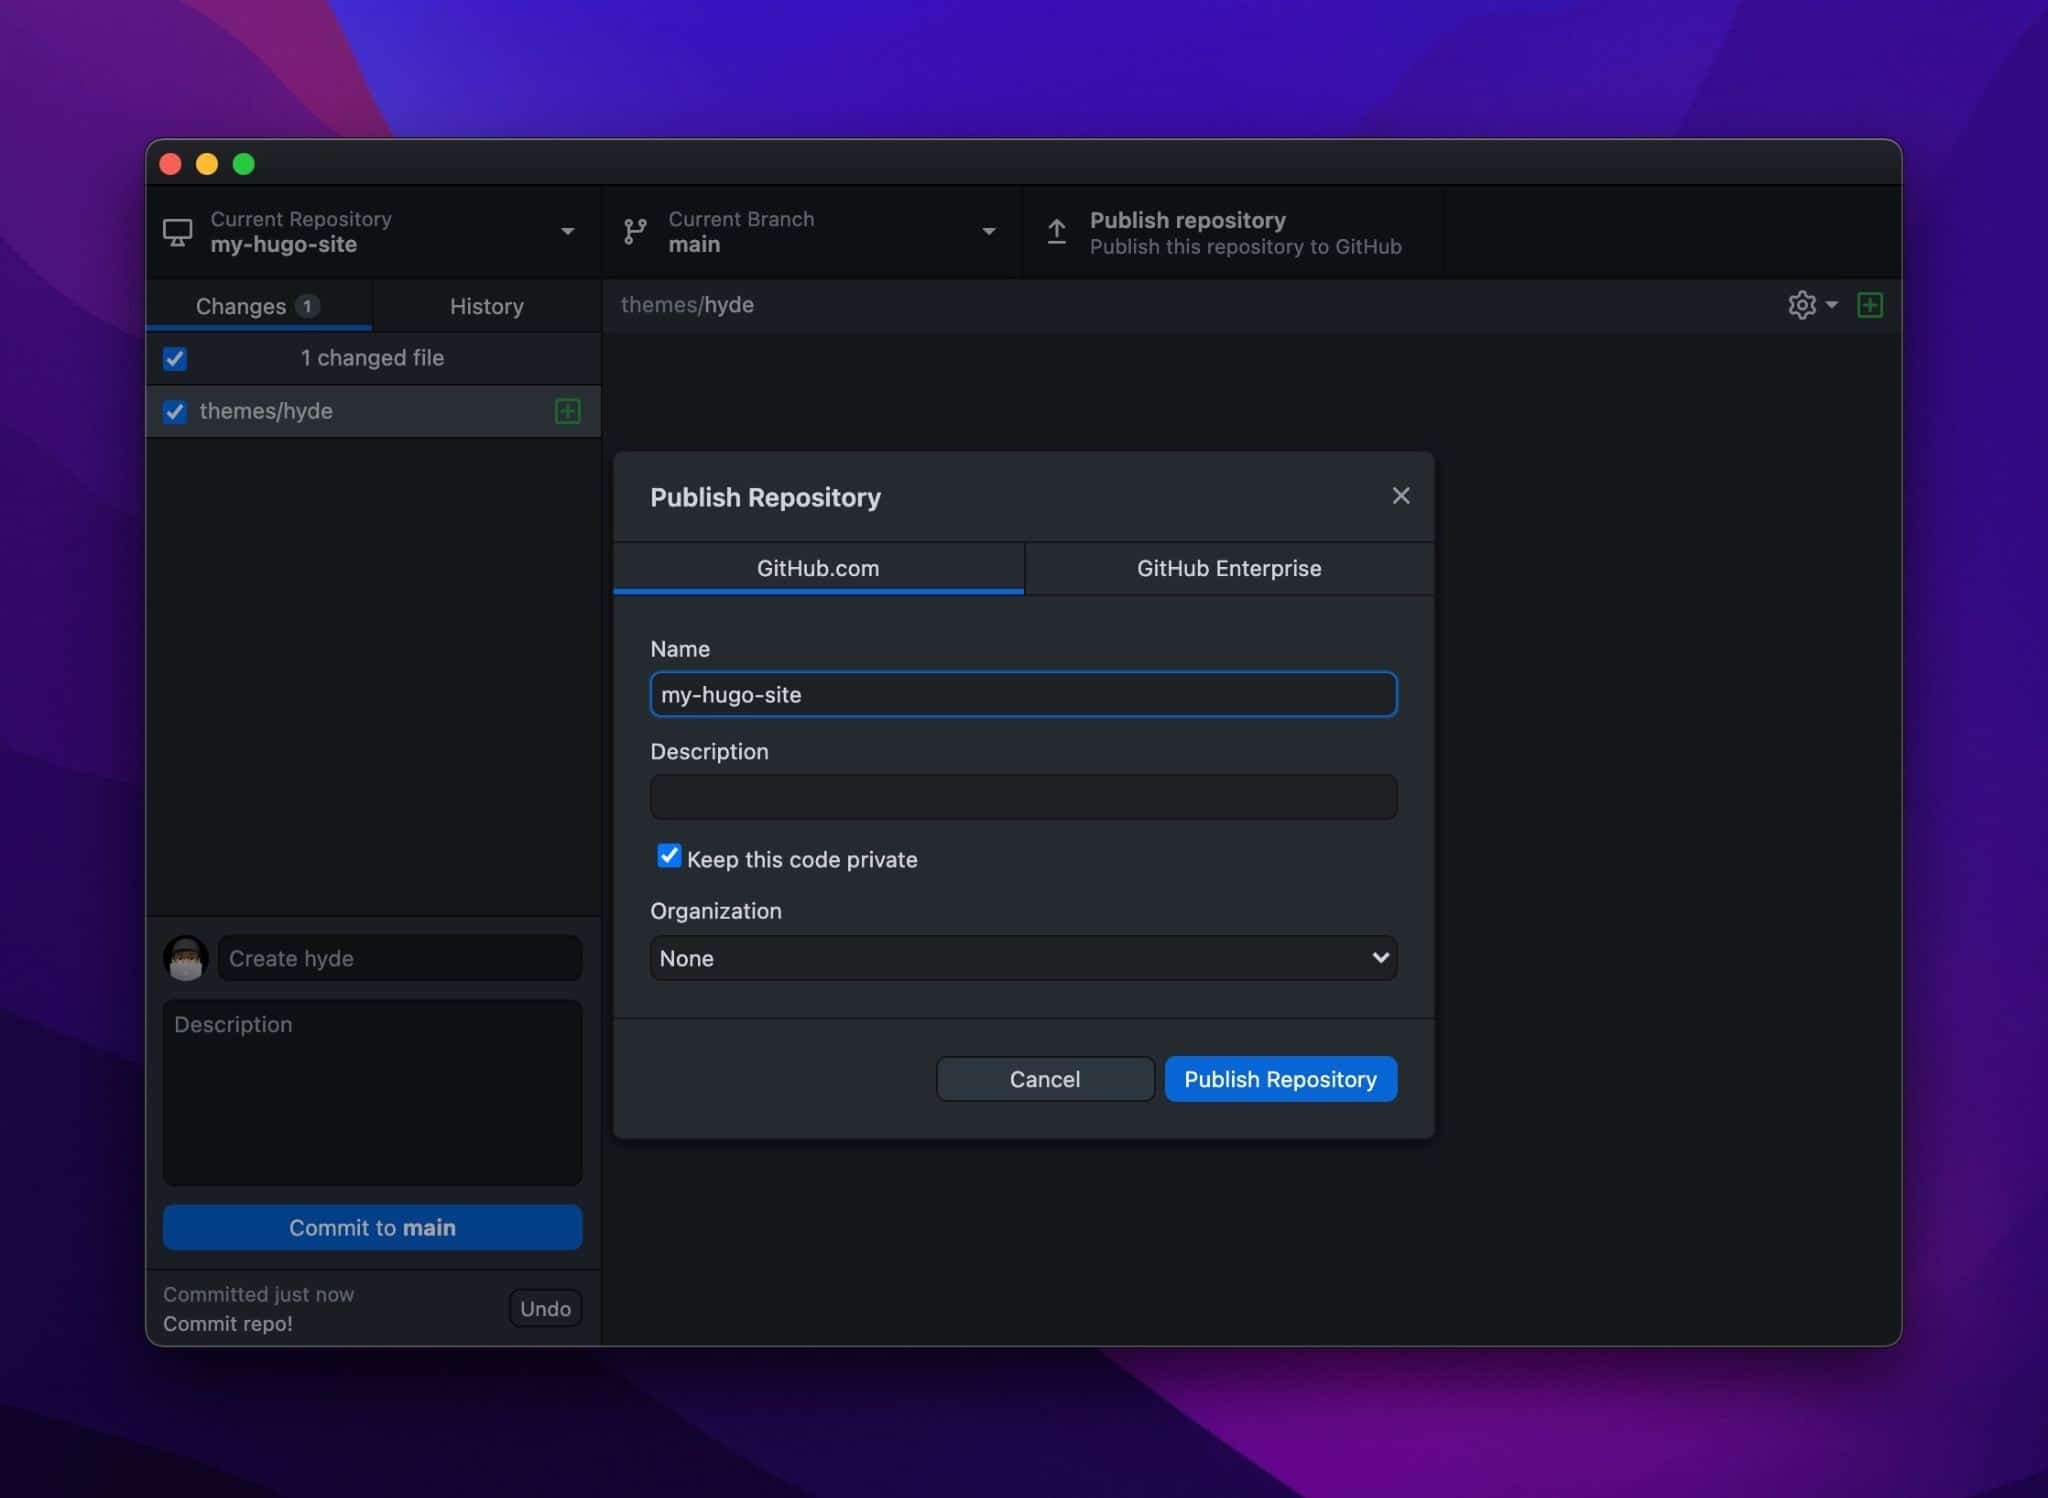
By means of default, the “Stay this code non-public” possibility is checked. If you wish to have your code to be open-source and publicly obtainable, be at liberty to uncheck it. After all, click on Post Repository as soon as once more.
Post your GitHub repository.
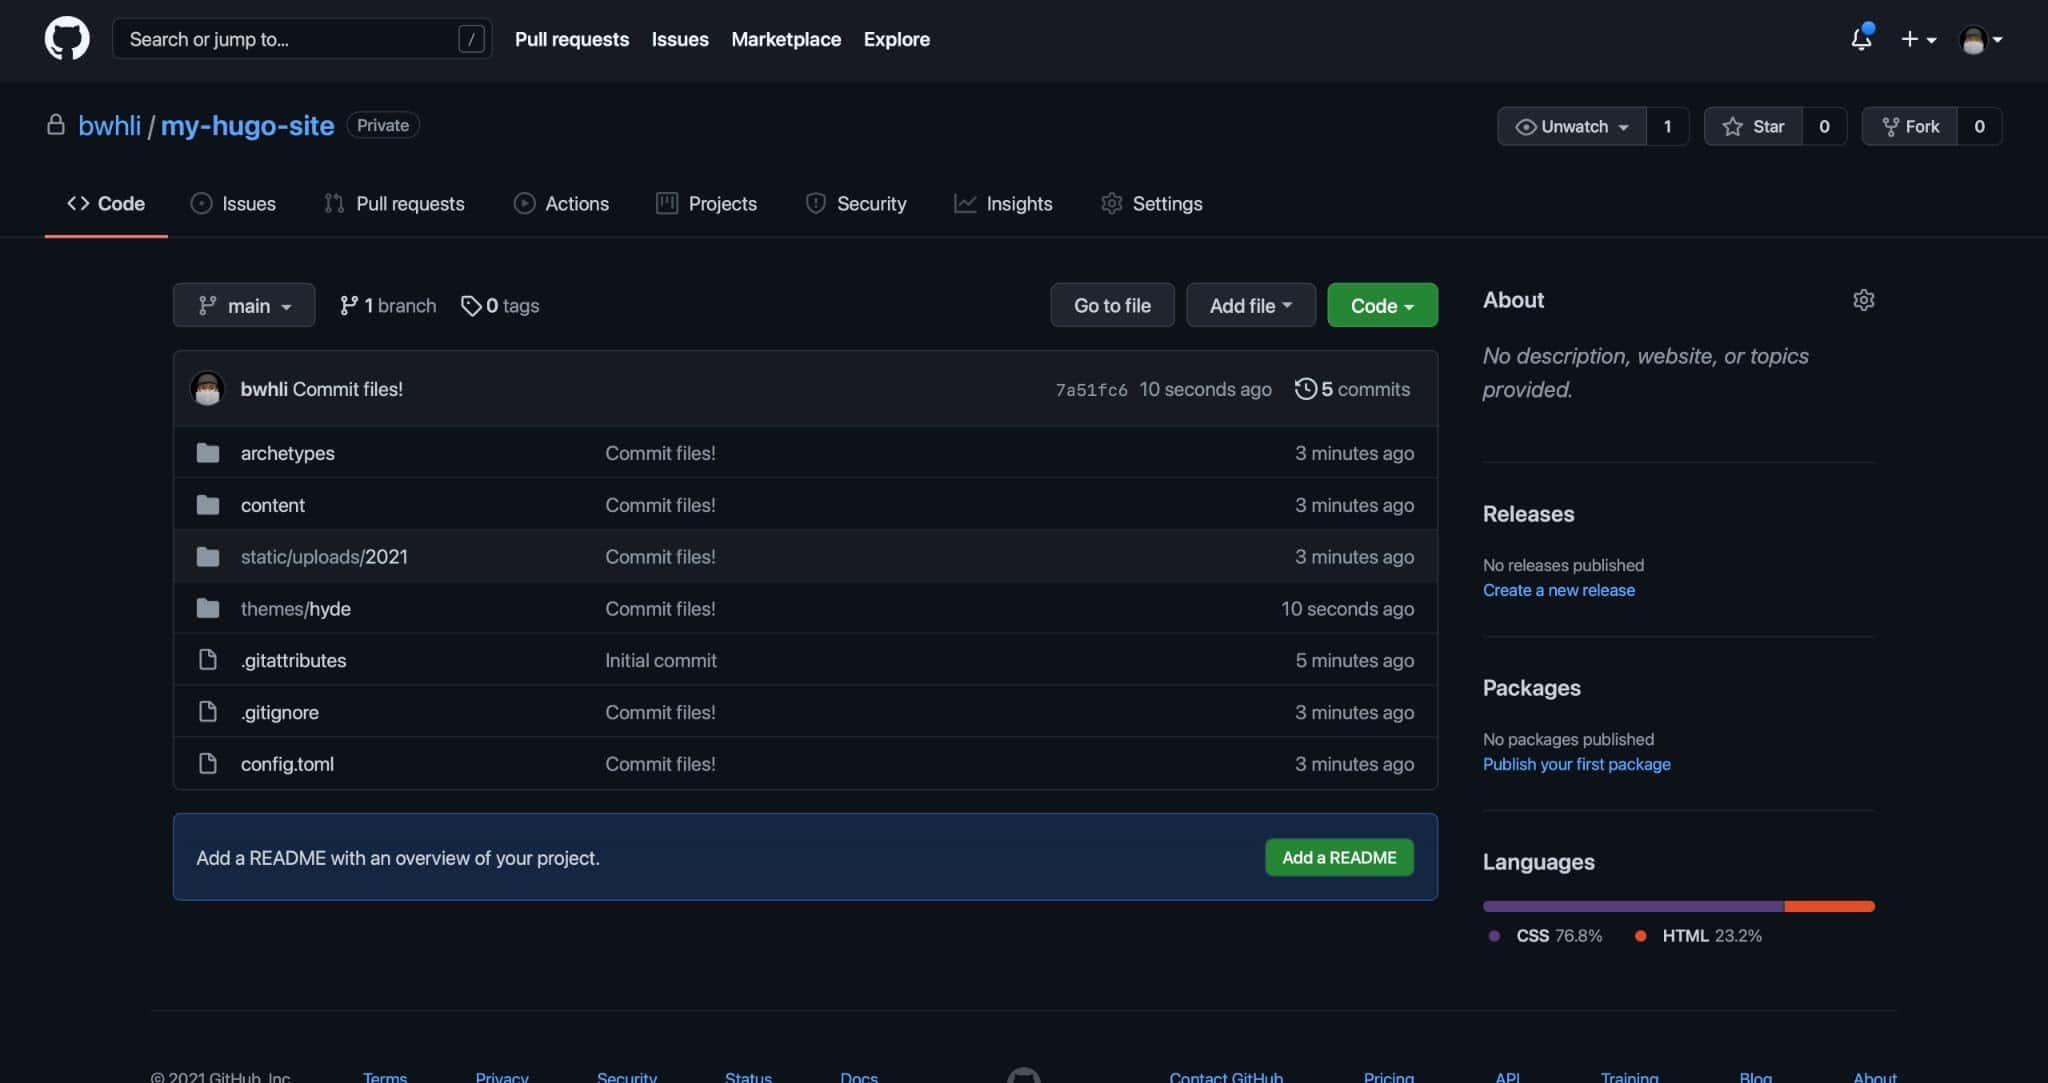
Now, in case you move to GitHub, you must see your repository on-line like so:
Hugo venture repository on GitHub.
How you can Hyperlink GitHub Repo to Netlify
In case you don’t have already got a Netlify account, join one here. To hyperlink a GitHub repository to Netlify, click on New web site from Git within the Netlify dashboard.
New web site from Git on Netlify.
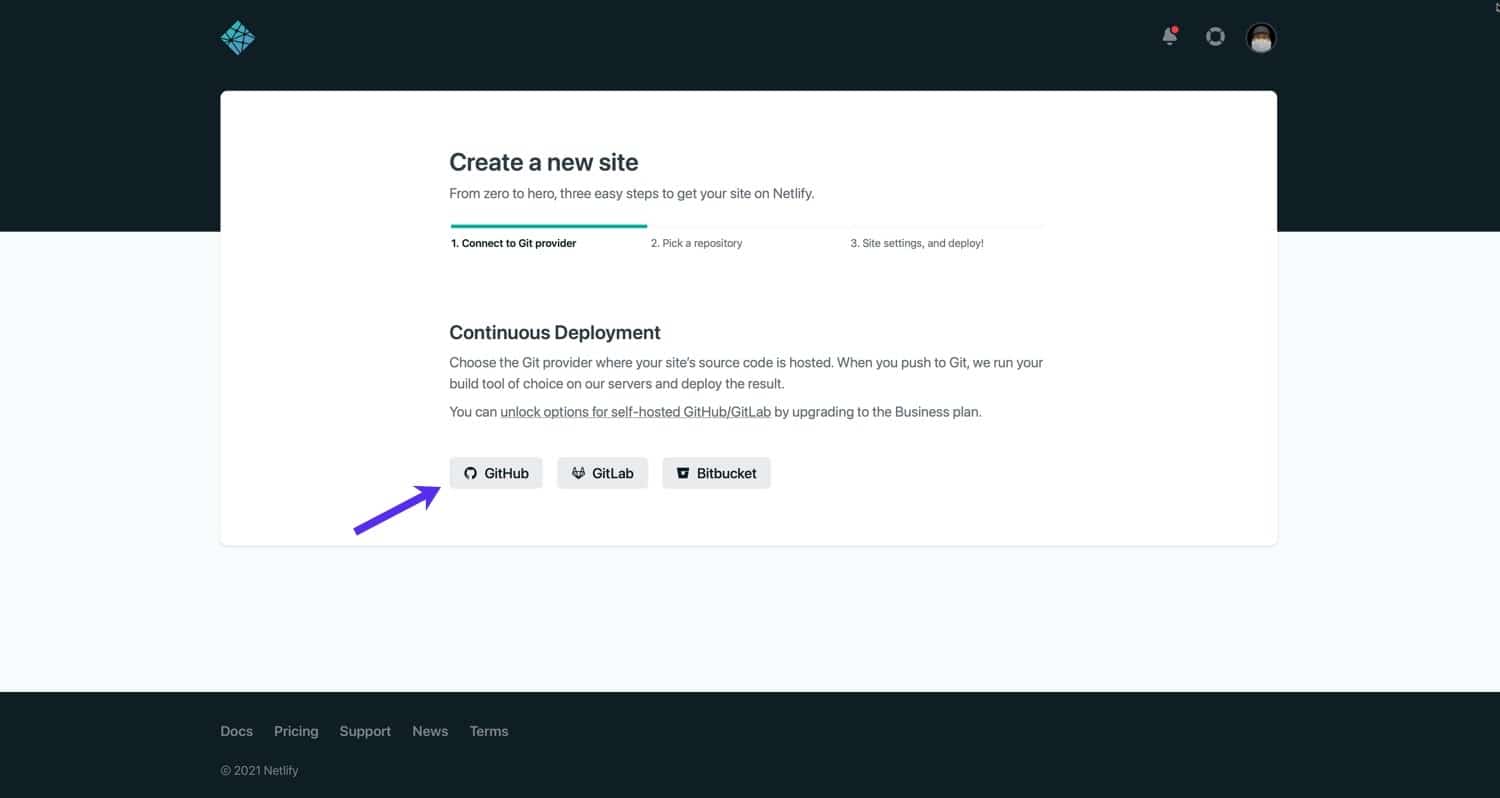
Below Steady Deployment, make a choice the GitHub possibility.
Make a selection “GitHub” for steady deployment.
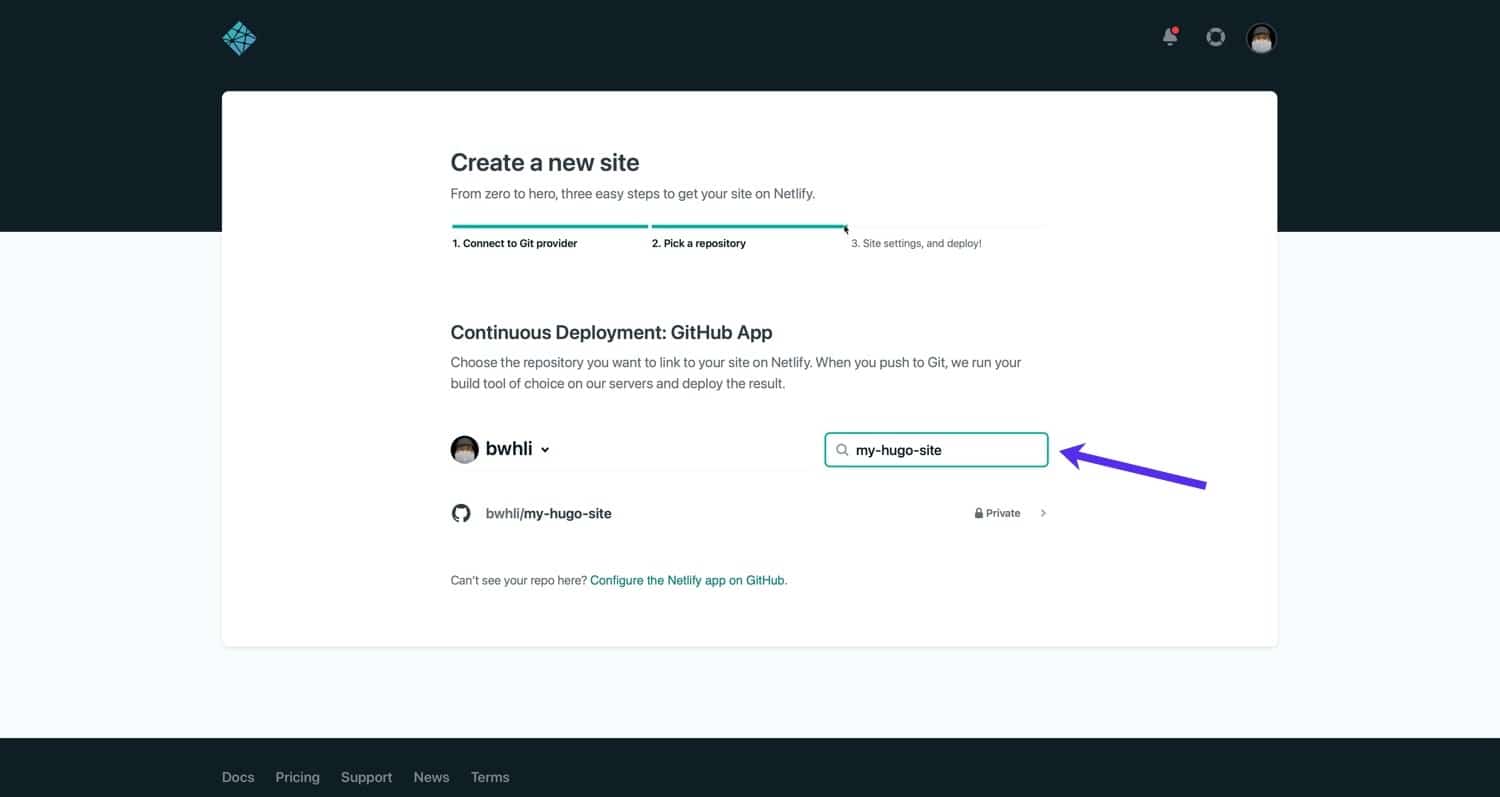
Subsequent, use the hunt field to search out your Hugo venture repository.
To find your Hugo venture repository.
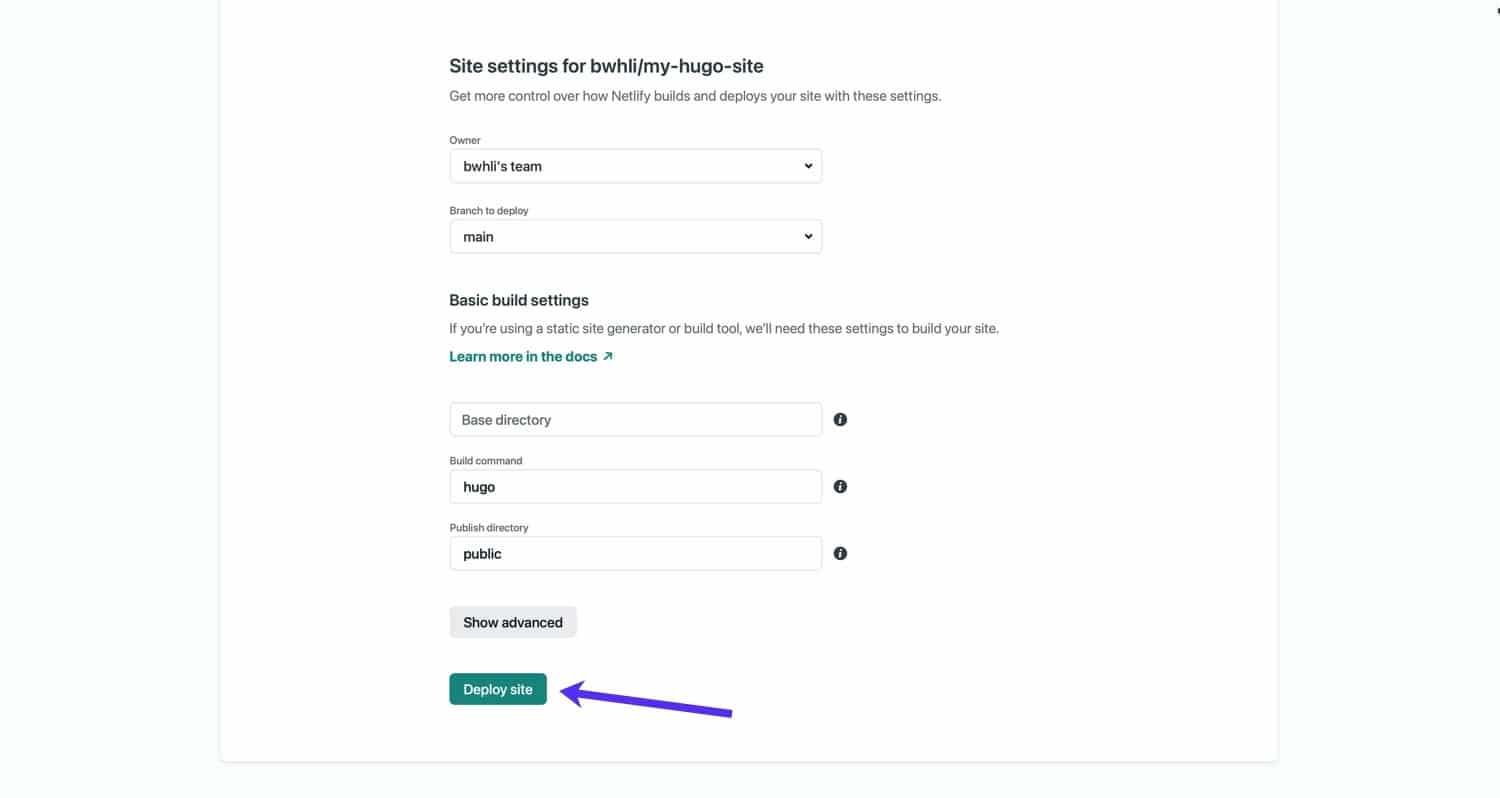
Subsequent, specify the settings for the continual deployment. Since Netlify can come across a Hugo configuration, the default settings must paintings high quality for a elementary deployment.
As you get extra accustomed to Hugo, you could delve into surroundings variables, customized construct instructions, and extra. In the meanwhile, atmosphere the construct command to hugo and the general public listing to public will can help you deploy a easy Hugo web site. After specifying the construct command and public listing, click on Deploy Website online.
Deploy Hugo web site on Netlify.
Since Hugo is this type of rapid static web site generator, the deployment must most effective take a couple of seconds for a elementary web site. As soon as the deployment finishes, you’ll have the ability to see a staging URL within the Netlify dashboard. Click on the URL to view the deployed web site.
Netlify staging URL.
Right here’s our Hugo web site on Netlify. As you'll see, it’s just like the web site on our local environment:
Hugo web site on Netlify.
At this level, you'll arrange a customized area and SSL certificates to your Netlify-hosted web site. To try this, we propose regarding the official Netlify documentation.
Since we’ve related Netlify to GitHub, a brand new decide to the Hugo venture GitHub repo will robotically cause a brand new deployment on Netlify!
Hugo is without doubt one of the hottest static web site turbines on the planet, and for a just right explanation why. No longer most effective does it have tremendous rapid construct processing, but it surely additionally ships with tough templating features that make stronger partials and shortcodes.
On this educational, you realized tips on how to configure Hugo, create a brand new venture, upload content material information, edit theme information, and deploy a completed static web site. We advise going during the reliable Hugo documentation to be told extra about Hugo and its extra complicated options like customized purposes, entrance topic, and CSS/JS buildpacks.
What are your ideas on Hugo and different static web site turbines? Please tell us within the feedback under!