
A developer portfolio is a selection of paintings samples and tasks showcasing your abilities and revel in. A robust portfolio units you except for different applicants when searching for jobs. However no longer handiest that: A portfolio can be a useful gizmo for networking, keeping an eye on your learnings, and, in the long run, setting up your self as a topic skilled.
On this instructional, you are going to learn to construct a developer portfolio the use of Subsequent.js and deploy at once out of your GitHub repository to Kinsta’s Utility Webhosting platform, which gives a loose .kinsta.app area to get your paintings reside briefly.
Right here’s a reside demo of the developer portfolio you’ll be development with Subsequent.js. You’ll get admission to this challenge’s GitHub repository in the event you’d love to take a more in-depth glance or you’ll want to fork this Subsequent.js portfolio starter challenge I created. The starter portfolio comprises fundamental codes just like the kinds, a Font Superior CDN hyperlink, photographs, and fundamental construction.
Contents
- 0.1 Why Subsequent.js?
- 0.2 How To Set Up Your Subsequent.js Construction Surroundings
- 0.3 How To Construct a Responsive Developer Portfolio The usage of Subsequent.js
- 1 Whats up, I am Joe 👋
Necessities/Must haves
This can be a “observe alongside” form of instructional. It’ll be more straightforward so that you can code alongside when you have:
- Fundamental wisdom of HTML, CSS, and JavaScript
- A little bit wisdom of React and perhaps Subsequent.js
- Node.js and npm (Node Package deal Supervisor) or yarn put in in your laptop
Why Subsequent.js?
Subsequent.js is a React-based open-source JavaScript library framework that can be utilized for quite a lot of internet construction tasks as it simplifies development server-side rendered and static programs. It streamlines the method via leveraging the most efficient options of React and optimizing rendering efficiency for advanced consumer revel in. Probably the most maximum not unusual use instances for Subsequent.js come with:
- Construction static web pages: Subsequent.js can construct static web pages which are rapid, simple to deploy, and require minimum upkeep, just like the developer portfolio site we’ll be development all over this instructional.
- Construction dynamic web pages: Subsequent.js lets you create dynamic web pages that may exchange content material in keeping with consumer interactions or server-side information fetching.
- Making improvements to site efficiency: The usage of server-side rendering, Subsequent.js can fortify site efficiency via decreasing the time it takes for a web page to load.
- Construction ecommerce sites: Subsequent.js is well-suited for development ecommerce web pages that require server-side rendering for advanced search engine marketing and function.
- Construction innovative internet programs (PWAs): Subsequent.js helps the introduction of PWAs, which might be internet programs that serve as like local apps and may also be put in on a consumer’s software.
How To Set Up Your Subsequent.js Construction Surroundings
To arrange a construction setting for Subsequent.js, first set up Node.js in your laptop, as a result of you are going to use the npx command to run npm applications with no need to put in them globally in your gadget. As soon as this is sorted, you’ll be able to now create a Subsequent.js challenge via operating the next command:
npx create-next-app@newest my-portfolioA suggested will seem asking you to verify some further dependencies. Then you’ll be able to run npm run dev to make your app to be had at localhost:3000.

When making a Subsequent.js challenge the use of the npx command, it robotically scaffolds a folder construction with the next major directories:
- pages: This folder comprises the appliance’s pages, which might be robotically routed in keeping with their dossier identify. As an example, pages/index.js will be the house web page, whilst pages/about.js will be the about web page.
- public: This folder comprises static information that may be served at once, corresponding to photographs, fonts, and different property.
- elements: This folder is not obligatory and comprises reusable UI elements that can be utilized around the utility.
- kinds: This folder may be not obligatory and comprises world kinds that may be carried out around the utility.
Different directories and information will also be generated relying at the explicit configuration and contours, however those are the core directories of a fundamental Subsequent.js challenge.
For this instructional, the whole lot that we construct will seem at the index web page (our one-page site), and you are going to come with elements for more than a few sections just like the hero, about, tasks, and others.
How To Construct a Responsive Developer Portfolio The usage of Subsequent.js
A portfolio generally is composed of elements like those:
- Navbar part
- Hero part
- About part
- Abilities part
- Initiatives part
- Touch part
- Footer part
The Navbar and Footer elements are anticipated to seem on all pages if the portfolio has a couple of web page. This may also be completed in Subsequent.js via defining a format.
Defining Layouts in Subsequent.js
In Subsequent.js, a format is a method to outline a constant construction for the elements that seem on each and every web page of a site. The format typically comprises components corresponding to a header, navigation menu, and footer displayed throughout all web site pages.
Get started via making a elements folder within the src (supply) listing of your Subsequent.js challenge. Subsequent, create the Navbar and Footer elements that might be used throughout the Structure part.
Right here’s the Navbar part in Navbar.jsx:
// elements/Navbar.jsx

import Hyperlink from "subsequent/hyperlink";

const Navbar = () => {
  go back (


          Joe's Portfolio


      Resume

  )
}

export default Navbar;
Right here’s the Footer part in Footer.jsx:
// elements/Footer.jsx
const Footer = () => {
go back (
<>
)
}
export default Footer;Notice: For the Font Superior icons to paintings, you will have to both set up Font Superior into your challenge or use its CDN. You’ll upload the CDN hyperlink on your _document.js dossier like this:
// pages/_document.js
import { Html, Head, Major, NextScript } from 'subsequent/record';
export default serve as File() {
go back (
Notice: If you happen to hyperlink in a special model of Font Superior by way of the CDN, it is very important switch in above the fitting integrity hash for that liberate.
After growing the entire essential elements on your format, you’ll be able to create the Structure part itself and upload this part on your pages via wrapping your web page content material inside it.
The Structure part will settle for a >code>youngsters prop, permitting you to get admission to the content material of your Subsequent.js pages.
// elements/Structure.jsx

import Navbar from './navbar';
import Footer from './footer';

const Structure = ({ youngsters }) => {
  go back (
    <>

      {youngsters}


  )
}

export default Structure;
At this level, you have got effectively created the Structure part which holds the Navbar and Footer along the kids props located correctly. You’ll now upload the Structure part on your pages via wrapping the web page content material in it. This might be completed within the _app.js dossier.
// pages/_app.js

import '@/kinds/globals.css';
import Structure from '../elements/format';

export default serve as App({ Element, pageProps }) {
  go back (


  );
}
You might have now succeeded in making a format on your developer portfolio. For this portfolio, we center of attention extra on Subsequent.js and the right way to deploy your site to Kinsta. So you’ll be able to reproduction the kinds within the kinds/globals.css dossier into your individual challenge. If you happen to release your portfolio site in dev mode, you must now see your app’s format.

Now it’s time to present your portfolio site the fitting content material.
Construction Portfolio Elements
You’ll now create particular person elements for every phase of your developer’s portfolio. A lot of these elements might be imported into the index web page of your Subsequent.js challenge, so they may be able to show while you release your challenge with npm run dev.
The Hero Element
The Hero part is the primary phase under the Navbar, whose major goal is to seize the consumer’s consideration and provides them a way of what the site or utility is ready.
// elements/Hero.jsx
import Symbol from "subsequent/symbol";
const Hero = () => {
go back (
)
}
export default Hero;Within the code above, you are going to understand that the Subsequent.js Symbol part is used as an alternative of the HTML img tag so as to add the picture as it allows automated symbol optimization, resizing, and a lot extra.
Within the About part, you are going to additionally understand {that a} easy paragraph to mention little in regards to the developer used to be added along some social icons from Font Superior so as to add social hyperlinks.
That is what the Hero part must appear to be:

You’ll upload extra content material to the Hero part, tweak the kinds within the kinds/globals.css dossier and even recreate this phase to your personal manner.
The About Element
The About part is supposed to inform readers or those who talk over with your portfolio extra details about you in as many paragraphs as you need. If you want to inform extra about your self, you’ll be able to create a devoted “About Me” web page and upload a button in this phase to learn extra about your self.
// elements/About.jsx

import Symbol from "subsequent/symbol";

const About = () => {
  go back (

      About Me


            As a developer, I've at all times been hooked in to growing sublime and efficient answers to
            advanced issues. I've a powerful basis in instrument construction, with a focal point on internet
            applied sciences corresponding to HTML, CSS, and JavaScript. I experience operating on each the front-end and
            back-end of programs, and I'm at all times searching for techniques to optimize efficiency, fortify consumer
            revel in, and make sure the very best point of code high quality.

          All the way through my occupation, I've labored on quite a lot of tasks, from easy static web pages to
            advanced enterprise-level programs. I'm skilled in operating with plenty of construction
            equipment and frameworks, together with React, Angular, Vue.js, Node.js, and Laravel. I'm at all times keen
            to be informed and discover new applied sciences, and I'm continuously in search of out alternatives to fortify
            my abilities and information.


  )
}

export default About;
The code above comprises two paragraphs of textual content in regards to the developer and a picture of the developer. That is what the About phase is predicted to appear to be:

You’ll at all times tweak the kinds so as to add extra photographs and a lot extra.
The Abilities Element
The abilities part is supposed to turn one of the crucial developer’s maximum used applied sciences or applied sciences the developer has used up to now.

You’ll make this more straightforward to care for via growing an array in an exterior dossier after which import into the talents part, so you’ll be able to loop via as an alternative of duplicating an identical code.
// elements/Abilities.jsx

const Abilities = () => {
  go back (

      Abilities


          HTML


          CSS


          JavaScript


          React


          Node


          Python


  )
}

export default Abilities;
Within the code above, a card is created for every ability, and every card will grasp the era icon from font-awesome and the era identify. You’ll additionally upload extra kinds and tweak the code to make it extra sexy and distinctive.
The Initiatives Element
The challenge part is among the vital sections of a developer’s portfolio. Initiatives supply tangible proof of a developer’s abilities and skills and exhibit their talent to use their wisdom to real-world issues.
Each and every challenge will come with a temporary description of the challenge, a hyperlink to its supply code (we’re the use of GitHub hyperlinks right here), and another main points you want to upload.

You’ll create an array to carry every challenge’s main points after which import it into your part to steer clear of hard-coding them.
Let’s create a information.js dossier to retailer the array of challenge information. You’ll retailer this dossier within the part folder or the pages/api folder. For this demo, I can retailer it within the elements folder. This array will grasp an object for every challenge, and the article will grasp the challenge identify, description, and GitHub hyperlink.
// elements/information.js

export const projectData = [
  {
    id: 1,
    title: 'Todo List App',
    description:
      'A simple Todo List App built with JavaScript. All datas are stored in localstorage. It helps users check list out their plans and tick as they do them.',
    gitHubLink: 'https://github.com/olawanlejoel/Todo-List-App',
  },
  {
    id: 2,
    title: 'Books Library App',
    description:
      'A simple Book Library App built with JavaScript. It helps readers have a good list of books they are either currently reading or have finished reading.',
    gitHubLink: 'https://github.com/olawanlejoel/Book-Library',
  },
  {
    id: 3,
    title: 'Quotes Generator',
    description:
      'Helps you generate quotes from about 1600 quotes written by different authors . Quotes are automatically copied to your clipboards.',
    gitHubLink: 'https://github.com/olawanlejoel/random-quote-generator',
  },
  {
    id: 4,
    title: 'Password Generator',
    description:
      'Helps you generates random passwords, you can select what you want your password to entail and also you can copy generated password to clipboard.',
    gitHubLink: 'https://github.com/olawanlejoel/Password-Generator',
  },
  {
    id: 5,
    title: 'Twitter UI Clone',
    description:
      'Simple Twitter UI clone built with TailwindCSS and Vue Js. This covers only the homepage of Twitter UI. This is cool to get started with TailwindCSS as it helps understand basic concepts.',
    gitHubLink: 'https://github.com/olawanlejoel/TwitterUI-clone',
  },
];
You’ll now create a challenge part to make use of this information via looping via simply. You’ll use any JavaScript iteration manner, however for this instructional, you’ll be able to use the JavaScript map() array option to glance throughout the information array after uploading it into the Initiatives part.
// elements/Initiatives.jsx
import { projectData } from './information.js';
const Initiatives = () => {
go back (
)
}
export default Initiatives;Within the code above, you have got effectively have shyed away from repetition via looping throughout the array to output all tasks into the Initiatives part making it simple to care for and upload extra tasks.
The Touch Element
One reason why to create a developer’s portfolio is so possible purchasers can achieve out to you. A technique can be for folks to ship you an e mail, which is what we’ll facilitate on this Touch part.
// elements/Touch.jsx

const Touch = () => {
  go back (

      Get In Contact
      If you need us to paintings in combination, have any questions or need me to talk at your match, my inbox is at all times open. Whether or not I simply wish to say hello, I will take a look at my absolute best to get again to you! Cheers!
      Say Hi

  )
}

export default Touch;
Position your e mail deal with within the a tag in order that the button will release an e mail utility with a message addressed to you.

You might have now effectively created the entire elements on your portfolio utility. The next move can be so as to add them on your index web page. Navigate to pages/index.js dossier — which is created via default — and change its code with the next.
// pages/index.js
import Hero from '@/elements/Hero';
import About from '@/elements/About';
import Abilities from '@/elements/Abilities';
import Initiatives from '@/elements/Initiatives';
import Touch from '@/elements/Touch';
import Head from 'subsequent/head';
const House = () => {
go back (
<>
Joel's Portfolio
While you now run your utility, you are going to understand a complete portfolio site has been created. After all, earlier than deploying your utility, let’s set up a dependency. One benefit of the use of Subsequent.js is the numerous options it brings to the desk, corresponding to file-based routing, symbol optimization, and a lot extra.
Symbol optimization is treated with the Subsequent.js Symbol part. Earlier than deploying an utility into manufacturing that makes use of the Subsequent.js Symbol part, it’s endorsed that you simply set up sharp. You’ll do that via navigating on your terminal, making sure you’re to your challenge’s listing, after which operating the next command:
npm i sharpYou’ll now deploy your utility, and the photographs will paintings correctly with the entire optimization that Subsequent.js supplies.
How To Deploy Subsequent.js Utility to Kinsta
While you’re glad along with your portfolio showcasing your absolute best construction paintings and key data, you are going to most likely wish to proportion it with others, proper? Let’s see how to do this the use of GitHub and Kinsta’s Utility Webhosting platform.
Push Your Code to GitHub
There are more than a few techniques to push codes to GitHub, however for this instructional, let’s use the Git command line interface. Git is extensively utilized in instrument construction as it supplies a competent and environment friendly method to organize code adjustments, collaborate on tasks, and care for model historical past.
You’ll add your code to GitHub the use of the next steps:
First, create a brand new repository (similar to an area folder to retailer your code). You’ll do that via logging in on your GitHub account, clicking at the + button within the most sensible proper nook of the display and settling on New repository from the dropdown menu as observed within the symbol under.

The next move can be to present your repository a reputation, upload an outline (not obligatory), and choose whether or not you need your repository to be public or non-public. Then click on Create repository. You’ll now push your code to the brand new GitHub repository.
All this is had to push your code with Git is the repository URL, which you’ll be able to to find at the repository’s major web page, below the Clone or obtain button, or within the steps that seem after making a repository.

You’ll get ready to push your code via opening your terminal or command suggested and navigating to the listing that comprises your challenge. Use the next command to initialize an area Git repository:
git initNow upload your code to the native Git repository the use of the next command:
git upload .The above command provides all information within the present listing and its subdirectories to the brand new Git repository. You’ll now dedicate your adjustments the use of the next command:
git dedicate -m "my first dedicate"Notice: You’ll change “my first dedicate” with your individual temporary message describing the adjustments you made.
After all, push your code to GitHub the use of the next instructions:
git faraway upload beginning [repository URL]
git push -u beginning grasp
Notice: Make sure you change “[repository URL]” with the URL of your individual GitHub repository.
After getting finished those steps, your code might be driven to GitHub and obtainable via your repository’s URL. You’ll now deploy your repository to Kinsta.
Deploy Your Portfolio to Kinsta
Deployment to Kinsta occurs in simply mins. Get started on the My Kinsta dashboard to log in or create your account.
Subsequent, you are going to authorize Kinsta on GitHub in those fast steps:
- Click on Packages at the left sidebar
- Click on Upload provider
- From the dropdown menu, click on Utility as a result of you need to deploy a Subsequent.js utility to Kinsta.

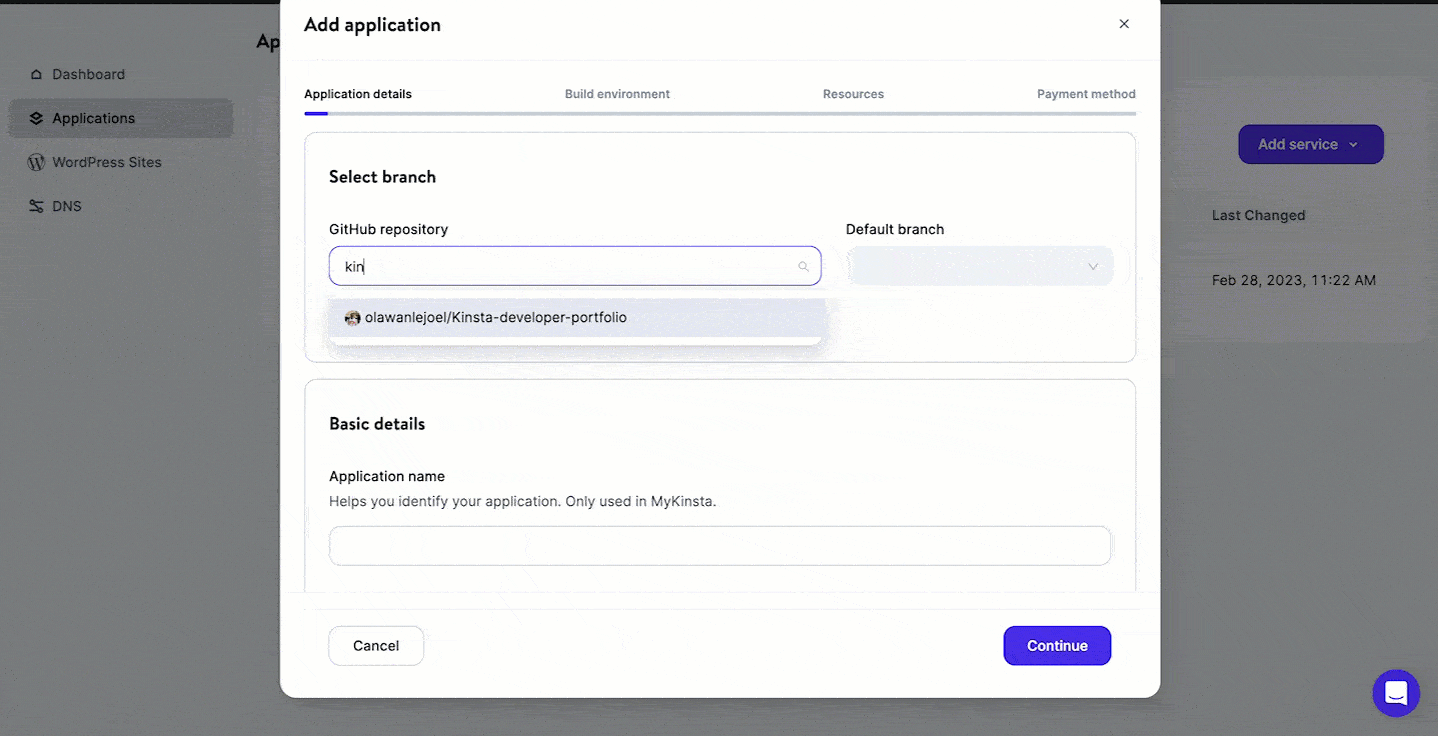
A modal will seem in which you’ll be able to choose the repository you want to deploy.
When you have a couple of branches to your repository, you’ll be able to choose the only you want to deploy. You’ll additionally assign a reputation to this utility. Ensure that to choose a information heart location a few of the 25 to be had, after which Kinsta will robotically stumble on a get started command.
At this level, your utility will get started deploying. Inside of a couple of mins, a hyperlink might be equipped to get admission to the deployed model of your utility. On this case, it’s: https://kinsta-developer-portfolio-ir8w8.kinsta.app/

Notice: Automated deployment used to be enabled, so Kinsta robotically re-deploys your utility every time you are making adjustments on your codebase and push it to GitHub.


Abstract
There are a variety of explanation why builders must imagine the use of Subsequent.js for his or her internet tasks. First, it supplies optimized efficiency out-of-the-box, with options corresponding to pre-fetching and code splitting that assist scale back web page load instances. 2nd, it supplies a well-known construction revel in for React builders, supporting common equipment corresponding to styled elements and React hooks.
Subsequent.js additionally helps a variety of deployment choices, from conventional server-based web hosting to trendy serverless platforms like Kinsta’s. This permits builders to make a choice the deployment choice that most closely fits their wishes whilst profiting from the framework’s efficiency optimizations and different advantages.
On this instructional, you have got discovered step by step the right way to construct a responsive portfolio web site the use of Subsequent.js after which deploy it to Kinsta’s Utility Webhosting platform.
Now problem your self via including extra options on your newly advanced portfolio site. A couple of concepts to get your ingenious juice flowing: upload extra pages with detailed data, combine a weblog with MDX, enforce animation.
And you’ll be able to get began on Kinsta with our cheap Utility Webhosting Interest Tier and our free-trial be offering.
Proportion your tasks and revel in within the feedback under.
The publish How To Construct and Deploy a Developer Portfolio With Subsequent.js gave the impression first on Kinsta®.
WP Hosting