Maximum internet sites want a well-designed function phase to show the options of goods or services and products. So, on this educational, I’m going to turn you methods to create a singular function phase in Divi. To try this, we’re going to get just a little ingenious with Divi’s Circle Counter module so as to add animation on your blurb icons. And by way of the use of some customized spacing, I’ll display you the way you’ll simply place your blurbs to coincide well with a divider background. The overall design is each blank and distinctive. And with a couple of minor touches, it may be an ideal addition on your subsequent venture.
Let’s get began!
Contents
- 1 Sneak Peek
- 2 Making a New Web page and Deploying the Visible Builder
- 3 Developing the Characteristic Segment Header
- 4 Developing the Primary Characteristic Segment and Background Design
- 5 Including Blurbs to the 4 Column Row
- 6 Upload Circle Counters to Overlap Blurb Icons
- 7 Use Row Padding to Place the Icons to Coincide with the Divider
- 8 How the Characteristic Segment Seems to be on Cell
- 9 Ultimate Ideas
Sneak Peek
Here’s a little sneak peek of the design and gif to assist illustrate the animation component.
![]()
![]()
Making a New Web page and Deploying the Visible Builder
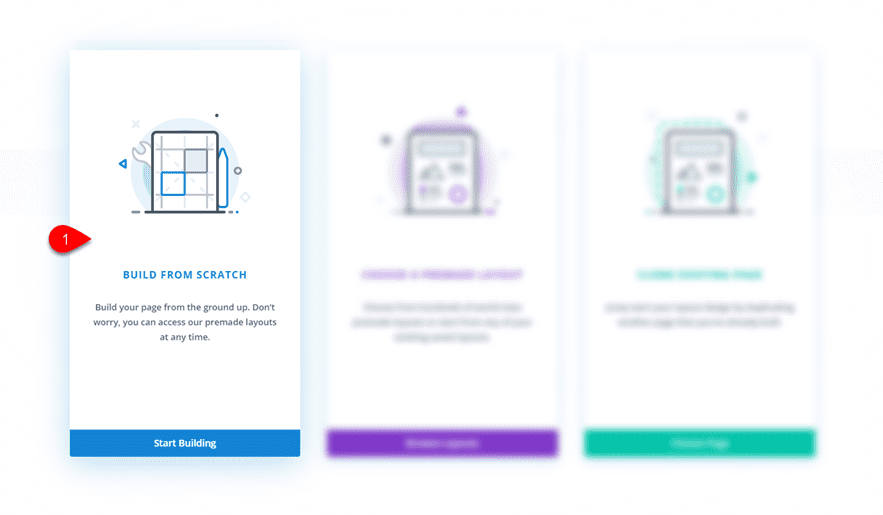
To get issues began, move on your WordPress Dashboard and move to Pages > Upload New. Then provide you with web page a name and click on to make use of the Divi Builder. Then click on to make use of the Visible Builder. You’re going to be brought on with 3 choices. Make a choice the strategy to “Construct From Scratch”.
Your clean canvas awaits!
Developing the Characteristic Segment Header
The highest header to your function phase is beautiful easy. The original component is the sophisticated field shadow displayed beneath to present just a little intensity to the design.
To create it, insert a one-column row on your common phase.
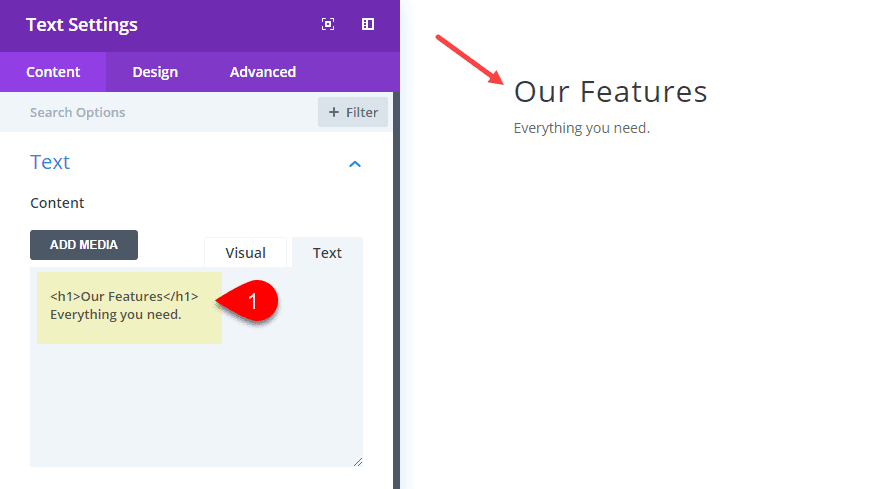
Then upload a textual content module to the row and replace the settings as follows:
Content material:
Our Options
The whole lot you wish to have.
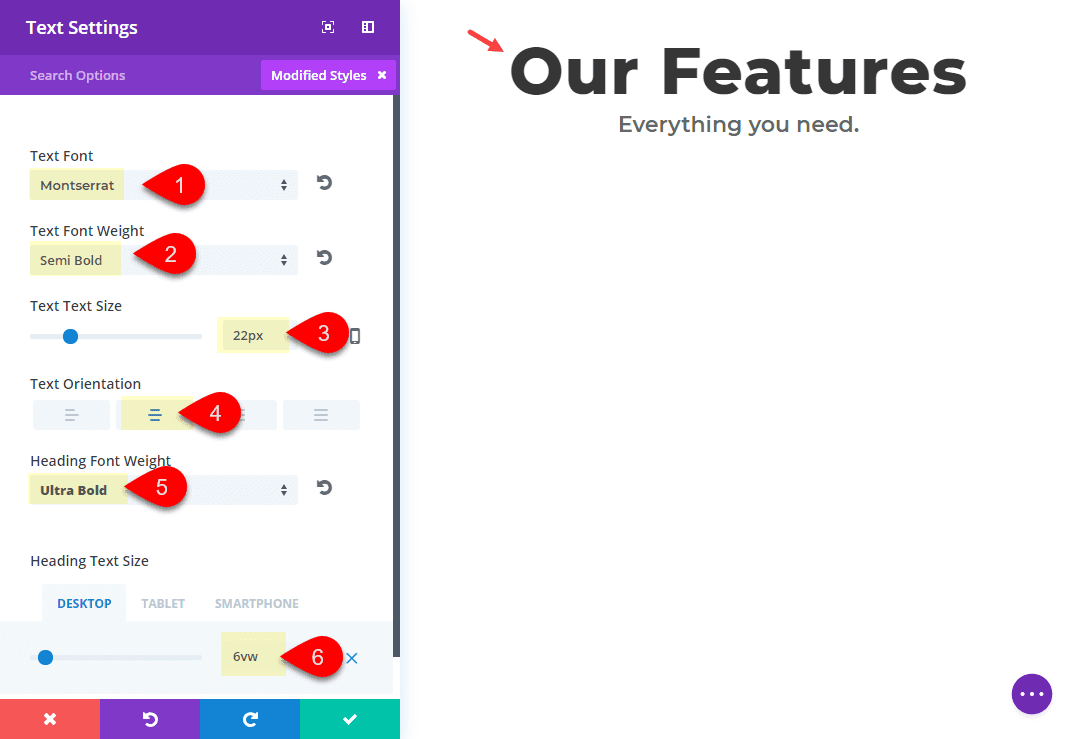
Textual content Font: Montserrat
Textual content Font Weight: Semi Daring
Textual content Textual content Measurement: 22px
Textual content Orientation: Middle
Heading Font Weight: Extremely Daring
Heading Textual content Measurement: 6vw(desktop), 50px(pill), 30px(smartphone)
Now save your settings and leap over to the phase settings and upload a field shadow as follows:
Field Shadow: see screenshot
Field Shadow Vertical Place: 19px
Field Shadow Blur Energy: 80px
Field Shadow Unfold Energy: -16px
Shadow Colour: rgba(136,150,171,0.13)
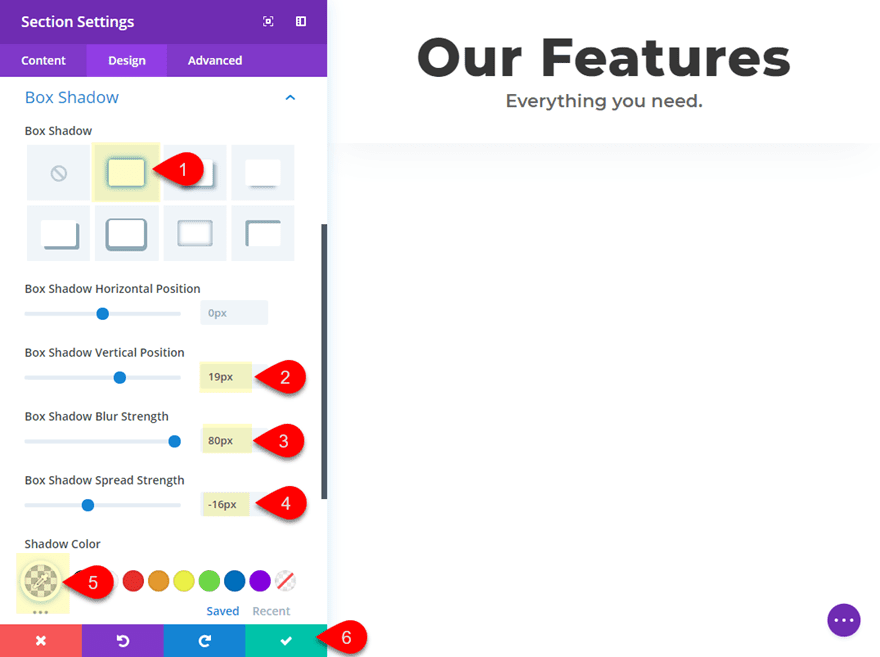
Save Settings.
Beautiful easy stuff. Now let’s get to the joys phase.
Developing the Primary Characteristic Segment and Background Design
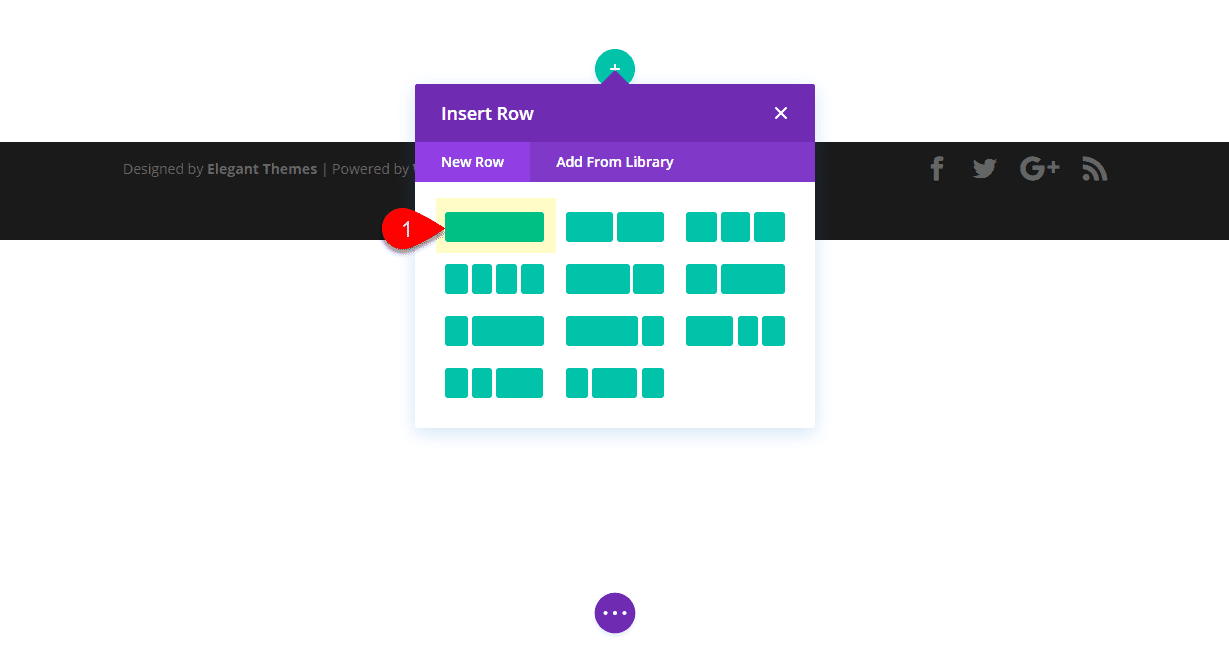
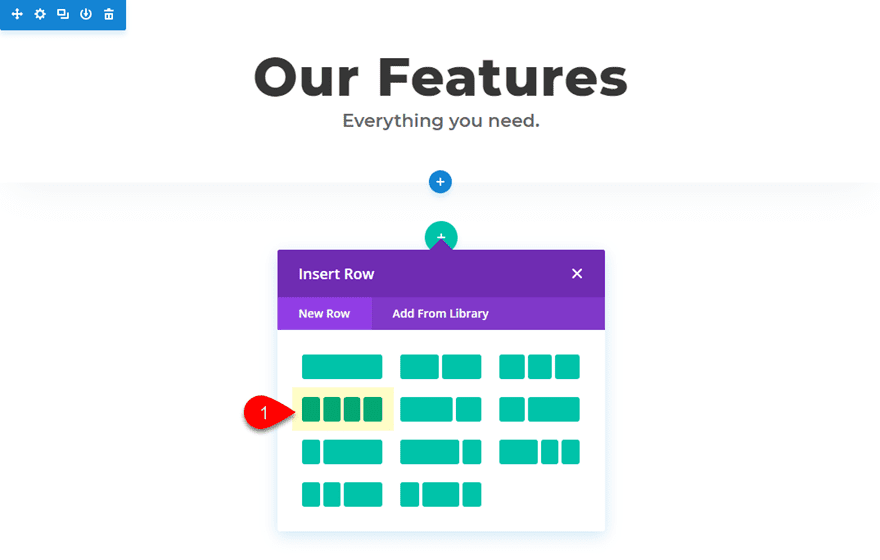
We wish to upload a brand new phase to carry our options. Most often, you could possibly be capable of merely upload a brand new row to the former phase, however on this case we wish to upload a Divider background which is to be had within the Segment component.
Pass forward and upload a brand new phase immediately beneath the phase you simply completed. Then upload a four-column format to the row.
We can be including blurbs to those columns, however for now let’s replace our phase settings.
For this phase, we wish to give it a customized max-width. That is necessary to stay the design in position on greater browser sizes. We additionally wish to upload a piece Divider to function the background that coincides with the association of our blurbs (extra in this later).
Pass to the phase settings and replace the next:
Width: 1080px
Segment Alignment: Middle
Dividers: Most sensible
Divider Taste: see screenshot
Divider Colour: rgba(136,150,171,0.07)
Divider Peak: 52%
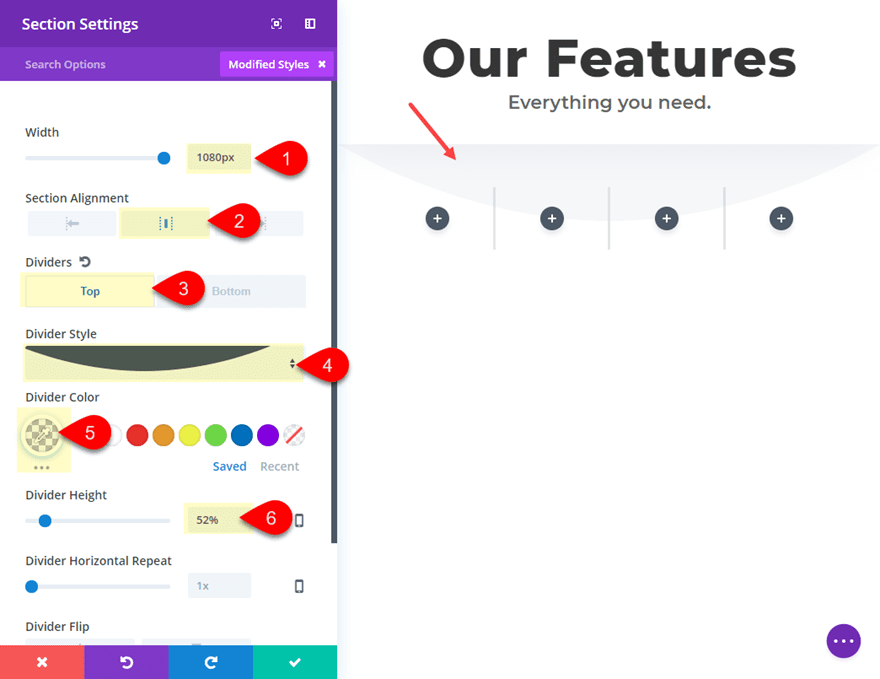
Save Settings.
Giving the phase a customized width (or max-width) of 1080px is mainly how your rows are setup by way of default inside of a piece. So, necessarily, we’re making our complete phase the scale of a default row.
Including Blurbs to the 4 Column Row
At this level we will be able to move forward and get started including our blurbs to every of the 4 columns. Click on the grey icon within the first column so as to add your first blurb. Replace the content material within the field to incorporate much less textual content (2 sentences), then select to make use of an icon as an alternative of a picture (I selected the picture icon).
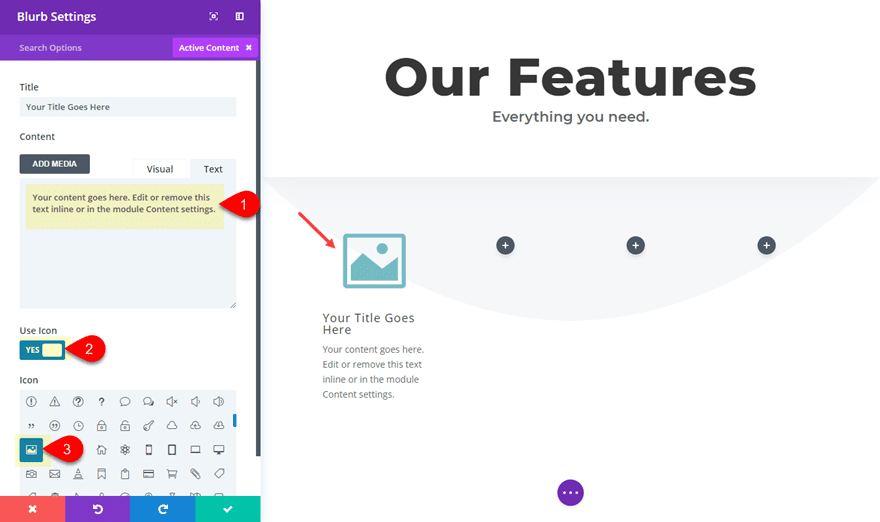
Below the design tab, replace the next:
Icon Colour: #974450
Circle Icon: YES
Circle Colour: rgba(255,255,255,0.5)
Use Icon Font Measurement: YES
Icon Font Measurement: 48px
Textual content Orientation: Middle
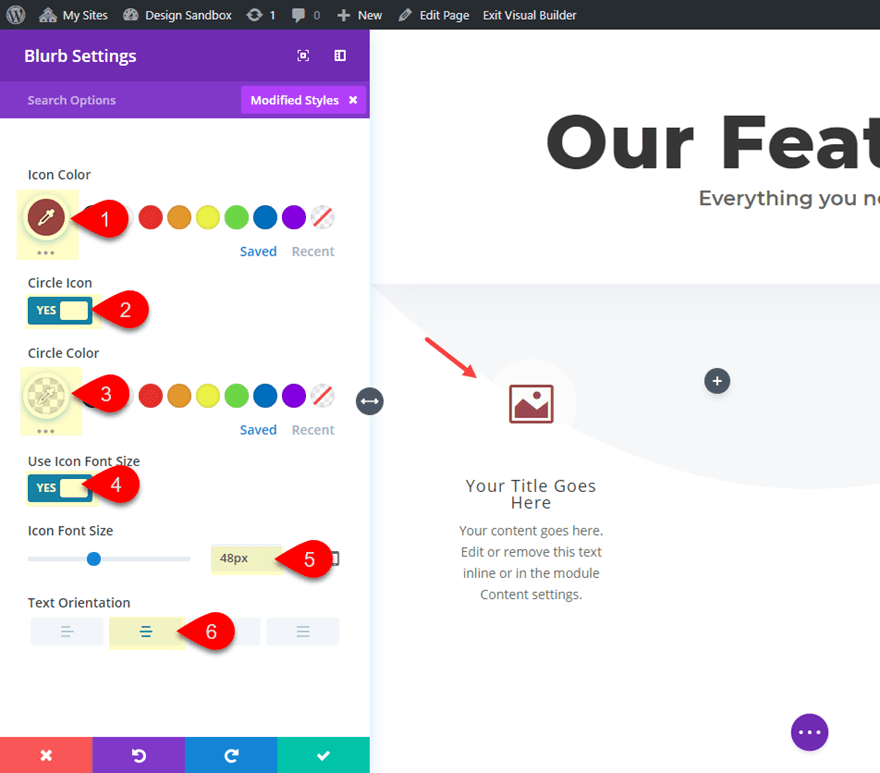
Save Settings.
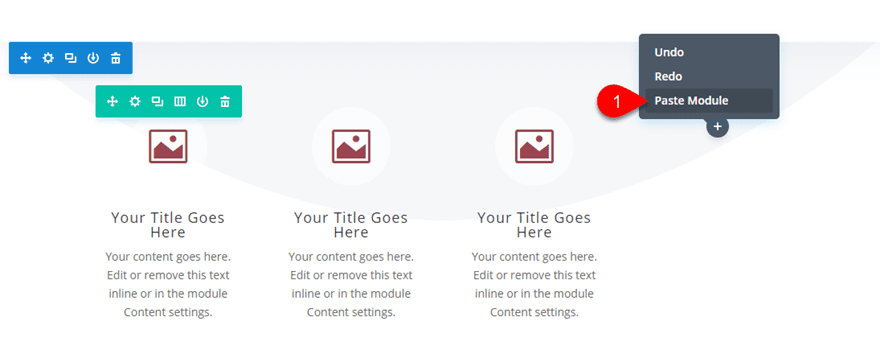
Now reproduction and paste the blurb module into every of the rest columns so that you’ve got one blurb in every column.
You’ll return and replace the icons if you need at this level, however you don’t must.
Upload Circle Counters to Overlap Blurb Icons
So as to add the animation to our blurb icons, we’re going to overlap every icon with a circle counter that has a distinct quantity price. This may occasionally motive the circle animation to regularly building up with every icon to turn development. Alternatively, you’ll use no matter nubmer price you need with every circle counter.
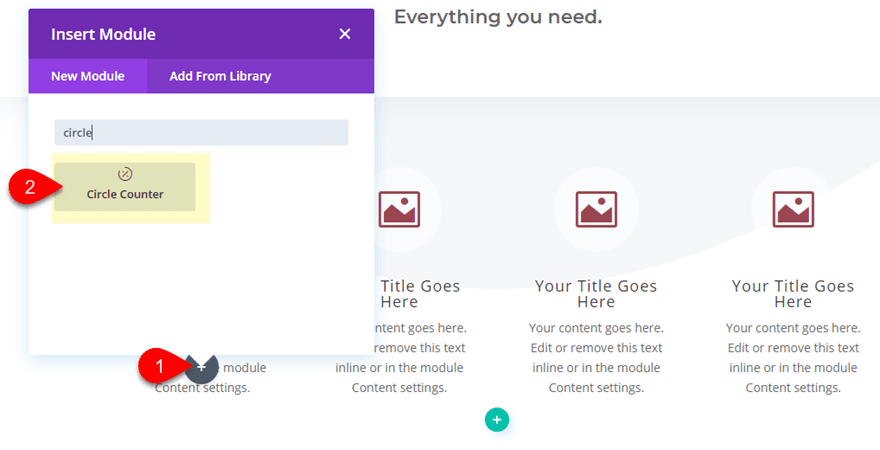
Click on the grey “Upload New Module” icon beneath the blurb module within the first column after which upload the counter module.
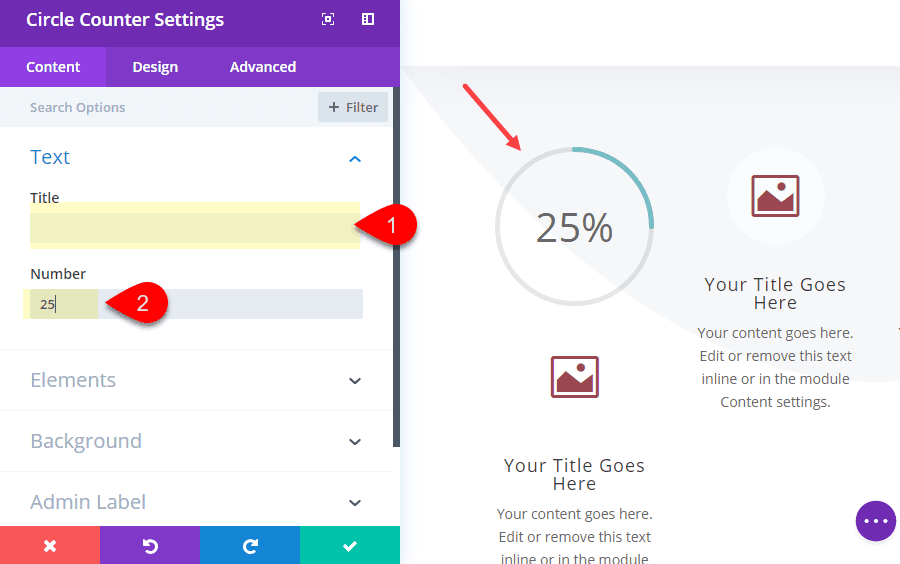
Earlier than you get started enhancing the circle module settings, move forward and drag it above the blurb module. Now you’ll replace the content material settings as follows:
Delete the textual content within the name field
Quantity: 25
Then replace the design tab settings as follows:
Bar Background Colour: #974450 (identical colour as your blurb icons)
Quantity Textual content Colour: rgba(0,0,0,0) (that is totally clear in order that it hides the quantity)
Quantity Textual content Measurement: 0px (to do away with any undesirable textual content house inside the circle)
Width: 109px (this was once set in response to the scale of the icon it’ll overlap)
Module Alignment: Middle
Margin-bottom: -102px (this may increasingly completely overlap the icon)
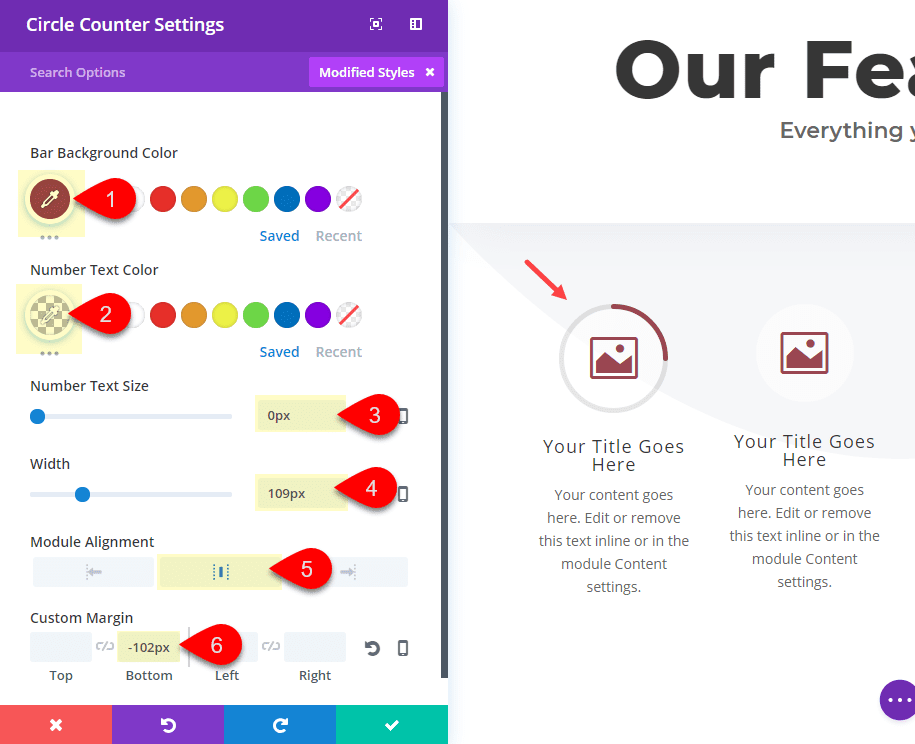
Save Settings.
Now all you wish to have to do is reproduction and paste the circle counter module into every of the rest columns after which drag it to the highest of every blurb. After the duplicated circle counters are in position, replace the second one circle counter quantity to 50, the 3rd counter quantity to 75, and the fourth counter quantity to 100. The outcome will have to appear to be this after the animation is entire.

Use Row Padding to Place the Icons to Coincide with the Divider
The ultimate step to this design is to place the icons to coincide with the arc of the divider background. To try this we wish to upload some customized padding the the row. Open the row settings and replace the next:
Make This Row Fullwidth: YES
Column 2 Customized Padding: 9% Most sensible (desktop), 0% Most sensible (pill)
Column 3 Customized Padding: 9% Most sensible (desktop), 0% Most sensible (pill)
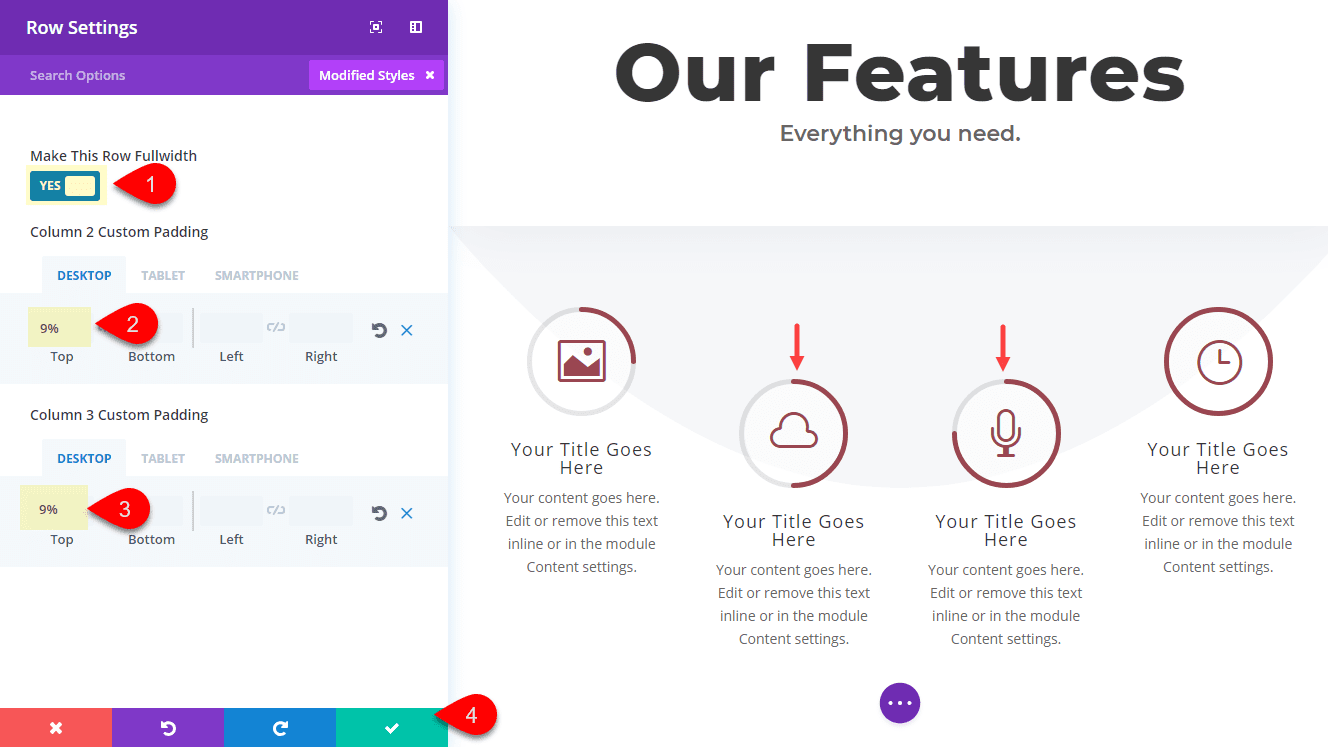
That’s it!
Take a look at the overall outcome.
![]()
Realize how the icons at the moment are animated by way of the circle counter with various quantity values. And the icons are coinciding with the divider background.
![]()
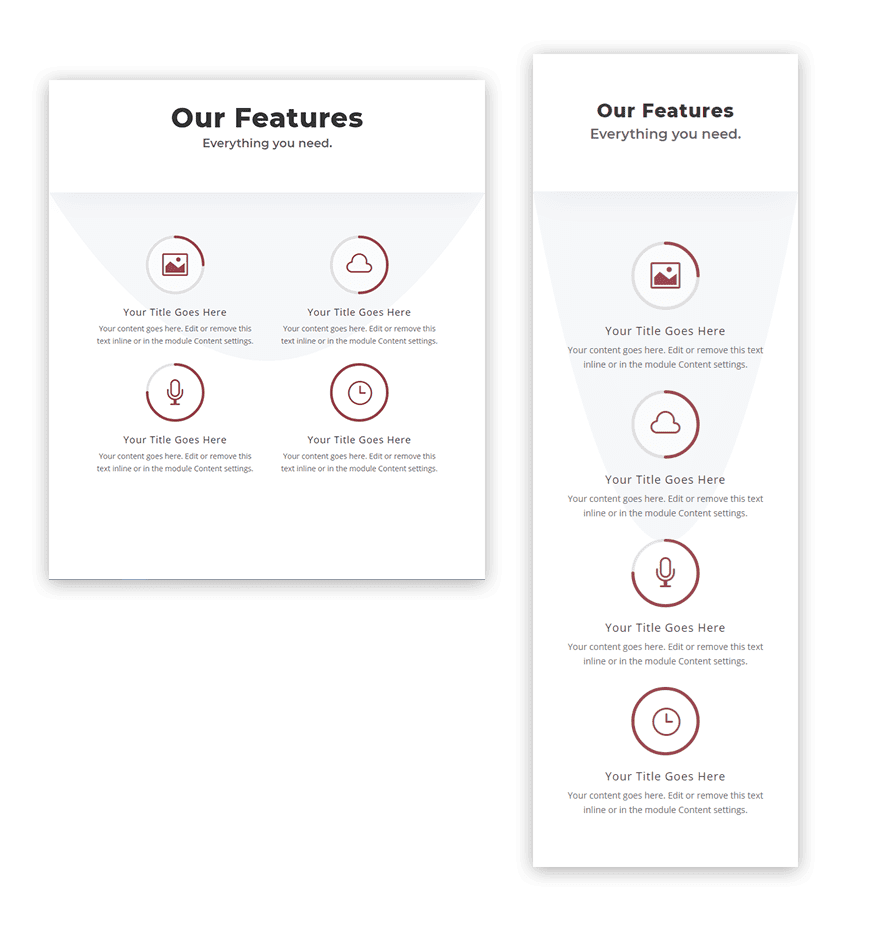
How the Characteristic Segment Seems to be on Cell
Here’s a take a look at how the design appears to be like on pill and smartphone shows.
Ultimate Ideas
The original parts of this selection phase design are gentle and delicate, which will have to make it simple so that you can incorporate into your individual layouts with some minor changes. And if the circle counter animations aren’t your cup of tea, be happy to depart the ones out and easily use the circle icon of the blurb module. Or chances are you’ll select to make use of handiest the circle counters with the quantity values visual for an inventive format for that includes statistics. If the rest, I’m hoping this offers you a couple of concepts to discover by yourself.
I stay up for listening to from you within the feedback.
Cheers!
The put up Design a Unique Feature Section in Divi with Icons Animated by Circle Counters seemed first on Elegant Themes Blog.
WordPress Web Design