
Astro is a contemporary frontend framework that empowers builders to construct rapid and environment friendly static web sites. With Astro, builders can leverage the ability of contemporary JavaScript frameworks like React, Vue.js, and Svelte to create dynamic person interfaces whilst generating static HTML, CSS, and JavaScript recordsdata all the way through the construct procedure.
When coupled with WordPress as a headless content material control device (CMS), Astro permits seamless integration of backend APIs and frontend code, taking into account environment friendly building of static web sites with dynamic content material. This means gives a number of advantages.
Static websites generated with Astro and a WordPress backend boast awesome functionality. They are able to be served at once from a content material supply community (CDN), getting rid of the desire for server-side processing and leading to sooner load occasions and a smoother person enjoy.
This instructional guides you during the strategy of putting in place a static web site the usage of Astro hosted on Kinsta’s Static Website online Web hosting carrier and the usage of WordPress for the backend.
Contents
- 0.1 The position of WordPress as a headless CMS
- 0.2 Arrange your building atmosphere
- 0.3 Combine WordPress with Astro
- 0.4 Expand your web site with Astro and WordPress
- 1 Weblog Posts
- 1.1 )) } This code demonstrates methods to use the wpquery serve as to fetch information from the WordPress web site the usage of GraphQL and render it at the Astro web site. Use npm run dev to release the native building server and spot the newest WordPress weblog posts in your Astro web site at http://localhost:4321/weblog. Astro venture showing WordPress posts. To take care of dynamic routing for person weblog posts, you wish to have to make use of a mixture of Astro’s dynamic routes and WordPress GraphQL’s question variables. Via passing the put up ID or slug as a question variable, you’ll dynamically generate the web page content material for each and every weblog put up. This permits for a extra customized person enjoy in your web page. Deploy your static web site on Kinsta
- 1.2 Abstract
The position of WordPress as a headless CMS
A headless CMS, like WordPress, separates the content material control and supply layers. It permits the backend to take care of content material whilst a unique device, like Astro, handles the frontend.
WordPress serves as a content material repository, supplying information to the frontend, which shows the content material to customers by the use of an API. This structure complements flexibility via enabling you to repurpose content material for a number of outputs, giving WordPress customers a well-known content material control enjoy.
Decoupling the frontend from the backend additionally gives larger flexibility in frontend design and content material migration. Moreover, enabling accessibility thru APIs future-proofs the content material.
Arrange your building atmosphere
There are 3 steps you will have to practice to arrange your atmosphere:
- Set up Astro.
- Arrange a WordPress web site.
- Create a WordPress staging atmosphere.
Must haves
To practice this instructional, be sure to have the next:
- Elementary figuring out of HTML, CSS, and JavaScript
- Node.js and npm (Node Bundle Supervisor) or yarn put in in your laptop
- A Kinsta account. Join to host a static web site without cost and get right of entry to the MyKinsta dashboard.
Set up Astro
- To your venture, make a brand new listing and navigate into it.
- Scaffold a brand new venture via working the command underneath on your terminal:
npm create astro@newestThis step produces configuration activates. Set them up in accordance with what you wish to have.
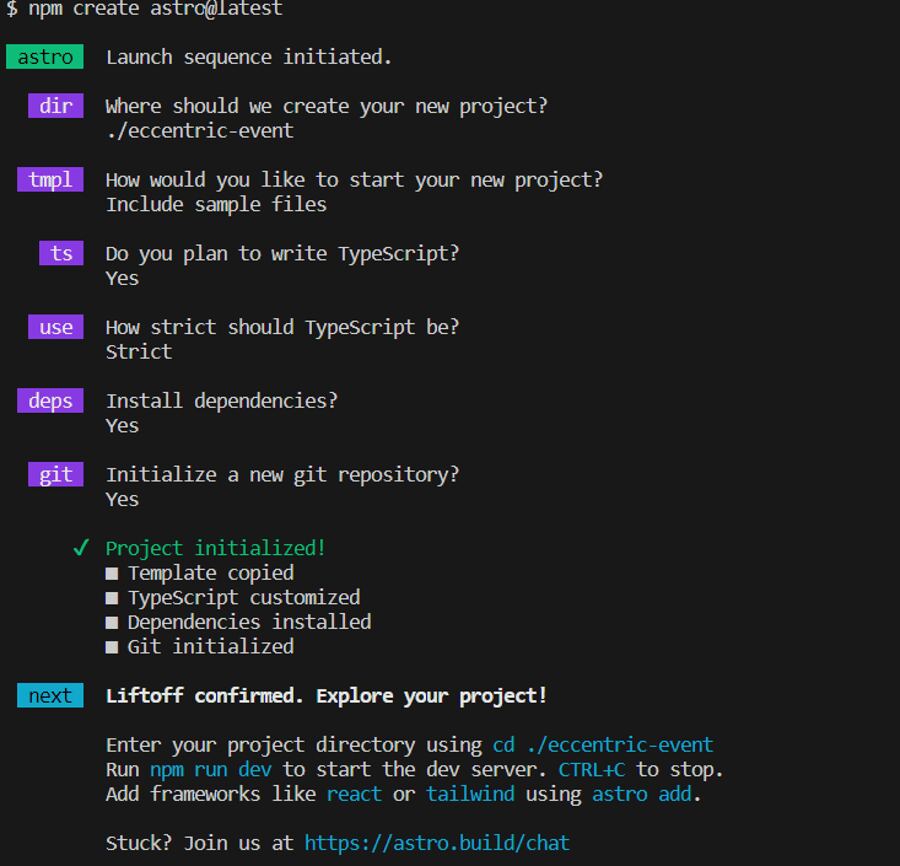
Directions for configuring your new Astro venture. - As soon as the venture is effectively created, run
npm run devto release the native building server on http://localhost:4321/.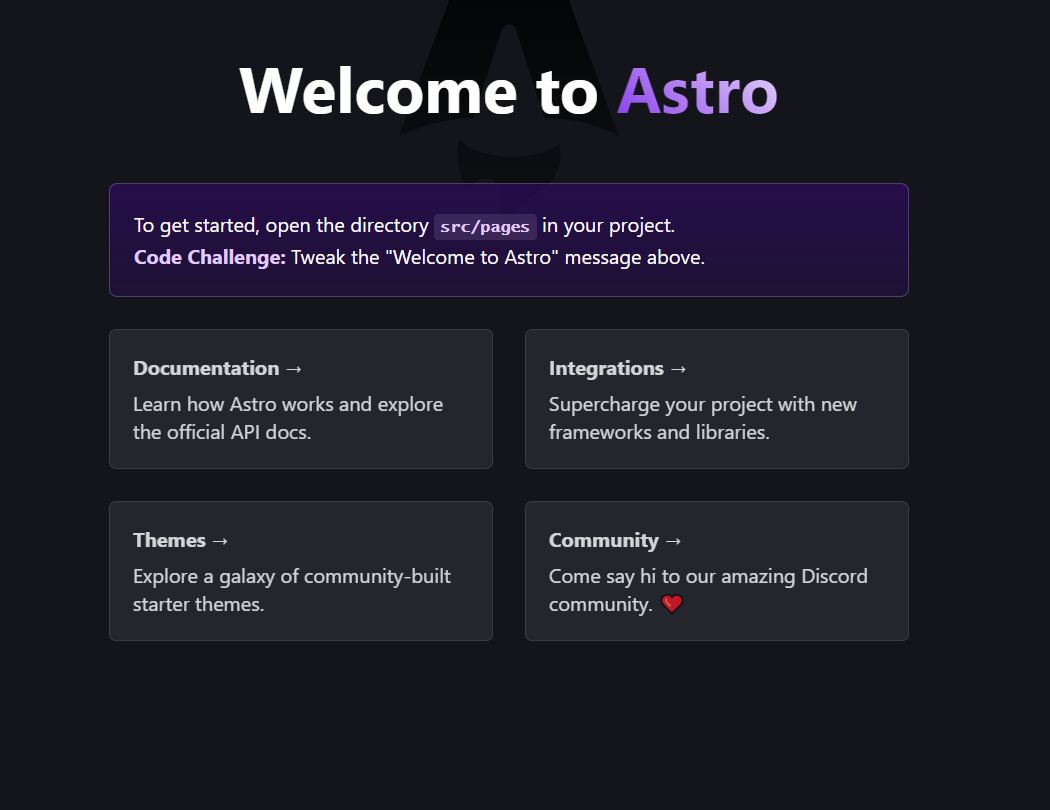
Astro effectively put in.


Arrange a WordPress web site on Kinsta
Kinsta is a high-end WordPress internet hosting supplier famend for its intuitive interface and high-performance infrastructure. Observe those steps to create a WordPress web site on Kinsta.
- In your MyKinsta dashboard, click on WordPress Websites after which Create a web site.
- Make a selection the Set up WordPress choice and click on Proceed.
- Supply a Website online title, choose a Knowledge heart location, and click on Proceed.
- Supply all different knowledge and click on Proceed.
- As soon as your web site is created, you must see the message, “Your web site has been created!”
Create a WordPress staging atmosphere
Each and every WordPress set up at Kinsta has the choice of organising a unfastened staging atmosphere become independent from the true manufacturing web site. That is nice for checking out new WordPress variations, plugins, code, and basic building paintings.
The stairs for making a WordPress Staging atmosphere on Kinsta are as follows.
- At the menu bar, click on Are living after which Create New Surroundings.
WordPress staging atmosphere. - Make a selection Same old atmosphere and click on Proceed.
- Click on Clone an current atmosphere, supply an Surroundings title, choose Are living for Surroundings to clone, and click on Proceed.
- As soon as deployed, you’ll to find the WordPress staging atmosphere at the Are living menu.
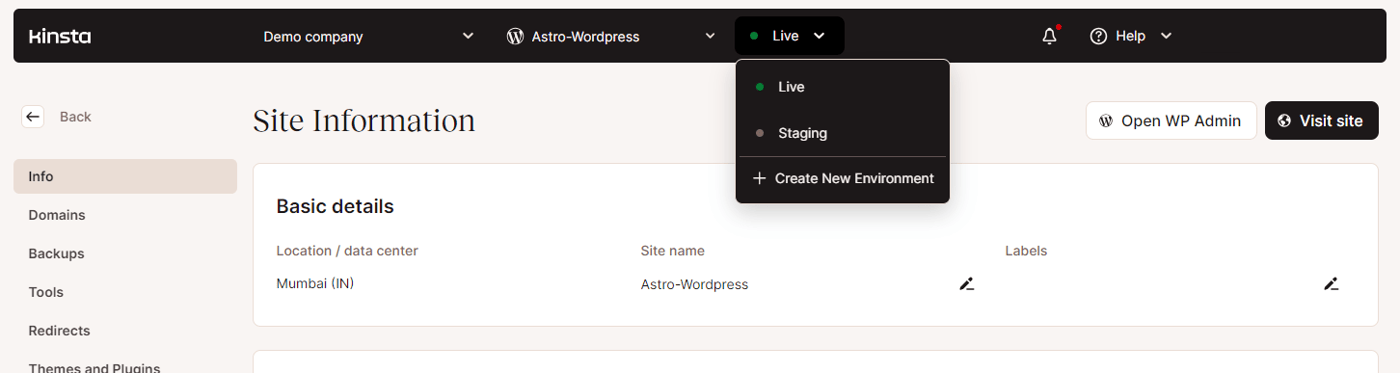
A hit advent of a staging atmosphere.


Combine WordPress with Astro
Two number one strategies exist for integrating WordPress with Astro: a REST API and GraphQL. This information makes use of the GraphQL means.
To combine WordPress with Astro, you will have to:
- Set up WPGraphQL.
- Attach Astro to WordPress.
Set up WPGraphQL
First, set up the WPGraphQL plugin in your WordPress web site prior to the usage of GraphQL to glue Astro to it.
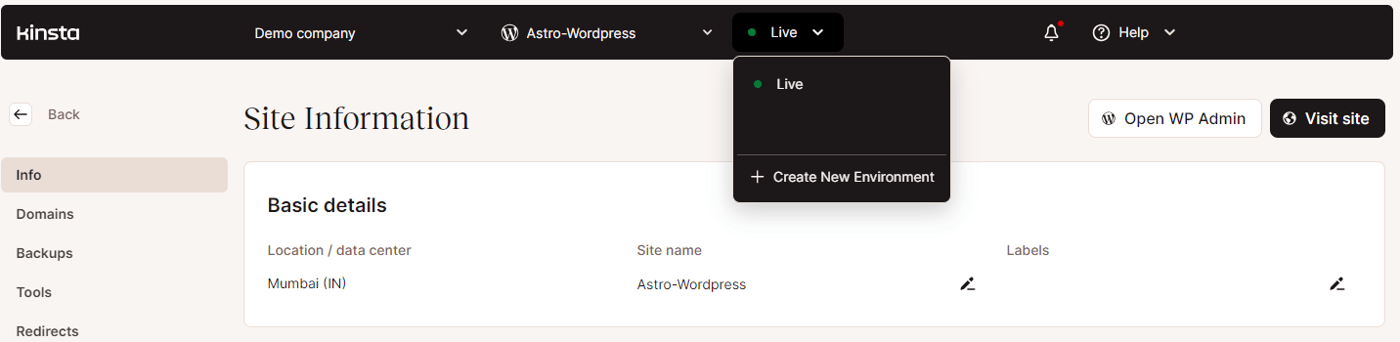
- At the MyKinsta dashboard, choose your WordPress web site.
- At the menu bar, click on Staging after which Open WP Admin within the upper-right nook.
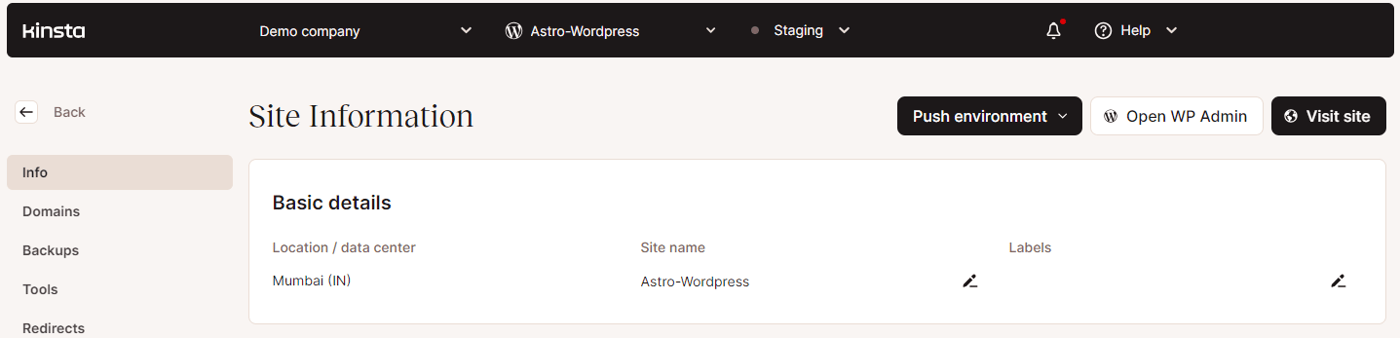
Website online Data web page. - Give you the credentials that you simply used when growing your WordPress web site.
- Click on the Plugins menu at the left navigation bar.
- Click on Upload New Plugin so as to add the WPGraphQL plugin.
- Seek for “WPGraphQL,” click on Set up New to put in the WPGraphQL plugin, after which click on Turn on.
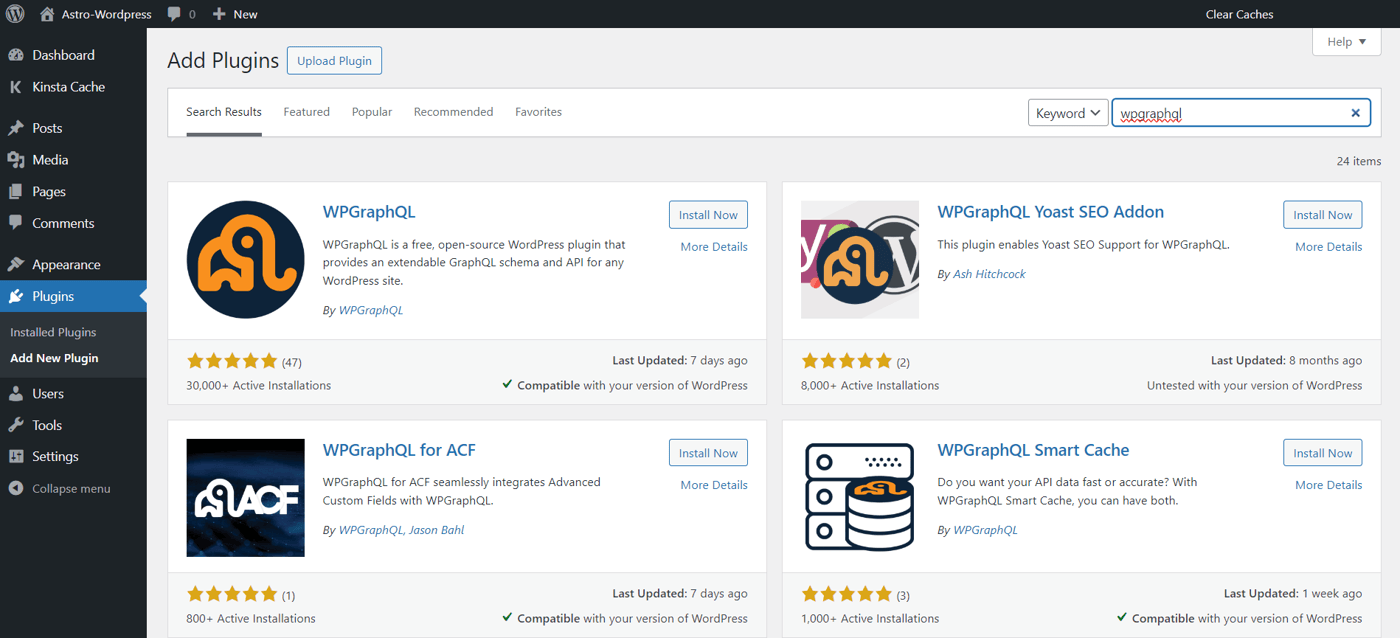
Putting in the WPGraphQL plugin. - To check that the WPGraphQL plugin you put in works as anticipated, open the GraphQL menu at the navigation bar and click on GraphiQL IDE.
- Use the next code within the GraphiQL IDE and click on Run at the best left to execute the GraphQL question:
{
  posts {
    nodes {
      slug
      excerpt
      identify
    }
  }
}
This GraphQL question successfully retrieves the
slugs,excerpts, andtitlesof posts from the WordPress web site.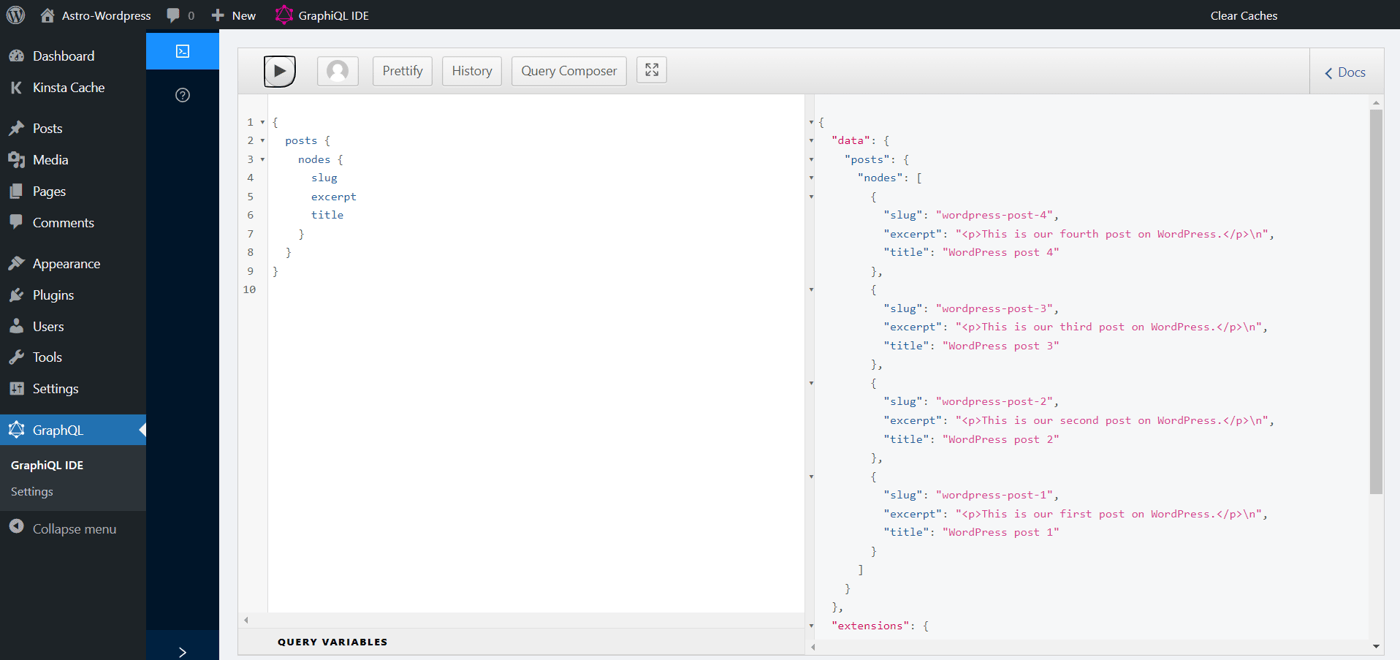
Operating the GraphQL question. At the left facet of the GraphiQL IDE, you’ll see the record of posts returned via working the GraphQL question. Your WordPress GraphQL endpoint is out there at
https://your_wordpress_staging_url/graphql.


Attach Astro to WordPress
To glue Astro to WordPress, practice those directions:
- Create a folder named graphql within your Astro venture’s src folder.
- Create a wordPressQuery.ts report within the graphql folder.
- Use the next code within your wordPressQuery.ts report. Remember to exchange
https://your_wordpress_staging_url/graphqltogether with your WordPress staging URL.interface gqlParams { question: String; variables?: object; } export async serve as wpquery({ question, variables = {} }: gqlParams) { const res = look forward to fetch('https://your_wordpress_staging_url/graphql', { means: "put up", headers: { "Content material-Sort": "software/json", }, frame: JSON.stringify({ question, variables, }), }); if (!res.good enough) { console.error(res); go back {}; } const { information } = look forward to res.json(); go back information; }This code defines an interface
gqlParamsand an asynchronous serve aswpquerythat facilitates GraphQL queries to the WordPress web site.
Expand your web site with Astro and WordPress
- To create a brand new static web page in Astro, create a report named weblog.astro within the src/pages listing.
- Paste the next code within the newly created report:
--- import Format from "../layouts/Format.astro"; import { wpquery } from "../graphql/wordPressQuery"; const information = look forward to wpquery({ question: ` { posts{ nodes{ slug excerpt identify } } } `, }); ---Weblog Posts
{ information.posts.nodes.map((put up: any) => ( <> )) }This code demonstrates methods to use the
wpqueryserve as to fetch information from the WordPress web site the usage of GraphQL and render it at the Astro web site. - Use
npm run devto release the native building server and spot the newest WordPress weblog posts in your Astro web site athttp://localhost:4321/weblog.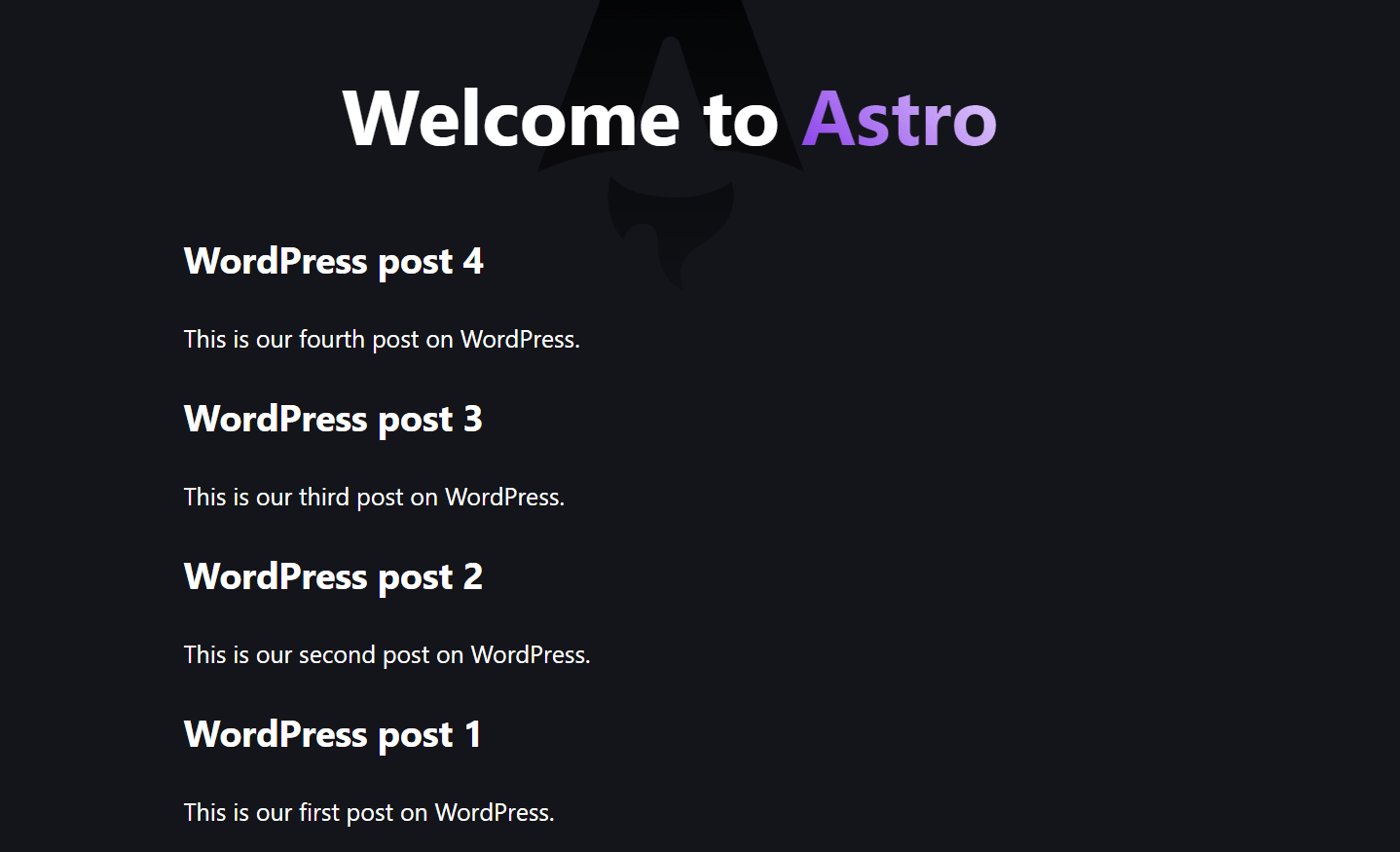
Astro venture showing WordPress posts.

To take care of dynamic routing for person weblog posts, you wish to have to make use of a mixture of Astro’s dynamic routes and WordPress GraphQL’s question variables. Via passing the put up ID or slug as a question variable, you’ll dynamically generate the web page content material for each and every weblog put up. This permits for a extra customized person enjoy in your web page.
Deploy your static web site on Kinsta
Now, push your codes in your most well-liked Git supplier (Bitbucket, GitHub, or GitLab). Subsequent, practice those steps to deploy your static web site to Kinsta:
- Within the MyKinsta dashboard, click on Static Websites after which Upload web site.
- Authorize Kinsta together with your Git supplier.
- Make a selection a GitHub Repository and a Default department. Supply a Show title to your static web site and choose the Automated deployment at the dedicate field. This allows the automated deployment of all new adjustments made to the repository. Click on Proceed.
- Within the Construct settings phase, Kinsta routinely completes all of the fields. Depart the whole lot as is and click on Create Website online.
- Get right of entry to your Astro web site via going to the URL that looks because the area at the Assessment web page of your deployed web site. You’ll be able to get right of entry to weblog posts by the use of
https://your_kinsta_site_url/weblog.
Abstract
There may be extra to what you’ll do with Astro and WordPress. The WordPress API can be utilized to get right of entry to quite a lot of information out of your web site and create distinctive use instances with Astro.
With Kinsta’s controlled WordPress Web hosting, you acquire get right of entry to to a powerful infrastructure, international CDN, edge caching, a couple of information facilities, and enterprise-level options. This guarantees a quick and protected atmosphere to your WordPress web site.
Moreover, whilst you use frontend frameworks like Astro with headless WordPress, you’ll host its static recordsdata on Kinsta’s Static Website online Web hosting without cost. This implies you handiest pay for WordPress internet hosting, maximizing potency and cost-effectiveness.
What’s your tackle headless WordPress and Astro? Have you ever explored their doable for growing distinctive answers? Percentage your reviews within the remark phase underneath.
The put up Construct a static web site with WordPress and Astro seemed first on Kinsta®.
WP Hosting