Internet construction is intrinsically associated with collaboration. As a rule you’ll be operating with different builders, and although you don’t, Git mean you can in lots of different ways.
Git is the software that controls the edition of the programs we make. It’s utilized by solo developers, giant corporations, or even Linux, the largest open supply venture on the planet.
As a web developer, it’s extraordinarily necessary to know the way to make use of Git for internet construction correctly. We’re now not simply speaking about “git upload”, “git dedicate”, and “git push”. You will have to know the entire workflow of making a internet venture with Git.
Now not satisfied but? Let’s get started!
Contents
Why Use Git?
Those are simply one of the causes to begin the usage of Git:
- Group: As an alternative of managing your venture in folders like v1, v2, v3, and so forth, you have got one venture with a unique database that retail outlets all of the variations of the information
- Collaboration: Git means that you can and other folks paintings at the similar venture on the similar time with out developing conflicts.
- Open-source: Git is open-source, but it surely’s additionally the instrument we use to collaborate and create nice open-source instrument. Any individual could make pull requests to open-source tasks on platforms like GitHub or Bitbucket.
- Platform flexibility: These days, you have got many various Git webhosting products and services to choose between, comparable to Gitlab, GitHub, Bitbucket, and SourceForge. You’ll be able to even use a self-hosted resolution for all of your tasks.
- Simple backups: Undo errors conveniently, and not lose your venture codebase.


We’ve discussed the time period GitHub a few times now, so what’s the adaptation between Git and GitHub?
This may increasingly confuse you should you’re completely new to Git. To place it in easy phrases, Git and GitHub are related yet different tools.
Git is the edition keep an eye on gadget (VCS) we use to stay keep an eye on of the adjustments of our information, whilst GitHub is a carrier we use to retailer our venture information and their Git historical past on-line (situated within the .git/ folder of your venture).
Git is put in in the neighborhood, for your system, and with out webhosting products and services like GitHub or GitLab, it will be very tough to collaborate with different developers.
GitHub supercharges Git through including different options that make stronger collaboration, like cloning, forking, and merging. In combination, those two gear mix to convey you a reasonably pleasant ecosystem to broaden, set up, and display your venture to other folks.
Fundamental Git for Internet Building Workflow
Within the subsequent sections, you’ll be taught extra about Git workflow for internet construction thru hands-on follow.
Set up Necessities
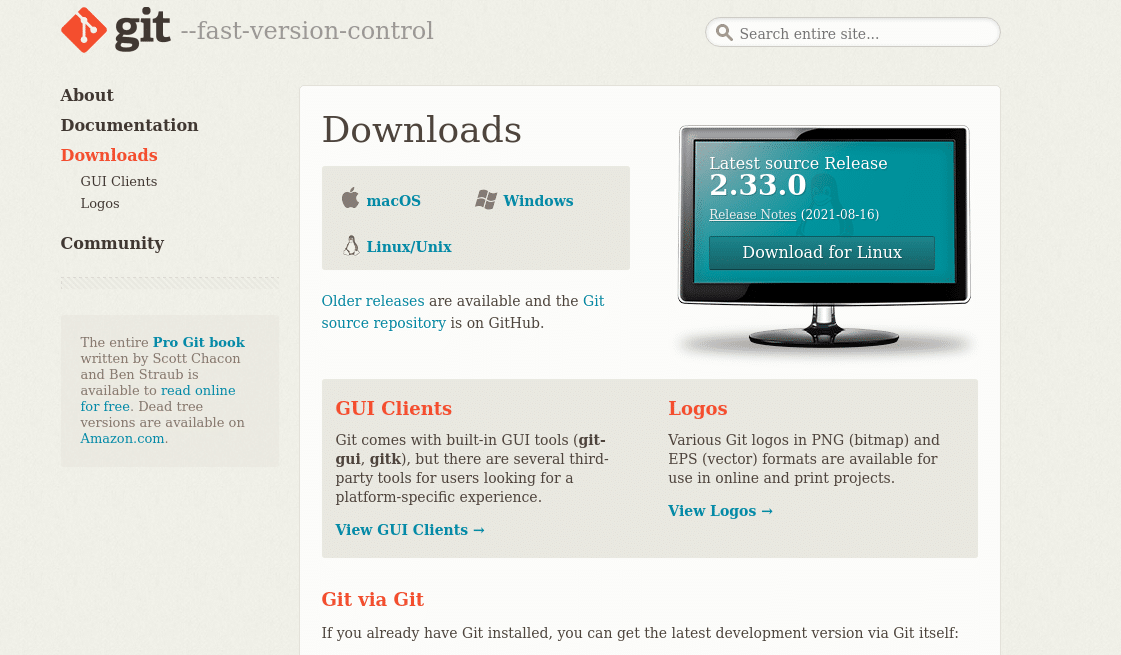
If you happen to’ve now not put in Git but, it is a very best time. It’s simple to put in and to be had on maximum working methods.
Obtain it from the official downloads page, or set up it with a bundle supervisor should you’re the usage of Linux or macOS:
To check that the entirety went tremendous with the set up, stir up a terminal on Linux or macOS through looking for “Terminal” for your programs menu, or through opening Git bash on Home windows (which comes put in with Git through default).
Then kind:
git --version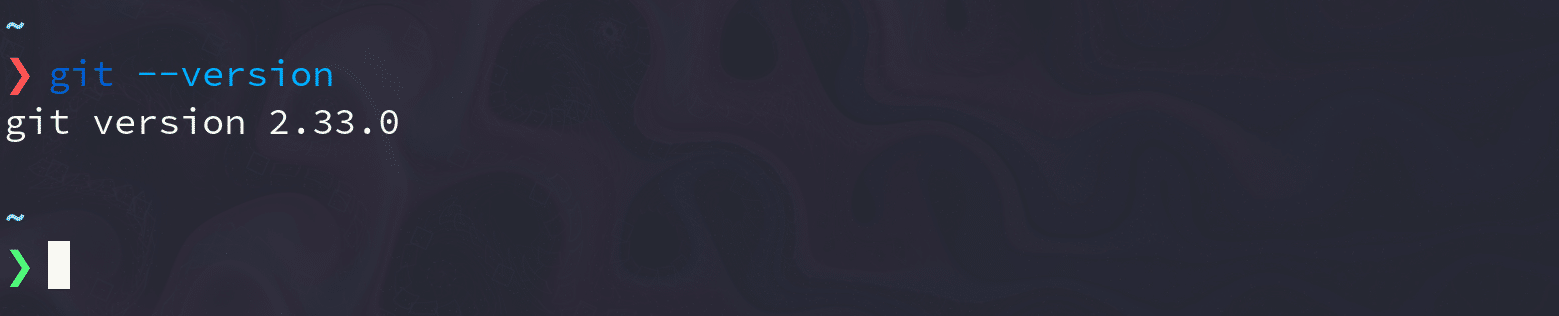
If you happen to get a Git edition as a reaction, you’re excellent to move.
We’ll additionally want a GitHub account, so remember to sign up or log in to GitHub:
After you have Git put in and feature logged into your GitHub account, you’ll be able to transfer directly to the following segment.
Fundamental Git Workflow for Collaborative Tasks
As discussed previous, more often than not you received’t be growing solo tasks. Participating is a key talent, and Git and GitHub lend a hand us to make it a easy but efficient procedure.
The standard workflow of a Git venture seems like this:
- Get an area reproduction of the venture through cloning a repository, or repo. If you happen to’re participating, you will have to fork the repo first.
- Create a department with a consultant identify of the characteristic you’ll be operating on.
- Edit the venture.
- Dedicate the adjustments for your native system.
- Push the adjustments to the faraway repo.
- Create a pull request to the unique repo.
- Merge and resolve conflicts in the primary department of the unique repo.
Educational
Now it’s time to get our arms grimy!
On this information, you’re going to create a easy HTML web page. For sensible functions, you’ll fork the bottom venture from the HTML site repository for your GitHub account. This will also be finished for all public to be had repositories.
To fork the HTML web site, move to this GitHub repository and click on at the Fork button situated on the best proper of the web page:
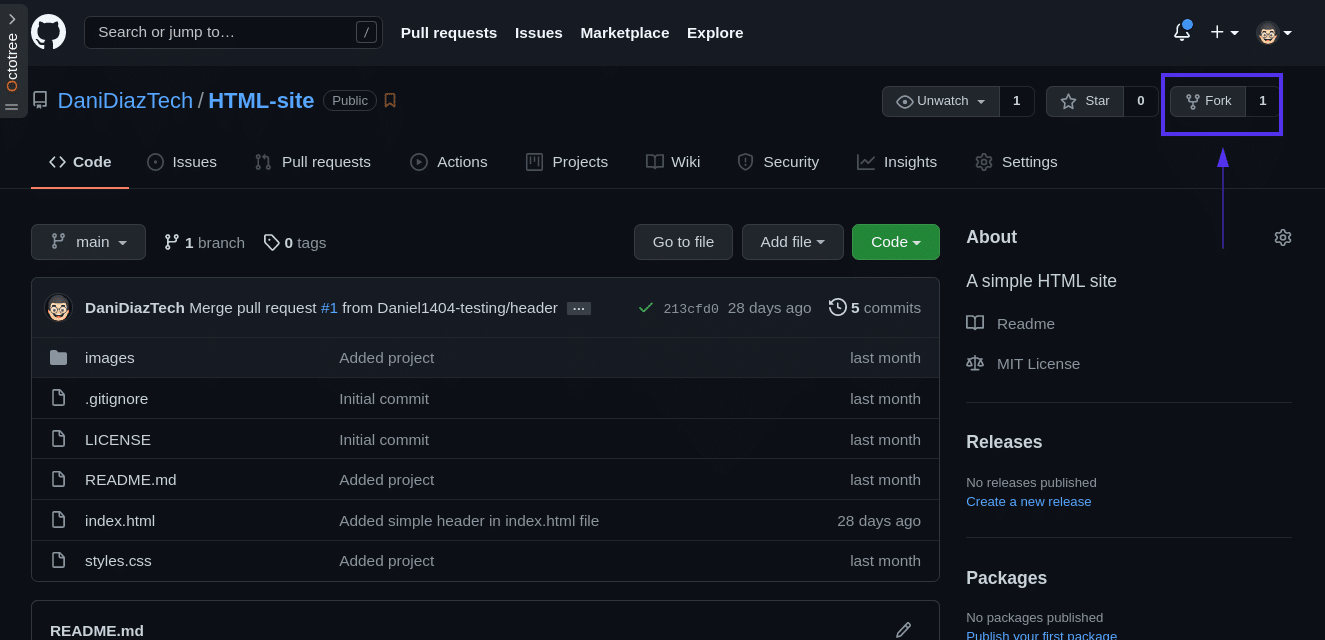
Now you have got a fork of the unique repo that’s most effective to be had for your GitHub account. It’s the very same repo — till you begin to dedicate adjustments.
As you’ll be able to see, forking a public repo takes simply a few seconds. That is nice for open-source tasks, however be mindful that if your company has a non-public repo, you’ll wish to be incorporated as a contributor prior to seeking to fork it.
It’s time to convey your fork for your native system. To do that, you wish to have to clone it with the command git clone, which retrieves the Git repository from the faraway server:
git clone remote_urlYou want to interchange remote_url together with your fork’s URL. To get the precise URL of a GitHub repo, move to its web page and click on on Code. Then make a selection SSH, and duplicate the hyperlink it offers you:
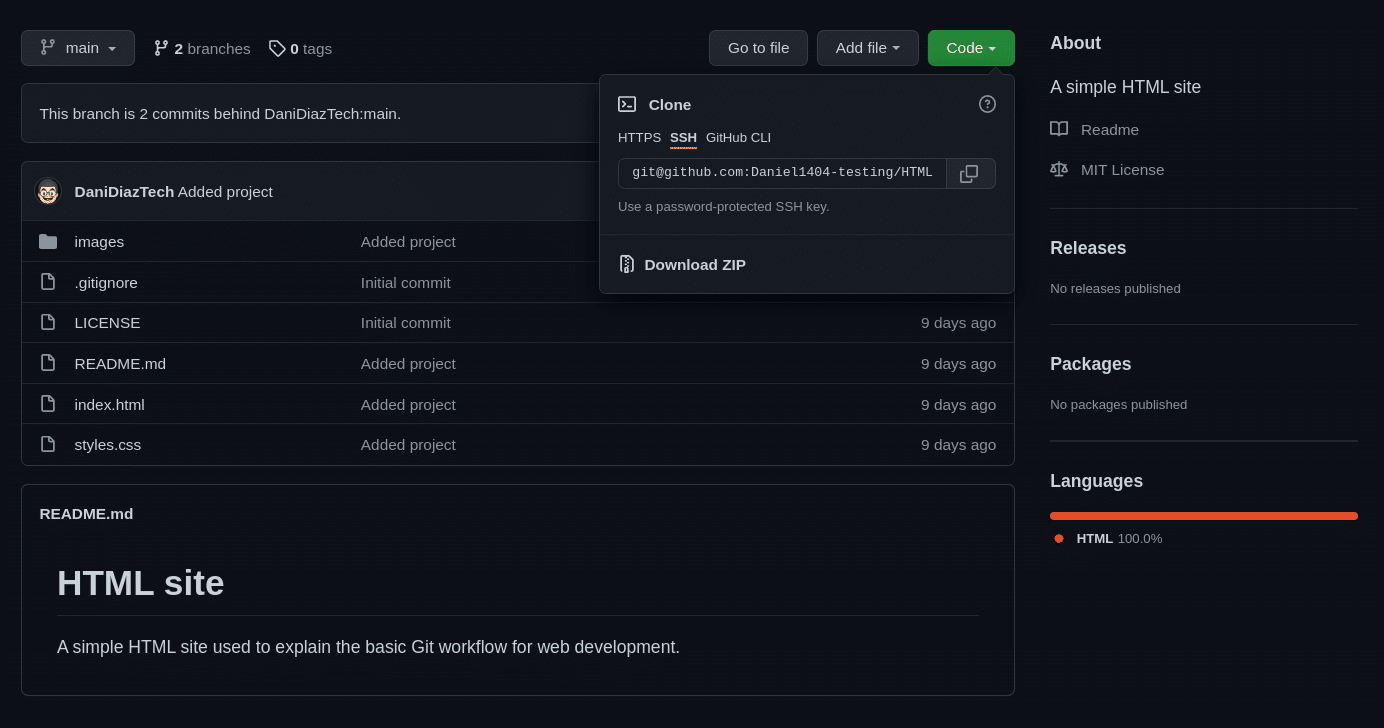
The command you could possibly run to clone the forked repo is:
git clone [email protected]:yourusername/HTML-site.gitWhilst you clone a repo, you get a folder with its identify. Inside that folder is the venture’s supply code (on this case, the HTML web site) and the Git repo, which is situated inside a folder named .git.
You’ll be able to see the listing of information within the new listing through opening the brand new folder in a graphical document supervisor, or through checklist them without delay from the terminal with the ls or dirinstructions:
# Linux/macOS
ls HTML-site/
# Home windows
dir HTML-site
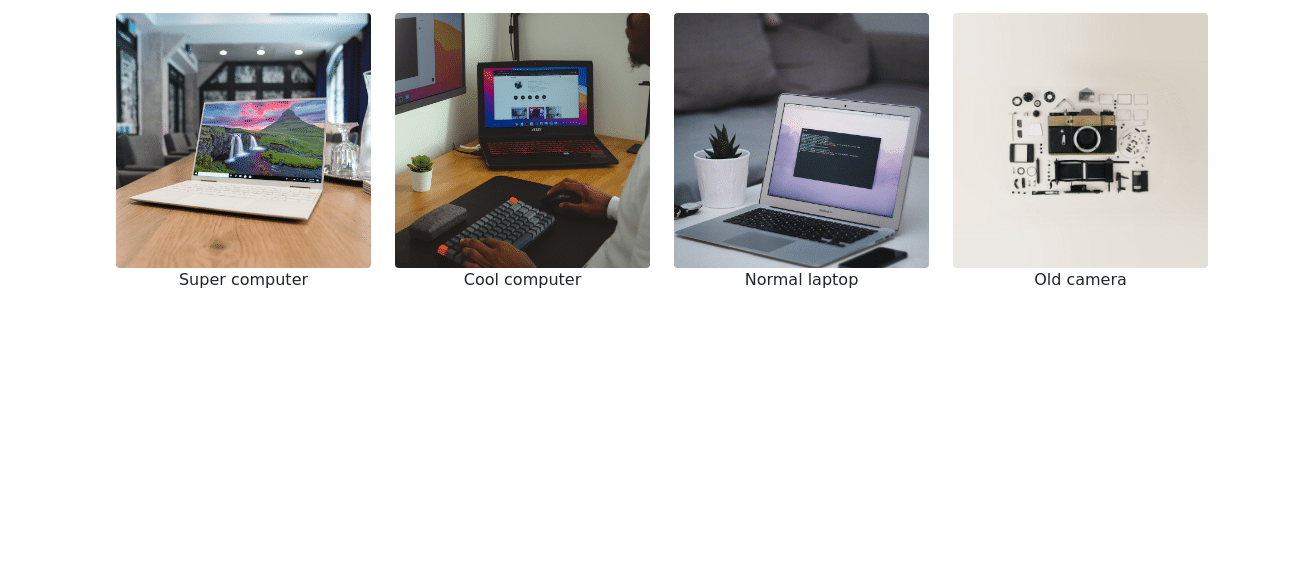
.git pictures .gitignore index.html LICENSE README.md kinds.cssThis HTML web site could be very easy. It makes use of Bootstrap for sensible functions and a couple of footage from Unsplash, the place you’ll be able to download free images for your site.
If you happen to open the index.html document for your browser, you’ll see a easy web page with a couple of pictures:
It’s time to mess around with this venture. It feels very empty, and perhaps a header with the identify of the web site may improve the consumer enjoy.
To try this, input the HTML-site listing and create a department named header. On this new department, we will be able to edit all of the information and enforce as a lot code as we would like as it received’t have an effect on the primary (authentic) department.
Run the next command:
git checkout -b header
This may occasionally create a department named “header” and turn you over to it proper after this. It’s identical to:
git department header
git checkout header
To verify the entirety went tremendous, run:
git standing
# On department header
# not anything to dedicate, operating tree blank
You’ll see that you just’ve been shifted from the “major” department to the “header” department, however the operating tree remains to be blank since we haven’t edited any information.
For your favorite code editor, open the index.html document for your branched venture. This document comprises some hyperlinks to Bootstrap 5, so we will be able to benefit from the framework’s ready-to-use elements.
Upload the next code to the index.html document within the tag and above the picture container:
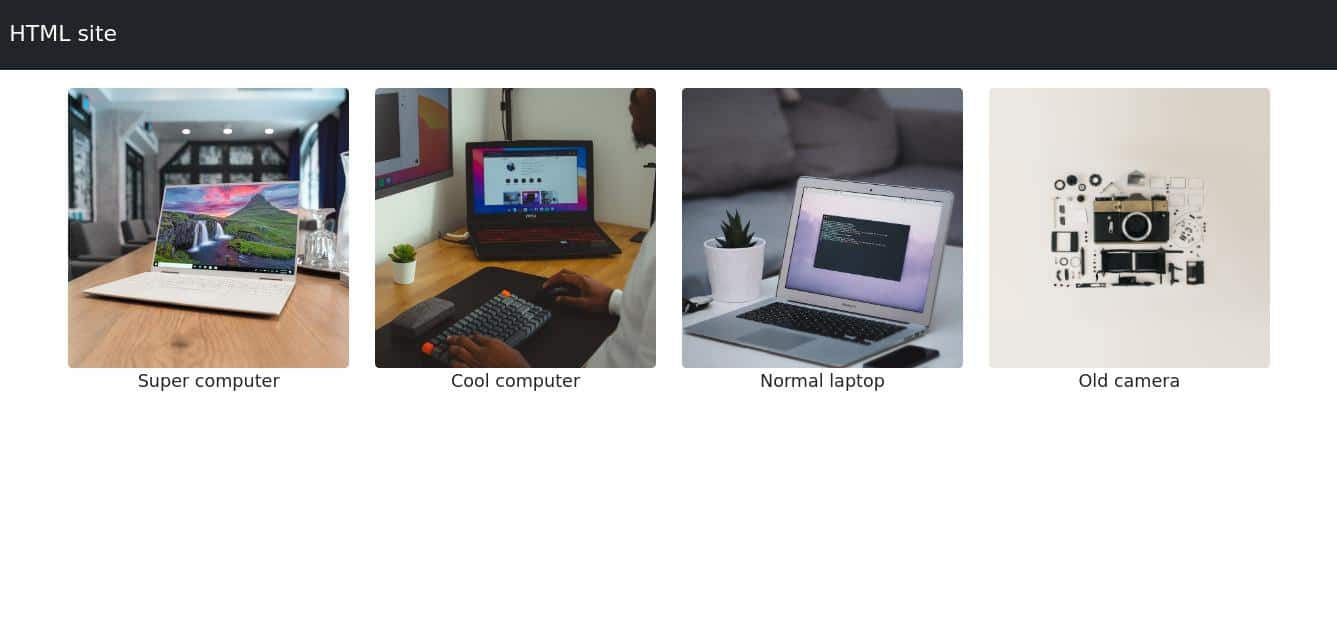
Significantly better-looking! Be at liberty to make different branches and adjustments you would like.
When you’re finished modifying the venture, it’s time to dedicate all of the adjustments for your native repo. Within the venture listing, kind the next into your terminal:
git upload --all
git dedicate -m "Added easy header in index.html document"Whilst you first get started a venture, it’s commonplace to have descriptive dedicate messages, however with time and shifted center of attention, the messages’ high quality has a tendency to move down. Be sure to stay alongside of excellent naming follow.
Now you’ve made a dedicate for your native repo (which remains to be most effective to be had for your laptop), it’s time to push it to the faraway repository.
If you happen to attempt to push the dedicate as standard, it received’t paintings since you’re recently operating at the header department. You want to set the upstream department for header:
git push --set-upstream foundation headerRanging from August 13, 2021, GitHub calls for the usage of SSH authentication, so be sure to have your keys appropriately arrange.
Uninterested in subpar stage 1 WordPress webhosting strengthen with out the solutions? Check out our world-class strengthen workforce! Check out our plans
After this, you will have to be capable to see a brand new department named header for your forked repository (e.g. https://github.com/yourusername/HTML-site/branches):

To create a pull request to the unique repo, click on on Examine, down within the Energetic branches segment.
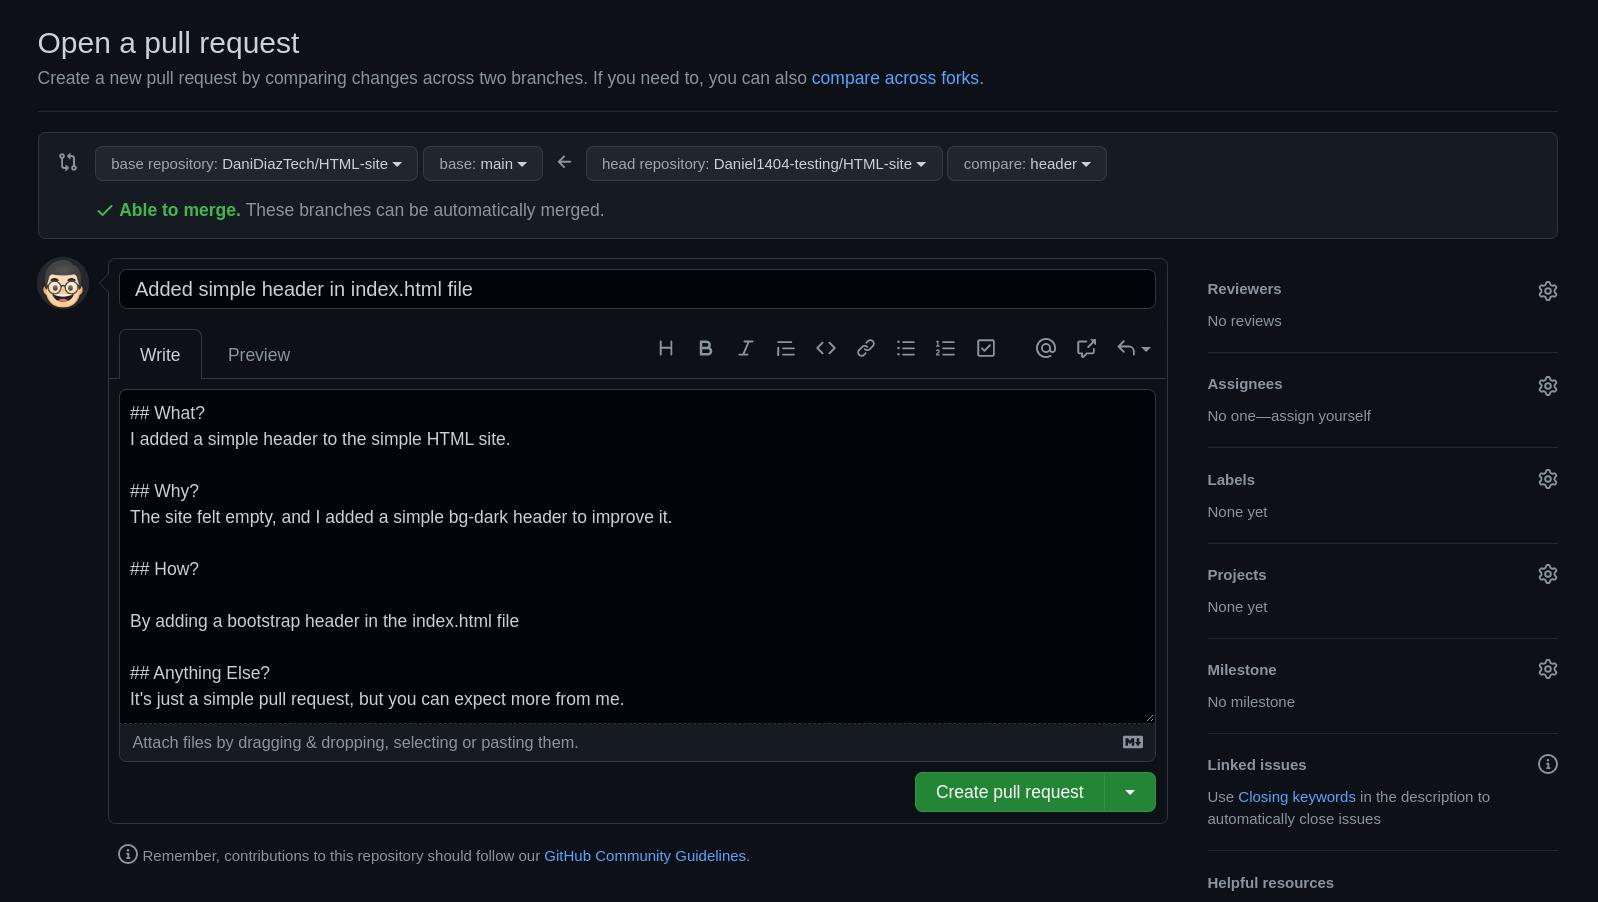
This may occasionally information you to a pull request, the place you’ll want to select what department (the unique or your fork) you wish to have to merge with. By way of default, it presentations the technique to merge with the bottom repository:

When you click on at the pull request choice, you’ll wish to write a brief description of the adjustments made, simply as together with your previous commits. As soon as once more, you should be concise but descriptive:
Click on at the Create pull request button and stay up for the bottom repository proprietor to just accept or come up with comments for your adjustments.
Congratulations — you’ve simply finished all of the steps of a commonplace Git workflow for internet construction!
This was once a in reality fundamental instance, however the common sense extends throughout tasks of all sizes. You’ll want to enforce this workflow carefully in larger collaborative tasks as neatly.
Easy methods to Use Git at Kinsta
If you happen to’re a Kinsta user, you have already got two techniques to make use of Git and GitHub from inside your MyKinsta portal.
Let’s get started with the primary choice. You’ll be able to simply SSH in and pull a repo from any Git webhosting carrier like GitHub, Gitlab, or Bitbucket.
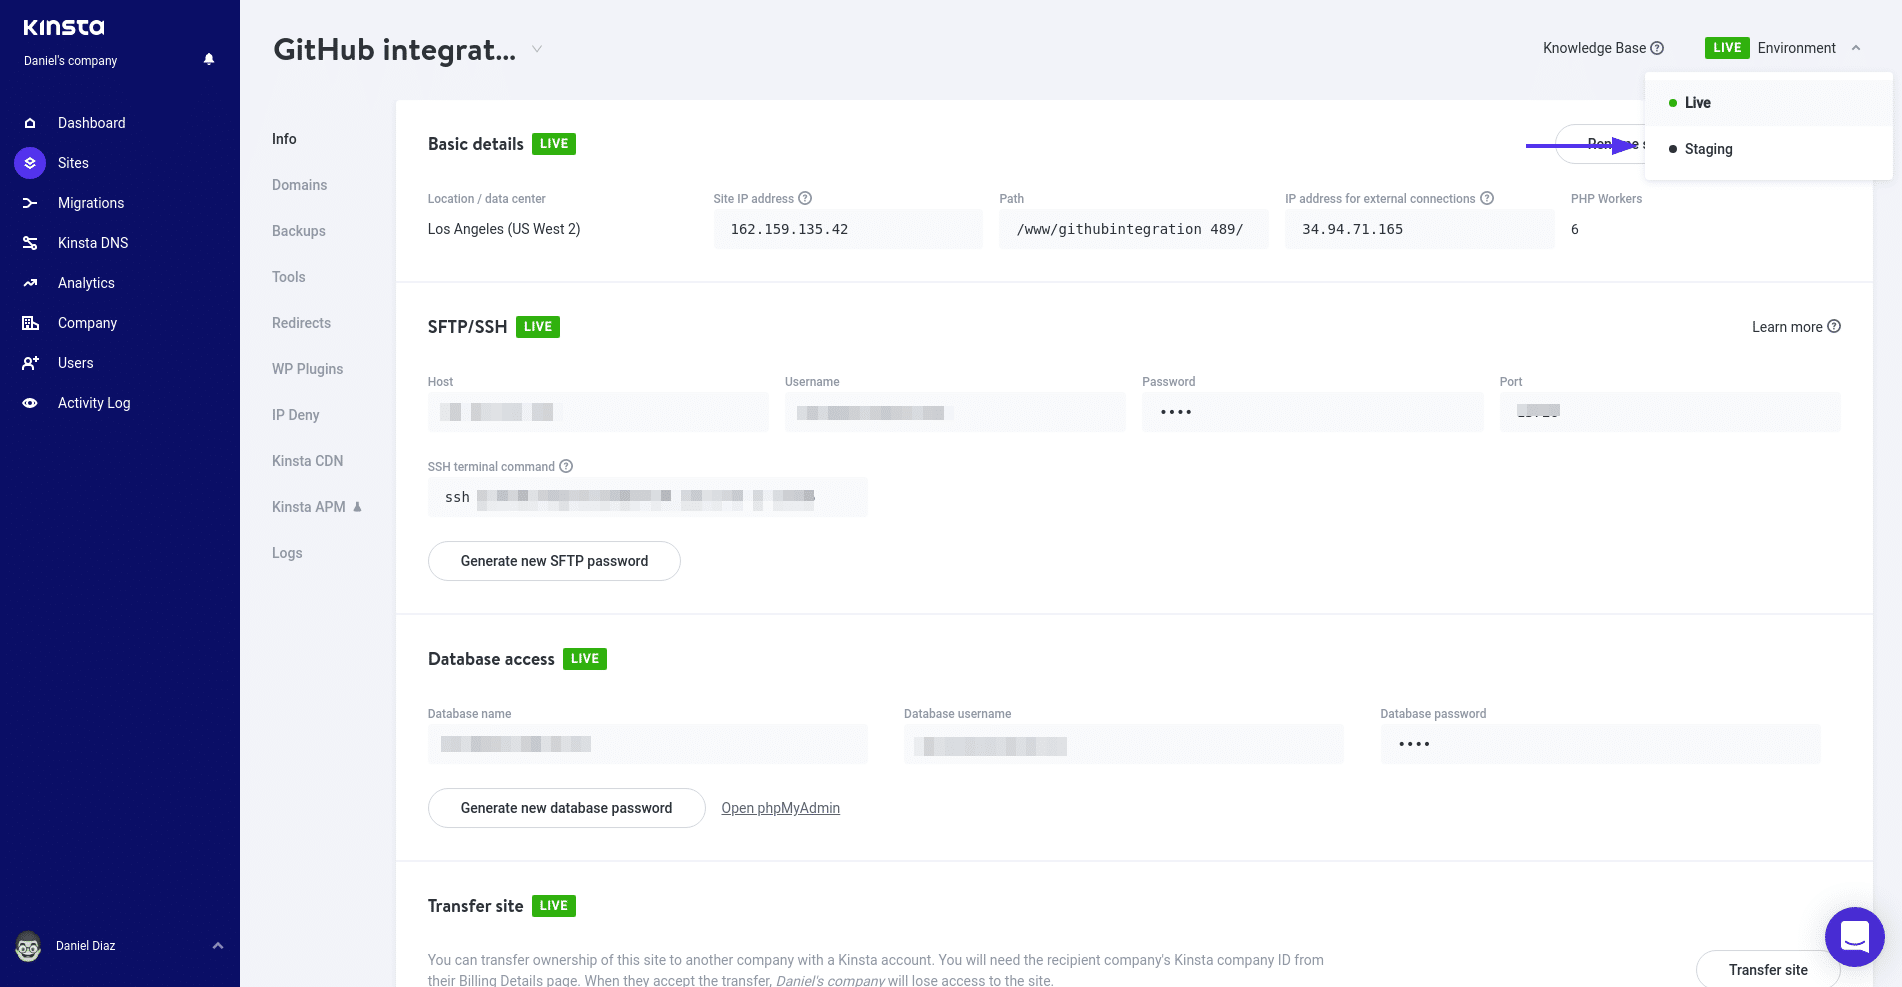
To do that, move for your Websites tab, make a choice a web site, and move to your SSH details section, and duplicate the SSH terminal command.

Login by the use of SSH for your web site through pasting the command above for your terminal, and getting into for your web site’s public folder (situated beneath /www/yoursitename/). Right here’s the place all your WordPress information are situated, so you’ll be able to pull down a Git repo with a customized theme or plugin that you just’ve been operating on.
Right here’s the way you’d pull down a Git repo in a easy command:
ssh [email protected] -p PORT "cd /www/my_site/public && git pull https://github.com/consumer/repo.git"
Now, introducing the brand new GitHub deployment characteristic at Kinsta, you’ll be able to deploy a complete WordPress web site from a GitHub repository.
Your GitHub repo will have to come with a replica of the WordPress core files, and naturally, your web site’s content material inside the wp-content folder.
Let’s take a snappy take a look at this feature.
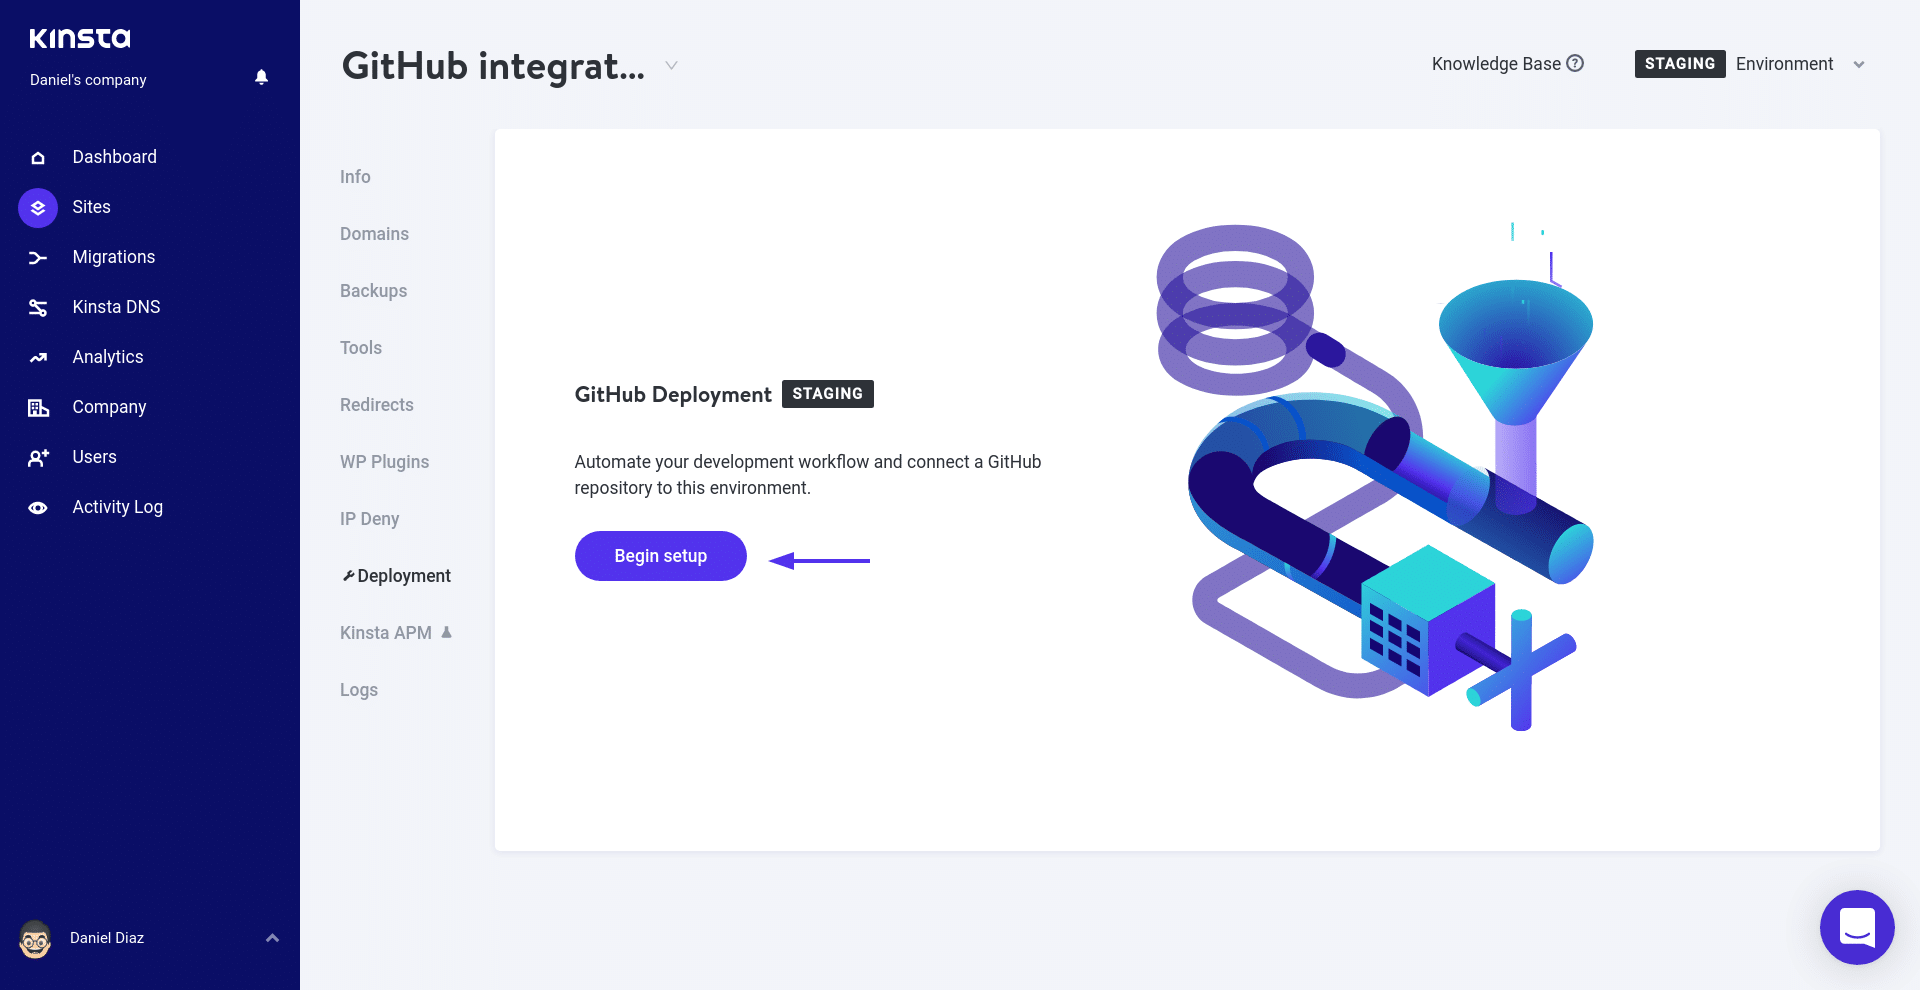
Cross to considered one of your corporate’s websites and create a staging atmosphere. This wouldn’t take longer than a few mins.
When you’re for your staging web site, move to the Deployment tab and click on on Start setup button. You’re going to look a GitHub modal that may let Kinsta attach together with your GitHub account.
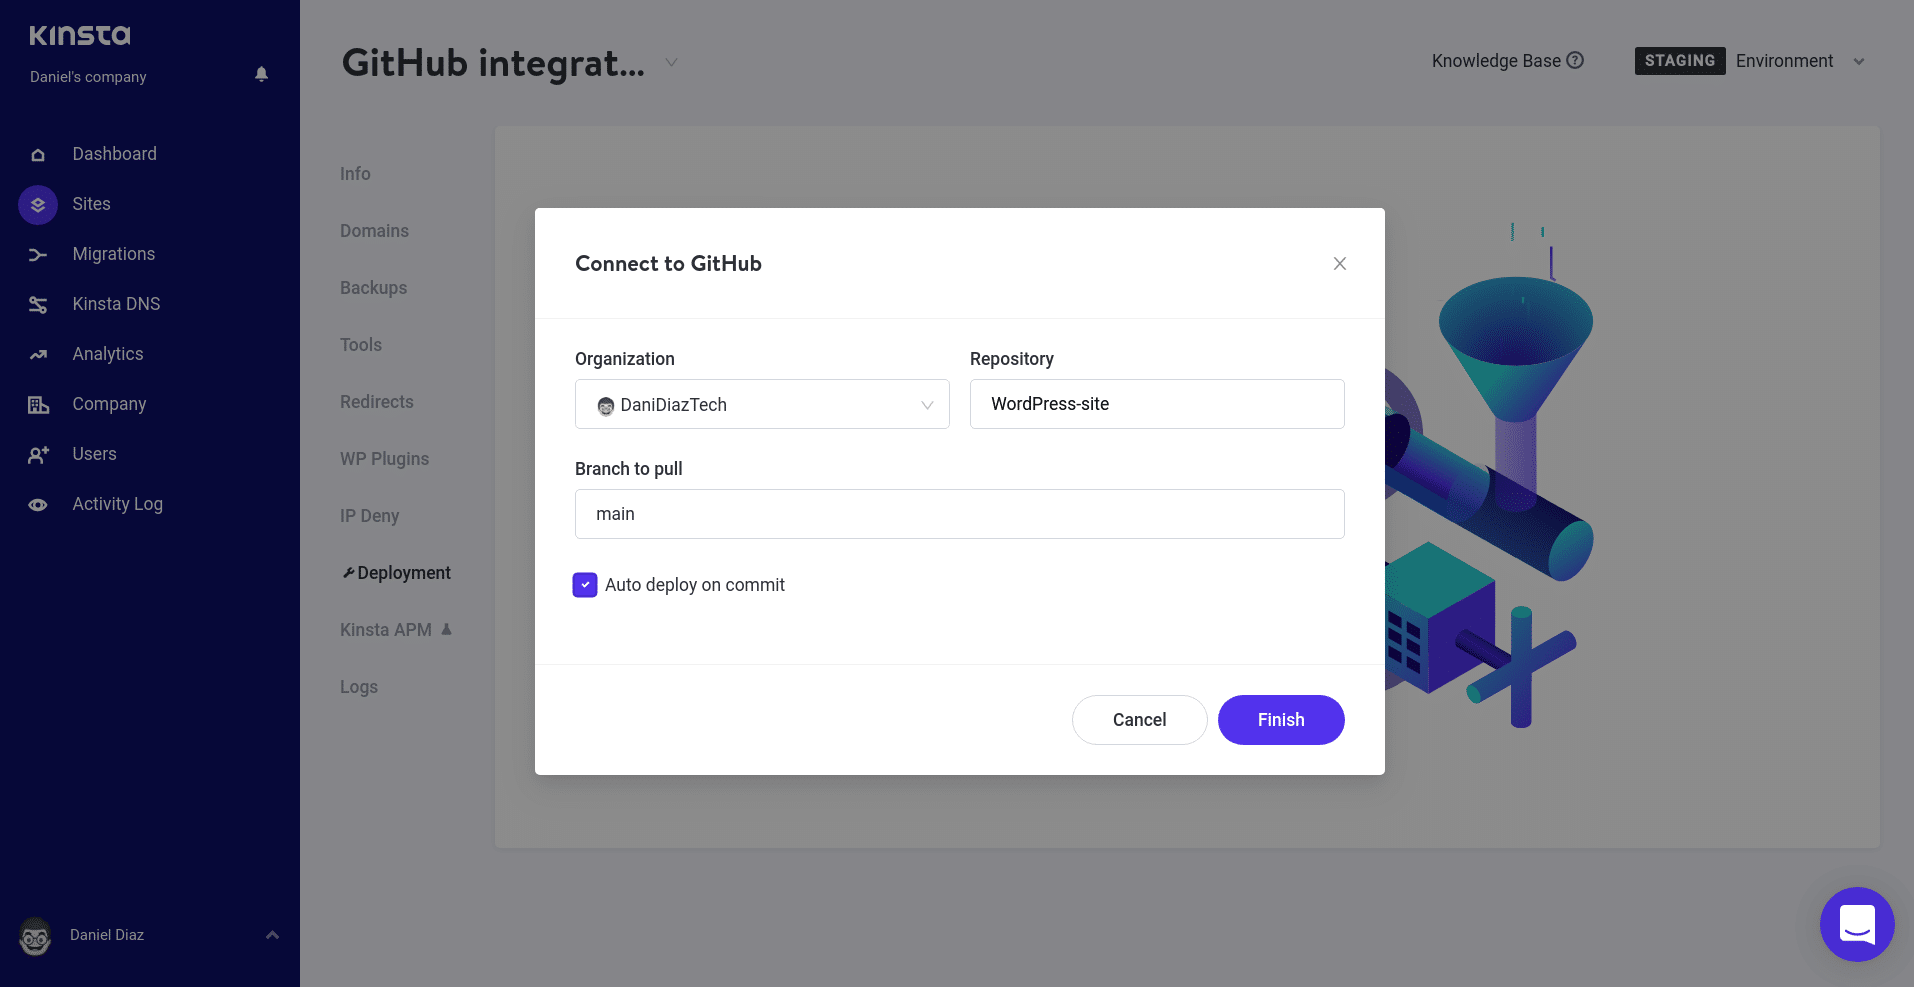
Now, make a choice the repo you’re going to tug your web site from.
In any case, deploy your web site and consult with it thru your staging web site URL.
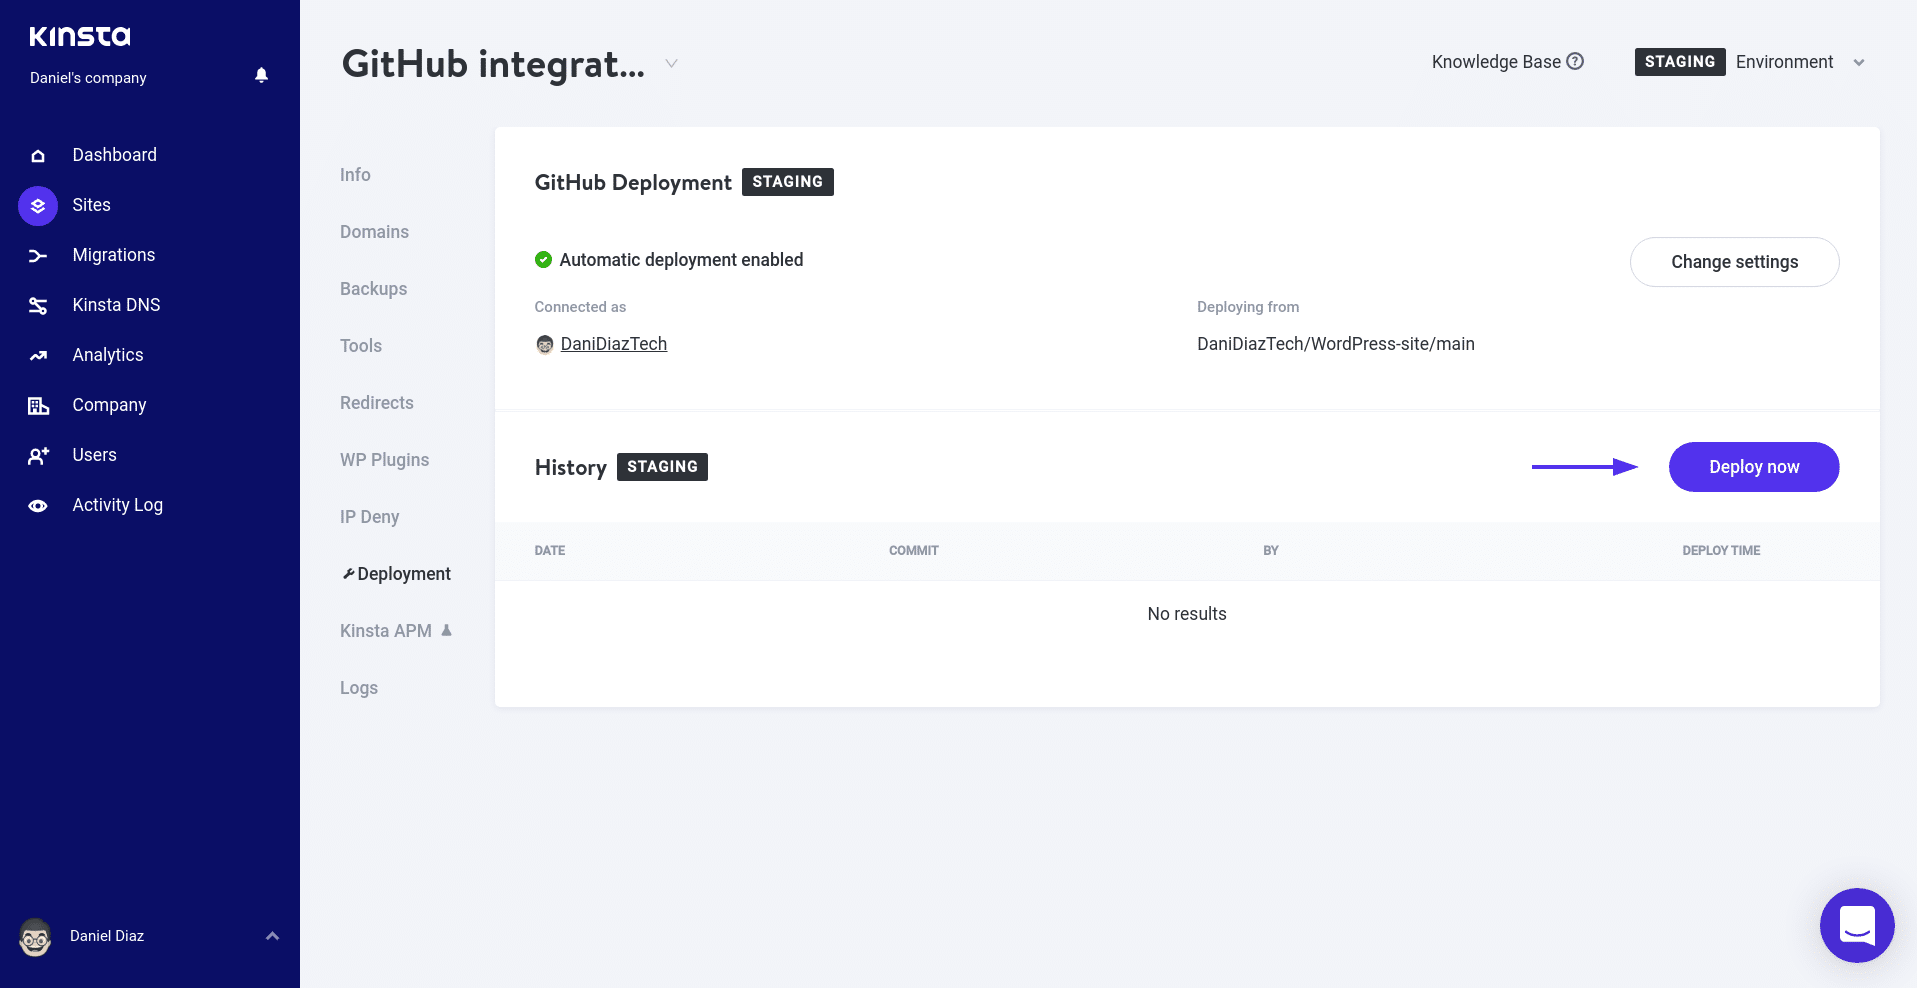
This selection remains to be in Beta, however quickly each and every Kinsta consumer may have get right of entry to to it.
The usage of Git and Kinsta is usually a robust aggregate if you realize to make use of them neatly. Whilst our educational right here items only a easy instance, you’ll be able to be taught a lot more from our Git knowledge base article.
Step up your Git knowledge with this guide to a typical project workflow 
Abstract
These days, Git is a must-learn instrument for internet construction, since more often than not you’ll be participating with others to create the most productive venture you’ll be able to.
On this article, we’ve mentioned some necessary causes to make use of Git for your tasks, and we’ve proven you the elemental workflow of participating in a Git repo.
Git is the sort of robust instrument that you’ll be able to lengthen its utilization even to WordPress hosting, so it will probably most effective get advantages you to be told and enforce it as a part of your internet construction talents arsenal.
Do you have got some other tips for making improvements to this fundamental Git workflow for internet construction? Tell us within the feedback segment!
The submit Git for Web Development: Get to Know the Typical Workflow of a Project gave the impression first on Kinsta®.
WP Hosting