
Comments and surveys lend a hand form your business plan in step with your shoppers’ responses. ClickUp Paperwork are one of the vital many helpful options that ClickUp gives to collect data to your shoppers.
This educational is designed to lead you on find out how to create a kind thru ClickUp. We will be able to stroll you throughout the technique of growing and sharing shape URLs and find out how to get admission to the knowledge crammed by way of the bureaucracy. Let’s get began.
Contents
What’s ClickUp
ClickUp is a flexible productiveness device that gives the whole thing from making plans, monitoring, and managing initiatives and advertising and marketing campaigns in addition to growing environment friendly workflows. The app gives a blank interface, cross-platform availability, and integration with many well-liked apps.
Additionally, it options advertising and marketing dash templates, time-tracking features, real-time reporting, crew collaboration and communique, and top customization. All in all, you’ll have your groups, duties, and gear in combination on one productiveness platform.
Consult with Signal Up ClickUp
Making a ClickUp Shape
#1 – Join an account
Join an account (it’s loose), then log in on your ClickUp account.

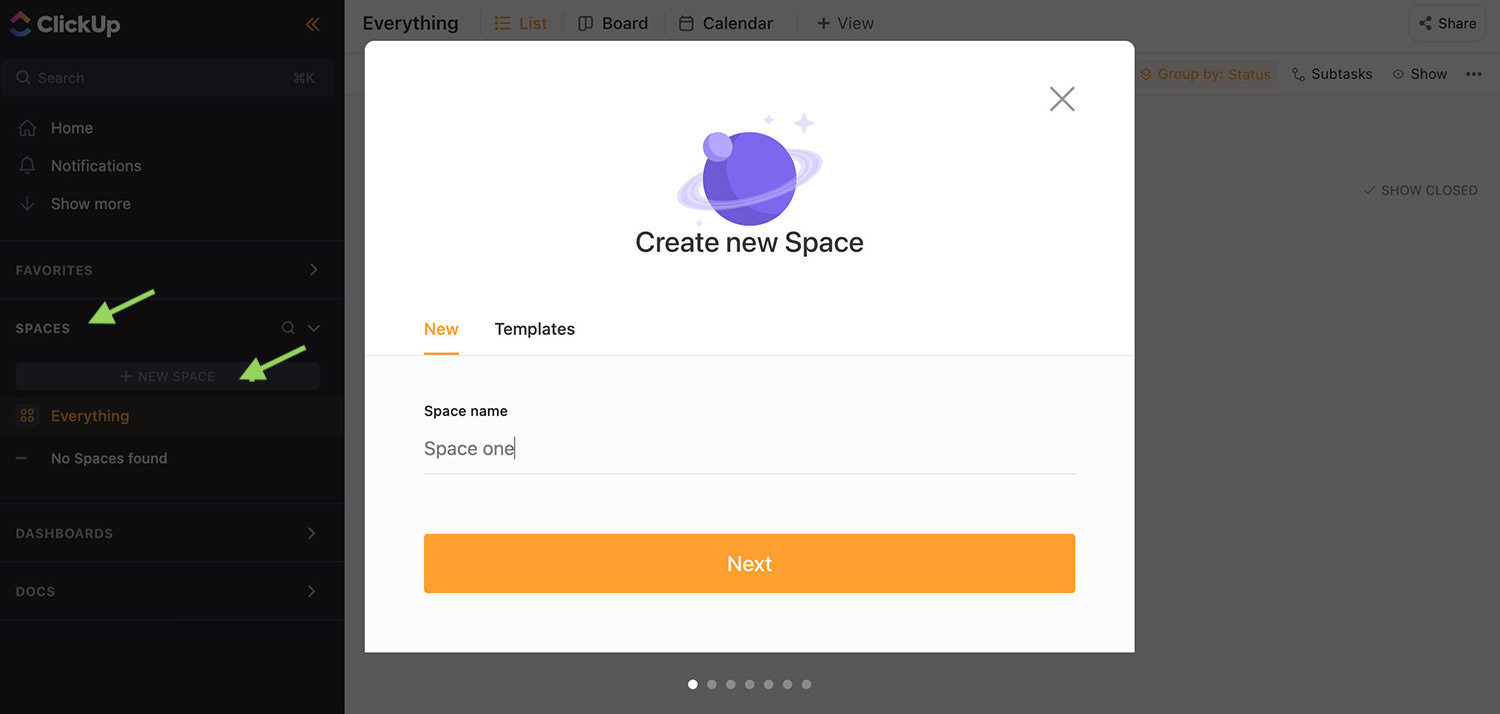
#2 – Create a House
Get started with growing an area in the event you haven’t already. To create an area, pass to the sidebar, make bigger SPACES, then click on “+ NEW SPACE“. Give your new house a reputation, then observe the on-screen directions to create your house.

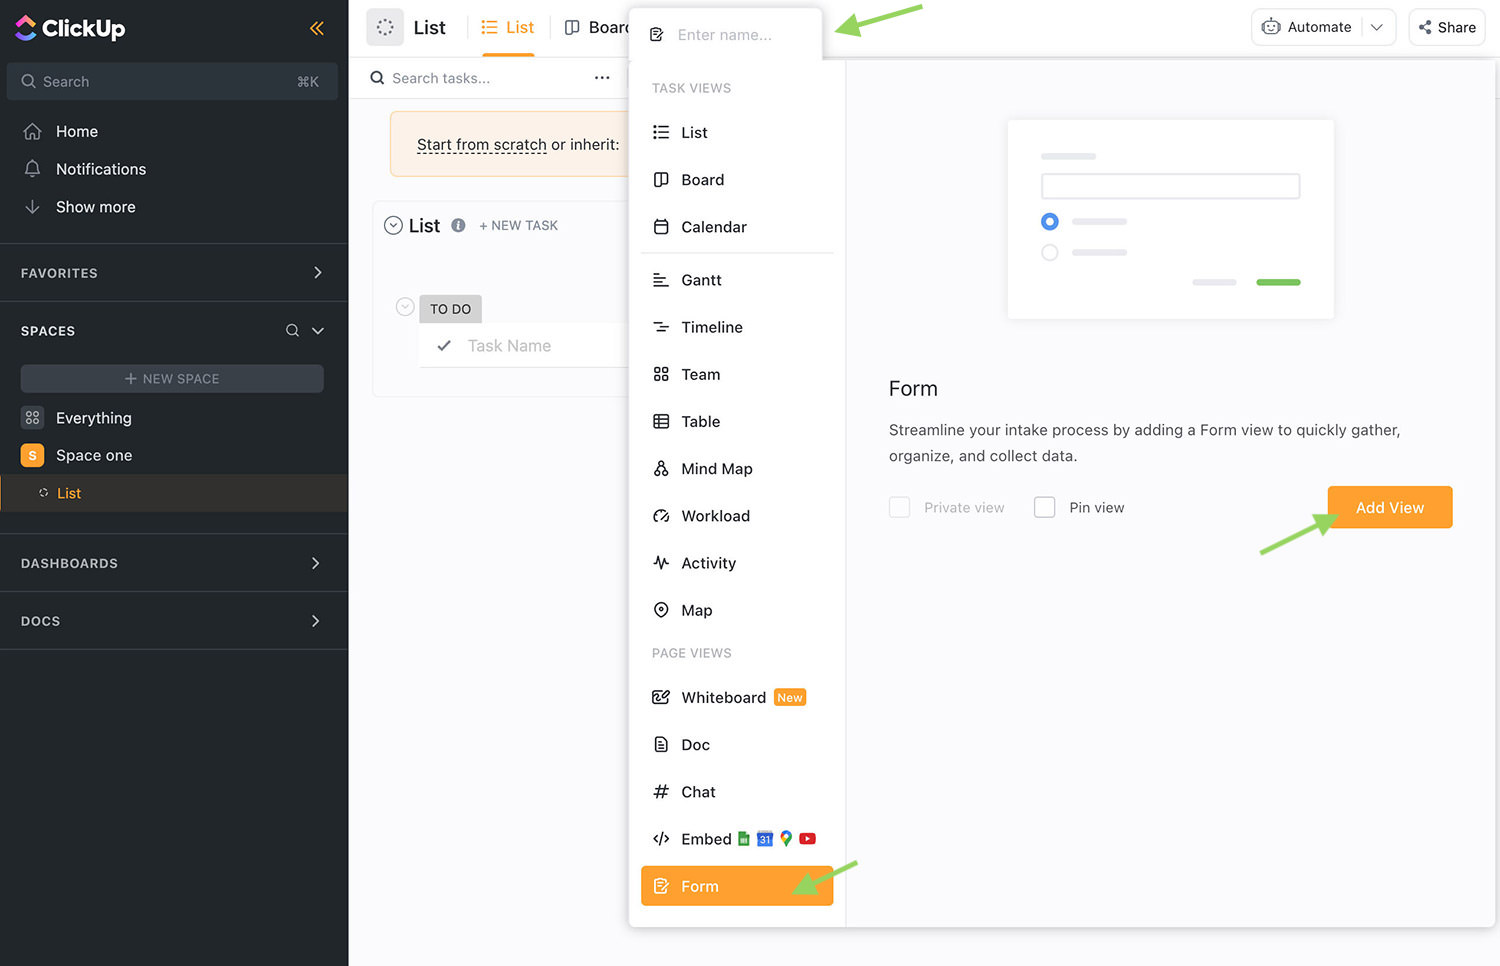
#3 – Create a Shape
Click on at the House (at the sidebar) you simply created, then pass to “+ View” at the best navigation, make a selection “Shape“, then click on “Upload View“.

#4 – Customise your Shape
Your new shape comes without a fields, a default shape description, and publish button. It’s totally as much as you what you need your shape to seem like.

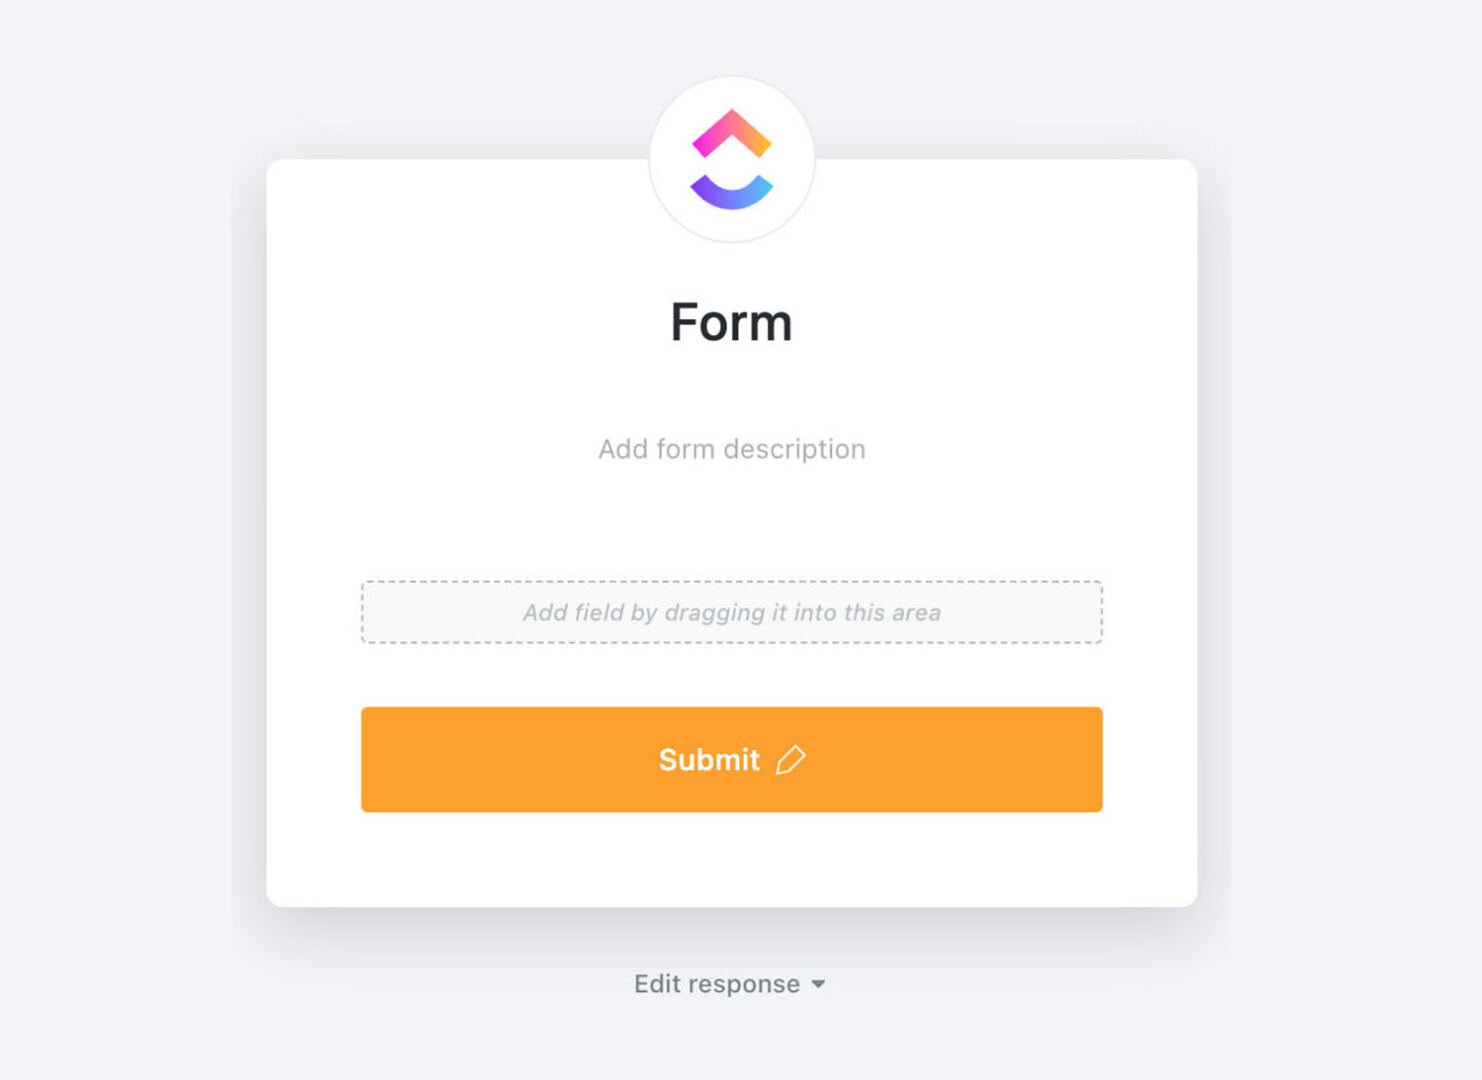
To customise your shape, you’ll get started by way of dragging the Duties Box at the left into the shape, or you’ll create your individual fields by way of clicking at the “+ Upload Customized Box“.

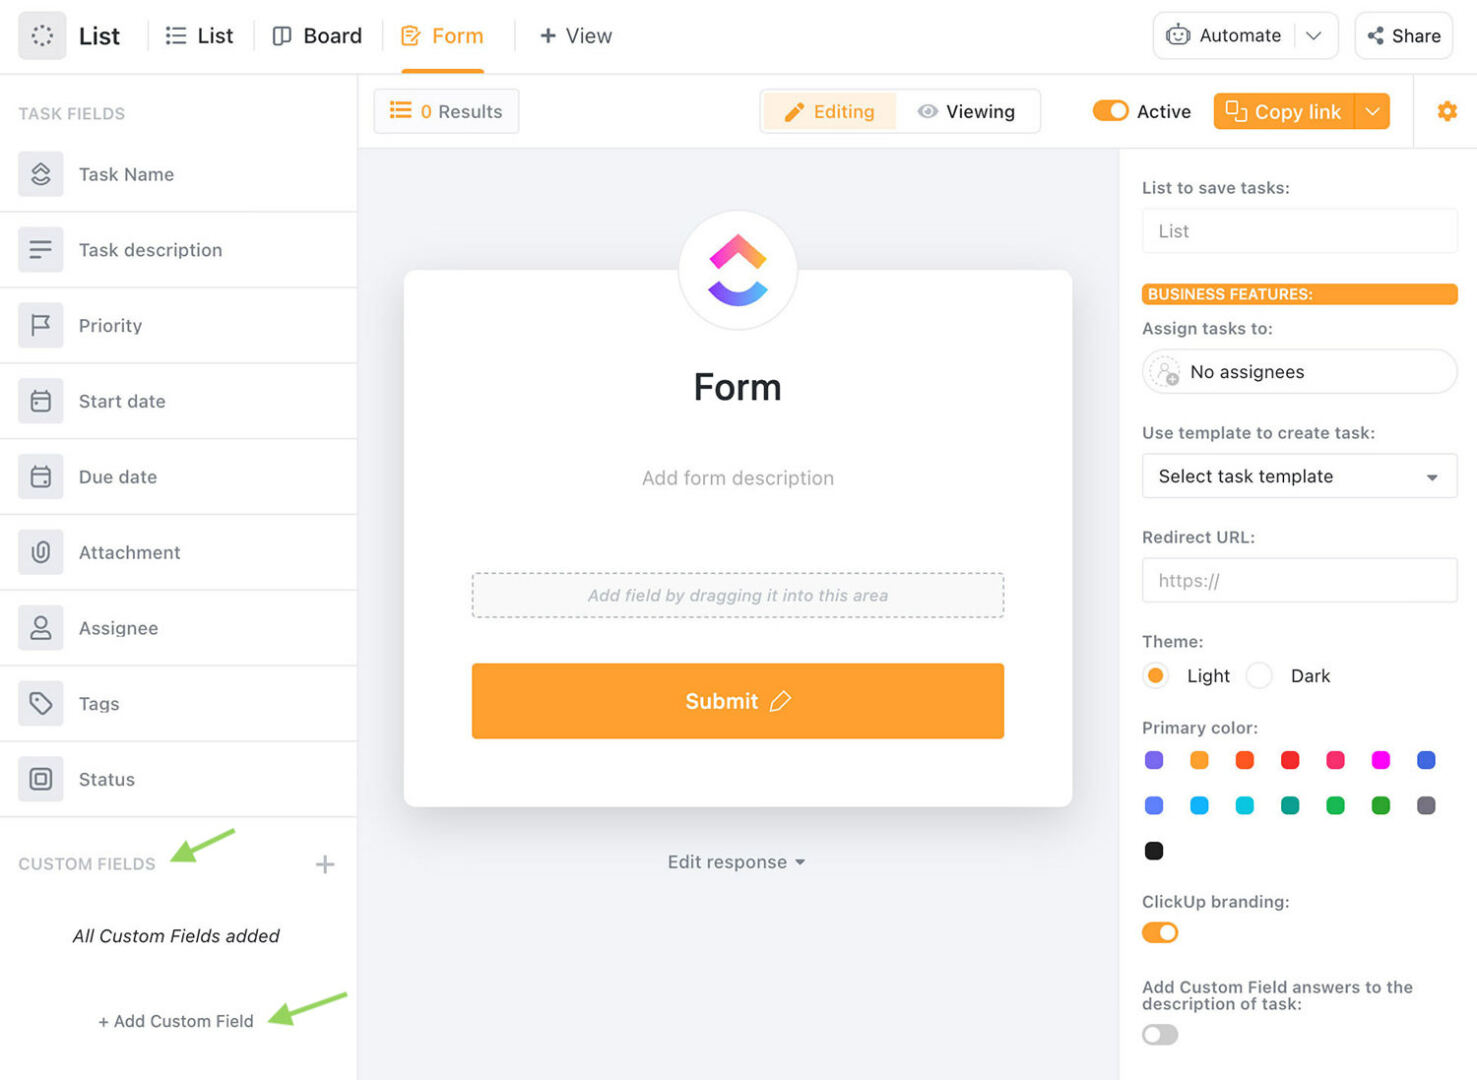
For simplicity sake, we can a kind that include the Title and Site fields for this educational
Directions:
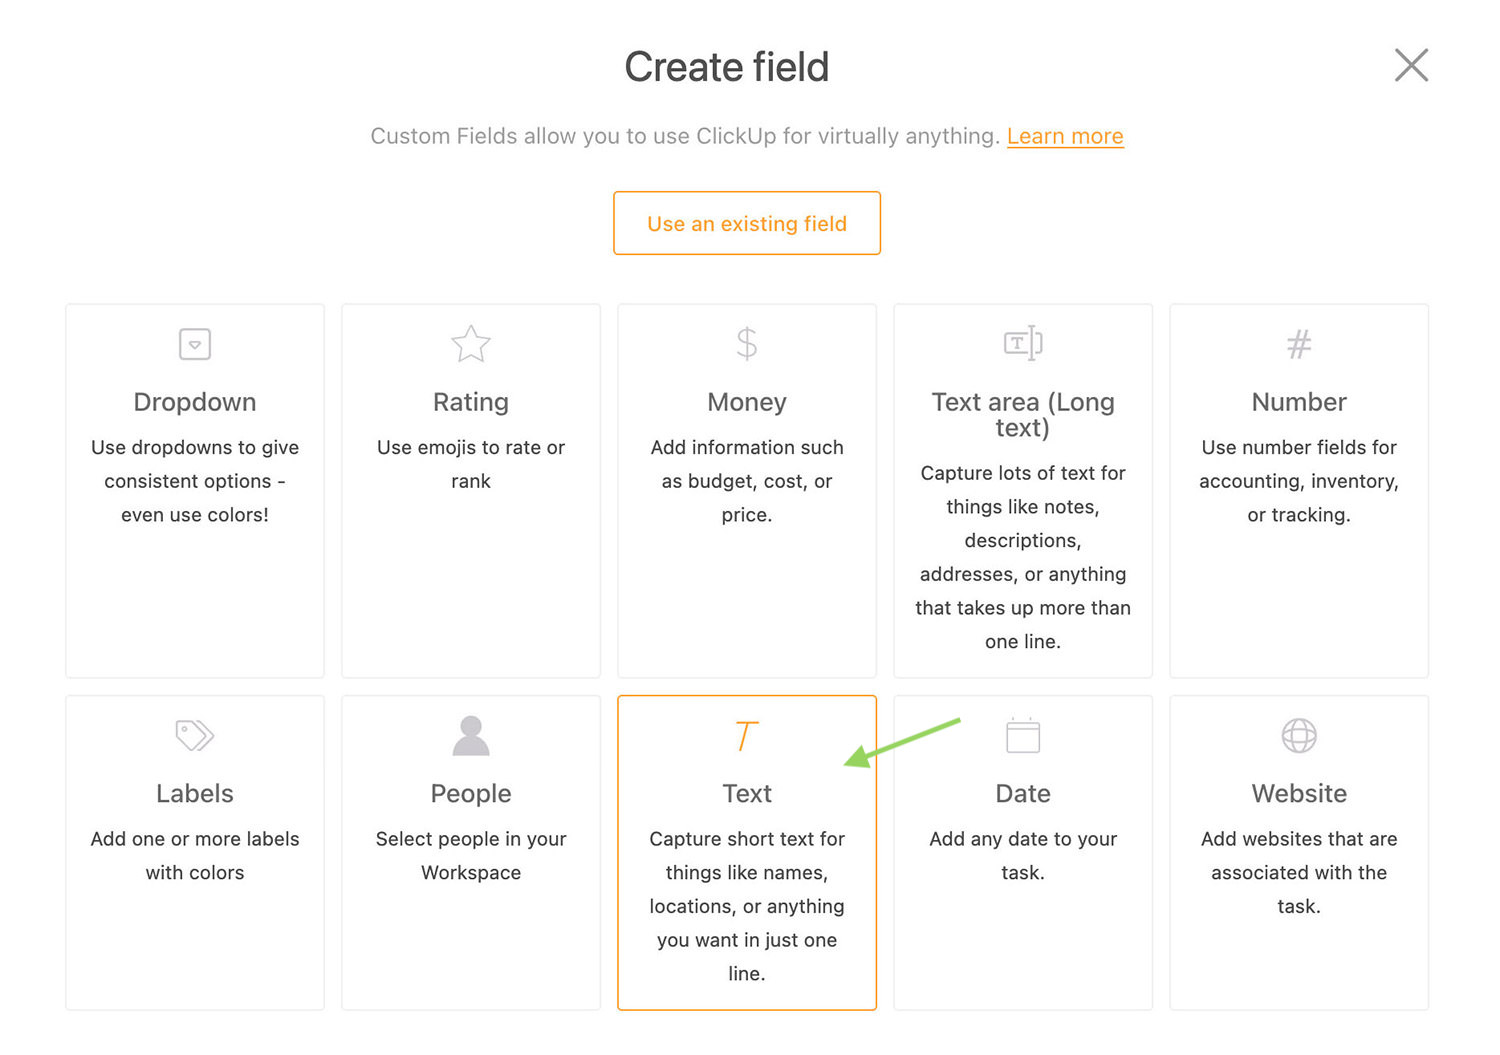
- Click on “+ Upload Customized Box“
- Choose Textual content.
- Input “Title” in “Box Title“, and click on Create.
- Drag the “Title” box to the shape.
- Click on “+ Upload Customized Box” once more. This time, make a selection “Site” and repeat the method to tug it into the shape.


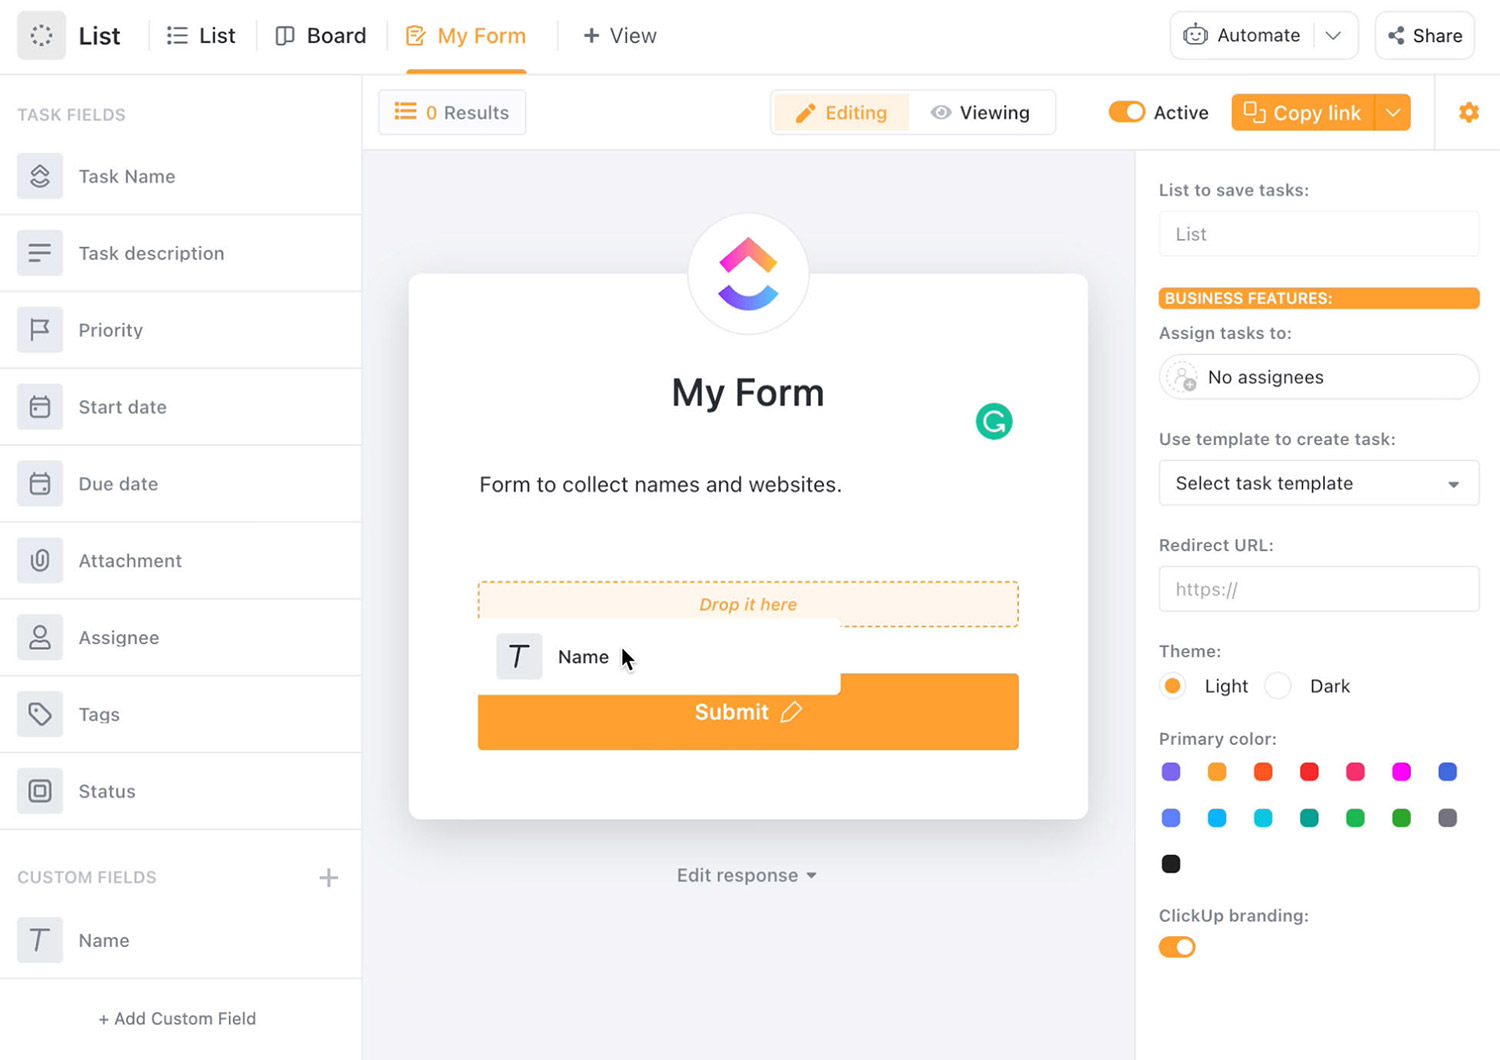
That’s it. A easy shape to assemble names and internet sites is now created.
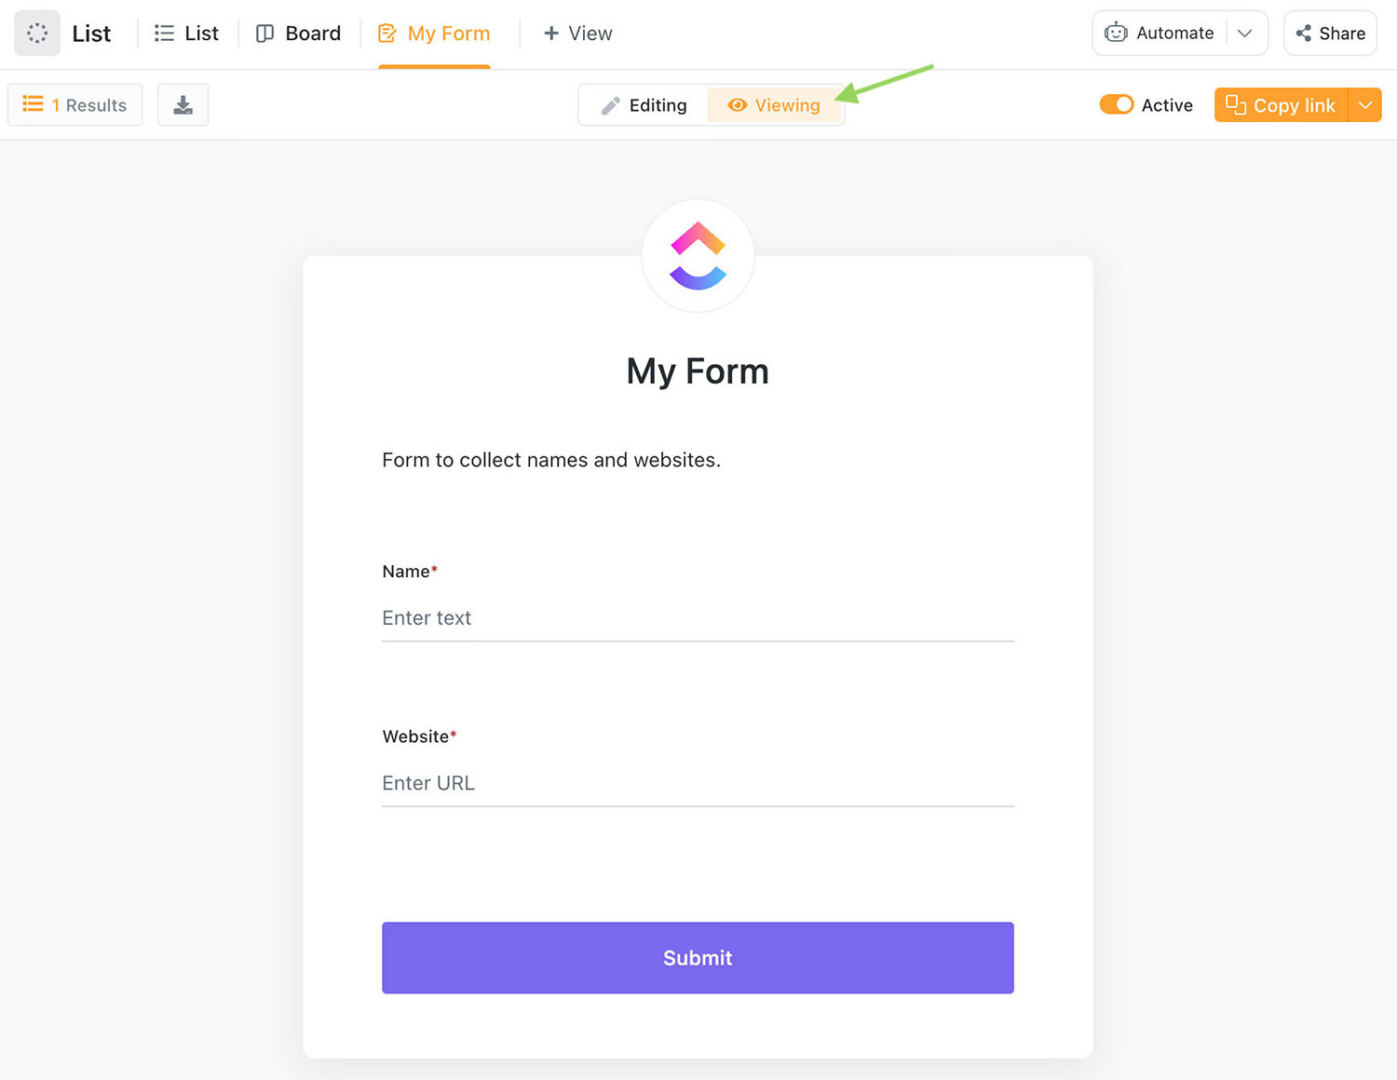
#5 – View your shape
To view your newly created shape, pass to “Viewing” at the best (but even so “Enhancing), or below “My Shape” at the best navigation.

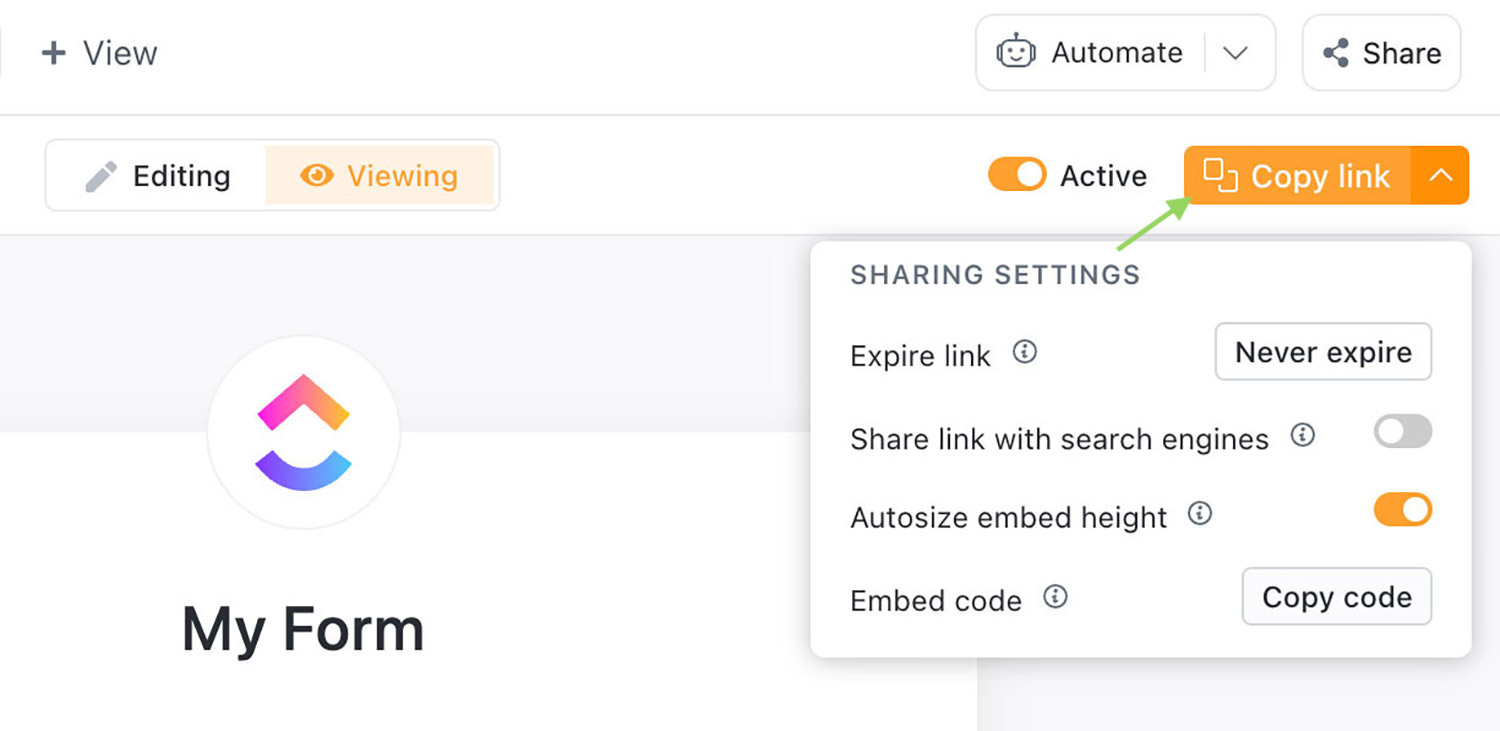
#6 – Proportion your shape
To proportion this type the usage of its URL, click on at the “Replica hyperlink” button at the best proper nook, or click on at the arrow beside it to additional customise your shape.

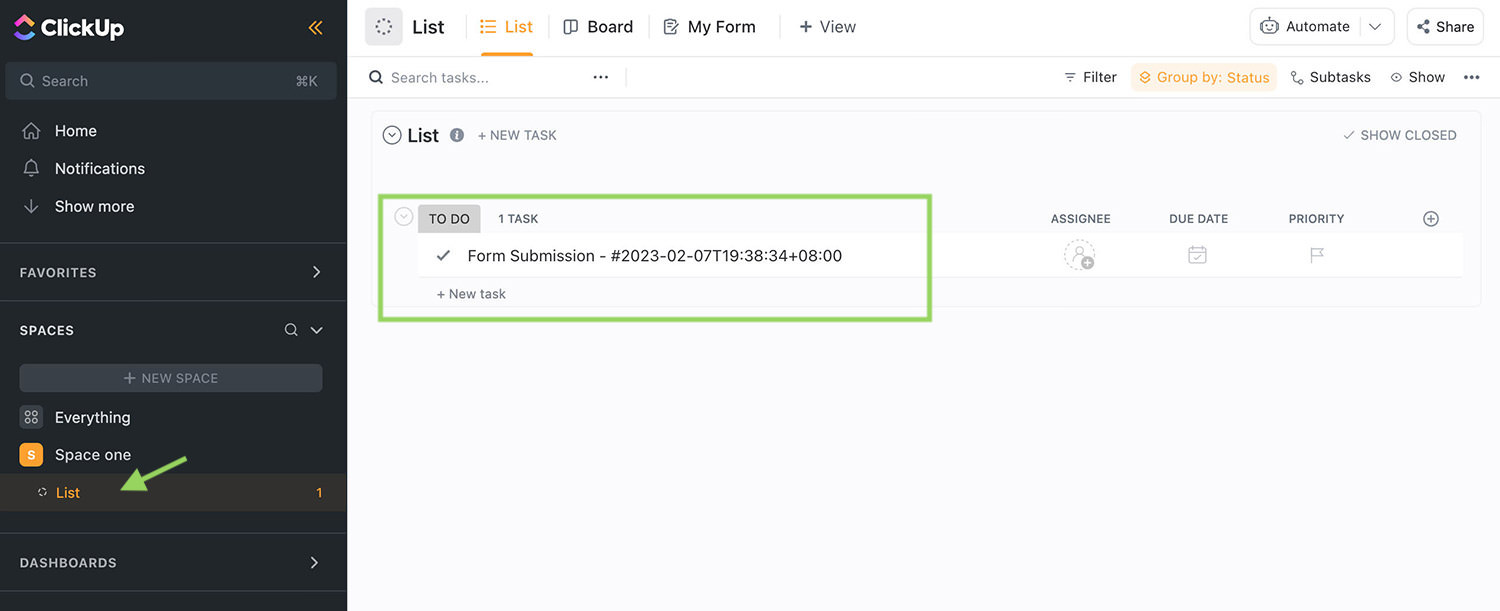
#7 – View accrued shape information
To view information accrued by way of the shape, click on to your House’s identify, then make a selection “Listing“.

The publish Find out how to Create a ClickUp Shape gave the impression first on Hongkiat.
WordPress Website Development Source: https://www.hongkiat.com/blog/create-clickup-form/