
Docker is a well-liked open-source platform for growing, transport, and operating programs. It encapsulates programs and their dependencies in boxes to advertise consistency throughout other environments. This consistency is helping save you problems associated with dependency conflicts and “it really works on my system” discrepancies.
With Docker, you’ll outline the vital dependencies and extensions the use of Dockerfiles. This implies your programs have all of the required libraries and gear in a reproducible, remoted atmosphere.
Kinsta Utility Webhosting provides dynamic strengthen for customized Dockerfiles, which lets you have larger keep watch over of your utility’s atmosphere. With a Dockerfile, you’ll use nearly any language—you’re now not limited to the languages supported by means of Nixpacks or Buildpacks.
This hands-on article walks you thru how one can set up and use PHP dependencies and extensions in Docker.
Contents
Why use Docker for putting in dependencies?
The use of Docker to put in dependencies has a number of advantages:
- Atmosphere consistency — Docker permits you to package deal your utility, its dependencies, and its configurations right into a container. This means guarantees that the surroundings wherein your utility runs stays constant throughout other configurations and techniques, together with advancement, trying out, and manufacturing environments.
- Ease of setup and dependency solution — Docker permits you to arrange your app’s atmosphere on any system that helps it by means of specifying all its required dependencies and configurations. In consequence, you keep away from compatibility problems and the trouble of manually putting in dependencies.
- Model keep watch over and isolation — Docker boxes encapsulate all dependencies, together with their particular variations inside the container. This implies you’ll model keep watch over your utility and its dependencies, selling reproducibility and getting rid of conflicts between other dependency variations.
Moreover, Docker boxes supply isolation, which is helping get rid of conflicts between dependencies of various programs operating at the similar gadget.
Arrange your utility on Kinsta
Putting in your utility on Kinsta is simple. Talk over with MyKinsta and apply the sign-up procedure. As soon as registered, you’ll get right of entry to an impressive website hosting dashboard and a set of options designed to optimize efficiency and safety.
Kinsta’s Utility Webhosting helps a variety of programming languages, together with PHP, Python, Node.js, and Ruby. This in depth language strengthen guarantees compatibility with numerous programs, empowering you to make a choice the language that most nearly fits your mission necessities.
As an example, in the event you’re growing a dynamic internet utility with PHP, Kinsta’s optimized website hosting atmosphere guarantees prime efficiency and reliability in your PHP-based tasks. Or, in the event you’re development a RESTful API with Node.js or a data-driven internet utility with Python, Kinsta supplies the infrastructure and strengthen vital in your utility.
To revel in how one can deploy an utility the use of a Dockerfile on Kinsta, use this utility, a fundamental PHP-based authentication gadget that makes use of MariaDB to retailer records. This utility additionally leverages a couple of composer programs, together with recognize/validation for enter validation and ircmaxell/password-compat for password hashing.
Get ready your Docker atmosphere
A Dockerfile is a textual content document containing all of the instructions, organized within the vital order, that you wish to have to construct the specified symbol. A fundamental Dockerfile for a PHP utility would seem like this:
FROM php:8.3-cli
COPY . /usr/src/myapp
WORKDIR /usr/src/myapp
CMD [ "php", "./your-script.php" ]
This Dockerfile creates a container atmosphere for operating a PHP script from a command-line interface (CLI). It begins by means of the use of the reliable PHP symbol with the CLI variant, making sure that handiest the PHP runtime is incorporated within the container.
It then copies the contents of the native listing — which comprises the Dockerfile — into the /usr/src/myapp listing inside the container. After environment the running listing to /usr/src/myapp, it specifies the PHP script to execute, your-script.php, the use of the php command.
The picture comprises many pre-compiled PHP extensions. So, get started by means of checking if the extension you wish to have is put in by means of operating the php -m command.
If your desired extension isn’t out there within the base symbol, Docker supplies the next helper scripts that can assist you set up further extensions extra simply:
docker-php-ext-configuredocker-php-ext-installdocker-php-ext-enable
As an example, the demo utility for this educational makes use of the MySQLi extension to have interaction with the MariaDB database. This extension isn’t compiled into the picture by means of default, so set up it the use of the next command to your Dockerfile:
RUN docker-php-ext-install mysqliTo jot down a Dockerfile for the demo utility, create a brand new document named Dockerfile within the mission root folder. Paste the next code within the document:
FROM php:8.3-apache

# Set up MySQL Jstomer, server, and different dependencies
RUN apt-get replace &&
	apt-get set up -y
	default-mysql-client
	default-mysql-server
	git
	&& apt-get blank
	&& rm -rf /var/lib/apt/lists/*

# Set up mysqli PHP extension for MySQL strengthen
RUN docker-php-ext-install mysqli
This code specifies the reliable PHP symbol — in particular model 8.3 — with Apache put in as the bottom symbol for the container. This symbol supplies a preconfigured atmosphere for operating PHP programs with Apache because the internet server.
It then installs the extra dependencies the demo utility calls for, together with default-mysql-client and default-mysql-server, which create and have interaction with the MariaDB database.
In spite of everything, the snippet above installs the mysqli PHP extension the use of docker-php-ext-install, which permits the demo utility to ascertain a connection and carry out operations at the MariaDB database.
Organize dependencies with Docker
Managing PHP dependencies with Docker comes to the use of Composer, a well-liked dependency supervisor for PHP. By way of putting in Composer in a Docker container, you’ll streamline the method of putting in, updating, and managing PHP dependencies — all whilst facilitating consistency and reproducibility throughout other environments.
Practice the stairs underneath to make use of Composer for dependency control inside the demo utility. Upload the code in each and every of the stairs in your Dockerfile.
- Set up Composer within the Docker symbol the use of the command underneath:
# Set up Composer
COPY --from=composer/composer:latest-bin /composer /usr/bin/composer
This command copies a pre-built Composer binary document from the Docker Hub repository into your symbol.
--from=composer/composer:latest-binspecifies the supply symbol from which to replicate information.The
/composertrail within the supply symbol comprises the information to replicate, whilst your Docker symbol’s/usr/bin/composertrail is the vacation spot for those information. - Subsequent, set the running listing by means of operating the next:
# Set running listing WORKDIR /var/www/html - Reproduction the composer.json and composer.lock information to the picture.
# Reproduction composer.json and composer.lock COPY composer.json composer.lock ./ - Set up the Composer dependencies indexed in composer.json.
# Set up Composer dependencies RUN composer set up --no-dev --optimize-autoloader--no-devinstructs Composer to skip the development-specific dependencies.--optimize-autoloaderinstructs Composer to optimize the autoloader for higher efficiency.
You’ll replace and set up dependencies over the years by means of enhancing the composer.json document as wanted, including new dependencies, updating model constraints, and taking away dependencies which are not required.
After making the vital adjustments, you run composer set up or composer replace inside the Docker container to put in or replace dependencies accordingly.
Observe ultimate configurations
Ahead of the appliance works with Docker, you will have to create the database and database person, set atmosphere variables, and duplicate the mission information into the Docker symbol.
To try this, apply the stairs underneath and duplicate each and every code snippet in your Dockerfile.
- Set the surroundings variables the PHP utility will use to hook up with the MariaDB database. You’ll change the
DB_USER,DB_PASSWORD, andDB_NAMEtogether with your most well-liked credentials.# Set atmosphere variables ENV DB_HOST=localhost DB_USER=kinsta_user DB_PASSWORD=your_password_here DB_NAME=kinsta_docker_auth # Trail to the Unix socket document used for connecting to the MariaDB server. DB_SOCKET=/var/run/mysqld/mysqld.sock - Reproduction the PHP utility information to the Docker symbol:
# Reproduction PHP utility information into the picture COPY . . - Reproduction the startup script into the picture:
# Reproduction the startup script
COPY scripts/get started.sh /usr/native/bin/get started.sh
This script runs when the container begins and is answerable for beginning the database server, making a database, desk, and person, and beginning the Apache server. You’ll create this script later.
- Make the script executable the use of the
chmodcommand:# Make the script executable RUN chmod +x /usr/native/bin/get started.sh - In spite of everything, execute the script the use of the command underneath:
# Execute the startup script
CMD ["/usr/local/bin/start.sh"]
Now that the Dockerfile is whole, you create the startup script mentioned previous.
Create a brand new document named scripts/get started.sh within the mission root folder and upload the next code. Be sure you use the database credentials that you just outlined within the Dockerfile.
#!/bin/bash

# Get started MariaDB server
carrier mariadb get started

# Look ahead to MariaDB to be totally initialized (retry as much as 30 occasions, ready 1  2nd between each and every strive)
strive=0
whilst [ $attempt -lt 30 ]; do
		if mysqladmin ping &>/dev/null; then
    		echo "MariaDB is up and operating."
    		spoil
		else
    		echo "MariaDB isn't but out there. Retrying..."
    		strive=$((strive+1))
    		sleep 1
		Fi
carried out

# If MariaDB failed to begin inside the specified makes an attempt, go out with an error
if [ $attempt -eq 30 ]; then
		echo "Error: MariaDB failed to begin inside the specified time."
		go out 1
fi

# Set the database title, username, and password
dbname="kinsta_docker_auth"
dbuser="kinsta_user"
dbpassword="your_password_here"

# Create the database if it does now not exist
mysql -u root -e "CREATE DATABASE IF NOT EXISTS $dbname;"

# Create a database person and assign privileges to the database
mysql -u root -e "CREATE USER '$dbuser'@'localhost' IDENTIFIED BY '$dbpassword';"
mysql -u root -e "GRANT ALL PRIVILEGES ON $dbname.* TO '$dbuser'@'localhost';"
mysql -u root -e "FLUSH PRIVILEGES;"

# Create customers desk if it does now not exist
mysql -u root -e "USE $dbname; CREATE TABLE IF NOT EXISTS customers (
		identification INT AUTO_INCREMENT PRIMARY KEY,
		username VARCHAR(20) UNIQUE NOT NULL,
		password_hash VARCHAR(255) NOT NULL
);"

# Get started Apache server
apache2ctl -D FOREGROUND
This Bash script begins the MariaDB server. Then, when the server is totally initialized, it creates a database, a person with suitable privileges, and a desk inside the database. In spite of everything, it begins the Apache server.
Deploy on Kinsta
Ahead of deploying your utility to Kinsta, you will have to configure a couple of configurations for the Apache server. Kinsta’s Utility Webhosting carrier has ports 80 and 443 open, however we advise the use of port 8080 in case your utility exposes any ports.
By way of default, the Apache server listens for connections on port 80, so that you will have to configure it to hear connections on port 8080. To take action, apply those steps:
- Create a folder named apache-conf within the mission’s root folder.
- Within the newly created folder, create a document named apache-config.conf. Upload the code underneath to configure Apache to hear connections on port 8080:
ServerAdmin webmaster@localhost DocumentRoot /var/www/html ErrorLog ${APACHE_LOG_DIR}/error.log CustomLog ${APACHE_LOG_DIR}/get right of entry to.log mixed - Within the apache-conf folder, create a brand new document named apache-ports.conf and upload the code underneath.
# Trade the Pay attention directive to pay attention on port 8080 Pay attention 8080 # Stay the present configuration for port 443Pay attention 443 Pay attention 443 The
Pay attention 8080directive instructs Apache to pay attention for incoming connections on port 8080. - Now, you wish to have to switch the Dockerfile to use this configuration to the Apache server. Within the Dockerfile, upload those instructions simply after the command for environment the running listing (
WORKDIR /var/www/html). Those are answerable for copying the customized configuration information into the correct directories.# Arrange Apache digital host COPY apache-conf/apache-config.conf /and many others/apache2/sites-available/000-default.conf # Arrange Apache ports COPY apache-conf/apache-ports.conf /and many others/apache2/ports.conf - In spite of everything, create a .dockerignore document within the mission root folder. This document holds a listing of folders and information that are supposed to now not be copied into the Docker symbol. Upload
supplierto exclude the supplier folder.
With all of the configurations carried out, you’ll deploy to Kinsta. Add your mission information in your most well-liked Git supplier (Bitbucket, GitHub, or GitLab), then apply the stairs underneath.
- For your MyKinsta dashboard, make a choice Packages at the sidebar and click on the Upload utility button.
- At the Upload utility web page, make a choice your Git repository and department, supply an utility title, select a knowledge heart location, and click on Proceed.
- At the Construct atmosphere web page, make a choice Use Dockerfile to arrange container symbol. Supply “Dockerfile” because the Dockerfile trail and a length (“.”) because the Context. Click on Proceed.

Construct atmosphere phase of the Upload utility shape. - Go away the whole lot at the Arrange your processes web page and click on Proceed.Notice: The database will lose records whilst you restart or redeploy the appliance. If you wish to have to deal with this factor, take a look at Kinsta’s continual garage and follow it in this web page. This information won’t assessment putting in continual garage.
- Verify the fee main points at the Abstract web page and click on Deploy now.
- As soon as the deployment is whole, open your utility’s area to view the reside web site.
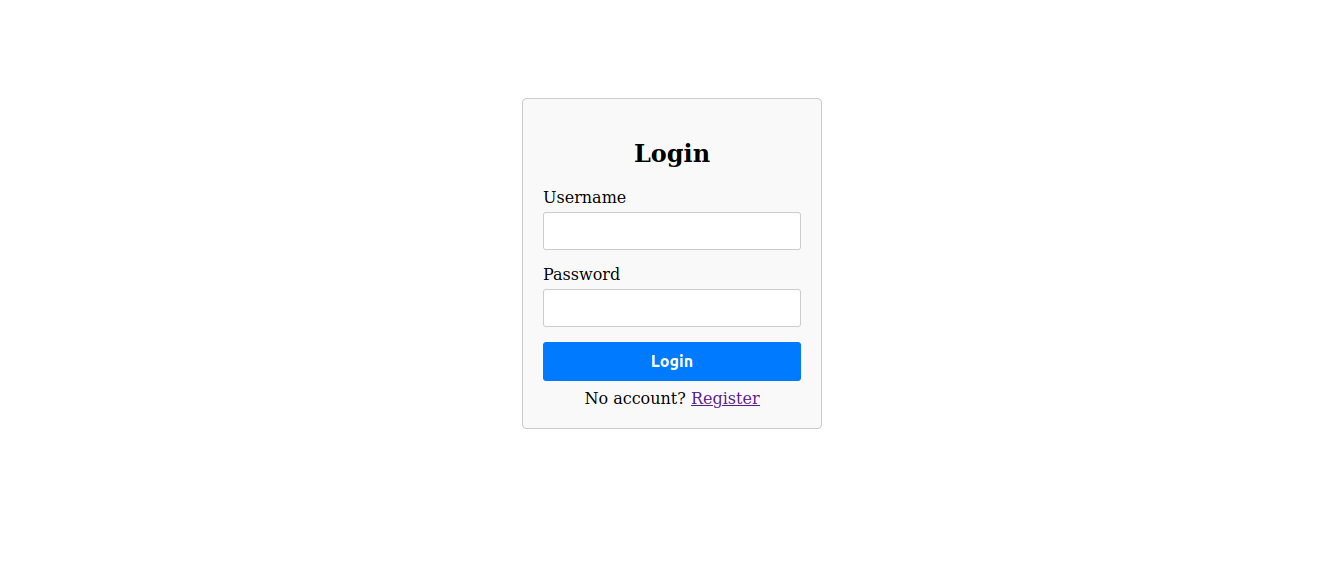
Login web page at the reside site. Sign in for an account, log in the use of your main points, and take a look at that you’ll get right of entry to the safe web page and that the whole lot works as anticipated.

The appliance’s homepage as soon as logged in.


Track and optimize your utility
As soon as your utility is up and operating on Kinsta, tracking and optimizing its efficiency is very important. It guarantees your utility can perform easily and use sources successfully.
Optimizing your utility’s efficiency is the most important for handing over a quick and responsive person revel in.
Kinsta is all the time running on techniques to optimize your utility’s efficiency. We provide complete tracking gear that can assist you observe quite a lot of efficiency metrics, together with bandwidth, general construct time, CPU utilization, reminiscence intake, community visitors, and reaction occasions. You’ll view all this data by means of navigating in your app’s Analytics phase at the Kinsta dashboard.
If you happen to stumble upon a subject or surprising utility conduct, you’ll navigate in your Logs phase at the Kinsta dashboard. Its detailed evaluate of your utility’s efficiency and behaviour comprises error and get right of entry to logs.
By way of meticulously reviewing those logs, you’ll acquire treasured insights into what may well be inflicting the problem, reminiscent of error messages, stack lines, or patterns of peculiar conduct. This knowledge allow you to diagnose the foundation reason for the issue and take suitable movements to get to the bottom of it.
Moreover, you’ll leverage efficiency optimization ways inside of your Docker atmosphere, reminiscent of optimizing Docker pictures and imposing easiest practices for utility structure and code optimization.
Abstract
Docker’s light-weight and conveyable boxes make it simple to package deal and deploy programs with all of the required dependencies, irrespective of the underlying infrastructure. By way of containerizing your utility and its dependencies, you advertise consistency throughout other environments, streamline setup processes, and acquire higher versioning keep watch over.
Leveraging Docker with Kinsta complements your utility’s deployment procedure. Its strengthen for customized Dockerfiles and a variety of programming languages, together with PHP, guarantees compatibility and versatility in your tasks.
With Utility Webhosting’s infrastructure and Docker’s containerization era, you’ll succeed in streamlined deployment, scalability, and reliability in your programs.
Have you ever used Docker in your mission prior to? Do you have got revel in or insights on Docker? Percentage them within the feedback underneath!
The publish Tips on how to set up PHP dependencies and extensions with Docker seemed first on Kinsta®.
WP Hosting