
WooCommerce allows you to promote basically any type of product on-line. On the other hand, it’s lacking sure vital options out of the field, comparable to enabling you to print invoices. That’s the place the BizPrint cloud printing service is available in.
The use of BizPrint, you’ll be capable of accelerate success time and cut back mistakes, which mean you can stay consumers satisfied. Automatic bill printing may even save your staff time, and allow them to concentrate on extra productive duties. Additionally, you get complete regulate over which gadgets to make use of, and when to print each and every bill or receipt.
On this article, we’ll introduce you to BizPrint and provide an explanation for how the carrier works. Then we’ll display you how you can attach your WordPress web page with a BizPrint account, and mean you can get started printing WooCommerce receipts. Let’s get to it!
Contents
An Advent to BizPrint Cloud Printing

BizPrint is a cloud printing platform and control carrier for WooCommerce. You’ll be able to attach the carrier in your web page and to a couple of native printers.
Then BizPrint mean you can automate printing jobs generated from WooCommerce orders at the stations you select. For those who don’t want automation, you’ll be able to regulate printing jobs manually, and all of it occurs inside WordPress.
As it’s possible you’ll know, WooCommerce can’t connect with a printer through default. If you wish to print a receipt, that procedure most often comes to a number of steps. It’s important to arrange a unique plugin to generate the ones invoices, after which obtain them and print each and every one manually. All of the ones duties take time that BizPrint mean you can get again.
For those who run any form of trade that calls for you to print invoices, orders, or receipts, you’ll be able to take pleasure in the usage of BizPrint. Eating places, as an example, can use this method to automate buyer orders. You’ll be able to even configure WooCommerce to ship orders to a printer within the kitchen, so workforce can get operating on them in an instant.
In fact, that’s only one instance. You’ll be able to configure BizPrint to hook up with as many printers as you want in any community, and hyperlink the ones gadgets along with your WooCommerce retailer. Even if that can sound sophisticated, BizPrint could also be remarkably easy to arrange and you’ll be able to do it in simplest 3 steps. Extra importantly, you’ll be able to get began the usage of BizPrint totally free.
How you can Set Up and Use BizPrint in WooCommerce (In 3 Steps)
Setup Complexity Stage: Amateur
Estimated Setup Time: 10 mins
Step one you’ll wish to use BizPrint with WooCommerce is to set up a BizSwoop account. BizSwoop gives a unfastened plan that helps as much as 50 print jobs per 30 days, so we suggest opting for that choice whilst you take a look at the plugin. Then you’ll be able to soar proper into putting in your first station.
Step 1: Set Up a Station and Uncover Native Printers
As soon as your BizSwoop account is in a position, you’ll acquire get admission to to a dashboard that appears like this:

Inside of your dashboard, you’ll get an outline of your plan and what number of prints you’ve ordered right through the present month. You’ll be able to additionally arrange new packages (connections with web pages) or stations, which we’ll do first.
Click on at the plus signal subsequent to Stations, and BizPrint will ask you to go into a reputation for the brand new station:
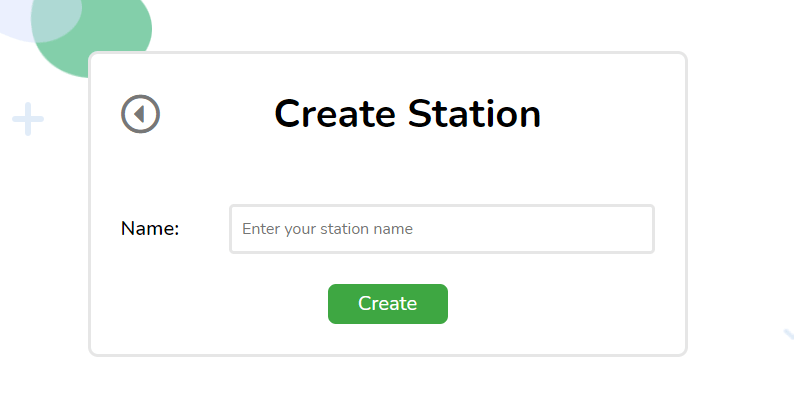
After you choose a reputation, BizPrint will display your station’s public and secret keys, which you’ll get to make use of in a minute. For now, pass forward and download the BizPrint Cloud App for whichever Working Machine (OS) you’re the usage of.
Then you’ll be able to set up the app. When you run it, the tool will ask you to go into the general public and secret keys that BizPrint generated for you:

You’ll see a message that signifies the app is effectively attached to BizPrint. Now, choose the Setup PDF Printer choice within the native app:
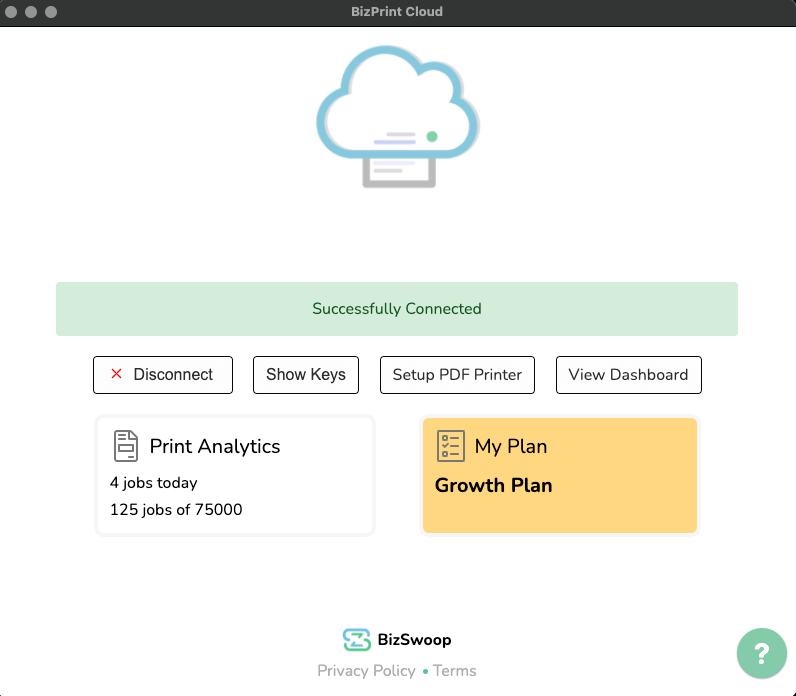
You’ll be capable of create or designate an area folder the place BizPrint will retailer PDF variations of your WooCommerce receipts. At this degree, the tool will routinely stumble on any printers which might be attached in your laptop.
You’ll be capable of see them for those who go back to the Station menu in your BizPrint dashboard:

When you have a couple of printers, don’t fear – you’ll be in a position to select which of them you need to make use of when configuring new print jobs. For now, let’s pass in your WordPress dashboard.
Step 2: Attach WooCommerce to BizPrint
As we discussed sooner than, you’ll wish to use the BizSwoop Print Supervisor plugin to glue WooCommerce to BizPrint. Sooner than we set it up, go back in your BizPrint dashboard and click on at the plus signal subsequent to the Packages phase.
Choose the choice so as to add a brand new software, then BizPrint will ask you to set a reputation for it and input your website online’s URL:
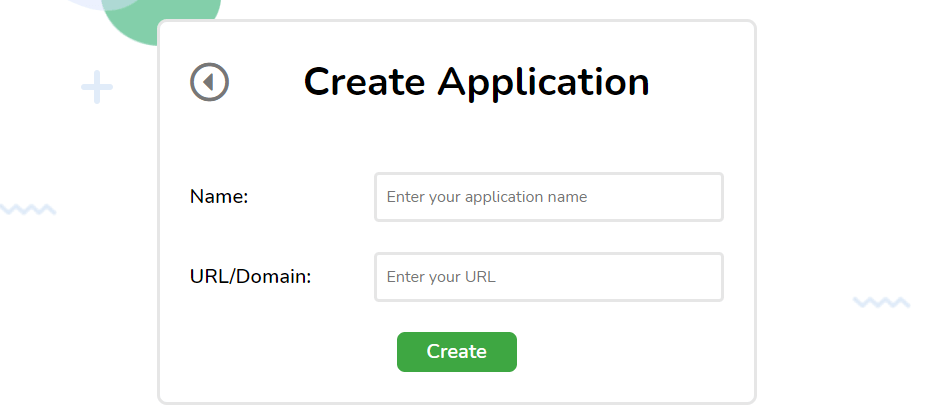
When you fill out each fields and hit the Create button, BizPrint will display you a brand new public and secret key. That’s the pair of keys you’ll use to glue the carrier with WooCommerce.
Subsequent, navigate in your WordPress dashboard and choose the Plugins tab. Click on on Upload New and seek “BizSwoop” to search out the Print Manager for WooCommerce plugin:

Set up and turn on the plugin, after which pass to WooCommerce > Print Settings > Settings. Now upload each your public and secret software keys:

You’re virtually in a position to begin printing receipts now. Sooner than that, we nonetheless wish to configure the plugin so it is aware of what to do with new orders.
Step 3: Configure Print Supervisor for WooCommerce
After connecting the plugin along with your BizPrint account, you’ll be able to navigate to WooCommerce > Print Settings > Places and choose the Upload New choice. Now you’ll be in a position to make a choice which of the printers attached along with your account you need to make use of:

For those who scroll down, you’ll be able to additionally select which template to make use of to your print receipts. Through default, you get get admission to to 3 choices, however you’ll be able to additionally purchase further templates. The plugin additionally means that you can upload customized data to each and every template:

When you configure your receipt settings, you’ll be able to pass to WooCommerce > Print Settings > Common. Right here, you’ll be capable of come to a decision whether or not to allow automated printing and which order statuses must cause new print jobs:
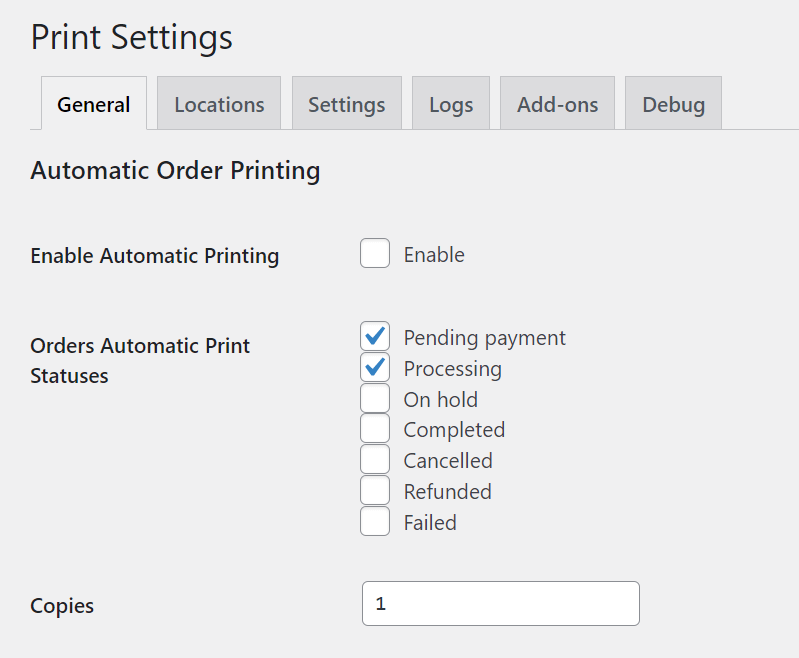
For those who allow automated printing, that’s just about it. After you save the adjustments, WooCommerce will ship new jobs to BizPrint, which is able to give the print orders in your native gadgets.
On the other hand, you’ll be able to cause print jobs manually through going to WooCommerce > Orders and clicking at the icons underneath the Print column for each and every order:

For those who cause print jobs manually, you’ll be in a position to make a choice which printer to make use of. Now that BizPrint is about up, you’ll be able to go away the paintings as much as the plugin and the platform. All you need to do is make sure that your printers are up and working.
Conclusion
Printing bodily receipts for a WooCommerce retailer is usually a chore. It’s important to generate invoices, obtain them, print them, and stay monitor of them. BizPrint simplifies that procedure through supplying you with get admission to to a carrier that you’ll be able to use to glue WooCommerce with a couple of computer systems and as many printers as you need. You’ll be able to even automate print jobs relying on order statuses.
Connecting WooCommerce with BizPrint is inconspicuous, and you’ll be able to do it in 3 steps after setting up a BizSwoop account:
- Arrange a station and uncover native printers.
- Attach WooCommerce to BizPrint.
- Configure Print Manager for WooCommerce.
Coping with printing jobs is usually a irritating revel in for numerous companies. On the other hand, BizPrint makes the setup and configuration procedure as simple as conceivable. When you configure your WooCommerce retailer to paintings with BizPrint, you’ll be able to overlook about coping with printers manually, which is usually a large lifesaver. Even higher, you’ll be able to check out the carrier totally free.
Do you might have any questions on how you can use BizPrint with WooCommerce? What trade operation would you employ BizPrint for? Let’s discuss them within the feedback phase beneath!
The put up Print Manager for WooCommerce: An Overview and Review gave the impression first on Torque.
WordPress Agency