
Each time a brand new replace comes out, the design probabilities you have got build up. Combining dynamic content material and hover choices, for example, can convey surprising effects. To display that, we’ll display you how one can create 3 surprising dynamic weblog publish hero sections the usage of Divi’s integrated choices most effective. We’ll information you step-by-step thru each and every one of the most examples that may encourage you to create your individual diversifications as smartly.
Let’s get to it!
Contents
- 1 Preview
- 2 Upload a New Weblog Put up
- 3 Developing the Modules
- 4 Developing Instance #1
- 5 Developing Instance #2
- 6 Developing Instance #3
- 7 Preview
- 8 Ultimate Ideas
Preview
Earlier than we dive into the academic, let’s check out the outcome of all 3 examples we’ll be growing.
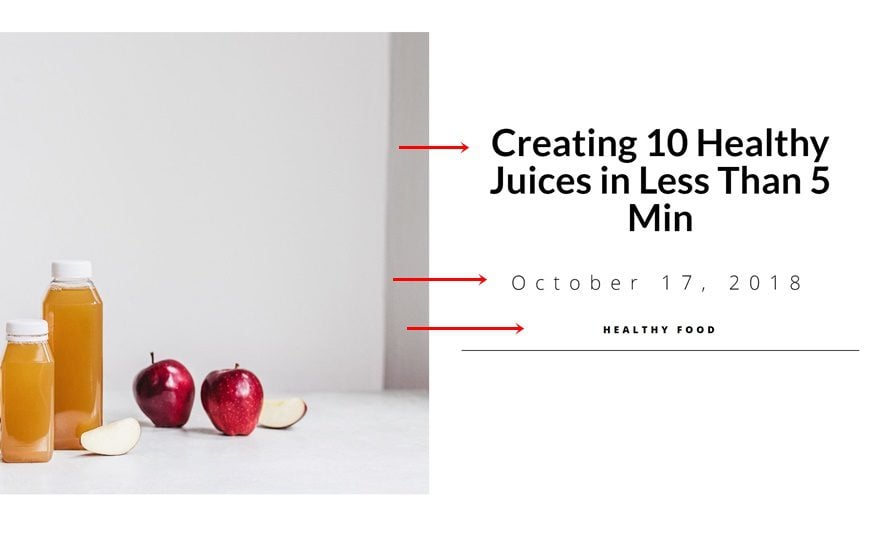
Instance #1
Instance #2

Instance #3

Upload a New Weblog Put up
Put up Main points
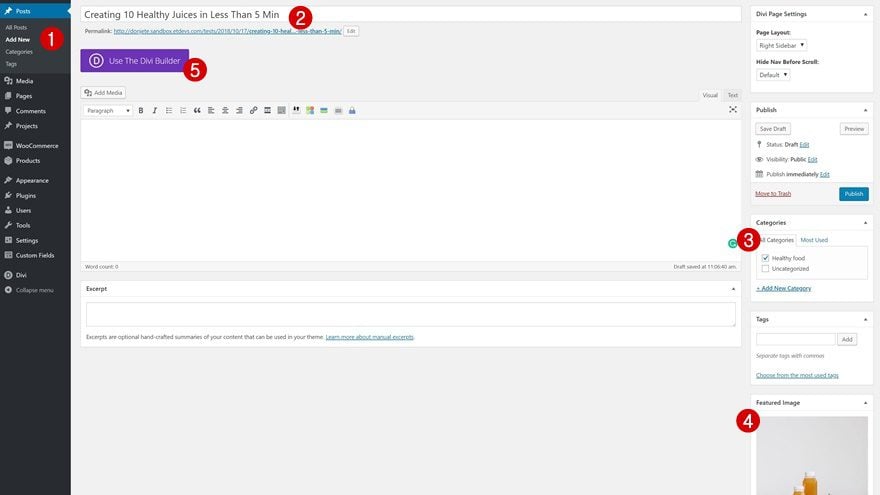
First issues first, get started via growing a brand new weblog publish. Upload the identify, the class of selection and the featured symbol. As soon as that’s completed, permit the Divi Builder.
Divi Web page Settings
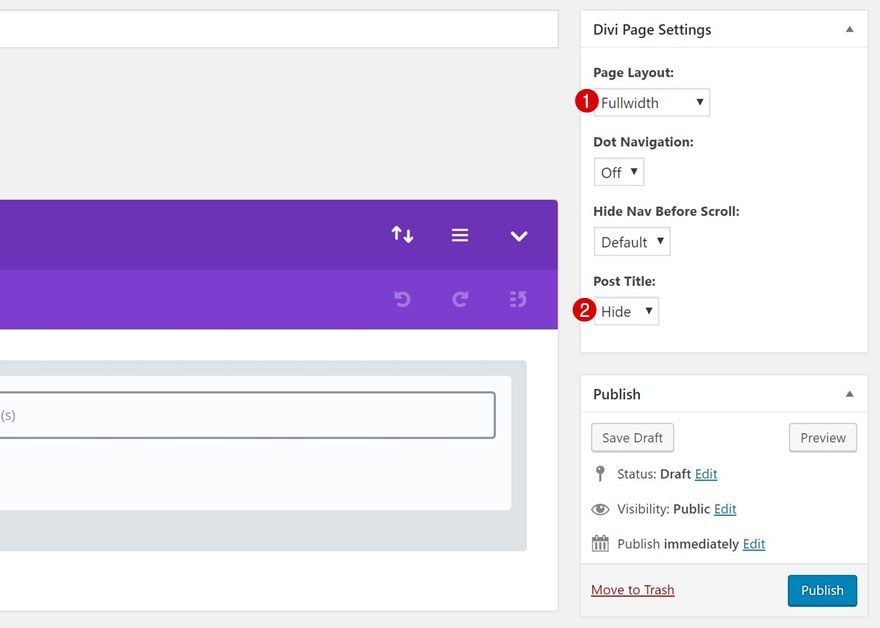
Earlier than switching over to the Visible Builder, trade the Divi Web page Settings within the best proper nook of the brand new weblog publish.
- Web page Format: Fullwidth
- Put up Identify: Disguise
Transfer over to Visible Builder
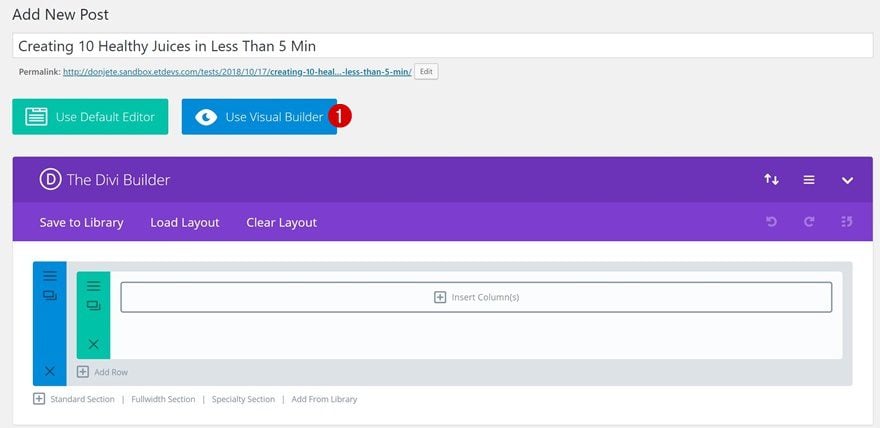
Time to change over to the Visible Builder to start out growing the other examples!
Developing the Modules
Upload a New Segment + One-Column Row
Earlier than we dive into each and every one of the most examples one by one, we’ll get started via growing the Textual content Modules containing dynamic content material. All the way through all 3 examples, we can use those premade modules to complete the design. Whenever you’ve added a brand new phase, upload a brand new row to it the usage of the next column construction:

Put up Identify Textual content Module
Choose Put up Identify Dynamic Content material
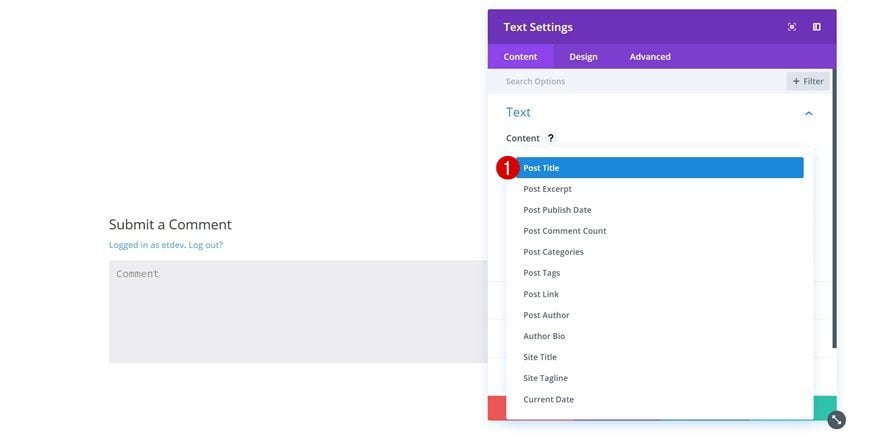
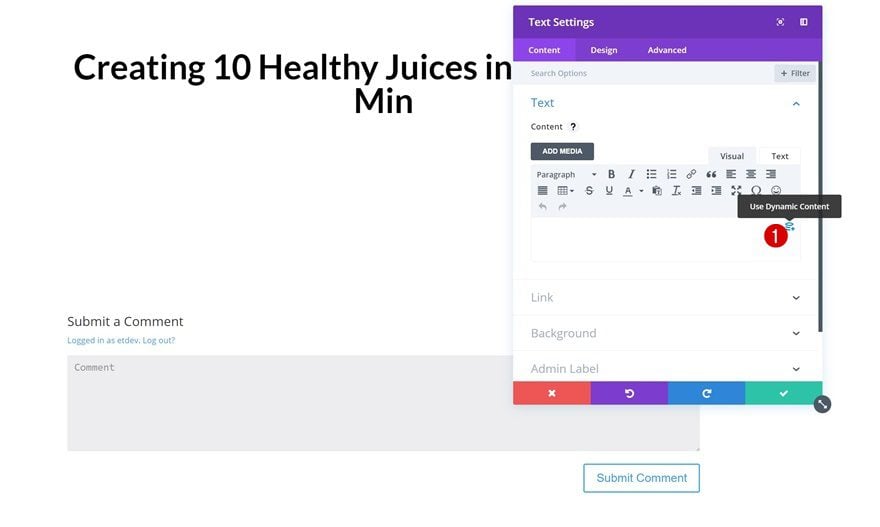
The primary dynamic module we’d like will include the Put up Identify. Upload a brand new Textual content Module and choose Put up Identify within the listing of dynamic content material.
Textual content Settings
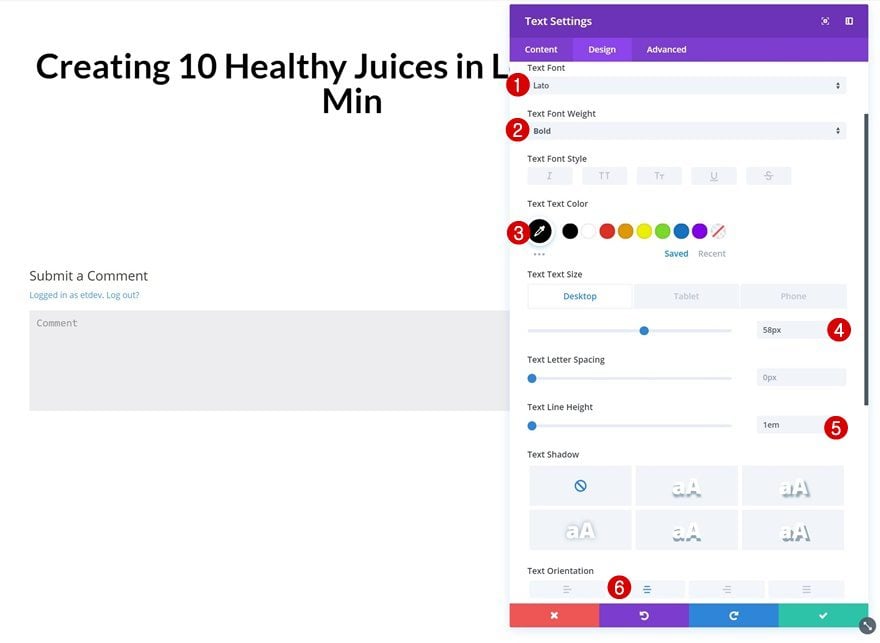
Then, pass to the textual content settings and make some adjustments.
- Textual content Font: Lato
- Textual content Font Weight: Daring
- Textual content Colour: #000000
- Textual content Measurement: 58px (Desktop), 45px (Pill), 35px (Telephone)
- Textual content Line Top: 1em
- Textual content Orientation: Middle
Spacing
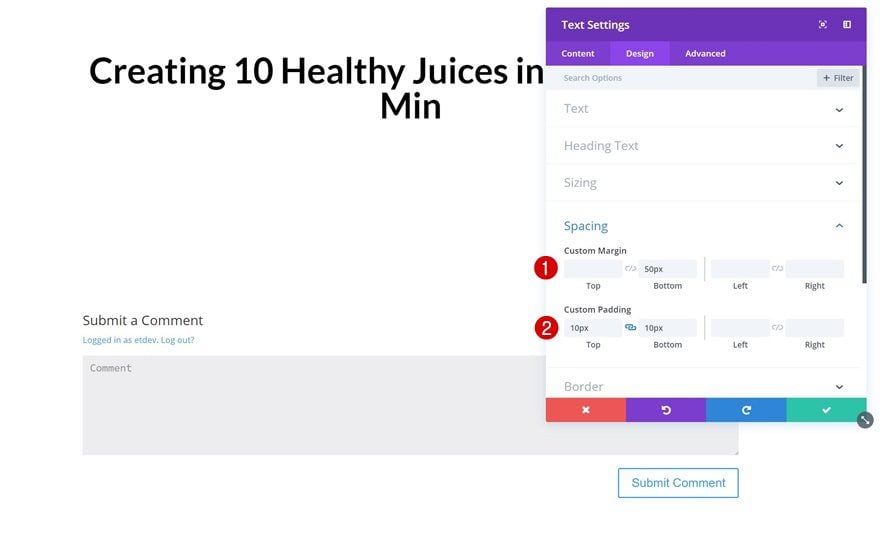
Exchange the spacing values as smartly.
- Backside Margin: 50px
- Most sensible Padding: 10px
- Backside Padding: 10px
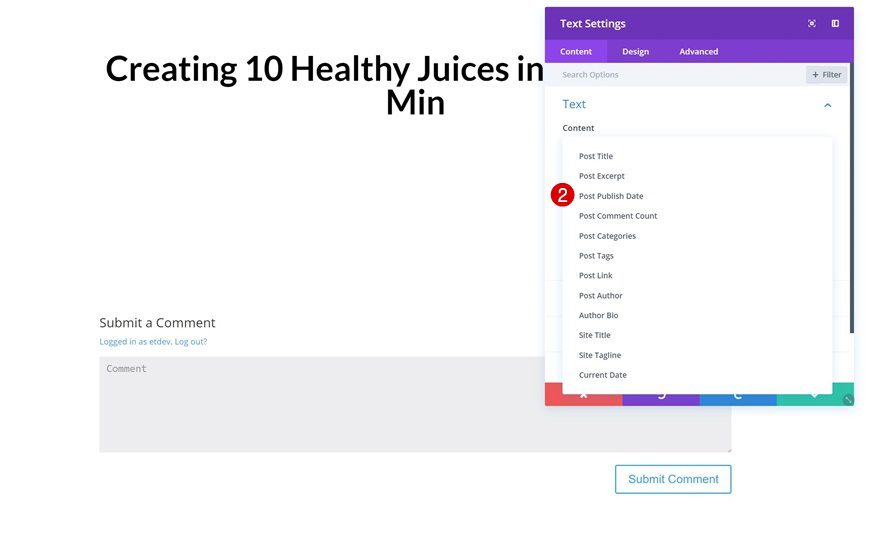
Put up Submit Date Textual content Module
Choose Put up Submit Date Dynamic Content material
The second one module we’ll want is a Textual content Module containing the Put up Submit Date. Pass forward and upload one and choose Put up Submit Date within the dynamic content material listing.
Textual content Settings
Exchange the textual content settings of this module subsequent.
- Textual content Font Weight: Gentle
- Textual content Colour: #000000
- Textual content Measurement: 30px (Desktop), 20px (Pill), 16px (Telephone)
- Textual content Letter Spacing: 14px
- Textual content Orientation: Middle

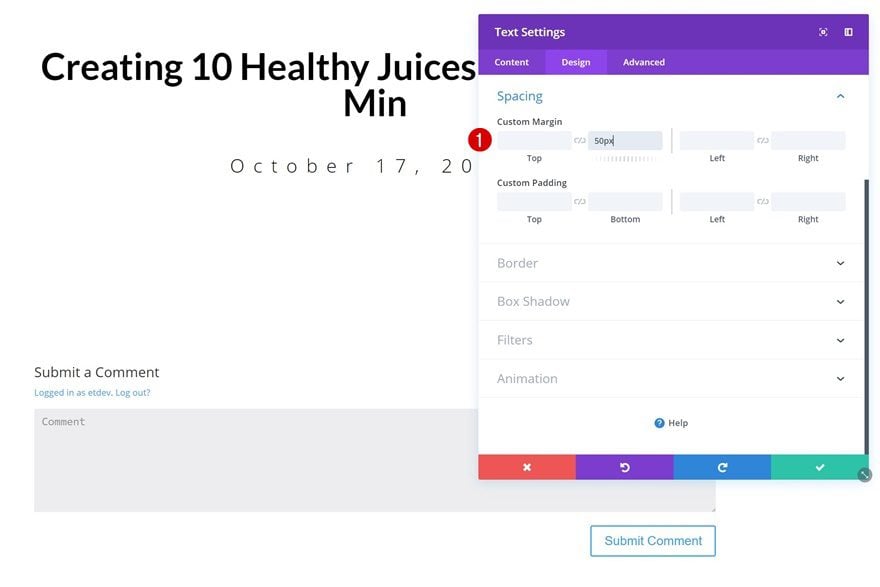
Spacing
Upload some backside margin as smartly.
- Backside Margin: 50px
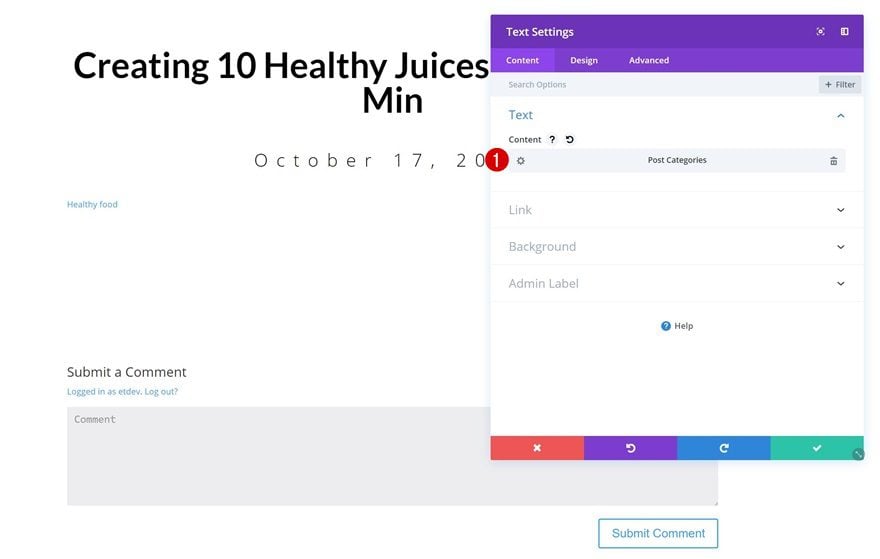
Put up Classes Textual content Module
Choose Classes Dynamic Content material
The closing module we’ll upload is a Textual content Module containing Put up Classes dynamic content material.
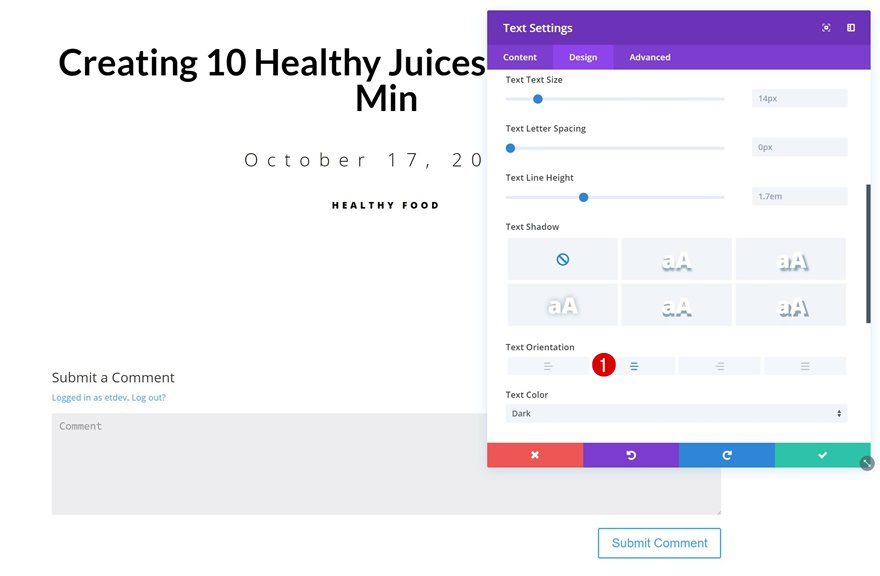
Textual content Settings
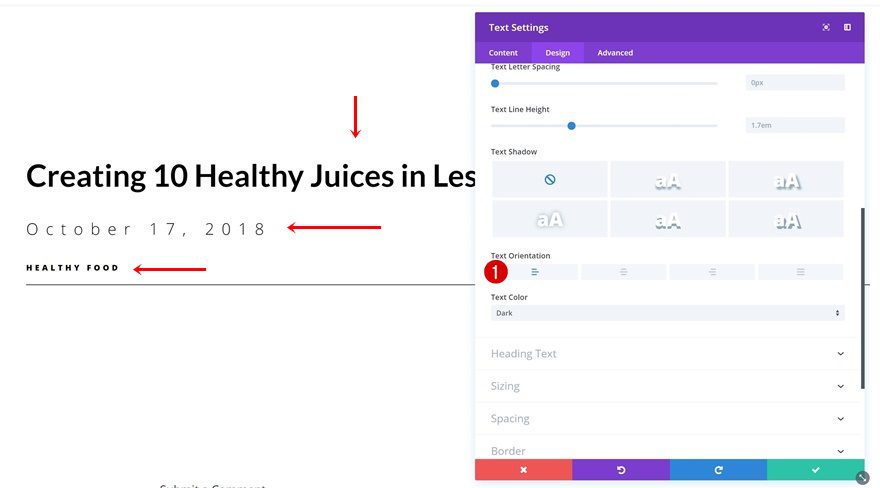
Pass to the textual content settings and alter the textual content orientation.
- Textual content Orientation: Middle
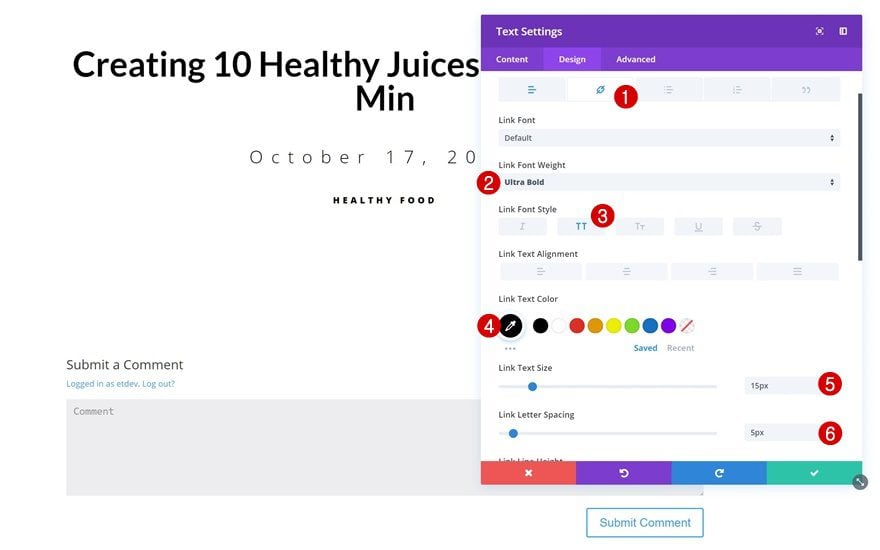
Hyperlink Textual content Settings
Then, observe some adjustments to the hyperlink textual content settings.
- Hyperlink Font Weight: Extremely Daring
- Hyperlink Font Taste: Uppercase
- Hyperlink Textual content Colour: #000000
- Hyperlink Textual content Measurement: 15px
- Hyperlink Letter Spacing: 5px
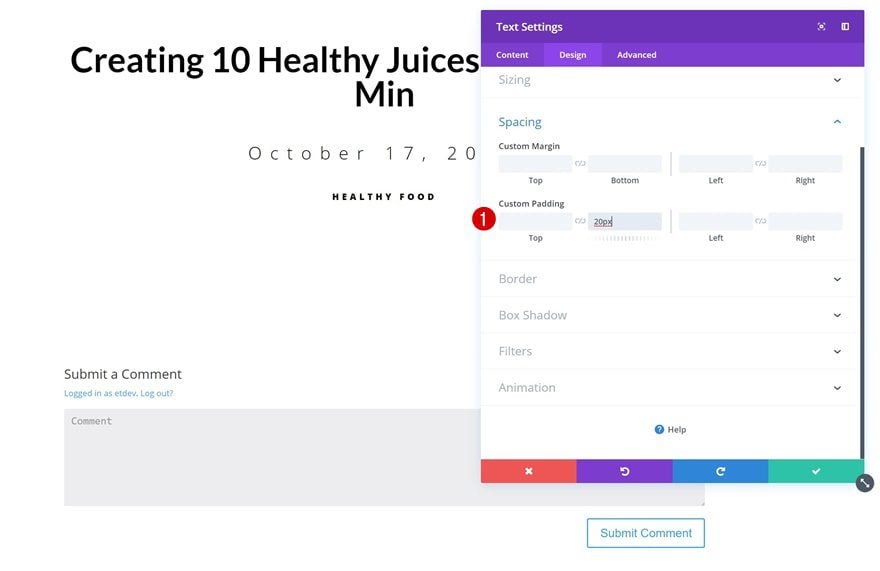
Spacing
Upload backside padding subsequent.
- Backside Padding: 20px
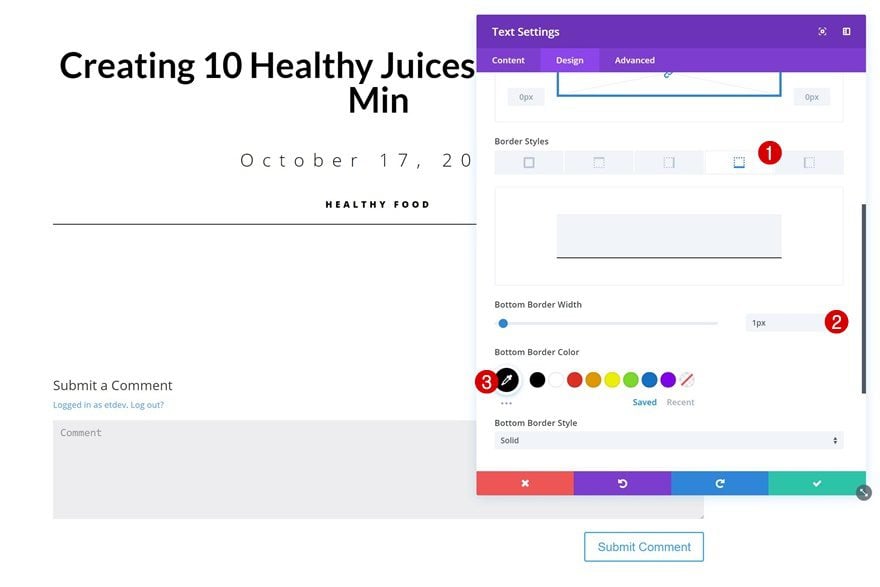
Border
And end off with a delicate backside border.
- Backside Border Width: 1px
- Backside Border Colour: #000000
Developing Instance #1
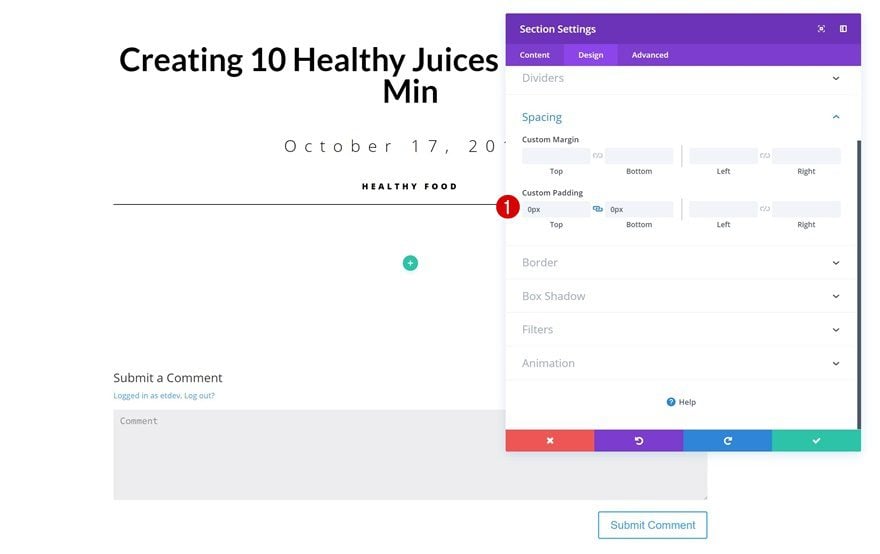
Upload New Segment
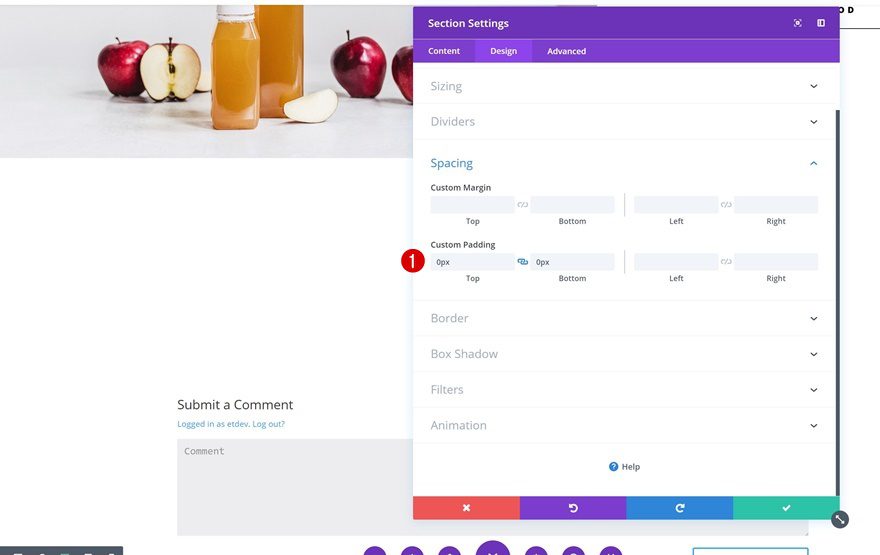
Spacing
Let’s get started growing the primary instance! Proper underneath the former phase you’ve created, pass forward and upload a brand new one. Open its settings and take away the entire default customized padding.
- Most sensible Padding: 0px
- Backside Padding: 0px
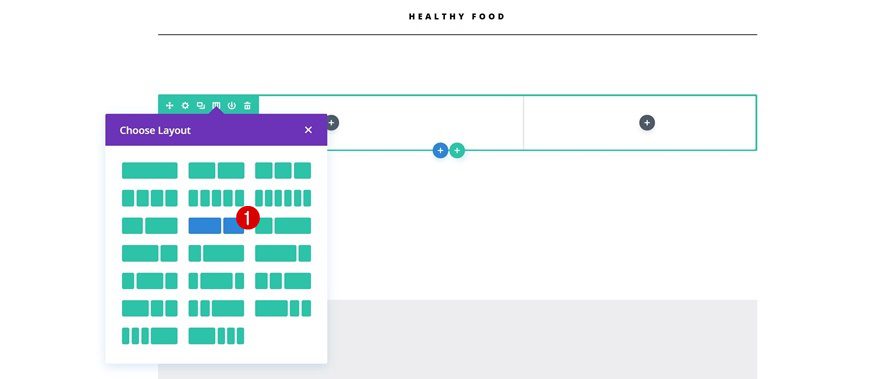
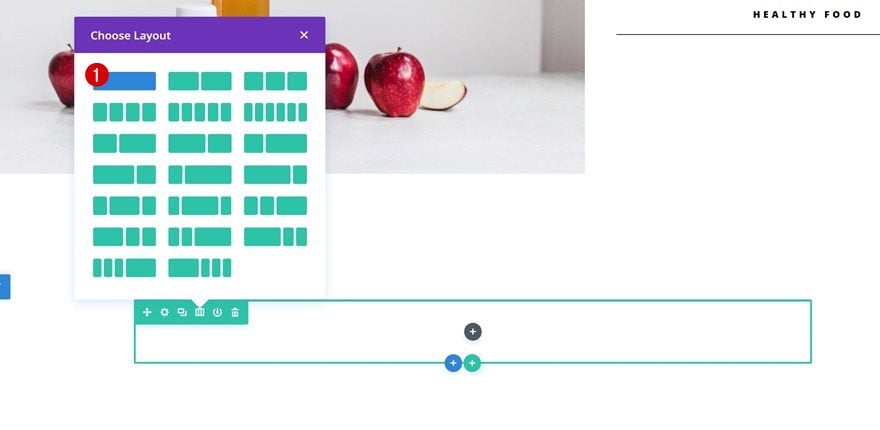
Upload New Row
Column Construction
Proceed via including a brand new row with the next column construction:
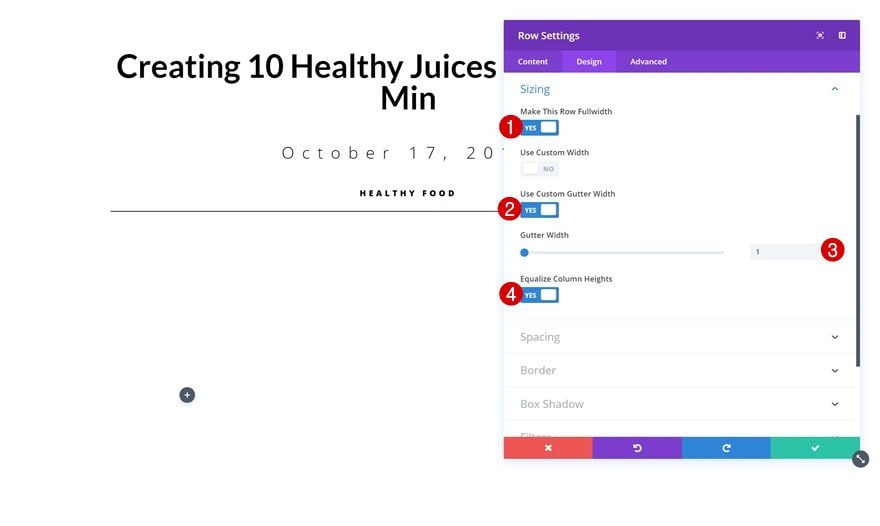
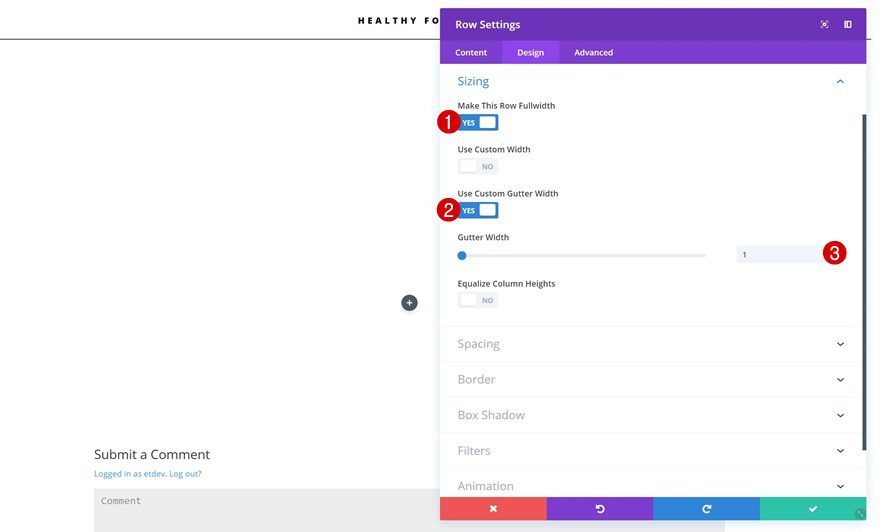
Sizing
Open the sizing settings of this row and alter issues round.
- Make This Row Fullwidth: Sure
- Use Customized Gutter Width: Sure
- Gutter Width: 1
- Equalize Column Heights: Sure
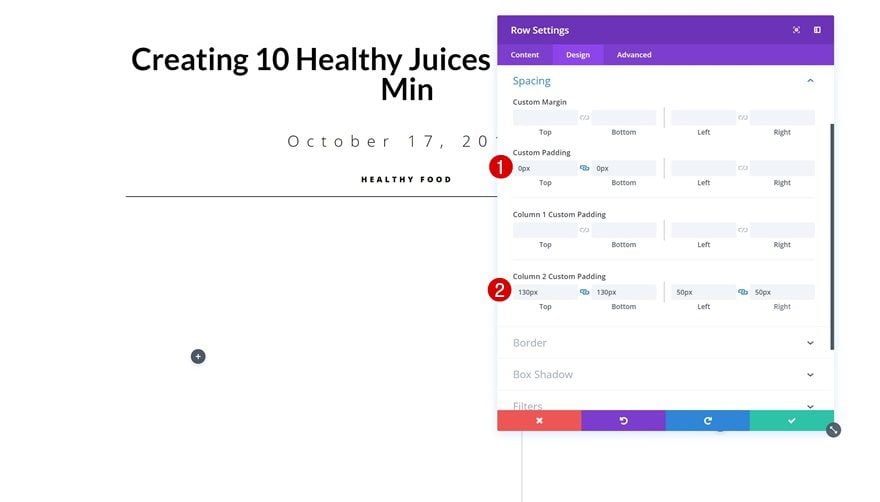
Spacing
Upload some customized spacing values subsequent.
- Most sensible Padding: 0px
- Backside Padding: 0px
- Column 2 Most sensible Padding: 130px
- Column 2 Backside Padding: 130px
- Column 2 Left Padding: 50px
- Column 2 Proper Padding: 50px
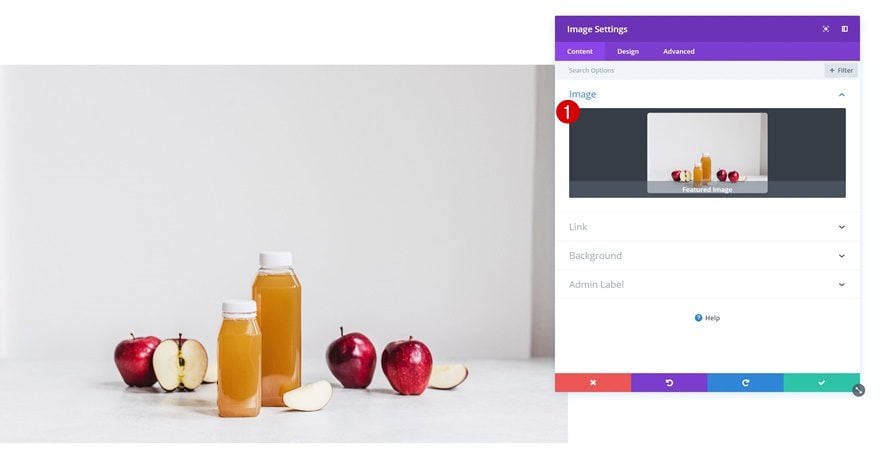
Upload Symbol Module to Column 1
Choose Featured Symbol Dynamic Content material
Continue via including an Symbol Module to the primary column. As an alternative of importing a picture, hyperlink the module to the dynamic Featured Symbol.
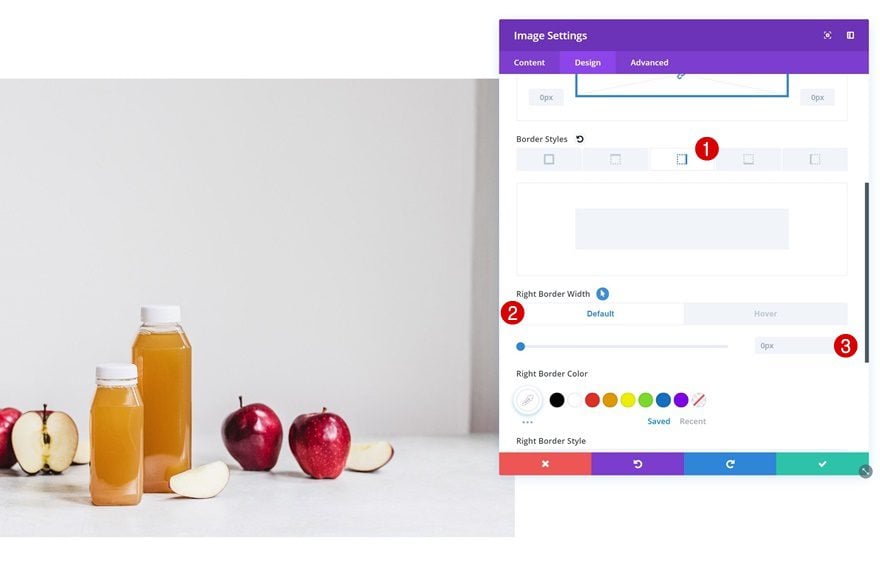
Border Default
We’re additionally including a proper border on hover. To try this, make a choice the next default border width first:
- Proper Border Width: 0px
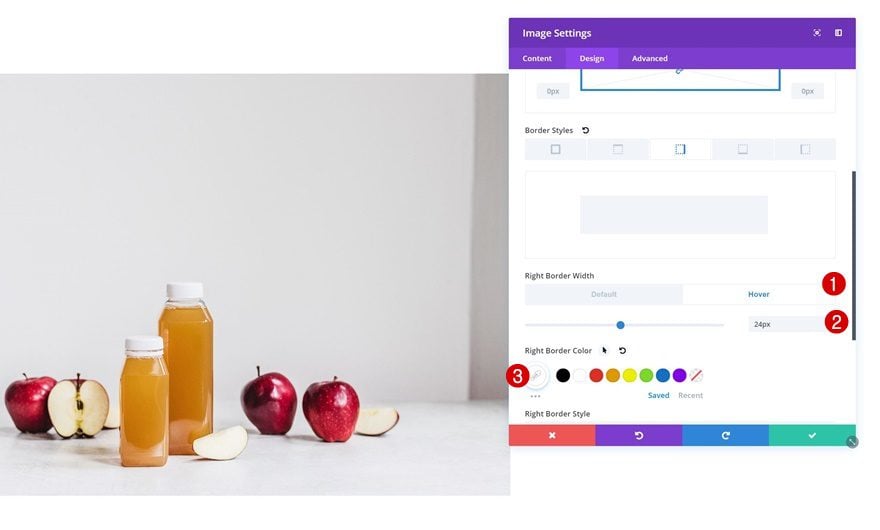
Border Hover
And upload the next settings on hover:
- Proper Border Width: 24px
- Proper Border Colour: #FFFFFF
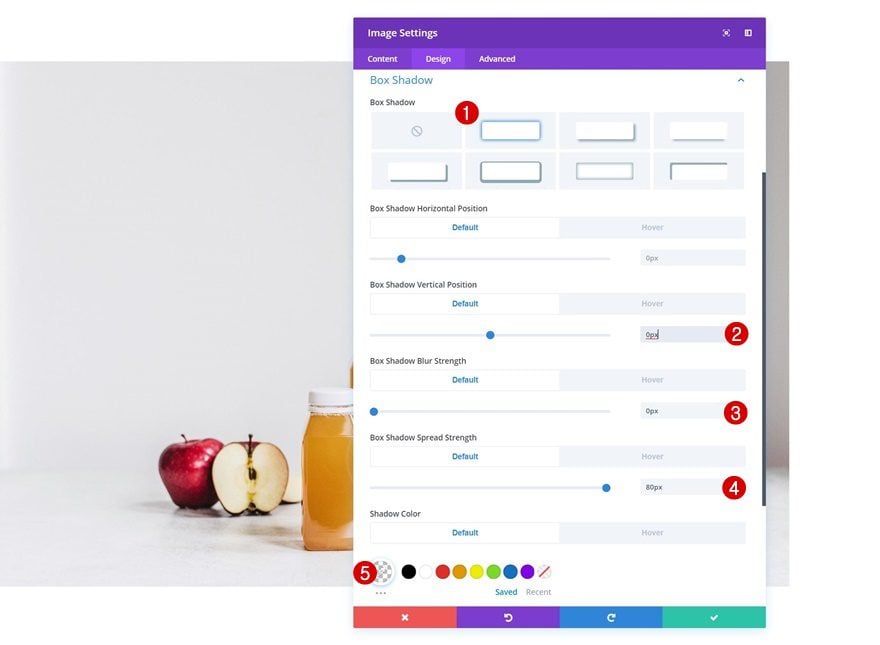
Field Shadow Default
Identical is going for the field shadow, observe the next default field shadow settings:
- Field Shadow Vertical Place: 0px
- Field Shadow Blur Power: 0px
- Field Shadow Unfold Power: 80px
- Shadow Colour: rgba(255,255,255,0)
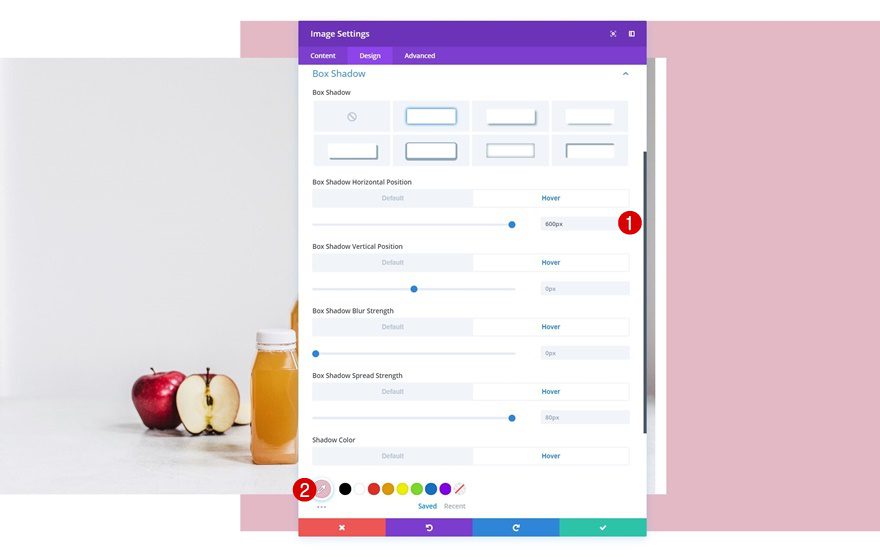
Field Shadow Hover
And alter issues round on hover:
- Field Shadow Horizontal Place: 600px
- Field Shadow Vertical Place: 0px
- Field Shadow Blur Power: 0px
- Field Shadow Unfold Power: 80px
- Shadow Colour: #E4BAC7
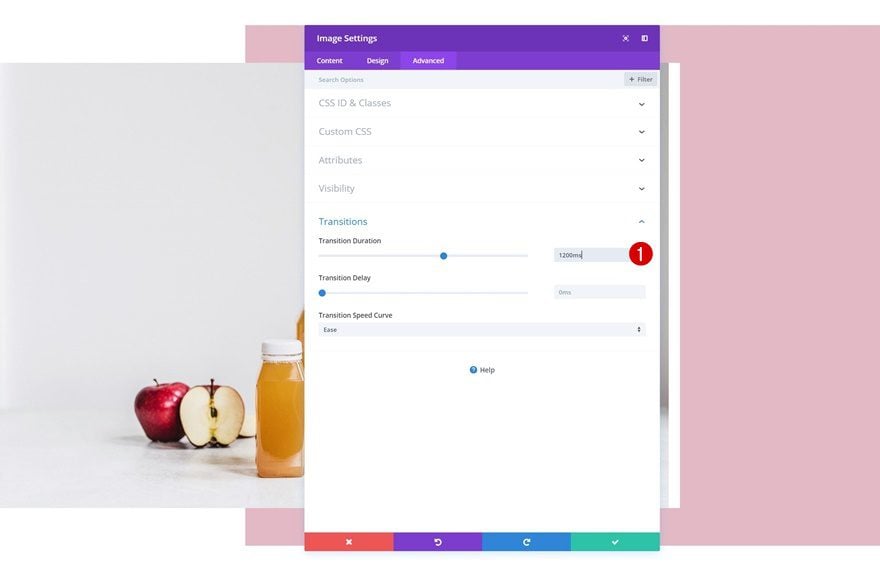
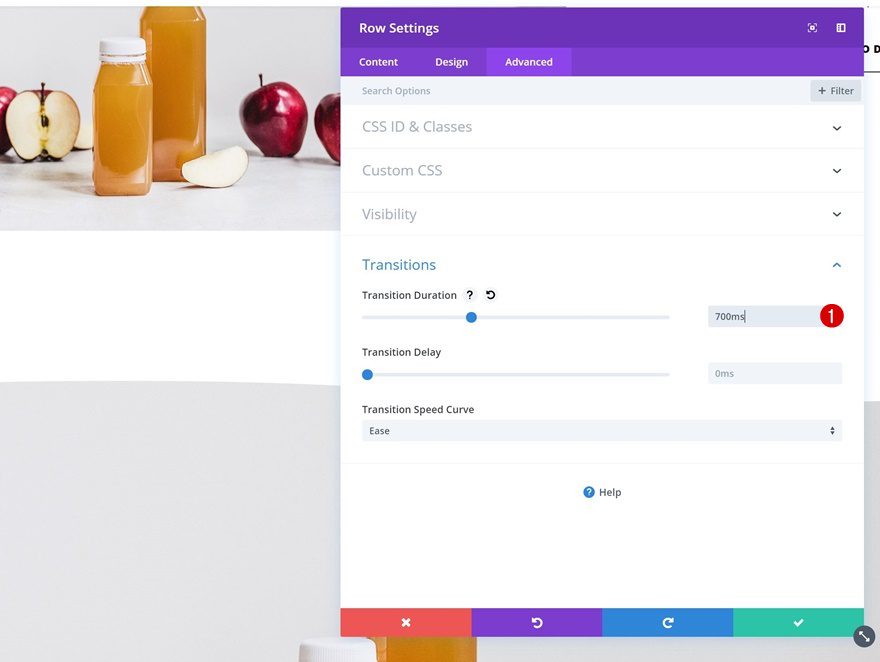
Transitions
To create a clean transition, trade the transition length within the complicated tab.
- Transition Length: 1200ms
Position Dynamic Modules in Column 2
The one factor left to do to finish this situation is putting the modules we’ve created within the first a part of this educational in the second one column.
Developing Instance #2
Upload New Segment
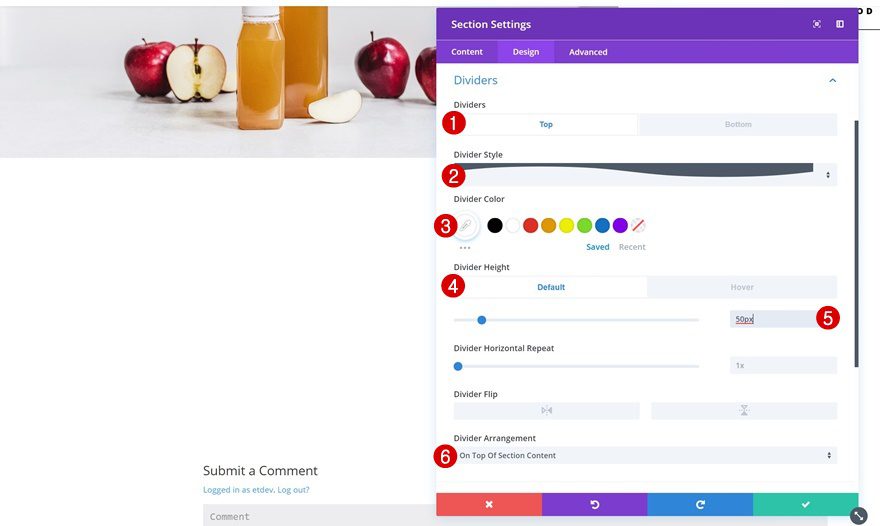
Most sensible Divider Default
Directly to the following one! Upload a brand new phase with the next best divider:
- Divider Taste: To find in Listing
- Divider Colour: #FFFFFF
- Divider Top: 50px
- Divider Association: On Most sensible Of Segment Content material
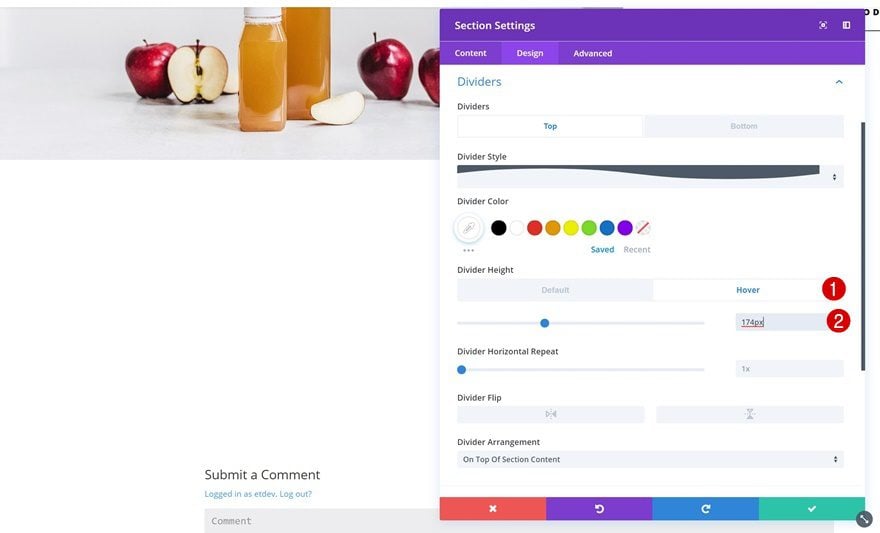
Most sensible Divider Hover
Exchange the divider peak on hover.
- Divider Top: 174px
Spacing
Take away the entire customized padding of the phase subsequent. This will likely permit the row and phase to collide in one of the most subsequent steps.
- Most sensible Padding: 0px
- Backside Padding: 0px
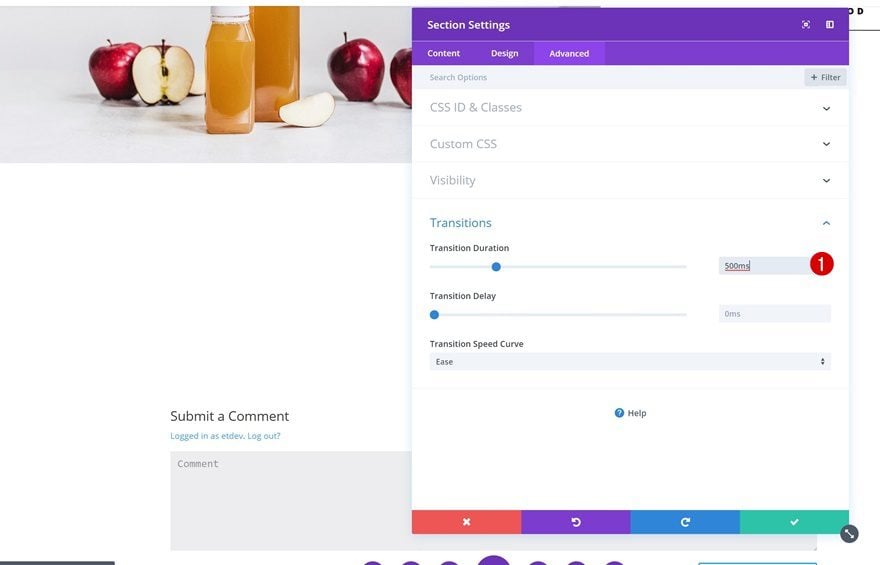
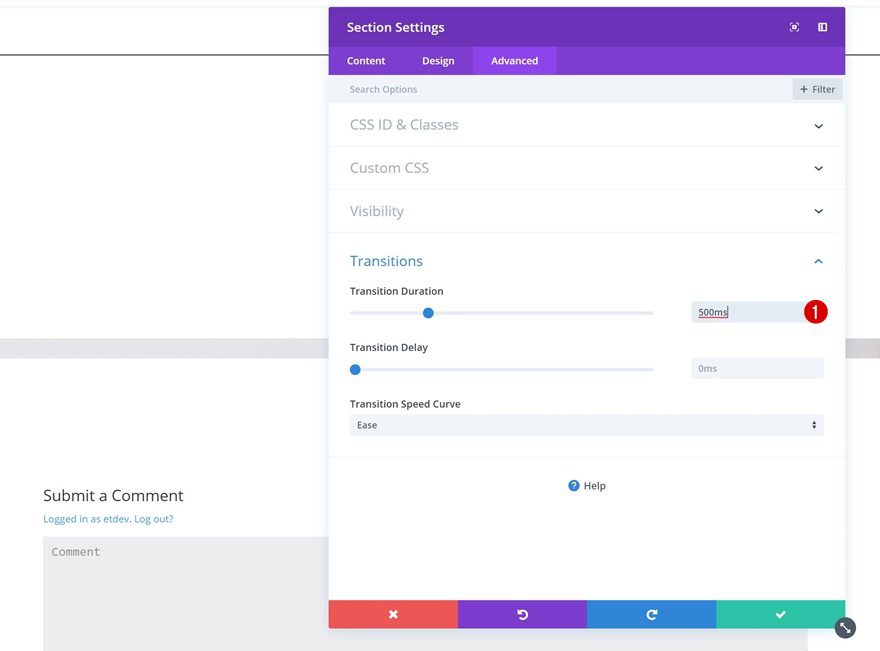
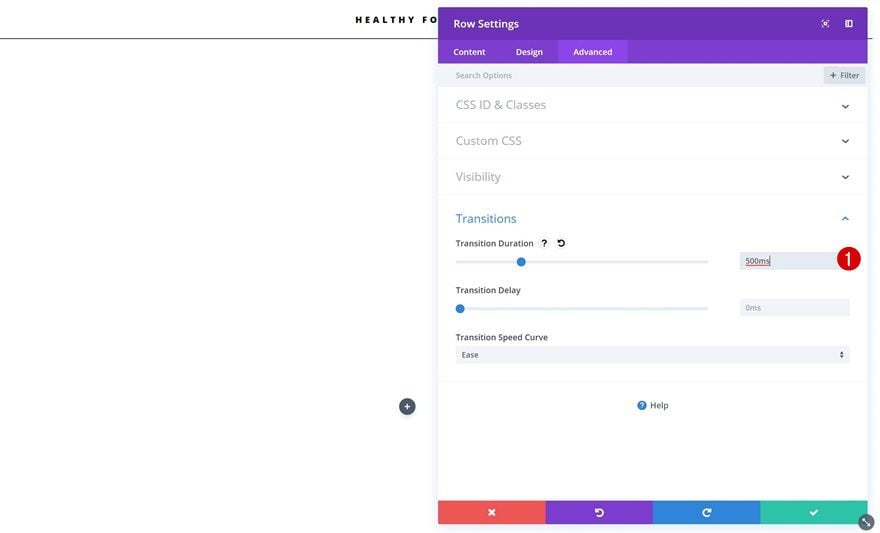
Transitions
To create a clean divider transition, trade the transition length within the complicated tab.
- Transition Length: 500ms
Upload New Row
Column Construction
Now, pass forward and upload a row on your phase the usage of the next column construction:
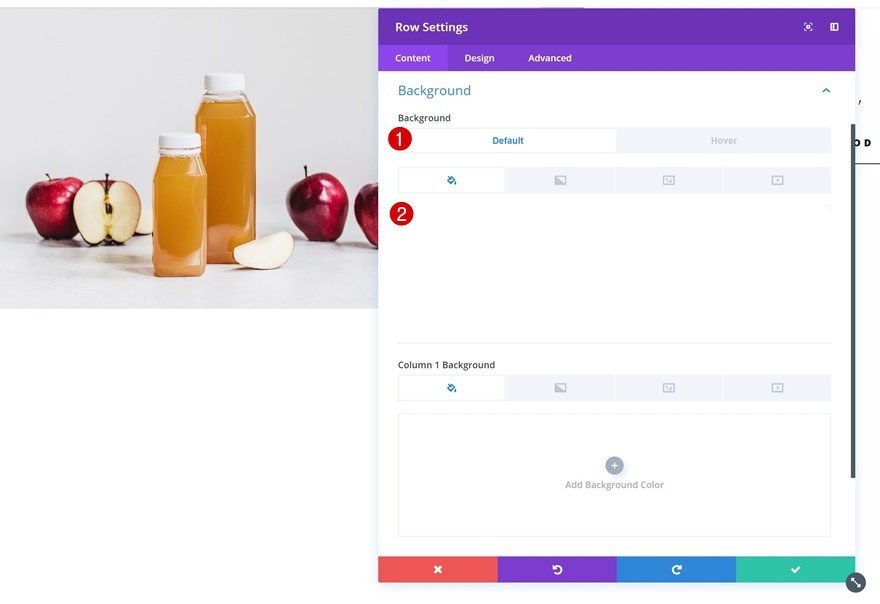
Background Colour Default
Upload the next background colour to it:
- Background Colour: #FFFFFF
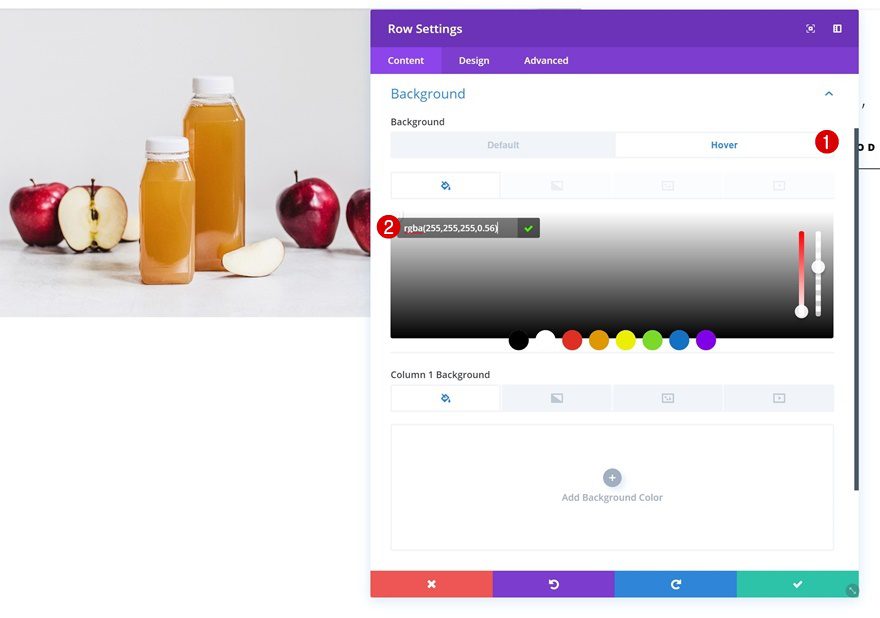
Background Colour Hover
Exchange the background colour on hover.
- Background Colour: rgba(255,255,255,0.56)
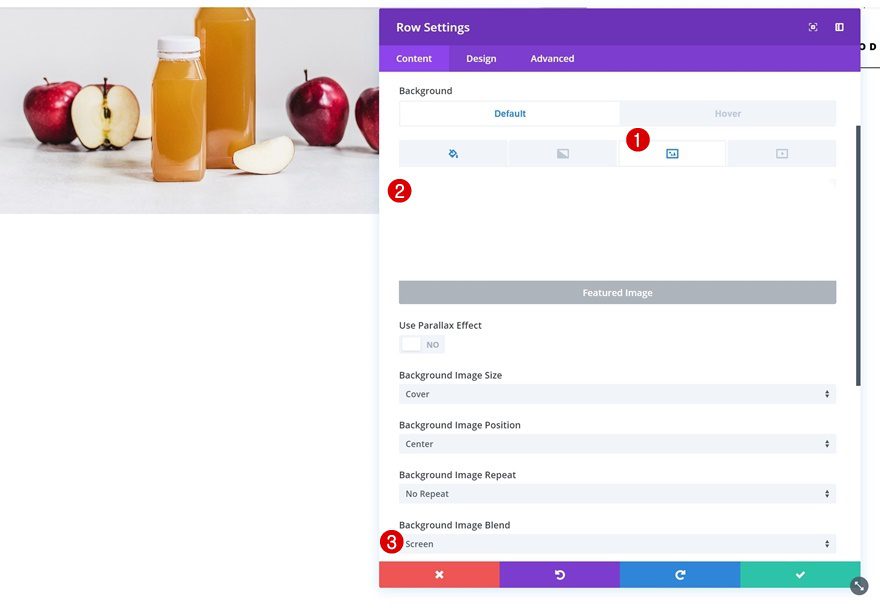
Featured Symbol Dynamic Background Symbol
Add the Featured Symbol as a dynamic row background symbol as smartly. After you accomplish that, trade the background symbol mix.
- Background Symbol Mix: Display
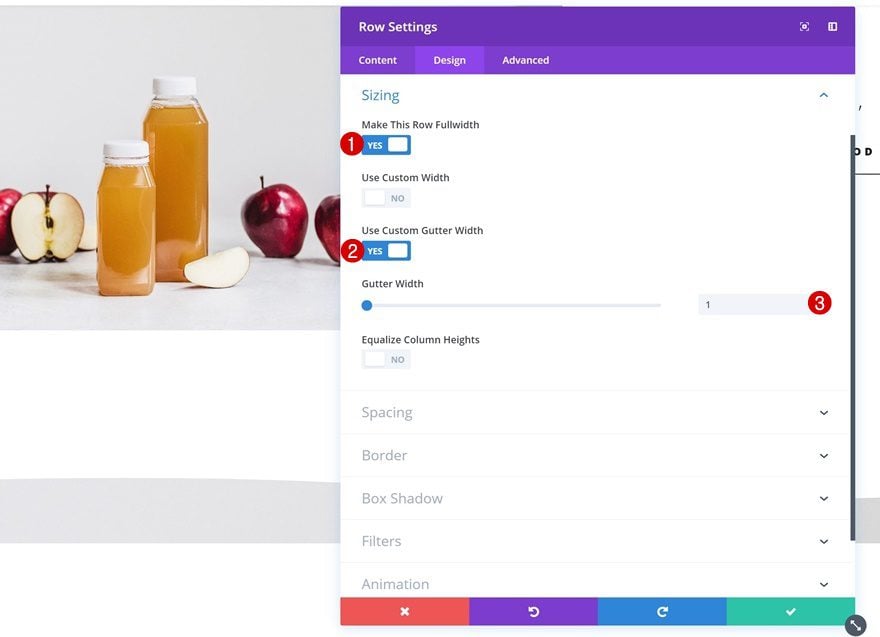
Sizing
Permit the row to absorb all the width of the display screen via converting the sizing settings.
- Make This Row Fullwidth: Sure
- Use Customized gutter Width: Sure
- Gutter Width: 1
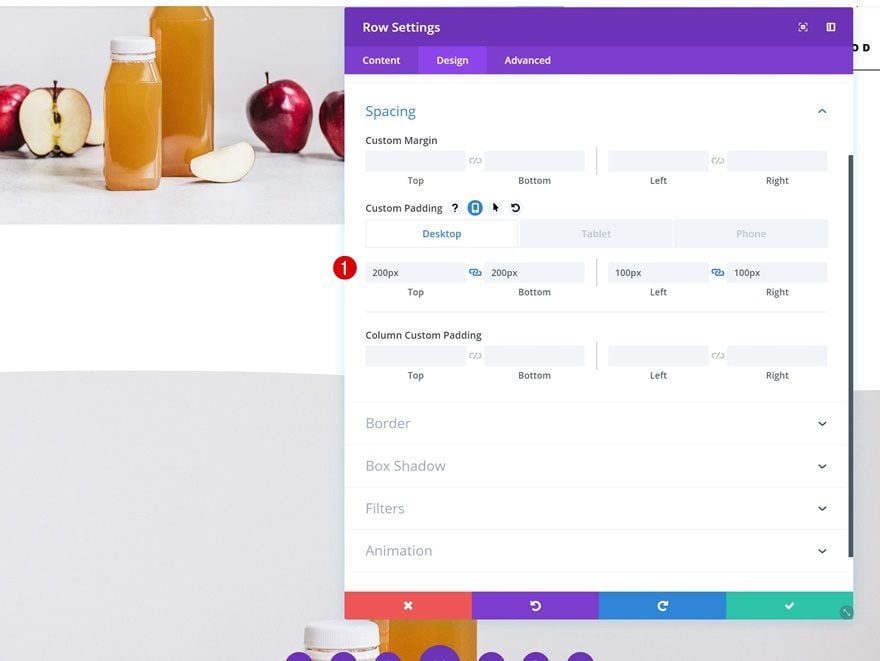
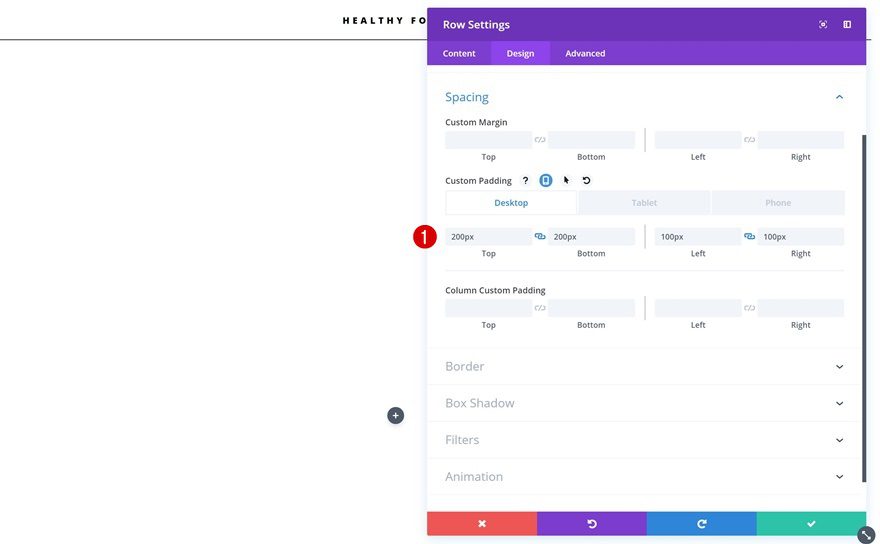
Spacing
And upload some customized padding spacing values.
- Most sensible Padding: 200px
- Backside Padding: 200px
- Left Padding: 100px (Desktop), 50px (Pill), 20px (Telephone)
- Proper Padding: 100px (Desktop), 50px (Pill), 20px (Telephone)
Transitions
Remaining however no longer least, create a clean transition via converting the transition length.
- Transition Length: 700ms
Position Dynamic Modules in Column
You’ll now position the entire dynamic modules within the row’s column and also you’re completed with the second one instance!

Developing Instance #3
Upload New Segment
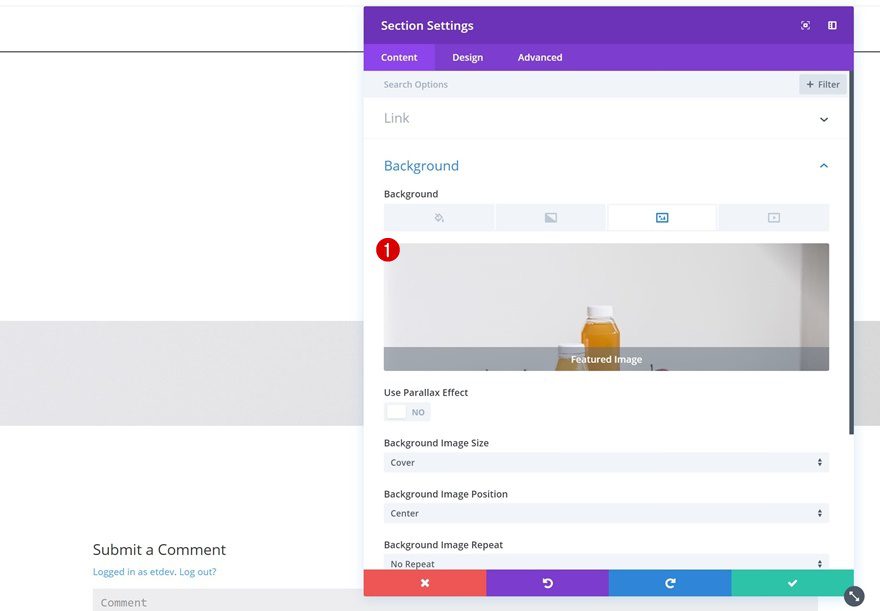
Featured Symbol Dynamic Background Symbol
Directly to the closing instance! Upload a brand new phase and choose the Featured Symbol because the phase background symbol.
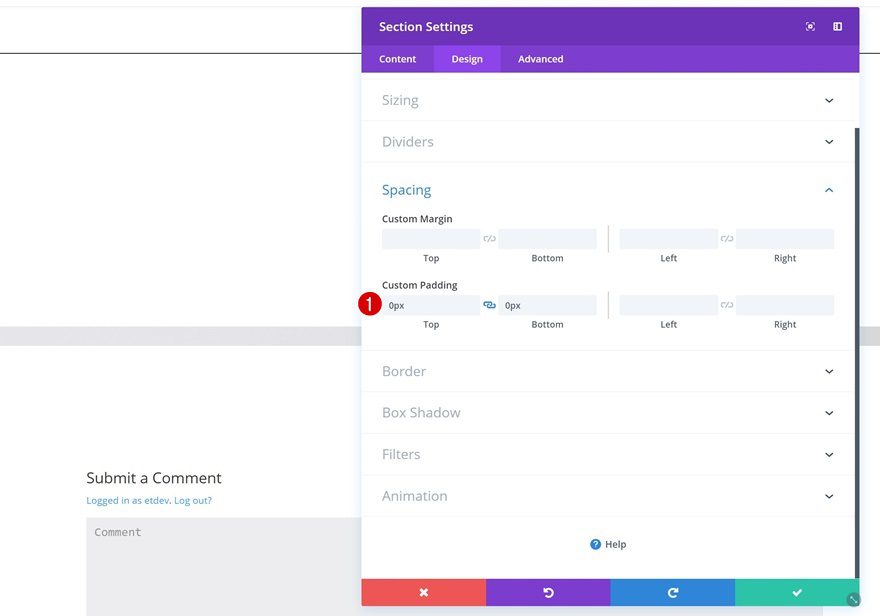
Spacing Default
Then, take away the entire default customized padding of the phase.
- Most sensible Padding: 0px
- Backside Padding: 0px
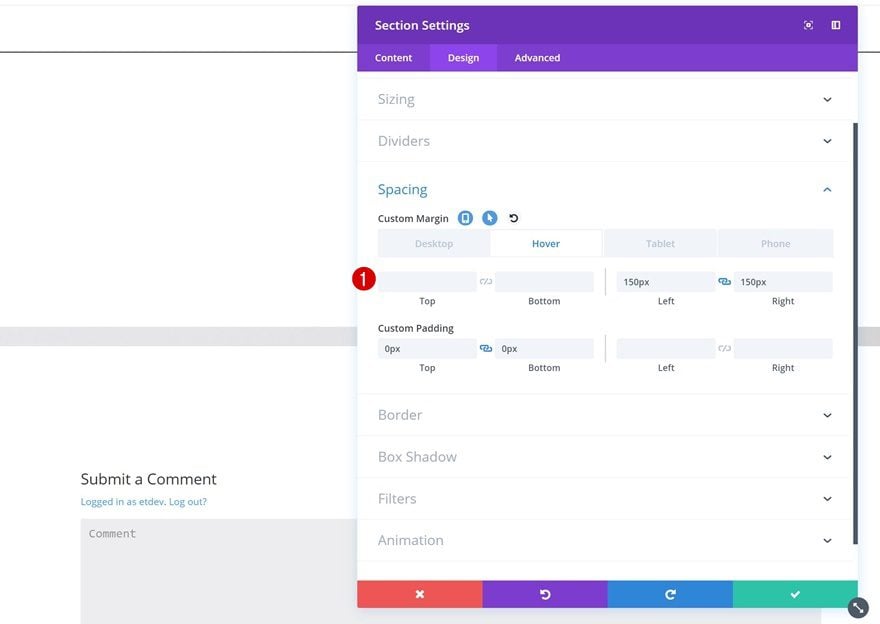
Spacing Hover
Upload some customized margin on hover to create a shrinking impact.
- Left Padding: 150px (Desktop), 50px (Pill), 30px (Telephone)
- Proper Padding: 150px (Desktop), 50px (Pill), 30px (Telephone)
Transitions
Exchange the transition length as smartly.
- Transition Length: 500ms
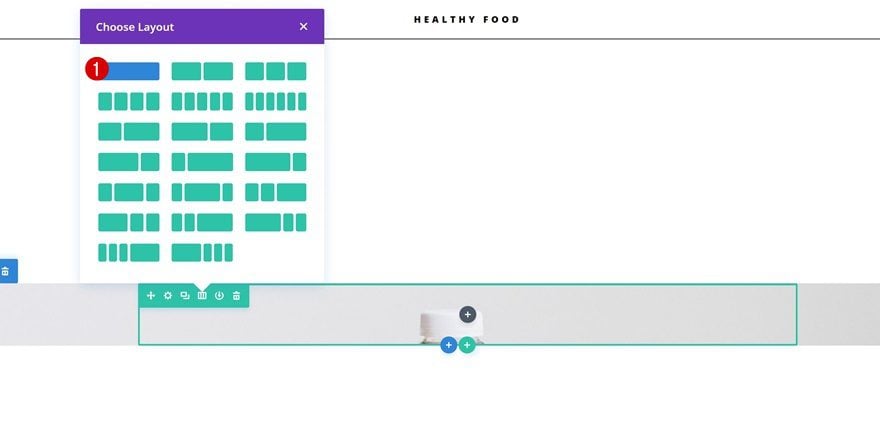
Upload New Row
Column Construction
Whenever you’re completed editing the phase settings, proceed via including a brand new row with the next column construction:
Background Colour Default
Upload the next background colour:
- Background Colour: #ffffff

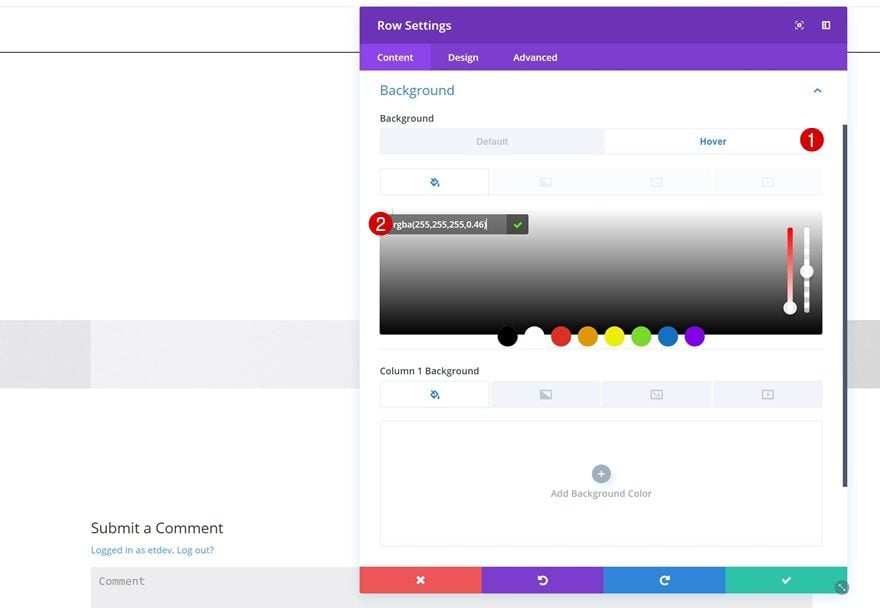
Background Colour Hover
Exchange the background colour on hover.
- Background Colour: rgba(255,255,255,0.46)
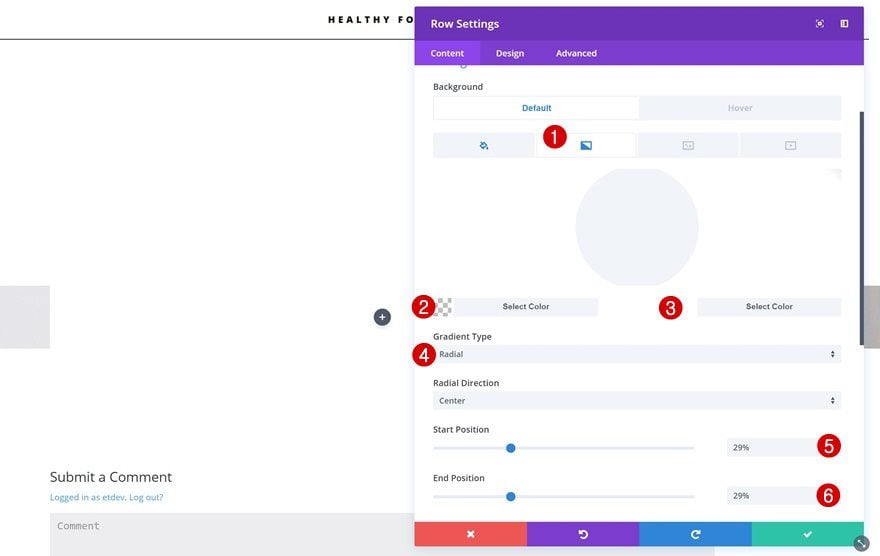
Gradient Background
Upload a radial gradient background as smartly.
- Colour 1: rgba(41,196,169,0)
- Colour 2: #ffffff
- Gradient Kind: Radial
- Get started Place: 29%
- Finish Place: 29%
Sizing
Exchange the sizing settings of the row subsequent.
- Make This Row Fullwidth: Sure
- Use Customized Gutter Width: Sure
- Gutter Width: 1
Spacing
And upload some customized padding values.
- Most sensible Padding: 200px
- Backside Padding: 200px
- Left Padding: 100px (Desktop), 50px (Pill), 20px (Telephone)
- Proper Padding: 100px (Desktop), 50px (Pill), 20px (Telephone)
Transitions
Remaining however no longer least, trade the transition length for a clean transition.
- Transition Length: 500ms
Position Dynamic Modules in Column
Pass forward and position all the premade modules within the row’s column.
Exchange Textual content Orientation of All Modules
The one factor you’ll want to trade about those modules is the textual content orientation and also you’re completed!
- Textual content Orientation: Left
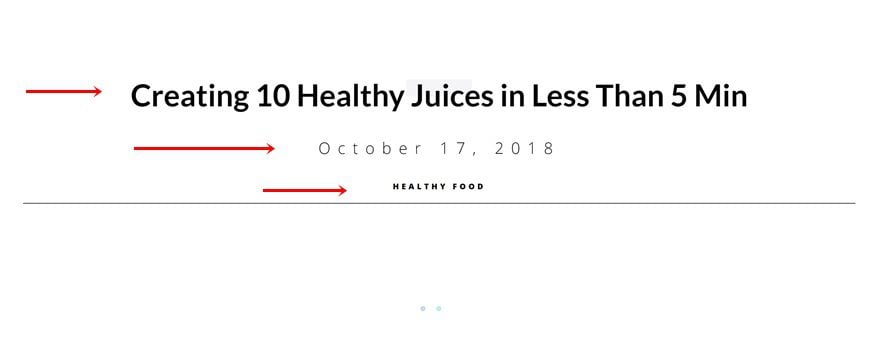
Preview
Now that we’ve long past thru the entire steps, let’s take a last take a look at all 3 examples we’ve created.
Instance #1
Instance #2
Instance #3
Ultimate Ideas
On this publish, we’ve proven you how one can mix dynamic content material with Divi’s hover choices to create surprising weblog publish hero sections. Those examples will undeniably encourage you to create your individual diversifications and personalize the weblog publish you set in the market. When you have any questions or ideas, you’ll want to depart a remark within the remark phase underneath!
The publish How to Create Beautiful & Engaging Dynamic Blog Post Hero Sections with Divi gave the impression first on Elegant Themes Blog.
WordPress Web Design