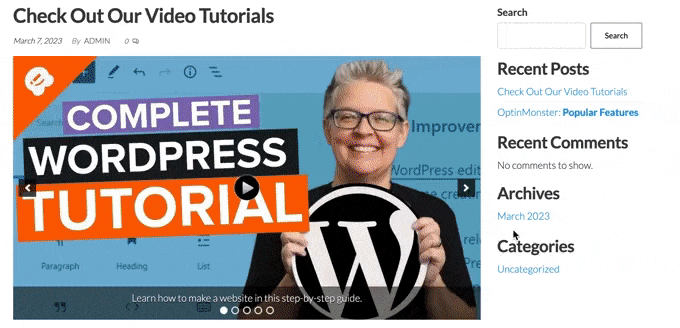
Do you need to create a responsive slider in your WordPress web page?
Sliders are frequently used at the entrance web page of internet sites to exhibit your maximum vital merchandise, services and products, testimonials or different content material in an interactive means.
On this article, we will be able to display you tips on how to upload a responsive slider in your WordPress web page.

Contents
- 1 Why Upload a Responsive WordPress Slider in your Website online?
- 2 Approach 1. Create a Responsive WordPress Slider The use of a Plugin (Fast and Simple)
- 3 Approach 2. Create a Responsive Slider The use of a Web page Builder (Extra Customizable)
- 4 Approach 3. Create a Slider The use of Spoil Balloon (Highest For Social Posts and Evaluations)
Why Upload a Responsive WordPress Slider in your Website online?
A slider or slideshow is a good way to focus on your most well liked WooCommerce merchandise, newest YouTube movies, buyer evaluations, and extra.

Some sliders autoplay, so that they transfer between slides routinely. This lets you show quite a lot of data in a small area, which leaves a lot of room to turn different content material.
Because of this, many internet sites use sliders on their maximum vital pages, similar to a touchdown web page, house web page, or gross sales pages.
Despite the fact that a slider is ready to autoplay, guests can generally transfer between slides manually through clicking on navigation buttons. On this means, a slider encourages guests to engage along with your web page, which makes it extra enticing.
You’ll see within the GIF under how dynamic a slider could make a web page.
With that mentioned, let’s see how you’ll be able to simply create a responsive slider in WordPress. Merely use the short hyperlinks under to leap immediately to the process you need to make use of.
Approach 1. Create a Responsive WordPress Slider The use of a Plugin (Fast and Simple)
If you wish to create a easy slider that appears excellent on desktop and cell, then we propose the usage of the Soliloquy plugin.
This WordPress slider plugin permits you to create slides the usage of pictures out of your media library and too can display movies hosted on third-party platforms like YouTube.

You’ll additionally upload alt textual content and captions to each and every slide, which is superb for WordPress search engine optimization.
First, you’ll want to join a Soliloquy account. After that, you’ll be able to set up and turn on the Soliloquy plugin to your web page. For extra main points, you’ll be able to observe our information on tips on how to set up a WordPress plugin.
Upon activation, move to Soliloquy » Settings within the WordPress dashboard and input your license key.

You’ll to find the important thing through logging into your account at the Soliloquy web page. After getting into this data, click on at the ‘Examine Key’ button.
With that completed, you’ll be able to upload a brand new slider in your WordPress web page through going to Soliloquy » Upload New.

You’ll get started through typing in a identify. That is simply in your reference so you’ll be able to use anything else that is helping you establish the slider on your WordPress dashboard.
Subsequent, it’s time so as to add pictures and movies to the slider. You’ll both drag and drop information onto the editor, or click on ‘Make a selection Recordsdata From Different Resources.’

If you wish to use pictures, then you’ll be able to upload the ones information in precisely the similar means you upload pictures within the WordPress block editor.
If you wish to come with movies, then we propose importing them to a video web hosting web page like YouTube or Vimeo. Importing movies without delay in your web page isn’t a good suggestion, as it could possibly decelerate your web page and soak up a large number of garage.
In the meantime, platforms like YouTube are optimized for video, so you’ll be able to display high-resolution movies on your sliders with out negatively affecting your web page.
After opting for a video web hosting platform, you’ll wish to add the entire movies you need to incorporate within the WordPress slider. If you happen to’re no longer certain tips on how to add movies, then we propose studying the reputable documentation or consumer handbook in your selected video platform.
With that completed, merely click on at the ‘Make a selection Recordsdata from Different Resources’ button after which choose ‘Insert Video Slide.’

You’ll now move forward and paste the video’s URL into the ‘Video URL’ box.
Soliloquy presentations the entire supported hyperlink codecs alongside the right-hand aspect, so be sure that your hyperlink makes use of this type of codecs.

With that completed, you’ll be able to move forward and kind a identify into the ‘Name’ box. That is simply in your reference so you’ll be able to use anything else you need. You’ll additionally upload alt textual content, which can lend a hand the various search engines perceive what this slide is all about.
After that, you’ll be able to kind an non-compulsory caption into the ‘Caption’ box. This can be proven in a gray bar alongside the ground of the video sooner than the customer presses ‘Play.’

If you happen to don’t wish to display this bar, then merely depart the ‘Caption’ box empty.
While you’re pleased with the guidelines you’ve entered, you’ll be able to create extra slides through clicking on ‘Upload Any other Video Slide.’
To configure this new slide, merely observe the similar procedure described above.

If you’ve created your whole slides, move forward and click on on ‘Insert into Slider.’
You’ll now see your whole slides within the ‘Recently in Your Slider’ segment.

Subsequent, you’ll be able to click on at the ‘Configuration’ tab and alter the slider show settings. As an example, there are alternatives to select a brand new slider theme, exchange the picture measurement, and alter the placement of the slider and captions.
You’ll additionally customise the slider arrows and the pause/play button, alter the transition pace, exchange the prolong time, and extra.

Subsequent, you’ll wish to be sure that your slider appears to be like simply as excellent on cell gadgets, because it does on computer systems and laptops.
That mentioned, click on at the ‘Cellular’ tab and take a look at the field subsequent to ‘Create Cellular Slider Photographs.’

You’ll then kind within the sizes you need to make use of for the photographs and movies on cell gadgets. When making those choices, it’s going to lend a hand to view the cell model of your WordPress web page on desktop.
By means of default, Soliloquy will disguise captions for cell customers. Ceaselessly, this is helping the slides have compatibility extra very easily at the smaller displays generally utilized by smartphones and capsules.
For this reason, we propose leaving this atmosphere disabled, however you’ll be able to take a look at the field subsequent to ‘Display Captions on Cellular’ in case you desire.
With that completed, click on at the ‘Misc’ tab. Right here, you’ll be able to upload customized CSS in your slider, edit the slider identify and slug, and export the slider.

While you’re pleased with how the slider is ready up, move forward and click on at the ‘Put up’ button.
Soliloquy will routinely create a shortcode that you’ll be able to upload to any web page, put up, or widget-ready space.

For more info on tips on how to position the shortcode, please see our information on tips on how to upload a shortcode in WordPress.
You’ll additionally realize some code snippets that you’ll be able to upload in your WordPress theme.

For step by step directions, see our information on tips on how to simply upload customized code in WordPress.
One of the simplest ways so as to add the slider in your web page is through the usage of the Soliloquy block. Merely move to the web page or put up the place you need to turn the slider after which click on at the ‘+’ button.
Within the popup that looks, kind in ‘Soliloquy.’

When the proper block seems, click on so as to add it in your WordPress weblog or web page.
After that, open the Soliloquy block and choose the slider you simply created.

You’ll now click on at the ‘Replace’ or ‘Put up’ button to make the slider are living.
Approach 2. Create a Responsive Slider The use of a Web page Builder (Extra Customizable)
If you wish to create a easy slider, then a plugin similar to Soliloquy is a great selection. On the other hand, if you wish to upload a sophisticated slider to touchdown pages, customized house pages, and even your WordPress theme, then we propose the usage of a web page builder plugin as a substitute.
SeedProd is the most productive drag-and-drop WordPress web page builder. It lets you design customized touchdown pages or even create a customized WordPress theme with no need to write down a unmarried line of code.
It additionally has an Symbol Carousel block that you’ll be able to use to create surprising sliders.

You’ll merely drop this ready-made block anyplace on a web page after which customise it the usage of the tough drag-and-drop editor.
First, you want to put in and turn on the SeedProd plugin. For extra main points, see our step by step information on tips on how to set up a WordPress plugin.
Word: There’s a loose model of SeedProd that permits you to create skilled designs it doesn’t matter what your funds. On the other hand, we’ll be the usage of the top rate SeedProd plugin because it comes with the Symbol Carousel block. If you happen to’re making a slider to advertise your merchandise or services and products, then the top rate plugin additionally integrates with WooCommerce and the entire very best e mail advertising and marketing services and products.
After activating the plugin, SeedProd will ask in your license key.

You’ll to find this license key beneath your account at the SeedProd web page. After getting into the guidelines, click on at the ‘Examine Key’ button.
With that completed, move to SeedProd » Touchdown Pages on your WordPress dashboard.

SeedProd comes with over 180 professionally designed templates which might be grouped into classes. Alongside the highest you’ll see classes that assist you to create gorgeous coming quickly pages, turn on repairs mode, create a customized login web page for WordPress, and extra.
All of SeedProd’s templates are simple to customise, so you’ll be able to use any design you need. While you discover a template you favor, merely hover your mouse over it and click on at the checkmark icon.

You’ll now kind a reputation in your touchdown web page into the ‘Web page Identify’ box. SeedProd will routinely create a ‘Web page URL’ the usage of the web page identify.
It’s sensible to incorporate related key phrases on this URL anyplace imaginable, as this may increasingly lend a hand search engines like google and yahoo perceive what the web page is ready. It will ceaselessly reinforce your WordPress search engine optimization.
To switch the web page’s automatically-generated URL, merely kind into the ‘Web page URL’ box.

While you’re pleased with the guidelines you’ve entered, click on on ‘Save and Get started Modifying the Web page.’ This may increasingly load the SeedProd web page builder interface.
This easy drag-and-drop builder presentations a are living preview of your web page design to the proper. At the left is a menu with the entire other blocks and sections you’ll be able to upload to the web page.

While you discover a block you need so as to add, merely drag and drop it onto your template.
To customise a block, simply click on to make a choice that block within the SeedProd editor. The left-hand menu will now replace to turn the entire settings you’ll be able to use to customise it.

As you’re construction the web page, you’ll be able to transfer blocks round your format through dragging and shedding them. For extra detailed directions, please see our information on tips on how to create a touchdown web page with WordPress.
To create a responsive slider the usage of SeedProd, merely to find the Symbol Carousel block within the left-hand menu after which drag it onto your format.

Subsequent, click on to make a choice the Symbol Carousel block within the web page editor.
You’ll now move forward and upload the entire pictures you need to turn within the slider. To begin, click on at the ‘Symbol 1’ merchandise that SeedProd creates through default.

You’ll now both use a photograph from SeedProd’s integrated library, or click on on ‘Use Your Personal Symbol’ and select a record from the WordPress media library.
After opting for a picture, you’ll be able to upload a caption that may seem under that symbol. SeedProd doesn’t show captions through default, however we’ll display you tips on how to allow them later on this put up.

While you’re pleased with how the slide is configured, click on at the ‘Upload Photographs’ button to create any other slide.
So as to add extra slides, merely observe the similar procedure described above.

After including the entire pictures in your slider, it’s time to customise how that slider appears to be like and acts.
Within the left-hand menu, click on to increase the ‘Carousel Settings’ segment.

To begin, you’ll be able to transfer between gentle and darkish modes for the slider’s navigation buttons.
To check out those other modes, click on at the buttons subsequent to ‘Navigation Colour Mode.’ The are living preview will replace routinely so you’ll be able to see which mode you favor the most productive.

By means of default, the carousel presentations a unmarried slide, and guests will wish to use the navigation controls to peer extra content material.
On the other hand, you might wish to display more than one slides directly through opening the ‘Slide to Display’ dropdown and opting for a host from the listing. This may also be helpful if the slider has quite a lot of content material and also you’re nervous guests would possibly no longer click on via the entire slides.

By means of default, guests will wish to click on to peer the following slide. With that during thoughts, you might wish to allow autoplay, as this ceaselessly will increase what number of slides a customer sees.
To do that, click on to allow the ‘Autoplay’ transfer after which specify how lengthy each and every slide must keep onscreen through typing a host into ‘Autoplay Pace.’

If you happen to added captions in your pictures, then you should definitely click on at the ‘Display Caption’ slider to show it from ‘No’ to ‘Sure.’
You’ll additionally exchange the caption alignment.

Relying at the background colour, you might wish to exchange the caption colour sooner than they’re visual to guests.
To do that, click on at the ‘Complex’ tab after which use the ‘Caption Colour’ settings.

You’ll additional taste the textual content through clicking at the ‘Edit’ button subsequent to ‘Caption Typography.’
This provides some settings the place you’ll be able to exchange the font measurement, line top, spacing, and extra.

While you’re pleased with how the captions glance, you’ll be able to upload other field shadows to the slides the usage of the ‘Slider Symbol Types’ dropdown.
Those shadows can truly make the slides stand out, so it’s value attempting other shadows to peer whether or not they suit your web page design.

Within the ‘Complex’ tab you’ll additionally to find settings that assist you to upload a border, exchange the spacing, or even create an front animation.
All these settings are self-explanatory so it’s value taking a look via them to peer what other roughly results you’ll be able to create.

While you’re pleased with how the slider appears to be like, you’ll be able to proceed operating on the remainder of the web page. Merely drag blocks onto your design after which customise them the usage of the settings within the left-hand menu.
If you wish to delete a block, then merely hover over it after which click on at the trash can icon when it seems that.

When requested, move forward and click on on ‘Sure, delete it.’
While you’re pleased with how the web page appears to be like, it’s time to make it are living through clicking at the ‘Save’ button. In the end, choose ‘Put up’ to make your slider are living.

Approach 3. Create a Slider The use of Spoil Balloon (Highest For Social Posts and Evaluations)
We’re much more likely to take a look at issues that we see people purchasing, the usage of, or recommending. With that being mentioned, it’s a good suggestion to turn social evidence to your web page together with buyer evaluations, testimonials, and even certain feedback you’ve were given on social media.
One of the simplest ways to turn social evidence to your web page is through the usage of Spoil Balloon. Spoil Balloon has plugins that assist you to embed content material from Instagram, Fb, Twitter, and YouTube.
It additionally has a Evaluations Feed plugin that you’ll be able to use to show evaluations from Fb, Tripadvisor, Yelp, and Google.

On the other hand, appearing quite a lot of certain feedback and evaluations to your on-line retailer or web page can soak up a large number of area.
That’s why Spoil Balloon comes with integrated carousel layouts and templates that you’ll be able to use to create responsive sliders. This lets you create social media and evaluation slideshows with only some clicks.

Even higher, Spoil Balloon will fetch new content material routinely so the slider will all the time display the newest posts.
An alternative choice is appearing the content material from your personal social media accounts.

If guests like what they see, they could make a decision to observe you on social media.
That can assist you get extra fans, Spoil Balloon comes with ready-made name to motion buttons that you’ll be able to upload in your sliders.

For detailed step by step directions, please see our guides on tips on how to upload social media feeds to WordPress, and tips on how to display Google, Fb, and Yelp evaluations in WordPress.
We are hoping that this newsletter helped you discover ways to simply create a responsive WordPress slider. You may additionally need to take a look at our information on how to select the most productive design instrument, or see our knowledgeable select of the very best are living chat instrument for small companies.
If you happen to preferred this newsletter, then please subscribe to our YouTube Channel for WordPress video tutorials. You’ll additionally to find us on Twitter and Fb.
The put up Find out how to Simply Create a Responsive Slider in WordPress first seemed on WPBeginner.
WordPress Maintenance