
Authentication is one among internet programs’ most crucial and crucial options. Internet frameworks like Laravel supply some ways for customers to authenticate.
You’ll put in force Laravel authentication options briefly and securely. Alternatively, enforcing those authentication options poorly will also be dangerous, as malicious events can exploit them.
This information will train you all you want to understand to get began along with your selected Laravel authentication strategies.
Learn on!
Contents
An Intro To Laravel Authentication
Laravel introduces modules which might be made up of “guards” and “suppliers.” Guards outline person authentication for each and every request, and suppliers outline person retrieval from power garage (e.g. MySQL database).
We outline our authentication parameters in a report named config/auth.php. It comprises a number of choices to tweak and adjust Laravel’s authentication conduct.
First, it’s important to outline the authentication defaults. This selection controls your software’s default authentication “guard” and password reset choices. Chances are you’ll trade those defaults as required, however they’re a great get started for many programs.
Subsequent, you outline authentication guards in your software. Right here, our default configuration makes use of consultation garage and the Eloquent person supplier. All authentication drivers have a person supplier.
go back [
    /*
    Defining Authentication Defaults
    */

    'defaults' => [
        'guard' => 'web',
        'passwords' => 'users',
    ],

    /*
    Defining Authentication Guards

    Supported: "consultation"
    */

    'guards' => [
        'web' => [
            'driver' => 'session',
            'provider' => 'users',
        ],
     ],

    /*
    Defining Consumer Suppliers

    Supported: "database", "eloquent"
    */

    'suppliers' => [
        'users' => [
             'driver' => 'eloquent',
             'model' => AppModelsUser::class,
        ],

        // 'customers' => [
        //     'driver' => 'database',
        //     'table' => 'users',
        // ],
    ],

    /*
    Defining Password Resetting
    */

    'passwords' => [
        'users' => [
            'provider' => 'users',
            'table' => 'password_resets',
            'expire' => 60,
            'throttle' => 60,
         ],
     ],

     /*
     Defining Password Affirmation Timeout
     */

    'password_timeout' => 10800,
];
Later, we be sure that all authentication drivers have a person supplier. This defines how the customers are retrieved out of your database or different garage mechanisms to persist your person’s knowledge. Chances are you’ll configure a couple of resources representing each and every fashion or desk in case you have a couple of person tables or fashions. Those resources could also be assigned to any additional authentication guards you have got outlined.
Customers may additionally need to reset their passwords. For this, you’ll specify a couple of password reset configurations in case you have multiple person desk or fashion within the software and need separate settings in keeping with the precise person varieties. The expiration time is the selection of mins each and every reset token can be legitimate. This safety function helps to keep tokens short-lived, so they have got much less time to be guessed. Chances are you’ll trade this as wanted.
In the long run, you should outline the time sooner than a password affirmation instances out, and the person is brought on to re-enter their password by the use of the affirmation display screen. Through default, the timeout lasts for 3 hours.
Sorts of Laravel Authentication Strategies
There’s no very best approach of authenticating each state of affairs, however understanding them will allow you to make higher selections. This and the way Laravel is evolving with the brand new options in Laravel 9. This makes our task as builders approach more uncomplicated when switching authentication modes.
Password Primarily based Authentication
As a rudimentary strategy to authenticate a person, it’s nonetheless utilized by hundreds of organizations, however taking into consideration present building, it’s obviously changing into out of date.
Distributors should put in force advanced password implementations whilst making sure minimum friction for the top person.
It really works beautiful simple, the person inputs the title and the password, and if within the Database there’s a fit between the ones two, the server makes a decision to authenticate the request and let the person get admission to the sources for a predefined time.
Token Primarily based Authentication
This technique is used the place the person is issued a singular token upon verification.
Having this token, now the person can get admission to related sources. The privilege is lively till the token expires.
Whilst the token is lively, the person does now not have to make use of any username or password, however upon retrieving a brand new token, the ones two are required.
Tokens are widely utilized in a couple of eventualities nowadays since they’re stateless entities that include the entire authentication knowledge.
Offering a strategy to separate token technology from token verification offers distributors a lot flexibility.
Multi-Issue Authentication
Because the title suggests, it implies the use of no less than two authentication elements, raising the protection it supplies.
In contrast to two-factor authentication that comes to two elements handiest, this technique can contain two, 3, 4, and extra…
This technique’s standard implementation comes to the use of a password, and then the person is shipped a verification code on their smartphone. Distributors enforcing this technique must search for false positives and community outages, which will turn into giant issues whilst scaling up rapid.
How To Enforce Laravel Authentication
This segment will train you a couple of tactics to authenticate your software’s customers. Some libraries like Jetstream, Breeze, and Socialite have loose tutorials on the way to use them.
Handbook Authentication
Beginning with registering customers and growing the wanted routes in routes/internet.php.
We can create two routes, one to view the shape and one to sign up:
use AppHttpContrllersAuthRegisterController;
use IlluminateSupportFacadesRoute;

/*
Internet Routes

Sign up internet routes in your app's RouteServiceProvider
in a gaggle containing the "internet" middleware
*/

Direction::get('/sign up', [RegisterController::class], 'create']);

Direction::publish('/sign up', [RegisterController::class], 'retailer']);
And create the controller wanted for the ones:
php artisan make controller Auth/RegisterController -rNow replace the code as follows:
namespace AppHttpControllersAuth;

use AppHttpControllersController;
use illuminateHtppRequest;

elegance RegisterController extends Controller
{
    public serve as create()
    {
        go back view('auth.sign up');
    }

    public serve as retailer(Request $request)
    {
    }
}
The controller is empty now and returns a view to sign up. Let’s make that view in sources/perspectives/auth and get in touch with it sign up.blade.php.
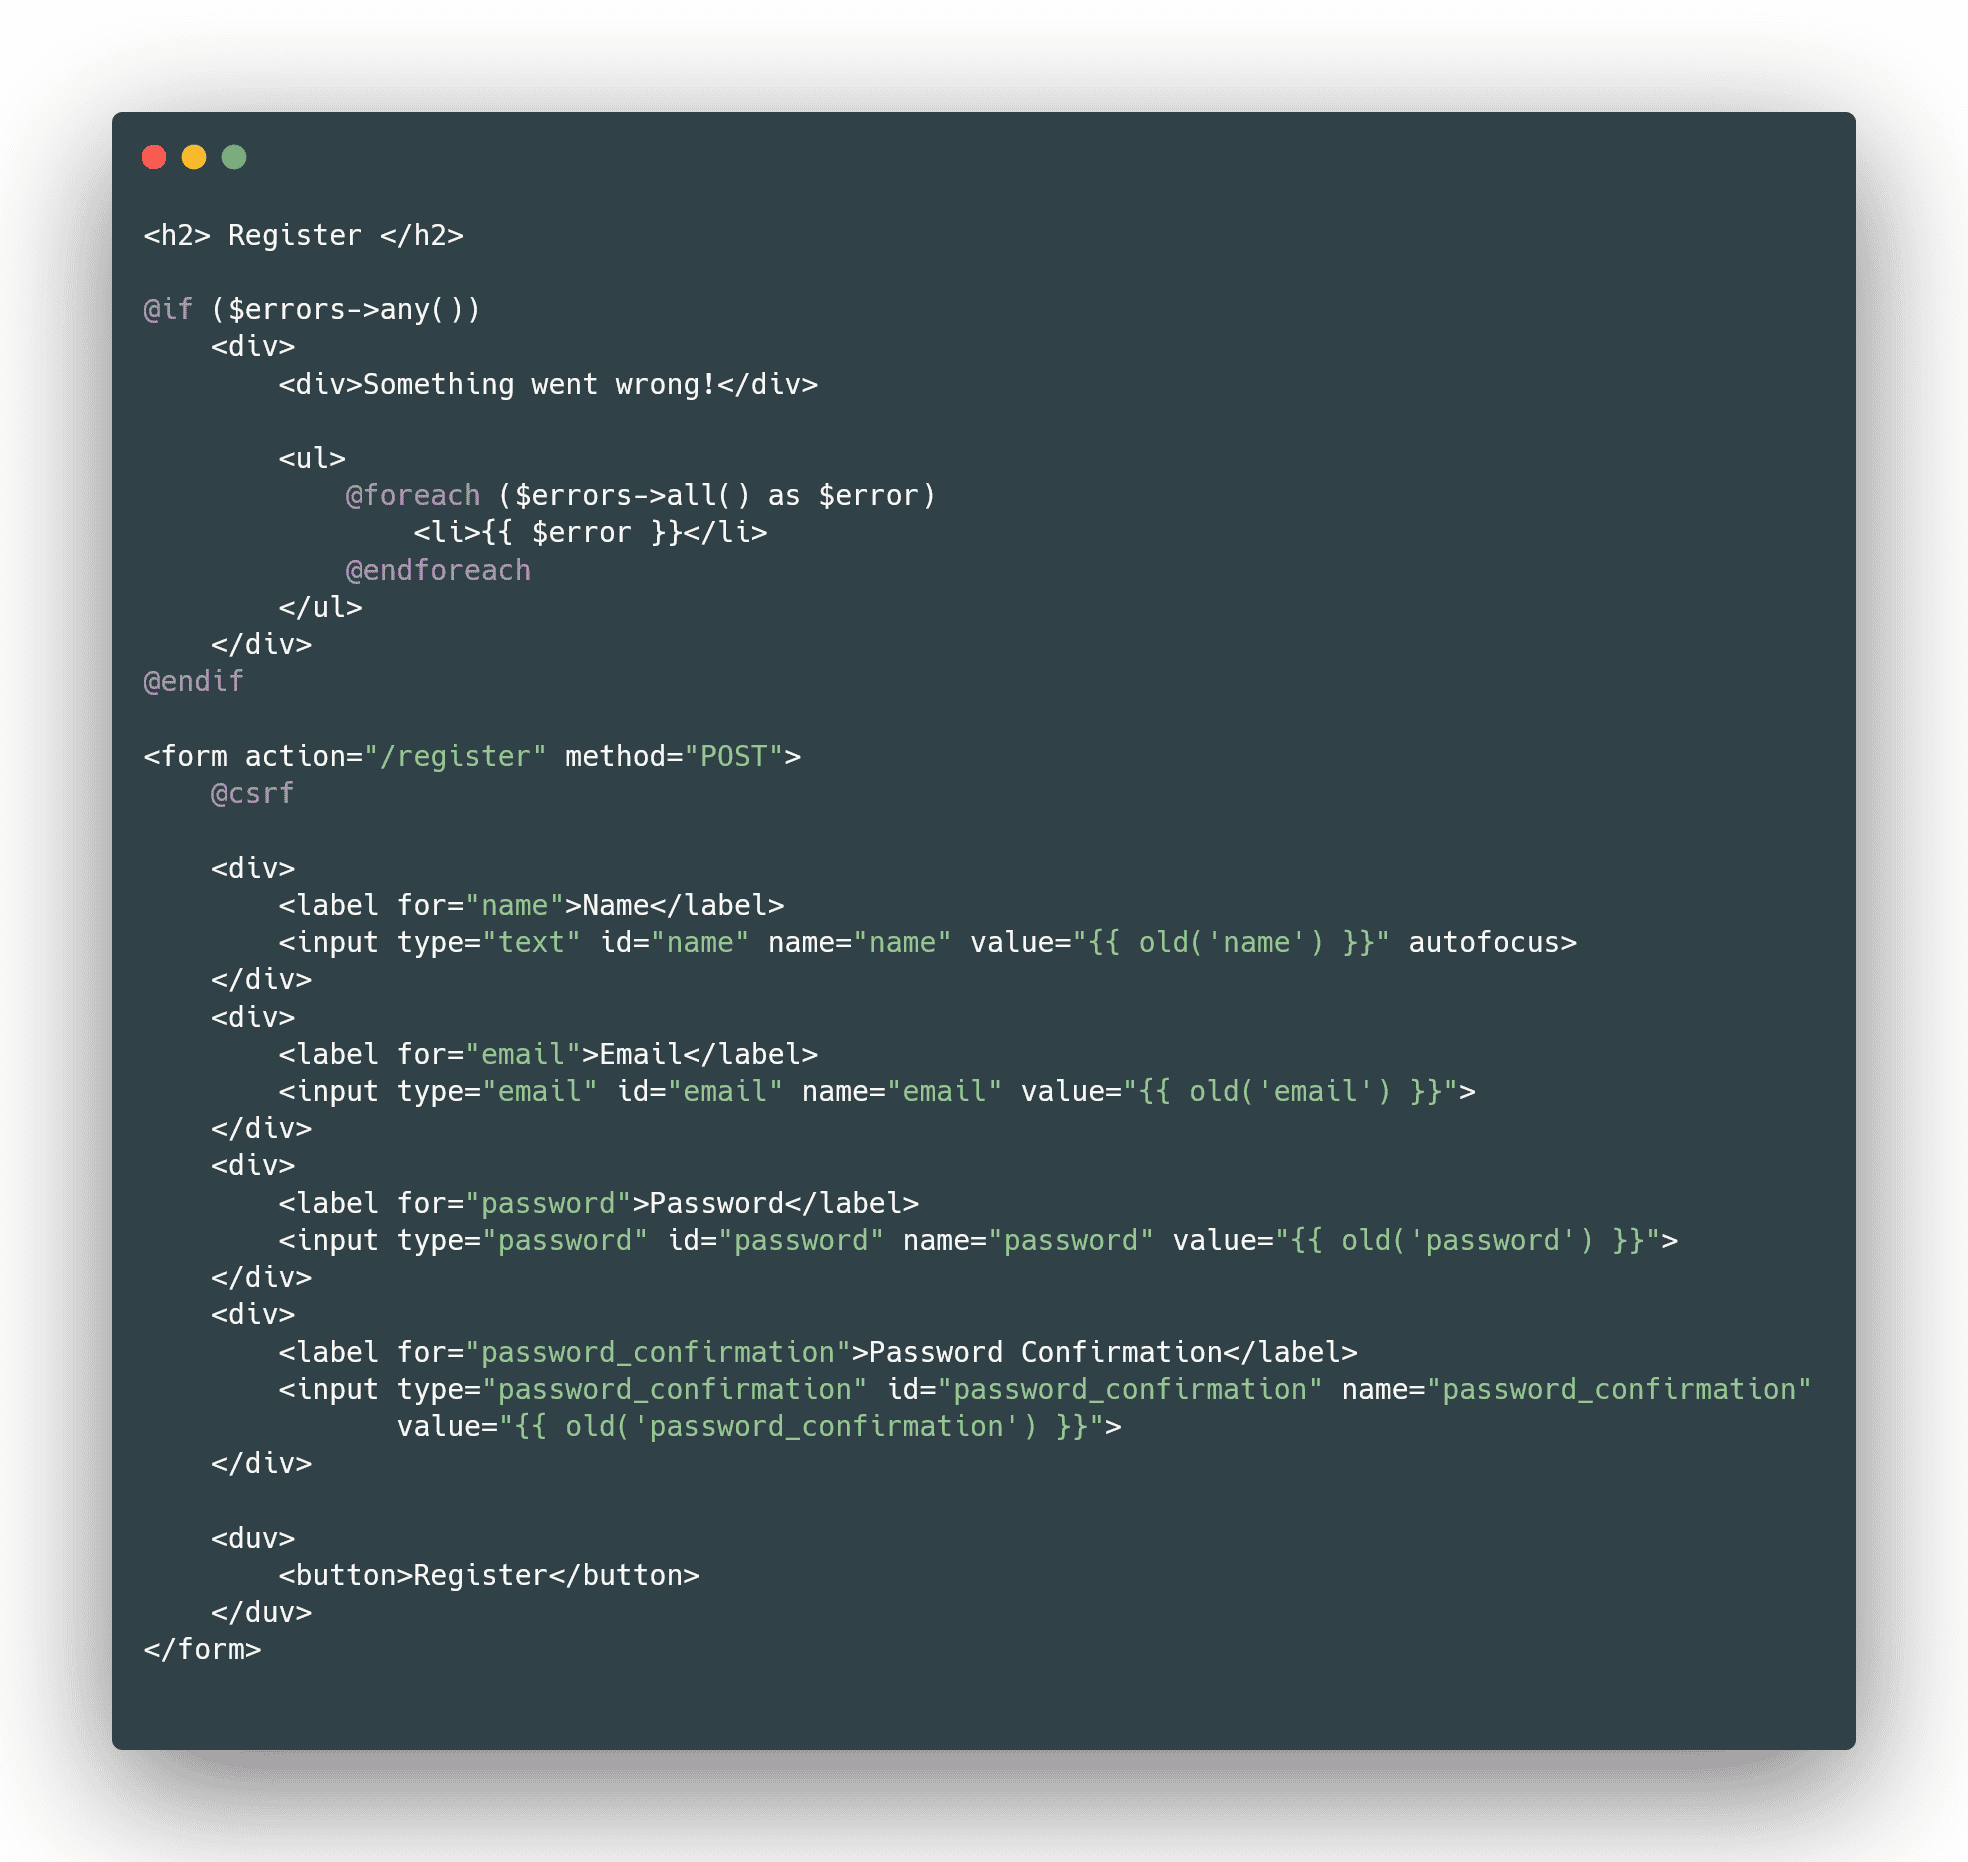
Now with the whole lot in position, we must discuss with our /sign up course and spot the next shape:
public serve as retailer(Request $request)
{
    $credentials = $request->handiest('electronic mail', 'password');

    if (Auth::strive($credentials, $request->crammed('bear in mind'))) {
        $request->consultation()->regenerate();

        go back redirect()->supposed('/');
    }

    go back again()->withErrors([
        'email' => 'The provided credentials do not match our records.',
    ]);
}
Now that we will be able to show a kind {that a} person can whole and get the knowledge for it, we must get the customers’ knowledge, validate it, after which retailer it within the database if the whole lot is ok. Right here you should utilize a database transaction to verify the knowledge you insert is whole.
We can use Laravel’s request validation function to be sure that all 3 credentials are required. We’ve to verify the e-mail has an electronic mail structure and is exclusive within the customers desk and that the password is showed and has at least 8 characters:
namespace AppHttpControllersAuth;

use AppHttpControllersController;
use IlluminateFoundationAuthUser;
use IlluminateHttpRequest;
use IlluminateSupportFacadesHash;

elegance RegisterController extends Controller
{
    public serve as retailer(Request $request)
    unique:users',
            'password' => 'required

    public serve as create()
    {
        go back view('auth.sign up');
    }
}
Now that our enter is validated, anything else going in opposition to our validation will throw an error that can be displayed within the shape:
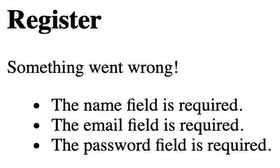
Assuming we’ve created a person account within the retailer manner, we additionally need to log within the person. There are two tactics by which we will be able to do it. We will do it manually or use Auth facade.
After the person logs in, we must now not go back them to the Sign up display screen however as a substitute to a brand new web page, like a dashboard or homepage. That’s what we’re going to do right here:
namespace AppHttpControllersAuth;

use AppHttpControllersController;
use AppProvidersRouteServiceProvider;
use IlluminateFoundationAuthUser;
use IlluminateHttpRequest;
use IlluminateSupportFacadesAuth;
use IlluminateSupportFacadesHash;

elegance RegisterController extends Controller
{
    public serve as retailer(Request $request)
    email

    public serve as create()
    {
        go back view('auth.sign up');
    }
}
And now that we’ve got a person registered and logged -n, we must be sure that he can safely log off.
Laravel suggests we invalidate the consultation and regenerate the token for safety after a logout. And that is exactly what we’re going to do. We’re beginning by way of growing a brand new /logout course the use of the LogoutController’s break manner:
use AppHttpControllersAuthRegisterController;
use AppHttpControllersAuthLogoutController;
use IlluminateSupportFacadesRoute;

/*
Internet Routes

This is the place you'll sign up internet routes in your software. Those
routes are loaded by way of the RrouteServiceProvider with a gaggle which
comprises the "internet" middleware staff. Now create one thing nice!
*/

Direction::get('/sign up', [RegisterController::class, 'create']);

Direction::publish('/sign up', ['RegisterController::class, 'store']);

Direction::publish('/logout', [Logoutcontroller::class, 'destroy'])
    ->middleware('auth');
Passing the logout in the course of the “auth” middleware is essential. The customers must be not able to get admission to the course if they don’t seem to be logged in.
Now, create a controller as we did sooner than:
php artisan make:controller Auth/LogoutController -rWe will be sure that we get the request as a parameter within the break manner. We logout the person in the course of the Auth facade, invalidate the consultation and, regenerate the token, then redirect the person to the homepage:
namespace AppHttpControllersAuth;

use AppHttpControllersController;
use IlluminateHttpRequest;
use IlluminateSupportFacadesAuth;

elegance LogoutController extends Controller
{
    public serve as break(Request $request)
    {
        Auth::logout();

        $request->consultation()->invalidate();

        $request->consultation()->regenerateToken();

        go back redirect('/');
     }
}
Remembering Customers
Maximum, if now not all, trendy internet programs supply a “bear in mind me” checkbox on their login shape.
If we need to supply a “bear in mind me” capability, we might move a boolean price as the second one argument to the strive manner.
When legitimate, Laravel will stay the person authenticated indefinitely or till they’re manually logged out. The person desk should come with the string remember_token (this is the reason we regenerate the tokens) column, the place we can retailer our “bear in mind me” token.
The default migration for customers already comprises it.
First issues first, it’s important to upload the Consider Me box for your shape:
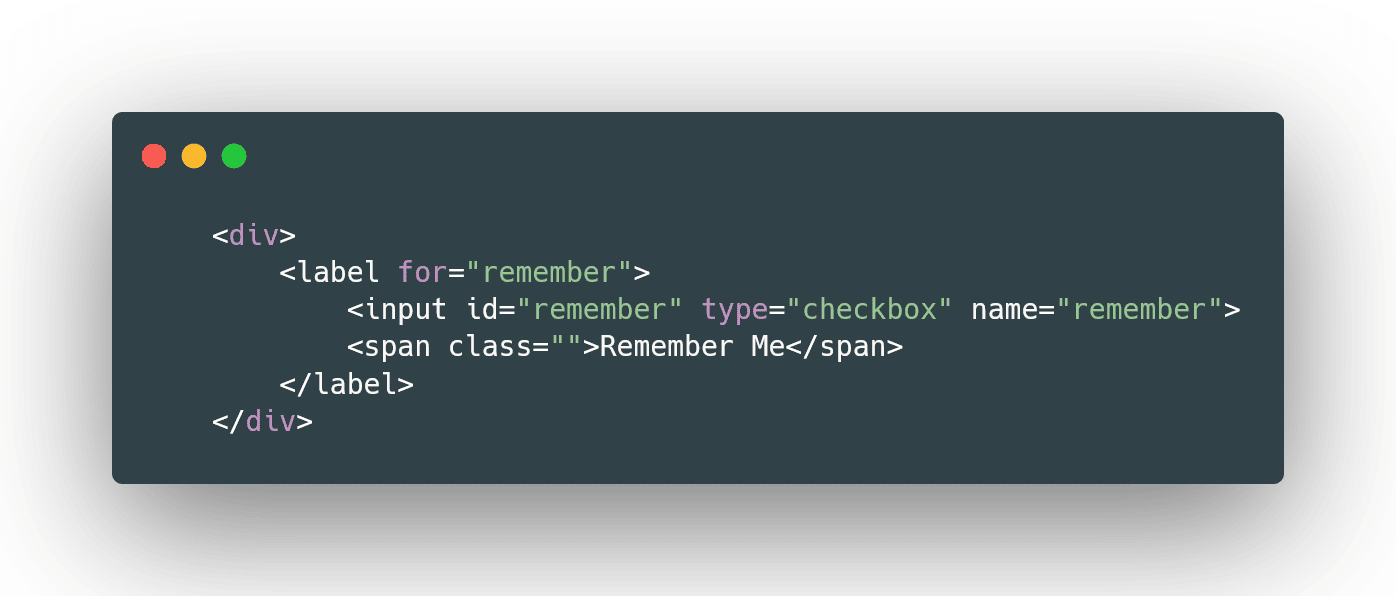
And after this, get the credentials from the request and use them at the strive manner at the Auth facade.
If the person must be remembered, we can log him in and redirect him to our homepage. Differently, we can throw an error:
public serve as retailer(Request $request)
{
    $credentials = $request->handiest('electronic mail', 'password');

    if (Auth::strive($credentials, $request->crammed('bear in mind'))) {
        $request->consultation()->regenerate();

        go back redirect()->supposed('/');
    }

    go back again()->withErrors([
        'email' =>
Resetting Passwords
Most web applications today provide ways for users to reset their passwords.
We will make another route for the forgotten password and create the controller as we did. Additionally, we will add a route for the reset password link that contains the token for the entire process:
Route::post('/forgot-password', [ForgotPasswordLinkController::class, 'store']);

Direction::publish('/forgot-password/{token}', [ForgotPasswordController::class, 'reset']);
Within the retailer manner, we can take the e-mail from the request and validate it as we did.
After this, we will be able to use the sendResetLink manner from the password facade.
After which, as a reaction, we need to go back the standing if it succeeded in sending the hyperlink or mistakes in a different way:
namespace AppHttpControllersAuth;

use AppHttpControllersController;
use IlluminateHttpRequest;
use IlluminateSupportFacadesPassword;

elegance ForgotPasswordLinkController extends Controller
{
    public serve as retailer(Request $request)
    email',
        ]);

        $standing = Password::sendResetLink(
            $request->handiest('electronic mail');
        );

        go back $standing === Password::RESET_LINK_SENT
            ? again()->with('standing', __($standing))
            : again()->withInput($request->handiest('electronic mail'))->withErrors(['email' => __($status)]);

}
Now that the reset hyperlink has been despatched to the person’s electronic mail, we must care for the good judgment of what occurs after that.
We can get the token, electronic mail, and new password within the request and validate them.
After this, we will be able to use the reset manner from the password facade to let Laravel care for the whole lot else at the back of the scenes.
We’re at all times going to hash the password to stay it protected.
Finally, we can take a look at if the password used to be reset, and if it have been, we can redirect the person to the login display screen with a luck message. Differently, we show an error that it might now not be reset:
namespace AppHttpControllersAuth;

use AppHttpControllersController;
use IlluminateHttpRequest;
use IlluminateSupportFacadesHash;
use IlluminateSupportFacadesPassword;
use IlluminateSupportStr;

elegance ForgotPasswordController extends Controller
{
    public serve as retailer(Request $request)
    {
        $request->validate([
            'token' => 'required',
            'email' => 'required|email',
            'password' => 'required|string|confirmed|min:8',
        ]);

        $standing = Password::reset(
            $request->handiest('electronic mail', 'password', 'password_confirmation', 'token'),
            serve as ($person) use ($request) {
                $user->forceFill(
                    'password' => Hash::make($request->password),
                    'remember_token' => Str::random(60)
                ])->save();
            }
        );

        go back $standing == Password::PASSWORD_RESET
            ? redirect()->course('login')->with('standing', __($standing))
            : again()->withInput($request->handiest('electronic mail'))->withErrors(['email' => __($status)]);
    }
}
Laravel Breeze
Laravel Breeze is an easy implementation of Laravel authentication options: login, registration, password reset, electronic mail verification, and password affirmation. You’ll use it to put in force authentication on your new Laravel software.
Set up and Setup
After growing your Laravel software, all it’s important to do is configure your database, run your migrations, and set up the laravel/breeze package deal thru composer:
composer require laravel/breeze –devAfter this, run the next:
php artisan breeze:set upWhich is able to post your authentication perspectives, routes, controllers, and different sources it makes use of. After this step, you have got whole keep watch over of the whole lot that Breeze supplies.
Now we need to render our software to the frontend, so we can set up our JS dependencies (which is able to use @vite):
npm set up:
npm run devAfter this, login and sign up hyperlinks must be in your homepage, and the whole lot must paintings easily.
Laravel Jetstream
Laravel Jetstream extends Laravel Breeze with helpful options and different frontend stacks.
It supplies login, registration, electronic mail verification, two-factor authentication, consultation control, API enhance by the use of Sanctum, and non-compulsory staff control.
You should make a choice from Livewire and Inertia at the frontend when putting in Jetstream. At the backend, it makes use of Laravel Support, which is a frontend agnostic, “headless” authentication backend for Laravel.
Set up and Setup
We can set up it thru composer in our Laravel Venture:
composer require laravel/jetstreamAfter this, we can run the php artisan jetstream:set up [stack] command, which accepts [stack] arguments Livewire or Inertia. You’ll move the –staff strategy to allow the groups function.
This will likely additionally set up Pest PHP for trying out.
And in any case, we need to render the frontend of our software the use of the next:
npm set up
npm run dev
Laravel Support
Laravel Support is a backend authentication implementation that’s frontend agnostic. You don’t have to make use of Laravel Support to put in force Laravel’s authentication options.
It’s additionally utilized in starter kits like Breeze and Jetstream. You’ll additionally use Support standalone, which is only a backend implementation. When you use it standalone, your frontend should name the Support routes.
Set up and Setup
We will set up Support thru composer:
composer require laravel/supportNow we need to post Support’s sources:
php artisan dealer:post –supplier="LaravelFortifyFortifyServiceProvider"After this, we can create a brand new app/Movements listing along with the brand new FortifyServiceProvider, configuration report, and database migrations.
In any case, run:
php artisan migrateOr:
php artisan migrate:recentAnd your Support is able to use.
Laravel Socialite
Laravel features a simple OAuth-based person authentication function. It helps social logins by the use of Fb, Twitter, LinkedIn, Google, Bitbucket, GitHub, and GitLab.
Set up
We will set up it thru composer:
composer require laravel/socialiteSetup and Utilization
After we’ve put in it, we need to upload the credentials for the OAuth supplier that our software makes use of. We can upload them in config/services and products.php for each and every provider.
Within the configuration, we must fit the important thing with the former services and products. A few of the ones keys come with:
- fb
- twitter (For OAuth 1.0)
- twitter-oauth-2 (For OAuth 2.0)
- github
- gitlab
- bitbucket
One provider configuration might seem like this:
'google' => [
    'client_id' => env("GOOGLE_CLIENT_ID"),
    'client_secret' => env("GOOGLE_CLIENT_SECRET"),
    'redirect' => "http://example.com/callback-url",
],
Authenticating Customers
For this motion, we can want two routes, one for redirecting the person to the OAuth supplier:
use LaravelSocialiteFacadesSociliate;

Direction::get('/auth/redirect', serve as () {
    go back Socialite:;driving force('google')->redirect();
});
And one for the callback from the supplier after authentication:
use LaravelSocialiteFacadesSocialite;

Direction:;get('/auht/callback', serve as () {
    $person = Socialite:;driving force('google')->person();

    // Getting the person knowledge
    $user->token;
});
Socialite supplies the redirect manner, and the facade redirects the person to the OAuth supplier, whilst the person manner examines the incoming request and retrieves the person knowledge.
After we’ve won our person, we need to take a look at if it exists in our database and authenticate it. If it does now not exist, we can create a brand new report to constitute the person:
use AppModelsUser;
use IlluminateSupportFacadesAuth;
use LaravelSocialiteFacadesSocialite;

Direction::get('/auth/callback', serve as () {
   /*
   Get the person
   */
   $googleUser = Socialite::driving force('google')->person();

   /*
   Create the person if it does now not exist
   Replace the person if it exists

   Take a look at for google_id in database
   */
   $person = Consumer::updateOrCreate([
       'google_id' => $googleUser->id,
   ], [
       'name' => $googleUser->name,
       'email' => $googleUser->email,
       'google_token' => $googleUser->token,
       'google_refresh_token' => $googleUser->refreshToken,
   ]);

   /*
   Authenticates the person the use of the Auth facade
   */
    Auth::login($person);

    go back redirect('/dashboard');
});
If we need to prohibit the person’s get admission to scopes, we might use the scopes manner, which we can come with with the authentication request. This will likely merge all prior to now specified scopes with the required ones.
A substitute for that is to make use of the setScopes manner that overwrites each different current scope:
use LaravelSocialiteFacadesSocialite;

go back Socialite::driving force('google')
    ->scopes(['read:user', 'write:user', 'public_repo'])
    ->redirect();

go back Socialite::driving force('google')
    ->setScopes(['read:user', 'public_repo')
    ->redirect();
Now that we know everything and how to get a user after the callback, let’s look at some of the data we can get from it.
OAuth1 User has token and tokenSecret:
$user = Socialite::driver('google')->user();

$token = $user->token;
$tokenSecret = $user->tokenSecret;
OAuth2 provides token, refreshToken, and expiresIn:
$user = Socialite::driver('google')->user();

$token = $user->token;
$refreshToken = $user->refreshToken;
$expiresIn = $user->expiresIn;
Both OAuth1 and OAuth2 provide getId, getNickname, getName, getEmail, and getAvatar:
$user = Socialite::driver('google')->user();

$user->getId();
$user->getNickName();
$user->getName();
$user->getEmail();
$user->getAvatar();
And if we want to get user details from a token (OAuth 2) or a token and secret (OAuth 1), sanctum provides two methods for this: userFromToken and userFromTokenAndSecret:
use LaravelSocialiteFacadesSocialite;

$user = Socialite:;driver('google')->userFromToken($token);
$user = Socialite::driver('twitter')->userFromTokenAndSecret($token, $secret);
Laravel Sanctum
Laravel Sanctum is a light authentication system for SPAs (Single Page Applications) and mobile apps. It lets users generate multiple API tokens with specific scopes. These scopes specify allowed actions by a token.
Usages
Sanctum can be used to issue API Tokens to the user without the intricacies of OAuth. Those tokens typically have long expiration times, like years, but may be revoked and regenerated by the user at any time.
Installation and Setup
We can install it via composer:
composer require laravel/sanctumAnd we have to publish the configuration and migration files:
php artisan vendor:publish –provider="LaravelSanctumSanctumServiceProvider"Now that we have generated new migration files, we have to migrate them:
php artisan migrateorphp artisan migrate:fresh
How To Issue API Tokens
Before issuing tokens, our User model should use the LaravelSanctumHasApiTokens trait:
use LaravelSanctumHasApiTokens;

class User extends Authenticable
{
    use HasApiTokens;
}
When we have the user, we can issue a token by calling the createToken method, which returns a LaravelSanctumNewAccessToken instance.
We can call the plainTextToken method on the NewAccessToken instance to see the SHA-256 plain text value of the token.
Tips and Best Practices for Laravel Authentication
Invalidating Sessions On Other Devices
As we have discussed previously, invalidating the session is crucial when the user logs out, but that should also be available as an option for all the owned devices.
This feature is usually used when the user changes or updates their password, and we want to invalidate their session from any other device.
Provided with the Auth facade, this is an easy task to achieve. Considering that the route we are using has the auth and auth.session middleware, we can use the logoutOtherDevices static method of the facade:
Route::get('/logout', [LogoutController::class, 'invoke'])
    ->middleware(['auth', 'auth.session']);
use IlluminateSupportFacadesAuth;

Auth::logoutOtherDevices($password);
Configuration With Auth::routes()
The routes manner of the Auth facade is only a helper to generate the entire routes required for person authentication.
The routes come with Login (Get, Put up), Logout (Put up), Sign up (Get, Put up), and Password Reset/Electronic mail (Get, Put up).
When you’re calling the process at the facade, it does the next:
public static fucntion routes(array $choices = [])
{
    if (!static::$app->providerIsLoaded(UiServiceProvider::elegance)) {
        throw new RuntimeException('In an effort to use the Auth:;routes() manner, please set up the laravel/ui package deal.');
    }

    static::$app->make('router')->auth($choices);
}
We’re excited about what occurs when the static manner is known as at the router. This will also be difficult because of the reality of the way facades paintings, however the next manner known as is like this:
/**
Sign up the everyday authentication routes for an software.

@param array $choices
@go back void
*/
public serve as auth(array $choices = [])
{
    // Authentication Routes...
    $this->get('login', 'AuthLoginController@showLoginForm')->title('login');
    $this->publish('login', 'AuthLoginController@login');
    $this->publish('logout', 'AuthLoginController@logout')->title('logout');

    // Registration Routes...
    if ($choices['register'] ?? true) {
        $this->get('sign up', 'AuthRegisterController@showRegistrationForm')->title('sign up');
        $this->publish('sign up', 'AuthRegisterController@sign up');
    }

    // Password Reset Routes...
    if ($choices['reset'] ?? true) {
        $this->resetPassword();
    }

    // Electronic mail Verification Routes...
    if ($choices['verify'] ?? false) {
        $this->emailVerification();
    }
}
Through default, it generates all routes but even so the e-mail verification one. We can at all times have the Login and Logout routes, however the different ones we will be able to keep watch over in the course of the choices array.
If we need to have handiest login/logout and sign up, we will be able to move the next choices array:
$choices = ["register" => true, "reset" => false, "verify" => false];Protective Routes and Customized Guards
We need to be sure that some routes will also be accessed handiest by way of authenticated customers and will also be briefly carried out by way of including both calling the middleware manner at the Direction facade or chaining the middleware manner on it:
Direction::middleware('auth')->get('/person', serve as (Request $request) {
    go back $request->person();
});

Direction::get('/person', serve as (Request $request) {
    go back $request->person();
})->middleware('auth');
This guard guarantees that incoming requests are authenticated.
Password Affirmation
For extra site safety, you ceaselessly need to verify a person’s password sooner than shifting on with another job.
We should outline a course from the verify password view to take care of the request. It’s going to validate and redirect the person to their supposed vacation spot. On the identical time, we can be sure that our password seems showed within the consultation. Through default, the password must be reconfirmed each 3 hours, however this will also be modified within the configuration report at config/auth.php:
use IlluminateHttpRequest;
use IlluminateSupportFacadesHash;
use IlluminateSupportFacadesRedirect;

Direction::publish('/confirm-password', serve as (Request $request) {
    if (!Hash::take a look at($request->password, $request->person()->password)) {
        go back again()->withErrors([
            'password' => ['The provided password does not match our records.']
        ]);
    }

    $request->consultation()->passwordConfirmed();

    go back redirect()->supposed();
})->middleware(['auth']);
Authenticable Contract
The Authenticable contract positioned at IlluminateContractsAuth defines a blueprint of what the UserProvider facade must put in force:
namespace IlluminateContractsAuth;

interface Authenticable
{
    public serve as getAuthIdentifierName();

    public serve as getAuthIdentifier();

    public serve as getAuthPassord();

    public serve as getRememberToken();

    public serve as setRememberToken($price);

    public serve as getrememberTokenName();
}
The interface lets in the authentication machine to paintings with any “person” elegance that implements it.
This holds irrespective of what ORM or garage layers are used. Through default, Laravel has the AppModelsUser that implements this interface, and this will also be noticed within the configuration report:
go back [
    'providers' => [
        'users' => [
            'driver' => 'eloquent',
            'model' => AppModelsUser::class,
        ],
     ],
];
Authentication Occasions
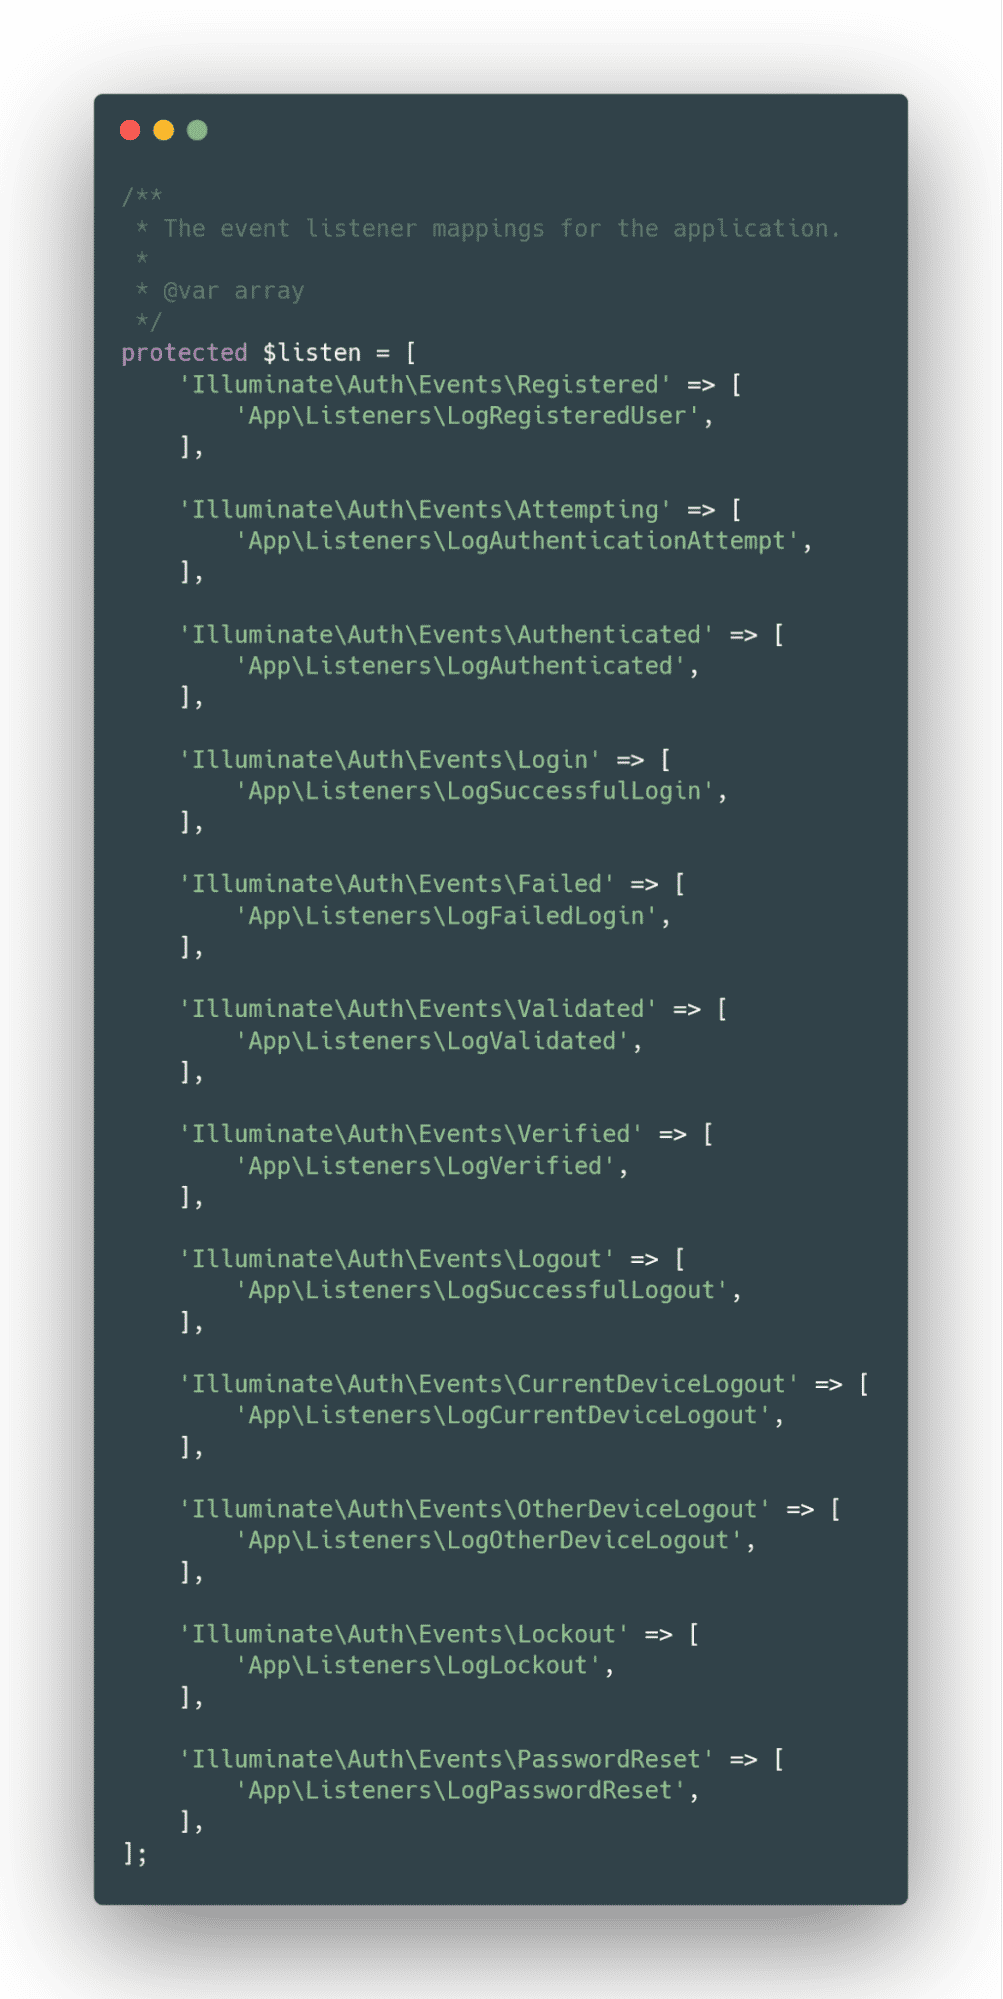
There are many occasions which might be dispatched all over the whole lot of the authentication procedure.
Relying in your objectives, you’ll connect listeners to these occasions on your EventServiceProvider.
Temporarily Create New Customers
Growing a brand new person briefly will also be carried out in the course of the AppUser:
$person = new AppUser();
$user->password = Hash::make('strong_password');
$user->electronic mail = '[email protected]';
$user->title = 'Username';
$user->save();
Or in the course of the create static manner at the Consumer facade:
Consumer::create([
 'password' => Hash::make('strong-password'),
 'email' => '[email protected]',
 'name' => 'username'
]);
Abstract
The Laravel ecosystem has a large number of starter kits to get your app up and operating with an Authentication machine, like Breeze and Jetstream. They’re extremely customizable because the code is generated on our aspect, and we will be able to adjust it up to we would like, the use of it as a blueprint if want be.
There are lots of safety issues referring to authentication and its intricacies, however all of those will also be solved simply in the course of the equipment that Laravel supplies. Those equipment are extremely customizable and simple to make use of.
Deploy your Laravel apps briefly and successfully with our rapid Laravel webhosting provider. See your app in motion with a loose trial.
The publish A Complete Information To Laravel Authentication gave the impression first on Kinsta®.
WP Hosting