
All of us love new subscribers to our e-mail record. And some of the number one tactics to get new subscribers is to offer your guests with a neatly designed e-mail opt-in shape. That’s why on this instructional, I’m going to turn you the way to succeed in 5 other designs with the Divi e-mail opt-in module to lend a hand spark your creativeness as to what’s imaginable with this robust and versatile module.
Contents
Sneak Peek
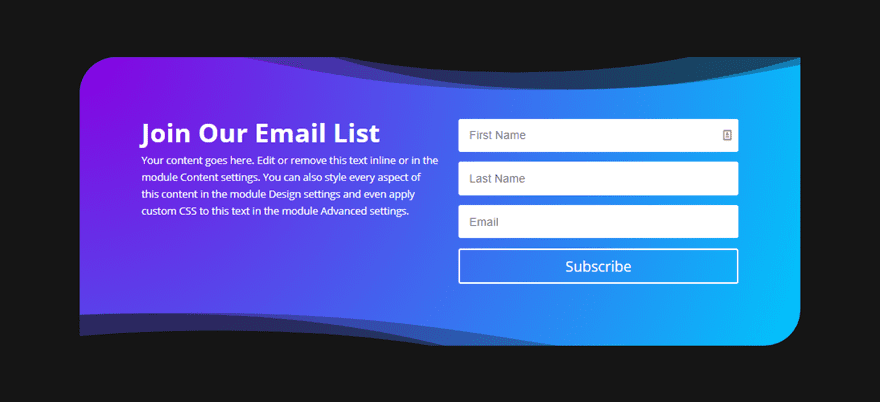
Here’s a preview of the 5 Divi Electronic mail Choose-in Module designs we will be able to be tackling these days.
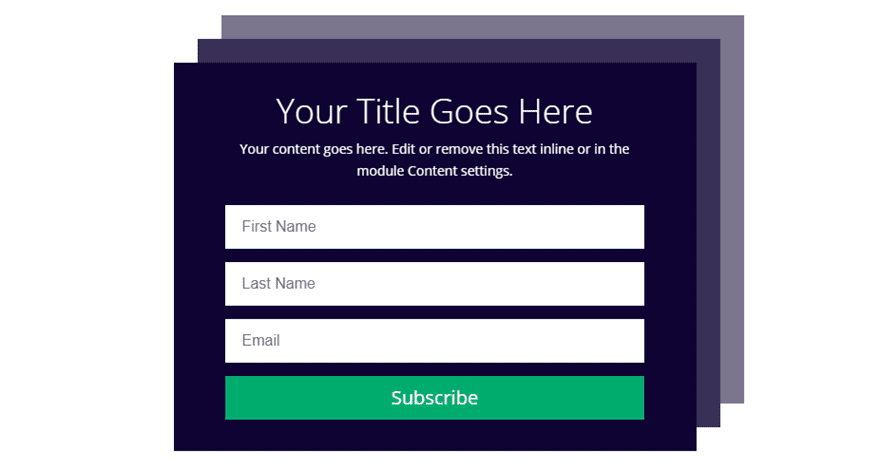
#1 Shadow Stacks Choose-in

#2 Large and Minimum Choose-in

#3 Thin Choose-in
#4 Guide Be offering Choose-in

#5 Minimize-out Body Choose-in

What You Wish to Get Began
For this instructional, all you’re going to want is Divi. We can be development every one from scratch so little need for a premade format. Then again, I can be the use of a couple of photographs from a few of our format packs however you’ll use your individual if you need.
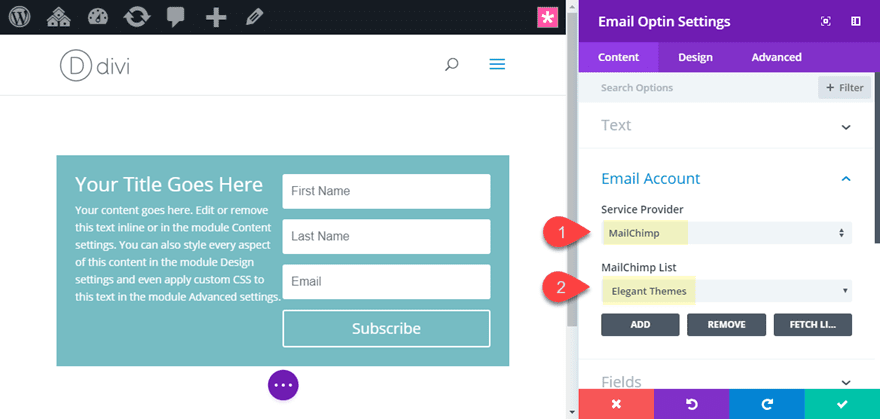
Additionally, you will need to know that you are going to no longer have the ability to see the optin shape fields at the reside web page till you assign an e-mail supplier/record in your e-mail opt-in module. You’ll be able to do that for your e-mail optin settings underneath Electronic mail Account.
Now let’s get to these designs!
#1 Shadow Stacks Choose-in
This design provides two field shadows to the Divi e-mail opt-in module for a singular stacking impact that makes the shape pop. The primary field shadow is added to the e-mail opt-in module and the second one field shadow is added to the row which has a customized length and border to make it paintings.
This is the way it’s executed.
First create a brand new phase with a one-column row and upload the e-mail opt-in module to the row.
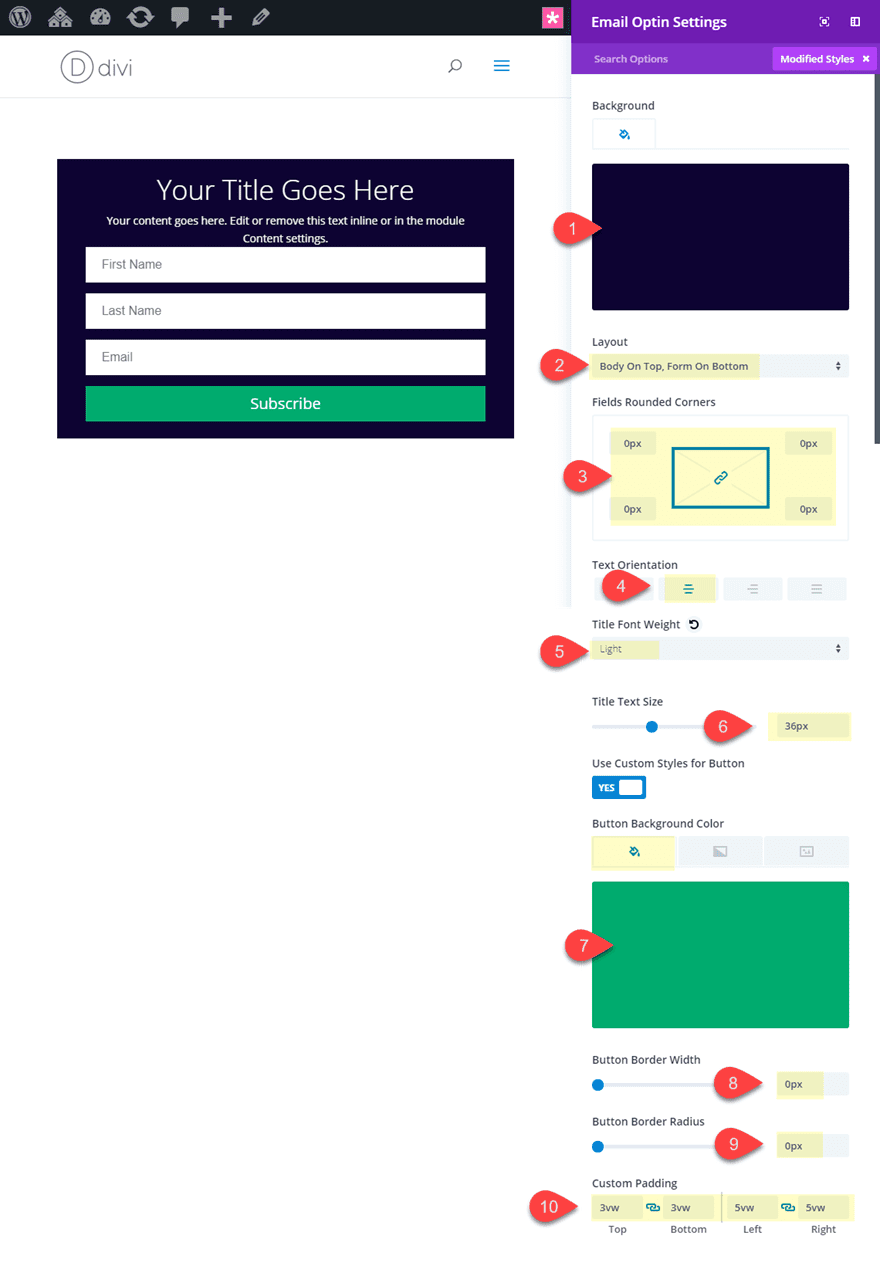
Open the e-mail opt-in settings and replace the next:
Background Colour: #1a0a38
Format: Frame On Most sensible, Shape On backside
Fields Rounded Corners: 0px
Textual content Orientation: Middle
Identify Font Weight: Mild
Identify Textual content Measurement: 36px
Button Textual content Colour: #ffffff
Button Background Colour: #00ac69
Button Border Width: 0px
Button Border Radius: 0px
Customized Padding: 3vw peak, 3vw backside, 5vw left, 5vw proper
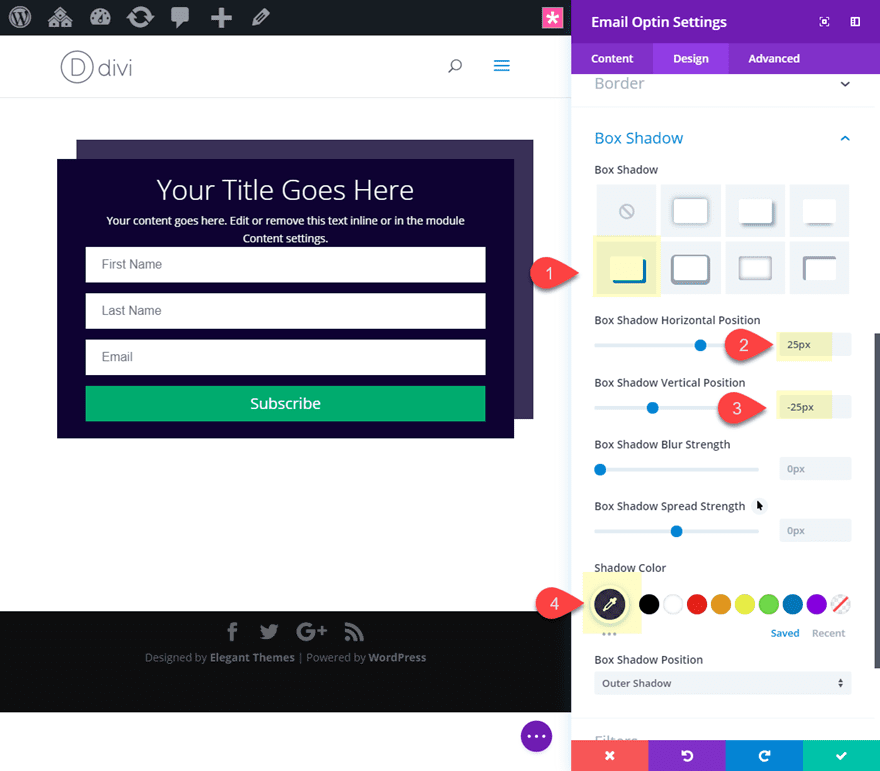
Now let’s upload our first field shadow layer at the back of our e-mail opt-in module.
Field Shadow: see screenshot
Field Shadow Horizontal Place: 25px
Field Shadow Vertical Place: -25px
Shadow Colour: rgba(26,10,56,0.82)
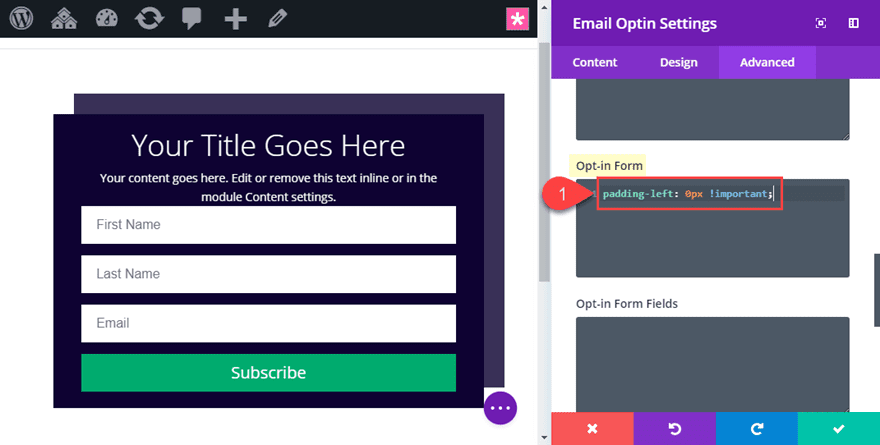
Now let’s upload a small snippet of customized CSS with a purpose to take out the left padding this is added to the shape by way of default. Pass to the complex tab and upload the next CSS underneath Choose-in Shape.
padding-left: 0px !necessary;
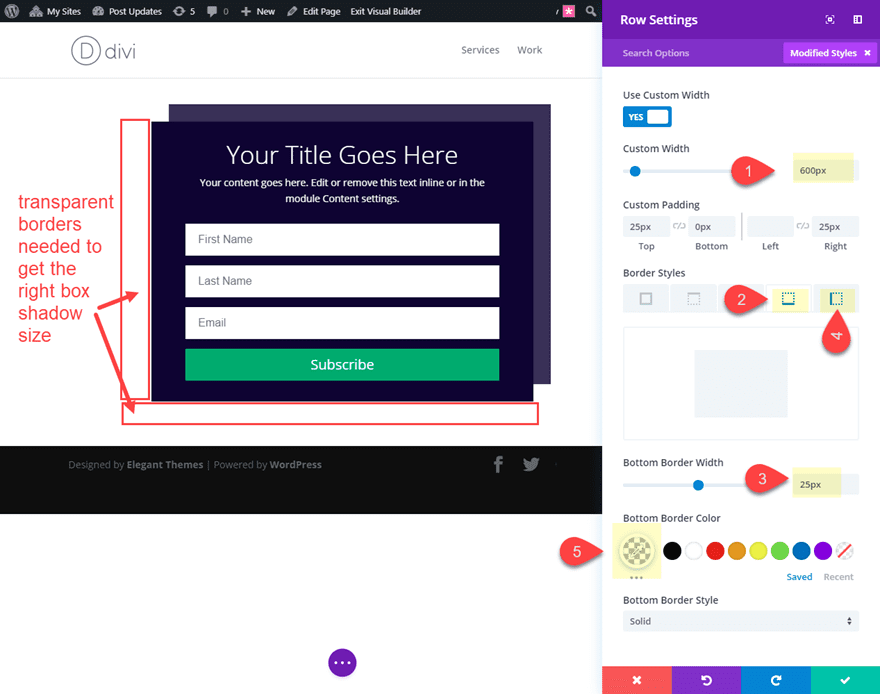
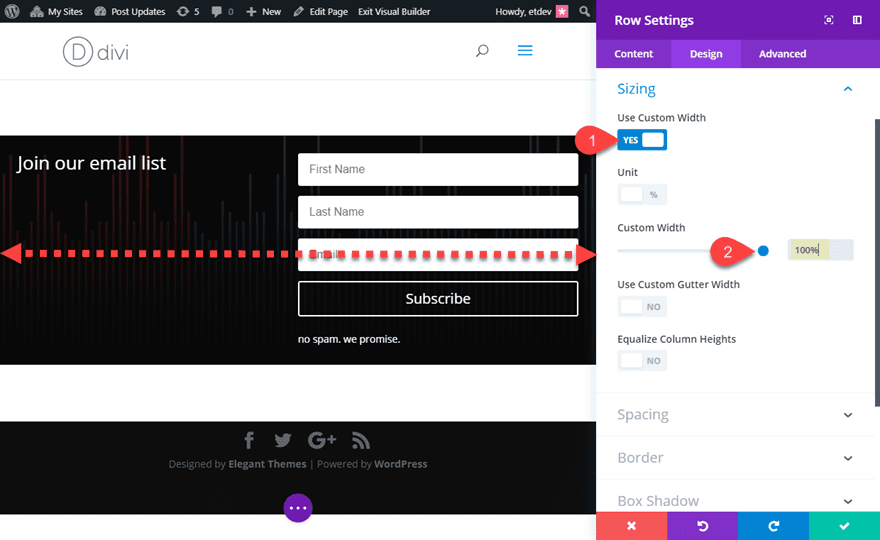
That looks after the e-mail opt-in module settings. Now let’s edit our row. Open the row settings and replace the next:
Customized Width: 600px
Customized Padding: 25px peak, 0px backside, 25px proper
Backside Border Width: 25px
Backside Border Colour: rgba(0,0,0,0)
Left Border Width: 25px
Left Border Colour: rgba(0,0,0,0)
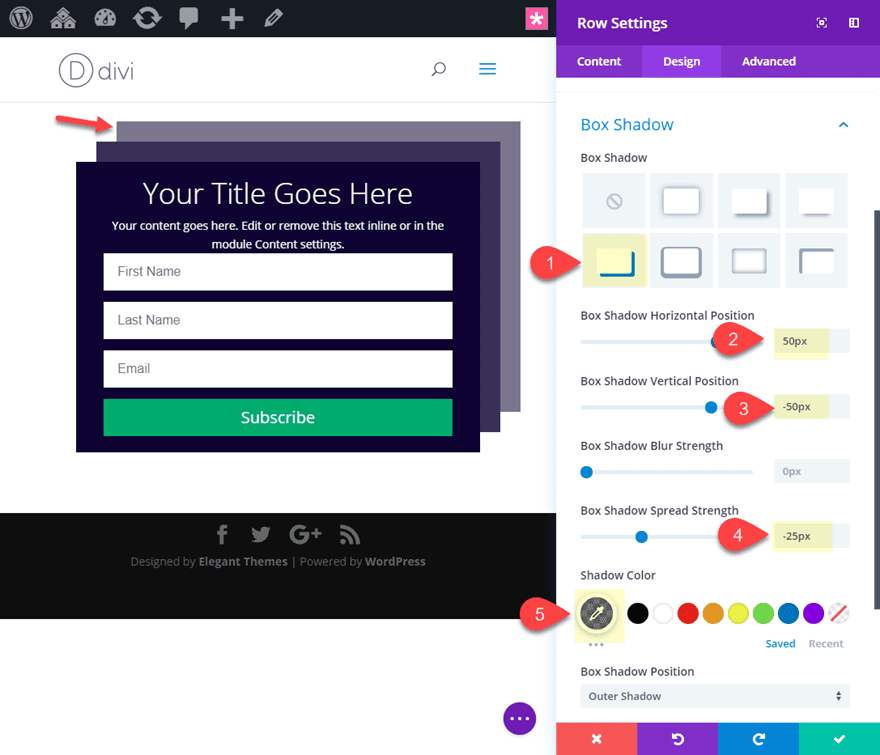
Now we will upload the field shadow to the row.
Field Shadow: see screenshot
Field Shadow Horizontal Place: 50px
Field Shadow Vertical Place: -50px
Field Shadow Unfold Energy: -25px
Shadow Colour: rgba(26,10,56,0.55)
Now let’s take a look at the general design.
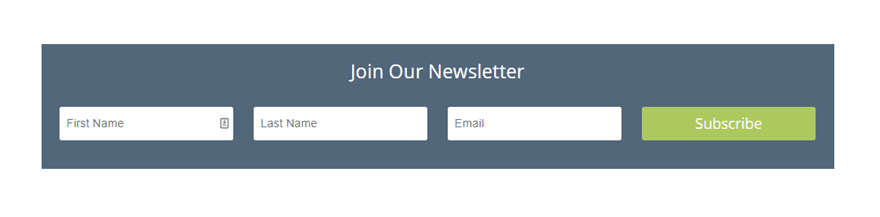
#2 Large and Minimum Choose-in
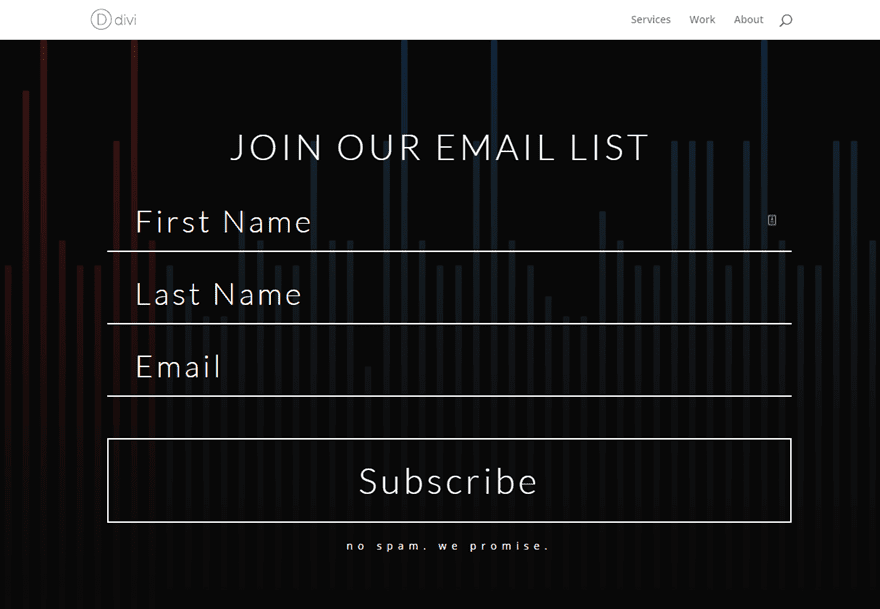
This e-mail opt-in design is minimum, blank, and massive. The shape fields scale with the dimensions of the browser in order that it appears nice on all units. And it’s no longer too giant that it forces the person to scroll.
Right here’s tips on how to do it.
First create a brand new phase with a one-column row and upload the e-mail opt-in module to the row.
Open the e-mail opt-in settings and replace the content material to incorporate your Identify and Footer textual content.
Then replace the background with a dismal colour or symbol:
Background colour: #121212
Background Symbol: That is non-compulsory. I’m the use of one from the Podcast Format Pack
Ahead of we proceed over to the design tab for extra customization, we wish to make room for the huge shape parts we will be able to be including. To try this, move to the row settings and replace the next:
Customized Width: 100%
Tip: The use of a 100% customized width is a good way to ensure your design doesn’t get any proper or left margin on cell. In case you use the “Make Fullwidth” choice, your max width shall be 89% so you’re going to nonetheless have margins on cell.
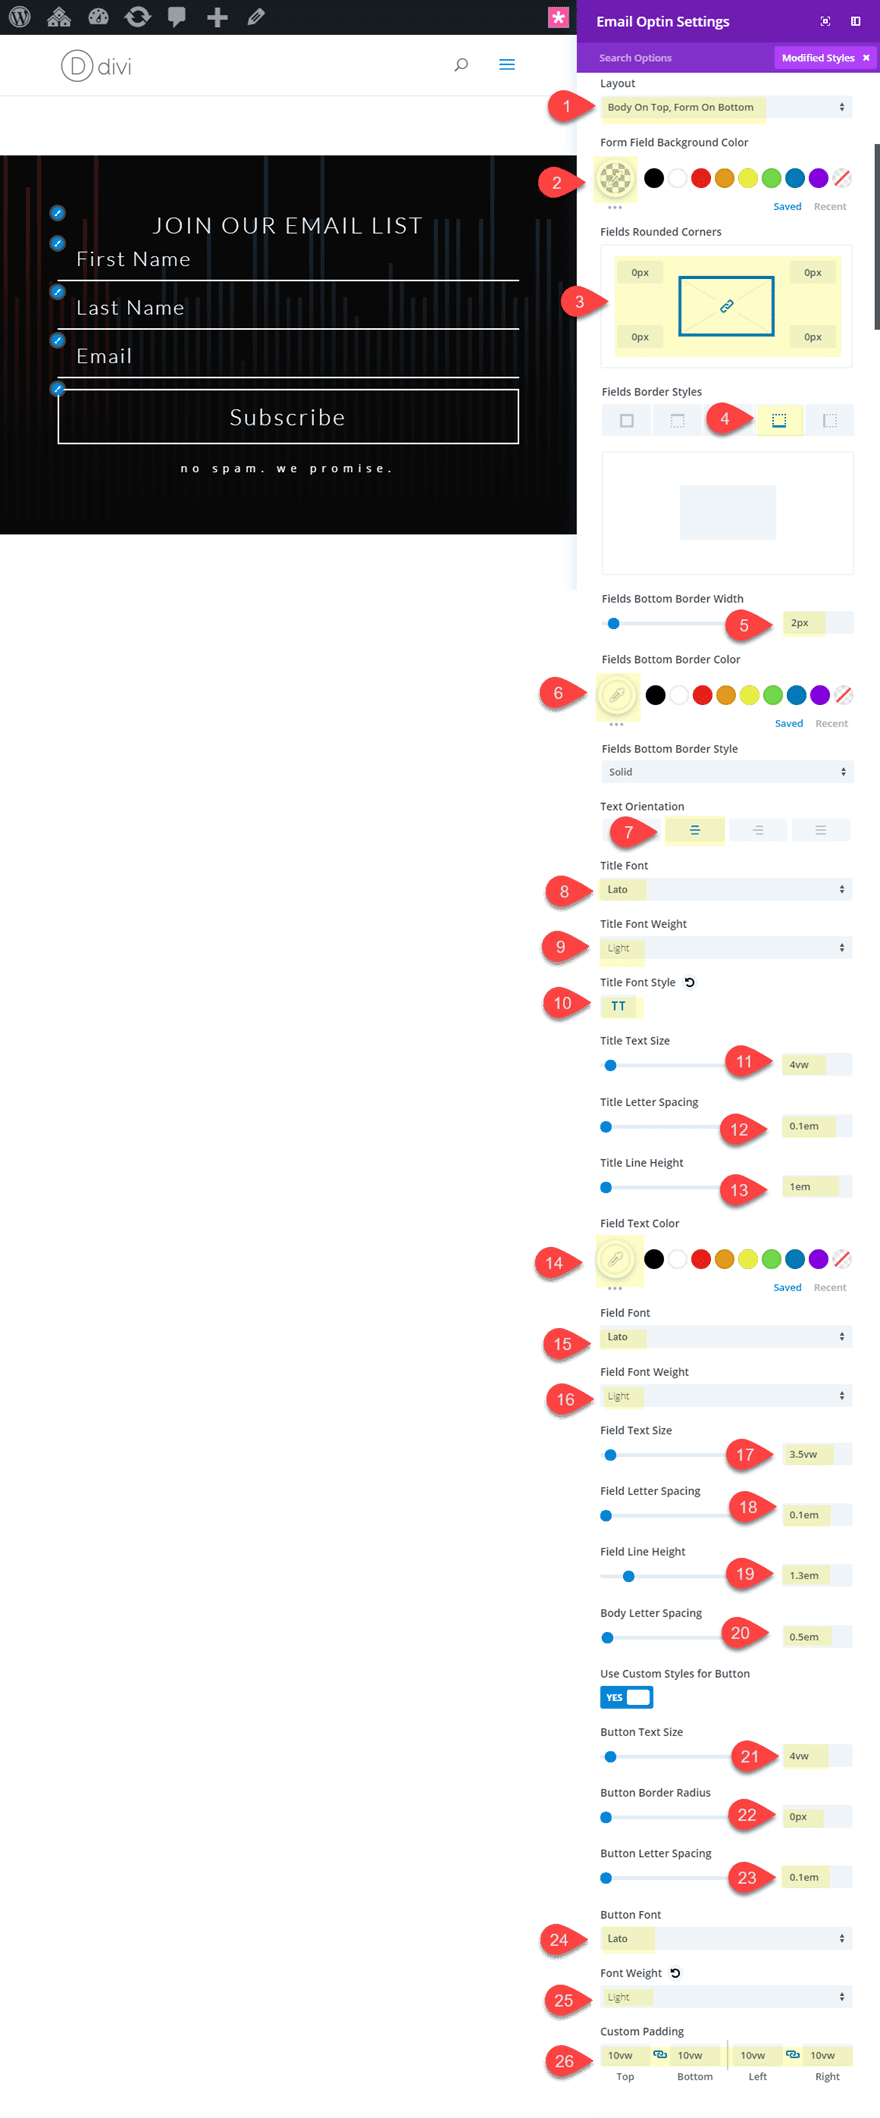
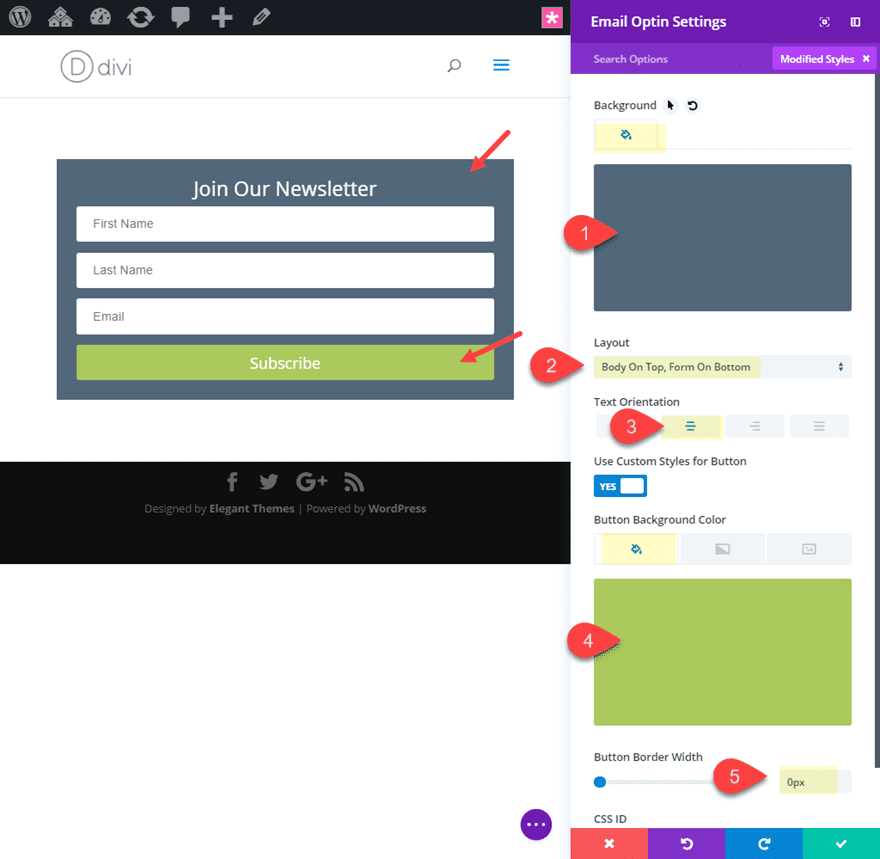
Now leap again into the Electronic mail Choose-in Module Settings and replace the next design:
Format: Frame On Most sensible, Shape On backside
Shape Box Background Colour: rgba(0,0,0,0)
Fields Rounded Corners: 0px
Fields Backside Border Width: 2px
Fields Backside Border Colour: #ffffff
Textual content Orientation: Middle
Identify Font: Lato
Identify Font Weight: Mild
Identify Font Taste: TT
Identify Textual content Measurement: 4vw
Identify Line Peak: 1em
Box Textual content Colour: #ffffff
Box Font: Lato
Box Font Weight: Mild
Box Textual content Measurement: 3.5vw
Box Letter Spacing: 0.1em
Box Line Peak: 1.3em
Frame Letter Spacing: 0.5em
Button Textual content Measurement: 4vw
Button Border Radius: 0px
Button Letter Spacing: 0.1em
Button Font: Lato
Font Weight: Mild
Customized Padding: 10vw peak, 10vw backside, 10vw left, 10vw proper
Understand using the vw length unit for font length blended with the em duration unit for line top and letter spacing. This permits the textual content and design to scale seamlessly when adjusting your browser.
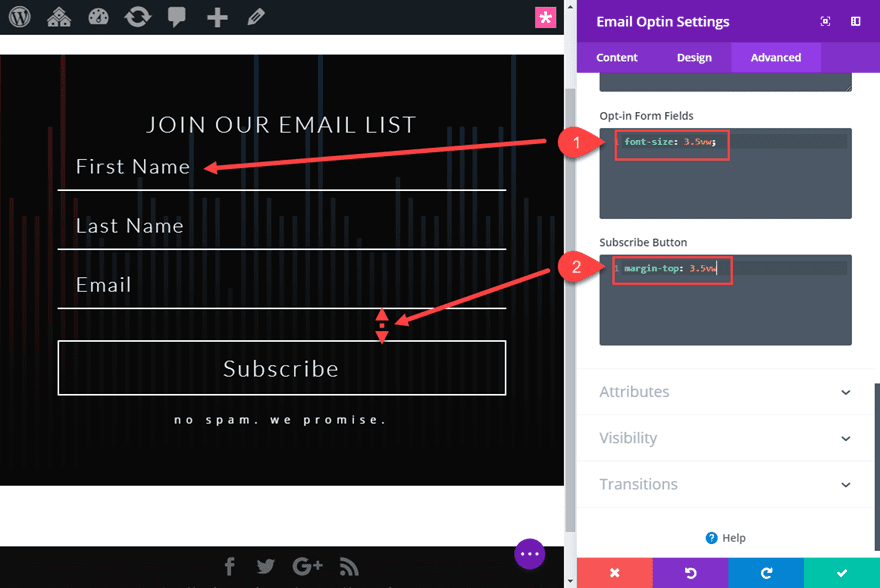
The remaining step is contains a couple of snippets of customized CSS to shine off the design. Pass to the complex tab and upload the next Customized CSS underneath Choose-in Shape Fields:
font-size: 3.5vw;
This will likely permit the dimensions of the textual content when typing to compare the placeholder textual content for your shape fields.
Then let’s upload some customized margin above the button to present it a bit respiring room. Upload the next underneath Subscribe Button:
margin-top: 3.5vw;
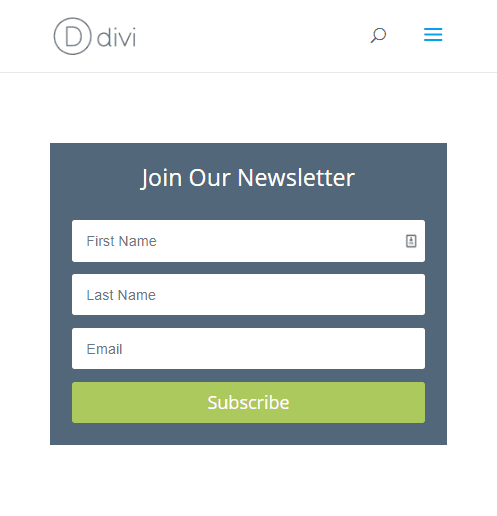
Now let’s take a look at the general design.
#3 Thin Choose-in

This subsequent design is bound to be a well-liked resolution for corporations and blogs having a look to avoid wasting vertical house on their posts or touchdown pages. Even if Divi’s Electronic mail Choose-in module is best possible for extra conventional vertical bureaucracy, you’ll in fact convert the shape to a thin horizontal shape with only a small snippet of CSS.
Right here’s tips on how to do it.
Create a brand new phase with a one-column row and upload the e-mail opt-in module to the row.
Open the e-mail opt-in settings and replace the content material to incorporate a Identify however not anything else.
Then replace the design with a background and a button colour as follows:
Background Colour: #54677d
Format: Frame On Most sensible, Shape On Backside
Textual content Orientation: Middle
Button Background Colour: #b0c94f
Button Border Width: 0px
Now it’s time for the customized CSS. Since we wish the thin shape design handiest on desktop (and no longer on cell), we will be able to be including the CSS to the web page (underneath web page settings) the use of a Customized CSS ID to focus on the shape taste.
To try this, move to the complex tab and provides the opt-in module a customized CSS ID.
CSS ID: thin
This shall be used to focus on this manner with the exterior CSS we will be able to upload to the web page.
Now open the Divi Builder web page settings and upload the next CSS underneath the Complex tab.
@media (min-width: 980px){
#thin.et_pb_newsletter .et_pb_newsletter_fields {
  flex-wrap: nowrap !necessary;
}
#thin.et_pb_newsletter .et_pb_newsletter_fields>* {
  flex-basis: 23%;
}
}

#thin .et_pb_newsletter_form {
  padding-left: 0px;
}

Since Divi already makes use of flex to taste the shape at the backend, this CSS takes out the flex-wrap assets that reasons the shape fields to align vertically. The result’s a horizontal format of the shape fields. Adjusting the flex-basis assets to 23% principally units the width of every of the shape fields. And since we added the CSS inside of a media question, the design will handiest occur on desktop with the default format of the shape exhibiting on cell.
This is the general design.
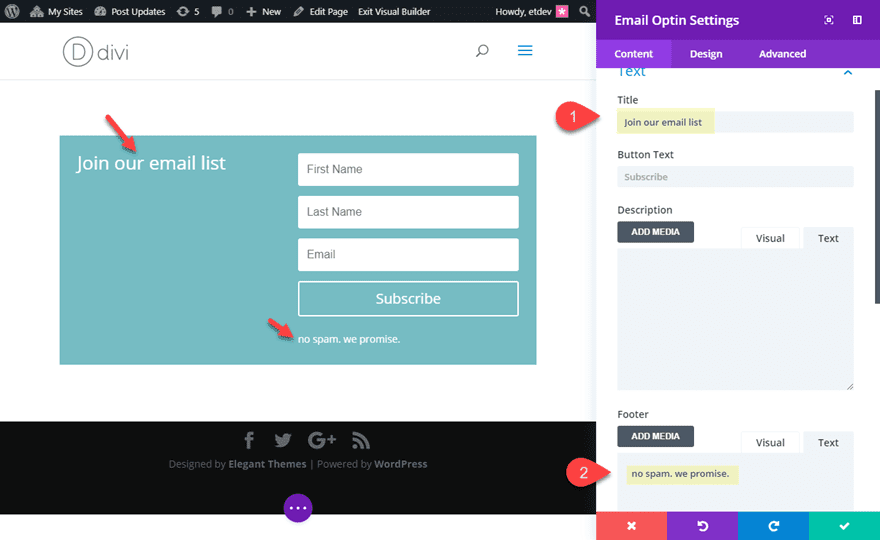
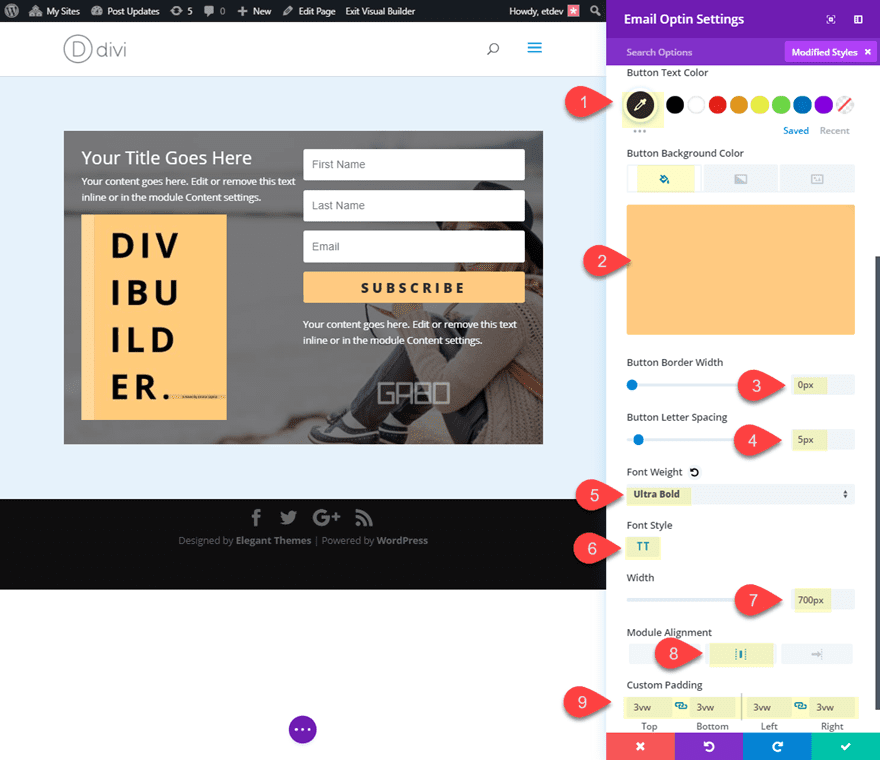
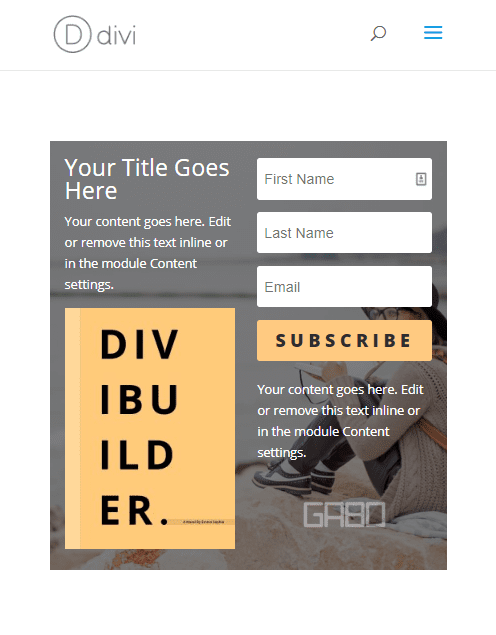
#4 Guide Be offering Choose-in
This design comprises a couple of photographs throughout the e-mail opt-in module for the needs of selling a unfastened guide be offering for signing up. To try this, all you wish to have to do is upload a picture the use of the integrated wysiwyg editor for including description and footer content material. It’s true that you’ll accomplish this similar design by way of combining the e-mail opt-in module with different modules in a two column row, however I assumed it will be useful to turn tips on how to do all of it in the similar module.
Right here’s tips on how to do it.
Create a brand new phase with a one-column row and upload the e-mail opt-in module to the row.
Open the e-mail opt-in settings and keep within the content material tab.
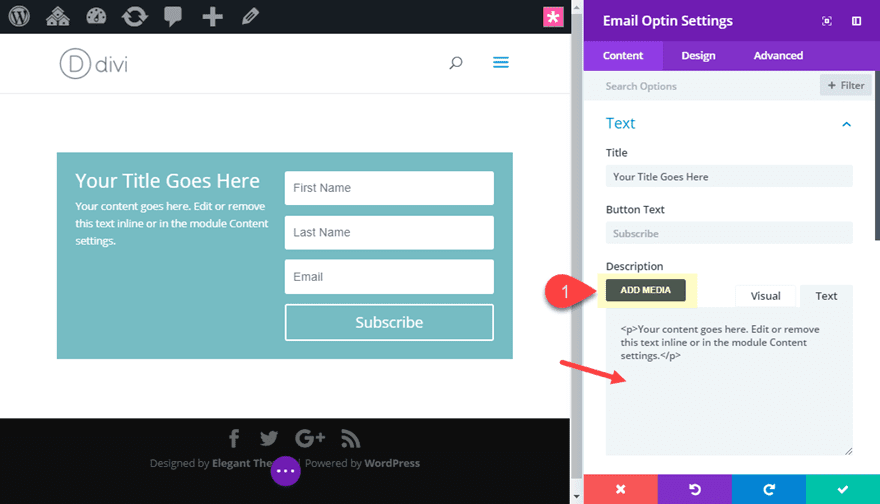
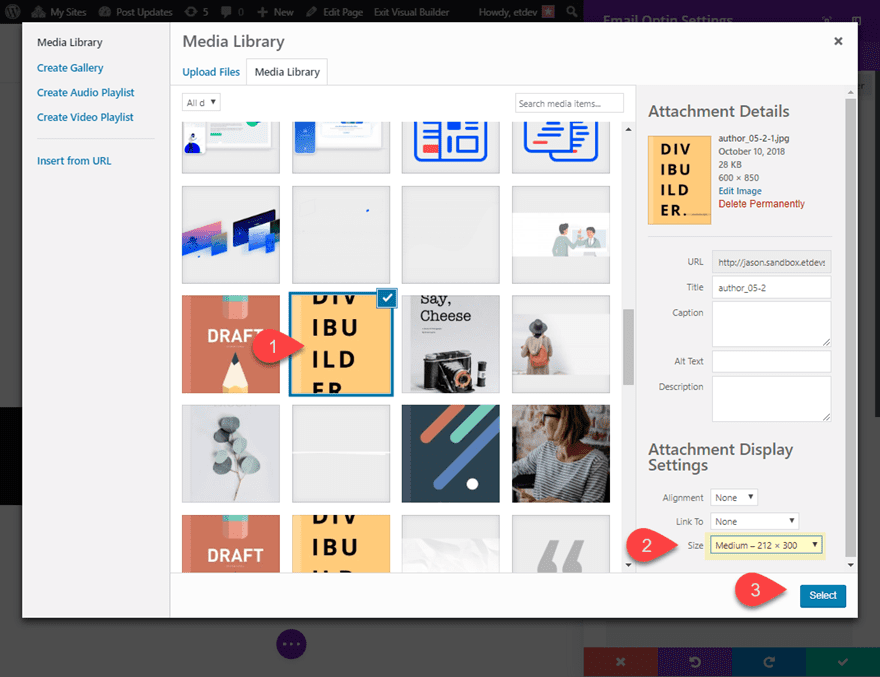
Beneath description, shorten the default textual content to just a few sentences. Then upload a picture out of your media library by way of clicking the Upload Media button.
You need to ensure the picture is not more than about 200px huge. For this situation, I’m the use of the medium length of the picture.
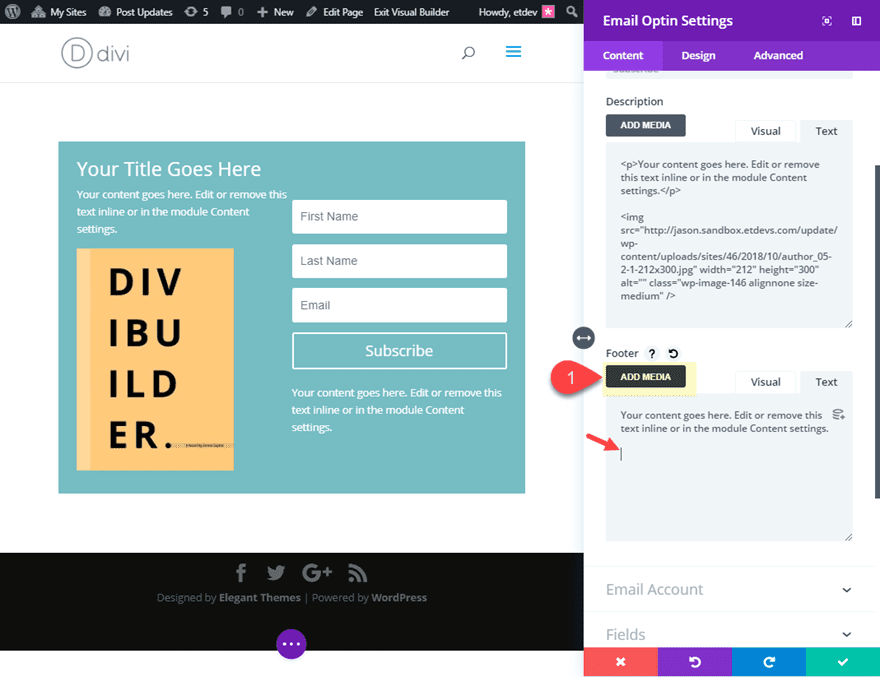
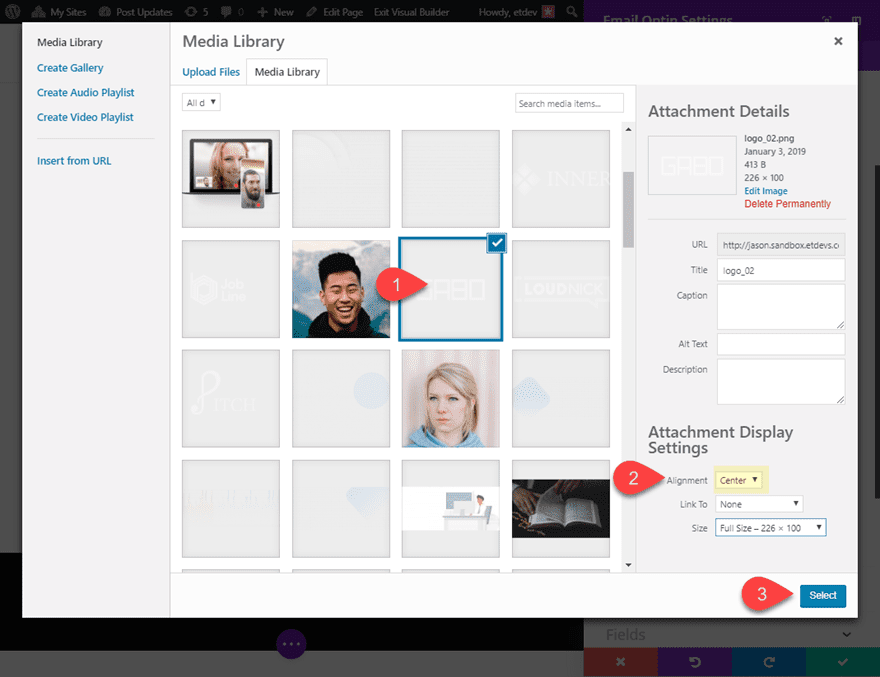
Beneath Footer, upload a couple of sentences for the footer textual content content material after which click on the Upload Media button so as to add an emblem symbol underneath the textual content (that is non-compulsory in fact).
To verify the picture is focused, set the alignment approach to heart when including the picture from the media library.
Now you’re ready to replace the remainder of the design. Get started by way of giving the module a background symbol and a background gradient above the picture to make the textual content extra readable.
Background symbol: [add image]
Background Gradient Left Colour: rgba(0,0,0,0.5)
Background Gradient Proper Colour: rgba(0,0,0,0.5)
Position Gradient Above Background Symbol: YES
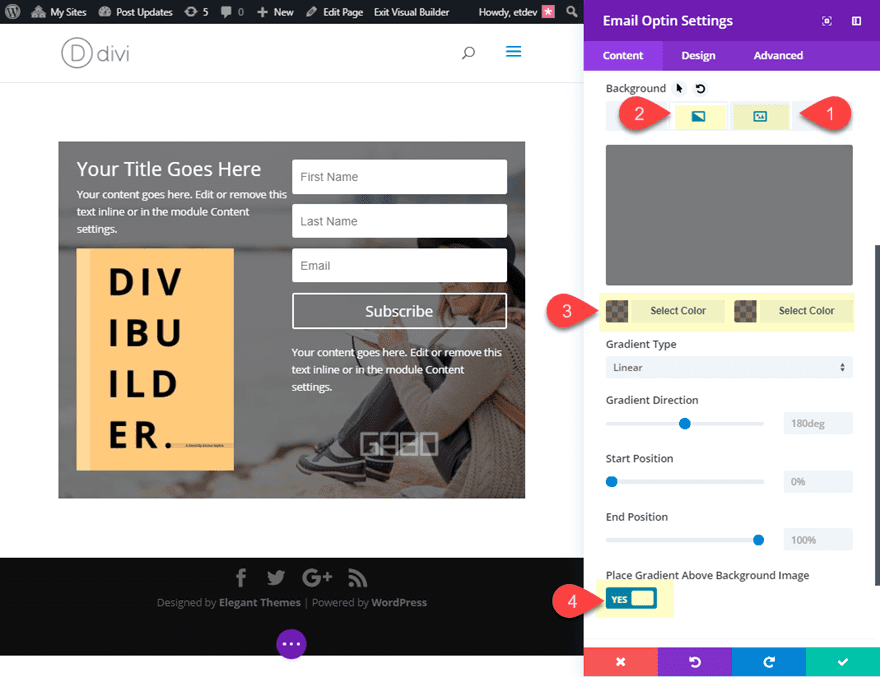
Then replace the remainder of the design as follows:
Button Textual content Colour: #333333
Button Background Colour: #ffcb7a
Button Border Width: 0px
Button Letter Spacing: 5px
Font Weight: Extremely Daring
Font Taste: TT
Width: 700px
Module Alignment: heart
Customized Padding: 3vw peak, 3vw backside, 3vw left, 3vw proper
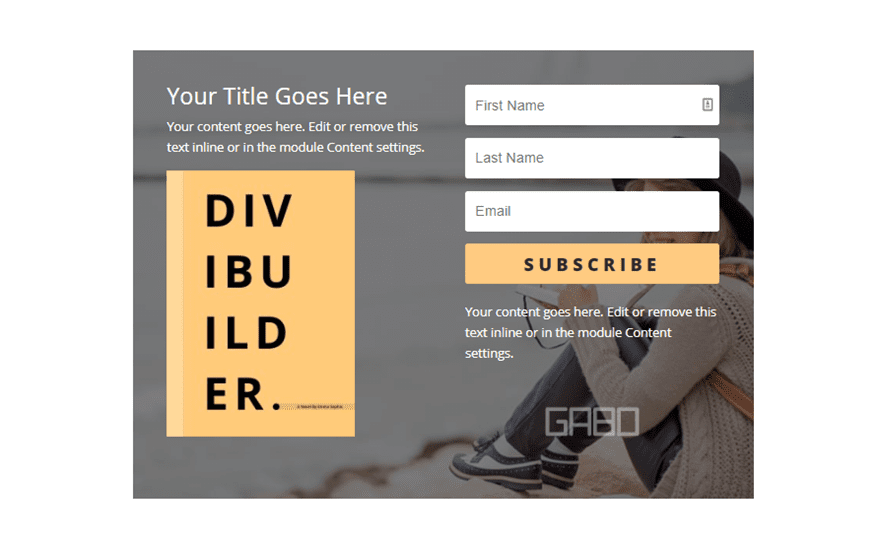
This is the general design.
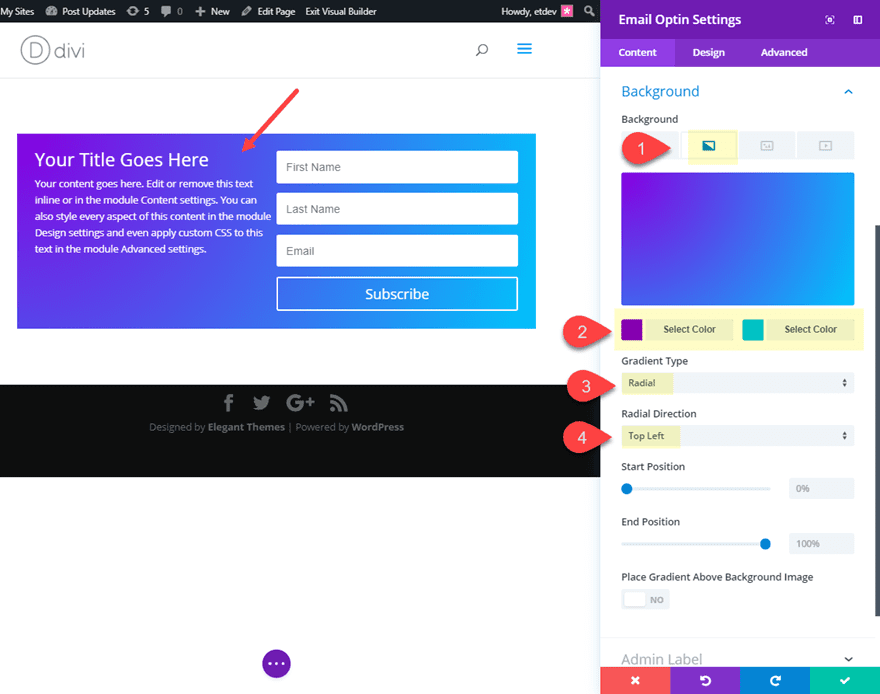
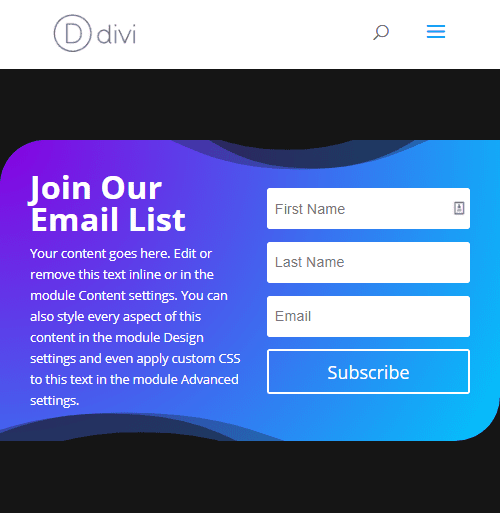
#5 Minimize-out Body Choose-in
This straightforward design method is a good way to present your e-mail opt-in a singular glance. The trick is to make use of phase dividers that experience the similar colour because the phase background. Then by way of regulate the peak of the dividers, you’ll overlap the e-mail opt-in shape with a purpose to lower out the sides in a singular manner for great framing impact.
This is tips on how to do it.
Create a brand new phase with a one-column row and upload the e-mail opt-in module to the row.
Open the e-mail opt-in settings and provides your module a background gradient.
Background Gradient Left Colour: #8300e9
Background Gradient Proper Colour: #06c8ff
Gradient Kind: Radial
Radial Route: Most sensible Left
Then replace the remainder of the design as follows:
Identify Font Weight: Daring
Identify Textual content Measurement: 36px
Width: 70% (desktop), 100% (pill and smartphone)
Module Alignment: heart
Customized Padding: 6vw Most sensible, 6vw Backside, 6vw Left, 6vw Proper
Rounded Corners: 50px peak left, 0px peak proper, 50px backside proper, 0px backside left
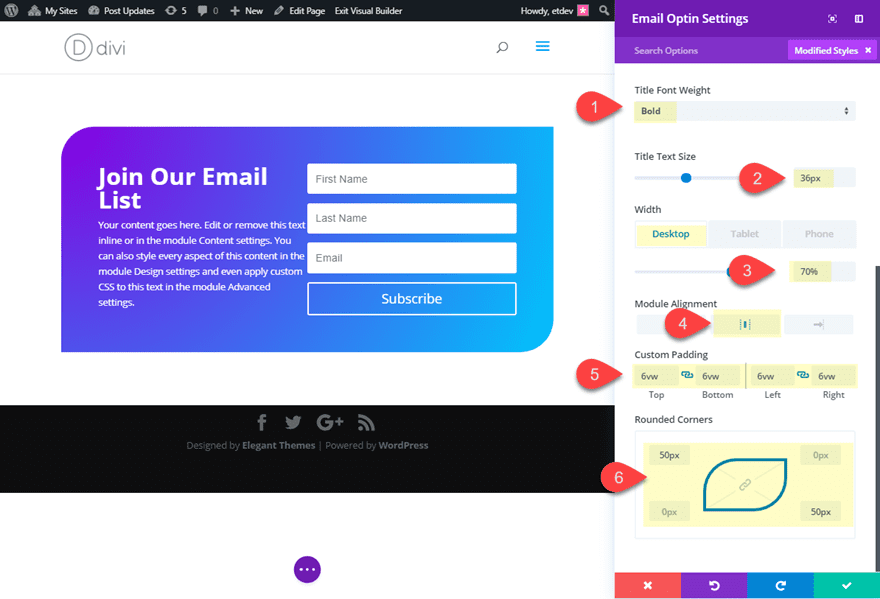
Save your settings.
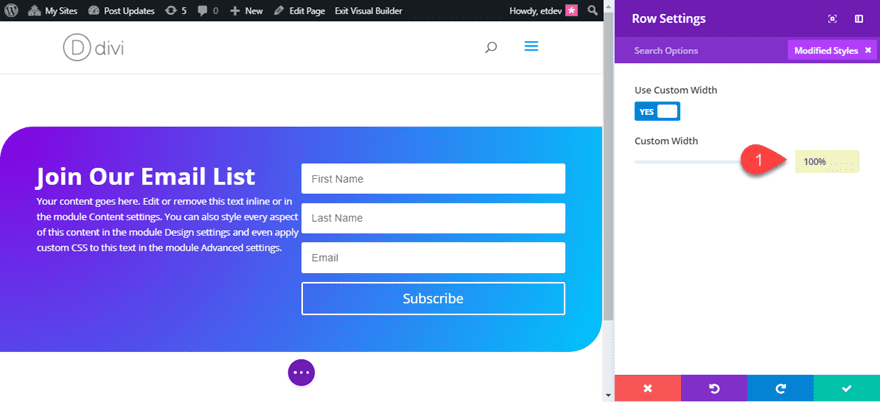
Then replace your row settings with a customized width.
Customized Width: 100%
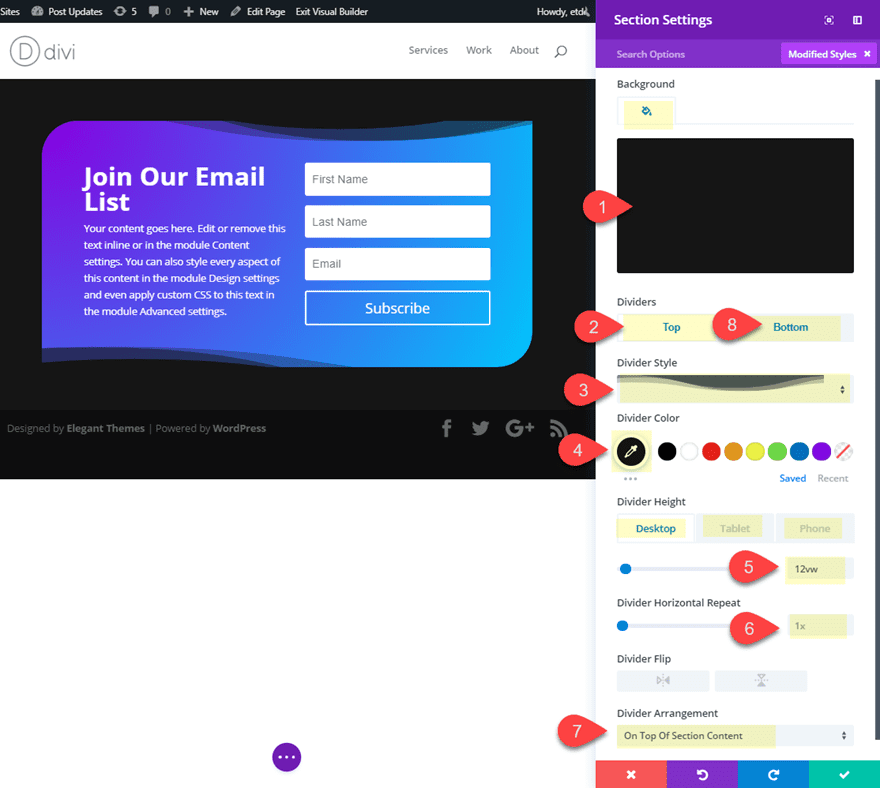
Now we’re able to customise the phase environment so as to add our cut-out body impact with the ones phase dividers.
Open the phase settings and replace the next:
Background Colour: #222222
Most sensible Divider Taste: see screenshot
Most sensible Divider Colour: #222222 (be sure that this fits the phase background colour)
Most sensible Divider top: 12vw (desktop), 150px (pill and smartphone)
Most sensible Divider Association: On Most sensible Of Phase Content material
Backside Divider Taste: see screenshot
Backside Divider Colour: #222222 (be sure that this fits the phase background colour)
Backside Divider top: 12vw (desktop), 150px (pill and smartphone)
Backside Divider Horizontal Repeat: 0.8x
Backside Divider Turn: vertical and horizontal
Backside Divider Association: On Most sensible Of Phase Content material
Now let’s take a look at the general design.
Take a look at publish on creating unique frame designs for extra in this design method.
Ultimate Ideas
Those e-mail opt-in designs are truly simply the top of the iceberg while you consider all of the taste choices to be had inside Divi. I purposefully stored the designs easy sufficient to provide the wide strokes of what you’ll do. Be at liberty to discover extra polished designs by yourself by way of including new fonts, colours, and hover results. And don’t disregard to have some amusing within the procedure.
I sit up for listening to from you within the feedback.
Cheers!
The publish 5 Email Opt-in Designs You Can Create with Divi’s Email Opt-in Module gave the impression first on Elegant Themes Blog.
WordPress Web Design