
Should you’re a WordPress developer, you’re almost certainly having a look to arrange a local development environment the place you’ll be able to take a look at your adjustments prior to pushing them in your reside website. On the other hand, chances are you’ll now not know one of the simplest ways to head about it.
There are a couple of alternative ways to transport a reside WordPress website to an area atmosphere. The most suitable choice will most probably rely on your revel in stage, and the migration procedure may handiest take a couple of mins.
On this submit, we’ll speak about why it’s possible you’ll need to transfer a reside web site to a staging atmosphere. Then, we’ll percentage two alternative ways emigrate your website. Let’s get began!
Contents
Why You May Wish to Transfer Your Are living Web page to Native
There are a couple of the explanation why chances are you’ll need to transfer your live WordPress site to a local environment. The primary reason why is in most cases for construction and checking out functions.
With an area construction atmosphere, you’ll be able to take a look at out adjustments in your theme or plugins with out affecting your reside content material. This lets you experiment freely with out being concerned about breaking your website.
Moreover, your internet hosting plan may now not have enough assets (equivalent to CPU or reminiscence) to run WordPress in the community. On this case, it may be useful to make use of a staging website on another host prior to the database is created and imported at the localhost.
Finally, some builders like to paintings offline on their native device as it’s quicker than running on a far off server. This isn’t essentially a reason why to transport your reside website to native, however it’s one thing to bear in mind.
Find out how to Transfer a Are living WordPress Web page to a Native Surroundings (2 Strategies)
Now that we’ve established some causes for shifting your reside website, let’s have a look at two strategies you’ll be able to use for a a success migration. Notice that for each strategies, you’ll want to create an area server atmosphere. You’ll be able to do that with MAMP, WAMP, or XAMPP. For this educational, we’ll be the use of the latter.
1. Use a Plugin
The fastest and best possibility is to make use of a plugin. Duplicator is a well-liked selection for migrating WordPress websites. It’s unfastened and reasonably simple to make use of, even though you’re now not a tech-savvy individual:
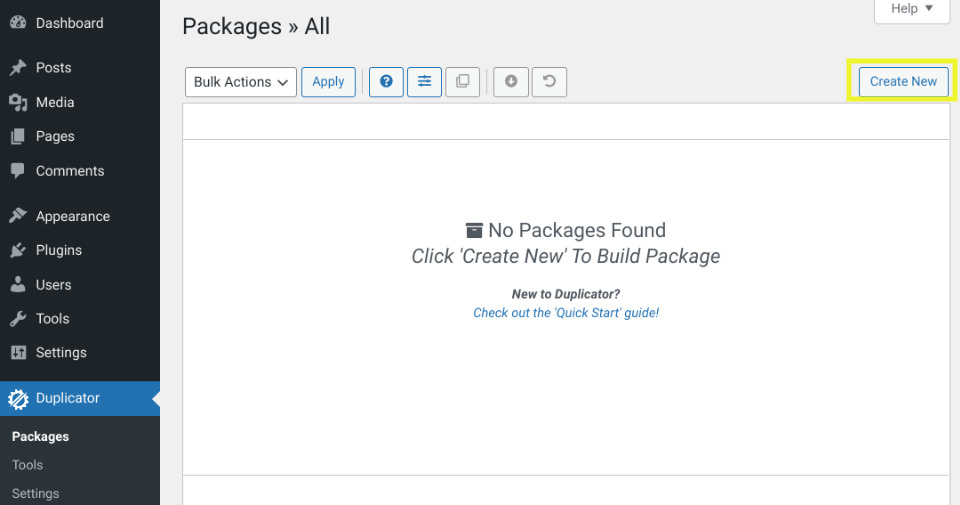
To get began, set up and turn on the plugin to your reside WordPress website. Subsequent, navigate to Duplicator > Applications and make a choice the Create New button:
At the subsequent display, you’ll want to select whether or not to incorporate any further recordsdata or directories. Click on at the Subsequent and Construct buttons to continue.
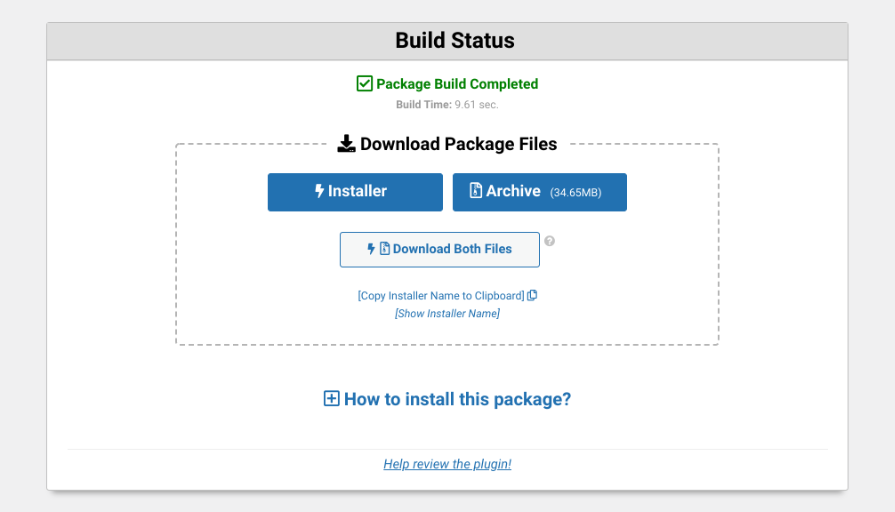
Duplicator will create a bundle of your WordPress website which you’ll be able to obtain in your pc. You’ll want to obtain each the installer.php and archive.zip recordsdata:
Now, it’s time to add the recordsdata in your native server and run the installer. To create a brand new database to your website in localhost, you’ll be able to use phpMyAdmin or run a SQL query in MySQL. You’ll want to make an observation of the identify, username, and password of your database.
Subsequent, you’ll want to create a brand new folder throughout the native server root folder (C:xamppwww) to your new native website. Open the folder, then reproduction and paste the archive.zip and installer script recordsdata.
You’ll be able to then pass to http://localhost/bundle/installer.php on your browser to run the Duplicator installer script:
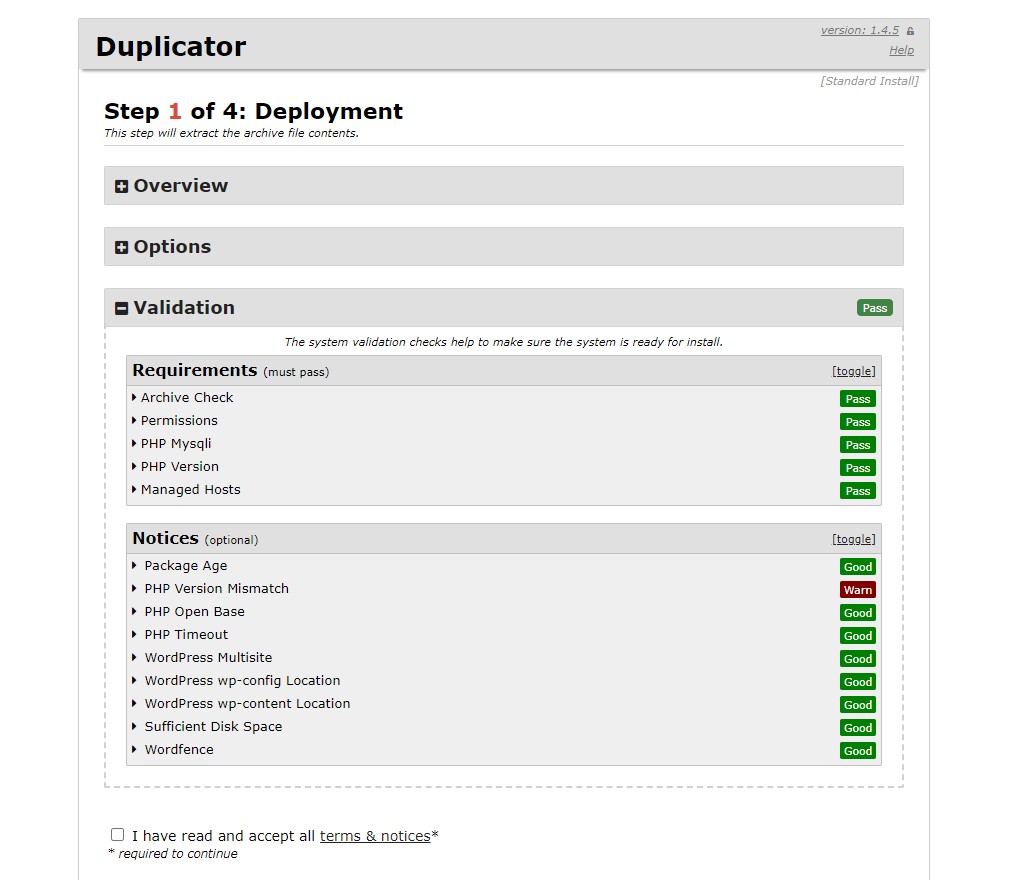
Right here, you’ll be able to enter your database main points. Whenever you’re executed, click on at the Subsequent button.
If the entirety is operating correctly, you must see a good fortune message. Click on on Subsequent to continue.
At the subsequent display, it is very important input a brand new username and password to your WordPress website. Then scroll down and make a choice Set up.
Duplicator will get started migrating your WordPress website to localhost. This procedure generally takes a couple of mins. When the migration is entire, you’ll see a good fortune message:

Click on at the Admin Login button to log in in your native WordPress website. You must now see your reside WordPress website working on localhost.
2. Manually Export Your Database
You’ll be able to additionally transfer your WordPress recordsdata and database manually out of your reside server in your native construction atmosphere. This technique is beneficial for skilled builders who’re comfy running with a File Transfer Protocol (FTP) shopper and phpMyAdmin.
Should you’re now not acquainted with those equipment, don’t concern! We’ll stroll you via every step of the method so that you could effectively migrate your website.
The very first thing you wish to have to do is again up your reside WordPress website. This manner, if the rest is going incorrect throughout the migration procedure, you’ll have a backup to fall again on.
Step 1: Export Your WordPress Database
First, you’ll want to export your WordPress database. Log into your hosting account’s cPanel and navigate to phpMyAdmin. Then, make a choice the database you need to export adopted by means of the Export button:
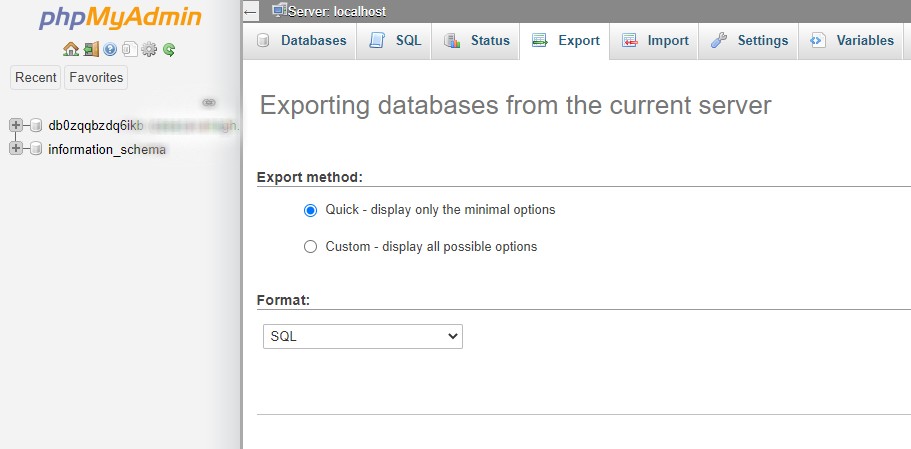
You’ll be able to make a choice from the short or customized strategies. Click on on Move to obtain your database recordsdata.
Subsequent, you’ll be able to obtain the WordPress recordsdata the use of an FTP shopper or File Manager. In Record Supervisor, you’ll be able to merely obtain the public_html folder. Should you’re the use of FTP, make a choice the entire recordsdata on your website’s root folder, then right-click and make a choice Obtain.
Step 2: Create a New Database
Now it’s time to create an area server atmosphere. Once more, you’ll be able to do that the use of MAMP or XAMPP.
Whenever you’ve set it up, you’ll be able to upload a folder within C:xamppwww to position your native website. You’ll be able to reproduction and paste the WordPress recordsdata right here.
You’ll additionally want to create a brand new database the use of phpMyAdmin. You’ll be able to do that by means of visiting http://localhost/phpmyadmin/. Then, make a choice the Database tab, identify your database, and make a choice Move:

Subsequent, make a choice the Import tab adopted by means of Make a selection Record:
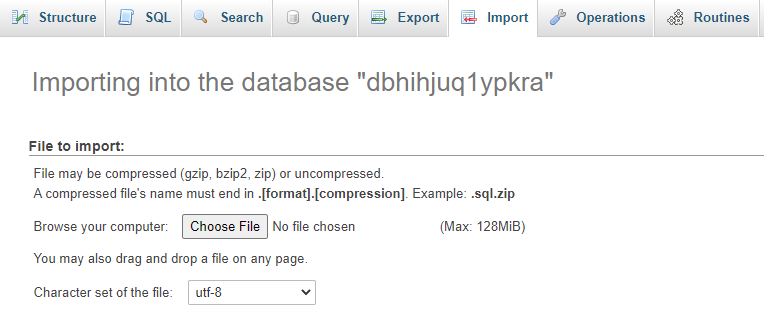
Then, add the database export document that you just downloaded previous, and click on at the Move button. PhpMyAdmin will unzip and import your WordPress database.
Step 3: Replace the wp-config Record
The remaining step is to replace your wp-config.php document. Navigate to the native WordPress set up folder and duplicate and paste the wp-config.php document right into a textual content editor:
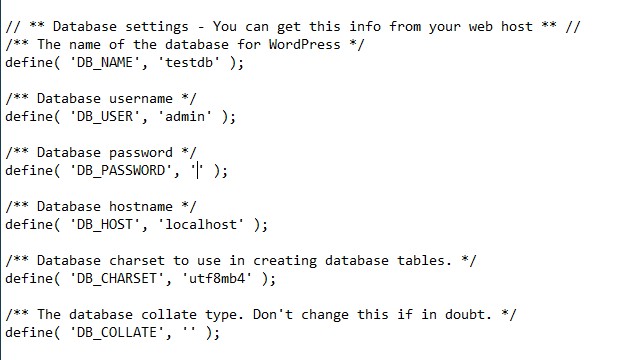
You’ll want to alternate the identify of the database in your new database identify created with phpMyAdmin. Then, you’ll be able to replace the database username and password (when you’re the use of one).
That’s it! You’ll be able to now get entry to your reside web site on your native browser.
Conclusion
Shifting your reside WordPress website to an area server is beneficial whilst you’re checking out out new options or modifying your recordsdata. It may save you pointless downtime and reduce the probabilities of one thing going incorrect.
As we mentioned on this article, there are two strategies you’ll be able to use to transport a reside website to an area atmosphere:
- Use a plugin equivalent to Duplicator.
- Create an area server atmosphere and manually export your database and recordsdata.
Do you might have any questions on shifting a reside WordPress website to native? Tell us within the feedback phase beneath!
The submit How to Move a Live WordPress Website to a Local Environment (2 Methods) seemed first on Torque.
WordPress Agency