
WooCommerce Blocks is helping you create customized retailer pages, exhibit your merchandise, and upload complicated ecommerce capability like filtering and looking — all with out writing a unmarried line of code.
Many blocks send with WooCommerce via default, however a number of new ones don’t. You’ll use those new blocks on your WooCommerce retailer via putting in the WooCommerce Blocks WordPress plugin. This plugin is a checking out flooring for experimental choices and attainable long term additions to the core WooCommerce Blocks.
Integrating WooCommerce Blocks into WordPress is easy with Kinsta, the place you’ll come with WooCommerce all through the setup procedure via checking a field. This integration facilitates fast, easy on-line retailer construction.
This hands-on information walks you via including WooCommerce features in your WordPress website the use of WooCommerce Blocks.
Contents
- 1 Necessities
- 2 Exploring WooCommerce Blocks
- 3 Use Product Grid block in WooCommerce
- 4 Upload a Featured Product block in your web page or put up
- 5 Make the most of Clear out blocks in WooCommerce
- 6 Cart and checkout pages
- 7 Tips on how to create a customized Store web page
- 8 Tips on how to track and analyze block efficiency
- 9 Abstract
Necessities
To practice along side this information, be sure to have:
- WooCommerce put in and activated on your WordPress dashboard
- Familiarity with WordPress
When you don’t have a WordPress website already, you’ll spin up a WordPress website with Kinsta’s dashboard or by the use of DevKinsta in the community. After you have your website, import those pattern merchandise on your WooCommerce retailer.
Exploring WooCommerce Blocks
The WordPress default block editor, offered with model 5.0, is the Gutenberg editor. It changed the vintage editor with a block-based machine, letting customers construct and customise visually interesting content material with out intensive frontend coding wisdom.
WooCommerce Blocks seamlessly integrates with Gutenberg editor’s intuitive drag-and-drop interface, providing a suite of devoted blocks designed for product show, cart control, checkout processes, and extra.
This integration empowers you to take complete good thing about the versatility and ease of the block editor whilst tailoring your WordPress website for optimum ecommerce efficiency.
To make use of WooCommerce Blocks, get started via opening or making a web page or put up. Click on the + button at the height bar to view all blocks, then navigate to the WOOCOMMERCE segment. Right here’s a short lived review of the other blocks:
- Product Seek — Provides a seek bar for fast visitor product searches.
- All Merchandise — Presentations all retailer merchandise in a grid.
- All Opinions — Lists all product evaluations.
- Vintage Checkout — Renders the vintage checkout shortcode.
- Vintage Cart — Renders the vintage cart shortcode.
- Buyer Account — Allows visitor login and logout features.
- Featured Class — Highlights a product class and a call-to-action (CTA) to inspire steered responses.
- Featured Product — Highlights a product or variation and a CTA.
- Lively Filters — Presentations the recently lively filters.
- Clear out via Value — Renders a worth vary that buyers can use to clear out merchandise.
- Clear out via Inventory — Allows filtering merchandise via stock standing.
- Clear out via Characteristic — Clear out merchandise according to attributes like dimension or colour comparable to dimension or colour.
- Clear out via Score — Allows consumers to clear out the goods via their ranking.
- Hand-Picked Merchandise — Presentations a choice of handpicked merchandise in a grid.
- Mini Cart — Supplies a snappy cart view button.
- Retailer Notices — Presentations customer-facing notifications generated via WooCommerce or different extensions.
- Absolute best Promoting Merchandise — Presentations a grid of your retailer’s all-time best possible dealers.
- Merchandise Classes Listing — Displays the entire product classes as an inventory or a dropdown.
- Merchandise via Class — Presentations a grid of goods from the chosen classes.
- Product Assortment (Beta) — Presentations merchandise from a chosen assortment.
- Latest Merchandise — Presentations the newest merchandise in a grid.
- On Sale Merchandise — Presentations present sale pieces in a grid.
- Merchandise via Tag — Presentations merchandise with the chosen tag in a grid.
- Best Rated Merchandise — Showcases the top-rated merchandise in a grid.
- Merchandise via Characteristic — Presentations the goods with the chosen attributes in a grid.
- Opinions via Class — Presentations the product evaluations from specified classes.
- Opinions via Product — Presentations evaluations arranged via product.
- Unmarried Product — Showcases a unmarried product.
- Cart — Presentations the buying groceries cart.
- Checkout — Presentations the shape enabling consumers to publish orders.
You presently know what each and every block represents. Let’s use a few of these blocks to create an ecommerce enjoy.
Use Product Grid block in WooCommerce
A product grid block is a flexible software for showcasing your retailer’s merchandise in an arranged, grid structure to your WordPress website. Right here’s learn how to upload and customise a product grid block:
- Navigate to the web page or put up the place you need the goods displayed. Assign a name like “Merchandise.”
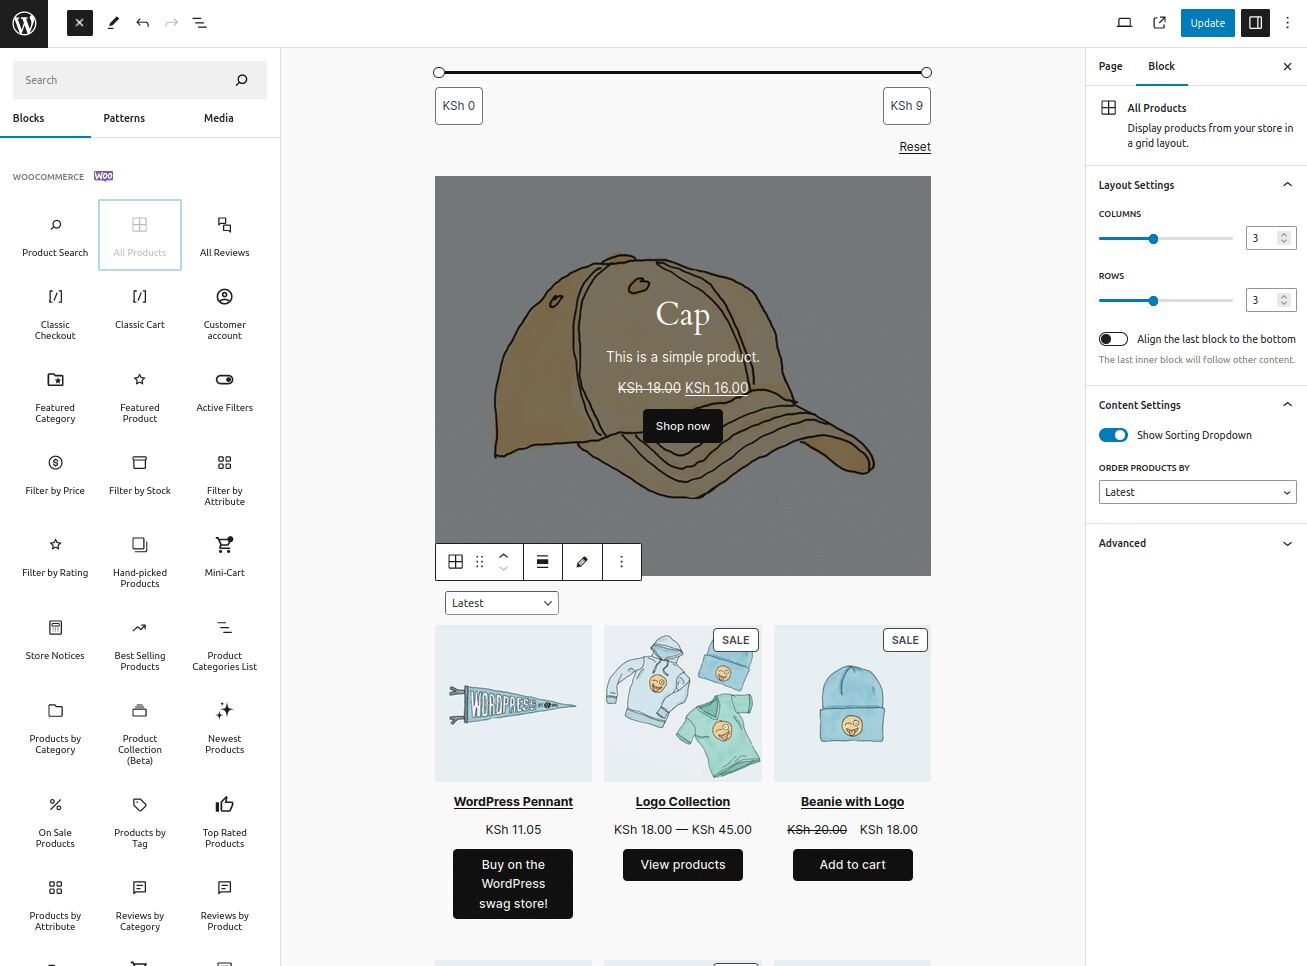
- Click on the + button at the height navigation bar to show the entire blocks. Scroll all the way down to the WOOCOMMERCE segment and choose All Merchandise. This motion shows your merchandise in a grid format at the web page.
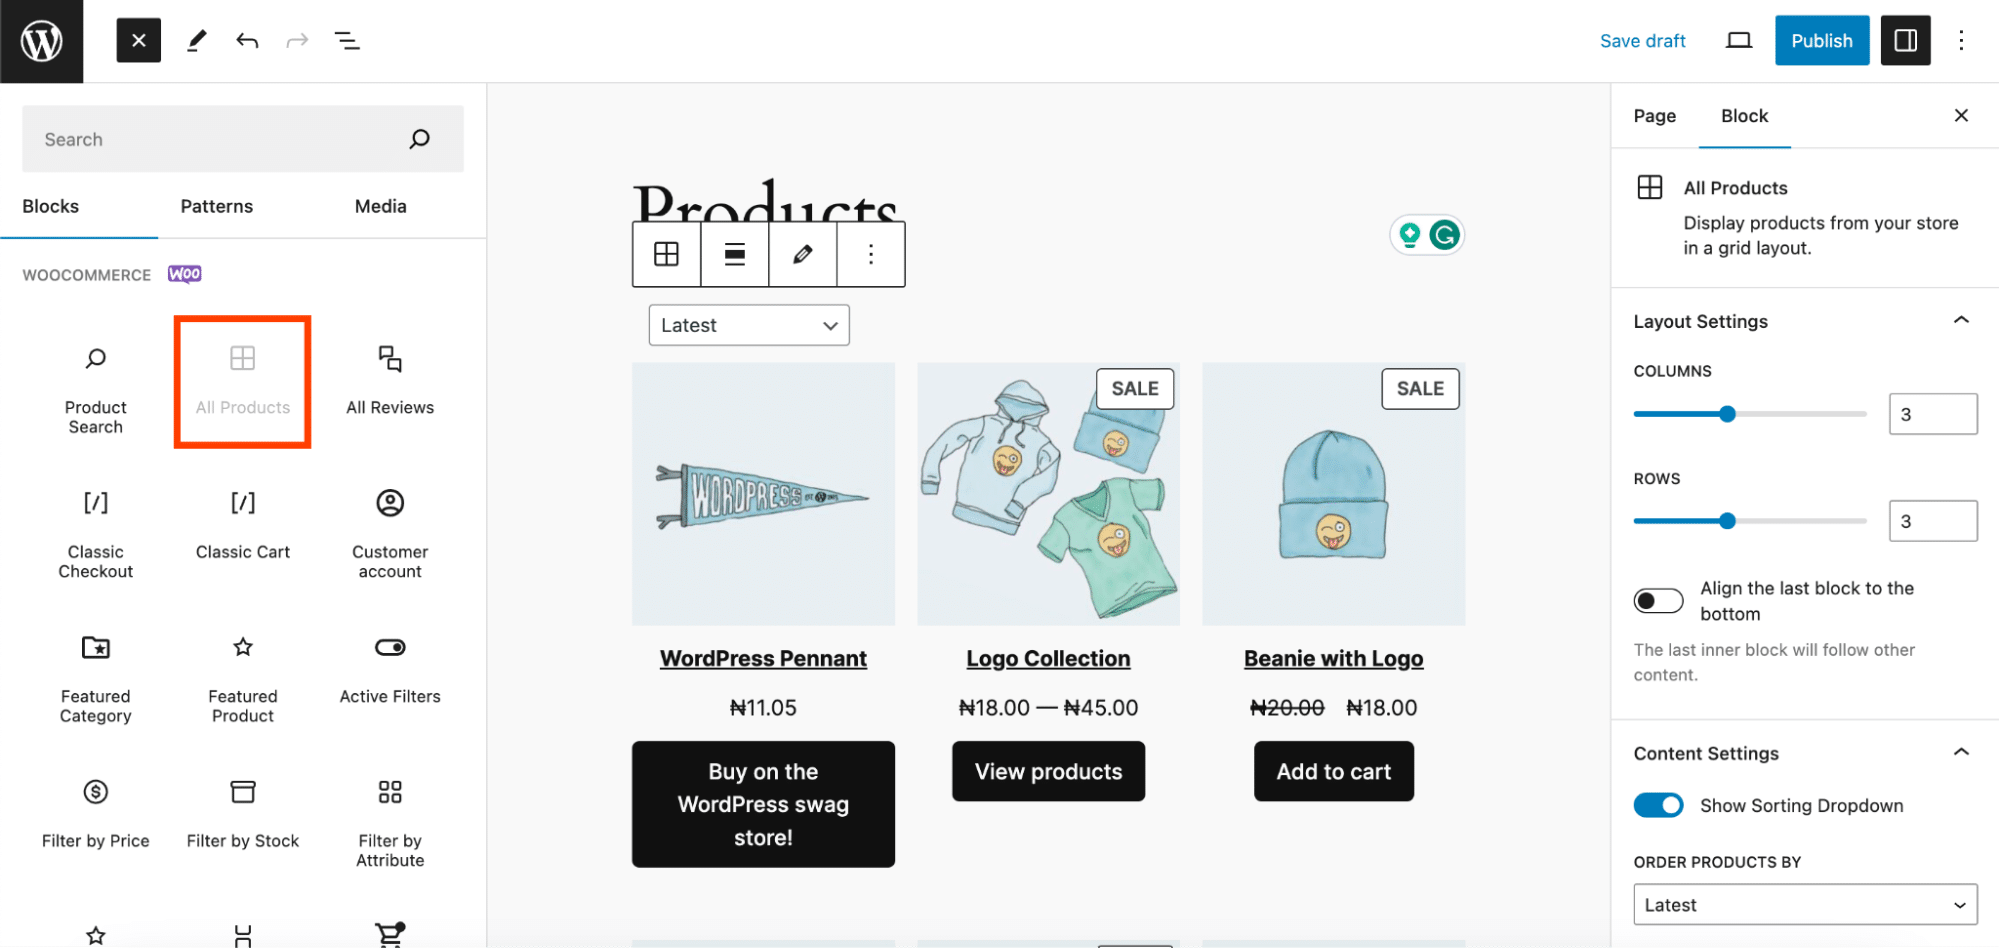
The usage of the All Merchandise WooCommerce Block to show merchandise in Grid. - To configure this block, use the block settings panel at the correct aspect. You’ll get admission to the settings via clicking the Settings icon (the second-rightmost icon at the height navigation bar).
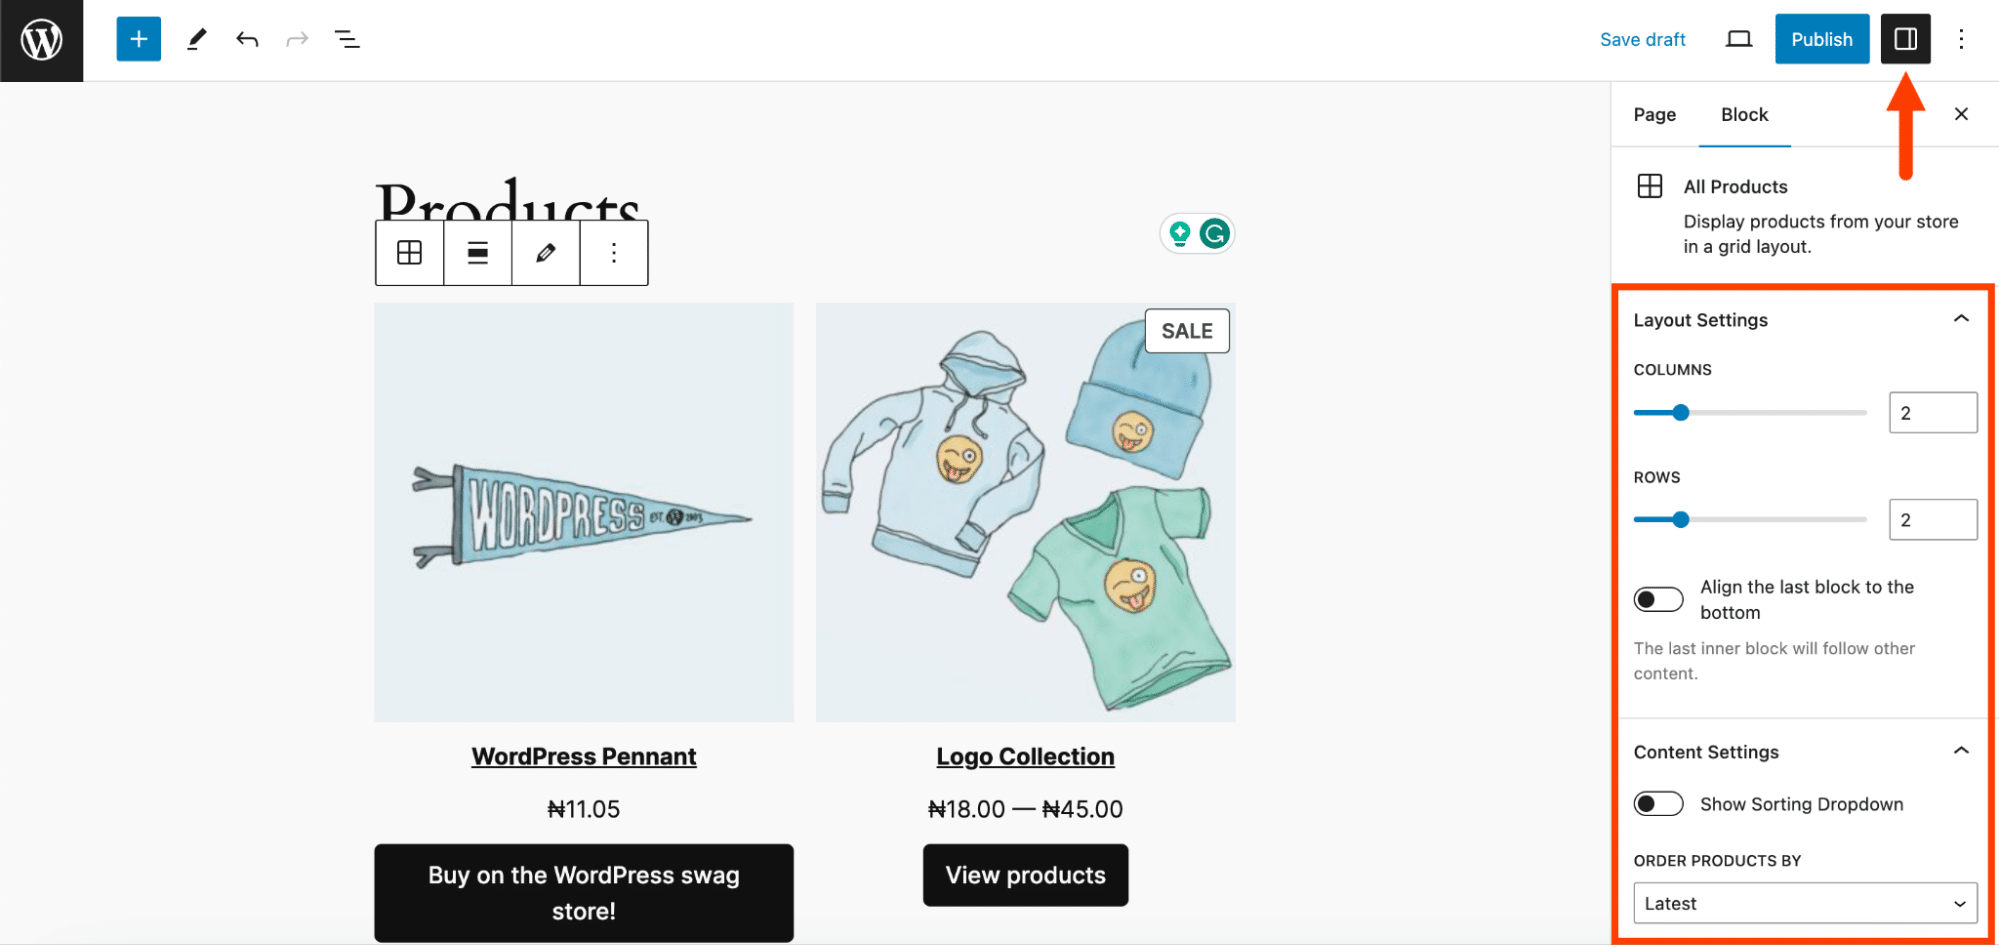
Settings panel to regulate the All Merchandise block. Right here, you’ll tailor the grid’s format, content material, and styling:
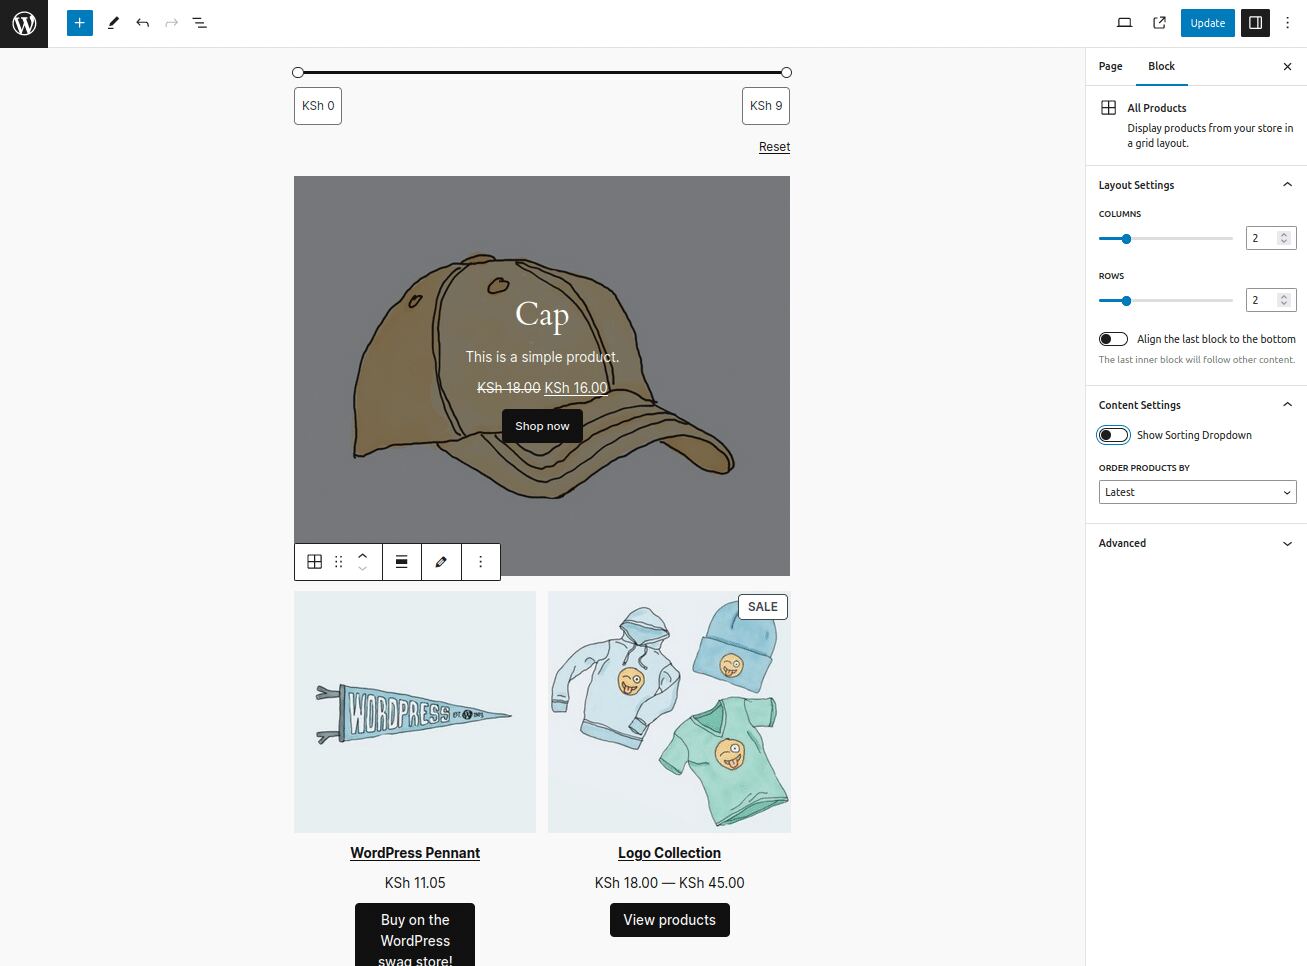
- Structure Settings: Alter the selection of rows and columns. For instance, set each to two for a balanced glance.
- Content material Settings: Come to a decision if you wish to come with a sorting dropdown menu for purchasers. This selection lets in consumers to type merchandise in a delegated order. You’ll disable it if most popular.
- Complex Styling: If wanted, you’ll upload CSS categories for extra subtle styling.
- Preview the web page when you’ve finalized the configurations to make sure the entirety seems as supposed. Then, click on the Put up button. This step means that you can make the web page available publicly, privately, or with password coverage, according to your desire.
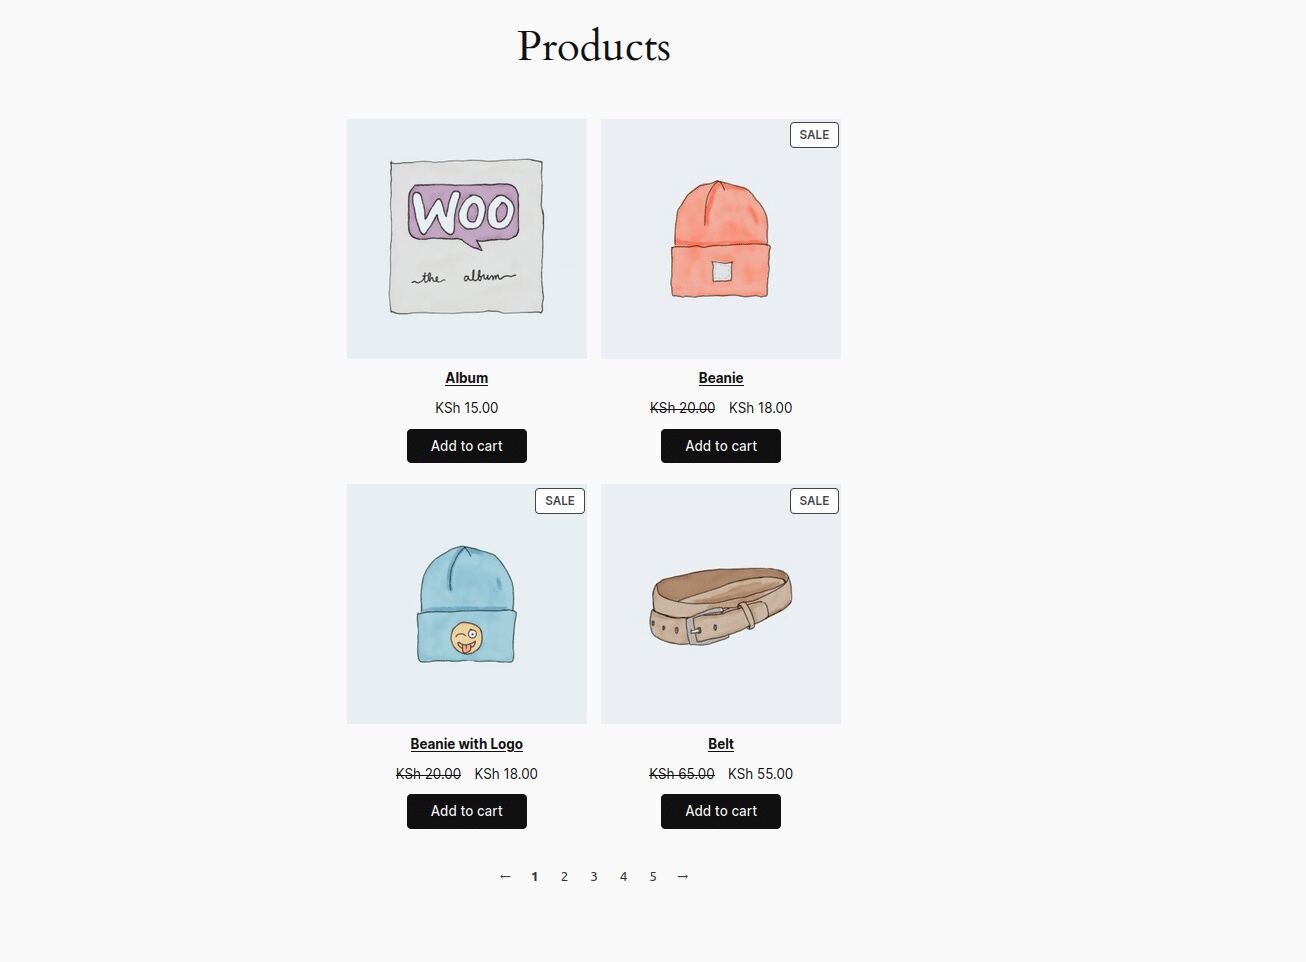
Up to date Merchandise web page shows merchandise in a 2-by-2 grid and displays a navigation bar.


Upload a Featured Product block in your web page or put up
The Featured Product block permits you to spotlight a product to your web page or put up. You’ll choose a product, customise its show settings, and upload it in your content material to attract consideration to a selected merchandise you need to exhibit.
Practice those steps so as to add a featured product block:
- Start via navigating to the web page or put up the place you need to function the product. Consider you’re designing a product grid and wish to position the featured product on the height. Create an area in that location, and also you’ll understand a + button at the left.
Then again, if in case you have an present block close to the specified spot, click on the 3 vertical dots so a menu pops up. You’ll make a selection Upload ahead of or Upload after.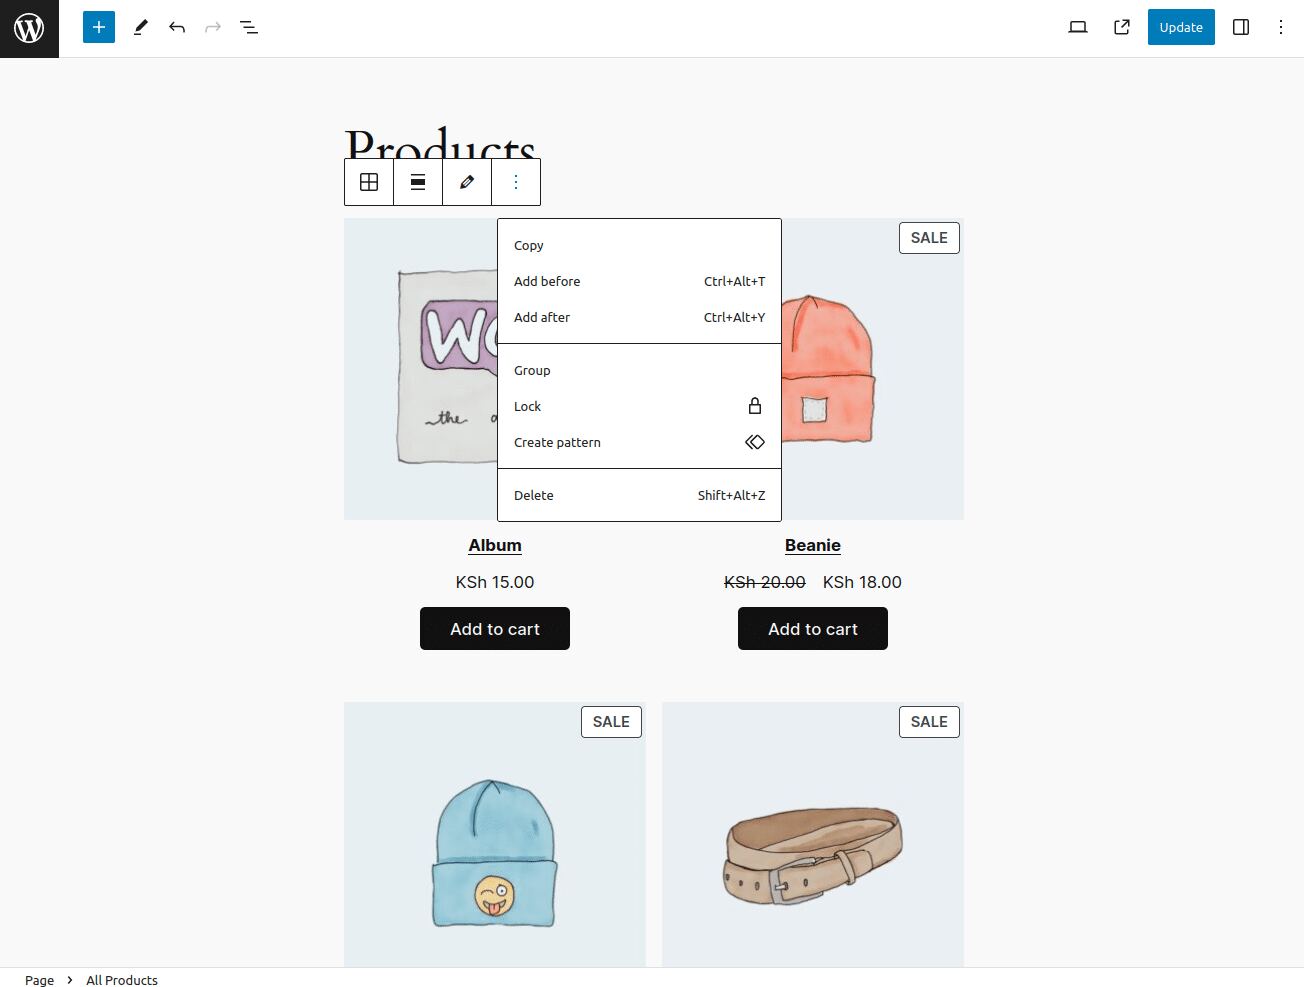
Including the Featured Product block ahead of the All Merchandise block. - Choose the + button at the height navigation bar to show the entire blocks and seek for Featured Product.
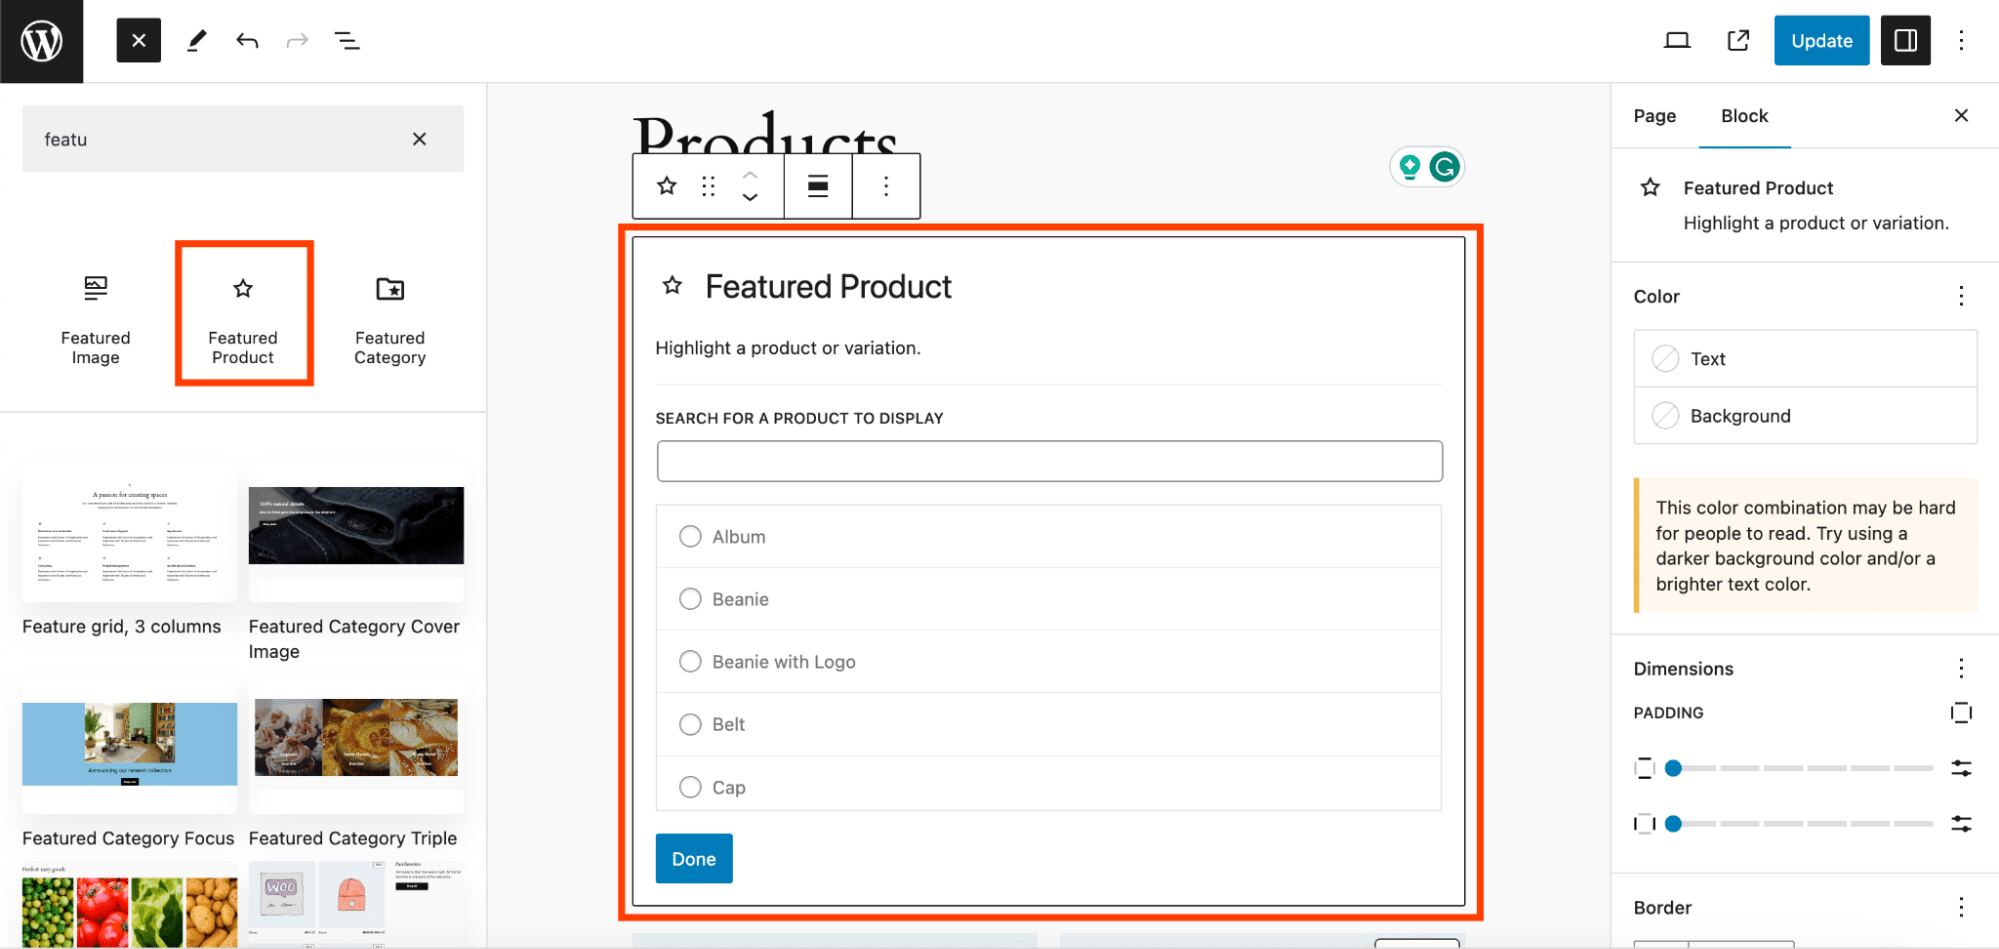
Choose a product as a featured product with the Featured Product block. - Select the product you need to show. Then, click on Executed.
- To offer your Featured Product block a singular appear and feel, click on on Settings. From the block settings panel, you’ll:
- Come to a decision whether or not to show the product description and value.
- Configure how your media (photographs and movies) must seem.
- Specify the alt textual content for the product symbol.
- Select the block overlay colour.
- Alter the opacity of the block.
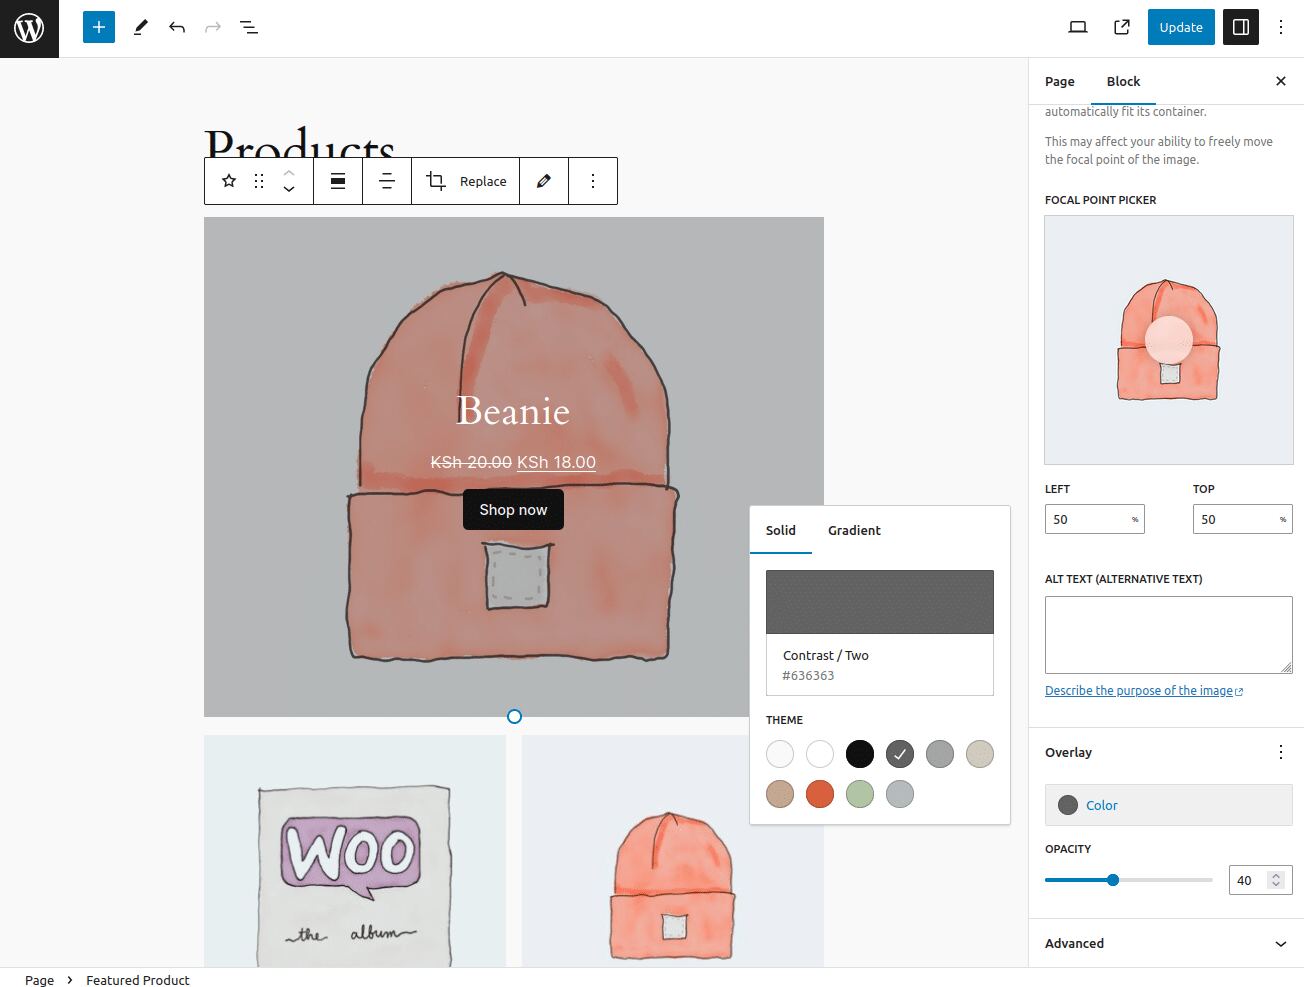
Adjusting the Featured Product block settings. - While you’ve made the entire vital changes, you’ll post your web page or replace it if it’s already reside. This permits you to see the block in motion and make sure it appears to be like simply how you need it to.
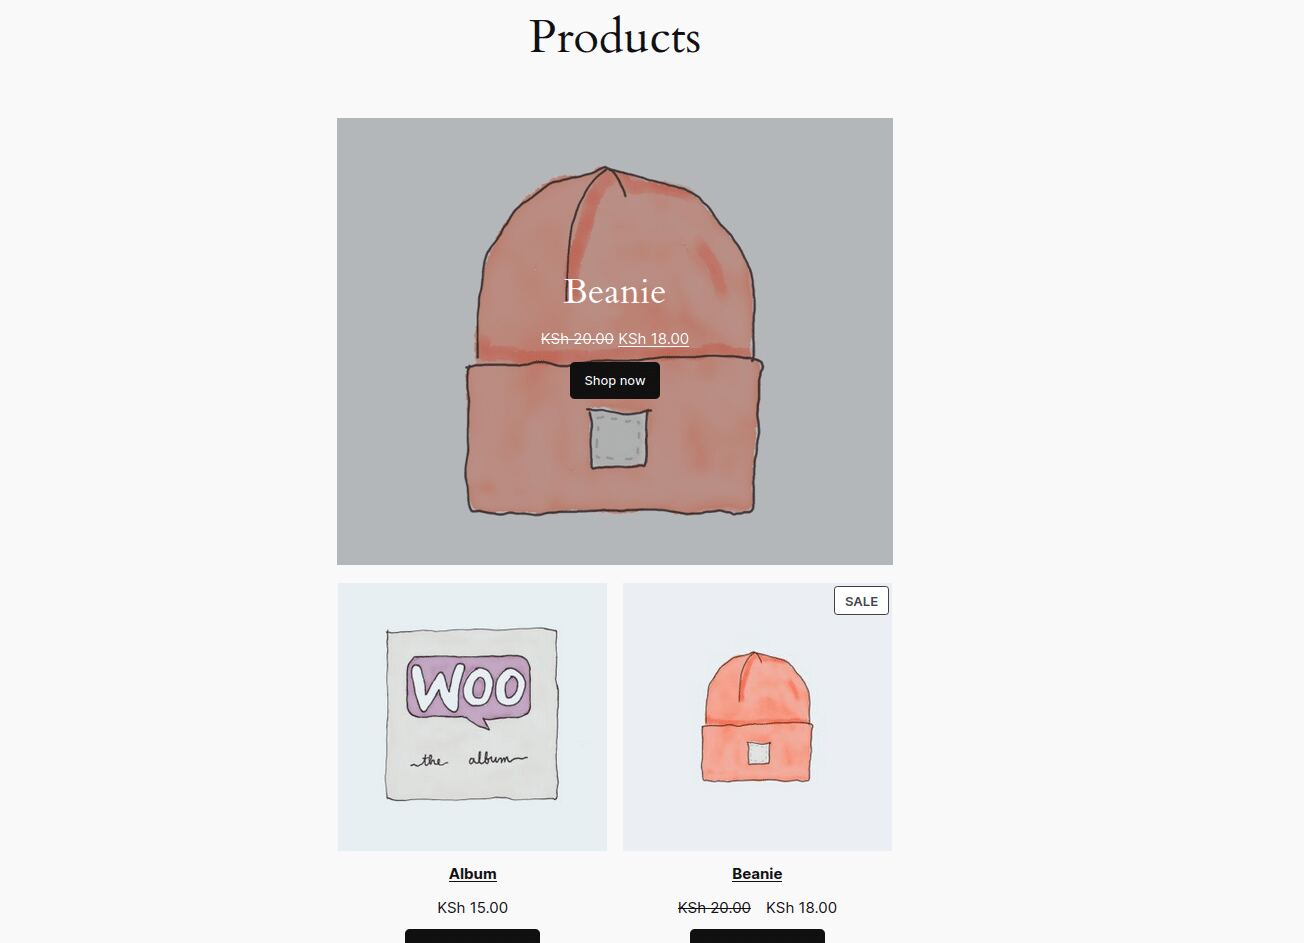
Preview of the up to date Merchandise web page showing the featured beanie merchandise above the product grid.


Make the most of Clear out blocks in WooCommerce
Clear out blocks permit your consumers to refine product searches according to particular standards, serving to them briefly find merchandise that fit their personal tastes or necessities.
- Navigate to the web page or put up the place you need so as to add the blocks. This information makes use of the similar Merchandise web page from the former steps.
- Select the place you want to upload the filters.
- Click on the + button from the tip navigation bar to show the entire blocks. Scroll all the way down to the WOOCOMMERCE segment and notice a clear out possibility for value, inventory, characteristic, and ranking. For instance, if you select Clear out via Value.
Including the Clear out via Value block
Via deciding on this block, you’ll show a worth vary bar that permits customers to clear out which merchandise seem at the web page according to their desired value vary. You’ll customise the block settings at the right-hand panel to fit your wishes.

Including the Clear out via Characteristic block
You’ll additionally use the Clear out via Characteristic block.

You’ll make a selection a particular characteristic, comparable to Colour, after which configure the settings accordingly. For instance, you’ll permit Show product depend to turn the selection of merchandise to be had in each and every colour.
You’ll then view the reside web page and check the capability of the clear out buttons.

Via following those steps, you’ll be offering your consumers a unbroken buying groceries enjoy via permitting them to simply refine their product searches according to more than a few standards, in the long run bettering their pleasure and serving to them to find the specified merchandise.
Cart and checkout pages
Your internet retailer’s cart and checkout options should be intuitive and completely useful for a clean person adventure. Making sure a very good visitor enjoy will depend on managing cart pieces successfully and facilitating an easy checkout procedure.
WooCommerce creates the Cart and Checkout pages via default the use of the correct blocks. Shoppers can upload merchandise to their cart and get admission to it during the navigation bar.

After confirming their cart contents, your visitor can choose the Continue to Checkout button, fill out the vital main points, and position their order.

Tips on how to create a customized Store web page
Now that you simply’ve discovered learn how to use positive WooCommerce Blocks, the next move comes to combining them to create a customized user-friendly store web page with the next blocks:
- Product Seek
- Clear out via Value
- Product Classes
- Featured Product
- All Merchandise
To create this practice store format, create a brand new web page and practice the stairs beneath.
- Input “Store” because the web page name.
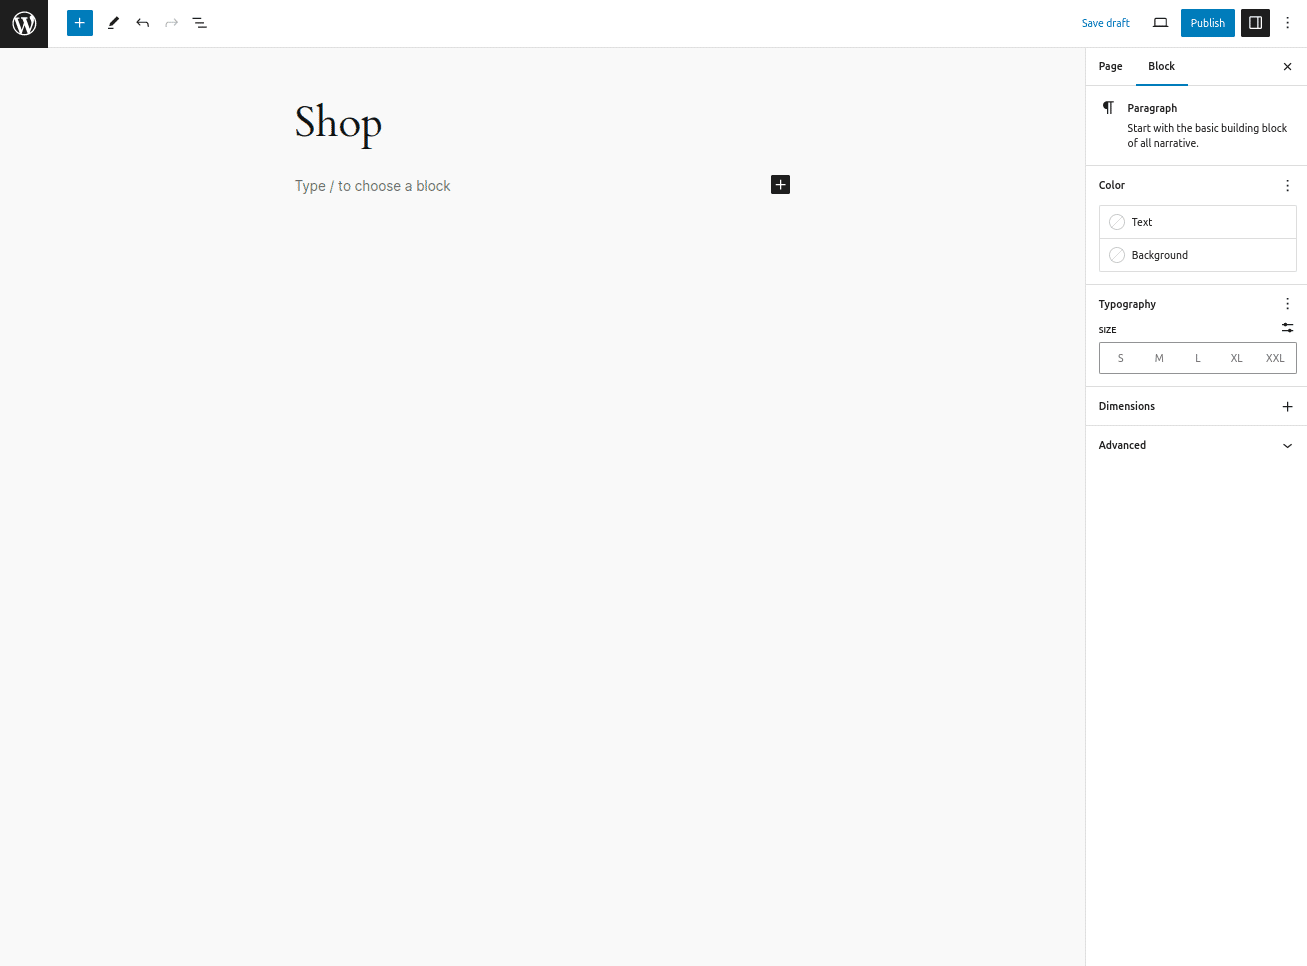
The Store web page in edit mode. - The usage of the similar steps as ahead of so as to add a block, upload the Product Seek block. Don’t practice any configurations.
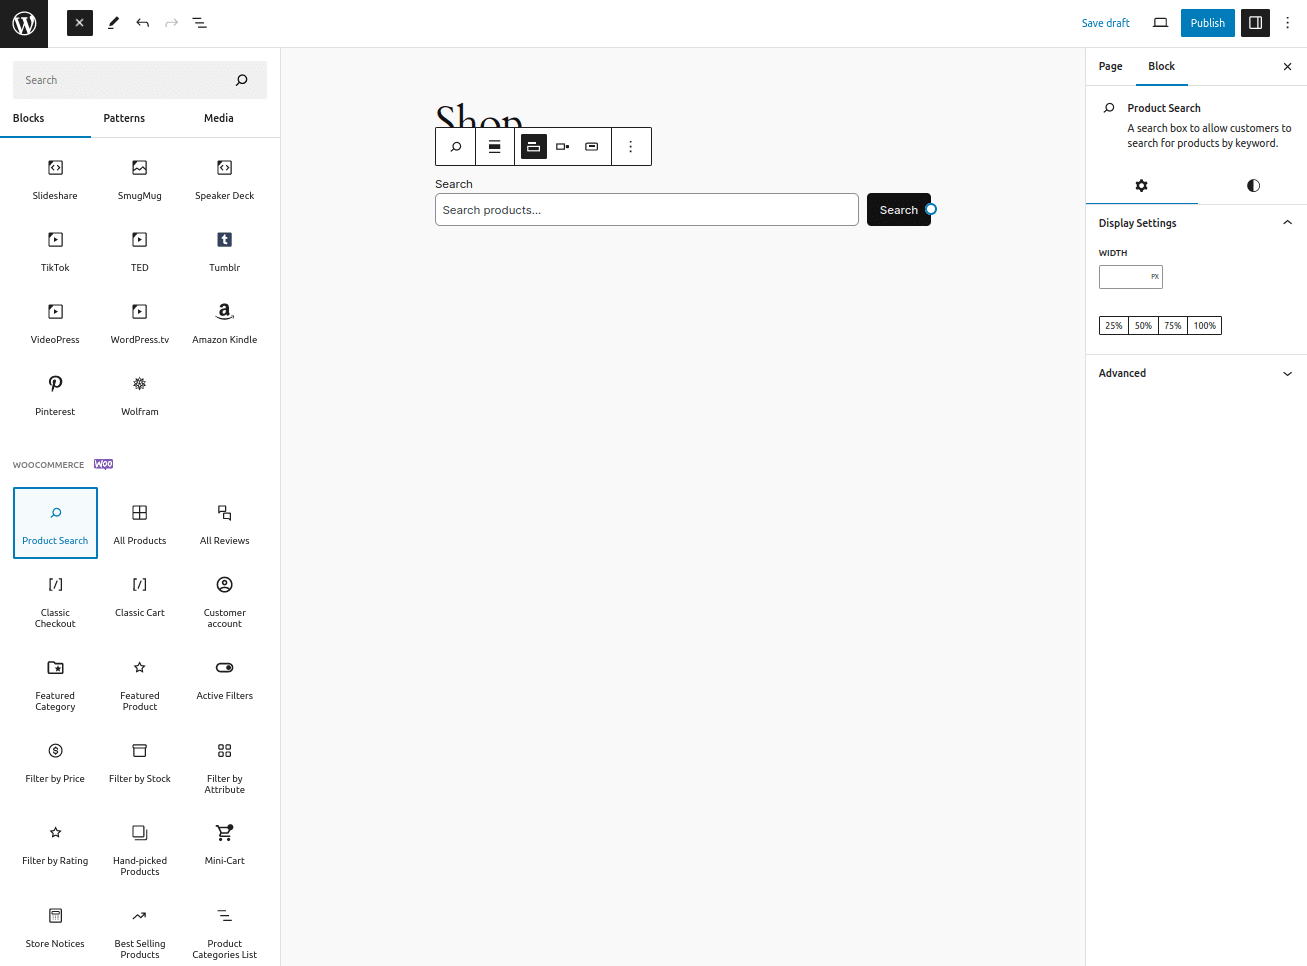
Including the Product Seek block. - Upload the Product Classes Listing block.
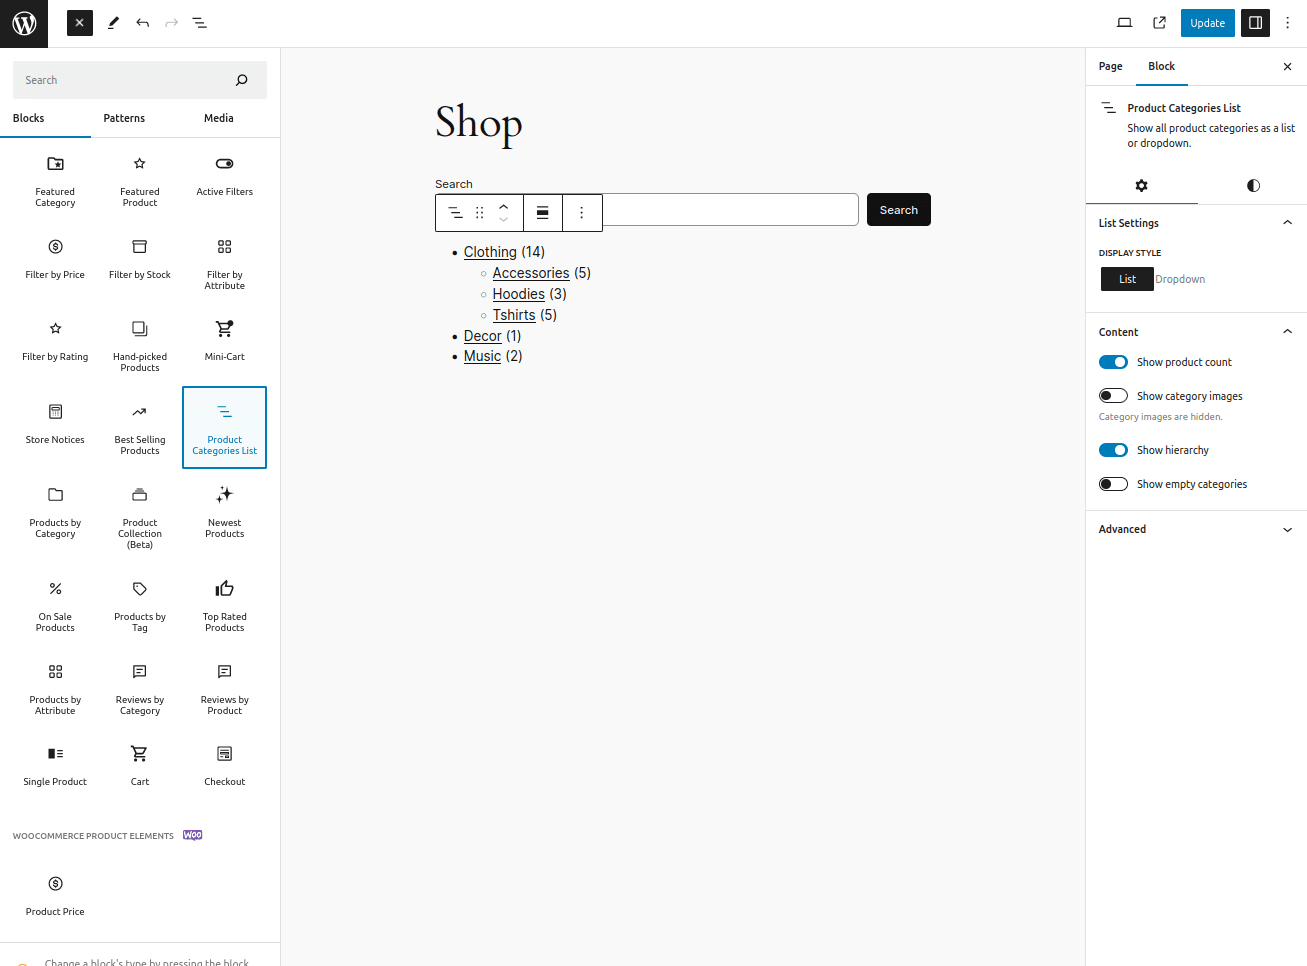
Including the Product Classes Listing block. Within the block environment web page, set the DISPLAY STYLE to Dropdown.
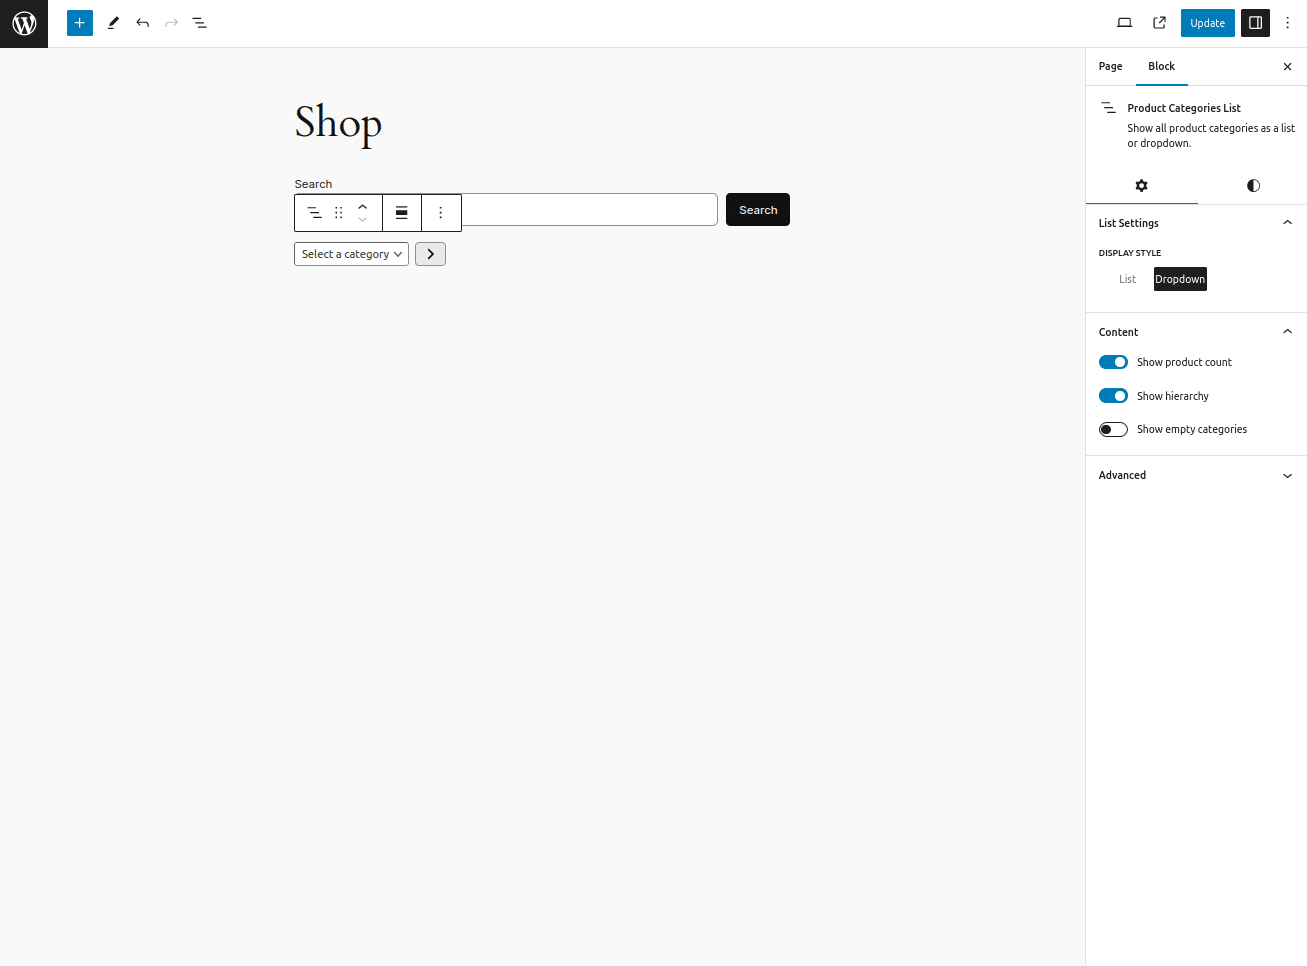
Adjusting the Product Classes Listing block settings. - Subsequent, upload the Clear out via Value block. Don’t configure the rest for this block.
- Upload the Featured Product block and choose the product to show. Follow the similar configurations because the Featured Product block you made previous.
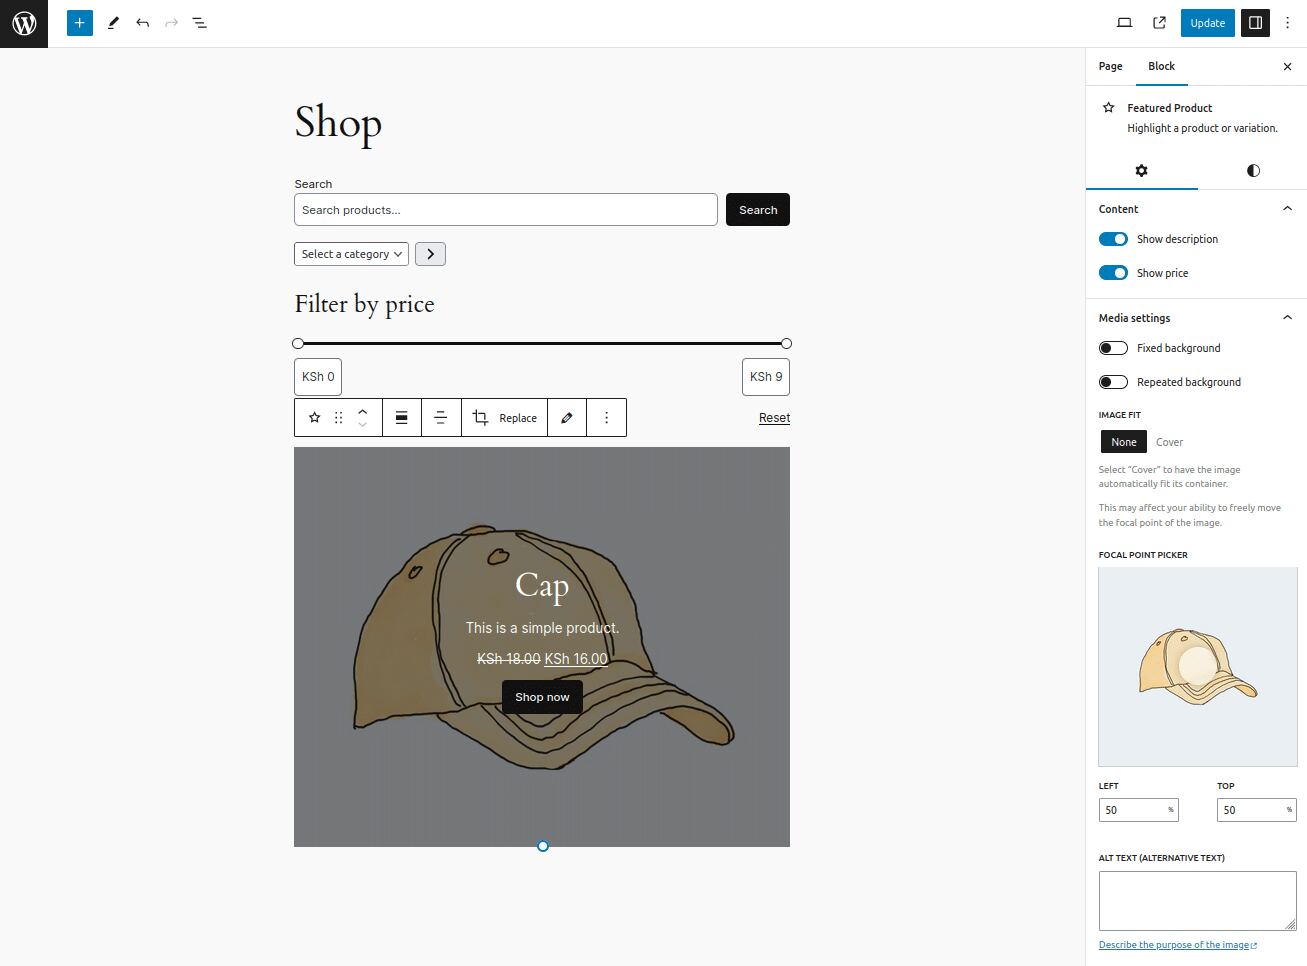
The Store web page displays the featured cap product with some settings for the featured product. - Upload the All Merchandise block.
Including the All Merchandise block. For this block’s settings, set the COLUMNS and ROWS values to two and deselect the Display Sorting Dropdown.
Adjusting the All Merchandise block settings. - Put up the web page and look at the effects.
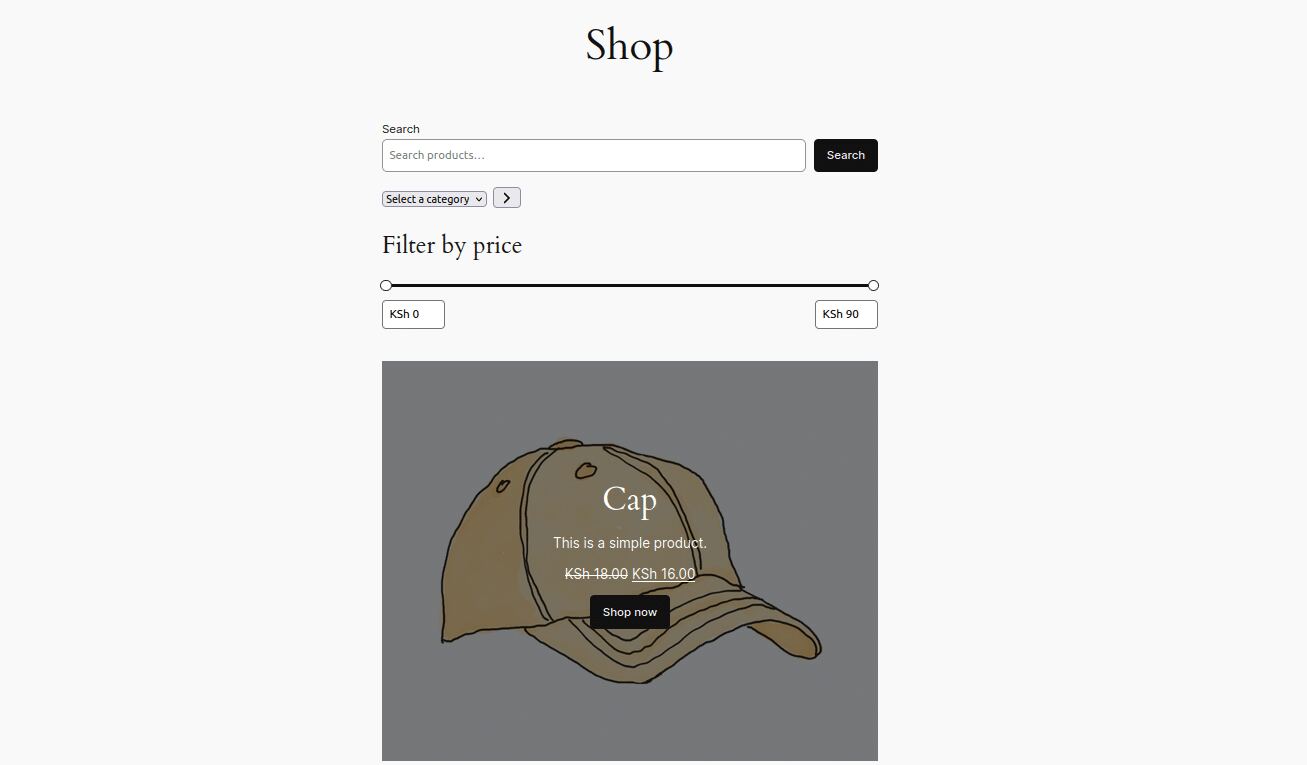
Previewing the Store web page. 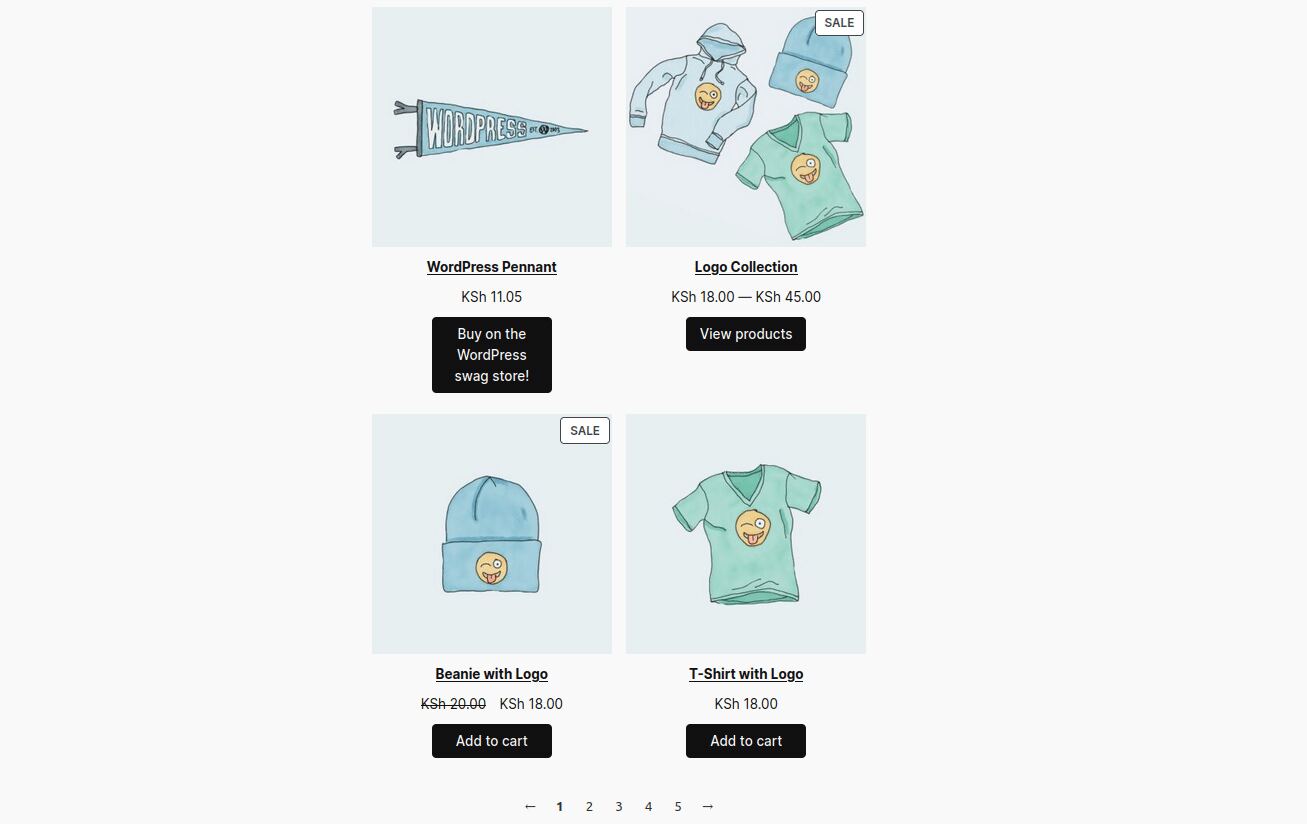
Previewing the Store web page.


Tips on how to track and analyze block efficiency
Kinsta’s tough gear track and analyze the efficiency of pages that use WooCommerce Blocks.
Kinsta’s APM software
Kinsta’s Software Efficiency Tracking (APM) software means that you can track the efficiency of pages containing WooCommerce Blocks. It captures timestamped details about PHP processes, MySQL database queries, and different a very powerful metrics, letting you monitor and analyze WooCommerce-facilitated transactions.
You may, as an example, analyze the period and frequency of interactions and attainable bottlenecks related to those pages. With this knowledge, you’ll exactly troubleshoot and optimize efficiency.
Kinsta’s analytics software
Comparing the affect of WooCommerce Blocks on person engagement and gross sales calls for a multifaceted method. Kinsta’s complete analytics gear play a a very powerful function right here. The usage of the WordPress analytics options inside the MyKinsta dashboard provides you with precious insights into more than a few efficiency metrics that at once affect person enjoy — and, in consequence, gross sales.
- The Assets segment of the MyKinsta dashboard tracks your website’s general visits, disk area, and bandwidth utilization. It supplies a quantitative review of website visitors and useful resource use.
- The Efficiency segment comprises metrics like reasonable PHP + MySQL reaction time and AJAX utilization. Those statistics mean you can monitor the responsiveness and interactivity of the pages the use of WooCommerce Blocks.
- The Reaction segment supplies reaction code breakdowns and blunder analyses, serving to you higher perceive person interactions and attainable hindrances they are going to come upon.
- The Geo & IP segment permits you to monitor content material supply community (CDN) utilization, cache potency, and geographical insights. This data is helping refine your website according to person habits, location, and function information.
Via intently tracking those analytics, you’ll determine attainable bottlenecks and optimize your pages the use of WooCommerce Blocks to make sure a unbroken, enticing person enjoy.
You’ll learn our final information on 18 robust tactics to hurry up your WooCommerce retailer to be informed extra pointers. Velocity is a very powerful for on-line shops, as slow-loading websites result in person frustration and misplaced gross sales.
Abstract
This information explored the features of WooCommerce Blocks, from including product grids and featured merchandise to enforcing robust clear out blocks. It additionally defined the importance of cart and checkout containers, essential parts in guiding consumers via a unbroken buying groceries enjoy.
Strategically combining more than a few WooCommerce Blocks lets in for an intuitive and visually interesting format. The method comes to cautious block variety, configuration, and association to cater to precise functionalities and visitor personal tastes.
Opting for Kinsta’s WordPress website hosting provider considerably complements the efficiency and reliability of your WooCommerce websites. With optimized server configurations, tough safety features, and seamless scalability, Kinsta guarantees that your on-line retailer operates at height potency.
Whether or not the use of WooCommerce blocks for product shows, filters, or cart functionalities, Kinsta’s website hosting infrastructure supplies the velocity and balance had to ship a phenomenal buying groceries enjoy in your consumers.
Have you ever skilled the use of WooCommerce blocks? If that is so, which block is your favourite, and what new block do you want to peer added? Percentage your ideas within the feedback segment.
The put up WooCommerce Blocks: Upload WooCommerce features in your WordPress website gave the impression first on Kinsta®.
WP Hosting