For those who run an internet retailer, you then’re legally required to assemble gross sales tax in maximum international locations. However taxes range by way of nation, state, and area, so understanding the correct tax charges on your services and products can get lovely difficult. 🤯
We promote to shoppers far and wide the arena, so we’ve confronted the similar demanding situations.
Thankfully, there are WordPress plugins that make it tremendous simple to mechanically accumulate taxes, it doesn’t matter what form of product you promote.
For instance, we use Simple Virtual Downloads to promote our instrument and plugins, and we adore it as it makes accumulating taxes a breeze. However in case you promote bodily merchandise or products and services, then you could want a other device like WooCommerce.
On this article, we’ll display you easy methods to accumulate taxes for Stripe bills in WordPress, step-by-step, for the entire maximum commonplace situations.

Contents
- 1 Why Accumulate Taxes for Stripe Bills in WordPress?
- 2 Accumulate Taxes for Subscriptions, Services and products, and Unmarried Merchandise (WP Easy Pay)
- 3 Accumulate Taxes for Bodily Merchandise (WooCommerce)
- 4 Accumulate Taxes for Virtual Merchandise (Simple Virtual Downloads)
- 5 Bonus: Create Visually-Interesting Invoices for Consumers
- 6 Similar Guides for Accepting Bills in WordPress
Why Accumulate Taxes for Stripe Bills in WordPress?
If you end up operating an internet trade, accumulating taxes is not only a easiest follow. It is usually a prison legal responsibility.
Whether or not you’re promoting bodily merchandise, virtual downloads, or subscription products and services, you wish to have to assemble the proper taxes at checkout to conform to native, state, and world regulations.
Failure to take action may result in hefty consequences and in addition hurt your small business’s recognition.
So, accumulating taxes for all of your Stripe bills in WordPress isn’t negotiable.
Remember, despite the fact that, that taxes also are a very powerful a part of the consumer enjoy.
While you calculate and show taxes obviously all through checkout, shoppers are much less more likely to really feel shocked or annoyed by way of ultimate fee totals. Plus, it presentations them that your small business is authentic and in addition simplifies your bookkeeping procedure.
Having stated that, let’s check out easy methods to simply accumulate taxes for Stripe bills in WordPress.
We will be able to duvet a couple of other strategies, and you’ll be able to use the short hyperlinks under to leap to the only you wish to have to make use of:
Accumulate Taxes for Subscriptions, Services and products, and Unmarried Merchandise (WP Easy Pay)
For those who promote subscriptions, products and services, or unmarried merchandise for your website online, then the best way to earn money and accumulate taxes is by way of making a easy fee shape.
To try this, we suggest WP Easy Pay. We adore it as it comes with numerous other premade fee templates, an intuitive shape builder, and whole junk mail coverage.
Whilst trying out the plugin, we discovered its fastened and automated tax price options tremendous useful for accumulating taxes. The fastened tax price choice means that you can set a tax price manually, which fits nice in case you are taken with one area with secure tax laws.
Alternatively, the automated tax price function calculates and applies the proper price in response to the client’s location, saving time and lowering the danger of mistakes.
For extra main points on our enjoy with the plugin, see our detailed WP Easy Pay assessment.
To get began, first, you wish to have to put in and turn on the WP Easy Pay plugin. To be informed extra, see our instructional on easy methods to set up a WordPress plugin.
☝ Word: WP Easy Pay has a unfastened plan. Alternatively, you’re going to want the professional model to unencumber the tax assortment function.
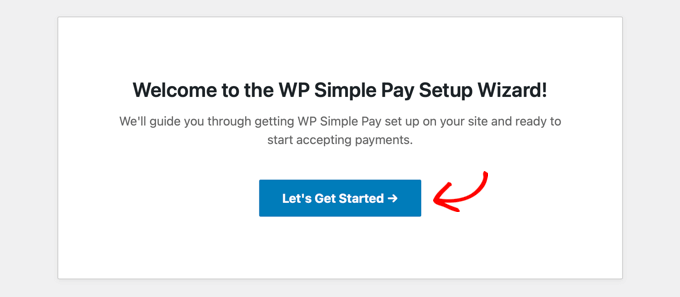
After you turn on the plugin, a setup wizard will seem for your display. Right here, merely click on the ‘Let’s Get Began’ button.
Subsequent, it’s a must to upload your plugin’s license key.
You’ll get this knowledge to your account at the WP Easy Pay website online. After you input your license key, click on the ‘Turn on and Proceed’ button.

Then, attach your Stripe account with WP Easy Pay. Understand that the plugin won’t paintings until you attach it with a brand new or current Stripe account.
To get began, click on the ‘Connect to Stripe’ button and log in for your account. For extra main points, see our instructional on easy methods to settle for Stripe bills in WordPress.

After you have effectively attached your website online with Stripe, the setup wizard will ask you to configure your emails.
At this level, you’ll be able to permit choices to obtain e-mail notifications for fee receipts, upcoming invoices, and fee notifications. You are going to additionally wish to input the e-mail cope with the place you wish to have to obtain those messages.
After all, simply click on the ‘Save and Proceed’ button. You’ll then whole the opposite steps and go out the setup wizard.

As soon as that’s carried out, move to the WP Easy Pay » Cost Bureaucracy web page from the WordPress dashboard.
Subsequent, click on the ‘Create Your Cost Shape’ button.

This will likely take you to the ‘Make a choice a template’ display. Right here, you’re going to see an inventory of premade templates.
You’ll select an acceptable template by way of clicking the ‘Use Template’ button below it. For this instructional, we can use the straightforward ‘Cost Shape’ template.

After you select a template, WP Easy Pay’s shape builder will release for your display. Right here, you’ll be able to get started by way of including a name and outline on your shape.
Then, make a choice your shape kind as ‘On-site fee shape.’

Now, head over to the ‘Shape Fields’ tab. Right here, you’re going to discover a dropdown menu the place you’ll be able to upload a brand new shape box.
When you do this, click on at the newly added method to make bigger the settings and customise it as wanted. You’ll additionally drag and drop the fields to arrange them on the other hand you prefer.
Those fields will display up for your fee shape, so make sure you upload the entire important shape fields to assemble the main points you wish to have out of your shoppers.
For instance, if you wish to display tax charges in response to the client’s location, it is important to upload an cope with box. This fashion, shoppers should supply their house cope with when making a purchase order.

As soon as this is carried out, transfer to the ‘Cost’ tab and upload a value on your product. You’ll additionally upload a couple of merchandise by way of clicking the ‘Upload Worth’ button.
Alternatively, in case you plan to promote subscription products and services, then make a choice the ‘Subscription’ choice and get started including other tiers.
If you end up able, scroll right down to the ‘Cost Strategies’ segment to select choices like ACH direct debit, card, Klarna, Verify, Money App, and Bancontact to just accept Stripe bills.

After you have carried out that, head as much as the ‘Tax Assortment’ segment. Right here, you’ll be able to make a choice one of the most two tax assortment strategies in step with your choice.
We will be able to provide an explanation for easy methods to upload a set tax price and an automated tax price for your fee shape.
Way 1: Upload Mounted Tax Price for Your Stripe Bills (Promoting in One Area)
On this segment, we can provide an explanation for easy methods to accumulate taxes in case you are promoting in one area. This can be a nice selection in case you promote and send merchandise most effective in a small area with uniform taxes, similar to a state or province.
👋 Word: Leap to the following segment if you wish to accumulate taxes in a couple of places with other tax charges.
To try this, it is important to outline the tax price on your merchandise manually.
First, you wish to have to open the ‘Cost’ tab within the settings for WP Easy Pay. Then, select the ‘Mounted tax charges’ choice from the Tax Assortment dropdown menu.

After you’ve made your variety, simply click on the ‘Save Draft’ button on your shape.
Subsequent, consult with the WP Easy Pay » Settings » Common web page from the WordPress dashboard and turn to the ‘Taxes’ tab.
Right here, you wish to have to test the ‘Permit’ field subsequent to the ‘International Tax Charges’ choice. This will likely open some new settings at the web page, the place it’s a must to click on the ‘Upload Price’ button.

You’ll now upload a reputation and tax price on your merchandise or products and services within the popup.
After that, you will have to specify if you wish to have your tax to be calculated inclusively or completely.
If you select inclusive tax, then the specified tax will mechanically be incorporated within the overall worth of the object.
In the meantime, with unique tax, shoppers will be capable of see the breakdown of the entire value of the acquisition. This will likely come with a subtotal with the bottom worth and a separate line appearing the gross sales tax.
We advise opting for unique tax so your shoppers don’t suppose you’re overcharging them.

When you’ve made your selection, merely click on the ‘Upload Tax Price’ button. The popup will shut mechanically. Then, click on the ‘Save Adjustments’ button to retailer your settings.
Now, open up your shape once more and consult with the ‘Cost Web page’ segment within the left column.
Right here, you’ll be able to test the ‘Permit a devoted fee web page’ field to create a customized fee shape web page. To customise the shape, you’ll be able to upload a permalink, colour scheme, symbol, and footer textual content.

After all, click on the ‘Post’ button to save lots of your settings.
You’ll now consult with your website online to look the fee shape with a set tax price.

Alternatively, if you wish to upload this type to an current web page, then simply click on the ‘Post’ button after including the tax price.
Then, open an current web page out of your WordPress dashboard and click on the ‘Upload Block’ button.
As soon as the block menu opens up, find and upload the WP Easy Pay block and select the shape you simply made out of the dropdown menu.

Subsequent, click on the ‘Replace’ or ‘Post’ button to retailer your adjustments.
You might have now added a fee shape with a set tax price to an current WordPress web page.

☝ Similar Publish: For those who’re putting in place taxes in WordPress, then working out on-line fee tendencies mean you can optimize your checkout procedure. Take a look at our publish on necessary fee statistics, information, and tendencies to stick knowledgeable.
Way 2: Upload Computerized Tax Price for Your Stripe Bills (Promoting in A couple of Places)
If you wish to mechanically configure the tax price on your shoppers in response to their location, then this technique is for you. That is ideally suited in case you’re promoting in a couple of international locations and areas.
To try this, you will have to select the ‘Routinely calculated by way of location’ choice from the ‘Tax Assortment’ dropdown menu within the WP Easy Pay shape builder.

When you do this, you’ll have to consult with your Stripe account dashboard to turn on automated tax assortment. From right here, you’ll be able to observe the other areas the place your small business is crossing the tax threshold.
You’ll then upload registration and get started accumulating taxes for those places simply.
Alternatively, consider to verify your foundation cope with and make a choice a default tax class to verify correct tax calculations for your small business.

Now, while you head again for your WordPress dashboard, you’re going to realize that opting for this feature has opened some new settings below the ‘Tax Assortment’ segment.
Right here, you may have to select a tax class for the services or products that you’re promoting from the ‘Tax Class’ dropdown menu.
For example, in case you promote skincare merchandise, then you’ll be able to select that choice.

Subsequent, come to a decision whether or not you wish to have to show tax inclusively or completely. If you select the inclusive choice, then the tax will likely be incorporated within the total product worth.
Alternatively, if you choose the unique choice, the tax quantity will likely be proven one after the other. The subtotal will show the bottom worth of the transaction, and there will likely be a separate line for gross sales tax.
We advise the usage of the unique choice, as it’s extra clear on your shoppers.

As soon as this is carried out, you’ll be able to head over to the ‘Cost Web page’ segment.
Test the ‘Permit a devoted fee web page’ field if you wish to have the plugin to generate a customized fee web page. Then, customise your web page on the other hand you prefer.
While you’re able, click on the ‘Post’ button to save lots of your adjustments.
Now, consult with your website online to look the fee shape with automated tax calculation in motion.

Alternatively, in case you don’t need the plugin to generate a completely new fee web page, simply click on the ‘Post’ button after configuring the tax settings.
Then, so as to add your fee shape to a pre-existing web page, simply open it with the block editor and select the WP Easy Pay block from the menu.
Subsequent, select the shape you made out of the dropdown menu throughout the block.
After that, click on the ‘Replace’ or ‘Post’ button to save lots of your adjustments.
Now, consult with your web site to view the Stripe fee shape with an automated tax calculation box.

💡 Knowledgeable Tip: Do you promote to shoppers far and wide the arena? Then, you’ll need to make certain your web site rather a lot briefly for guests, regardless of their location. At WPBeginner, we provide Web site Pace Optimization Services and products to verify your web site all the time runs easily. To be informed extra, see our WPBeginner Professional Services and products web page.
Accumulate Taxes for Bodily Merchandise (WooCommerce)
For those who run an internet retailer with a couple of bodily merchandise, then fee paperwork received’t be offering the simplest means. You’ll more than likely want extra eCommerce options and gear.
If so, we suggest the usage of WooCommerce. This unfastened eCommerce plugin makes it tremendous simple to promote your bodily merchandise, settle for bills thru Stripe, and accumulate taxes for the ones bills.
We’ve labored with this device so much, so we comprehend it just like the again of our hand. For extra insights on what it could actually do, take a look at our detailed WooCommerce assessment.
The most efficient section? The usage of WooCommerce’s integrated options, you’ll be able to mechanically calculate gross sales tax in response to your retailer’s location and the place your shoppers are.
Plus, it helps other tax charges, together with state, nation, or even city-specific taxes.
To start, you’ll wish to set up and turn on the WooCommerce plugin. To be informed extra, see our instructional on easy methods to set up a WordPress plugin.
After activating the device, you’ll be able to arrange your WooCommerce retailer to start out promoting merchandise. You are going to additionally wish to attach Stripe with WooCommerce to assemble bills.
Simply see our complete WooCommerce information if you wish to have assist with the method.

As soon as your retailer is about up, you wish to have to consult with the WooCommerce » Settings » Common web page from the WordPress dashboard and scroll right down to the ‘Permit Taxes’ segment.
Merely test the field subsequent to it and click on the ‘Save Adjustments’ button.

When you do this, a ‘Tax’ tab will seem within the best menu. While you consult with that web page, you’re going to get started by way of deciding how you wish to have to show taxes.
You’ll select to show taxes completely, which means they’ll be proven one after the other at checkout as a substitute of being incorporated within the product worth. This guarantees shoppers see precisely how a lot tax they’re paying sooner than finishing their acquire.

You’ll additionally select to show costs inclusively.
This implies the associated fee you input within the ‘Product information’ segment of your WooCommerce product will already come with tax.

Subsequent, it is important to set how taxes are calculated. To try this, open the ‘Calculate tax in response to’ dropdown menu and make a choice an choice.
You’ll select to calculate taxes in response to the client’s delivery cope with, which is superb in case you are delivery to other areas with various tax charges.
Alternatively, make a choice the billing cope with if you would like use the cope with your buyer enters for fee.
There may be the choice to make use of your store’s base location, which helps to keep issues easy by way of making use of your native tax price to all orders.

After that, it’s time to trade the delivery tax elegance. On this segment, you’ll be able to select how WooCommerce must calculate tax on the price of delivery.
For example, if you select ‘Transport tax elegance in response to cart pieces’, then the delivery tax value will likely be calculated in response to the tax elegance assigned to the product being shipped.
If you select the ‘Same old’ tax elegance, then the default tax price you may have arrange for the product can be carried out to the delivery tax.
The diminished tax elegance is for pieces that experience a decrease tax price, like positive meals merchandise or books, relying for your area.
After all, the 0 tax elegance applies no tax to delivery in any respect, which could be helpful in case you’re providing tax-free delivery promotions.

Subsequent, we suggest checking the field subsequent to ‘Spherical tax at subtotal stage, as a substitute of rounding in step with line.’
This implies taxes will likely be rounded in response to all the order subtotal quite than every particular person product line.

You’ll now regulate the remainder of the settings to suit your retailer’s wishes.
One key choice is deciding easy methods to show costs to your store, cart, and checkout pages.
You’ll select to turn costs together with tax, so shoppers see the general quantity prematurely, or except for tax, which provides transparency by way of appearing taxes one after the other.

Moreover, you’ll be able to configure the ‘Worth show suffix’ environment so as to add textual content after your product costs. This will assist display shoppers whether or not tax is incorporated or excluded in the associated fee they see.
For instance, in case you input “Worth incl. VAT: {price_including_tax}”, your retailer will show one thing like Worth incl. VAT: $50.40.
Subsequent, trade the ‘Show tax totals’ environment to keep watch over how taxes seem all through checkout. You’ll select to turn all taxes as a unmarried overall or show every tax as an itemized record.

If you select the ‘As a Unmarried Overall’ choice, WooCommerce will mix all acceptable taxes into one overall quantity. Consumers will see only a unmarried tax line as a substitute of separate breakdowns.
For instance, if a product has a couple of tax charges (like state tax and native tax), they’ll all be merged and easily proven as ‘Taxes’ at checkout. This helps to keep issues blank and easy.

Alternatively, in case you set it to ‘Itemized,’ then shoppers will see every tax price one after the other. This implies WooCommerce will record out each and every acceptable tax, similar to state and native taxes, on their very own traces.
This gives extra transparency, so shoppers know precisely what they’re paying for. The tax names proven would be the ones you input to your WooCommerce settings.
We’ll stroll you thru how to do this in your next step. As soon as you’re carried out, simply click on the ‘Save Adjustments’ button to retailer your settings.

Then, transfer to the ‘Same old Charges’ web page from the highest and click on the ‘Insert Row’ button.
You’ll now upload the rustic code, state code, postcode, metropolis identify, and tax price for every location the place you wish to have to assemble taxes.
For those who most effective need to accumulate taxes in step with your retailer’s location, then you’re going to most effective wish to upload one row. You’ll additionally upload a tax identify for every row so you’ll be able to simply differentiate them.

If you choose the itemized choice within the ‘Show tax totals’ segment, then the identify you select for every tax row would be the one displayed at the checkout web page.
For instance, in case you arrange separate tax charges for items and products and services (GST) and provinces (PST), the ones actual labels will seem within the order abstract.
After all, click on the ‘Save Adjustments’ button.

Now, consult with your WooCommerce retailer to look the tax price displayed for your checkout web page.
Relying for your settings, the velocity can be displayed for your product and cart web page.

Accumulate Taxes for Virtual Merchandise (Simple Virtual Downloads)
If you wish to accumulate taxes when promoting your virtual merchandise thru Stripe, then Simple Virtual Downloads (EDD) is the most suitable option.
This plugin is constructed in particular for promoting virtual merchandise and gives seamless tax assortment, together with for Stripe transactions. The plugin handles the entirety from environment charges to producing experiences, making tax control more straightforward for retail outlets.
We use EDD to promote our plugins and instrument. So, we’ve noticed firsthand how simple it’s to assemble Stripe bills and organize taxes. To be informed extra, see our whole Simple Virtual Downloads assessment.
First, you wish to have to put in and turn on the Simple Virtual Downloads plugin. For extra directions, see our information on easy methods to set up a WordPress plugin.
☝️ Word: EDD has a unfastened plan. Alternatively, upgrading to the professional model will provide you with get admission to to options like complex reporting, e-mail advertising integration, content material restriction, and extra.
When you turn on the plugin, it is important to arrange your retailer, upload merchandise, and fasten Stripe with the plugin.

To get began, observe our newbie’s information on easy methods to promote virtual downloads in WordPress.
When this is carried out, head over to the Downloads » Settings » Taxes web page within the WordPress admin sidebar.
Right here, permit the ‘Taxes’ choice by way of checking the field subsequent to it.

Then, select if you wish to show taxes completely or inclusively.
If you select ‘Sure, I can input costs inclusive of tax’, then the associated fee you entered in a product’s information is the entire quantity the client pays after taxes.

So, in case you set the cost of a product as $20, the client pays $20 at checkout. The precise quantity that may move in opposition to taxes will likely be calculated mechanically.
If you choose ‘No,’ the associated fee you entered at the product edit display won’t come with the tax quantity.

After that, we suggest checking the ‘Display Tax Price on Costs’ choice. This fashion, the client will see the quantity they’re anticipated to pay in tax under the acquisition button.
Subsequent, come to a decision how you wish to have to show product costs at the checkout web page. You’ll select to turn costs together with tax, this means that the entire worth shoppers see can have tax added.
Or, you’ll be able to display costs except for tax, the place the associated fee proven is solely the product quantity sooner than tax (also referred to as the subtotal). The tax will then be added one after the other at checkout.
After all, click on the ‘Save Adjustments’ button to retailer your settings.

Now, transfer to the ‘Charges’ segment from the highest. Right here, you’ll be able to upload tax charges for particular international locations or states/provinces in the ones international locations.
To try this, select a rustic/ state from the dropdown menu and upload its tax price. Then, click on the ‘Upload Price’ button.
You’ll repeat this step as time and again as you prefer.

As soon as you’re carried out, simply click on the ‘Save Adjustments’ button.
Now, simply consult with your virtual merchandise retailer to test how taxes are being gathered for Stripe bills.

Bonus: Create Visually-Interesting Invoices for Consumers
Managing tax assortment is a prison requirement for eCommerce websites. However in case you promote trade merchandise or products and services (otherwise you simply need to move above and past), then you’ll be able to additionally be offering your shoppers attention-grabbing invoices for his or her data.
An bill that presentations the subtotal, tax quantity, and overall value is helping with transparency and makes it more straightforward for purchasers to trace bills, care for reimbursements, or even take care of customs claims.
To create professional-looking invoices, we suggest the usage of FreshBooks.

This can be a well-liked accounting instrument for small companies that gives a very simple solution to create customizable invoices along with your brand and personalised notes.
Plus, it automates reminders for past due bills, securely processes routine bank card bills, and notifies each you and your shoppers.
You’ll additionally come with tax knowledge, fee phrases, reductions, and forex to your invoices, offering a transparent breakdown of bills.

Even though this can be a third-party device, FreshBooks seamlessly integrates with best website online developers, together with WordPress.
For step by step directions, see our instructional on easy methods to create invoices for purchasers the usage of WordPress.
Similar Guides for Accepting Bills in WordPress
Want additional information on accepting bills to your on-line retailer? Take a look at our comparable guides:
- Easiest Authorize.Internet WordPress Plugins (When compared)
- Tips on how to Simply Settle for Bitcoin Bills in WordPress (Step by way of Step)
- Easiest Bookkeeping Services and products for Your On-line Trade (When compared)
- Tips on how to Settle for Deposit Bills in WordPress (Simple Strategies)
- Easiest Credit score Card Processing Plugins for WordPress (When compared)
- Tips on how to Upload Stripe QR Code Cost in WordPress
- Tips on how to Check Stripe Bills on a WordPress Web site (Simple Strategies)
For those who favored this newsletter, then please subscribe to our YouTube Channel for WordPress video tutorials. You’ll additionally to find us on Twitter and Fb.
The publish Tips on how to Accumulate Taxes for Stripe Bills in WordPress (3 Simple Techniques) first gave the impression on WPBeginner.
WordPress Maintenance