
Divi’s Turn into controls make it actually simple to put and elegance the weather of your web page to create distinctive layouts. Divi’s blurb module is without doubt one of the maximum commonplace components for that includes pieces on a web site. So, I assumed I might display the best way to put the ones Turn into results to make use of through growing a few distinctive layouts that includes the blurb module. Positive, you’ll be able to accomplish identical positioning the use of margins and padding, however the procedure could be a lot more concerned and now not close to as a lot a laugh. Plus, the turn into controls can help you upload further styling to scale and rotate your blurbs for much more distinctive designs.
On this instructional, I’m going to turn you the best way to role and rotate blurbs in inventive tactics the use of Divi’s turn into controls.
Let’s get began.
Contents
Gettings Began
For this instructional, all you actually want is Divi. To set issues up, pass forward and create a brand new web page. Give your web page a identify and deploy the Divi builder at the entrance finish to construct a web page from scratch.
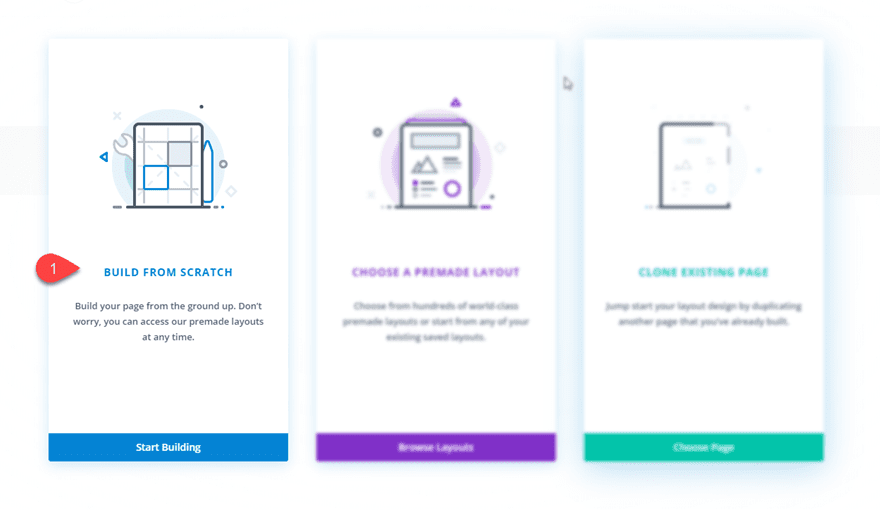
Now you’re ready to begin.
Developing Blurb Format Design #1
On this first format design, we’re going to construction our blurbs the use of two other rows. Then we’re going to use the Divi Turn into choices to scale and role the blurb modules to create a novel blurb module format.
Create the First Row
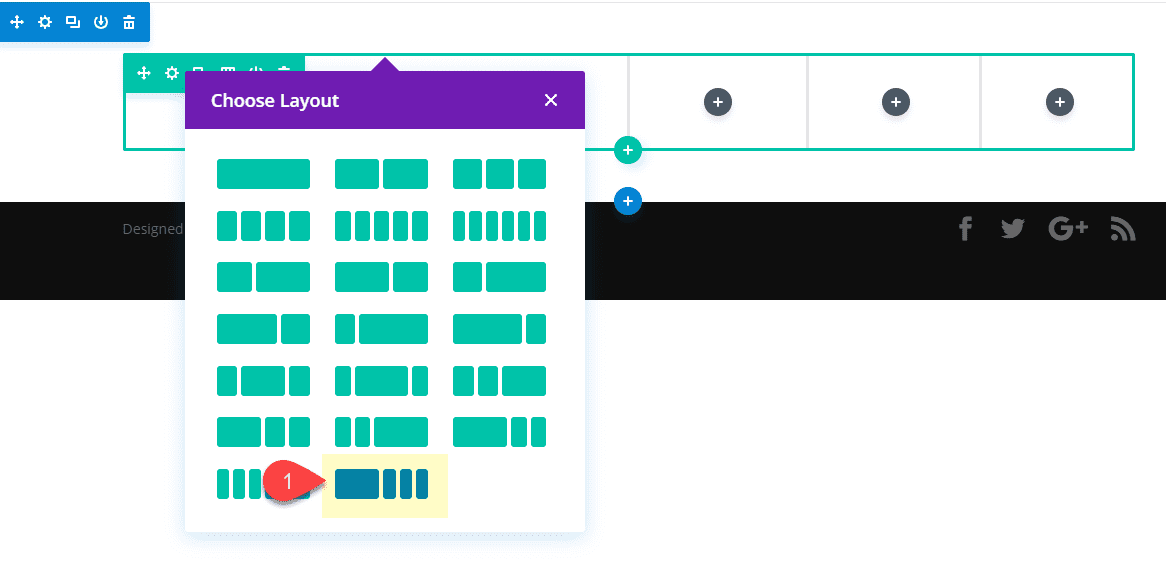
To get began, create an ordinary segment then upload the next column format for the row: 1/2 1/6 1/6 1/6
Upload and Taste the Textual content Module
Within the 1/2 column at the left, upload a textual content module with the next content material:
Our Services and products
Your content material is going right here. Edit or take away this newsletter inline or within the module Content material settings. You'll additionally taste each side of this content material within the module Design settings or even observe customized CSS to this newsletter within the module Complicated settings.

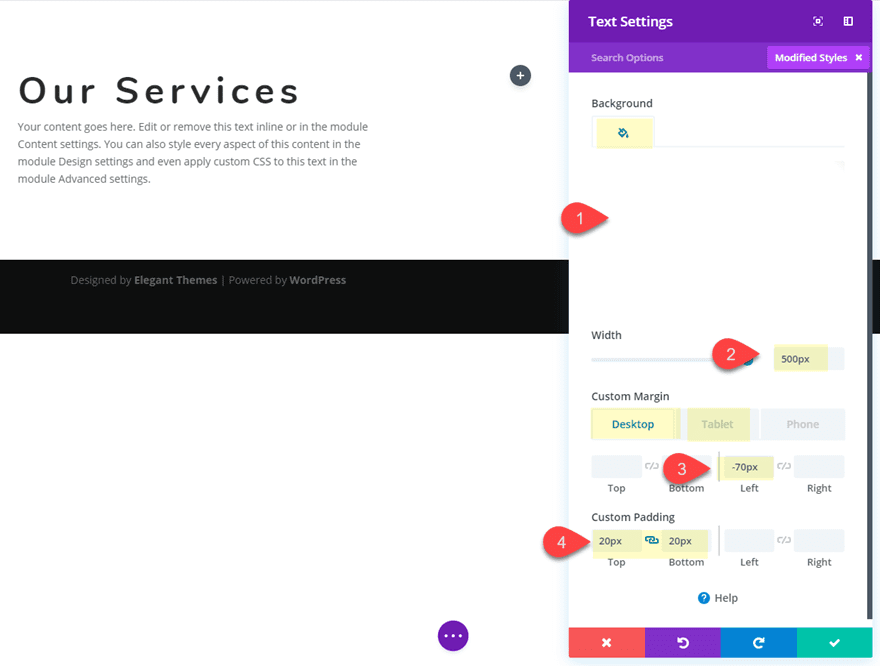
Then replace the next design settings:
Background Colour: #ffffff
Width: 500px
Customized Margin (desktop): -70px left
Customized Margin (pill): 20px left
Customized Padding: 20px best, 20px backside
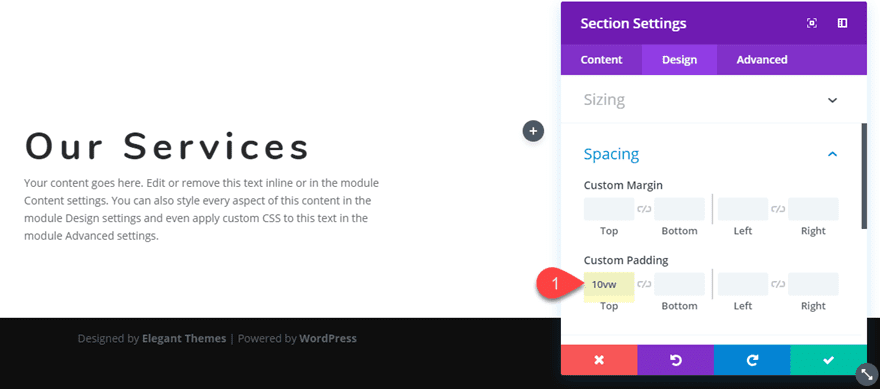
Replace Segment Padding
Subsequent, we wish to upload some padding to our segment. Open the segment settings and replace the next:
Customized Padding: 20vw best
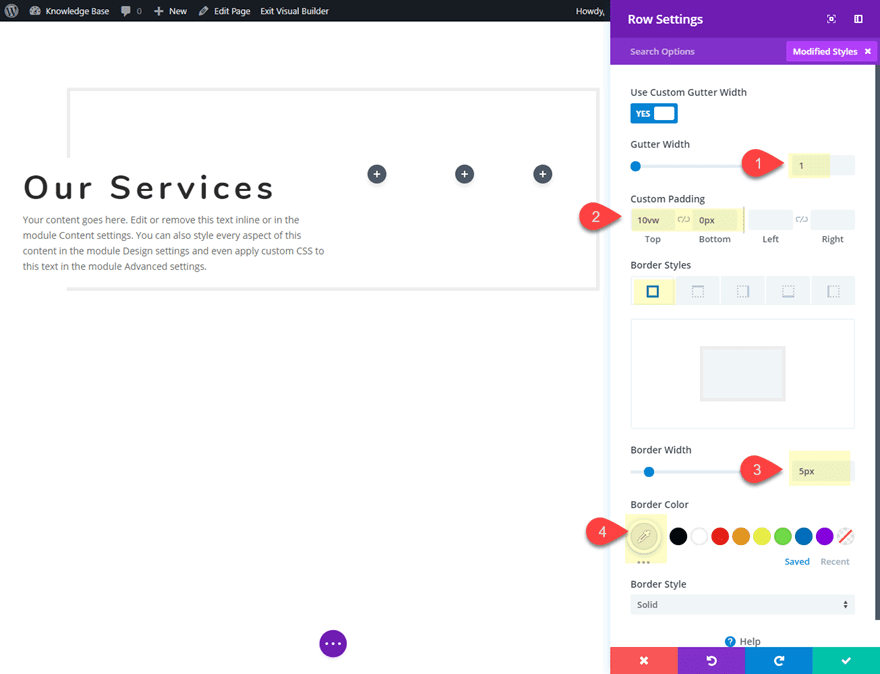
Replace Settings for First Row
Subsequent, replace the row settings as follows:
Gutter Width: 1
Customized Padding: 10vw best, 0px backside
Border Width: 5px
Border Colour: #eeeeee
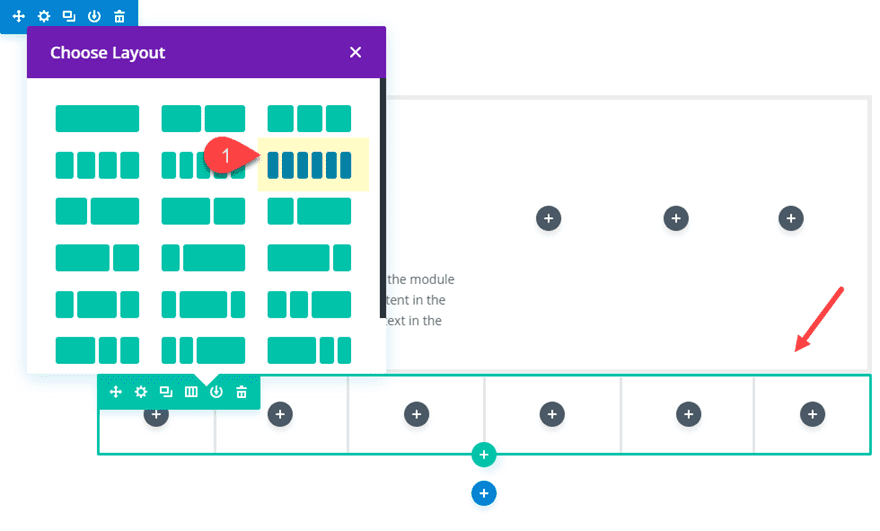
Upload the 2nd Row
Subsequent upload every other row underneath the row you simply custom designed. Give it a six-column format.
Create and Taste The Blurb Modules
Now it’s time to begin growing the blurb modules that we will be able to ultimately role the use of the turn into controls. Upload a blurb module column 2 of the primary (best) row you created.
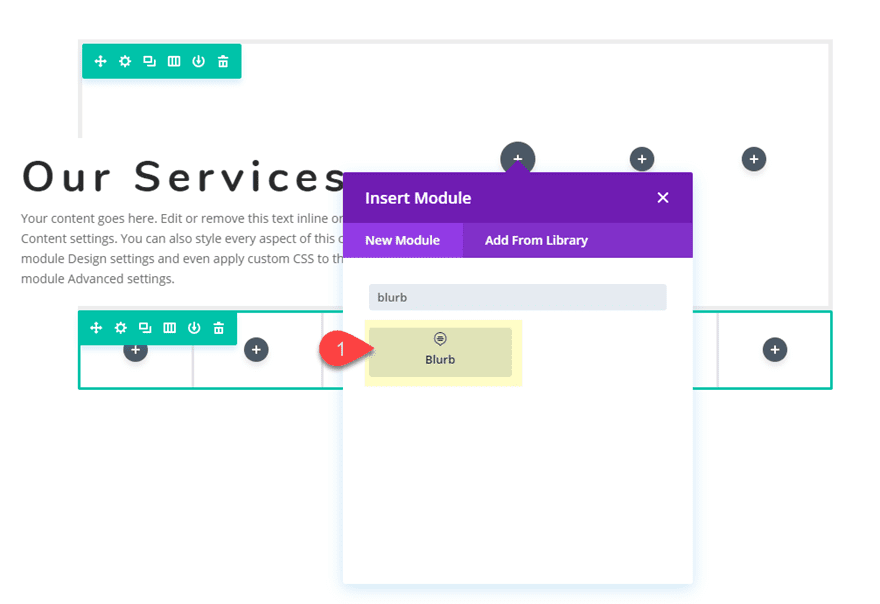
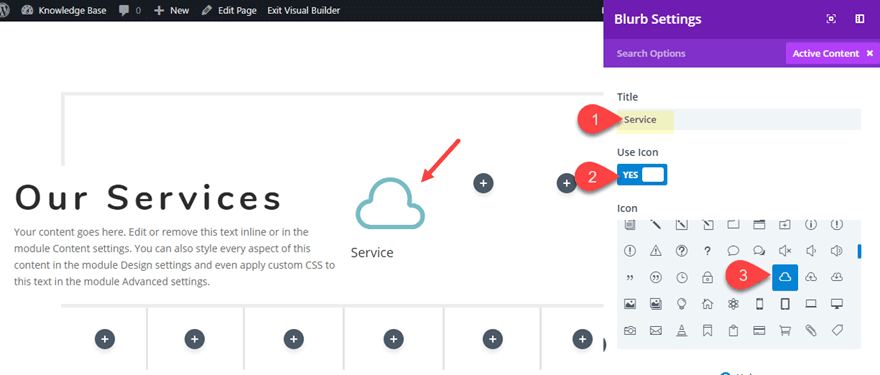
Within the blurb settings, delete the content material and replace the Identify textual content with the phrase “Services and products”. Then click on to make use of an icon as a substitute of a picture. For this situation, I’m the use of the cloud icon.
Replace the remainder of the blurb settings as follows:
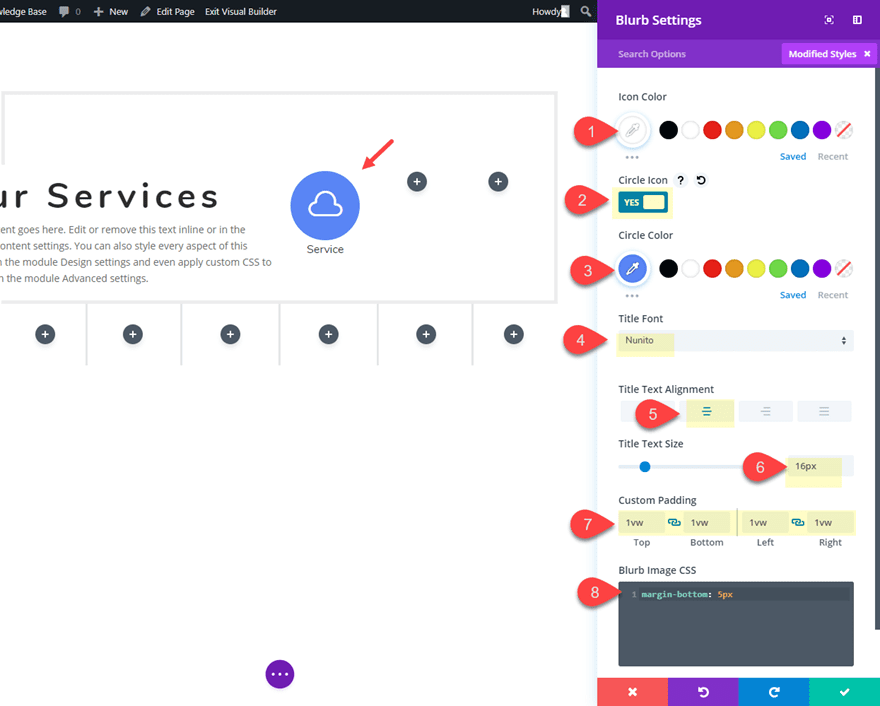
Icon Colour: #ffffff
Circle Icon: YES
Circle Colour: #5e89fb
Identify Font: Nunito
Identify Textual content Alignment: Middle
Identify Textual content Measurement: 16px
Customized Padding: 1vw best, 1vw backside, 1vw left, 1vw proper
Then replace the default margin underneath the blurb icon through including the next CSS to the Blurb Symbol CSS field underneath the complex tab:
margin-bottom: 5px
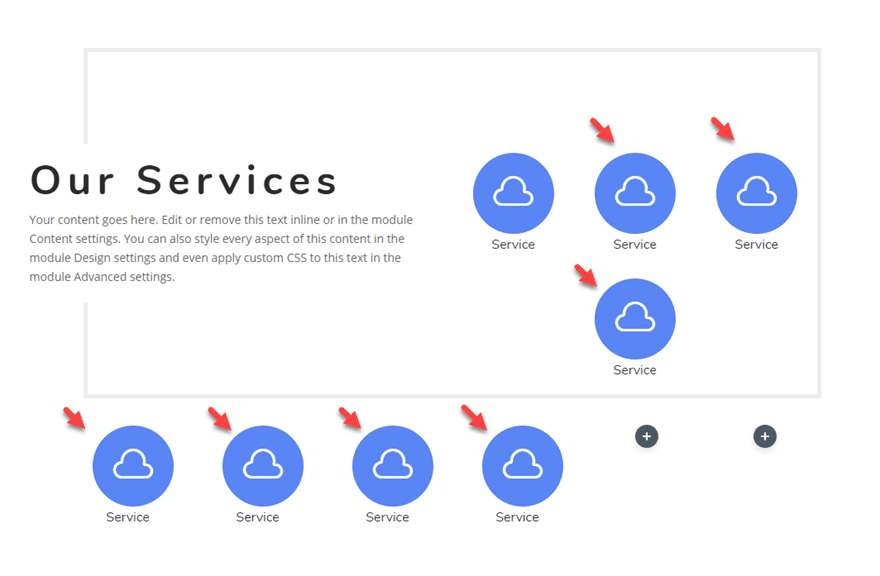
Subsequent, replica the blurb module you simply created and paste it into every of the columns ensuring you’ve two blurb module in column 3 of the highest row and you allow columns 5 and six empty in the second one row.
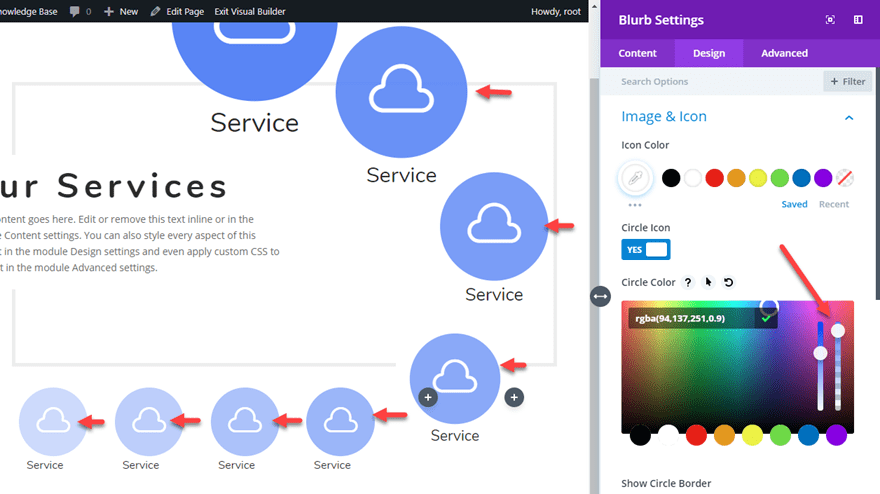
Upload Turn into Results to Scale and Place the Blurbs
Now we’re in a position to make use of the turn into controls to put and scale the blurbs into a novel design.
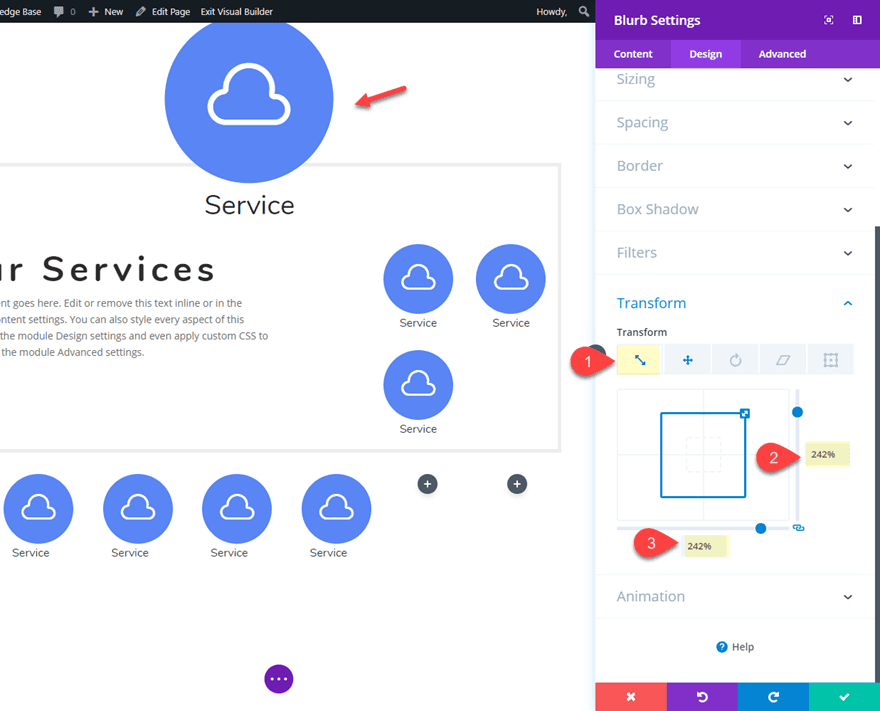
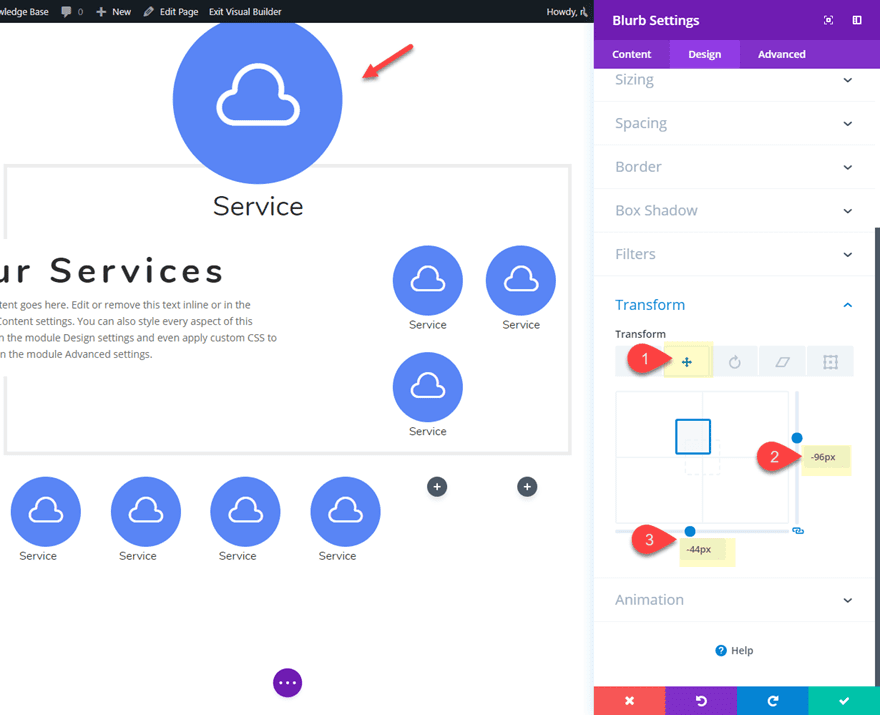
First, open the blurb surroundings of the blurb in column 2 of the highest row and replace the turn into controls as follows:
Turn into Scale X-axis: 242%
Turn into Scale Y-axis: 242%
Turn into Translate X-axis: -96px
Turn into Translate Y-axis: -44px
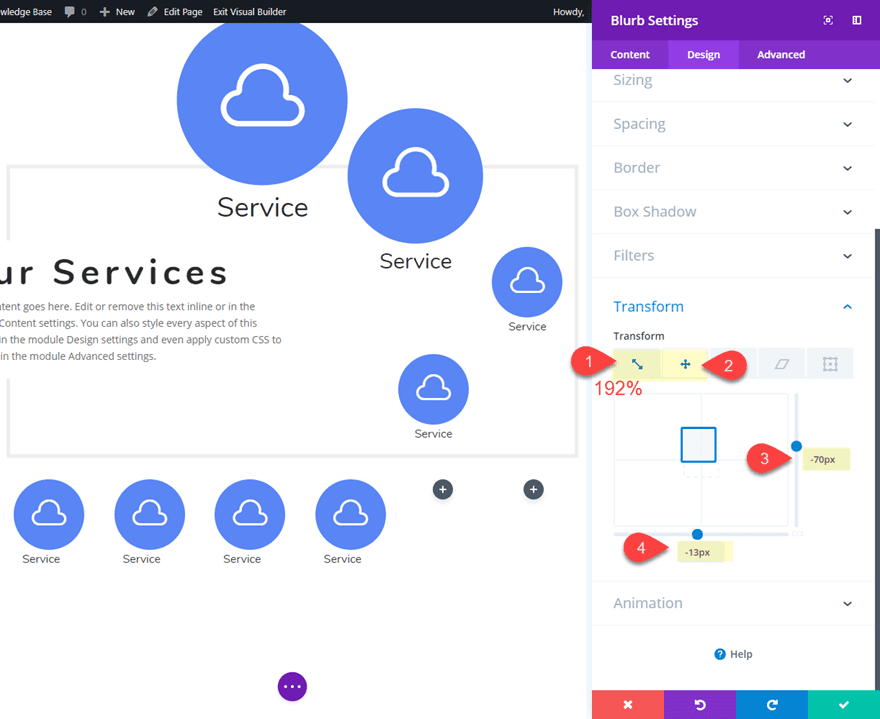
Subsequent, replace the settings of the highest Blurb module in column 3 of the primary row as follows:
Turn into Scale X-axis: 192%
Turn into Scale Y-axis: 192%
Turn into Translate X-axis: -70px
Turn into Translate Y-axis: -13px
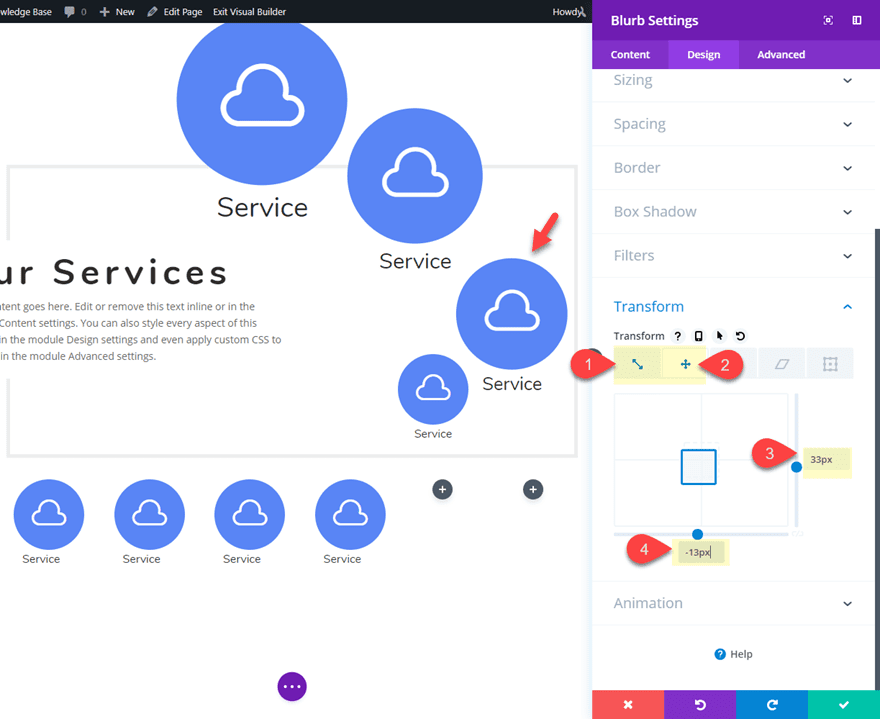
Then, replace the blurb module in column 4 of the highest row as follows:
Turn into Scale X-axis: 158%
Turn into Scale Y-axis: 158%
Turn into Translate X-axis: 33px
Turn into Translate Y-axis: -13px
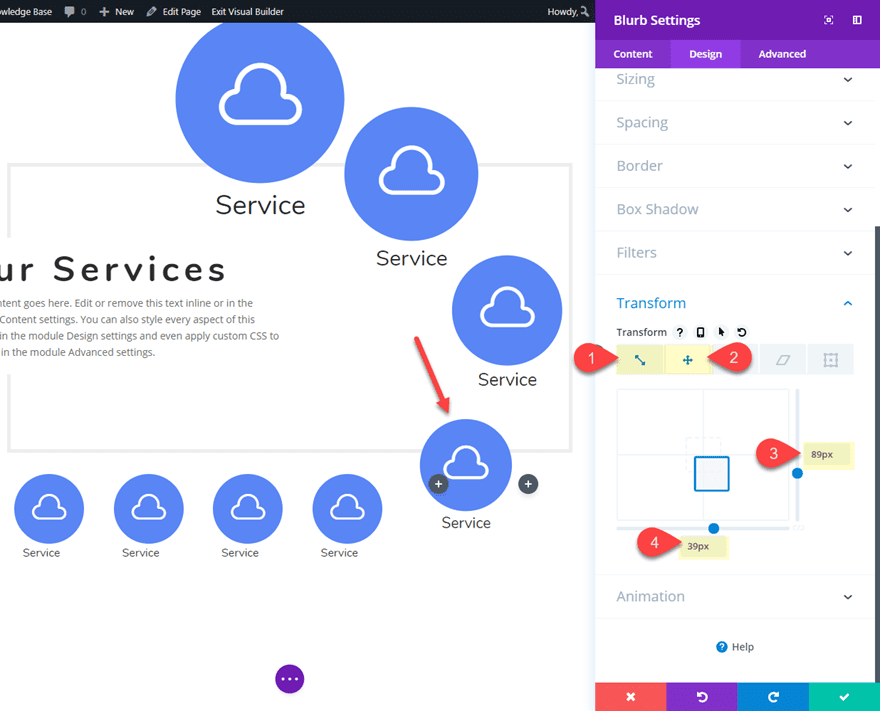
Subsequent, replace the ground blurb module in column 3 of the highest row as follows:
Turn into Scale X-axis: 132%
Turn into Scale Y-axis: 132%
Turn into Translate X-axis: 89px
Turn into Translate Y-axis: 39px
Then give it a the next background colour to create a destroy within the row border for a refined design part:
Background Colour: #ffffff
That’s it!
For an extra design part, you’ll be able to regularly build up the opacity of the circle colour on every of the icons used all through the format.
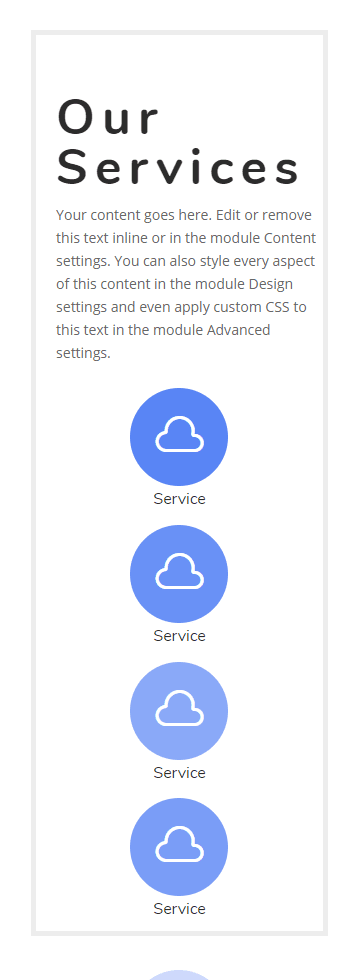
Cell Changes
To regulate the blurb module format for pill and contact shows, we will be able to merely set the transformation results again to the unique state in order that the blurbs go back to their unique dimension and will probably be placed within the columns properly. To do that we will be able to use Divi’s multi-select characteristic. Since it can be tough to click on at the modules which have been placed with the turn into assets, this is a just right time to permit the grid mode to your builder settings. This will likely can help you see the blurb modules of their unique role. As soon as you’re in grid mode, pass forward and cling down ctrl or cmd after which click on on every of the modules that experience a metamorphosis impact. Then click on the equipment icon of any of the modules decided on to open the part settings modal.
Within the Component Settings modal, replace the next:
Turn into Scale X-axis: 100%
Turn into Scale Y-axis: 100%
Turn into Translate X-axis: 0px
Turn into Translate Y-axis: 0px
This will likely repair the unique role and scale of the blurbs on pill and contact shows.
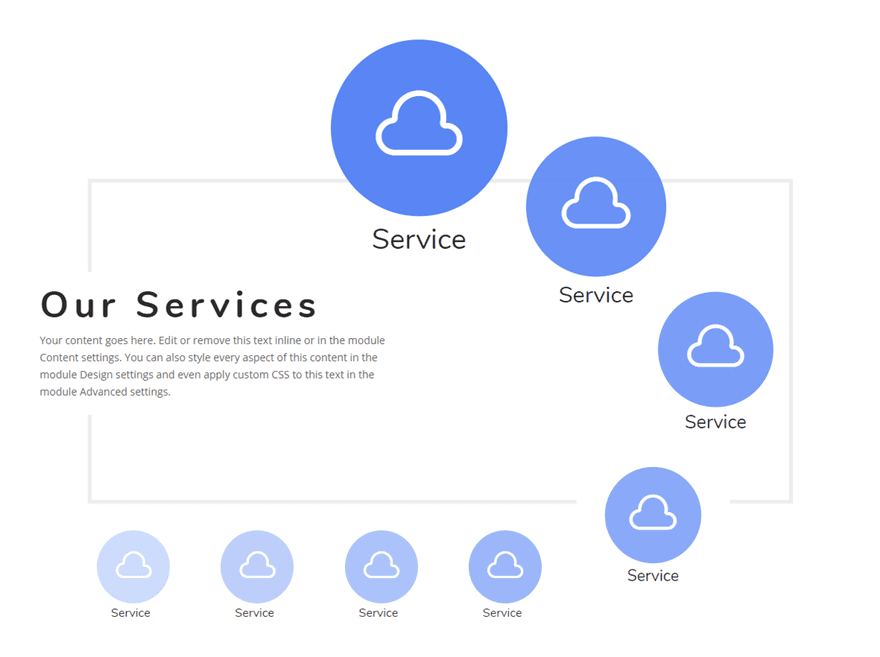
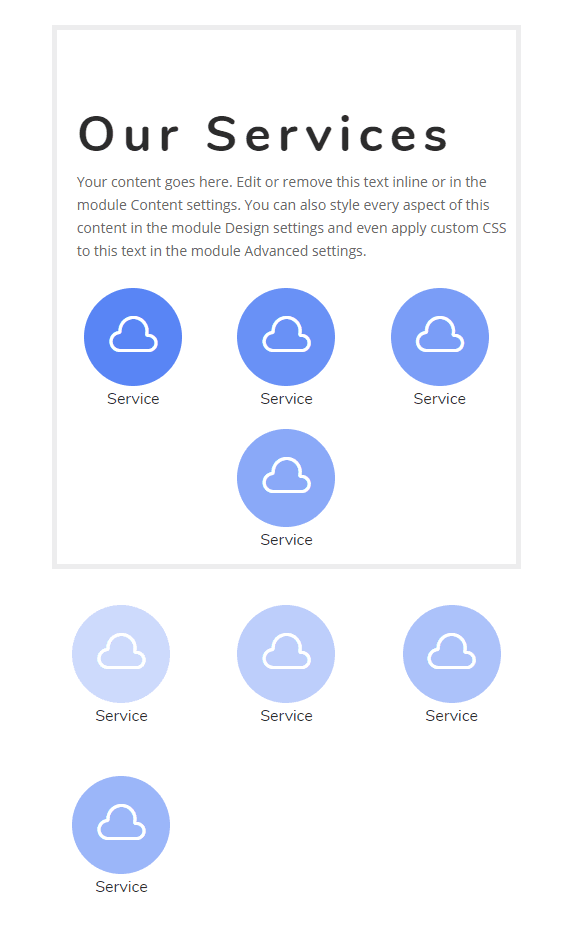
Ultimate End result
This is the general design.
Developing Blurb Module Format #2
On this subsequent instance, I’m going to turn you a novel blurb module format the use of Divi’s scale, translate and rotate turn into choices. I’ll additionally throw in an advantage CSS snippet that provides viewpoint to every of the blurbs. Right here’s the best way to do it.
Create the Heading
First, upload a brand new common segment with a one-column row. Then upload a textual content module to the row with the next content material:
Our Procedure
Your content material is going right here. Edit or take away this newsletter inline or within the module Content material settings. You'll additionally taste each side of this content material within the module Design settings or even observe customized CSS to this newsletter within the module Complicated settings.
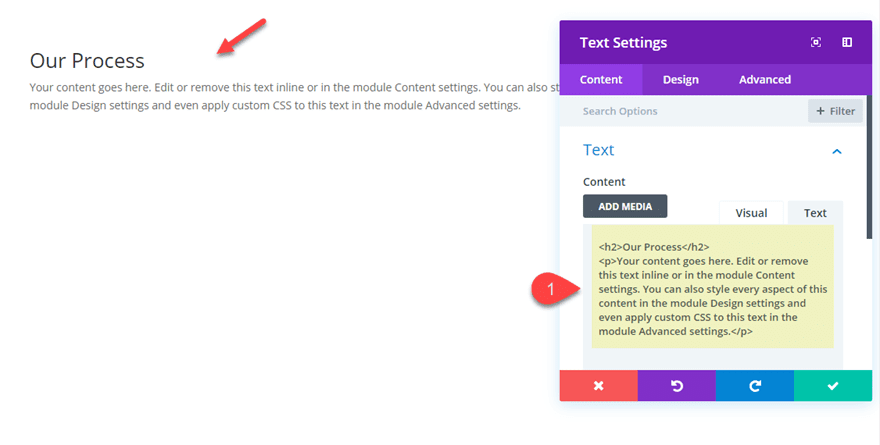
Then replace the remainder of the textual content module settings as follows:
Heading 2 Font: Nunito
Heading 2 Font Weight: Semi Daring
Heading 2 Textual content Measurement: 50px
Heading 2 Letter Spacing: 7px
Width: 500px
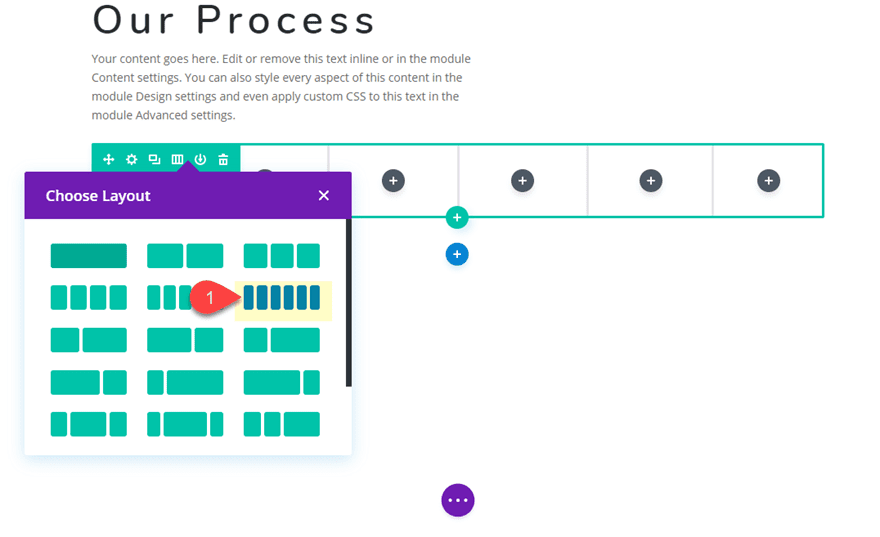
Developing the Blurb Format with a Six-Column Row
That looks after the heading. Now it’s time so as to add the row for our blurb module format. Cross forward and create a brand new row with a six-column format without delay underneath the present row.
Styling the Blurb Module
Within the first column, upload a brand new blurb module and replace the settings as follows:
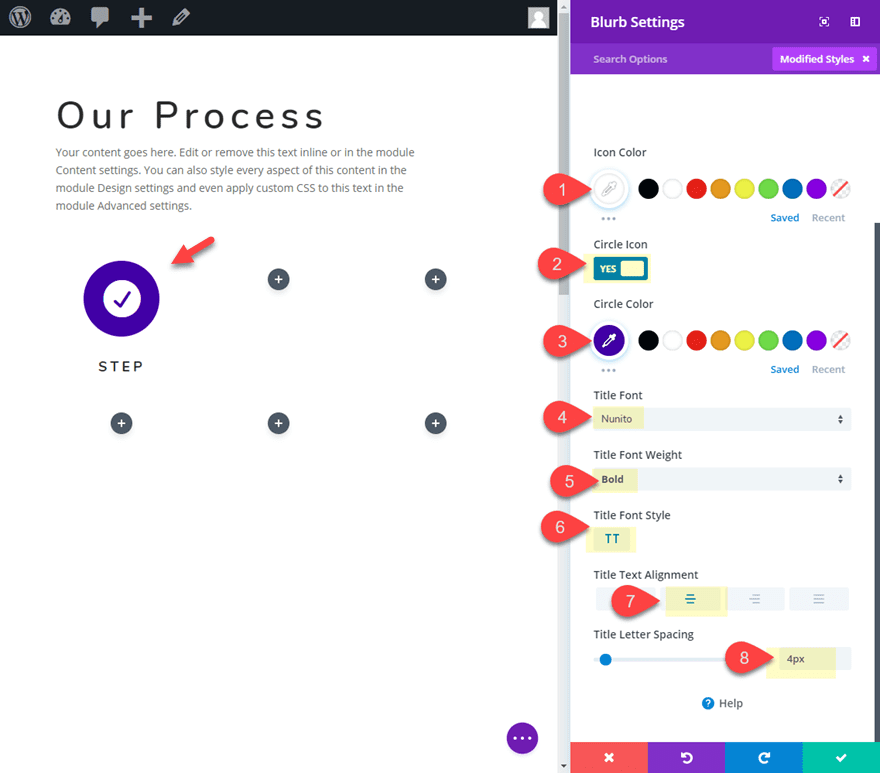
Delete the frame textual content within the content material field and replace the identify textual content with the phrase “Step”.
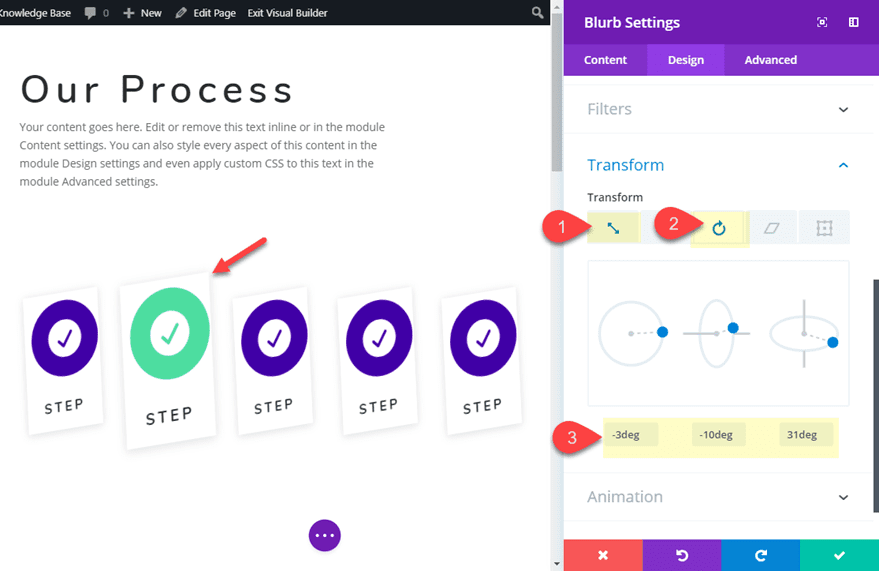
Then Click on to make use of an icon and select the circle take a look at icon.
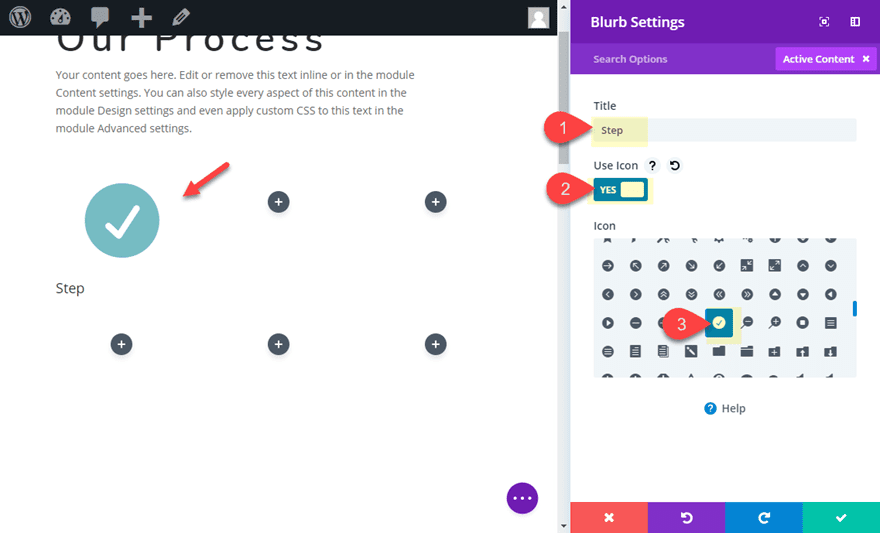
Give the Blurb a white background colour as follows:
Background Colour: #ffffff
Then replace the design settings:
Icon Colour: #ffffff
Circle Icon: YES
Circle Colour: #3d0dad
Identify Font: Nunito
Identify Font Weight: Daring
Identify Font Taste: TT
Identify Textual content Alignment: Middle
Identify Letter Spacing: 4px
Then, give the blurb a field shadow as follows:
Field Shadow: See Screenshot
Shadow Colour: rgba(0,0,0,0.12)
And in any case, upload the rotate transformation impact to the blurb module:
Turn into Rotate X-axis: -3deg
Turn into Rotate Y-axis: -10deg
Turn into Rotate Z-axis: 31deg
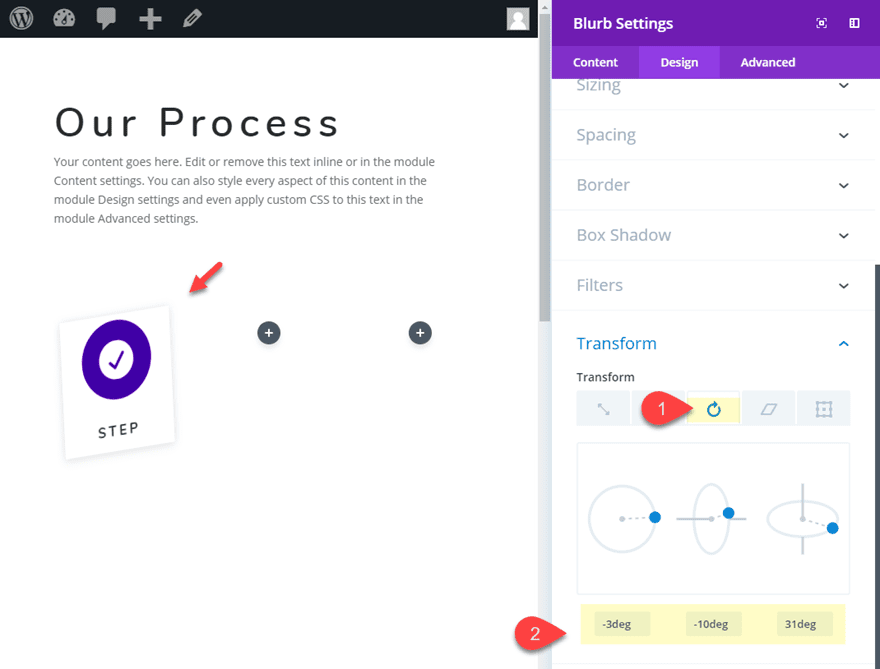
That looks after our first blurb module.
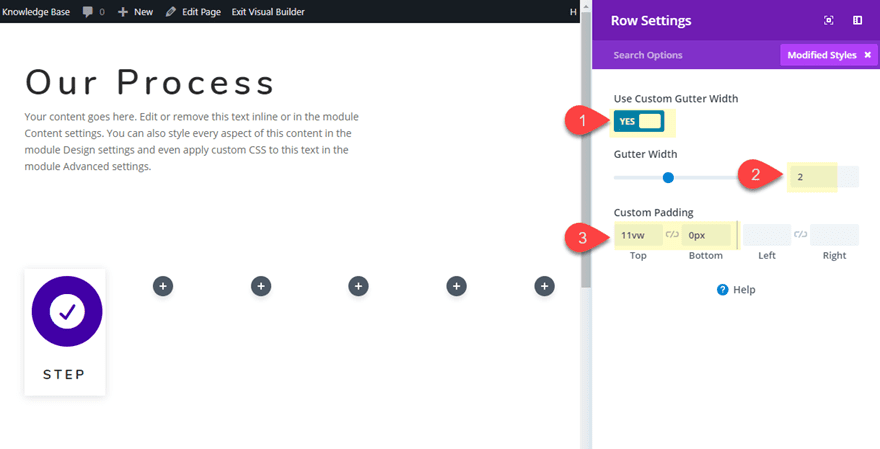
Replace Row Settings
Now prior to we commence duplicating our blurb module, we wish to replace the row settings as follows:
Gutter Width: 2
Customized Padding: 11vw best, 0px backside
This will likely assist use with spacing the blurbs within the format.
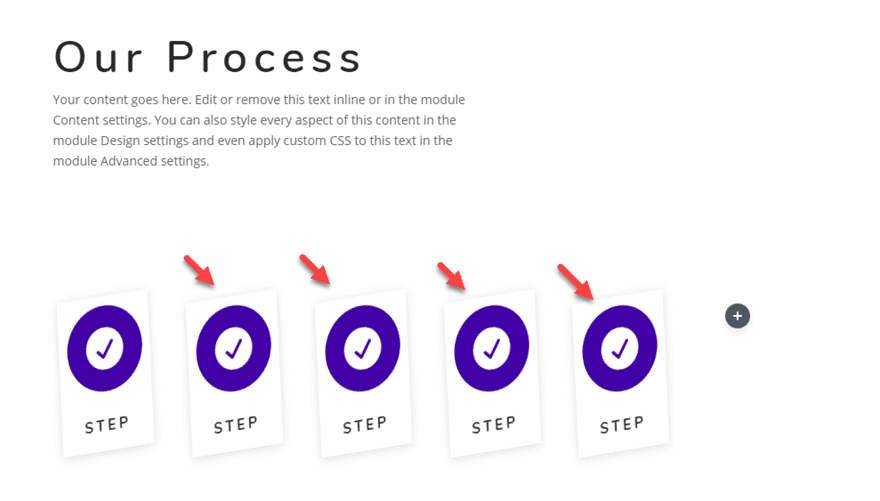
Duplicating and Styling The Remainder of the Blurbs
Now we’re in a position to copy and customise the remainder of the blurbs. Cross forward and replica the blurb module in column 1 and paste it into all the ultimate columns apart from the final column (column 6). We can depart column 6 empty to depart extra space for the blurbs to be moved to the correct.
Now open the blurb module surroundings in column 2 and replace the next:
Circle Colour: #62de9d
Turn into Scale X-axis: 120%
Turn into Scale Y-axis: 120%
Turn into Translate Y-axis: -10% (make sure you kind within the share price right here)
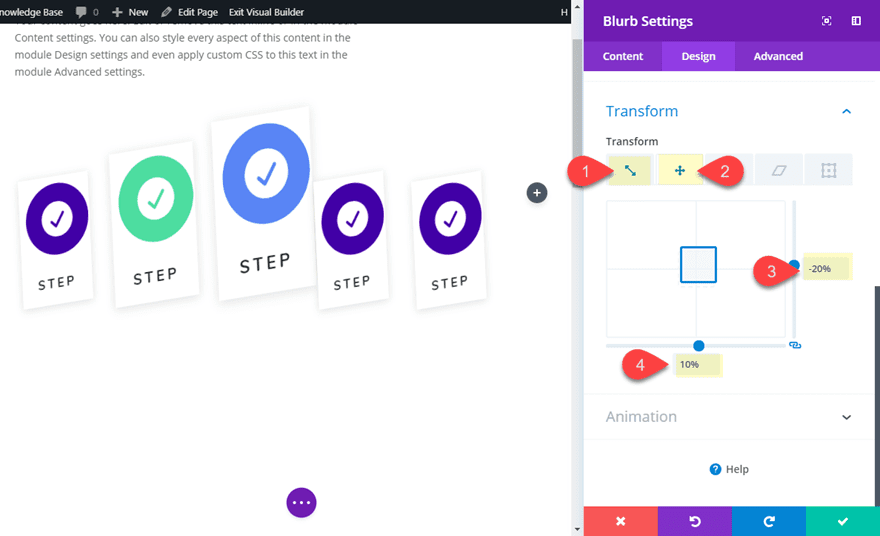
Subsequent, replace the blurb module in column 3 as follows:
Circle Colour: #5e89fb
Turn into Scale X-axis: 140%
Turn into Scale Y-axis: 140%
Turn into Translate Y-axis: -20%
Turn into Translate X-axis: 10%
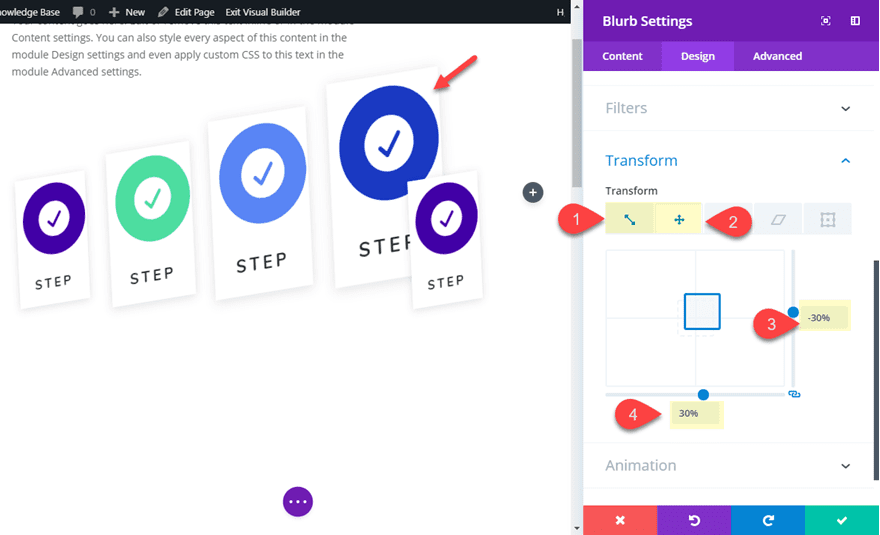
Replace the blurb module in column 4 as follows:
Circle Colour: #2a3fc9
Turn into Scale X-axis: 160%
Turn into Scale Y-axis: 160%
Turn into Translate Y-axis: -30%
Turn into Translate X-axis: 30%
And in any case, replace the blurb module in column 5 as follows:
Circle Colour: #62de9d
Turn into Scale X-axis: 180%
Turn into Scale Y-axis: 180%
Turn into Translate Y-axis: -40%
Turn into Translate X-axis: 55%
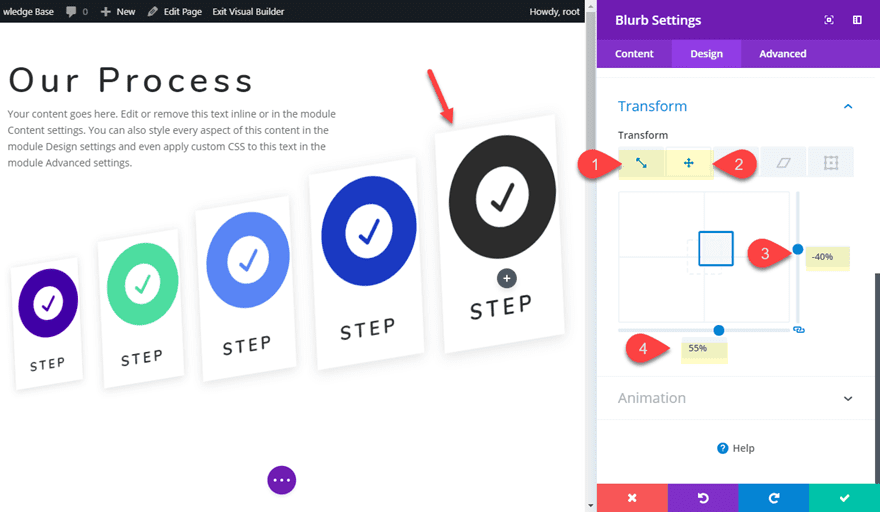
As you’ll be able to see, every of the blurbs will build up dimension through 20% from left to proper. And the Turn into translate share values make certain blurbs keep coated up properly.
For the reason that design overflows into the final column (column 6) we will be able to depart it clean. However you’ll be able to at all times upload every other blurb in column 6 if you happen to build up the scale of the row.
Including the Viewpoint Assets to Each and every Column
In CSS, the viewpoint assets is used to provide a 3-d-positioned part some viewpoint in Z-Area. Principally it defines how a long way the item seems clear of the consumer as they have a look at the display. The viewpoint assets will have to be implemented to the mother or father container of that which has the 3-d-position which on this case is our blurb module. Due to this fact, we will have to upload the viewpoint to every of the columns the use of a small snippet of CSS as follows.
Upload the next CSS to the Column Primary Component CSS field for every of the 5 Columns as follows:
Column 1 Primary Component:
viewpoint: 1000px
Column 2 Primary Component:
viewpoint: 1000px
Column 3 Primary Component:
viewpoint: 1000px
Column 4 Primary Component:
viewpoint: 1000px
Column 5 Primary Component:
viewpoint: 1000px

On this case, the exchange may be very refined however price the extra effort for my part.
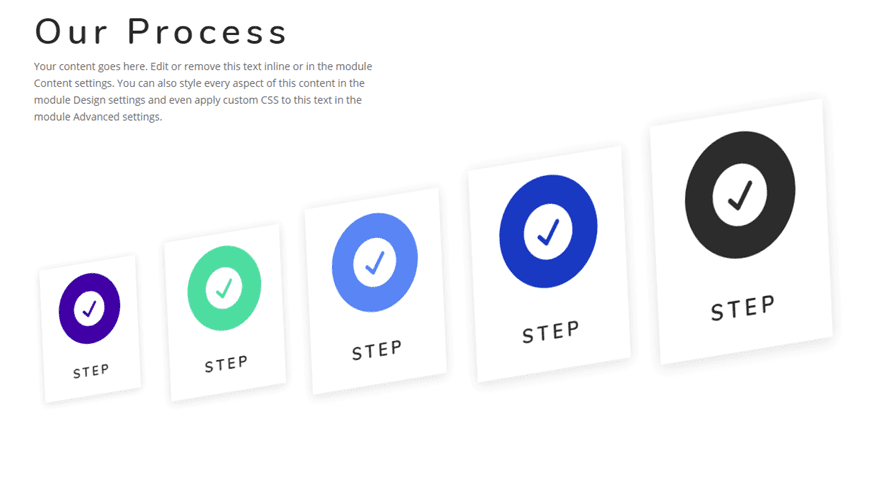
This is the blurb module format design with out viewpoint.
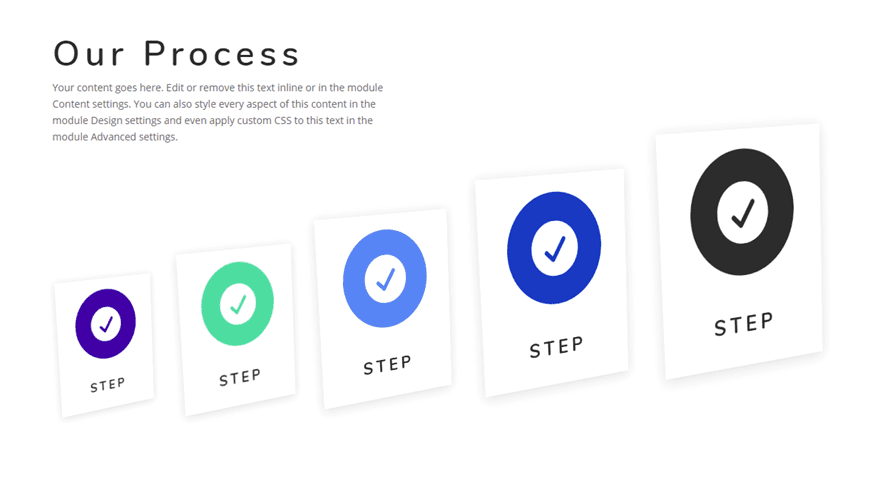
And right here it’s with the viewpoint in position.
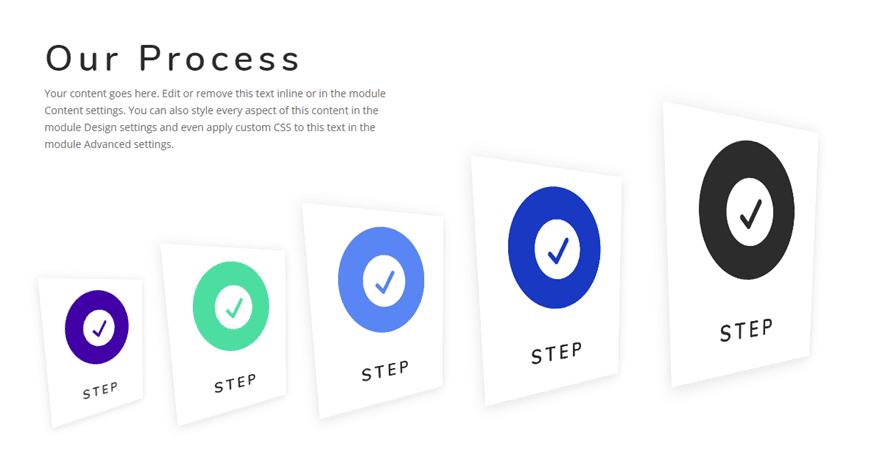
If you wish to make the blurbs seem nearer to the consumer, you’ll be able to lower the viewpoint price. For instance, that is what the blurbs will seem like with “viewpoint: 400px” added to every column.
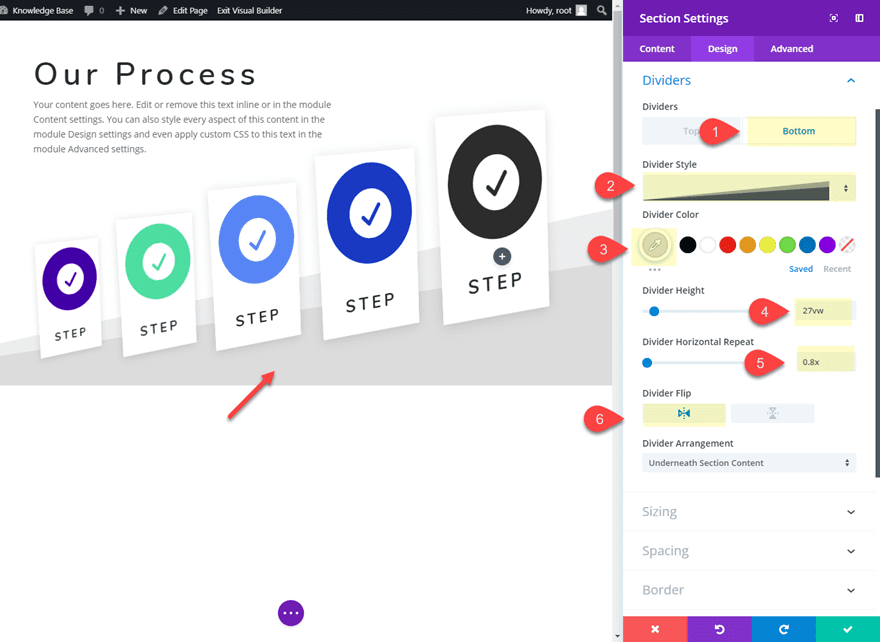
Including a Divider Background to the Segment
As a way to make the blurbs seem to be status on a floor, we will be able to upload a divider background to the segment. Open the segment settings and replace the next:
Backside Divider Taste: see screenshot
Backside Divider Colour: #dddddd
Backside Divider Top: 27vw
Backside Divider Horizontal Repeat: 0.8x
Backside Divider Turn: horizontal
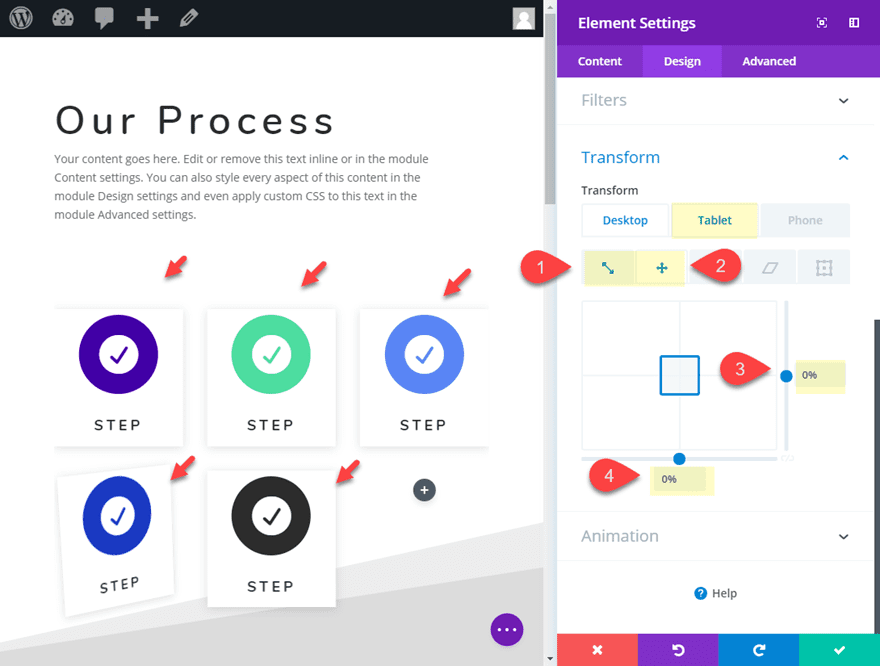
To regulate the format for pill and contact shows, it is important to multi-select every of the blurb modules and replace the next turn into choices within the Component settings for pill show:
Turn into Scale X-axis: 100%
Turn into Scale Y-axis: 100%
Turn into Translate Y-axis: 0%
Turn into Translate X-axis: 0%
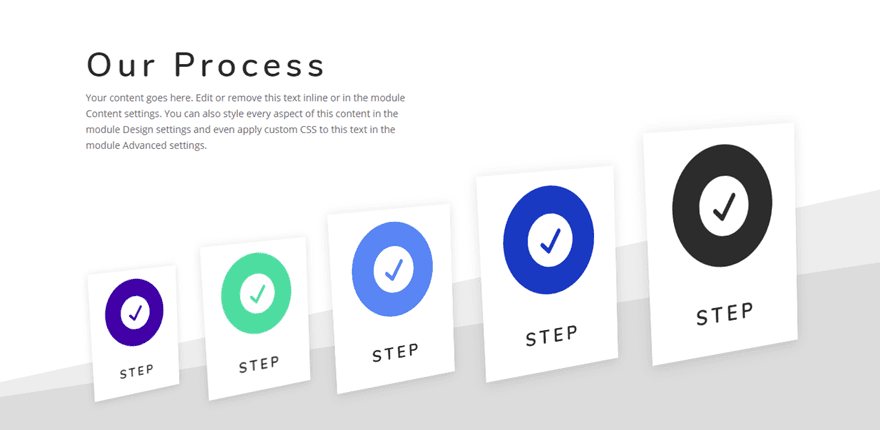
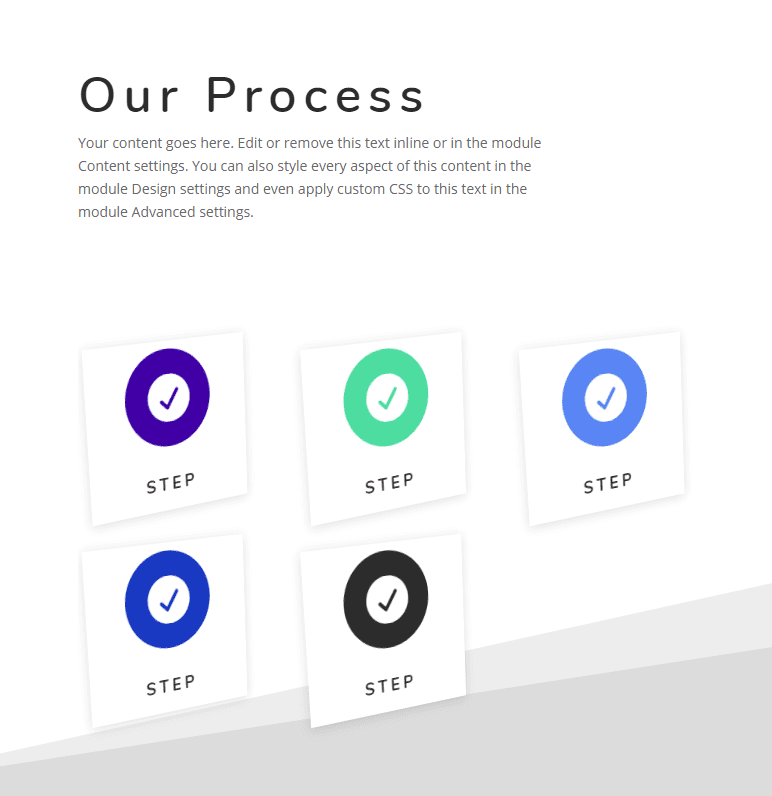
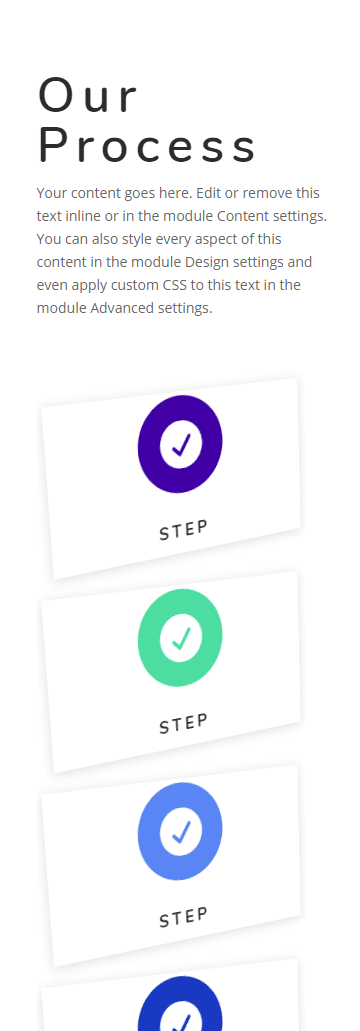
Ultimate End result
Now let’s take a look at the general results of the blurb module format.
Ultimate Ideas
With Divi’s turn into controls, you be capable to position your blurb modules in exact spaces of your web page with nice ease. This makes it a laugh to experiment and create new blurb module layouts for that includes products and services, procedure steps, and numerous different makes use of. I am hoping this instructional offers you a little bit inspiration for checking out out those design ways your self.
For extra inspiration, take a look at those 5 creative blurb module designs.
I stay up for listening to from you within the feedback.
Cheers!
The put up Using Divi’s Transform Controls to Create Unique Blurb Module Layouts gave the impression first on Elegant Themes Blog.
WordPress Web Design