
Once we talk about responsive choices, we most often bring to mind content material that adjustments form to suit other display sizes. With Divi, we will take responsive content material a lot additional. We will use Divi’s settings to scale back the period of the content material or substitute the content material or styling totally in accordance with the display dimension. On this submit, we’ll see how you can upload responsive content material to Divi’s testimonial module. We’ll quilt two other eventualities and display the main points of each.
Let’s get began.
Contents
- 1 Responsive Testimonial State of affairs One
- 2 Responsive Testimonial State of affairs Two
- 3 Finishing Ideas
Responsive Testimonial State of affairs One
Let’s say you wish to have to show a long-form testimonial. This will paintings nice on desktops the place you have got a large number of house to paintings with, however this may purpose an excessive amount of scrolling on cellular gadgets. To resolve this downside, we will create two variations of the content- an extended model to show on desktops and a brief model to show on cellular. We will use Divi’s settings to show the content material in accordance with the display dimension.
Responsive Testimonial State of affairs One Desktop Model
For the desktop model, create the testimonial as customary. The default settings of the Divi testimonial module show the desktop settings, so we don’t have to modify any settings. For my testimonial, I’ve used the dummy content material from the testimonial module and pasted it a couple of occasions to create a big testimonial. I’ve additionally made the entire fonts black.

This would possibly paintings neatly for the desktop model of a web page. Shoppers every so often cross into nice element a couple of challenge and that element will also be useful to attainable purchasers. The instance beneath displays the testimonial positioned throughout the Carrier Web page of the free Electrical Services Layout Pack that’s to be had inside of Divi. We’ll enlarge in this design.

State of affairs One Styling
For reference, listed here are the styling choices I’ve used from the format pack.
Quote Icon
First, cross to the design tab and set the Quote Icon Colour to #0047ff.
- Quote Icon Colour: #0047ff

Symbol
Scroll all the way down to Symbol and alter the Width to 120px and the Rounded Corners to 0px.
- Symbol Width: 120px
- Symbol Rounded Corners: 0px

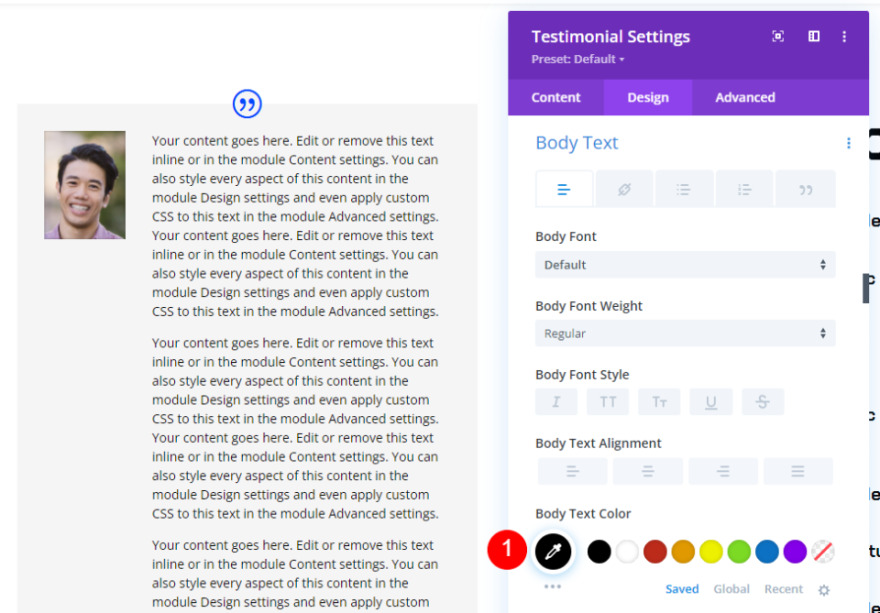
Frame Textual content
Subsequent, scroll to Frame Textual content and alter the Colour to black.
- Frame Textual content Colour: #000000
Creator Textual content
Scroll to Creator Textual content and alter the Font to Chakra Petch, the Colour to black, and the Dimension to 20px.
- Creator Textual content Font: Chakra Petch
- Colour: #000000
- Dimension: 20px

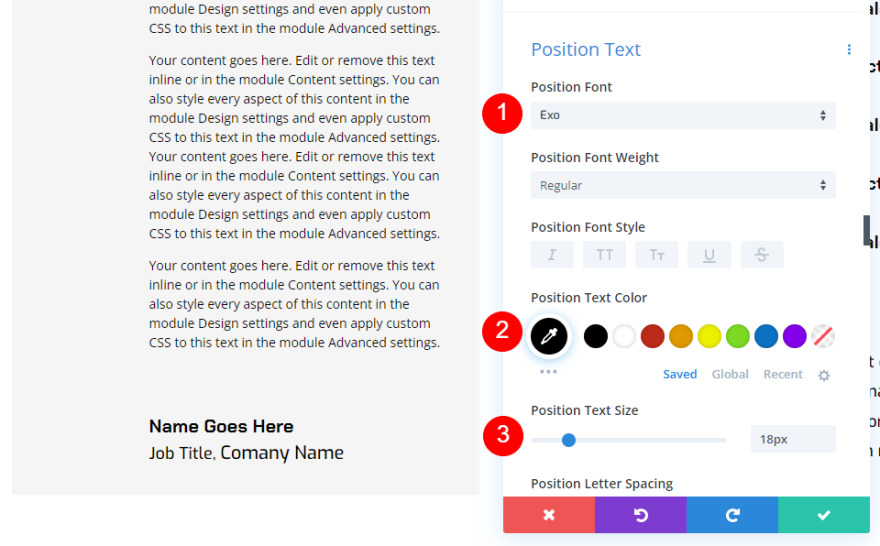
Place Textual content
Trade the Place Textual content to Exo, set it to black, and alter the Dimension to 18px.
- Place Textual content Font: Exo
- Colour: #000000
- Dimension: 18px
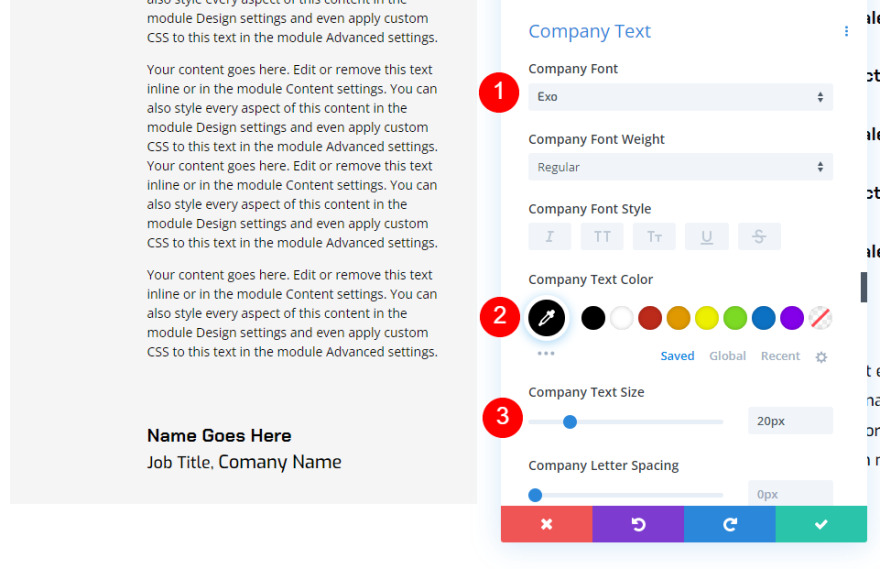
Corporate Textual content
In any case, exchange the Corporate Textual content to Exo, set it to black, and alter the Dimension to 18px.
- Corporate Textual content Font: Exo
- Colour: #000000
- Dimension: 18px
State of affairs One Desktop Model vs Cell
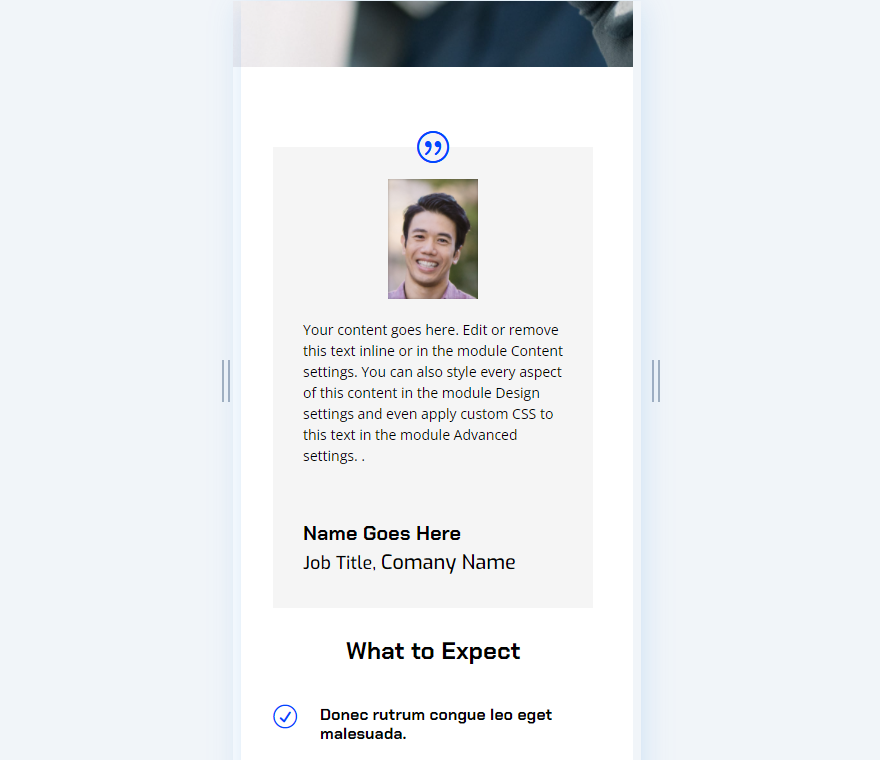
Our desktop model of the testimonial would possibly paintings for an in depth testimonial, however it’s too huge for cellular gadgets.
Right here’s the design on cellular. It seems like a long-form article and calls for a large number of scrolling to get previous it. Likelihood is that just right they gained’t learn all of this content material on cellular, and they may not scroll some distance sufficient to peer the following portion of content material which tells them what to anticipate. The answer is to create a cellular model of this frame content material that provides the consumer the principle knowledge they want.

Responsive Testimonial State of affairs One Cell Model
To create a cellular model of the testimonial content material, hover over the Frame choices within the content material tab of the testimonial module. This unearths a collection of icons. Click on the person who seems like a pill to turn the software tabs. You’ll see icons for a desktop, pill, and get in touch with.

Make a selection the Telephone icon. This displays the telephone model of the content material and lets you edit for this display dimension. The desktop and pill variations might not be suffering from the adjustments made to the telephone model.

Subsequent, create the content material in particular for the cellular model and shut the module.

We’ve a cellular model of the testimonial that handiest shows on telephones. The consumer can learn the bigger testimonial on a desktop and notice a shorter model that’s a lot more straightforward to make use of on a telephone.
Responsive Testimonial State of affairs Two
It’s additionally imaginable to modify the testimonial totally. Moderately than simply converting the frame content material, we will exchange the module’s settings to turn a special particular person’s testimonial. The responsive settings would exchange the content material to turn a special particular person and show their testimonial in accordance with the display dimension.
The method is equal to our first state of affairs, however it’s just a little extra advanced. We’d want to exchange now not handiest the frame content material, but additionally the call, process identify, corporate, and symbol. Shall we even exchange the styling if we needed.
State of affairs Two Desktop Model
For the desktop model, I’ve made a couple of adjustments to the desktop model from the former instance. We’ll restyle this module for the cellular model.
State of affairs Two Desktop Model Styling
First, let’s take a look at the desktop styling adjustments that I’ve made out of the final instance.
Symbol
Trade the Symbol Width and Peak to 140px.
- Symbol Width: 140px
- Symbol Peak: 140px

Frame Textual content
Subsequent, exchange the Frame Textual content Dimension to 16px and the Line Peak to at least one.8em.
- Textual content Dimension: 16px
- Line Peak: 1.8em

State of affairs Two Desktop Testimonial
Right here’s our new testimonial module.

State of affairs Two Cell Model
Now, let’s customise the testimonial in order that it adjustments to a fully other testimonial for cellular gadgets.
To create the cellular model, you’ll want to hover over the component you wish to have to regulate and make a choice the Pill icon. Then, make a selection the Telephone icon from the 3 gadgets. Any adjustments you are making to that component with the Telephone icon decided on will handiest have an effect on the telephone model of that component. You’ll want to make a choice the Telephone icon for each component.

I’ve decided on the Telephone icon for each component within the following steps.
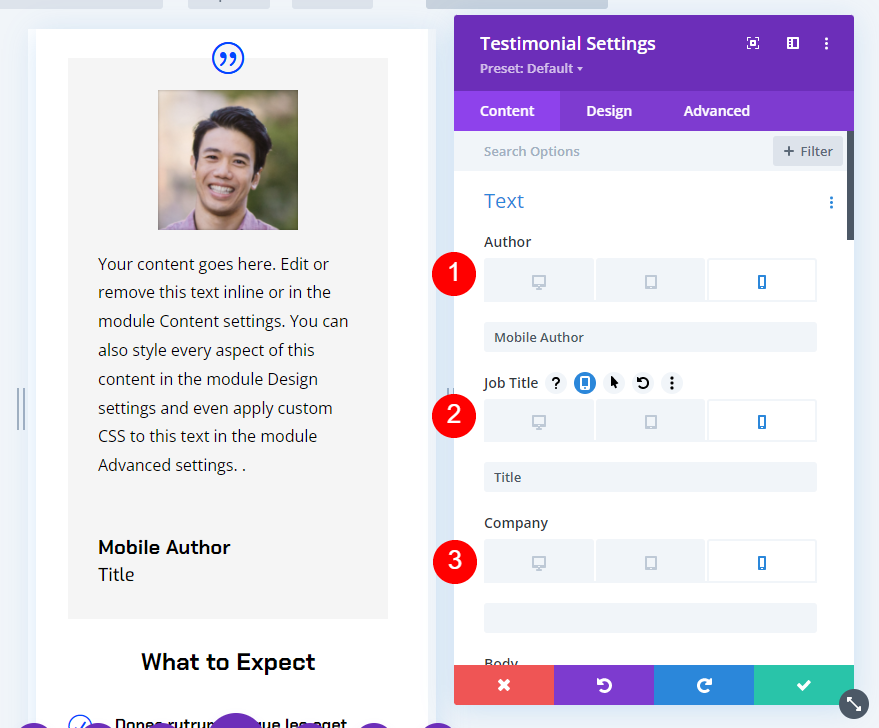
State of affairs Two Cell Model Content material
Make a selection the Telephone icon for every component beneath the Textual content choices and upload the brand new content material. I’ve left the Corporate box clean for cellular.
- Title: new author-name
- Activity Name: new identify
- Corporate: clean

Subsequent, make a choice the Telephone icon for the Frame content material and upload the brand new testimonial.
- Frame Content material: new testimonial

Subsequent, scroll all the way down to Symbol and alter the picture to compare the brand new testimonial. Beneath Parts, make a choice the Telephone settings for the Quote Icon and disable it. For this one, we’ll now not use the quote icon for telephones.
- Symbol: picture for the brand new testimonial
- Display Quote Icon: No

Subsequent, scroll all the way down to Background. With the Telephone settings decided on, exchange the background to black.
- Background: #000000
State of affairs Two Cell Model Design
Subsequent, make a choice the Design tab and make the next adjustments.
Symbol
Cross to the Symbol settings and alter the Peak to 90px. We’ll go away the width the similar.
- Symbol Peak: 90px

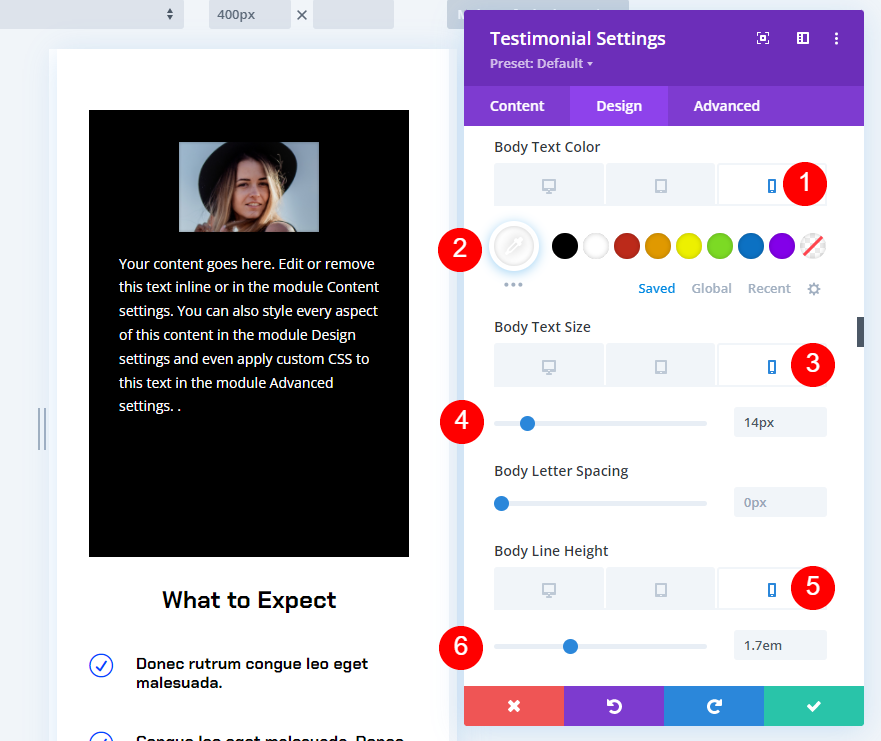
Frame Textual content
Scroll all the way down to Frame Textual content. Trade the Telephone Colour to black, the Dimension to 14px, and the Line Peak to at least one.7em.
- Colour: #ffffff
- Dimension: 14px
- Line Peak: 1.7em
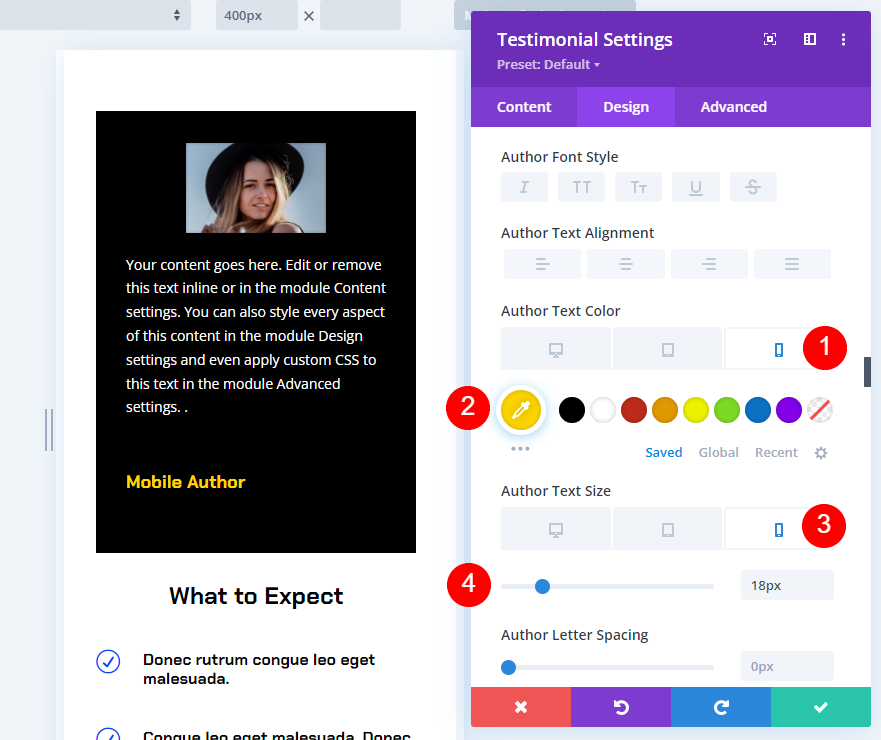
Creator Textual content
Scroll to Creator Textual content. Trade the Telephone Colour to #ffd600 and the Dimension to 16px.
- Colour: #ffd600
- Dimension: 18px
Place Textual content
In any case, scroll to Place Textual content. Trade the Telephone Colour to white and the Dimension to 14px. In case you use Corporate Textual content, make its settings fit the Place Textual content. Shut the settings and save your web page.
- Colour: #ffffff
- Dimension: 14px

State of affairs Two Desktop Model Outcome
Right here’s our testimonial module when considered on a desktop. Any individual viewing the web page on a telephone is not going to see this testimonial.

State of affairs Two Cell Model Outcome
Right here’s the similar web page when considered on a cellular software. Any individual viewing the web page on a desktop is not going to see this testimonial.

Finishing Ideas
That’s our take a look at how you can upload responsive content material to Divi’s testimonial module. Divi’s desktop and cellular settings make it simple to turn other content material in accordance with the display dimension. Trade the rest from the frame content material to styling to a fully other testimonial. It is a nice option to create responsive content material on your Divi testimonial modules.
We need to pay attention from you. Do you employ any of those the best way to make your testimonial module’s content material responsive? Tell us about your revel in within the feedback.
The submit How to Add Responsive Content to Divi’s Testimonial Module seemed first on Elegant Themes Blog.
WordPress Web Design