
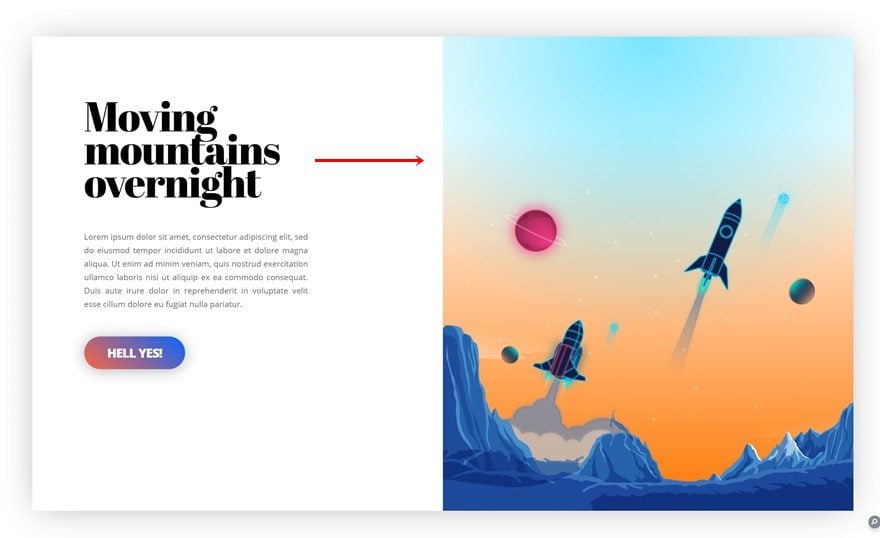
Developing web pages is all about ensuring each and every element is true. Being attentive to small main points to your design will temporarily upload up and carry the standard of your website online. With Divi’s new hover choices, you’ll without difficulty upload small interactions to your website online. Hover choices practice to just about all design settings. You’ll be able to, as an example, not directly trade a gradient background on hover to create a pleasing transition. That’s precisely what we’re going to turn you on this weblog publish. With the exception of reaching the gradient transition, we’ll additionally create a shocking design instance from scratch that you simply’re loose to make use of for any more or less website online you construct.
Let’s get to it!
Contents
- 1 Preview
- 2 Obtain The Illustrations for FREE
- 3 Obtain For Loose
- 4 You could have effectively subscribed. Please test your electronic mail deal with to substantiate your subscription and get get admission to to loose weekly Divi format packs!
- 5 Let’s Get started Developing!
- 5.1 Upload Phase #1
- 5.2 Upload Row #1
- 5.3 Upload Symbol Module to Column 1
- 5.4 Upload Name Textual content Module to Column 2
- 5.5 Upload Description Textual content Module to Column 2
- 5.6 Upload Button Module to Column 2
- 5.7 Upload Phase #2
- 5.8 Upload Row #2
- 5.9 Reproduction Textual content Modules & Button Module of Row #1
- 5.10 Position Duplicates in Column 1 of Row #2
- 5.11 Clone Symbol Module of Row #2
- 5.12 Position Reproduction in Column 2 of Row #2
- 6 Preview
- 7 Ultimate Ideas
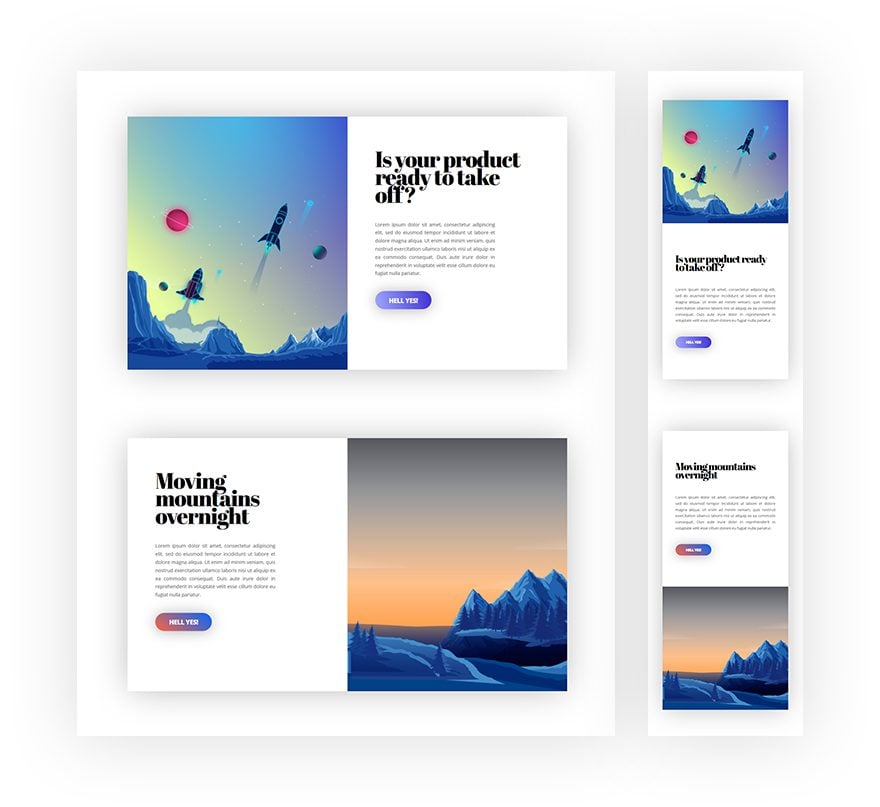
Preview
Prior to we dive into the academic, let’s take a snappy take a look at the outcome on other display sizes.
Static
Hover
Obtain The Illustrations for FREE
To put your arms at the loose illustrations that originate from the Video Game Layout Pack, you are going to first want to obtain them the usage of the button beneath. To achieve get admission to to the obtain it is very important subscribe to our Divi Day by day electronic mail listing through the usage of the shape beneath. As a brand new subscriber, you are going to obtain much more Divi goodness and a loose Divi Structure pack each and every Monday and Friday! If you happen to’re already at the listing, merely input your electronic mail deal with beneath and click on obtain. You’re going to now not be “resubscribed” or obtain additional emails.
@media most effective display and ( max-width: 767px ) {.et_bloom .et_bloom_optin_1 .carrot_edge.et_bloom_form_right .et_bloom_form_content:ahead of, .et_bloom .et_bloom_optin_1 .carrot_edge.et_bloom_form_left .et_bloom_form_content:ahead of { border-top-color: #ffffff !essential; border-left-color: clear !essential; }
}.et_bloom .et_bloom_optin_1 .et_bloom_form_content button { background-color: #f92c8b !essential; } .et_bloom .et_bloom_optin_1 .et_bloom_form_content .et_bloom_fields i { shade: #f92c8b !essential; } .et_bloom .et_bloom_optin_1 .et_bloom_form_content .et_bloom_custom_field_radio i:ahead of { background: #f92c8b !essential; } .et_bloom .et_bloom_optin_1 .et_bloom_border_solid { border-color: #f7f9fb !essential } .et_bloom .et_bloom_optin_1 .et_bloom_form_content button { background-color: #f92c8b !essential; } .et_bloom .et_bloom_optin_1 .et_bloom_form_container h2, .et_bloom .et_bloom_optin_1 .et_bloom_form_container h2 span, .et_bloom .et_bloom_optin_1 .et_bloom_form_container h2 sturdy { font-family: “Open Sans”, Helvetica, Arial, Lucida, sans-serif; }.et_bloom .et_bloom_optin_1 .et_bloom_form_container p, .et_bloom .et_bloom_optin_1 .et_bloom_form_container p span, .et_bloom .et_bloom_optin_1 .et_bloom_form_container p sturdy, .et_bloom .et_bloom_optin_1 .et_bloom_form_container shape enter, .et_bloom .et_bloom_optin_1 .et_bloom_form_container shape button span { font-family: “Open Sans”, Helvetica, Arial, Lucida, sans-serif; } p.et_bloom_popup_input { padding-bottom: 0 !essential;}

Obtain For Loose
Sign up for the Divi Newlsetter and we can electronic mail you a replica of without equal Divi Touchdown Web page Structure Pack, plus lots of alternative superb and loose Divi assets, guidelines and tips. Apply alongside and you are going to be a Divi grasp very quickly. In case you are already subscribed merely sort to your electronic mail deal with beneath and click on obtain to get admission to the format pack.
You could have effectively subscribed. Please test your electronic mail deal with to substantiate your subscription and get get admission to to loose weekly Divi format packs!
Let’s Get started Developing!
Upload Phase #1
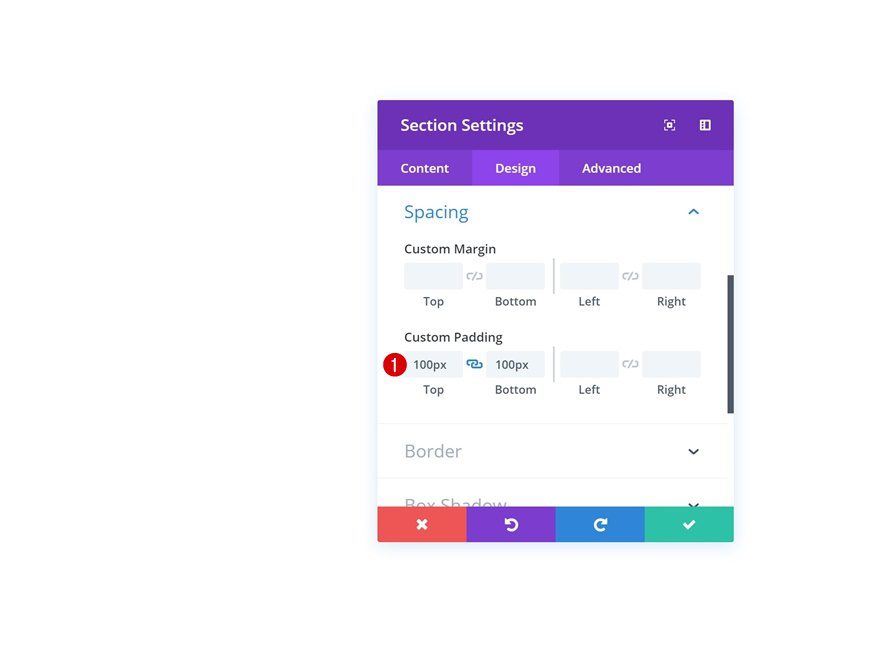
Spacing
The very first thing it is very important do is create a brand new web page or open an present one and upload a brand new common segment to it. Open the settings and upload some customized height and backside margin.
- Most sensible Padding: 100px
- Backside Padding: 100px
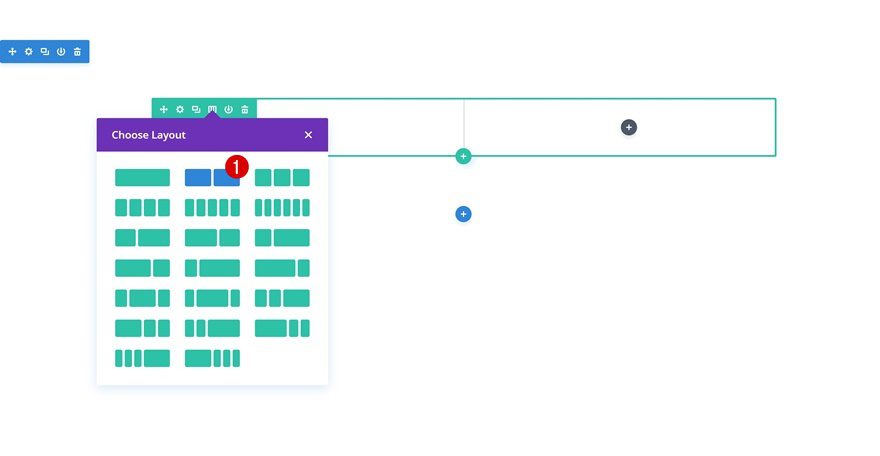
Upload Row #1
Column Construction
Proceed through including a brand new row the usage of the next column construction:
Column 1 Default Background Colour
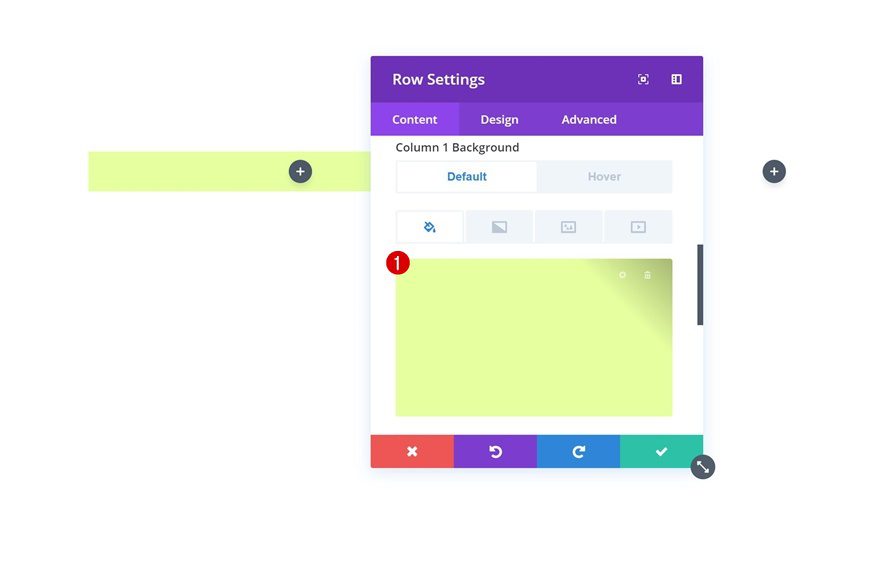
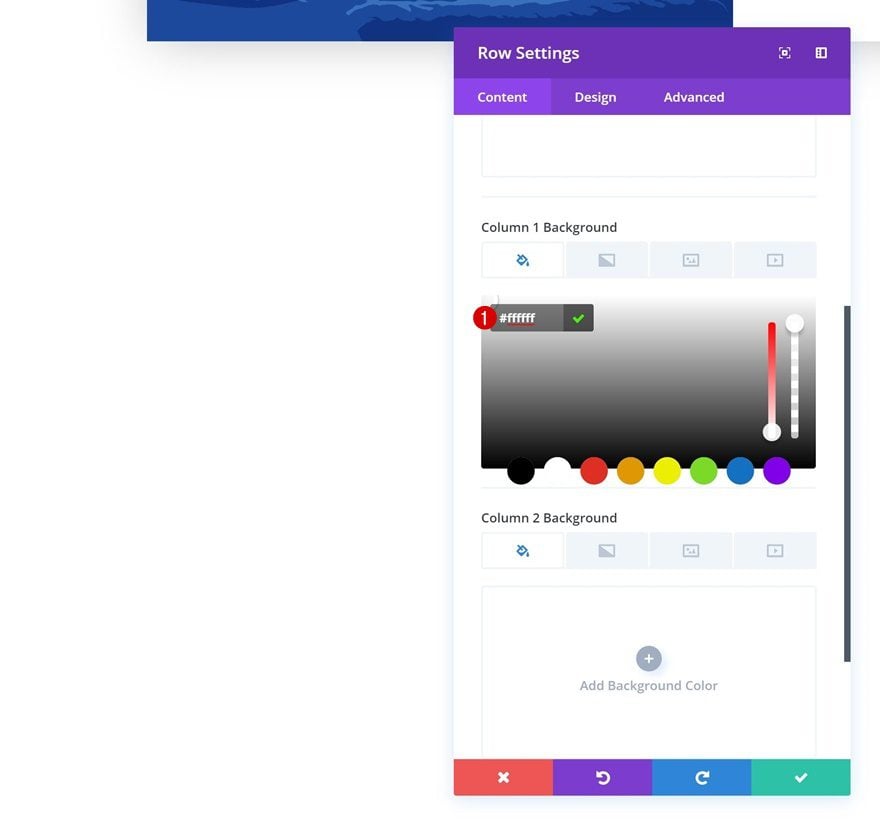
With out including any modules but, open the row settings and upload the next default background shade to column 1:
- Background Colour: #e7ffa0
Column 1 Hover Background Colour
Exchange this background shade on hover.
- Background Colour: #00020c

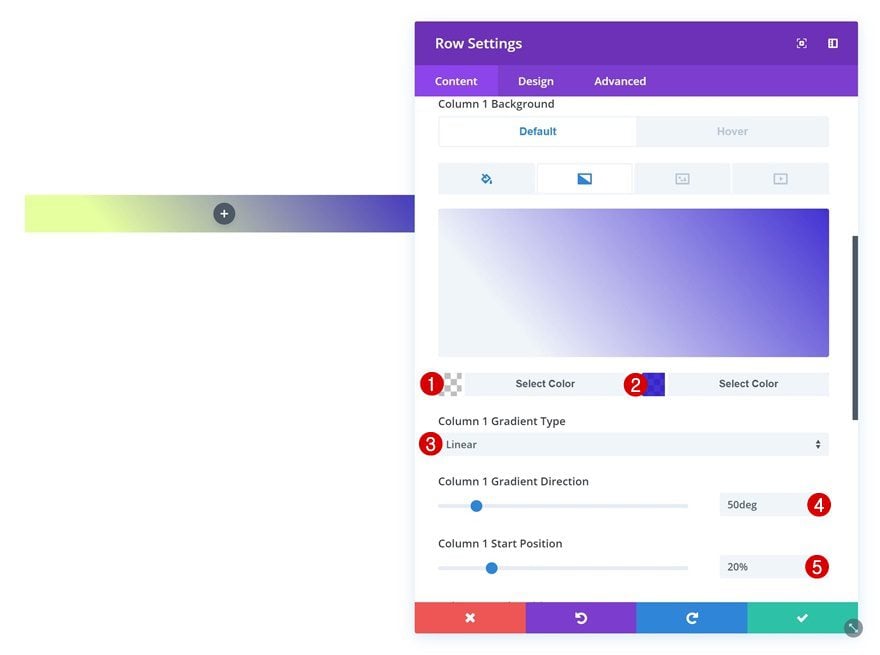
Column 1 Gradient Background
Upload a gradient background shade to column 1 as neatly. You’ll realize that we’re the usage of one totally clear shade. This colour will permit the background shade to turn thru, which in its flip adjustments on hover.
- Colour 1: rgba(255,255,255,0)
- Colour 2: rgba(16,0,201,0.8)
- Column 1 Gradient Sort: Linear
- Column 1 Gradient Course: 50deg
- Column 1 Get started Place: 20%
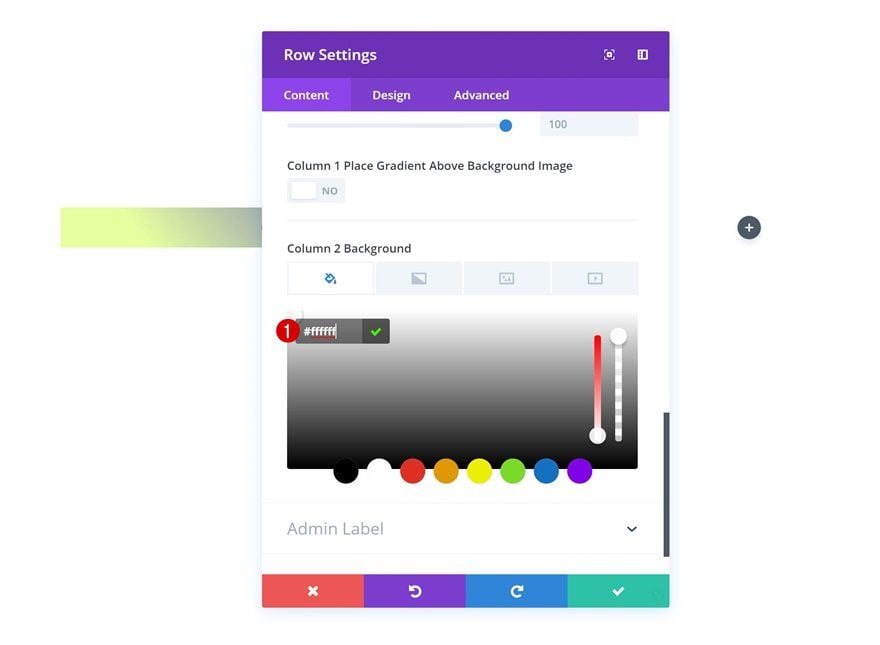
Column 2 Background Colour
Upload a column 2 background shade as neatly.
- Column 2 Background Colour: #ffffff
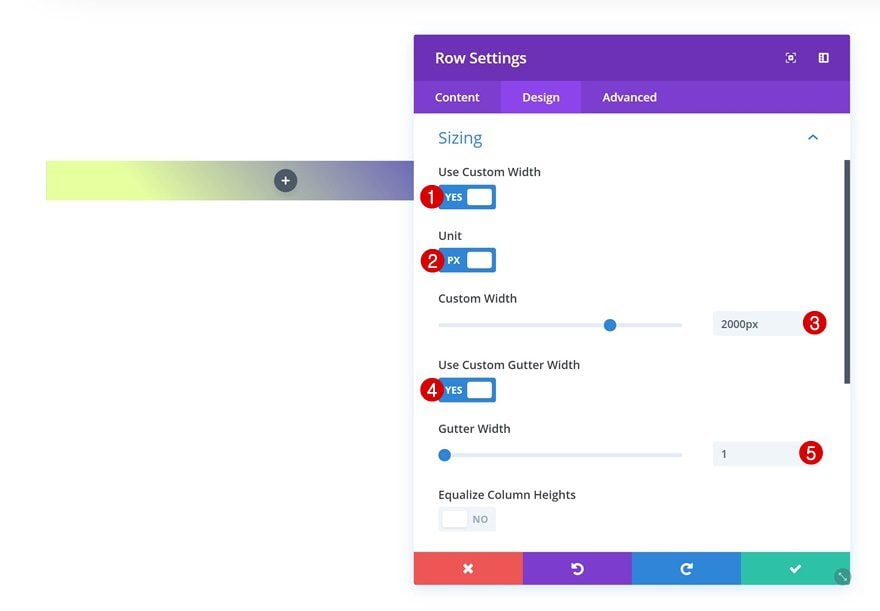
Sizing
Then, cross to the design tab and alter the sizing settings.
- Use Customized Width: Sure
- Unit: PX
- Customized Width: 2000px
- Use Customized Gutter Width: Sure
- Gutter Width: 1
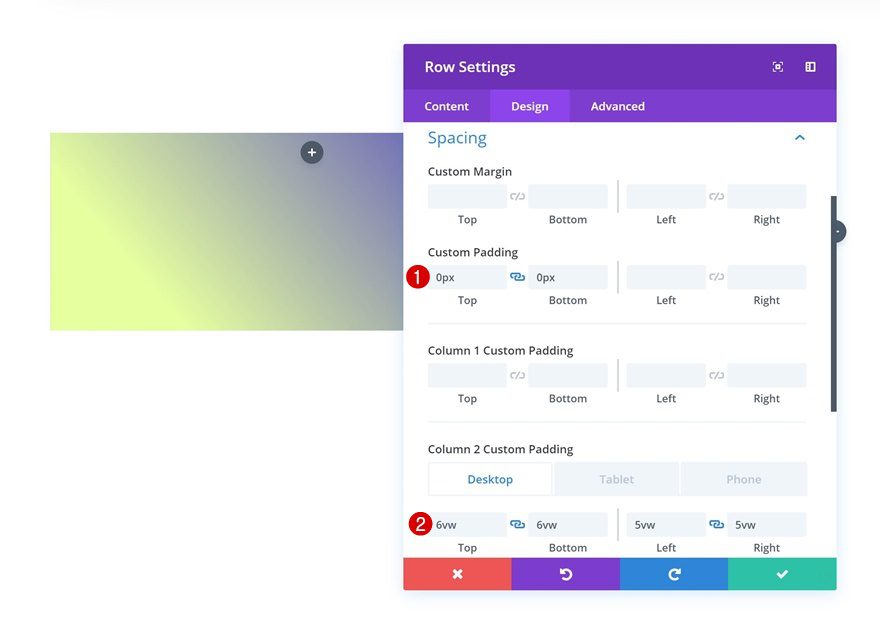
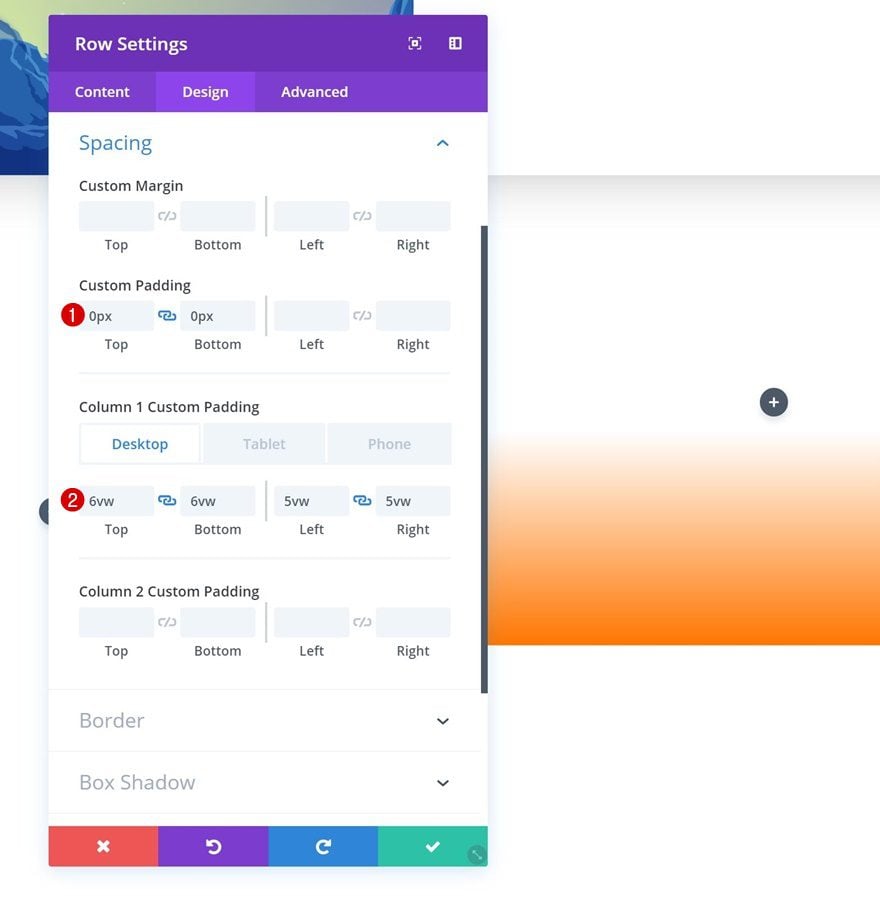
Spacing
Proceed through including some customized padding values within the spacing settings.
- Most sensible Padding: 0px
- Backside Padding: 0px
- Column 2 Most sensible Padding: 6vw (Desktop), 120px (Pill & Telephone)
- Column 2 Backside Padding: 6vw (Desktop), 120px (Pill & Telephone)
- Column 2 Left Padding: 5vw (Desktop), 80px (Pill), 50px (Telephone)
- Column 2 Proper Padding: 5vw (Desktop), 80px (Pill), 50px (Telephone)
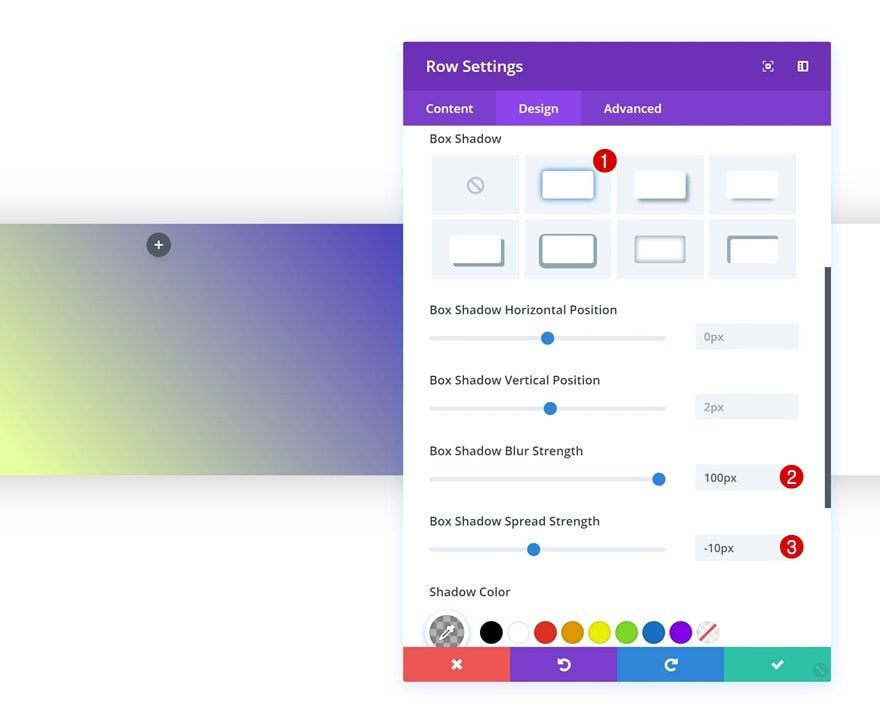
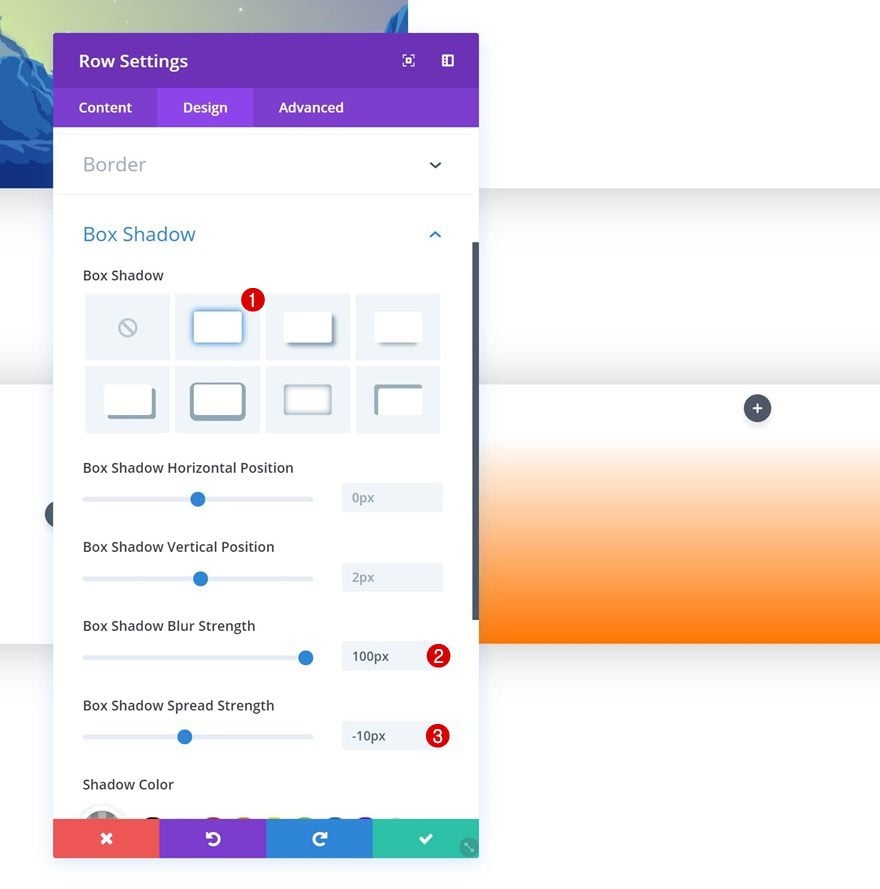
Field Shadow
And provides the row a delicate field shadow as neatly.
- Field Shadow Blur Energy: 100px
- Field Shadow Unfold Energy: -10px
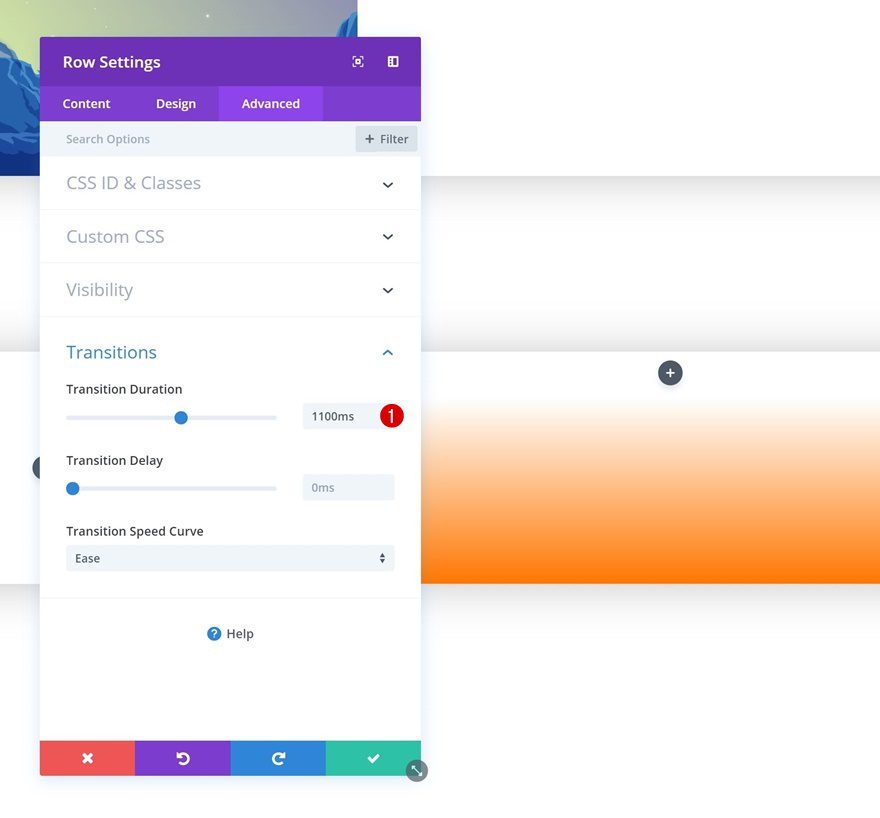
Transitions
Closing however now not least, we’re going to create a clean gradient background transition through expanding the transition length within the complex tab.
- Transition Period: 1100ms

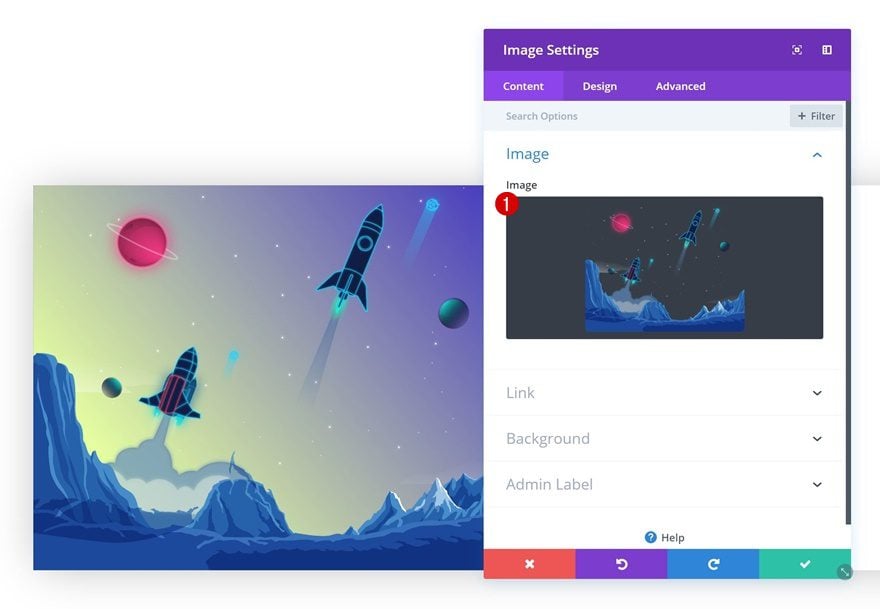
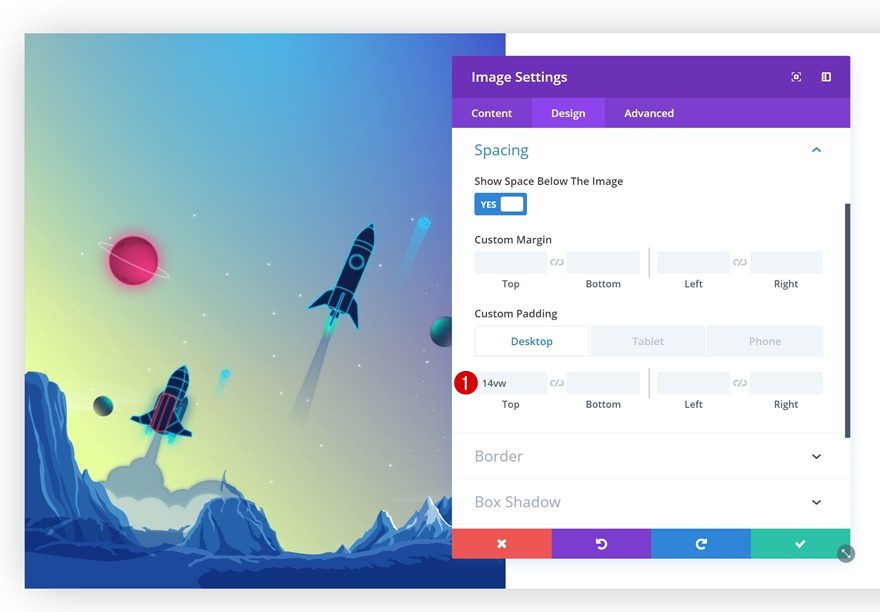
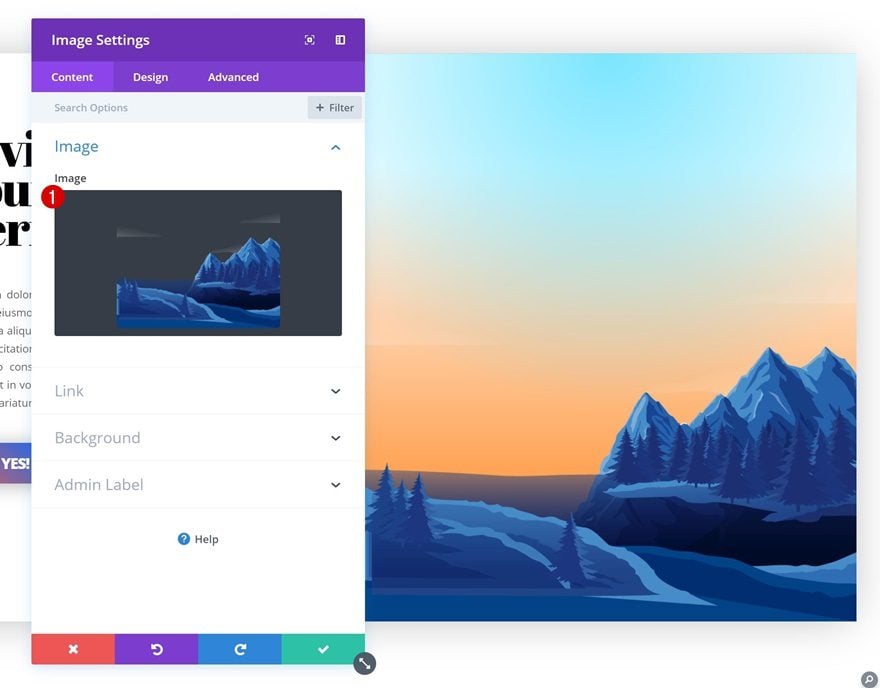
Upload Symbol Module to Column 1
Add Symbol
Time to start out including modules! Upload an Symbol Module to the primary column and add the ‘divi-gradient-background-on-hover-illustration-1.png‘ report which you’ll in finding within the zipped folder you’ve downloaded in the beginning of this publish.
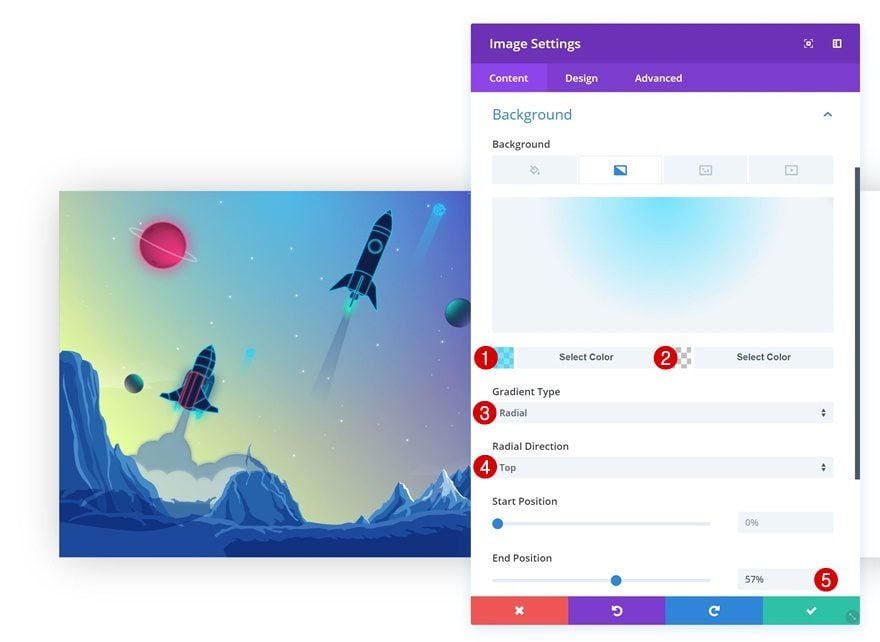
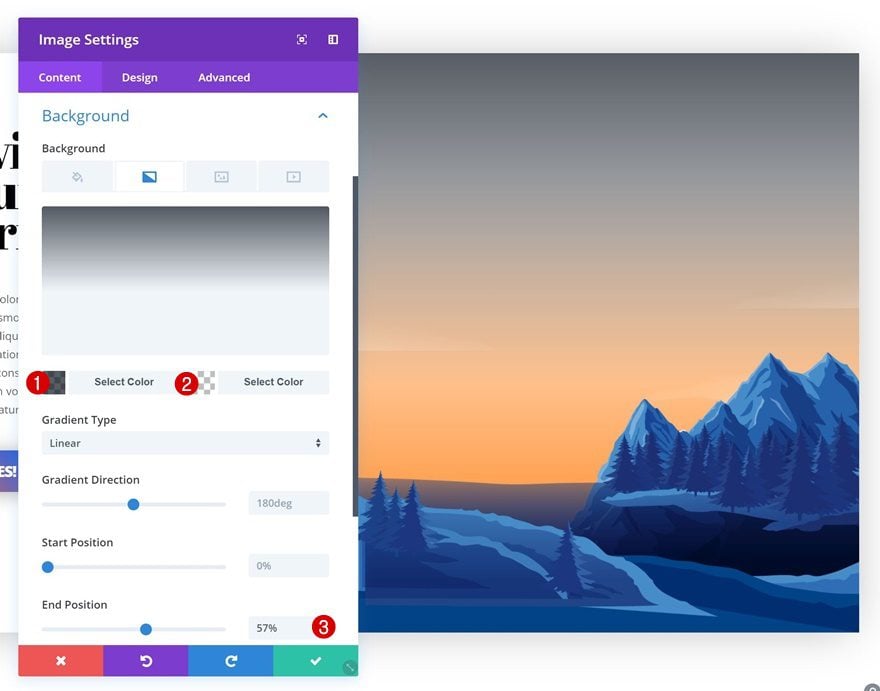
Gradient Background
Pass to the background settings of this Symbol Module and upload a gradient background. We’re once more the usage of one totally clear shade to permit the opposite colours to turn thru.
- Colour 1: rgba(50,217,255,0.66)
- Colour 2: rgba(255,255,255,0)
- Gradient Sort: Radial
- Radial Course: Most sensible
- Finish Place: 57%
Spacing
Then, upload some customized height padding to the module.
- Most sensible Padding: 14vw
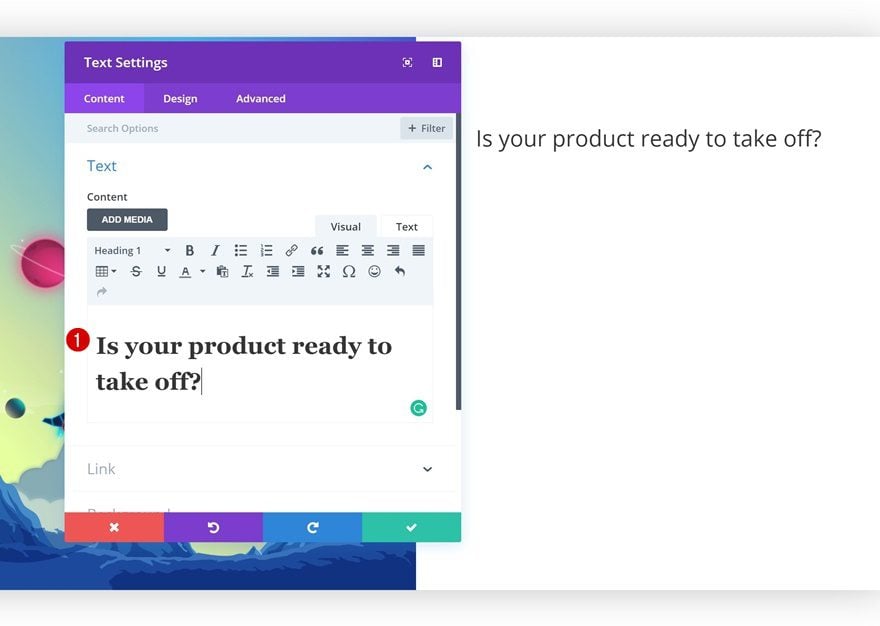
Upload Name Textual content Module to Column 2
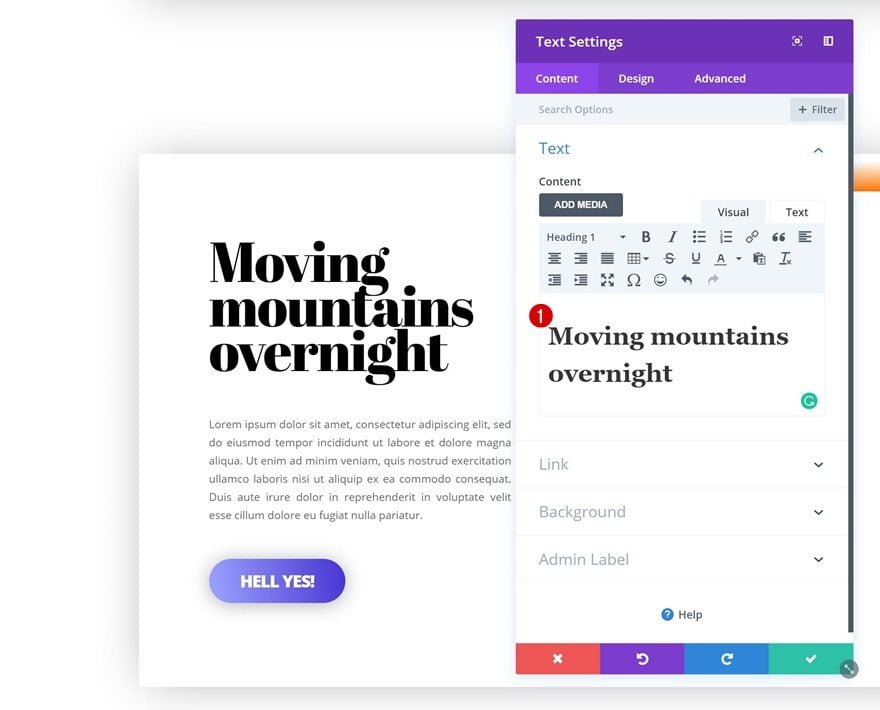
Upload Content material
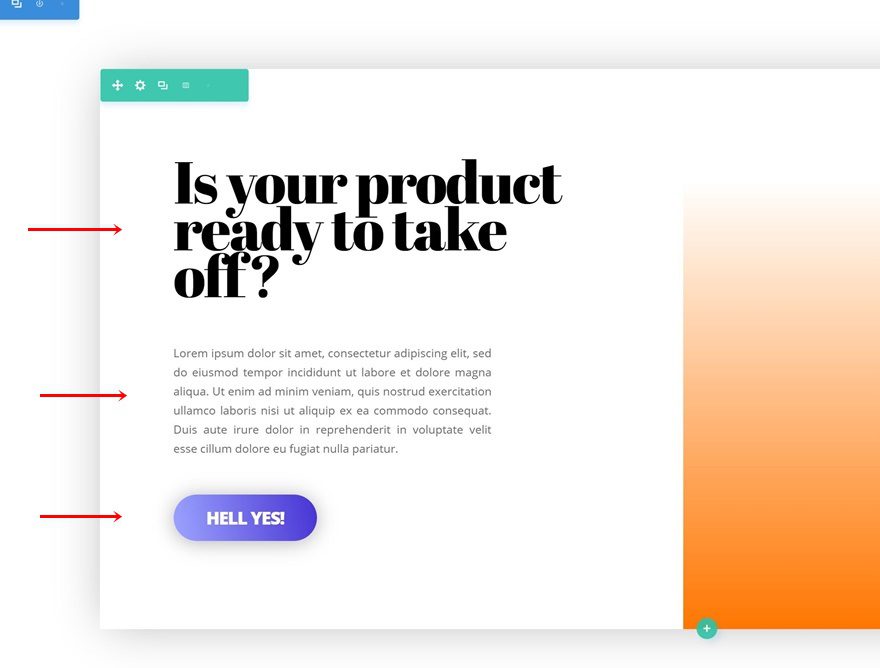
Directly to the second one column! The primary module we’ll want there’s a identify Textual content Module. Pass forward and upload some heading content material of selection.
Heading Textual content Settings
Then, cross to heading textual content settings and make some adjustments.
- Heading Font: Abril Fatface
- Heading Textual content Colour: #000000
- Heading Textual content Dimension: 4vw (Desktop), 60px (Pill), 40px (Telephone)

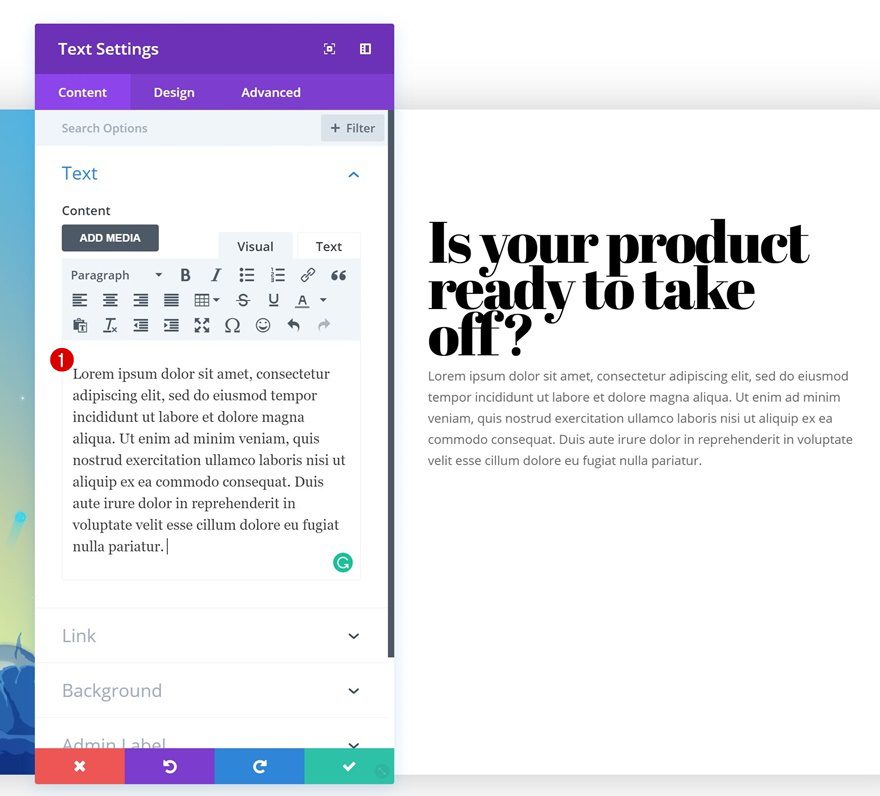
Upload Description Textual content Module to Column 2
Upload Content material
The second one module we’ll want is any other Textual content Module. Upload some content material of selection.
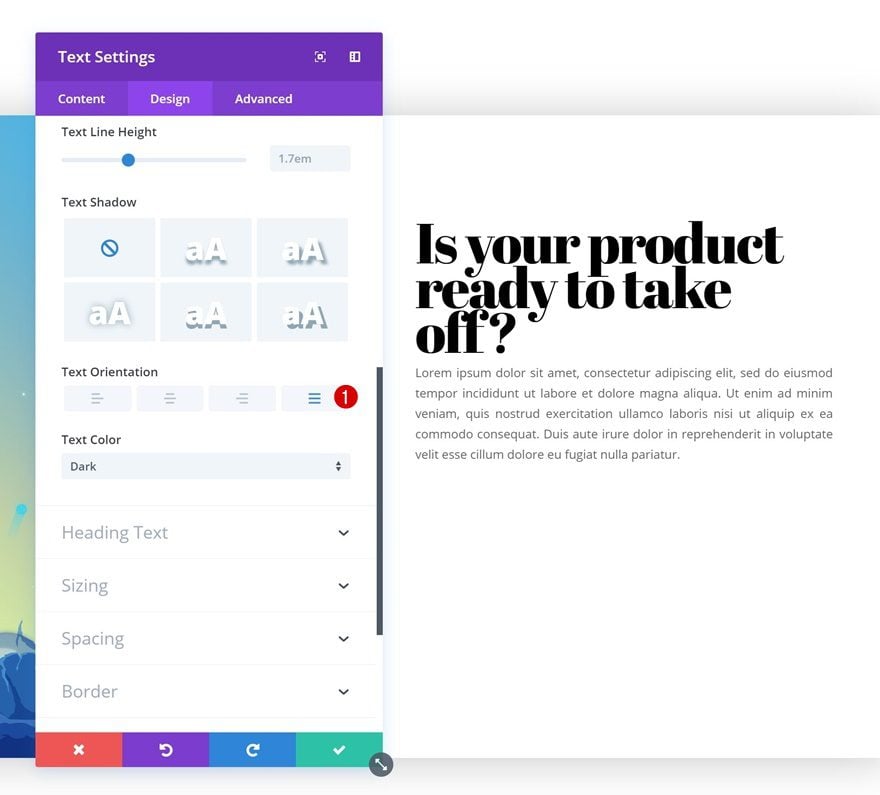
Textual content Settings
Then, cross to the textual content settings and alter the textual content orientation.
- Textual content Orientation: Justify
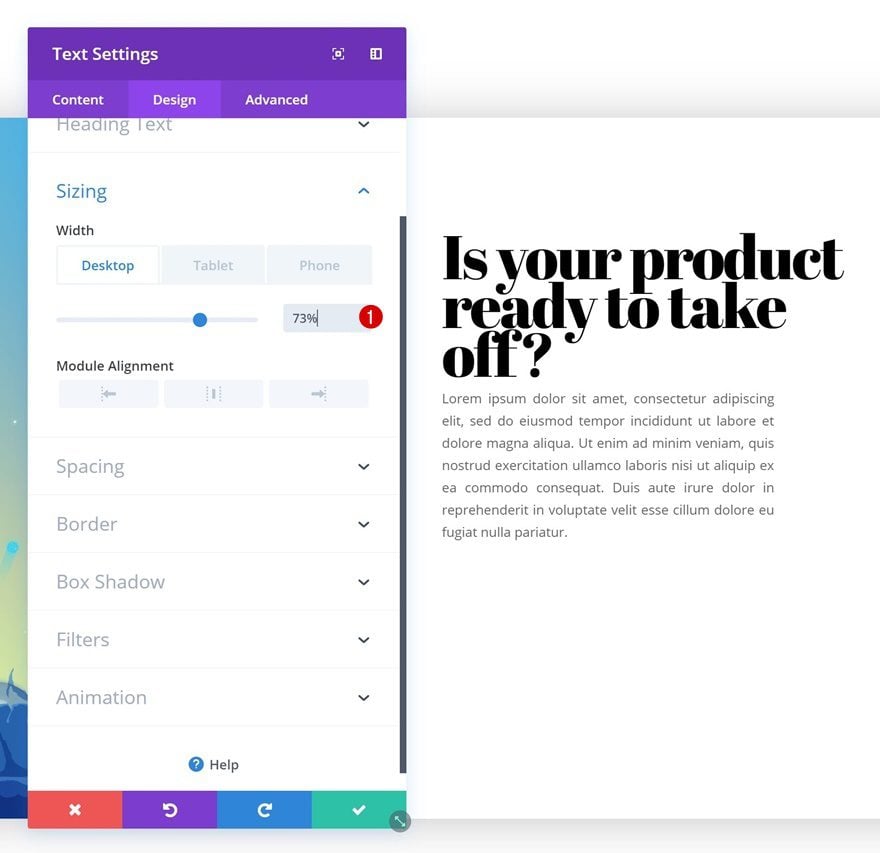
Sizing
Alter the width within the sizing settings as neatly.
- Width: 73% (Desktop), 100% (Pill & Telephone)
Spacing
Finally, upload some customized height and backside margin to the module to create whitespace.
- Most sensible Margin: 2.5vw (Desktop), 50px (Pill & Telephone)
- Backside Margin: 2.5vw (Desktop), 50px (Pill & Telephone)

Upload Button Module to Column 2
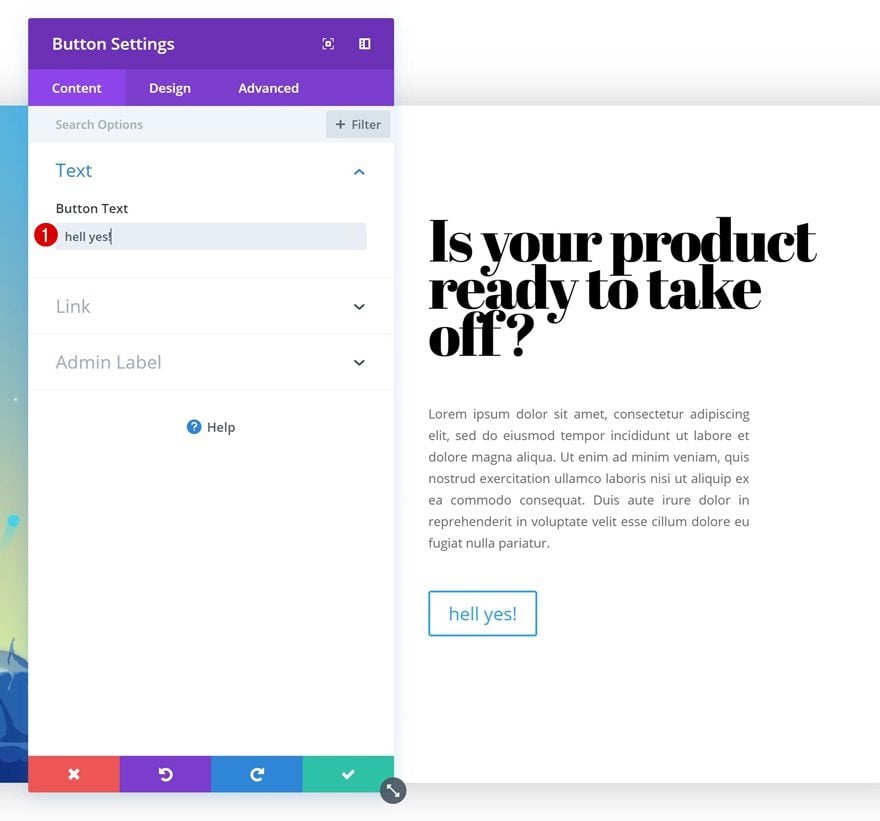
Upload Replica
The 3rd and ultimate module we’ll want in the second one column is a Button Module. Upload some reproduction of your selection.
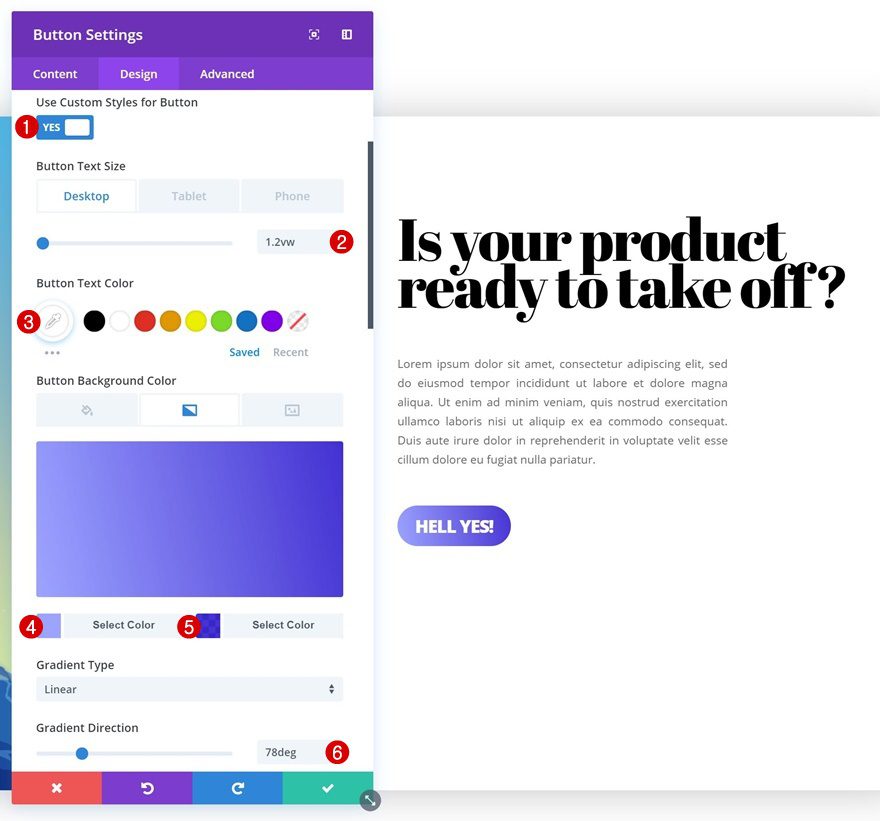
Button Settings
Regulate the button settings subsequent.
- Use Customized Kinds for Button: Sure
- Button Textual content Dimension: 1.2vw (Desktop), 14px (Pill & Telephone)
- Button Textual content Colour: #ffffff
- Gradient Colour 1: #9ea6ff
- Gradient Colour 2: rgba(16,0,201,0.8)
- Gradient Course: 78deg
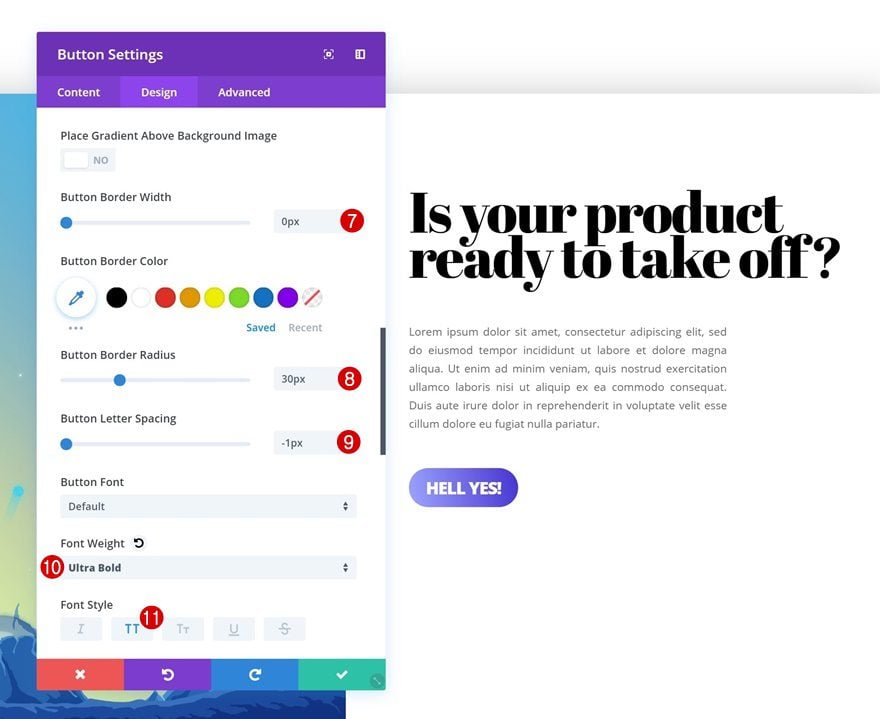
- Button Border Width: 0px
- Button Border Radius: 30px
- Button Letter Spacing: -1px
- Font Weight: Extremely Daring
- Font Taste: Uppercase
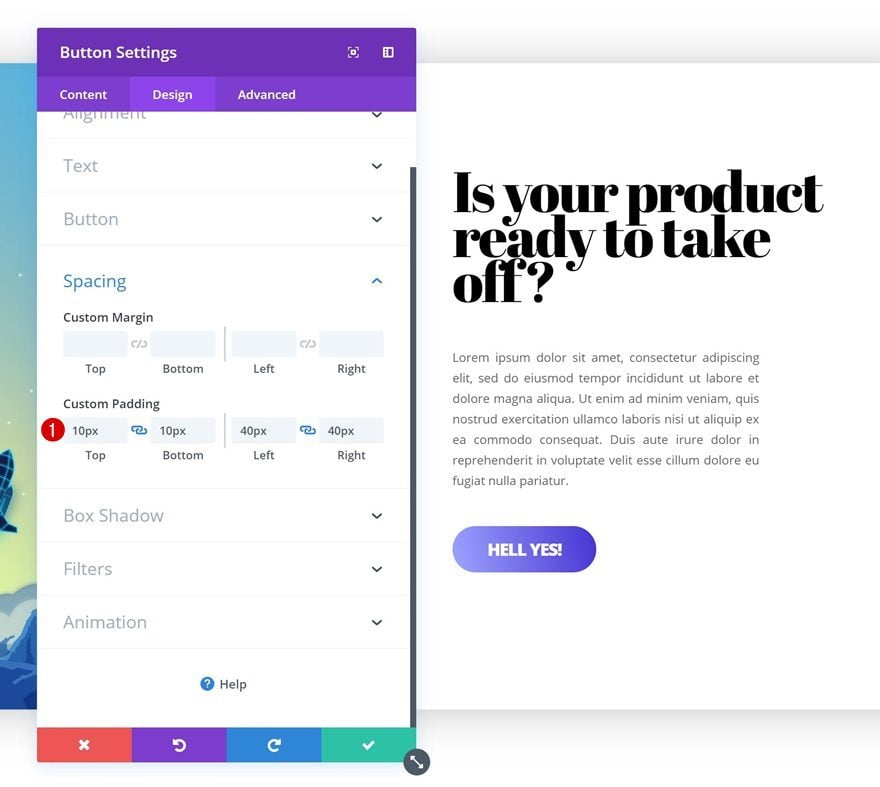
Spacing
Upload some customized padding values as neatly.
- Most sensible Padding: 10px
- Backside Padding: 10px
- Left Padding: 40px
- Proper Padding: 40px
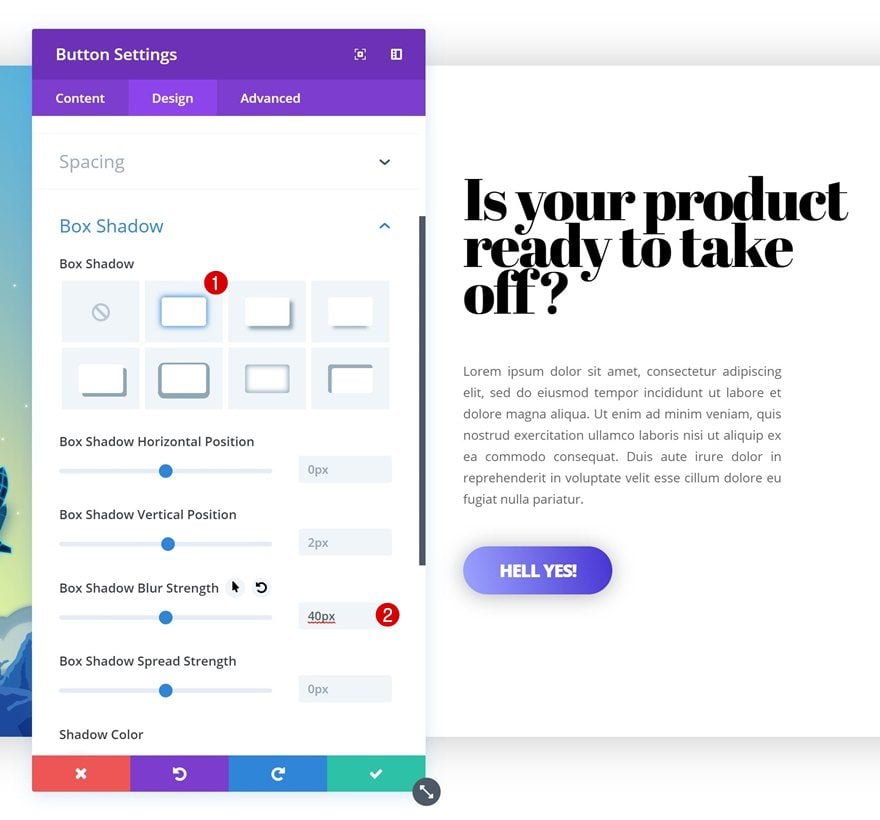
Field Shadow
And practice a delicate field shadow to the button.
- Field Shadow Blur Energy: 40px
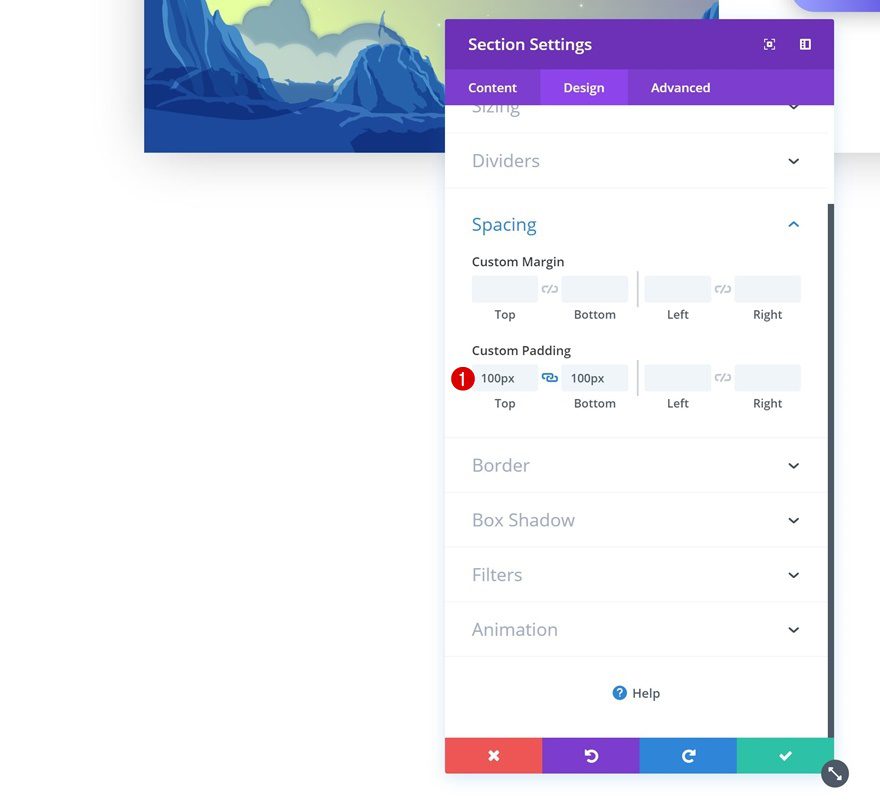
Upload Phase #2
Spacing
Now that we’ve completed the primary segment, we’ll transfer directly to the following. Upload a brand new common segment the usage of the next customized padding values:
- Most sensible Padding: 100px
- Backside Padding: 100px
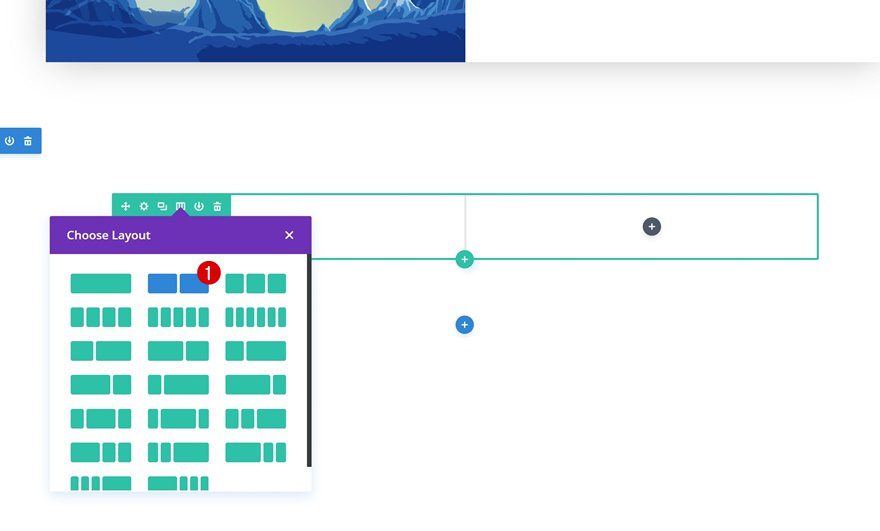
Upload Row #2
Column Construction
Proceed through including a brand new row to the segment the usage of the next column construction:
Column 1 Background Colour
With out including any modules but, open the row settings and upload the next background shade to column 1:
- Column 1 Background Colour: #ffffff
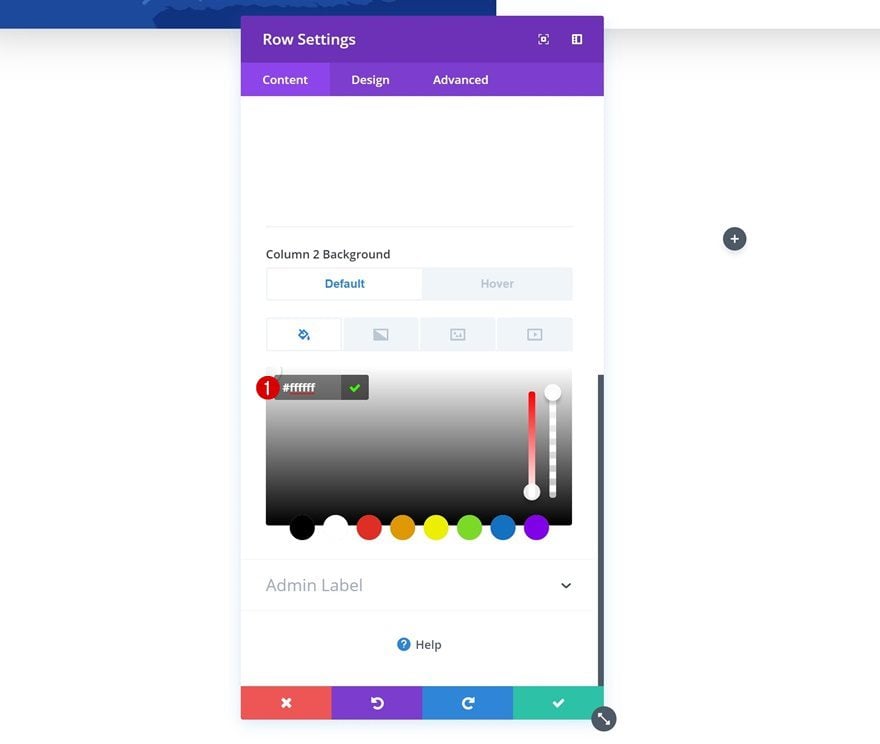
Column 2 Default Background Colour
Upload the next background shade to column 2.
- Column 2 Background Colour: #ffffff
Column 2 Hover Background Colour
And alter this background shade on hover.
- Column 2 Background Colour: #3d02ff

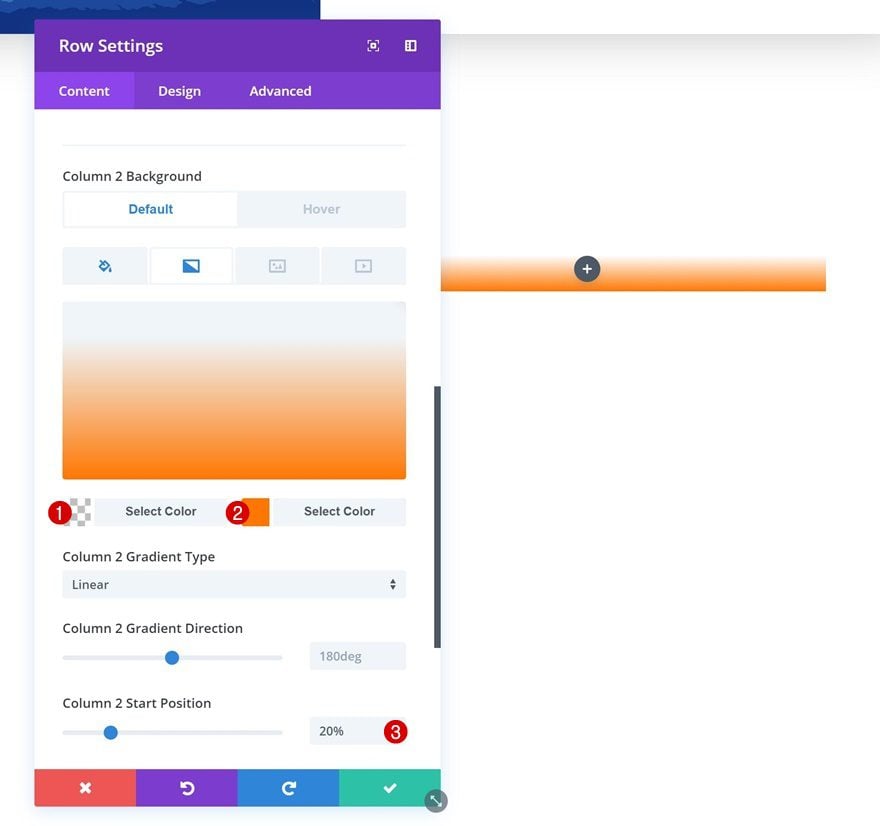
Column 2 Gradient Background
Upload a gradient background to the column as neatly.
- Colour 1: rgba(255,255,255,0)
- Colour 2: #ff7700
- Column 2 Get started Place: 20%
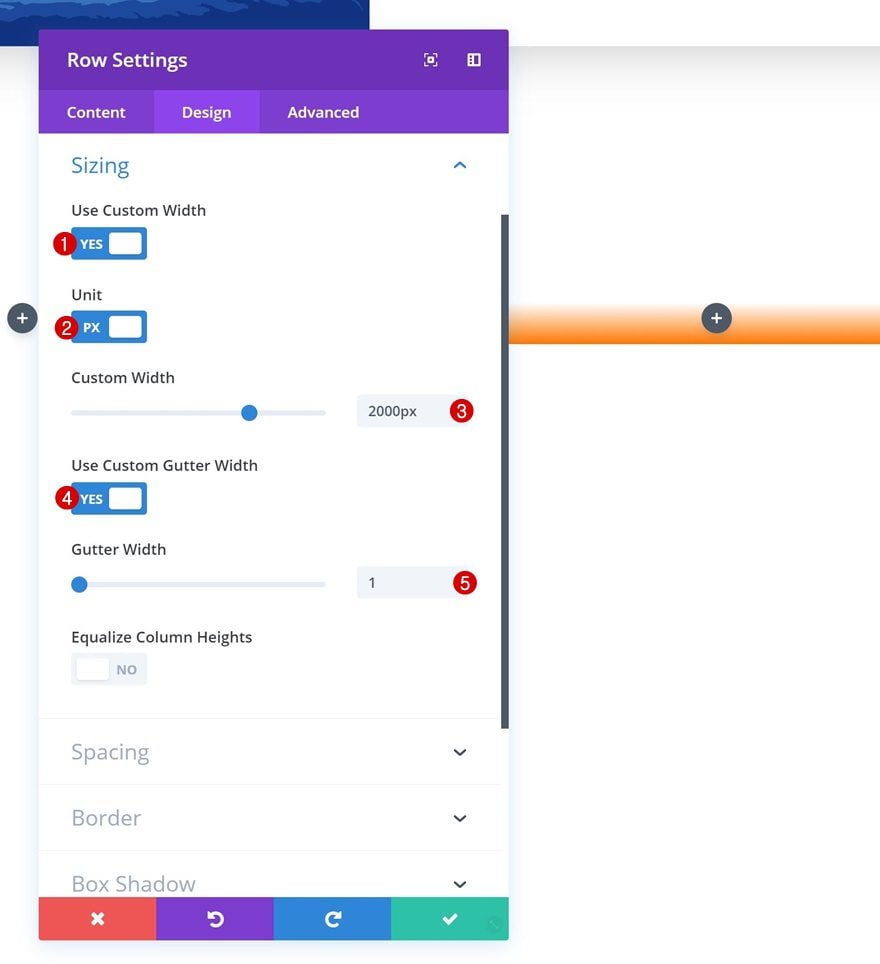
Sizing
Then, cross to the sizing settings and make some adjustments.
- Use Customized Width: Sure
- Unit: PX
- Customized Width: 2000px
- Use Customized Gutter Width: Sure
- Gutter Width: 1
Spacing
Proceed through including customized padding values within the spacing settings.
- Most sensible Padding: 0px
- Backside Padding: 0px
- Column 1 Most sensible Padding: 6vw (Desktop), 120px (Pill & Telephone)
- Column 1 Backside Padding: 6vw (Desktop), 120px (Pill & Telephone)
- Column 1 Left Padding: 5vw (Desktop), 80px (Pill), 50px (Telephone)
- Column 1 Proper Padding: 5vw (Desktop), 80px (Pill), 50px (Telephone)
Field Shadow
And upload a delicate field shadow to this row as neatly.
- Field Shadow Blur Energy: 100px
- Field Shadow Unfold Energy: -10px
Transitions
Closing however now not least, create a clean transition through expanding the transition length within the complex tab.
- Transition Period: 1100ms
Reproduction Textual content Modules & Button Module of Row #1
Since we have already got all of the modules we want within the earlier segment, we’re going to avoid wasting time through cloning them.
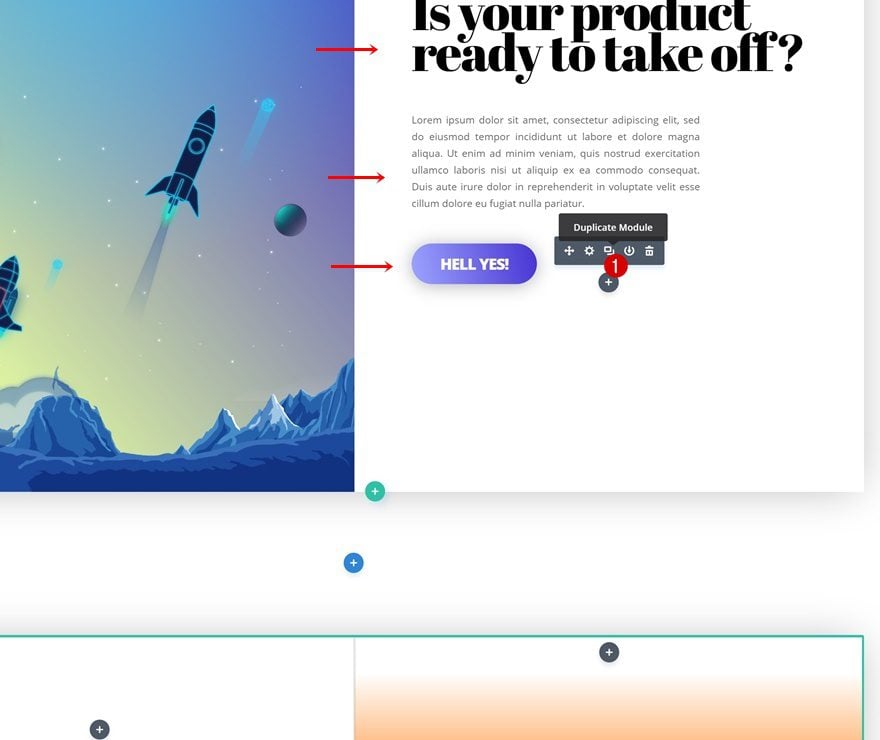
Position Duplicates in Column 1 of Row #2
And hanging the duplicates within the first column of the brand new row.
Exchange Content material
You should definitely trade the content material of your modules.
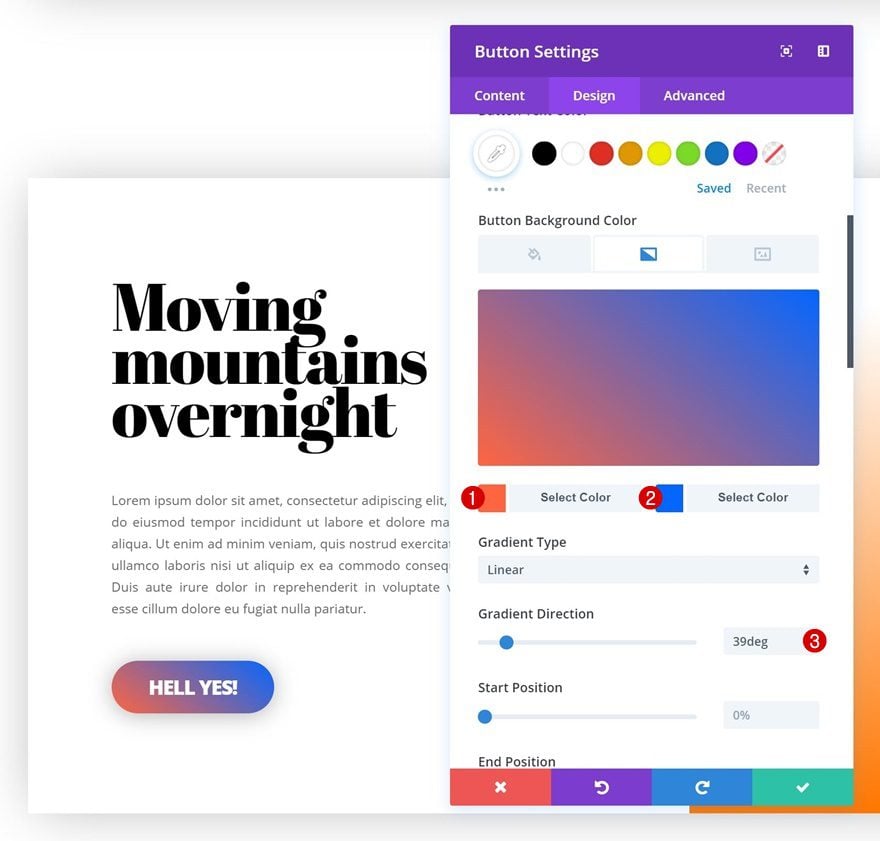
Exchange Button Gradient Background
Exchange the button gradient background too.
- Colour 1: #ff653f
- Colour 2: #0066ff
- Gradient Course: 39deg
Clone Symbol Module of Row #2
Clone the Symbol Module you’ll in finding within the first column of the former row as neatly.
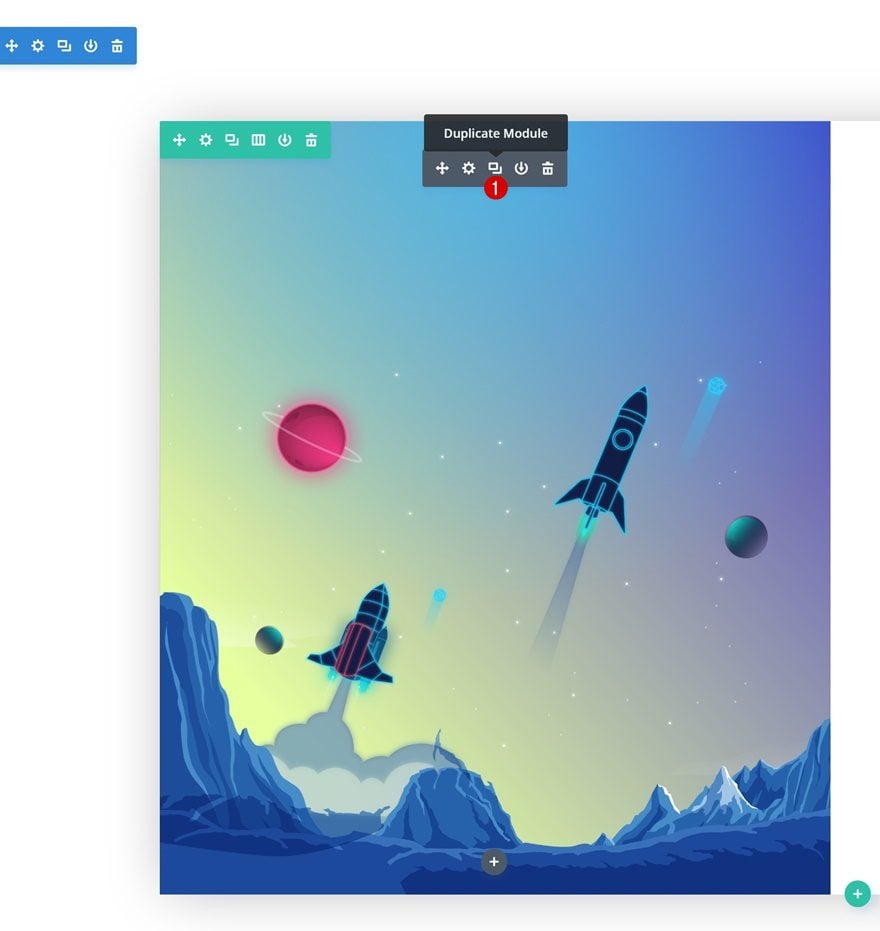
Position Reproduction in Column 2 of Row #2
And position the reproduction in the second one column of the brand new row.
Exchange Symbol
Exchange the picture to the ‘divi-gradient-background-on-hover-illustration-2.png‘ report you’ll in finding within the zipped folder which you’ve downloaded in the beginning of this publish.
Exchange Gradient Background
Closing however now not least, trade the gradient background of the Symbol Module.
- Colour 1: rgba(0,2,12,0.66)
- Colour 2: rgba(255,255,255,0)
- Finish Place: 57%
Preview
Now that we’ve long past thru all steps, let’s take a last take a look at the outcome on other display sizes!
Static
Hover
Ultimate Ideas
On this publish, we’ve proven you trade a gradient background on hover the usage of Divi. We’ve additionally created a shocking design instance from scratch that makes use of this means. You’re loose to make use of the design and illustrations for any more or less website online you’re development. When you’ve got any questions or tips, you should definitely go away a remark within the remark segment beneath!
The publish How to Change a Gradient Background on Hover with Divi gave the impression first on Elegant Themes Blog.
WordPress Web Design