
Whether or not you might have a podcast or are webhosting a WordCamp (or any speaker tournament), it’s all the time a good suggestion to have a visitor speaker segment to your web page. Like testimonials, showcasing visitor audio system is a good way to advertise price and identify credibility along with your target market. A visitor speaker segment could also be a key spot for reeling in some new applicants to your subsequent tournament or episode. This instructional displays you the way to design a visitor speaker segment that no longer simplest showcases audio system in a chic type, but in addition encourages new audio system to use with an efficient name to motion.
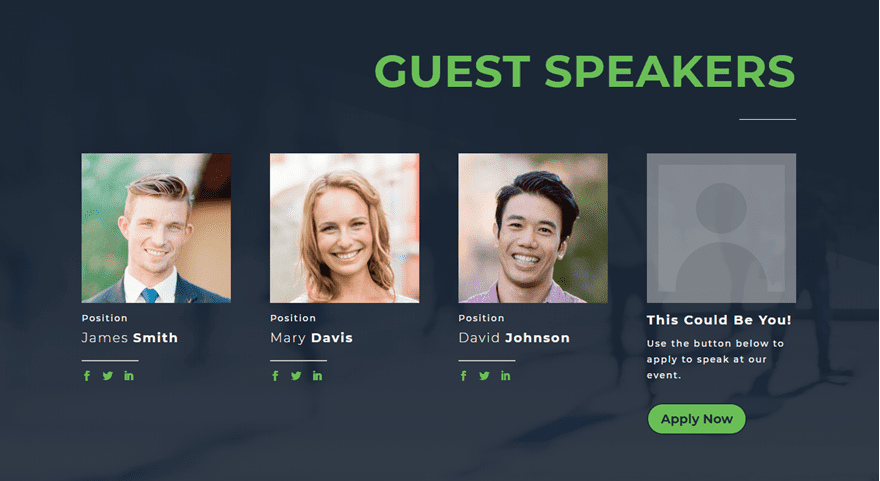
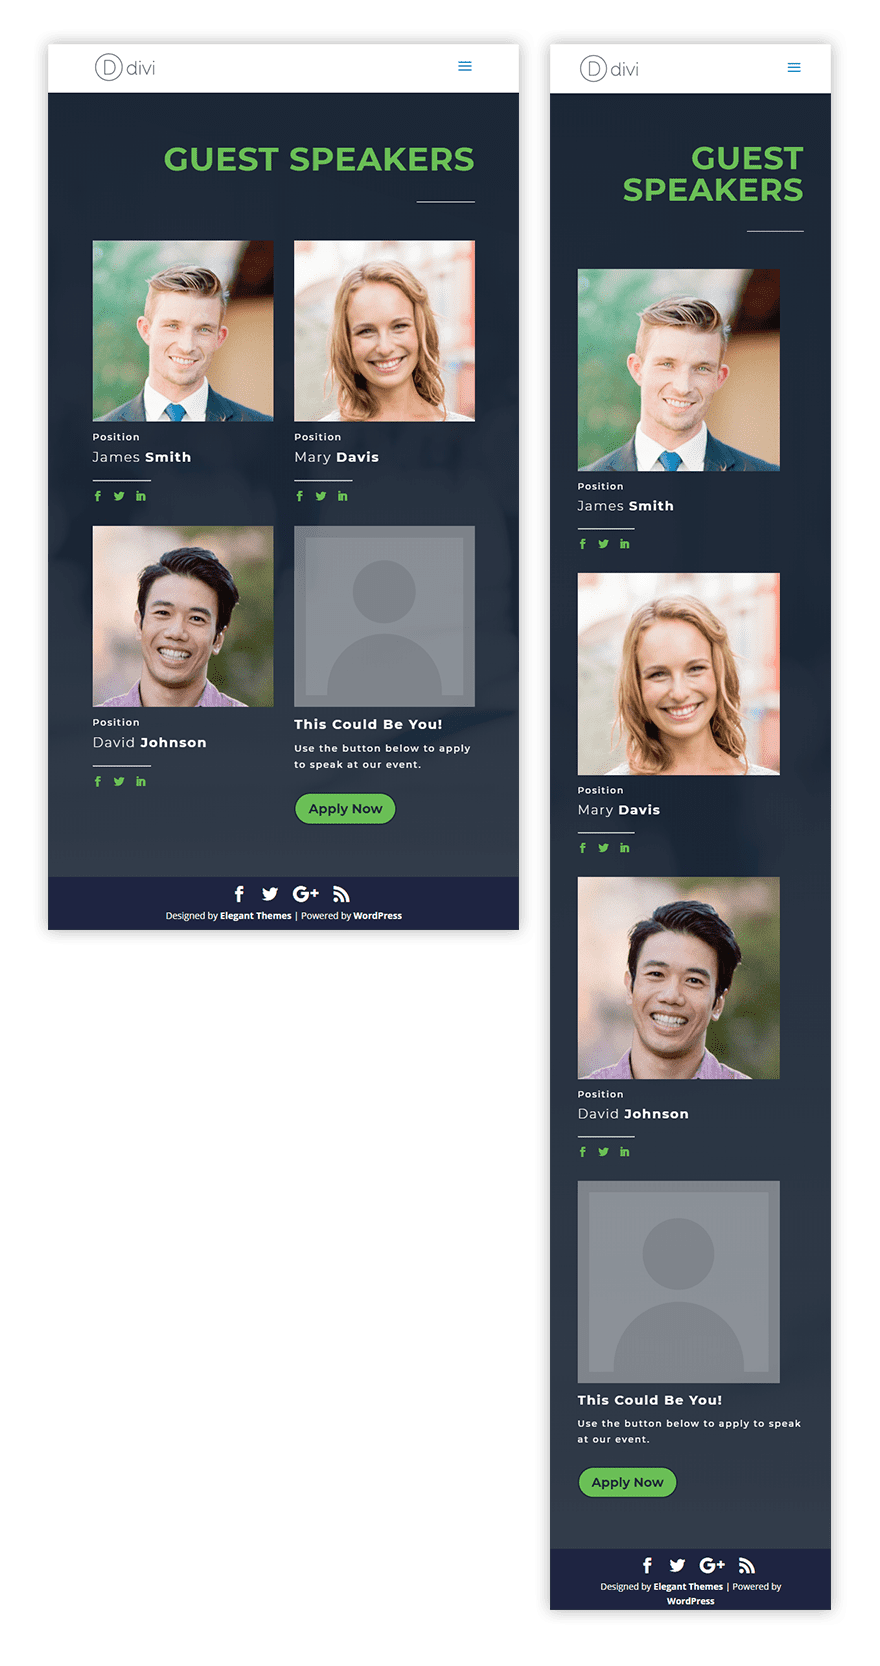
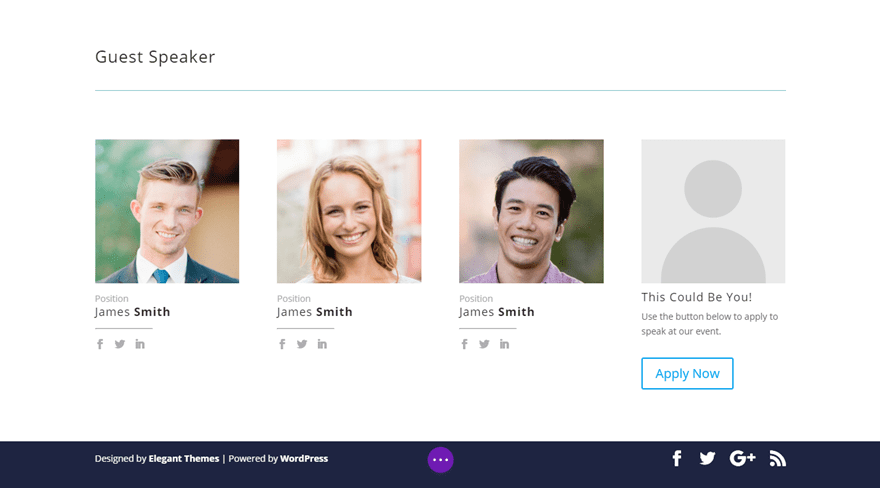
However prior to we bounce in, here’s a sneak peek on the ultimate design.
Contents
Sneak Peek
And right here is an advantage hover impact I’ll display you as neatly.
Let’s get began!
Construction the Elementary Construction and Content material
In the event you haven’t executed so already, create a brand new web page and deploy the Divi Builder to construct at the entrance finish.
The, upload a new segment with a one column row.
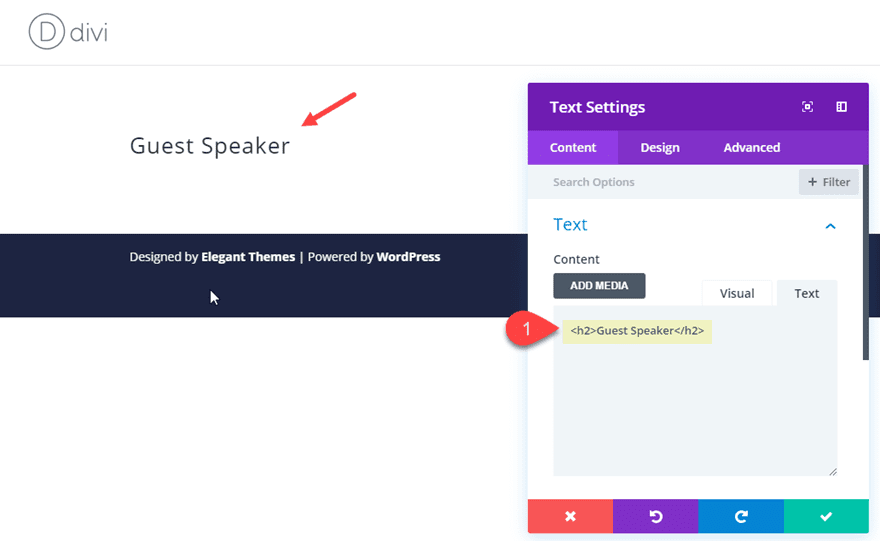
Upload a textual content module to the row with the next Content material:
Visitor Speaker
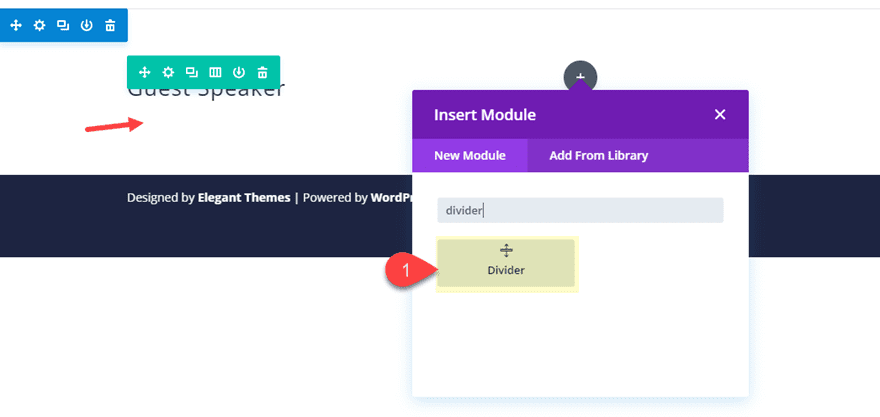
Subsequent, upload a divider module at once below the textual content module.
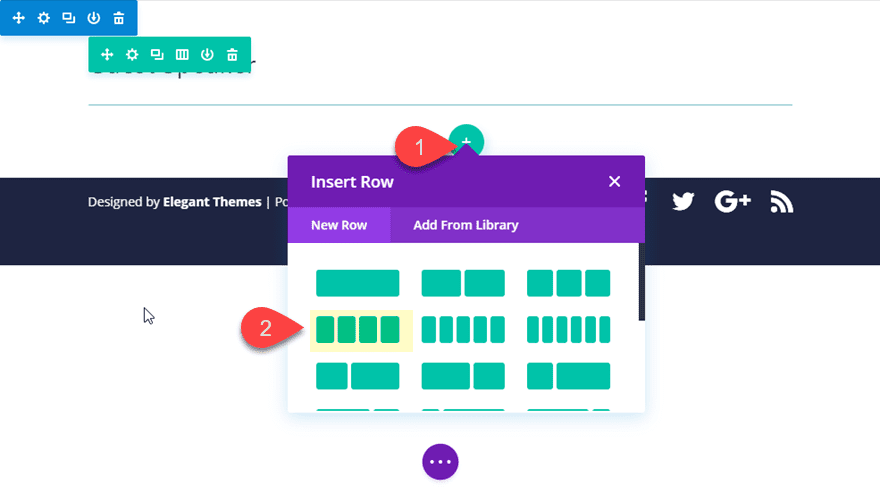
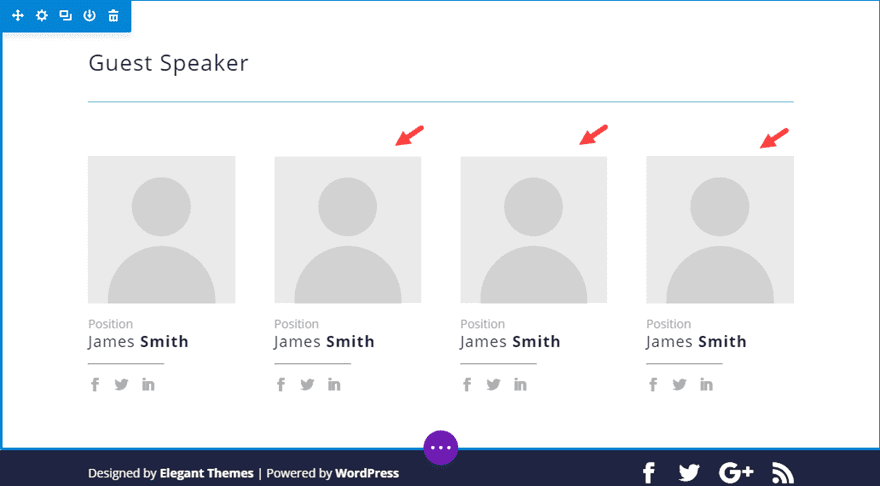
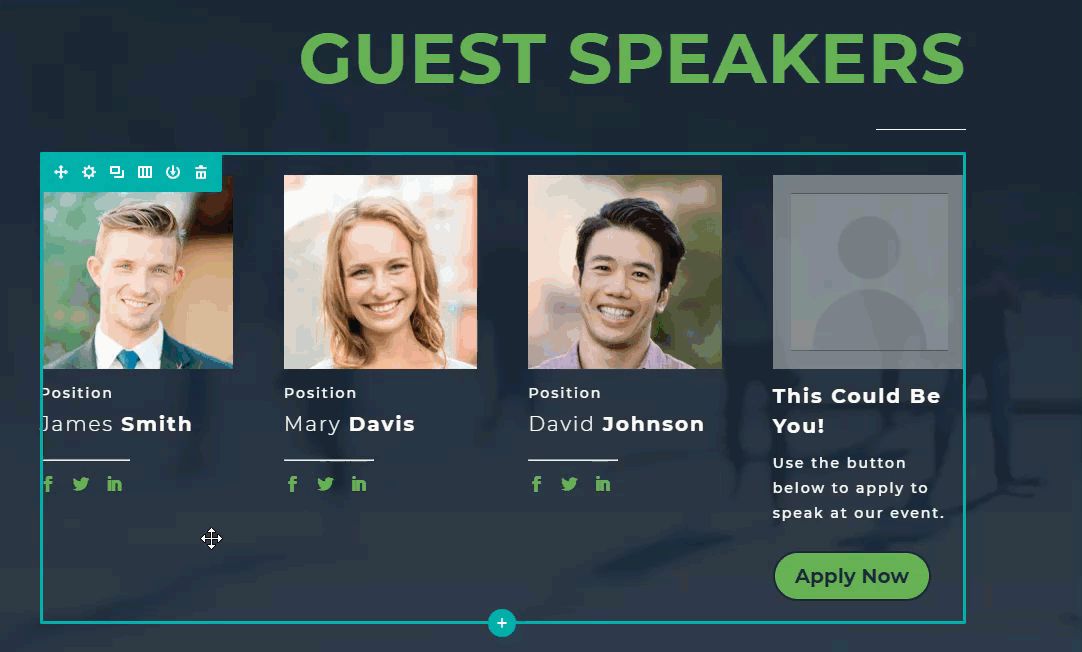
Now we’re going to upload a new row with a four-column construction to carry our visitor audio system.
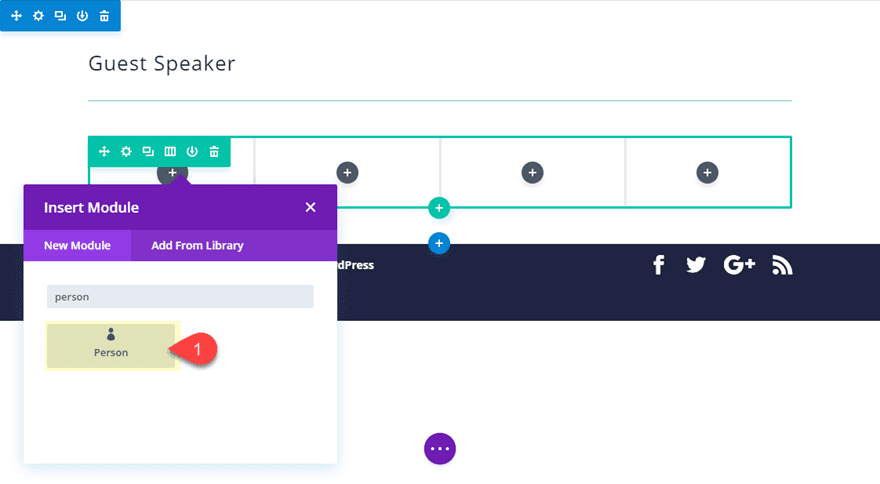
Within the first column of the row, upload an individual module.
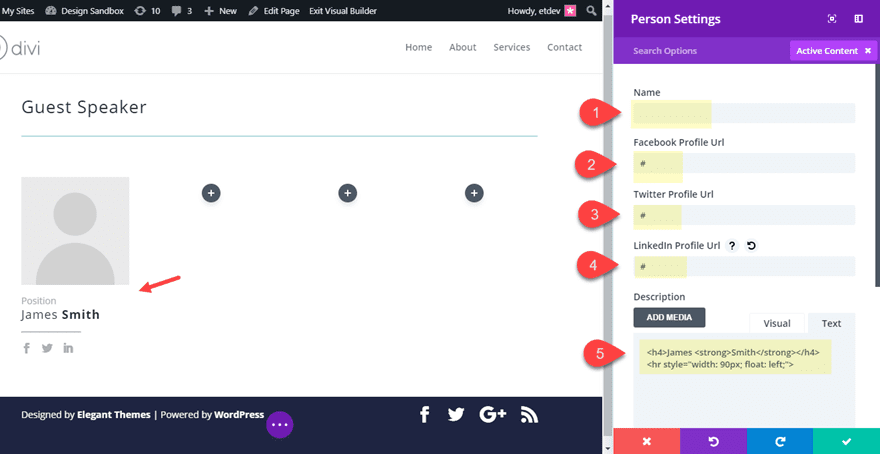
Replace the Individual module content material as follows:
Identify: [blank]
Fb Profile URL: [add “#” for now]
Twitter Profile URL: [add “#” for now]
LinkedIn Profile URL: [add “#” for now]
For the outline, upload the next:
James Smith
Notice: the hr tag generates a divider line that has some inline styling to make is 90px huge and flow to the left. The robust tag this is wrapped across the final identify makes it daring for a novel design part.
Now that you’ve the content material in position, save the individual module settings.
Replica the individual module you simply created and paste it into each and every of the remainder columns so that you’ve the similar particular person module in each and every of the 4 columns. To duplicate and paste you’ll use the fitting click on menu choices or the shortkeys cmd+c cmd+v (mac) or ctrl+c ctrl+v (win).
Open the atmosphere of the individual module in column 4 and replace the content material in order that in simplest comprises the next:
Identify: “This May Be You!”
Description: “Use the button under to use to talk at our tournament.”
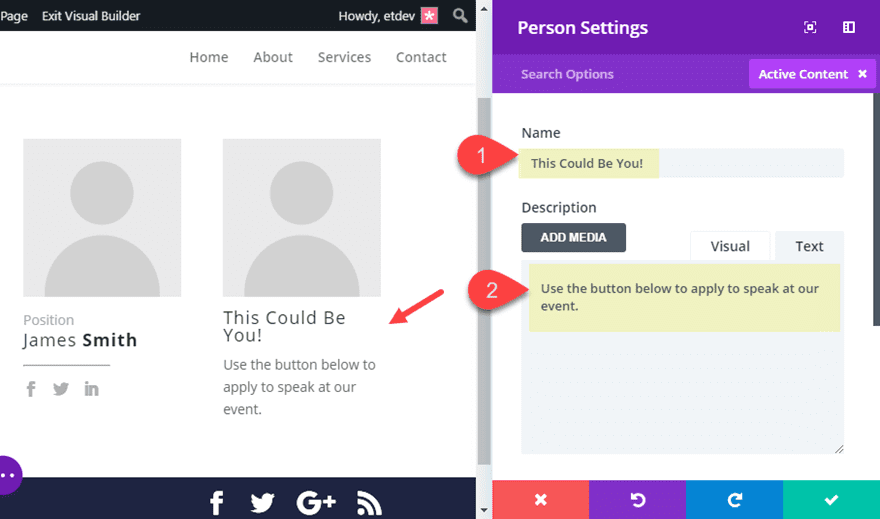
Save your settings.
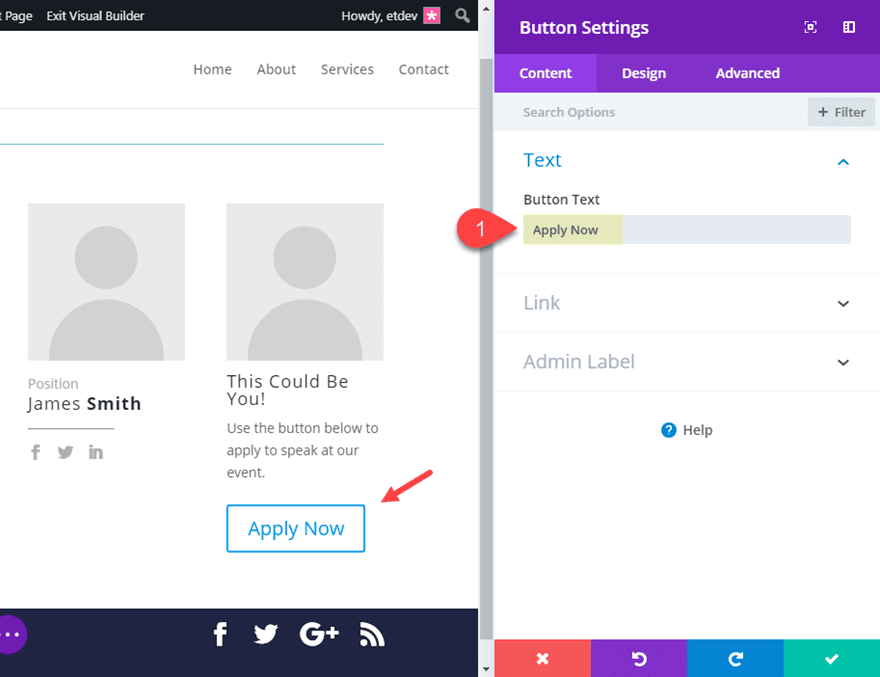
Subsequent, upload a button module at once below the individual module in column 4 and replace the button textual content content material to “Observe Now”. And save your settings.
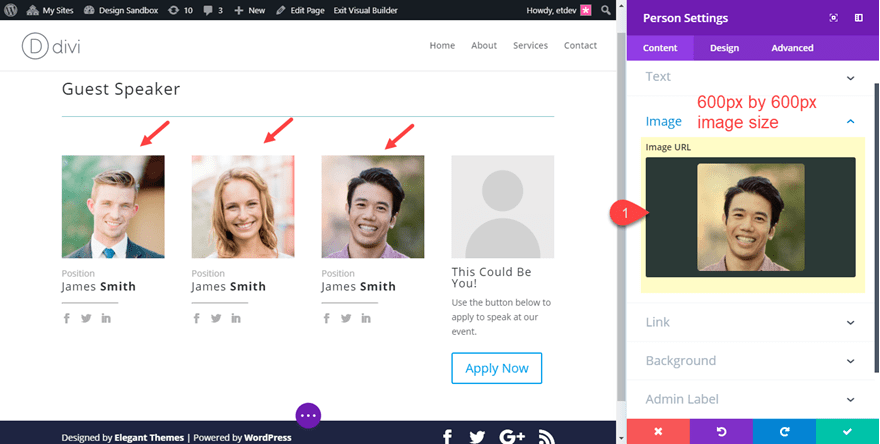
Return to the primary 3 particular person modules in columns 1-3 and upload the photographs for each and every of the visitor speaker portraits. Be sure they’re the similar measurement with equivalent top and width dimensions and that they’re big enough to account for column widths on all browser sizes (ideally 600px by 600px).
That is what your Visitor Talk structure must seem like at this level.
Styling the Visitor Speaker Structure
Styling the Segment
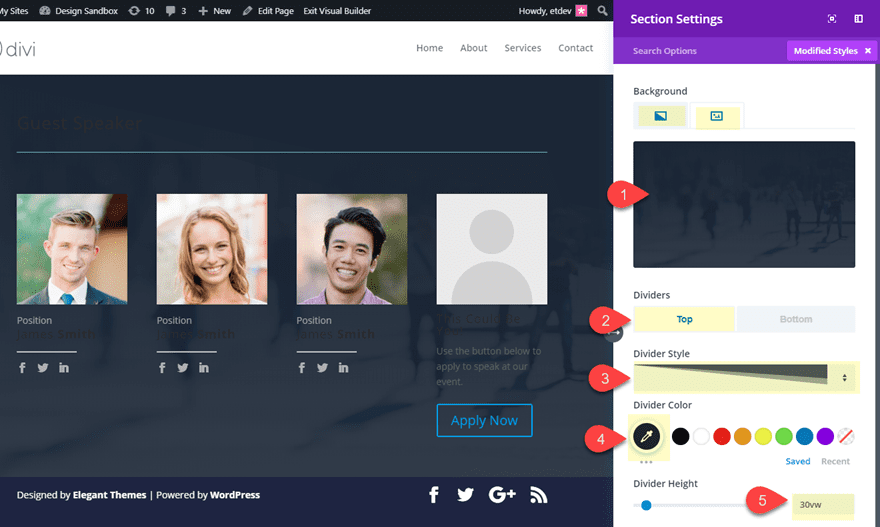
Open the segment settings and replace the next:
Background Symbol: [I’m using one from our Agency Layout]
Background Gradient Left Colour: #293039
Background Gradient Proper Colour: rgba(41,48,57,0.89)
Most sensible Divider Taste: see screenshot
Most sensible Divider Colour: #293039
Most sensible Divider Peak: 30vw
Converting the Row Widths
Since we wish either one of our rows to have the similar width, use multiselect to choose either one of the rows and click on on one of the vital settings icons to open the part settings.
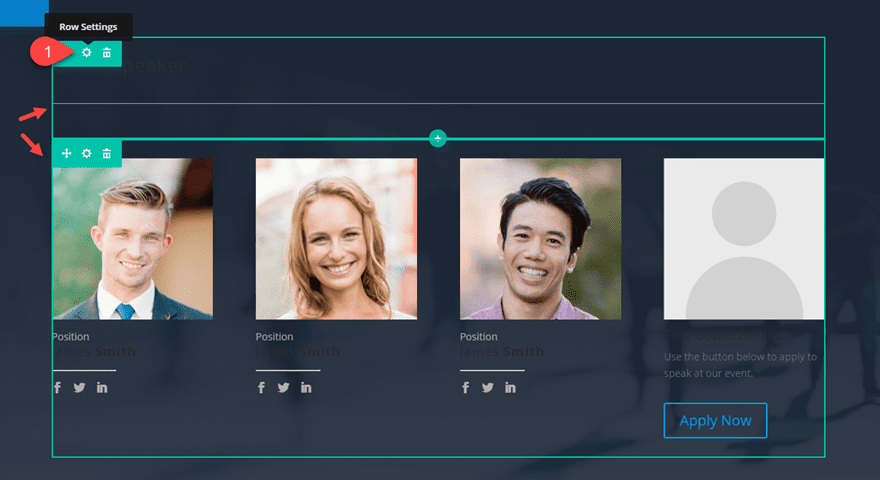
Then replace the next:
Customized Width: 80%
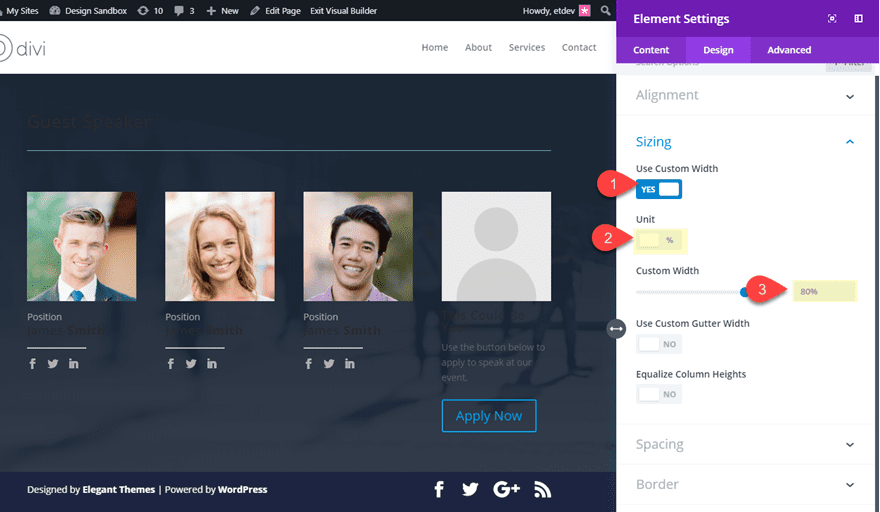
Now either one of your rows could have the similar customized width.
Styling the Headline
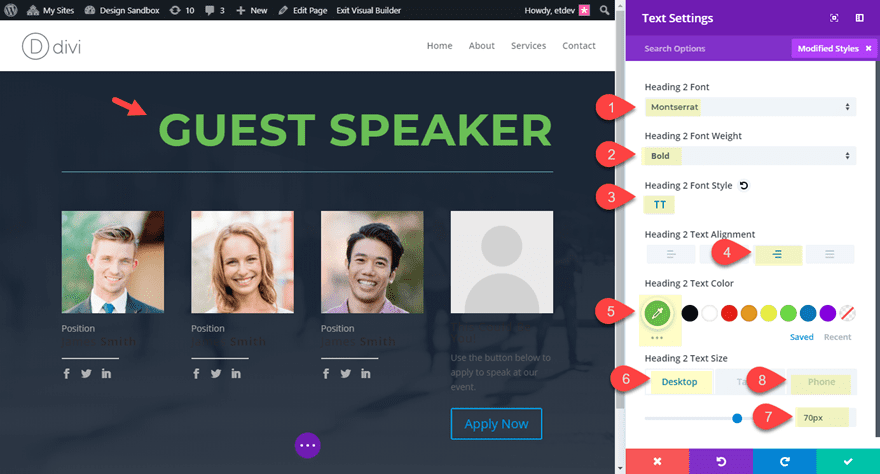
Open the settings of the textual content module containing your segment headline “Visitor Audio system” and replace the next:
Heading 2 Font: Montserrat
Heading 2 Font Weight: Daring
Heading 2 Font Taste: TT
heading 2 Textual content Alignment: proper
Heading 2 Textual content Colour: #74bf46
Heading 2 Textual content Dimension: 70px (desktop), 50px (smartphone)
Save settings.
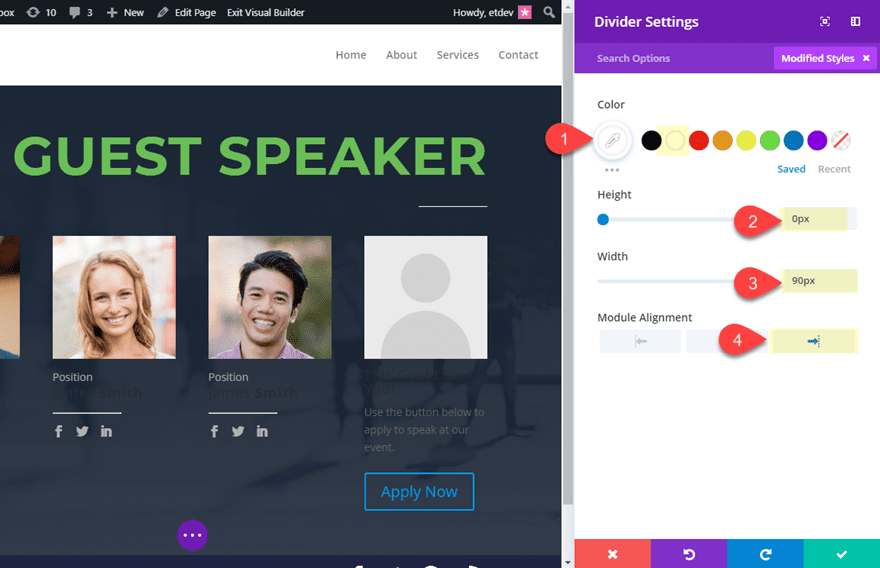
Now open the Divider settings and replace the next:
Colour: #ffffff
Peak: 0px
Width: 90px
Module Alignment: proper
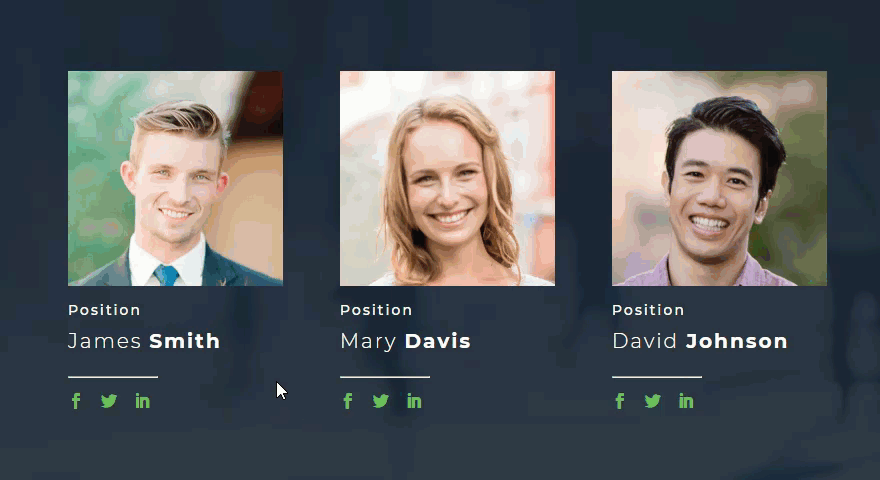
Styling the Individual Modules
Since we wish to give the similar preliminary styling to all of our particular person modules, use multiselect to choose each and every one after which click on at the settings icon of one of the vital modules to deploy the part settings modal.
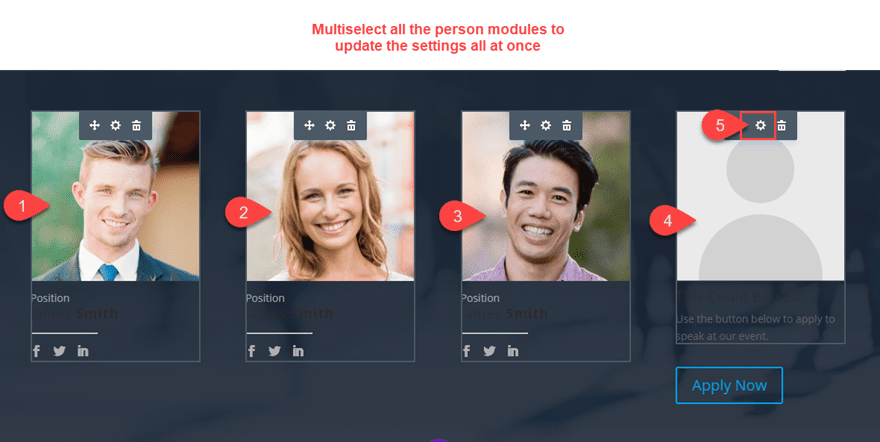
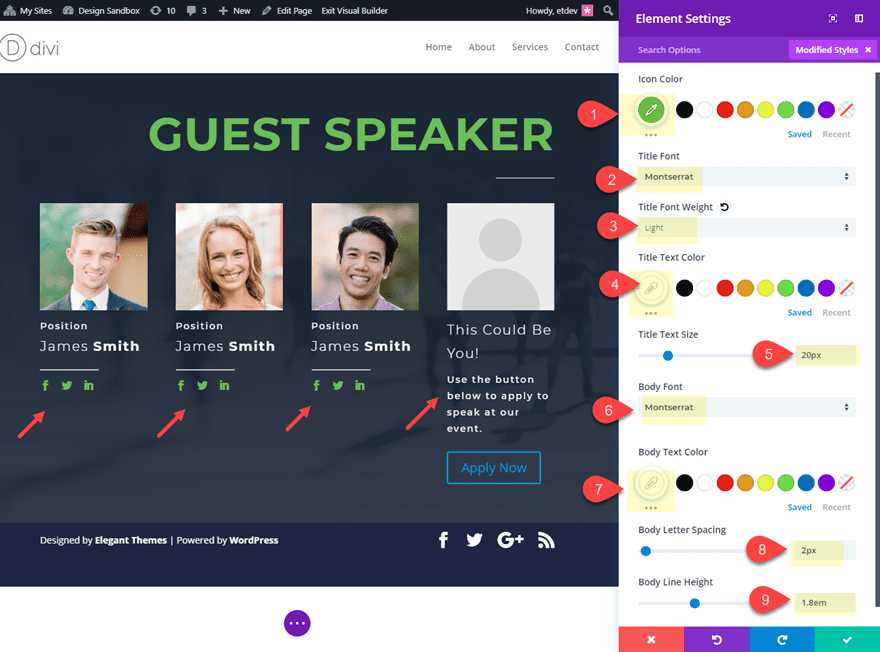
Replace the next part Settings:
Icon Colour: #74bf46
Identify Font: Montserrat
Identify Font Weight: Mild
Identify Textual content Colour: #ffffff
Identify Textual content Dimension: 20px
Frame Font: Montserrat
Frame Textual content Colour: #ffffff
Frame Letter Spacing: 2px
Frame Line Peak: 1.8em
Styling the CTA Individual Module
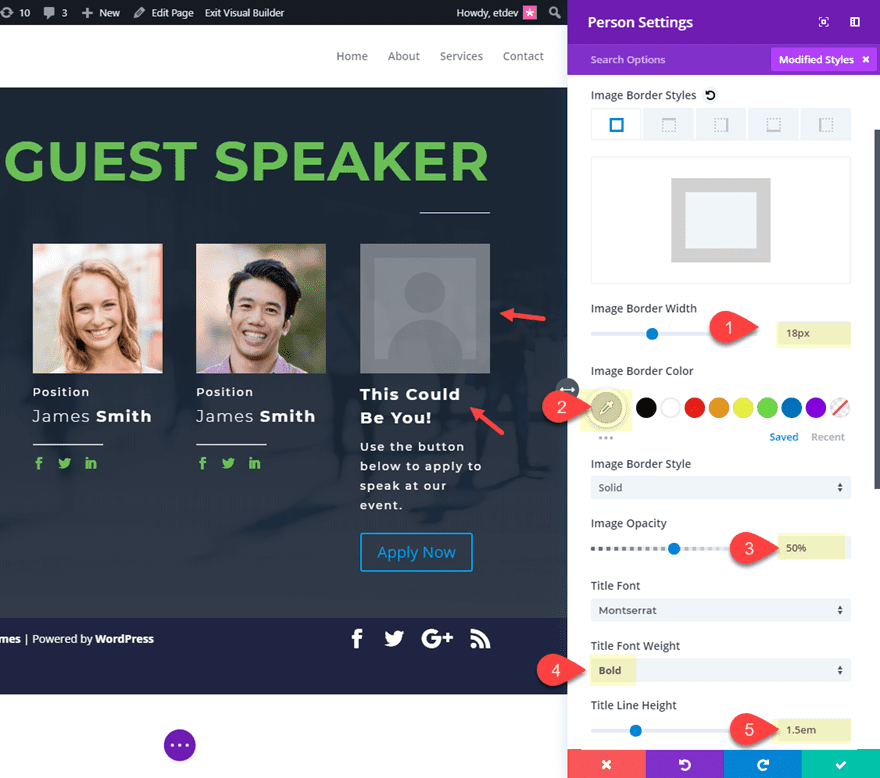
We’re the use of this particular person module as a choice to motion that pulls in new visitor audio system to use for a talking engagement. So, we will depart the default symbol (silhouette) lively as an inventive technique to show an empty spot. However there are a couple of taste changes we want to upload to finish the design. Open the settings of the individual module in column 4 and replace the next.
Symbol Border Width: 18px
Symbol Border Colour: #d2d2d2
Symbol Opacity: 50%
Identify Font Weight: Daring
Identify Line Peak: 1.5em
Now all there may be left to do is taste our button. Open the button module settings and replace the next:
Button Textual content Colour: #293039
Button Background Colour: #74bf46
Button Border Radius: 50px
Button Font: Montserrat
Font Weight: Daring
Now let’s check out the general outcome.
Bonus Tip: Symbol Zoom Hover Impact
Don’t put out of your mind about the entire integrated hover options to be had in Divi. In truth, you’ll view some inspiring tutorials on those hover results on our blog. However for this design, I assumed I might assume out of doors the field somewhat and come up with a couple of snippets of CSS that may reason your particular person symbol to zoom (or scale) rather on hover.
If you’re searching for a delicate hover impact to set your particular person modules aside, here’s the way to do it.
Use multiselect to choose the individual modules in columns 1, 2 and three. The open the part settings. Below the complicated tab input the next CSS below the Primary Part:
overflow: hidden;
This code will stay the increasing symbol from extending out of doors the module container.
Subsequent upload the next CSS below Member Symbol:
transition: all 0.3s;
This provides a easy transition when the picture scales in measurement.
So as to add the css on hover, click on the hover icon and make a choice the hover tab and input the next CSS:
turn into: scale(1.1) translateY(-4.5%);
This scales (or expands) the picture to a rather greater measurement and strikes it up a little.
Now the photographs could have a delicate zoom impact on hover.
Ultimate Ideas
Smartly, I am hoping you loved this instructional or a minimum of left with a couple of helpful design pointers. This visitor speaker segment structure can be utilized in various techniques. Some other best possible software could be for an worker web page to concurrently checklist present workers and inspire others to use for a place. Be at liberty to proportion some concepts with us.
I sit up for listening to from you within the feedback under.
Cheers!
The submit How to Design a Guest Speaker Section with an Effective CTA in Divi gave the impression first on Elegant Themes Blog.
WordPress Web Design