The Ken Burns Impact has been round for some time. The impact used to be made well-known by means of the American Documentarian, Ken Burns, as he used a mix of panning and zooming ways to carry photographs to lifestyles in his motion pictures. In internet design, the Ken Burns Impact has confirmed to be a well-liked design solution to carry background photographs to lifestyles.
The Ken Burns Impact may also be used as a hover impact for photographs. Definitely you could have noticed this used prior to. So that you could carry photographs to lifestyles, internet designers upload hover results to pictures that make them zoom, transfer, and rotate.
With the discharge Become results to the Divi Builder, it hasn’t ever been more straightforward to carry ken burns hover results in your photographs. Those turn out to be choices can help you scale (zoom), transfer (or pan), and rotate a picture alternatively you need. And because you’ll follow those transformations to the hover state of symbol, the design chances are just about unending.
On this educational, I’ll be appearing you the way simple it’s to create totally distinctive ken burns hover results to pictures and rows the use of the Divi Builder.
Let’s get began.
Contents
- 0.1 Sneak Peek
- 0.2 The Elementary Thought Defined
- 0.3 Obtain The Ken Burns Hover Impact Examples for FREE
- 0.4 Obtain For Loose
- 0.5 You have got effectively subscribed. Please test your e mail cope with to verify your subscription and get get entry to to loose weekly Divi structure packs!
- 0.6 Getting Began with a New Web page
- 0.7 Including the Ken Burns Impact to an Symbol in a One Column Row
- 0.8 Including the Ken Burns Hover Impact to a couple of photographs in a 3 Column Row
- 0.9 Including the Ken Burns Hover Impact to a Any Module with a Background Symbol
- 1 We are Engaged!
Sneak Peek
Here’s a sneak peek of the ken burns hover impact that may simply be completed with Divi’s turn out to be choices.


The Elementary Thought Defined
The fundamental idea for growing the Ken Burns hover impact comes to the use of Divi’s new turn out to be choices to scale, place, and rotate the picture when soaring over that symbol. You’ll be able to build up the dimensions turn out to be assets by means of a undeniable proportion to make the picture develop higher on hover. You’ll be able to use the translate turn out to be assets to transport the picture alongside the x and y axis. And you’ll rotate the picture the use of the rotate turn out to be assets by means of environment a selected level price (on this case the level price for rotation at the x axis). Finally, you’ll keep an eye on the transition period (velocity) and velocity curve to keep an eye on the rate a waft of the ken burns hover impact. The 3 turn out to be houses and transition houses paintings in combination to create a ken burns hover impact that carry your footage to lifestyles.
You’ll be able to simply effective song the turn out to be houses and transition houses the use of the integrated settings Divi supplies. Alternatively, the secret to meaking this impact paintings comes to a easy line of css (overflow:hidden) that want to be implemented to the column containing your symbol. Since you’ll be scaling, transferring, and rotating the picture, you need the overflow of the picture to be hidden outdoor of the column containing it.
After getting the elemental thought down and the capability in position, it’s exceptional how simple it’s to put the picture precisely how you need it the use of Divi’s turn out to be choices.
Obtain The Ken Burns Hover Impact Examples for FREE
To put your fingers at the loose Ken Burns Hover Impact Examples, you’ll first want to obtain it the use of the button under. To realize get entry to to the obtain it is important to subscribe to our Divi Day by day e mail checklist by means of the use of the shape under. As a brand new subscriber, you’ll obtain much more Divi goodness and a loose Divi Format pack each and every Monday! If you happen to’re already at the checklist, merely input your e mail cope with under and click on obtain. You are going to no longer be “resubscribed” or obtain further emails.
After getting downloaded the zip document, unzip the folder. Subsequent, import the .json structure the use of the Divi Builder Portability characteristic. Or you’ll merely drag the document into the Divi Builder the use of Divi’s Drag and Drop capability. That’s it!
@media handiest display and ( max-width: 767px ) {.et_bloom .et_bloom_optin_1 .carrot_edge.et_bloom_form_right .et_bloom_form_content:prior to, .et_bloom .et_bloom_optin_1 .carrot_edge.et_bloom_form_left .et_bloom_form_content:prior to { border-top-color: #ffffff !essential; border-left-color: clear !essential; }
}.et_bloom .et_bloom_optin_1 .et_bloom_form_content button { background-color: #f92c8b !essential; } .et_bloom .et_bloom_optin_1 .et_bloom_form_content .et_bloom_fields i { coloration: #f92c8b !essential; } .et_bloom .et_bloom_optin_1 .et_bloom_form_content .et_bloom_custom_field_radio i:prior to { background: #f92c8b !essential; } .et_bloom .et_bloom_optin_1 .et_bloom_border_solid { border-color: #f7f9fb !essential } .et_bloom .et_bloom_optin_1 .et_bloom_form_content button { background-color: #f92c8b !essential; } .et_bloom .et_bloom_optin_1 .et_bloom_form_container h2, .et_bloom .et_bloom_optin_1 .et_bloom_form_container h2 span, .et_bloom .et_bloom_optin_1 .et_bloom_form_container h2 robust { font-family: “Open Sans”, Helvetica, Arial, Lucida, sans-serif; }.et_bloom .et_bloom_optin_1 .et_bloom_form_container p, .et_bloom .et_bloom_optin_1 .et_bloom_form_container p span, .et_bloom .et_bloom_optin_1 .et_bloom_form_container p robust, .et_bloom .et_bloom_optin_1 .et_bloom_form_container shape enter, .et_bloom .et_bloom_optin_1 .et_bloom_form_container shape button span { font-family: “Open Sans”, Helvetica, Arial, Lucida, sans-serif; } p.et_bloom_popup_input { padding-bottom: 0 !essential;}

Obtain For Loose
Sign up for the Divi Newlsetter and we will be able to e mail you a replica of without equal Divi Touchdown Web page Format Pack, plus heaps of different wonderful and loose Divi sources, pointers and methods. Practice alongside and you’ll be a Divi grasp very quickly. If you’re already subscribed merely kind for your e mail cope with under and click on obtain to get entry to the structure pack.
You have got effectively subscribed. Please test your e mail cope with to verify your subscription and get get entry to to loose weekly Divi structure packs!
Getting Began with a New Web page
The very first thing you wish to have to do is create a brand new web page. Then come up with web page a name and deploy the Divi Builder at the entrance finish. Then make a selection the strategy to “Construct from Scratch”.
Including the Ken Burns Impact to an Symbol in a One Column Row
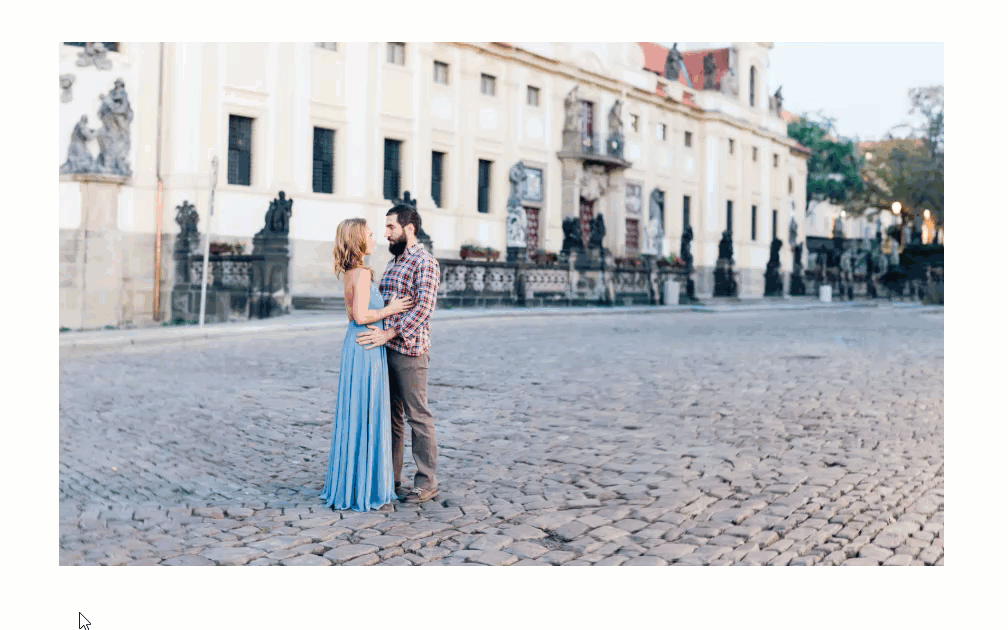
For this primary fundamental instance, I’m going to turn you methods to upload the ken burns hover impact to a unmarried symbol in a one column row. I’ll be the use of the dimensions, translate, and rotate turn out to be choices to perform this impact.
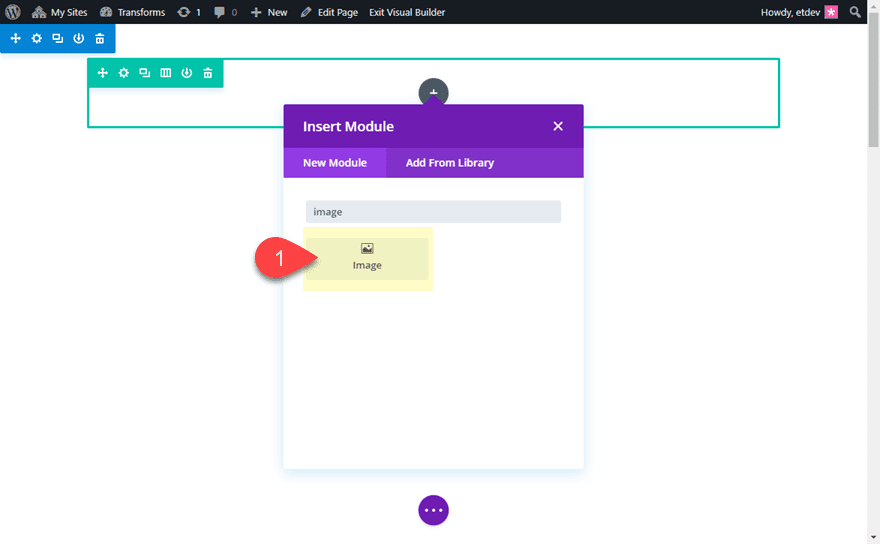
First, create a brand new a brand new phase with a one-column row. Then upload a picture module to the row.
Hiding Overflow of Column
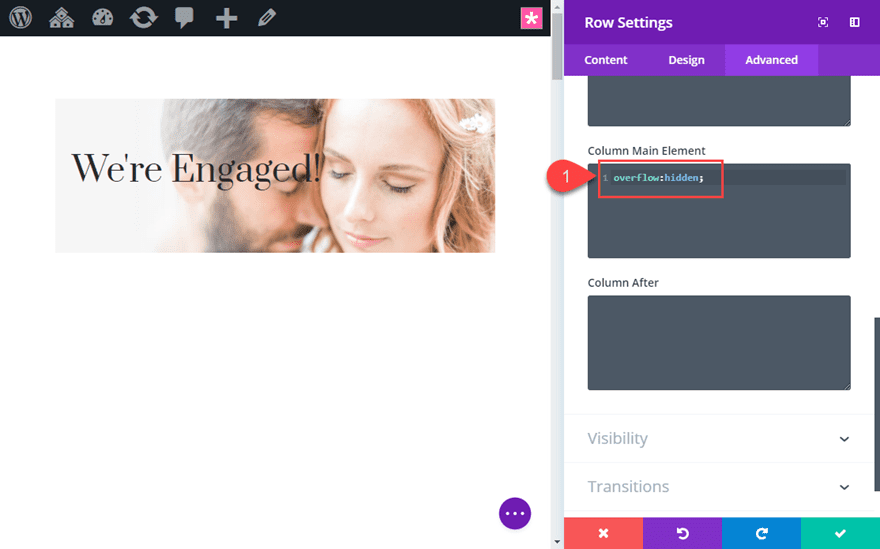
Ahead of we begin updating the Symbol settings, open the row settings and click on the Complex Tab. Then upload the next customized CSS to the Column Primary Part:
overflow: hidden;
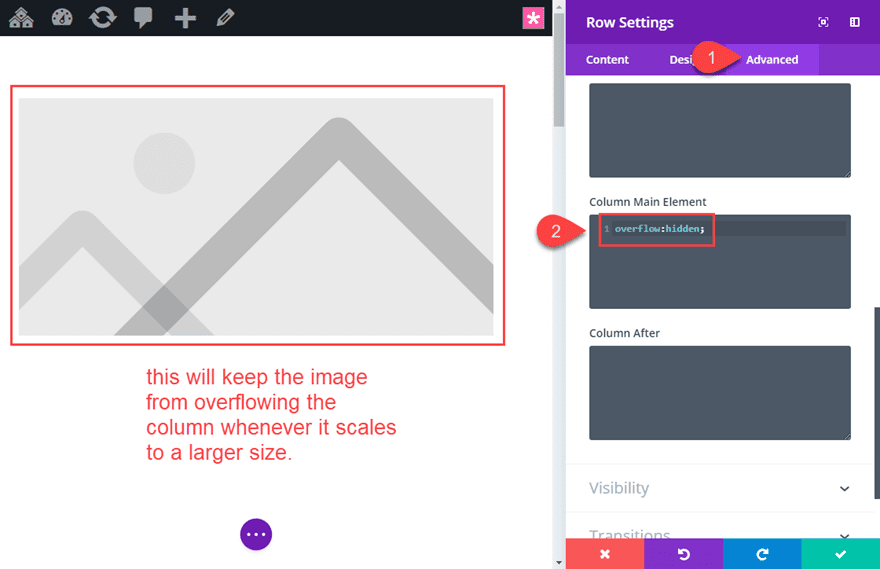
This may occasionally stay the picture from extending (or overflowing) past the column container every time the picture scales to a bigger dimension on hover. If you happen to don’t upload this, the picture will get away of the container and conceal different components of the web page. Technically, you need to upload this css to the row primary part as an alternative of the column, however you would have to eliminate any customized row padding as smartly.
Save the row settings.
Including your Symbol
Now we will be able to upload out symbol to the picture module. Open the picture module settings and upload a picture.
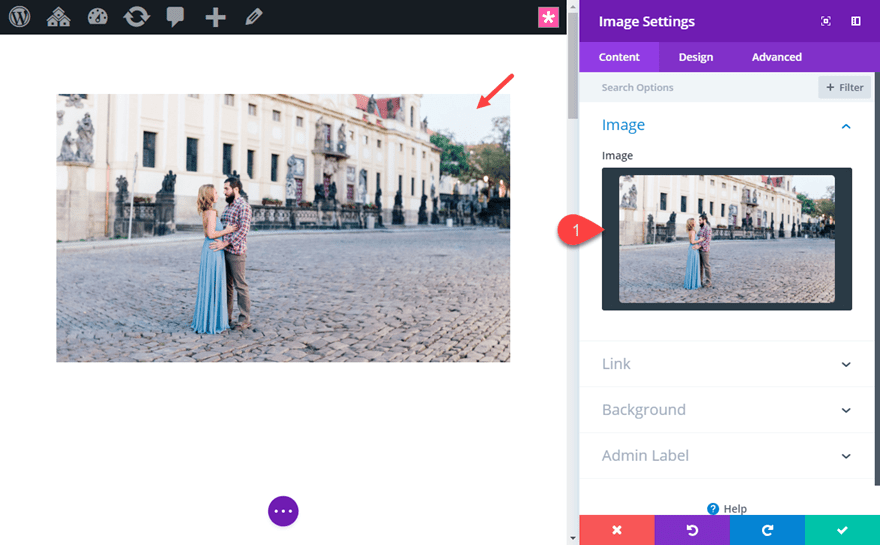
Be sure the picture is significantly higher than the column. That is essential to stay the picture from taking a look blurry whilst you scale the picture to a bigger dimension on hover. If you’re the use of the default settings of a one-column row, the max width of the column will likely be 1080px. So, I’m the use of a picture this is about 1500px in width and 900px in top.
Essential: Most of the time of thumb, the bigger the picture, the extra space you’ll have to scale, transfer and rotate the picture with out dropping symbol high quality.
Including Become Hover Results
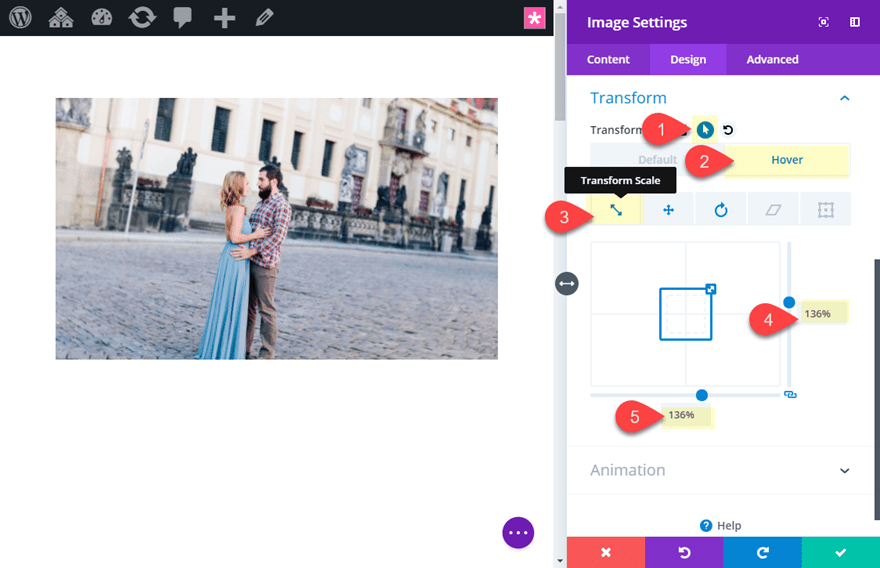
Now that we have got our symbol in position, it’s time to make use of the ones turn out to be choices to create the Ken Burns hover impact. Jump over to the design tab toggle open the Become choices. Turn on the hover results and make a selection the hover tab. Now any turn out to be impact customizations will follow handiest to the hover state of the picture module. Then below the Become Scale tab, replace the next:
Become Scale x-axis (hover): 136%
Become Scale y-axis (hover): 136%
Then click on the Become Translate tab and replace the next:
Become Translate x-axis (hover): 3%
Become Translate y-axis (hover): 9%
This strikes the picture to the left by means of 3% and downward by means of 9%. For this explicit symbol, I used to be going for and impact that will zoom in and produce the couple to the middle of the column viewport.
By way of default the translate period values will likely be in pixels (no longer proportion). You’ll be able to use pixels for transferring the picture round however I to find that the use of percentages makes the site extra responsive.
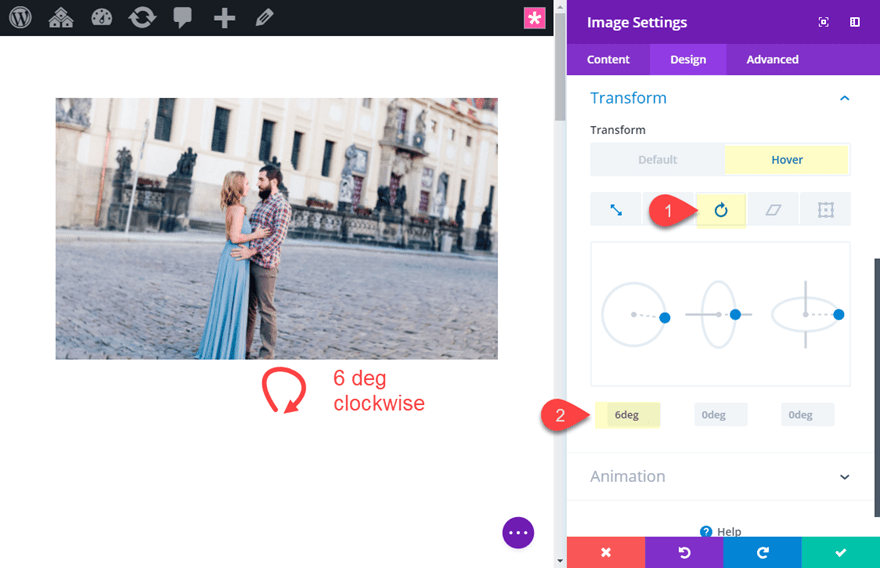
Subsequent click on the Become Rotate tab and replace the next:
Become Rotate x-axis (hover): 6deg
Replace Transition Choices
In any case, we want to replace the transition period (how lengthy it takes the turn out to be hover impact to finish) and the rate curve (the timing serve as that permits the transition to switch velocity over its period). For this case, I need the transition to take longer for a extra dramatic (and vintage) Ken Burns impact on hover. To do that, cross to the complicated tab and replace the transition choices as follows:
Transition Period: 2000ms (or 2 seconds)
Transition Pace Curve: Linear (this makes certain the rate of the transition doesn’t exchange in period)
Ultimate Consequence
Now Let’s take a look at the general end result. Don’t be misled by means of the choppiness of the gif under. The transition is actually easy on a are living web page.
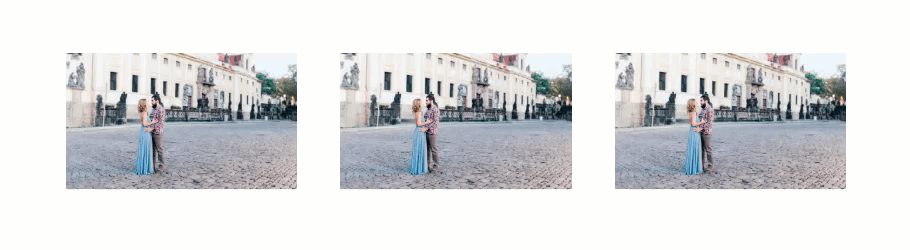
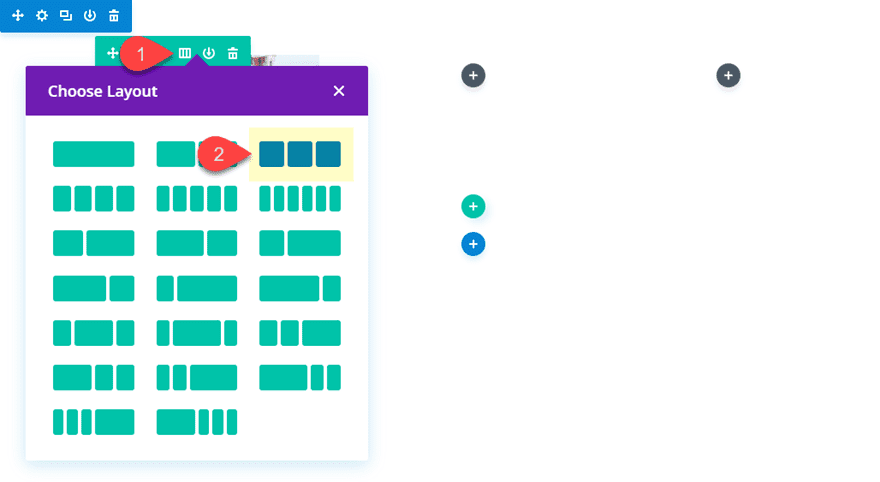
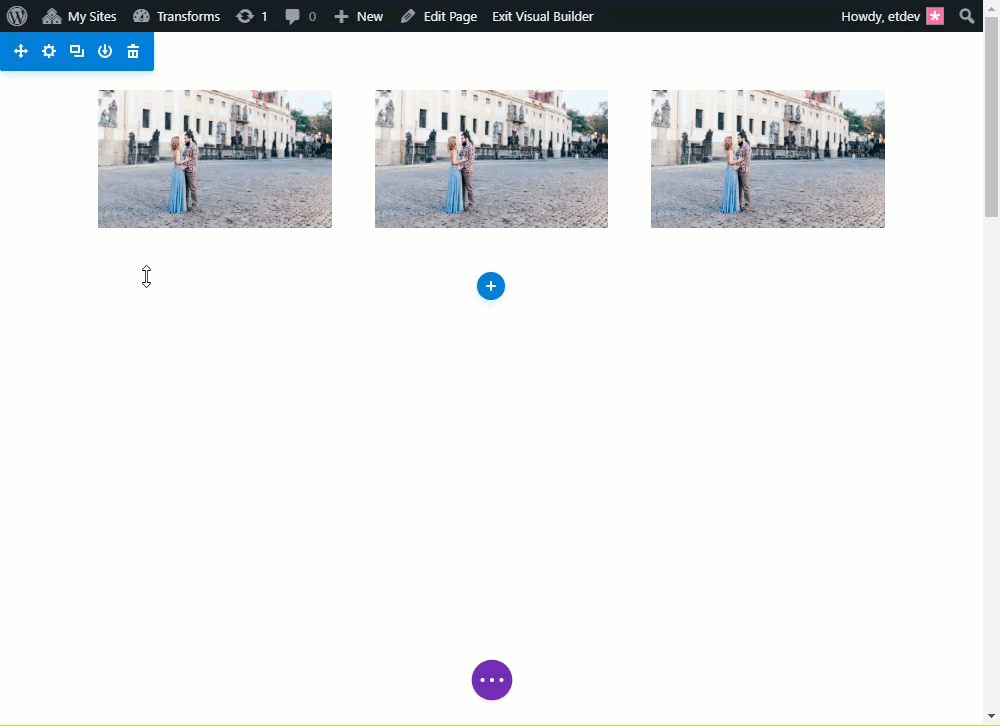
Including the Ken Burns Hover Impact to a couple of photographs in a 3 Column Row
If you’re short of so as to add the ken burns hover impact to pictures in a couple of columns, the similar procedure applies. The primary factor you wish to have to do is be certain and upload the “overflow:hidden” css snippet to every of the columns that comprise your symbol.
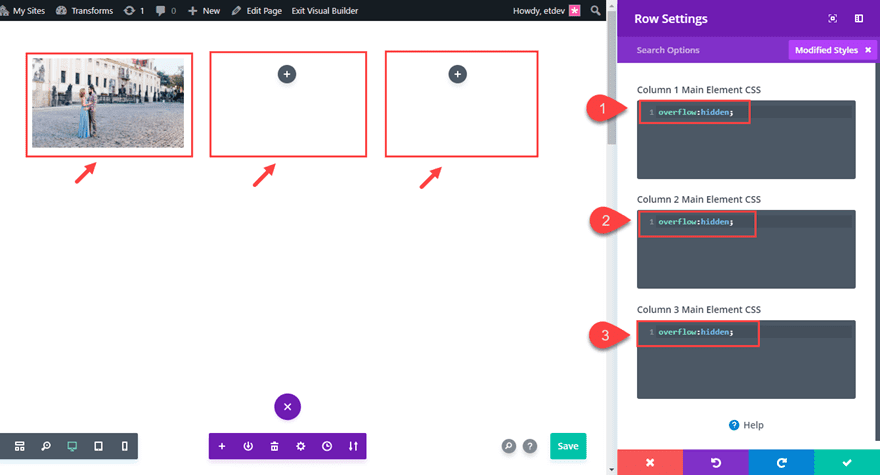
The usage of our earlier instance above, exchange the column construction of the row to a three-column structure.
Subsequent, replace the row settings with the customized CSS snippets that may cover the overflow of every column.
Column 1 Primary Part CSS:
overflow:hidden;
Column 2 Primary Part CSS:
overflow:hidden;
Column 3 Primary Part CSS:
overflow:hidden;
Subsequent reproduction the picture module and paste it into column 2 and column 3.
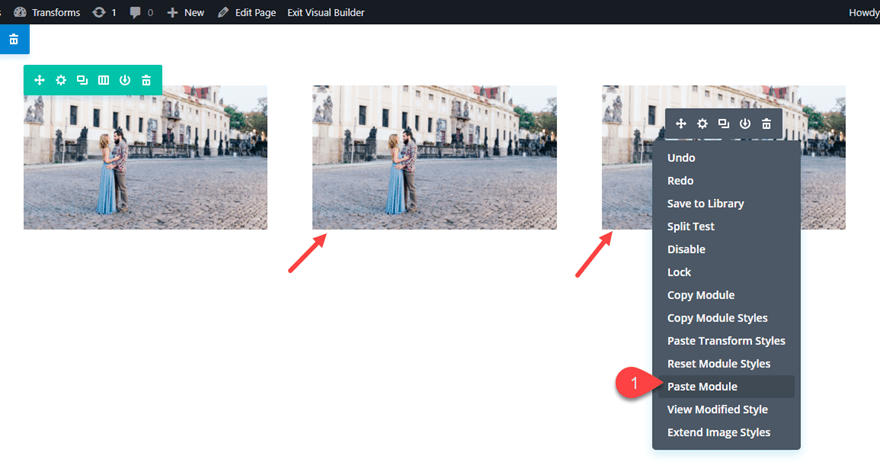
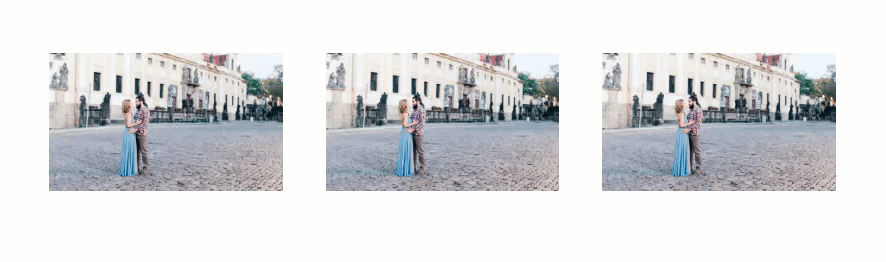
That’s it. This is the general end result.
Since this design is extra standard of a gallery grid structure, you’ll almost definitely need to accelerate the transition period somewhat to sharpen up the hover animation. You’ll be able to do that simply the use of Divi’s multiselect characteristic. Grasp ctrl or cmd and make a selection all the symbol modules. Then click on at the settings tools icon on probably the most photographs to open the Part Settings modal.
Now any updates you’re making within the part settings will likely be implemented to all photographs immediately. Replace the transition choices within the part settings as follows:
Transition Period: 500ms
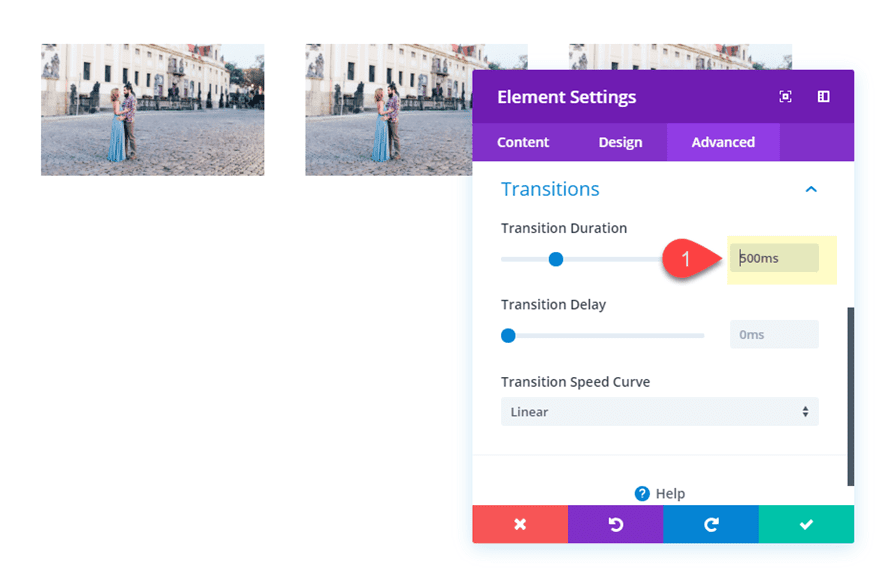
This is the brand new transition period in impact.
Including the Ken Burns Hover Impact to a Any Module with a Background Symbol
The Ken Burns hover impact may also be used for modules rather than the Symbol Module. This works smartly if you wish to turn out to be textual content or icons at the side of the background symbol of a module.
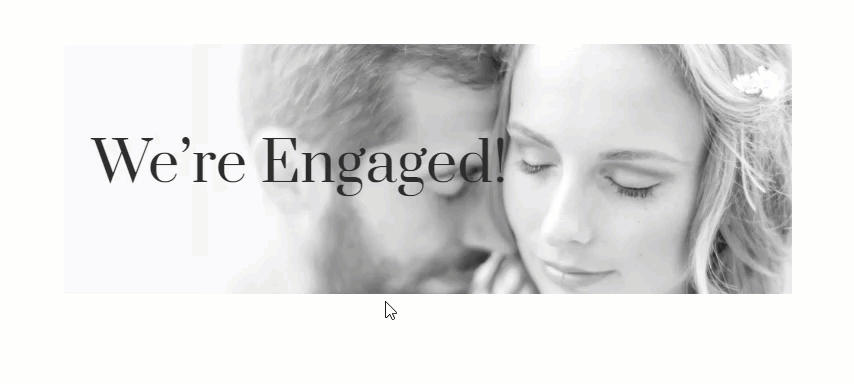
This is methods to upload the Ken Burns impact to a Textual content Module.
First create a brand new common phase with a one-column row. Then upload a textual content module to the row.
Replace the textual content module with the next content material:
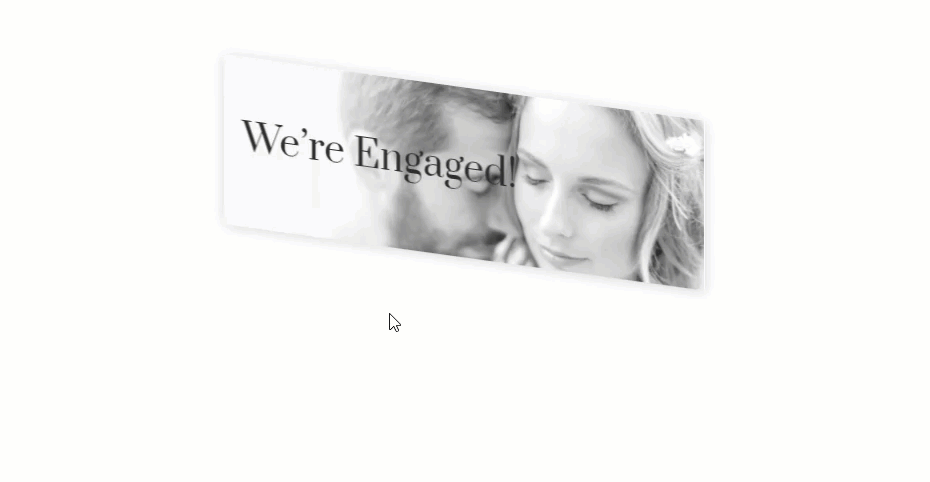
We are Engaged!
Then upload a background symbol to the module. Take note so as to add a picture big enough to depart room for scaling and transferring the picture on hover.
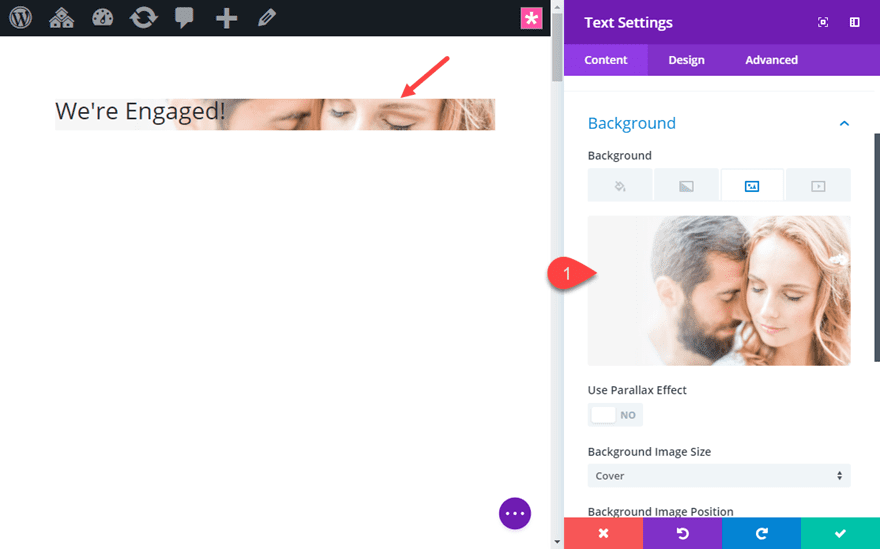
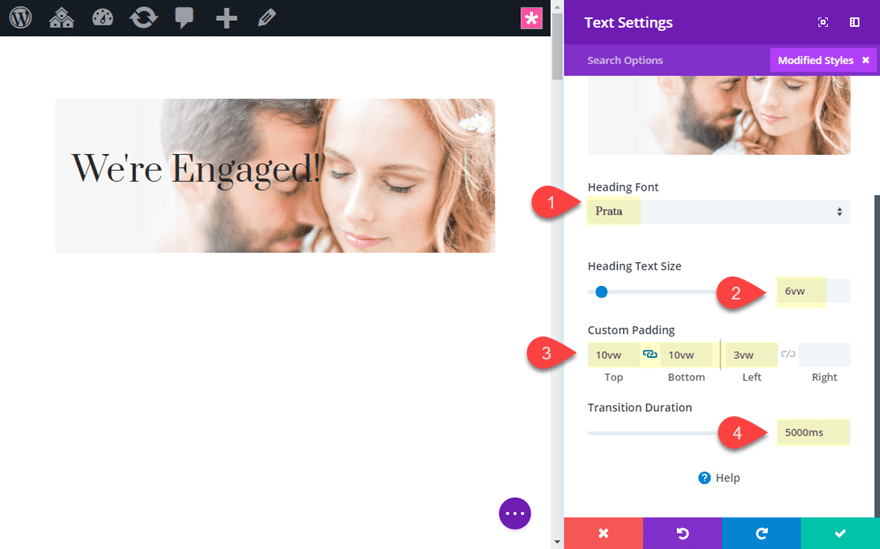
After which replace the heading design choices as follows:
Heading Font: Prata
Heading Textual content Measurement: 6vw
Customized Padding: 10vw peak, 10vw backside, 3vw left
Transition Period: 5000ms
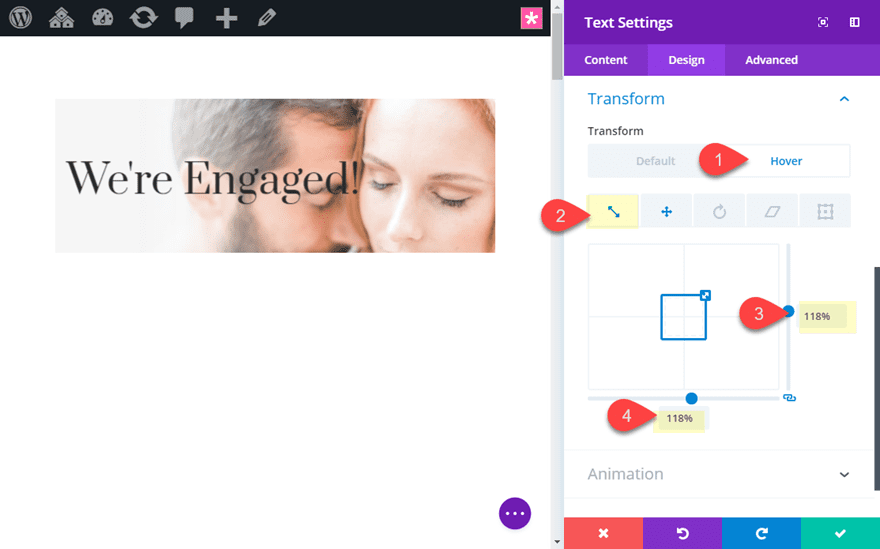
Now upload the next Become Settings to the textual content module.
Become Scale x-axis (hover): 118%
Become Scale y-axis (hover): 118%
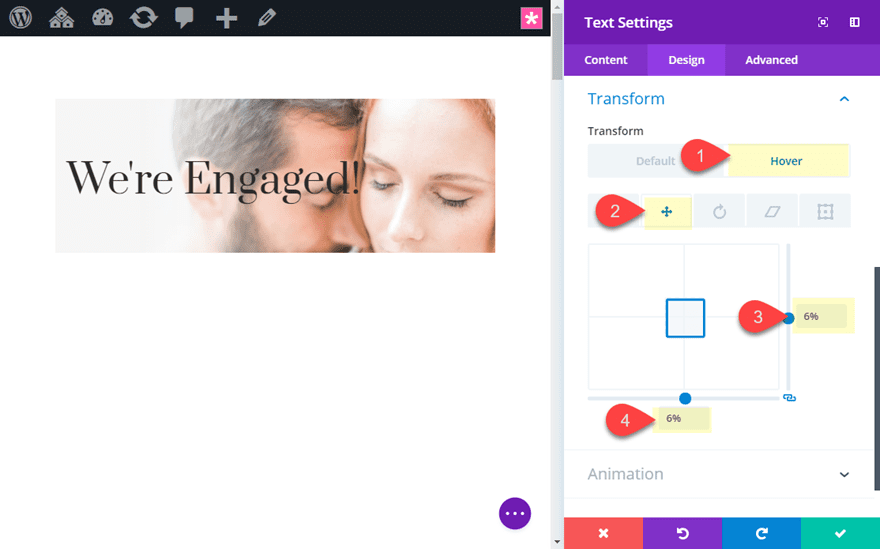
Become Translate x-axis (hover): 6%
Become Translate y-axis (hover): 6%
Now, replace the Row Settings with the next customized CSS for the Column.
Column Primary Part CSS:
overflow:hidden;
Now take a look at the end result.
Realize how the textual content and the background symbol will turn out to be in combination on hover.
Combining the Ken Burns Hover Impact with Further Hover Results
You’ll be able to additionally mix the Ken Burns Hover Impact this is implemented to a module with further results for much more creativity.
Combining Ken Burns Hover Impact with Filter out Results
When you forgot about them, clear out results are an effective way so as to add inventive styling in your modules, particularly on hover. And you’ll mix those clear out results with turn out to be impact for some beautiful distinctive hover transitions.
To turn you, let’s use the instance above that added the ken burns impact to a textual content module. For the reason that textual content module already has the turn out to be hover impact in position, let’s upload an extra clear out impact to switch the picture from black and white to paint.
Open the textual content module settings and replace the next clear out choice:
Saturation (default): 0%
Saturation (hover): 100%
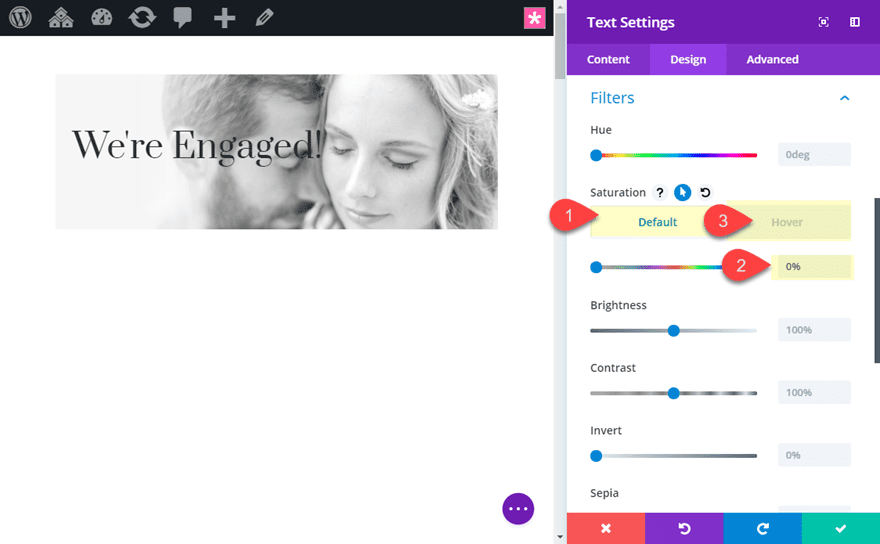
This transition will set the textual content module to 0% saturation by means of default which is able to strip out the colour making it black and white. Environment in again to 100% on hover will upload the unique coloration of the picture again.
This is the general impact of the clear out impact blended with the ken burns hover impact.
Combining Ken Burns Hover Impact with Row Become Results
For this case, I’m going to turn you methods to mix the ken burns hover impact with an extra turn out to be impact added to the row. The theory is to make use of turn out to be results to scale and rotate the row at its default state after which repair the unique design on hover.
NOTE: This method will actually handiest paintings smartly for a one-column row with a unmarried module. It’s because the customer will want to hover over the module and the row concurrently. Due to this fact the module must absorb the overall top and width of the row. Further modules or spacing will ruin the hover state and purpose issues.
To do that, we’re going to stick with our present textual content module design which already combines the ken burns hover impact with an extra clear out impact. So that is if truth be told a triple hover impact!
Open the settings of the row that accommodates the textual content module. Then replace the next:
Customized Padding: 0px peak, 0px backside, 0px left, 0px proper
That is to ensure there’s no further spacing between the textual content module and the row.

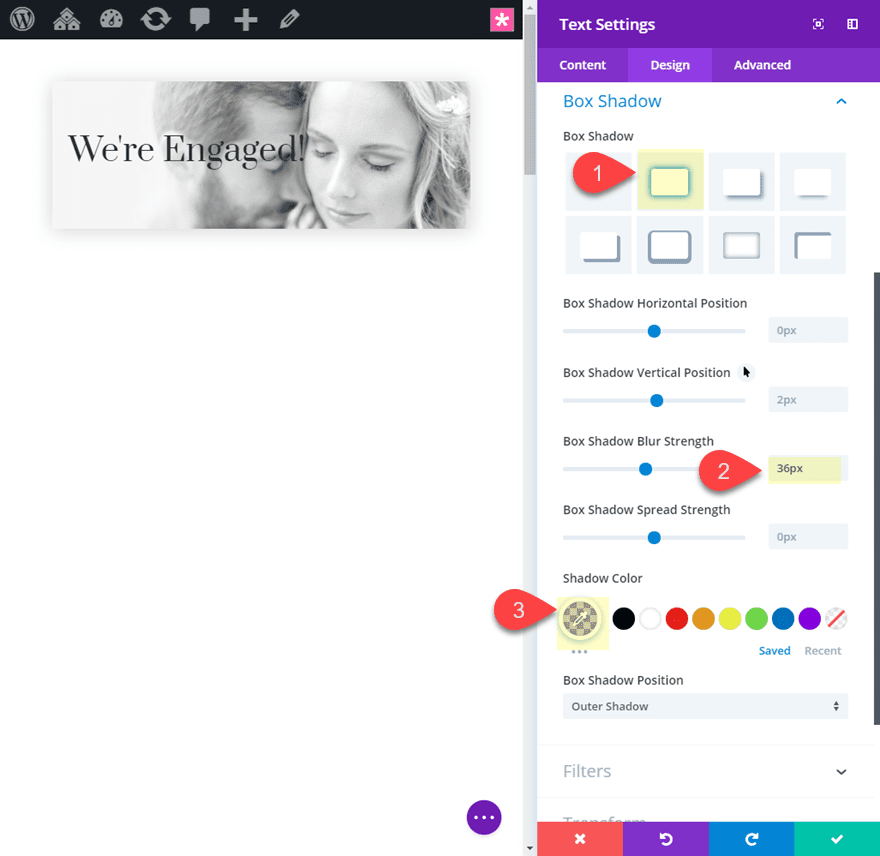
Subsequent we’re going to upload a field shadow to the row as follows:
Field Shadow: see screenshot
Field Shadow Blur Energy: 36px
Shadow Colour: rgba(0,0,0,0.17)
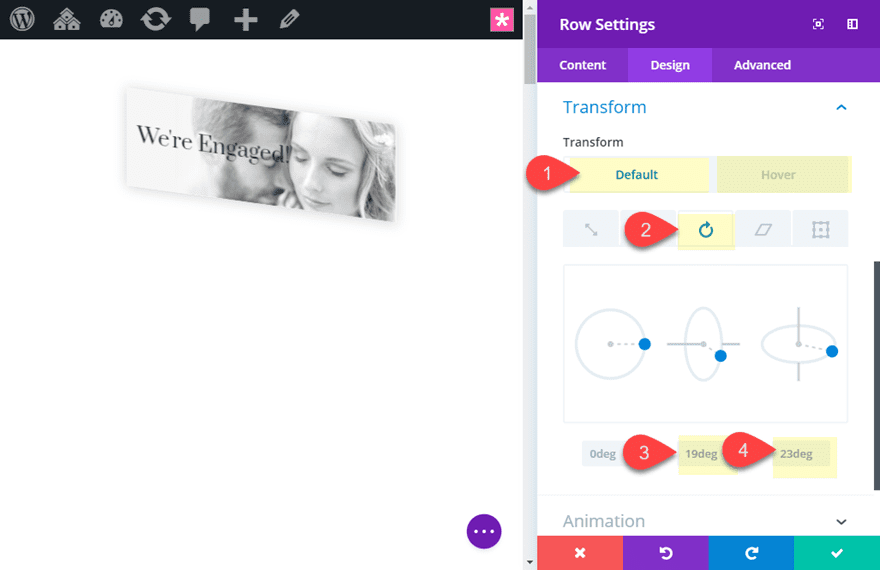
Now upload the next Become results:
Become Scale x-axis (default): 70%
Become Scale x-axis (hover): 100%
Become Scale y-axis (default): 70%
Become Scale y-axis (hover): 100%

Become Rotate y-axis (default): 19deg
Become Rotate y-axis (hover): 0deg
Become Rotate z-axis (default): 23deg
Become Rotate z-axis (hover): 0deg
Now let’s take a look at the general end result.
Including the Ken Burns Hover Impact to an Whole Row of Content material
Simply if you had been questioning, the Ken Burns hover impact may also be used to carry a whole row of content material to lifestyles on hover. This gained’t be very sensible for rows with numerous content material as a result of it’s going to be strategy to complicated or distracting for guests. However for such things as headers, it is a helpful design methodology. The trick is so as to add the customized CSS snippet “overflow:hidden” to the phase. Then you’ll upload the turn out to be results to the row.
Ultimate Ideas
Even supposing the Ken Burns Impact has been round for some time, you could nonetheless to find it helpful for growing some beautiful distinctive hover results in your photographs and modules in Divi. The trick is understanding methods to use the Divi Become choices that are strangely intuitive. This examples given on this educational had been intended to introduce the idea that and confidently supply just a little inspiration in your personal utilization. Whilst you take into accounts all of the techniques you mix turn out to be choices with all of the different styling choices to be had in Divi, heaps of concepts begin to pop up.
I sit up for listening to from you within the feedback.
Cheers!
The submit How to Add Ken Burns Hover Effects to Images, Modules and Rows in Divi seemed first on Elegant Themes Blog.
WordPress Web Design