If shoppers have bother paying at checkout, then that’s an enormous drawback on your on-line retailer. It could possibly harm your recognition and purpose customers to desert their carts, resulting in misplaced gross sales.
That’s why checking out Stripe bills ahead of you release your retailer is so vital. This straightforward step makes certain you’re in a position to procedure bills and develop your enterprise.
We at all times remember to do that after putting in place a web based retailer with WordPress. And on this article, we will be able to take you thru all of the procedure, step-by-step.
Stay studying to discover ways to simply check Stripe bills in your WordPress web site.

Contents
- 1 Your Maximum Dear Oversight: Why Stripe Cost Trying out Can’t Wait
- 2 Manner 1: Take a look at Stripe Bills in WooCommerce
- 3 Manner 2: Take a look at Stripe Bills for Virtual Merchandise
- 4 Manner 3: Take a look at Stripe Bills on WordPress Cost Paperwork
- 5 Bonus: Pointers & Sources for The usage of Stripe in WordPress
- 6 Steadily Requested Questions About Trying out Stripe Bills
Your Maximum Dear Oversight: Why Stripe Cost Trying out Can’t Wait
While you check Stripe bills in your WordPress web site, you make certain that the entirety works because it will have to ahead of launching your on-line retailer. Should you skip this step, it would finally end up costing you.
Believe a buyer tries to take a look at, and the cost fails on account of a setup factor. This isn’t most effective irritating for the consumer, however it is going to most likely additionally purpose misplaced gross sales.
Take into accounts it this manner. Should you ran a bodily retailer and your money sign up or POS machine stopped running, the client would don’t have any different selection however to go away and check out every other retailer.
The client wouldn’t be more than happy in regards to the inconvenience, and the possibilities of profitable them again could be very low. This implies neglecting cost checking out may just severely harm your on-line retailer.
The excellent news is that through checking out your cost machine ahead of going reside, you’ll catch and attach any issues early. That method, you’ll keep away from any misplaced gross sales and harm in your recognition.
You’ll be able to simulate real-world eventualities, like a success bills, declined transactions, or refunds, to look precisely how your cost gateway responds.
While you’re ready to deal with any scenario, you’ll have peace of thoughts that your Stripe account is safe and correctly built-in.
Having mentioned that, let’s check out tips on how to check Stripe bills in WordPress. On this instructional, we will be able to be discussing more than one strategies. You’ll be able to use the hyperlinks underneath to leap to the process of your selection.
Necessary Notes: Sooner than you observe this instructional, stay the next in thoughts:
📝 Should you don’t have already got a Stripe account, then we advise developing one first.
🔔 Stripe is a cost processing answer, and the plugins mentioned in every manner are genuine eCommerce answers (now not only for checking out).
🧪 Each and every manner gives a ‘check mode’, however it does now not cover your cost possibility from guests. So, you’ll need to be sure you run those exams ahead of all of your web site is going reside. Or, in case your web site is already public, you’ll check Stripe on a staging web site first.
Manner 1: Take a look at Stripe Bills in WooCommerce
Stripe is without doubt one of the maximum widespread cost gateways for accepting bank card bills in on-line retail outlets constructed with WooCommerce. Should you’re operating a WooCommerce retailer, this system is for you.
Knowledgeable Tip: Should you haven’t arrange your retailer but, see our whole WooCommerce instructional.
When your WooCommerce retailer is about up and able, you’ll want to set up and turn on the loose Stripe Cost Gateway for WooCommerce plugin. For main points, see our educational on tips on how to set up a WordPress plugin.
This plugin comes from the staff at the back of FunnelKit, which is a formidable suite of equipment designed that will help you create high-converting gross sales funnels and automate your advertising and marketing.
To be informed extra, see our whole FunnelKit overview.
After you turn on the plugin, merely click on the ‘Get started Onboarding Wizard’ button at the Plugins web page.

This may increasingly release the FunnelKit setup wizard in your display screen.
Now, move forward and click on the ‘Hook up with Stripe’ button to combine your present Stripe account with WooCommerce.

Subsequent, input the e-mail cope with and password related along with your Stripe account.
Then, click on at the ‘Log in’ button to proceed.

After that, when you have created more than one Stripe accounts with the similar e mail cope with, then select the one who you need to connect to the plugin.
While you do this, simply click on the ‘Attach’ button.

At the following display screen, you’re going to see a listing of cost strategies that you’ll turn on in your retailer the use of Stripe. Those will come with Card, SEPA Direct Debit, iDEAL, and extra.
Merely make your possible choices and click on the ‘Save and Proceed’ button.

As soon as that’s finished, you’ll want to arrange webhooks on your retailer. For detailed directions, see our educational on tips on how to settle for Stripe bills in WordPress.
After that, the plugin will ask you whether or not you need to run Stripe on ‘Take a look at’ mode or ‘Are living’ mode.
From right here, simply select the ‘Take a look at’ possibility and click on the ‘Save and Overview Settings’ button.

You’re going to now be redirected to the ‘Stripe Settings’ web page in WooCommerce.
Right here, you’ll need to examine the ‘Allow Stripe Gateway’ possibility and upload a identify and outline for the cost machine.

After that, scroll down and kind the credit cards that you just plan to simply accept to your retailer.
In any case, you’ll click on the ‘Save adjustments’ button to retailer your settings.

Now, discuss with your WooCommerce retailer and open the checkout web page. Right here, you’re going to understand that Stripe has been added as a cost possibility.
You’re going to additionally see a message letting you already know that check mode is recently enabled in your web site.
To check Stripe bills in your WooCommerce retailer, you’ll use the demo card main points discussed within the message, in conjunction with any long term expiration date and CVV.

Once you have finished some dummy purchases, you’ll simply examine if Stripe has gathered the bills through heading over in your Stripe dashboard and clicking at the ‘Bills’ tab.
Right here, you’ll to find the entire cost main points processed thru check mode.

Now, if all of your check bills had been processed with out factor, head again to the ‘Stripe Settings’ web page to your WordPress dashboard.
Right here, select the ‘Are living’ possibility from the ‘Mode’ dropdown menu to begin accepting genuine Stripe bills in WordPress.

Manner 2: Take a look at Stripe Bills for Virtual Merchandise
Should you promote virtual merchandise on-line the use of WordPress and need to settle for Stripe bills, then we advise the use of the Simple Virtual Downloads (EDD) plugin.
You’ll be able to use it to promote virtual merchandise like eBooks, plugins, PDFs, and extra. Plus, it comes with integrated Stripe integration, making it easy to check Stripe bills ahead of launching your retailer’s cost machine.
We use EDD ourselves to promote our plugins and instrument, and we’ve been truly proud of it. It’s beginner-friendly and springs with a large number of to hand options. To be informed extra, see our whole Simple Virtual Downloads overview.
First, you want to put in and turn on the Simple Virtual Downloads plugin. For main points, see our educational on tips on how to set up a WordPress plugin.
☝ Notice: Simple Virtual Downloads has a loose plan that you’ll use. Alternatively, upgrading to the professional model offers you get admission to to options like complicated reporting, obtain restrictions, routine bills, and extra.
While you’ve activated the plugin, head over to the Downloads » Settings » Bills web page from the WordPress dashboard and examine the ‘Take a look at Mode’ field.
After that, select Stripe as your cost possibility from the ‘Lively Gateways’ segment.

Then, transfer to the ‘Stripe’ tab from the highest and click on the ‘Hook up with Stripe’ button.
This may increasingly open a setup wizard the place you’ll want to attach your present Stripe account with EDD. Upon getting effectively finished that, simply click on the ‘Save Adjustments’ button to retailer your settings.

Now, discuss with the ‘Downloads’ web page and click on the ‘Upload New’ button.
As soon as the block editor opens, you’ll upload a virtual product in your retailer.
For step by step directions, see our newbie’s information on promoting virtual downloads on WordPress.
In any case, click on the ‘Put up’ button to make your product reside.

Now, you want to discuss with your on-line retailer and head over to the checkout web page.
Stripe will already be arrange as a cost gateway in check mode. You’ll be able to simply upload the demo card main points and click on the ‘Acquire’ button to check the cost procedure:
- Card quantity: 4242 4242 4242 4242
- Expiration date: Any long term date
- CVC: Any three-digit quantity
Understand that the main points discussed above received’t be displayed at the EDD checkout web page. We discovered them in Stripe’s legitimate documentation.
The processor means that you can use those main points to check cost flows in a safe surroundings with out being concerned about making genuine transactions.

In any case, you’re going to be taken to the acquisition affirmation web page if the transaction is a success.
Right here, you’ll see information about your acquire, such because the ‘Order Standing’ and the ‘Cost Manner.’

Alternatively, you’ll additionally examine the check bills immediately out of your Stripe account.
To try this, simply discuss with the ‘Bills’ web page to your Stripe dashboard.
Now that you’ve effectively examined your bills, head again to the Downloads » Settings » Bills web page.
Cross forward and uncheck the ‘Take a look at Mode’ field to make your Stripe cost machine reside. In any case, remember to click on the ‘Save Adjustments’ button to retailer your settings.

Manner 3: Take a look at Stripe Bills on WordPress Cost Paperwork
Want to check Stripe bills in your WordPress cost shape? This will also be to hand if you happen to’re promoting subscriptions, products and services, or simply a few merchandise to your on-line retailer.
Should you’re now not the use of it already, then we advise WP Easy Pay. It has an easy-to-use builder, sturdy unsolicited mail coverage, and works with more than one cost choices. You’ll be able to additionally use it to promote merchandise and simply settle for Stripe bills.
We did a deep dive into this plugin’s options for our complete WP Easy Pay overview. And we discovered that it’s nice for promoting unmarried merchandise, products and services, memberships, or subscriptions.
The added bonus is that it allows you to check Stripe bills ahead of you move reside.
First, you will have to set up and turn on the WP Easy Pay plugin. For main points, see our information on tips on how to set up a WordPress plugin.
☝ Notice: WP Easy Pay has a loose model that you’ll use. Alternatively, upgrading to the professional plan can unencumber extra cost choices and templates.
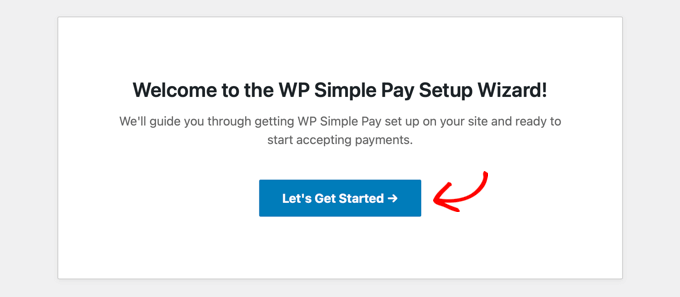
After you turn on the plugin, a setup wizard will open up in your display screen. Right here, click on the ‘Let’s Get Began’ button.
Now, you’re going to be taken to the next move, the place you’ll input your plugin’s license key.
You’ll be able to get this knowledge out of your account at the WP Easy Pay web page.

Subsequent, you’ll have to glue your present Stripe account with the plugin to simply accept on-line bills.
To get began, click on the ‘Hook up with Stripe’ button. For main points, examine our educational on tips on how to settle for Stripe bills in WordPress.

Upon getting effectively attached Stripe and WP Easy Pay, the setup wizard will ask you to configure your emails.
From right here, you’ll allow choices to obtain e mail notifications for cost receipts, upcoming invoices, and cost notifications.
You’ll want to additionally input the e-mail cope with the place you need the plugin to ship those messages. Then, click on the ‘Save and Proceed’ button.

After that, you want to finish the remainder of the setup wizard steps in keeping with your personal tastes.
As soon as you might be finished, head over to the WP Easy Pay » Cost Paperwork web page within the WordPress dashboard and click on the ‘Create Your Cost Shape’ button.

This may increasingly take you to the ‘Choose a template’ web page, the place you’re going to see a listing of premade templates introduced through WP Easy Pay.
There are alternatives to promote subscriptions, products and services, a unmarried product, and extra. Simply click on the ‘Use Template’ button while you to find one you prefer.
For this instructional, we will be able to be opting for a easy cost shape template.

This may increasingly take you to the ‘Upload New Cost Shape’ web page, the place you’ll upload a identify and outline on your shape.
Then, you’ll choose your shape sort as ‘On-site cost shape.’

Subsequent, transfer to the ‘Bills’ tab from the left column.
You’ll be able to now select ‘Take a look at Mode’ because the ‘Cost Mode’ on your shape. This may increasingly assist you to check Stripe bills in your WordPress web site.
After that, select your most popular tax assortment charges from the dropdown menu beneath the ‘Tax Assortment’ possibility.

At this level, you’ll consult with our information on tips on how to create a WordPress shape with cost choices for extra main points on customizing and publishing.
While you submit your shape at the entrance finish of your web site, you’re going to understand that ‘check mode’ shall be displayed on the backside.

This implies you’ll check Stripe bills. To take action, you’ll want to upload the demo card main points and click on the ‘Pay’ button.
We discovered those demo main points in Stripe’s legitimate documentation:
- Card quantity: 4242 4242 4242 4242
- Expiration date: Any long term date
- CVC: Any three-digit quantity
The processor gives them so you’ll check bills safely with out being concerned about making genuine transactions.
To ensure when you have gained the cost after hitting ‘Pay,’ head over in your Stripe dashboard.
As soon as there, transfer to the ‘Bills’ tab, the place you’re going to see the a success transaction.
Now that you’ve examined your Stripe bills, simply move to the WP Easy Pay » Cost Paperwork web page.
Right here, you want to click on the ‘Edit’ hyperlink beneath the shape you simply printed.

This may increasingly open the shape builder, the place you’ll want to transfer to the ‘Bills’ tab.
Right here, choose ‘Are living Mode’ because the cost mode on your shape and click on the ‘Replace’ button to retailer your adjustments.

Your shape will now get started accepting genuine Stripe bills from shoppers.
💡 Knowledgeable Tip: Taking a look to promote your merchandise or products and services globally? Your on-line retailer will want to load temporarily for guests, regardless of the place they’re.
At WPBeginner, we provide Web page Pace Optimization Services and products to make sure your web site delivers a quick, easy enjoy for patrons international. For extra main points, see our WPBeginner Professional Services and products web page!
Bonus: Pointers & Sources for The usage of Stripe in WordPress
Now that you just’re able to simply accept Stripe bills in WordPress, you will be curious about those further sources:
- The best way to Cut back Stripe Transaction Charges in WordPress (Knowledgeable Pointers)
- The best way to Upload Stripe QR Code Cost in WordPress
- The best way to Move Cost Processing Charges to Consumers in WordPress
- Highest Stripe Cost Plugins for WordPress
- 75+ Necessary On-line Cost Statistics, Information, and Developments
Steadily Requested Questions About Trying out Stripe Bills
Listed here are some questions that our readers regularly ask about checking out Stripe bills in WordPress:
How regularly will have to I check Stripe bills?
You will have to check Stripe bills each time you’re making any giant adjustments in your web site, corresponding to updating plugins, switching subject matters, or including new cost strategies.
It’s also a good suggestion to check periodically, particularly if you’re launching new merchandise or products and services, to ensure the entirety continues to be running easily.
Common checking out guarantees that your checkout procedure stays safe and useful, offering a hassle-free enjoy on your shoppers.
What will have to I do if a check transaction fails?
If a check transaction fails, you will have to first double-check that your Stripe integration continues to be in check mode. Then, test the demo card main points you entered, together with the expiration date and CVV.
If the main points are proper, then examine for any error messages from Stripe to spot the problem. Occasionally, the problem may well be associated with a atmosphere or plugin battle, so ensure the entirety is up to date and correctly configured.
Alternatively, if you’re nonetheless having bother, then you’ll succeed in out to the Stripe make stronger staff for lend a hand resolving the problem.
Can I exploit genuine bank card main points to check Stripe bills?
No, you shouldn’t use genuine bank card main points to check Stripe bills.
As a substitute, Stripe supplies demo card main points in particular for checking out, which simulate genuine transactions with out the use of precise cash.
This manner, you’ll check your cost machine safely with none possibility of unauthorized fees or affecting your shoppers. All the time be sure you are in check mode when doing this to keep away from processing genuine bills.
Can I check bills on my reside web site with out affecting genuine transactions?
Sure, you’ll check bills in your reside web site with out affecting genuine transactions through the use of Stripe’s check mode.
When this mode is enabled, all bills are simulated and received’t rate genuine cash or impact your shoppers. Simply ensure Stripe is in check mode and use the demo card main points it supplies to hold out check transactions.
Can I check subscriptions and routine bills with Stripe?
Sure, you’ll check subscriptions and routine bills with Stripe.
In check mode, you’ll arrange subscription plans and simulate routine bills to make sure the entirety works appropriately. Stripe means that you can check other subscription eventualities, corresponding to billing cycles and cost retries, with out affecting genuine transactions.
This makes it smooth to make sure that your subscription machine is about up correctly ahead of going reside.
We are hoping this text helped you discover ways to check Stripe bills in your WordPress web site. You might also need to see our educational on accepting ACH bills or our information to accepting iDEAL bills in WordPress.
Should you appreciated this text, then please subscribe to our YouTube Channel for WordPress video tutorials. You’ll be able to additionally to find us on Twitter and Fb.
The submit The best way to Take a look at Stripe Bills on a WordPress Web page (3 Simple Strategies) first gave the impression on WPBeginner.
WordPress Maintenance