
One of the vital major functions of hero sections is to persuade folks to stay scrolling down the web page and uncover extra content material and knowledge you’ve shared. With Divi’s integrated animation choices, you’ll upload interactive animations in your web page that can assist you persuasively lead guests down the web page. On this educational, we’re going to encourage guests to scroll right down to the products and services segment the use of arrow icons that cause them to the products and services segment.
Let’s get to it!
Contents
- 1 Preview
- 2 Let’s Get started Developing!
- 2.1 Upload Segment #1
- 2.2 Upload Row
- 2.3 Upload Textual content Module
- 2.4 Upload Segment #2
- 2.5 Upload Row
- 2.6 Upload Blurb Module
- 2.7 Upload Textual content Module #1 to Column 1
- 2.8 Upload Textual content Module #2 to Column 1
- 2.9 Upload Divider Module to Column 1
- 2.10 Upload Textual content Module #3 to Column 1
- 2.11 Clone Modules 3 Occasions & Position Duplicates in Ultimate Columns
- 2.12 Customise Blurb Icon #2
- 2.13 Customise Blurb Icon #3
- 2.14 Customise Blurb Icon #4
- 3 Ultimate Ideas
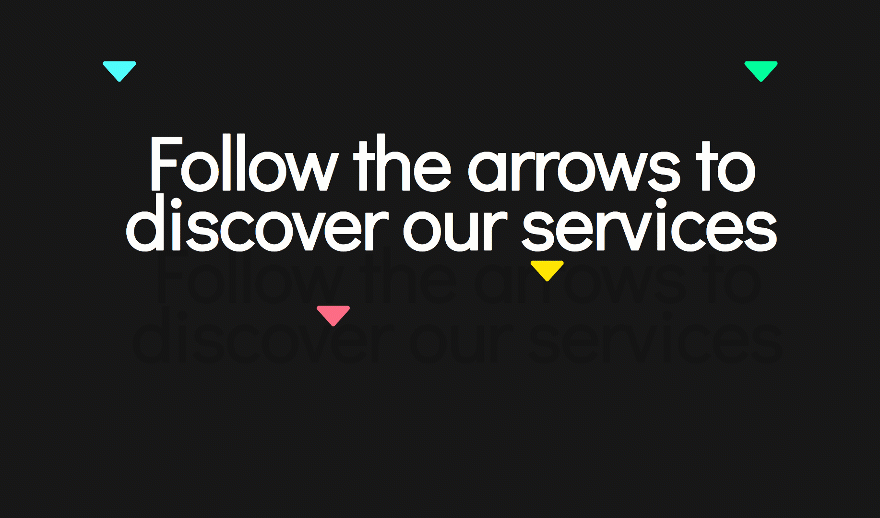
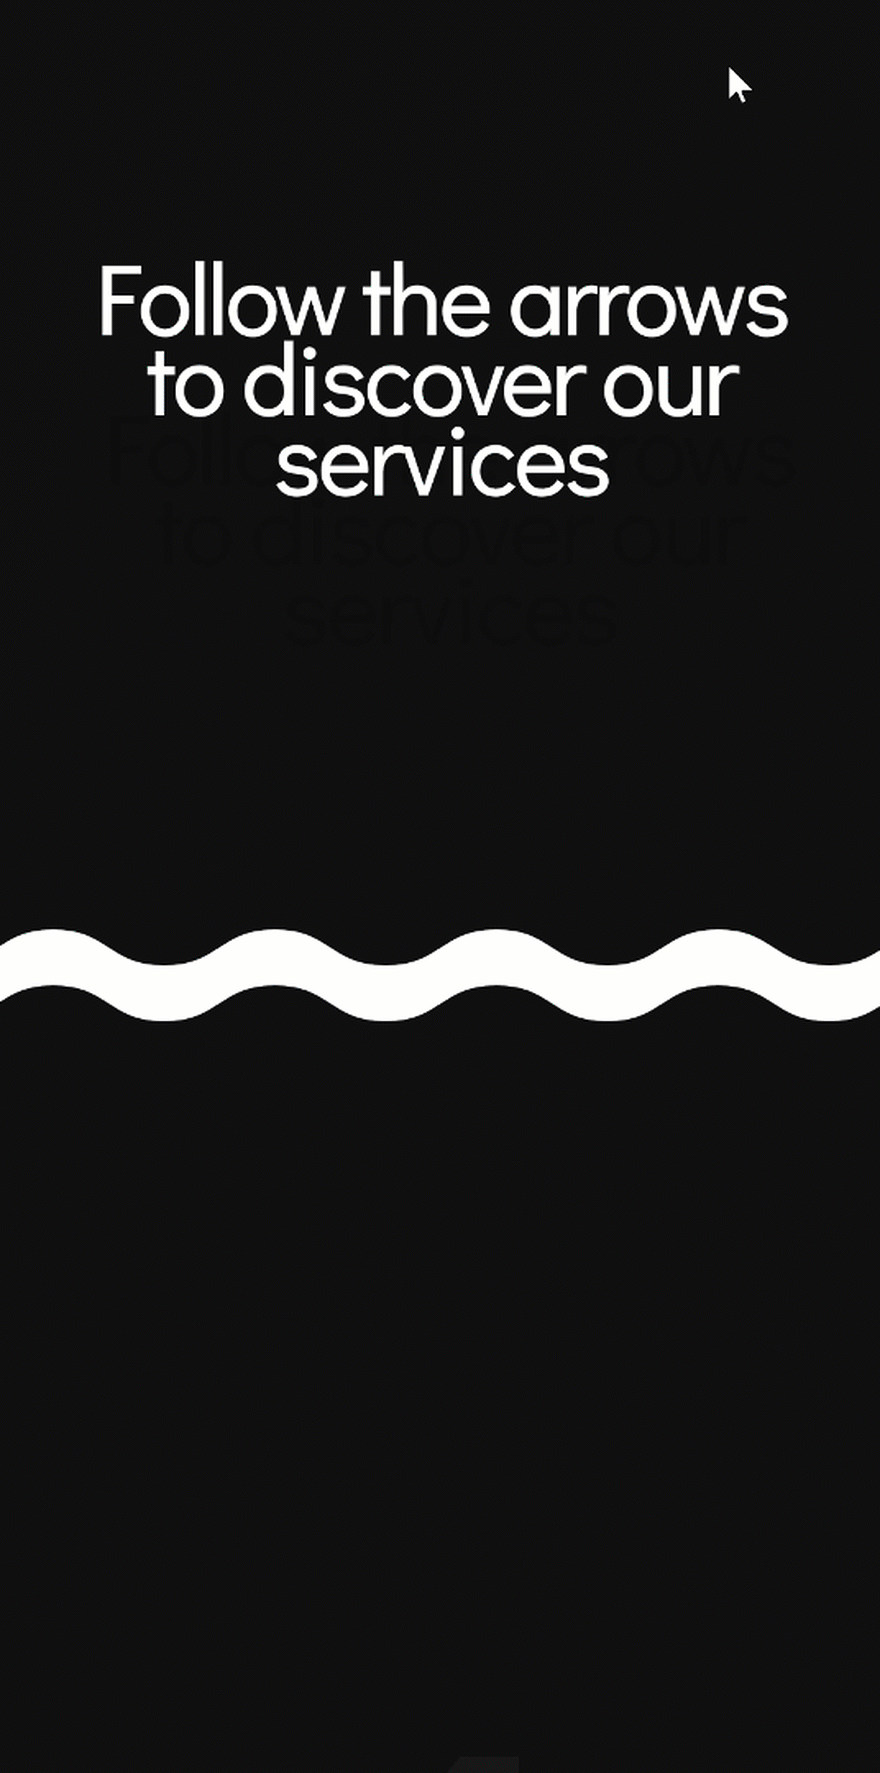
Preview
Prior to we dive into the academic, let’s take a snappy take a look at the end result on other display sizes.
Desktop
Cellular
Let’s Get started Developing!
Upload Segment #1
Background Colour
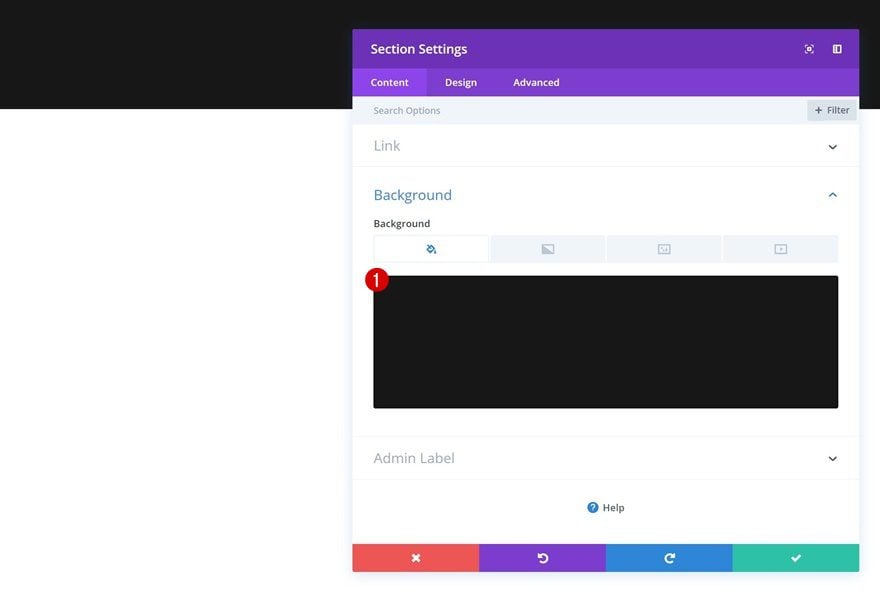
Create a brand new web page and upload a typical segment to it. Open the segment settings and alter the background colour.
- Background Colour: #0f0f0f
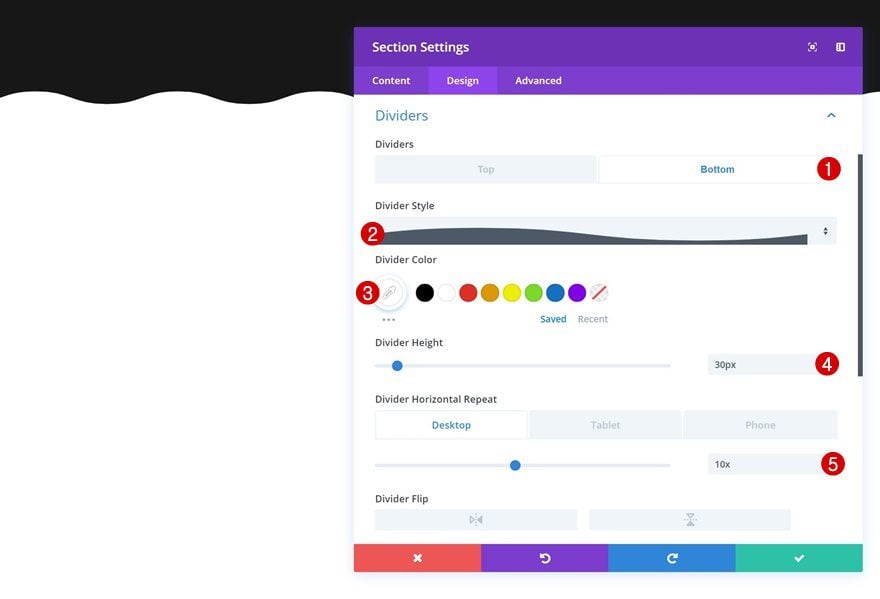
Backside Divider
Proceed via including a backside divider to the segment.
- Divider Taste: In finding in Record
- Divider Colour: #ffffff
- Divider Top: 30px
- Divider Horizontal Repeat: 10x (Desktop), 4x (Pill & Telephone)
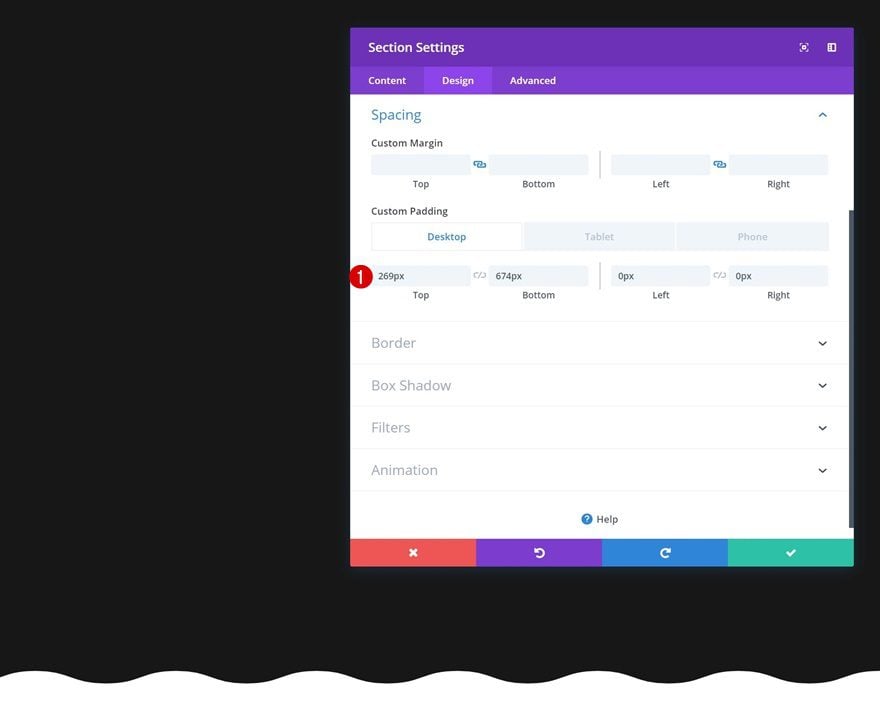
Spacing
Upload some customized padding values as neatly.
- Best Padding: 269px (Desktop), 100px (Pill & Telephone)
- Backside Padding: 674px (Desktop), 200px (Pill & Telephone)
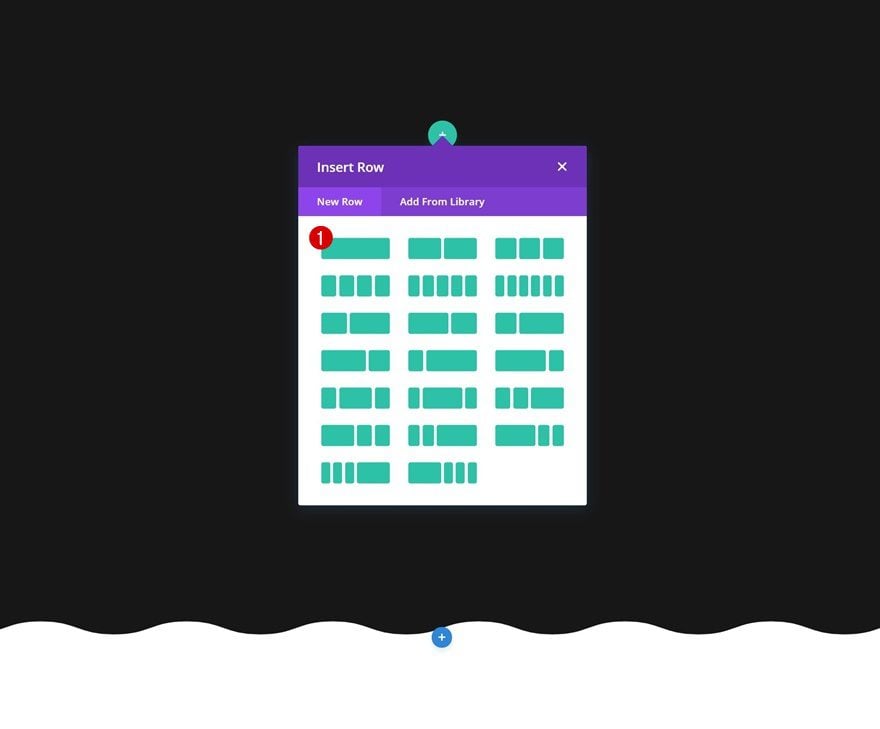
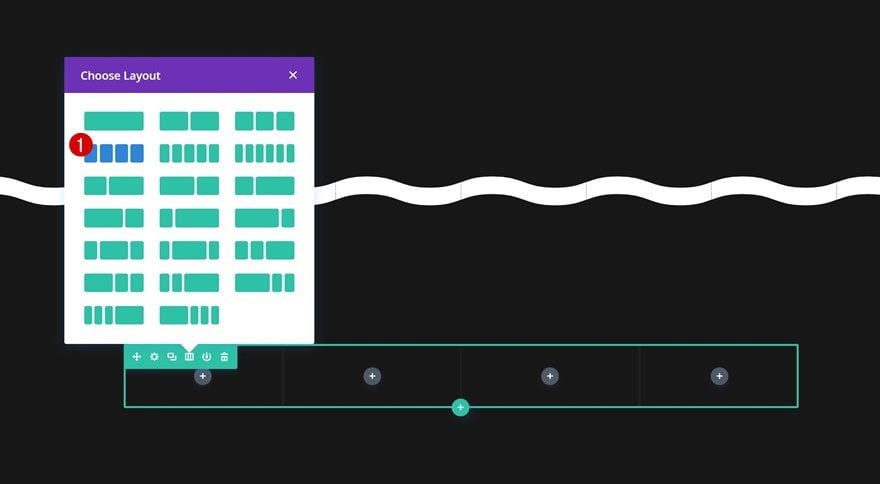
Upload Row
Column Construction
Then, upload a brand new row the use of the next column construction:
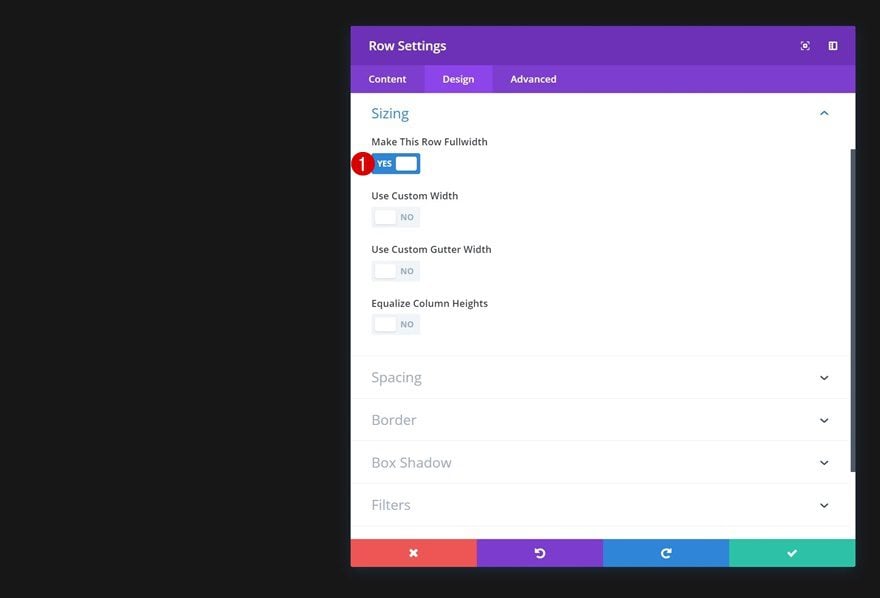
Sizing
With out including any modules but, open the row settings, pass to the sizing settings and allow the ‘Make This Row Fullwidth’ choice.
- Make This Row Fullwidth: Sure
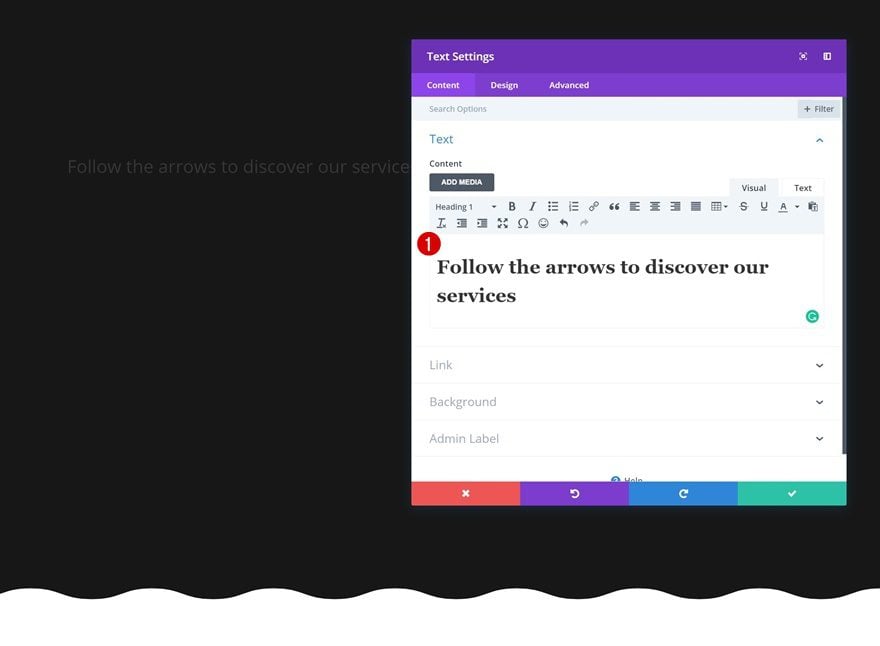
Upload Textual content Module
Upload Content material
The one module we’d like on this row is a Textual content Module. Move forward and upload some H1 content material of selection.
Heading Textual content Settings
Exchange the heading textual content settings subsequent.
- Heading Font: Didact Gothic
- Heading Font Weight: Daring
- Heading Textual content Alignment: Middle
- Heading Textual content Colour: #ffffff
- Heading Textual content Measurement: 170px (Desktop), 50px (Pill & Telephone)
- Heading Line Top: 0.8em
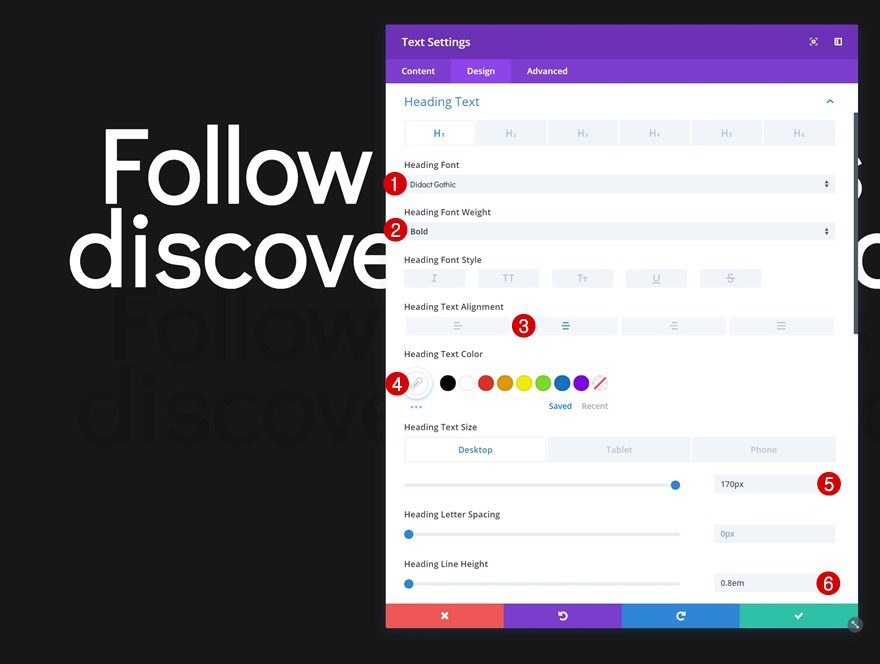
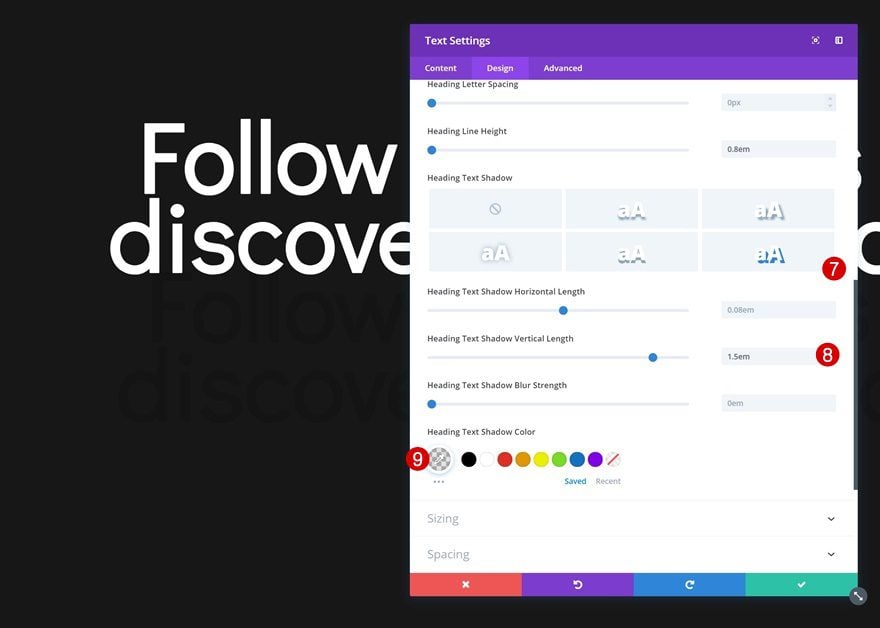
- Heading Textual content Shadow Vertical Duration: 1.5em
- Heading Textual content Shadow Colour: rgba(0,0,0,0.11)
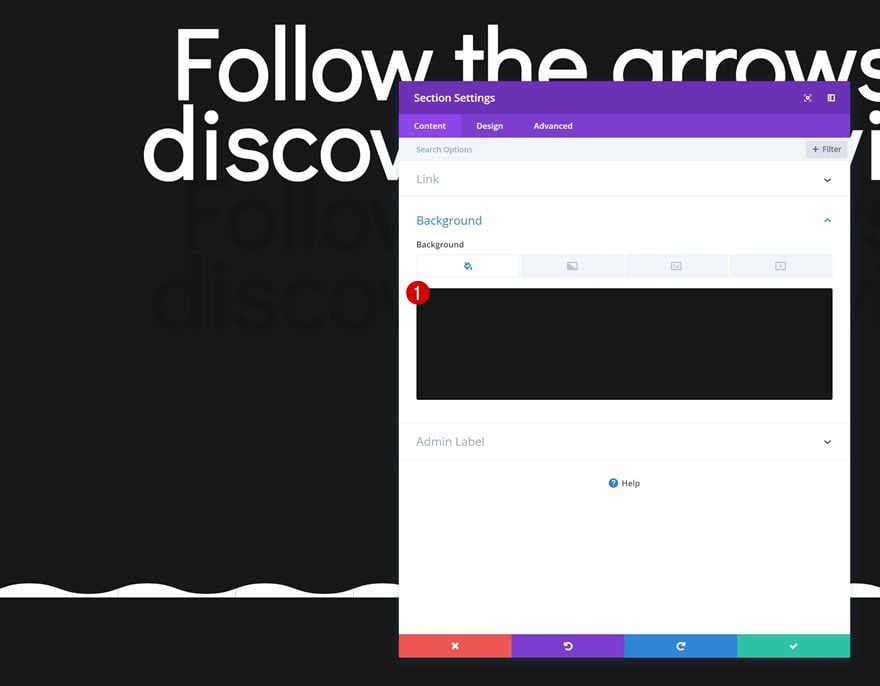
Upload Segment #2
Background Colour
Proceed via including the second one segment to the web page. Exchange the background colour within the segment settings.
- Background Colour: #0f0f0f
Best Divider
Upload a best divider to the segment as neatly.
- Divider Taste: In finding in Record
- Divider Colour: #ffffff
- Divider Top: 30px
- Divider Horizontal Repeat: 10x (Desktop), 4x (Pill & Telephone)

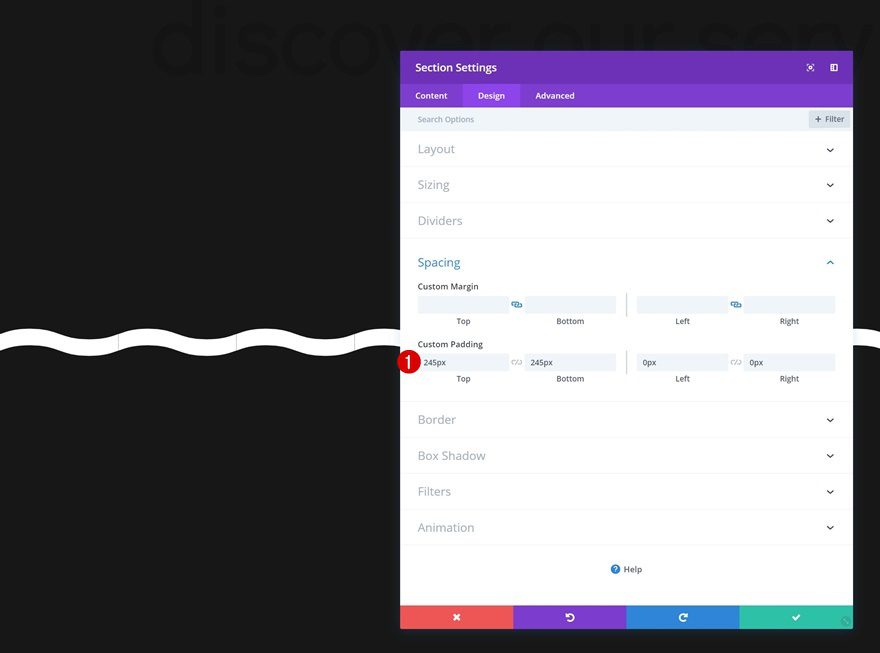
Spacing
And build up the spacing values within the spacing settings.
- Best Padding: 245px
- Backside Padding: 245px
Upload Row
Column Construction
Proceed via including a brand new row with the next column construction to the segment:
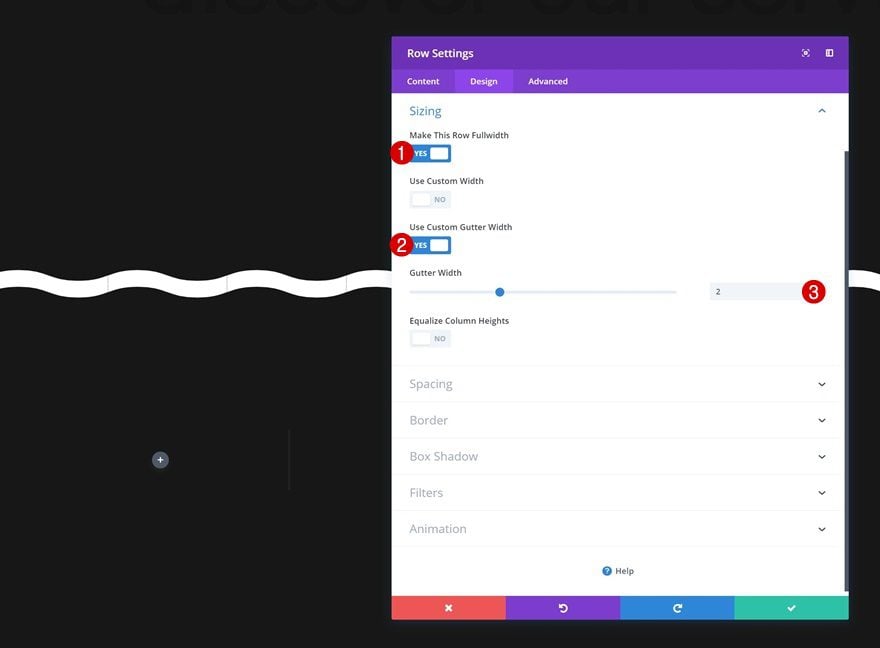
Sizing
Open the row settings, pass to the sizing settings and make some adjustments.
- Make This Row Fullwidth: Sure
- Use Customized Gutter Width: Sure
- Gutter Width: 2
Upload Blurb Module
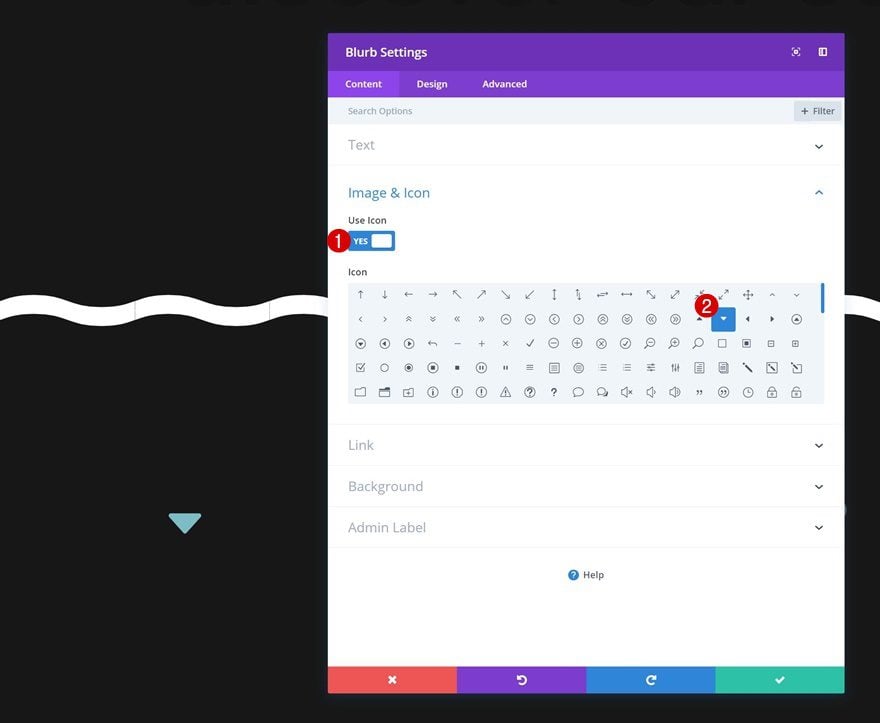
Make a choice Icon
The primary module we’ll want within the first column is a Blurb Module. The one a part of the component of the Blurb Module that we’d like is the icon. Make a choice the arrow icon that issues downwards.
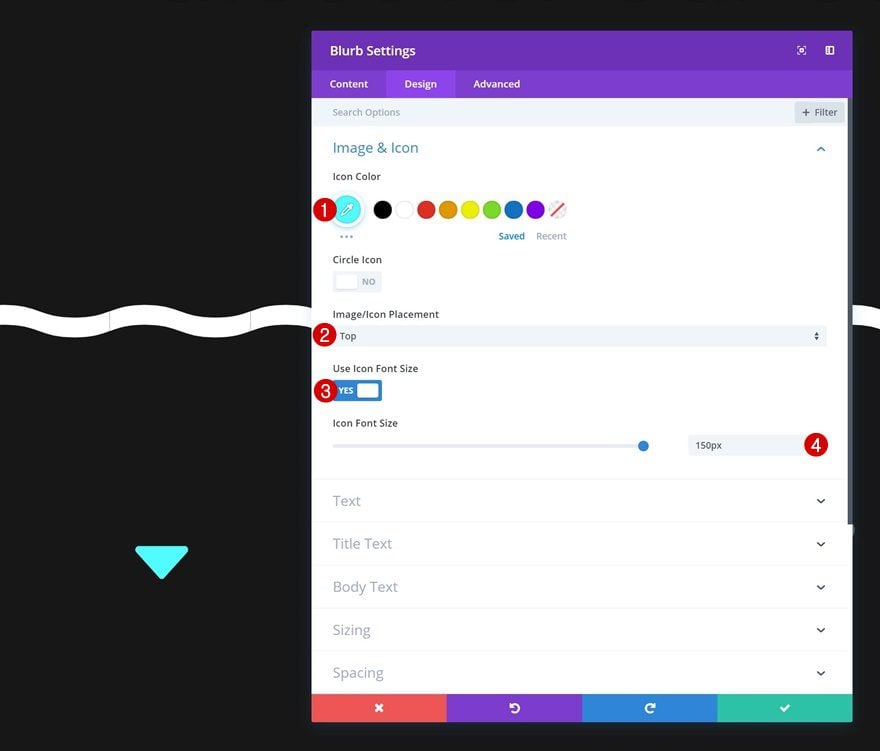
Icon Settings
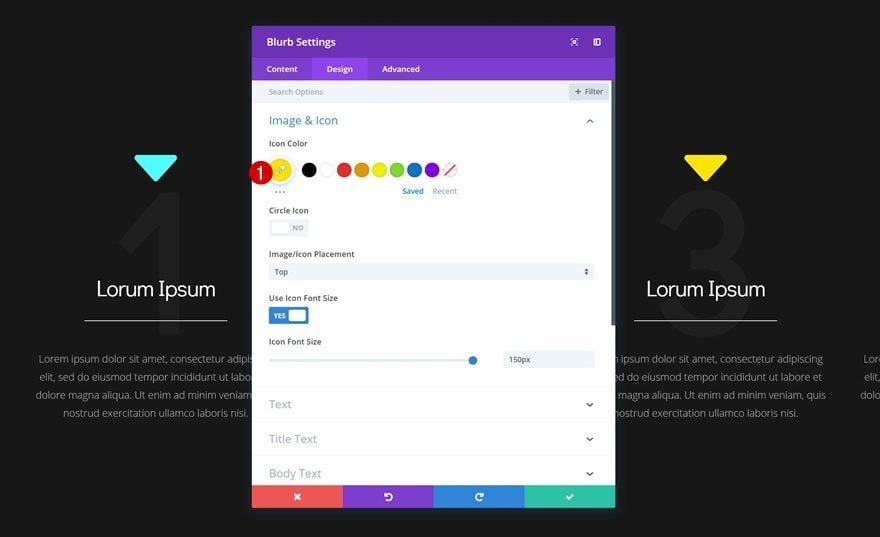
Then, pass to the design tab and alter the icon settings.
- Icon Colour: #4ffcff
- Icon Placement: Best
- Use Icon Font Measurement: Sure
- Icon Font Measurement: 150px
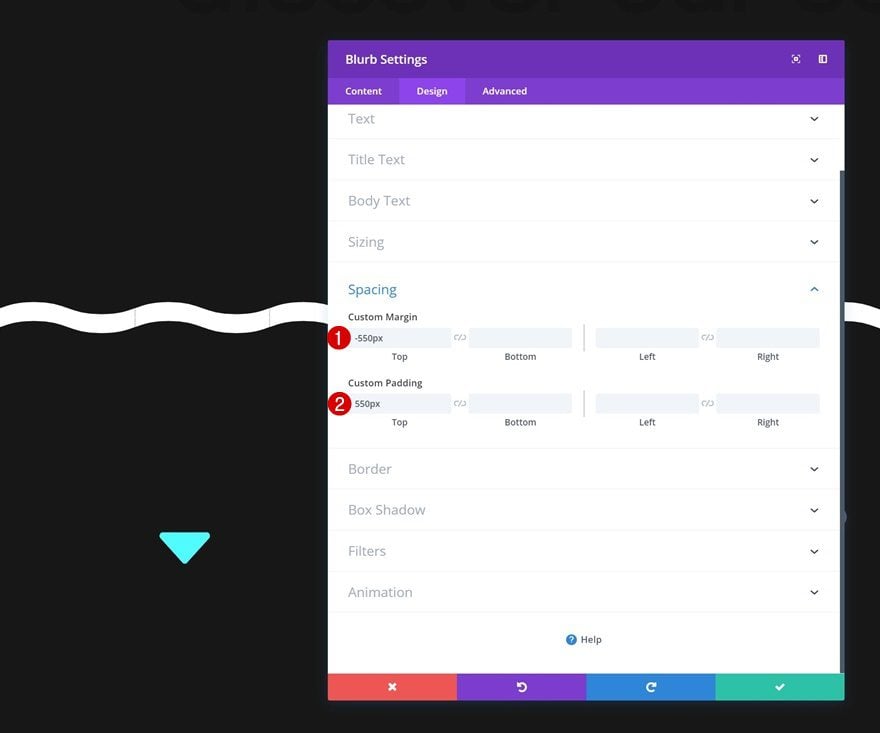
Spacing
To extend the succeed in of the icon, we’ll want to upload some adverse best margin. This will likely permit the Blurb Module to overlap the former segment and can permit the animation between two sections to occur easily. To make up for the customized margin, we’ll upload customized best padding as neatly. This will likely ensure the icon stays in the very same place as prior to. The one factor that adjustments is the scale and succeed in of all of the module.
- Best Margin: -550px
- Best Padding: 550px
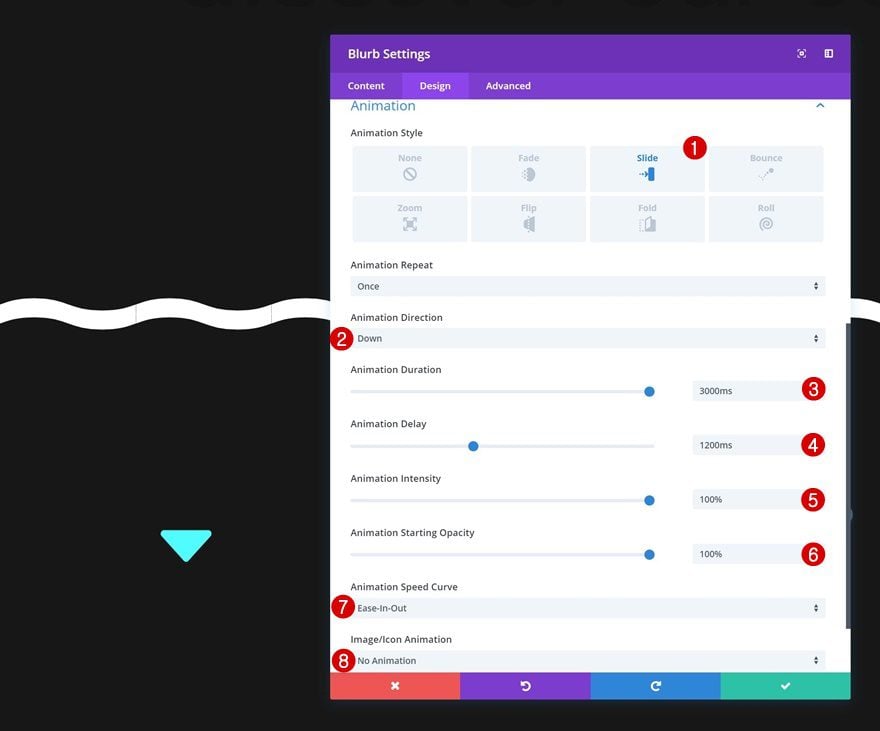
Animation
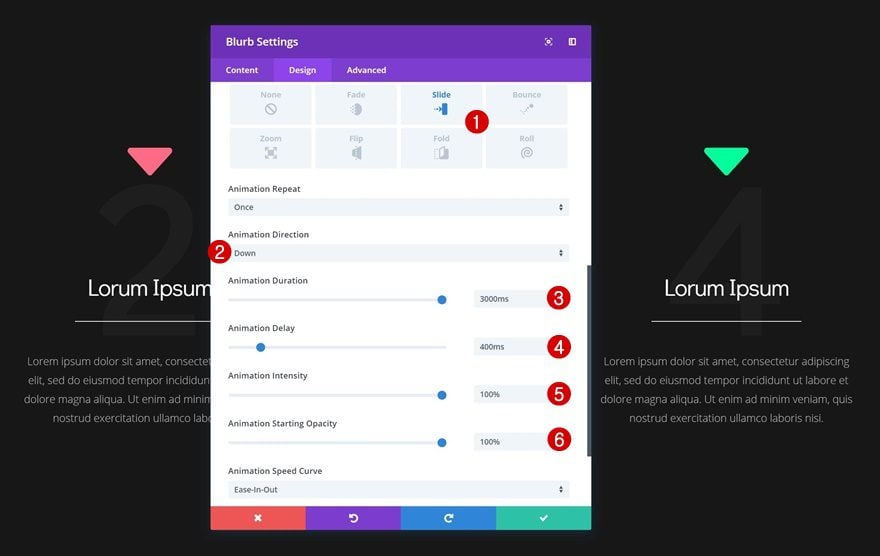
Ultimate however now not least, upload an animation to the Blurb Module the use of the next settings:
- Animation Taste: Slide
- Animation Course: Down
- Animation Length: 3000ms
- Animation Prolong: 1200ms
- Animation Depth: 100%
- Animation Beginning Opacity: 100%
- Animation Velocity Curve: Ease-In-Out
- Symbol/Icon Animation: No Animation
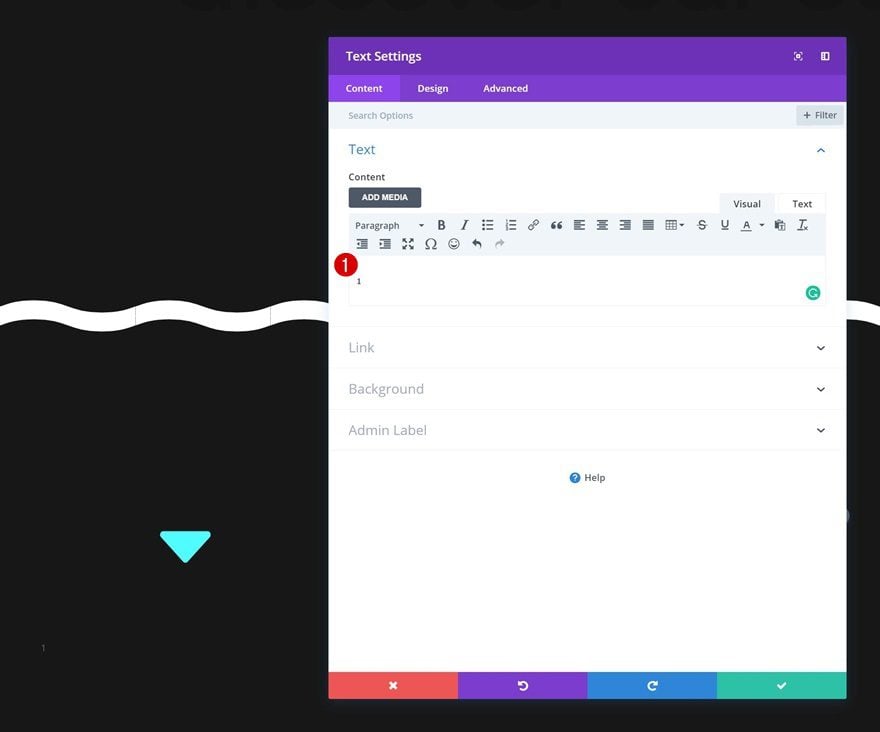
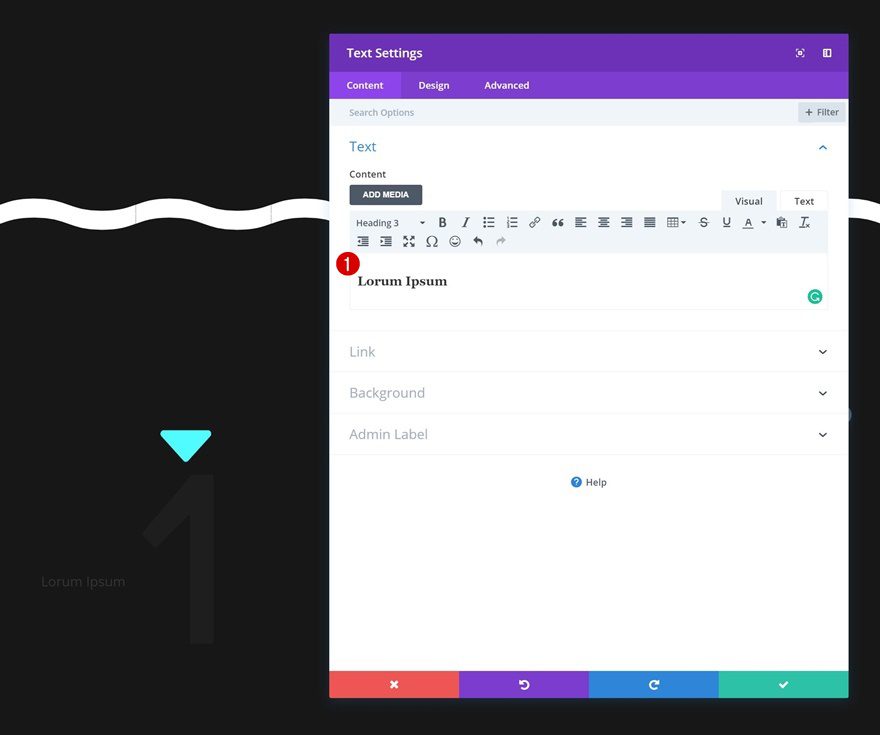
Upload Textual content Module #1 to Column 1
Upload Content material
The following module we’d like within the first column is a Textual content Module. Upload some content material of selection.
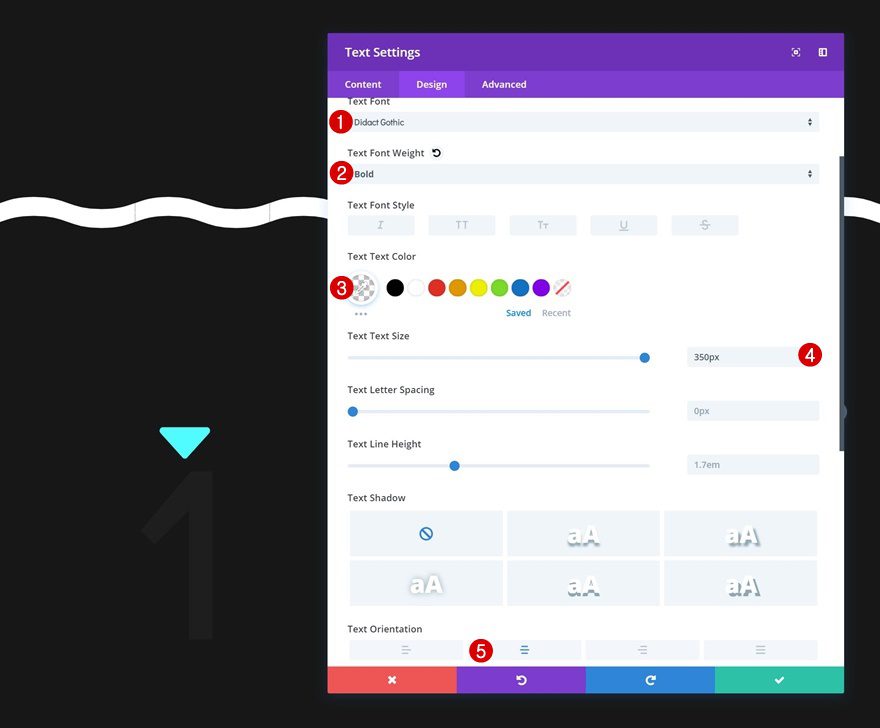
Textual content Settings
Proceed via converting the textual content settings.
- Textual content Font: Didact Gothic
- Textual content Font Weight: Daring
- Textual content Colour: rgba(255,255,255,0.03)
- Textual content Measurement: 350px
- Textual content Orientation: Middle
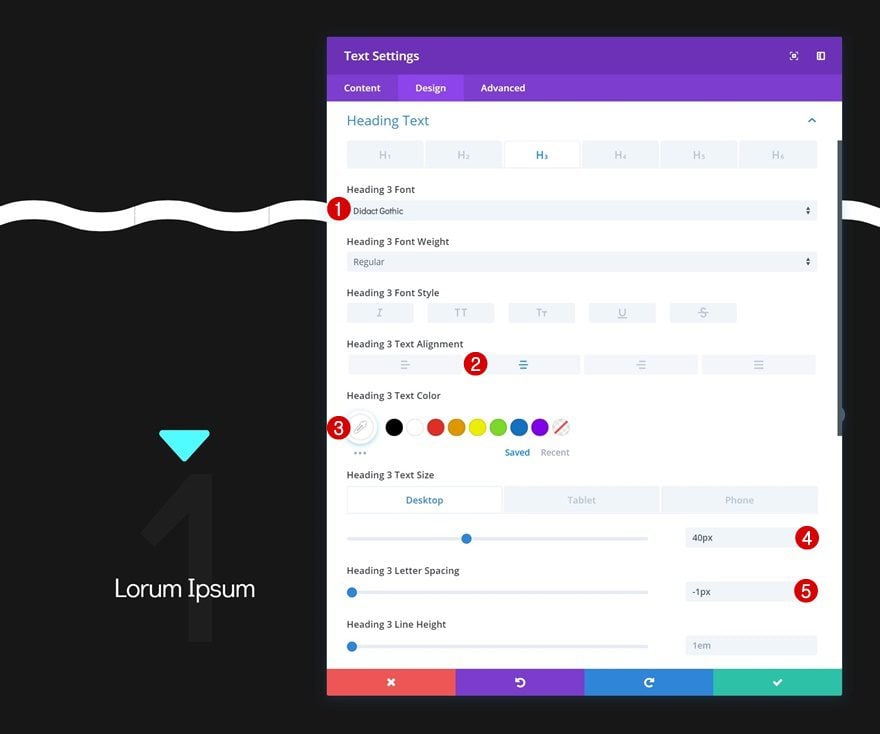
Upload Textual content Module #2 to Column 1
Upload Content material
Upload a 2nd Textual content Module to the primary column with some H3 content material of selection.
Heading Textual content Settings
And alter the heading textual content settings within the design tab.
- Heading 3 Font: Didact Gothic
- Heading 3 Textual content Alignment: Middle
- Heading 3 Textual content Colour: #ffffff
- Heading 3 Textual content Measurement: 40px (Desktop), 30px (Pill & Telephone)
- Heading 3 Letter Spacing: -1px
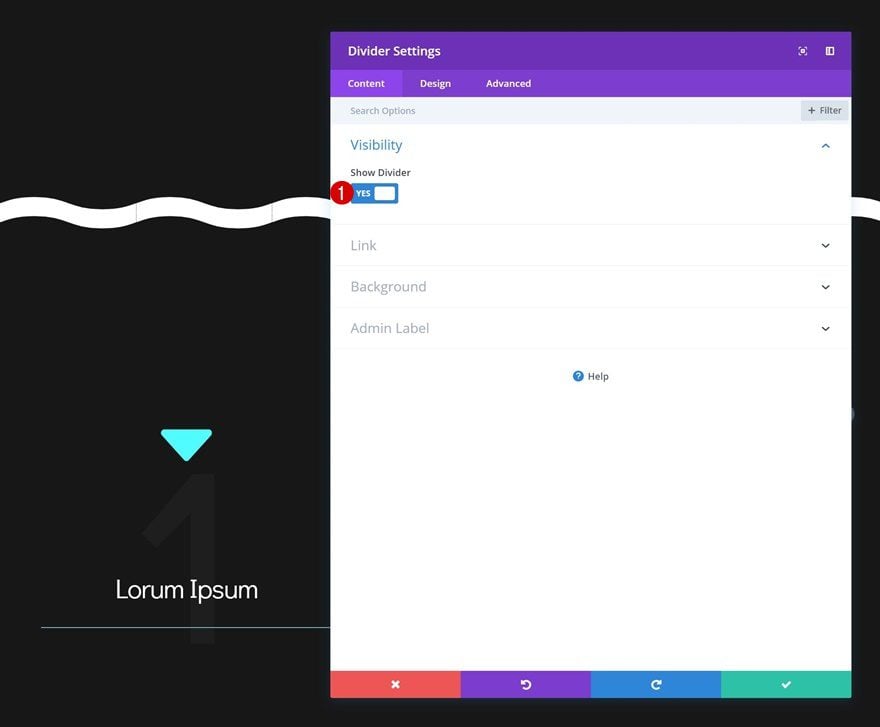
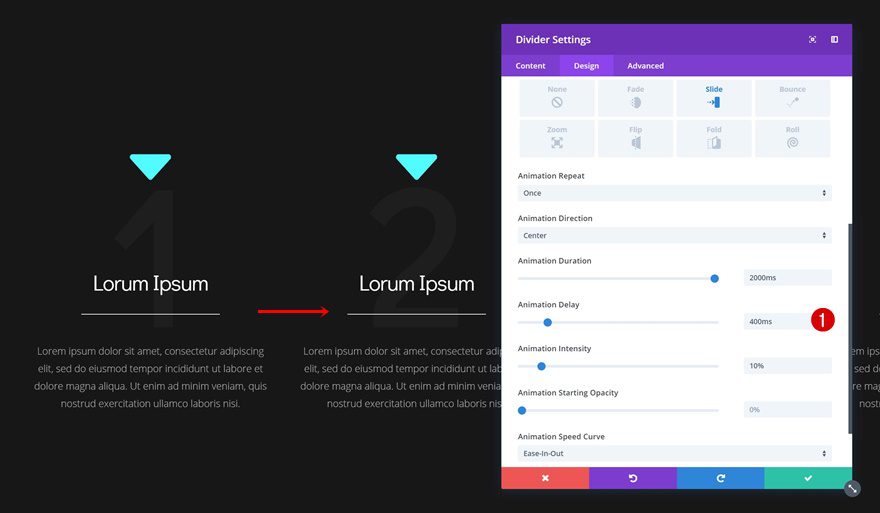
Upload Divider Module to Column 1
Visibility
The following module wanted within the first column is a Divider Module. Make sure that the ‘Display Divider’ choice is enabled.
- Display Divider: Sure
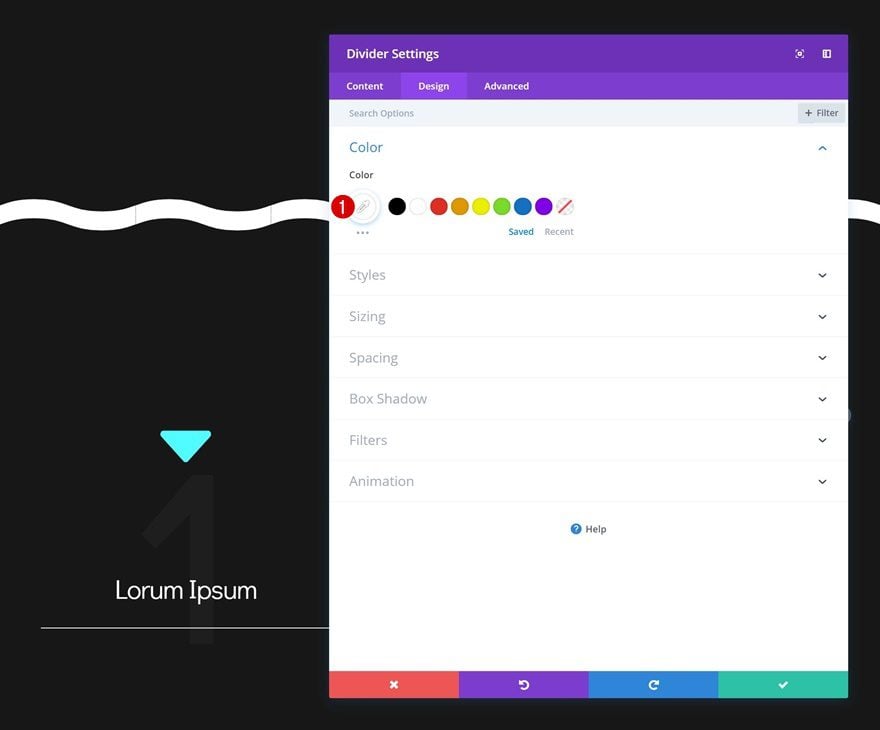
Colour
Proceed via converting the divider colour within the design tab.
- Colour: #ffffff
Sizing
Make some adjustments to the sizing settings too.
- Width: 59%
- Module Alignment: Middle

Animation
And upload an animation to the module as neatly.
- Animation Taste: Slide
- Animation Course: Middle
- Animation Length: 2000ms
- Animation Depth: 10%
- Animation Velocity Curve: Ease-In-Out

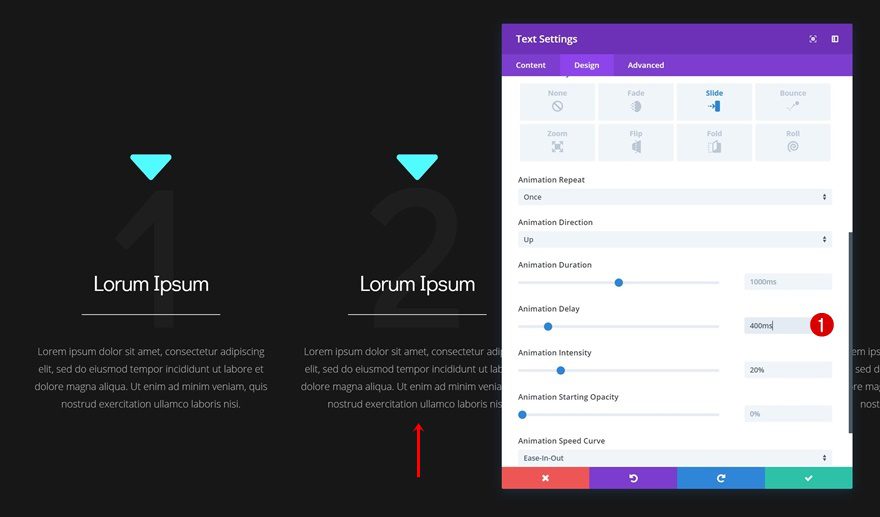
Upload Textual content Module #3 to Column 1
Upload Content material
The following and remaining module we’d like in column one is any other Textual content Module. Upload some content material of selection.
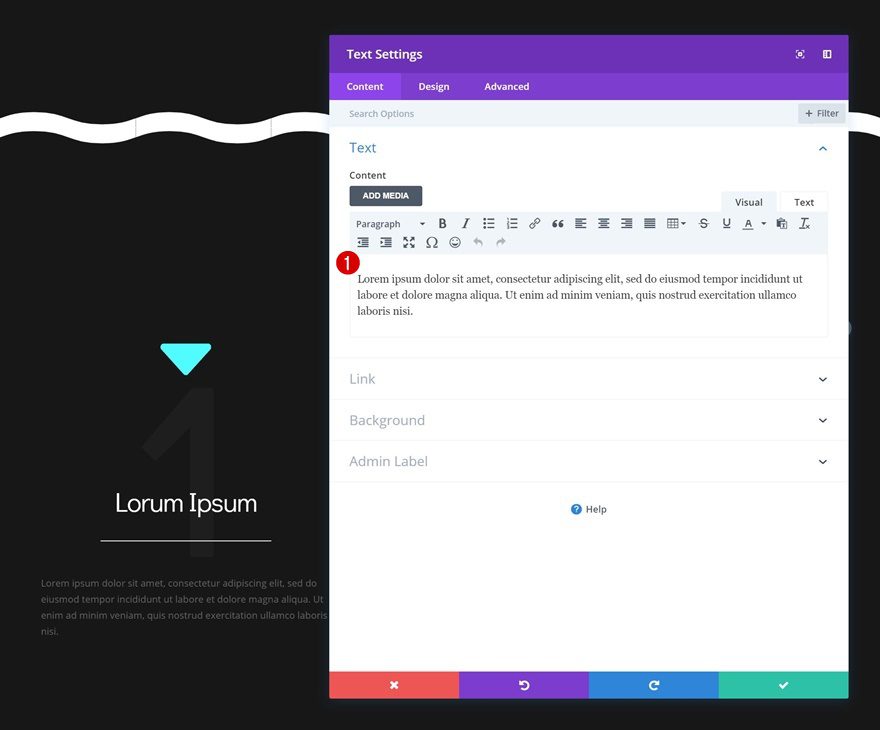
Textual content Settings
Proceed via converting the textual content settings.
- Textual content font Weight: Gentle
- Textual content Colour: #b7b7b7
- Textual content Measurement: 18px
- Textual content Line Top: 1.8em
- Textual content Orientation: Middle

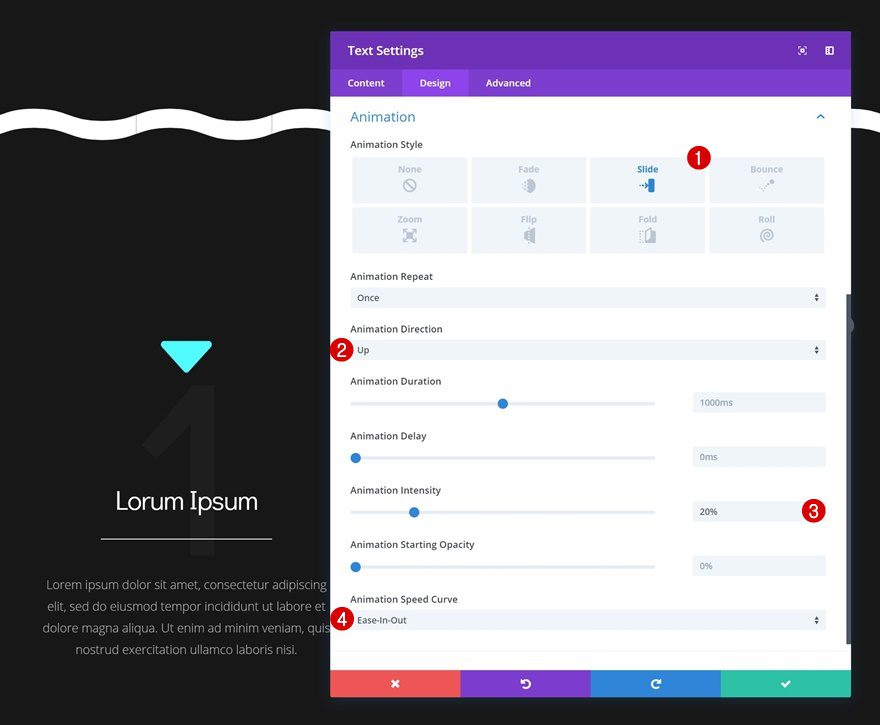
Animation
And upload an animation to the module.
- Animation Taste: Slide
- Animation Course: Up
- Animation Depth: 20%
- Animation Velocity Curve: Ease-In-Out
Clone Modules 3 Occasions & Position Duplicates in Ultimate Columns
Now that we’re finished editing all modules in column 1, we will be able to clone all modules in column one thrice and position the duplicates in the remainder columns.
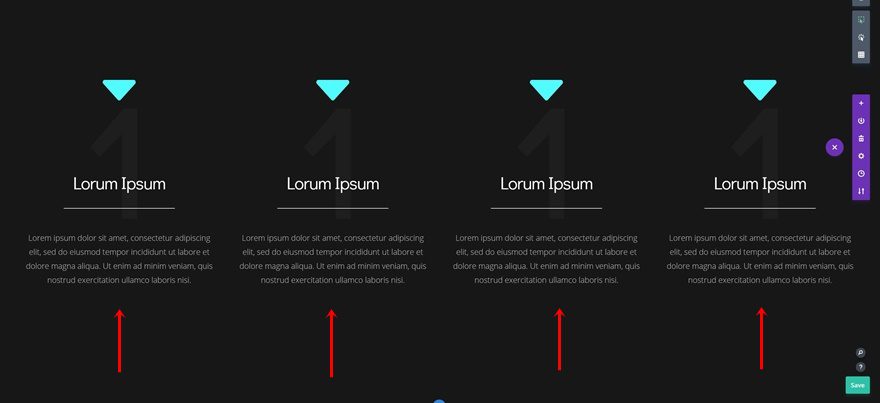
Exchange Module Content material
Exchange the content material of the duplicates.
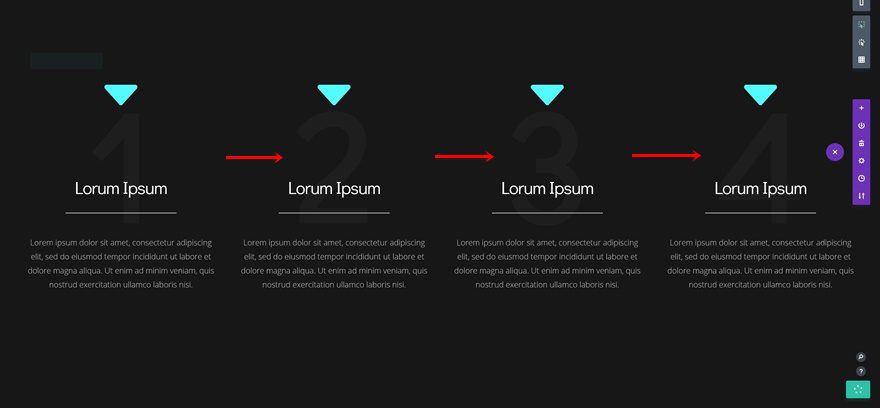
Upload Animation Prolong to Divider Modules of Duplicates
Upload some animation prolong to every probably the most Divider Module duplicates as neatly.
- Divider Module in Column 2: 400ms
- Divider Module in Column 3: 800ms
- Divider Module in Column 4: 1200ms
Upload Animation Prolong to Textual content Module #3 Duplicates
Do the similar factor for the remaining Textual content Module in every column.
- Ultimate Textual content Module in Column 2: 400ms
- Ultimate Textual content Module in Column 3: 800ms
- Ultimate Textual content Module in Column 4: 1200ms
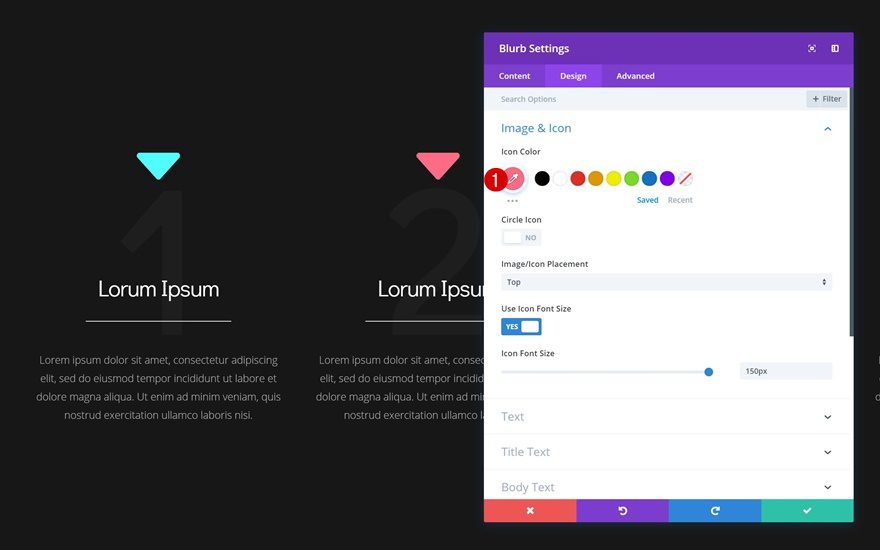
Customise Blurb Icon #2
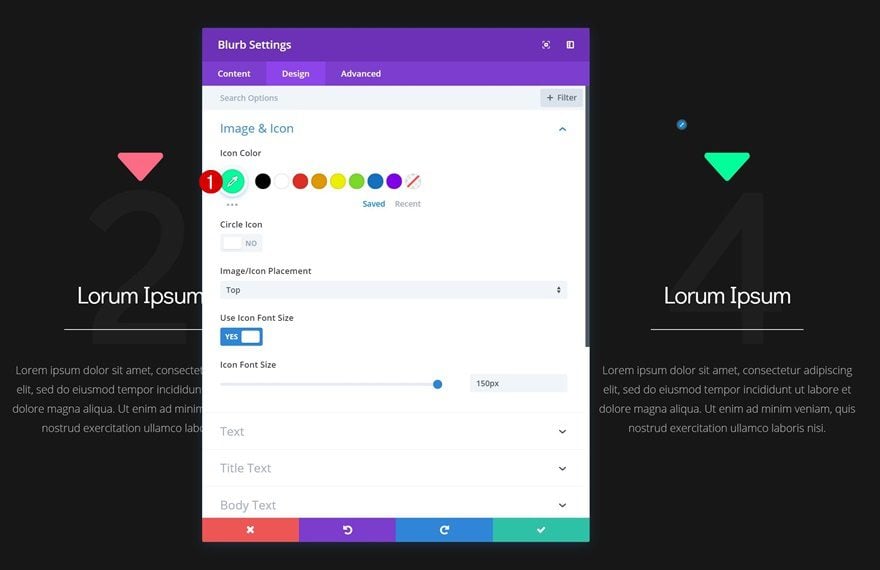
Icon Colour
We’re additionally editing the blurb icon’s colour and animation for every probably the most duplicates. Open the Blurb Module in column 2 and alter the icon colour.
- Icon Colour: #ff6b86
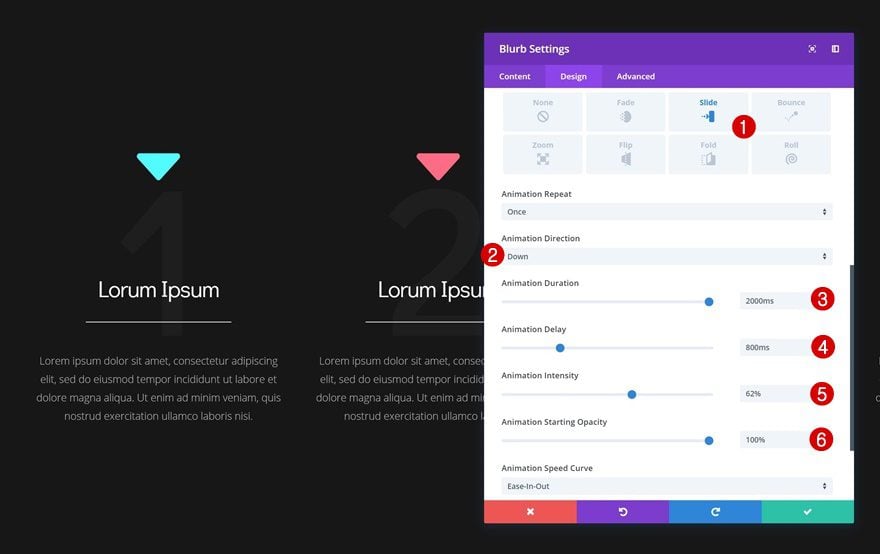
Animation
Exchange the animation settings as neatly.
- Animation Sort: Slide
- Animation Course: Down
- Animation Length: 2000ms
- Animation Prolong: 800ms
- Animation Depth: 62%
- Animation Beginning Opacity: 100%
- Symbol/Icon Animation: No Animation
Customise Blurb Icon #3
Icon Colour
Proceed via opening the Blurb Module in column 3 and alter the icon colour.
- Icon Colour: #ffe500
Animation
Adjust the animation settings as neatly.
- Animation Sort: Slide
- Animation Course: Down
- Animation Length: 1000ms
- Animation Prolong: 600ms
- Animation Depth: 69%
- Animation Beginning Opacity: 100%
- Symbol/Icon Animation: No Animation

Customise Blurb Icon #4
Icon Colour
Open the remaining Blurb Module, in column 4, and alter the icon colour.
- Icon Colour: #00ff9d
Animation
And end the design via converting the animation settings within the design tab.
- Animation Sort: Slide
- Animation Course: Down
- Animation Length: 3000ms
- Animation Prolong: 400ms
- Animation Depth: 100%
- Animation Beginning Opacity: 100%
- Symbol/Icon Animation: No Animation
Ultimate Ideas
On this put up, we’ve proven you the way to persuasively lead guests down the web page the use of Divi’s animation settings. The fundamental concept is that you just use Blurb Modules for his or her icons and build up their animation succeed in to the hero segment. You’ll use this method on any more or less web site you construct and get as inventive as you wish to have. When you have any questions or ideas, you’ll want to depart a remark within the remark segment underneath!
The put up How to Persuasively Lead Visitors Down the Page with Divi’s Built-in Animation Settings gave the impression first on Elegant Themes Blog.
WordPress Web Design