Numerous corporations will come with a “get began” CTA on there house web page. It’s in most cases is the principle name to motion at the web page, since it’s going to lead the consumer thru some form of meant procedure. It can be a easy “get began now” button that hyperlinks to every other web page. Or it can be a phase of a web page that comes with “getting began” directions and/or other choices the consumer can take to begin the method meant by means of the corporate.
On this educational, we’re going to turn you the best way to create a “Get Began” CTA that may divulge a couple of “Getting began” choices on hover. The usage of Divi, we can design a bit to look as a big button. Then when soaring over the button, the choices will seem just like a vertical slider would divulge the following slide.
The design is sublime and the capability might be helpful in some ways.
Let’s get began.
Contents
- 1 Sneak Peek
- 2 Obtain the “Get Began” CTA Divi Structure for FREE
- 3 Obtain For Unfastened
- 4 You will have effectively subscribed. Please test your electronic mail deal with to verify your subscription and get get right of entry to to loose weekly Divi structure packs!
- 5 What You Want to Get Began
- 6 Enforcing the “Get Began Right here” CTA Design in Divi
- 7 Get Began Right here...
- 8 Ultimate Ideas
Sneak Peek
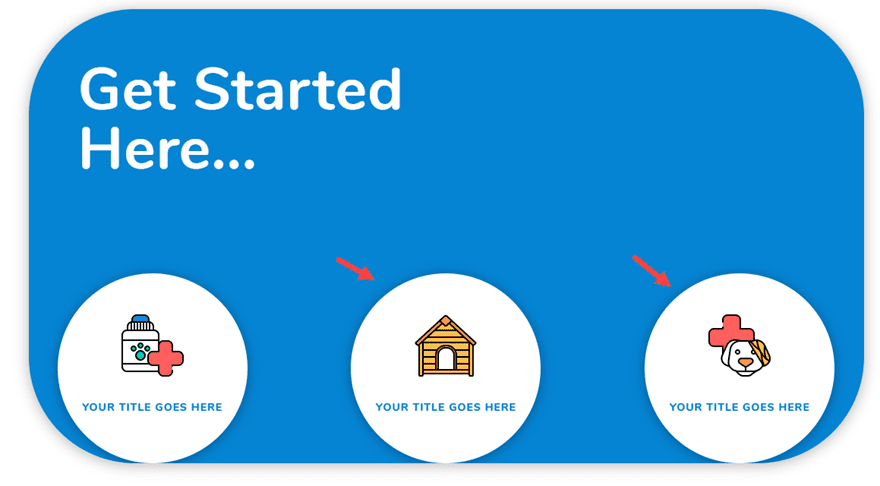
Here’s a fast take a look at the “Get Began” CTA we can construct on this educational.
Obtain the “Get Began” CTA Divi Structure for FREE
To put your arms at the design from this educational, you are going to first want to obtain it the usage of the button underneath. To achieve get right of entry to to the obtain it is very important subscribe to our Divi Day-to-day electronic mail listing by means of the usage of the shape underneath. As a brand new subscriber, you are going to obtain much more Divi goodness and a loose Divi Structure pack each Monday! In case you’re already at the listing, merely input your electronic mail deal with underneath and click on obtain. You are going to now not be “resubscribed” or obtain additional emails.
@media most effective display and ( max-width: 767px ) {.et_bloom .et_bloom_optin_1 .carrot_edge.et_bloom_form_right .et_bloom_form_content:prior to, .et_bloom .et_bloom_optin_1 .carrot_edge.et_bloom_form_left .et_bloom_form_content:prior to { border-top-color: #ffffff !necessary; border-left-color: clear !necessary; }
}.et_bloom .et_bloom_optin_1 .et_bloom_form_content button { background-color: #f92c8b !necessary; } .et_bloom .et_bloom_optin_1 .et_bloom_form_content .et_bloom_fields i { shade: #f92c8b !necessary; } .et_bloom .et_bloom_optin_1 .et_bloom_form_content .et_bloom_custom_field_radio i:prior to { background: #f92c8b !necessary; } .et_bloom .et_bloom_optin_1 .et_bloom_border_solid { border-color: #f7f9fb !necessary } .et_bloom .et_bloom_optin_1 .et_bloom_form_content button { background-color: #f92c8b !necessary; } .et_bloom .et_bloom_optin_1 .et_bloom_form_container h2, .et_bloom .et_bloom_optin_1 .et_bloom_form_container h2 span, .et_bloom .et_bloom_optin_1 .et_bloom_form_container h2 sturdy { font-family: “Open Sans”, Helvetica, Arial, Lucida, sans-serif; }.et_bloom .et_bloom_optin_1 .et_bloom_form_container p, .et_bloom .et_bloom_optin_1 .et_bloom_form_container p span, .et_bloom .et_bloom_optin_1 .et_bloom_form_container p sturdy, .et_bloom .et_bloom_optin_1 .et_bloom_form_container shape enter, .et_bloom .et_bloom_optin_1 .et_bloom_form_container shape button span { font-family: “Open Sans”, Helvetica, Arial, Lucida, sans-serif; } p.et_bloom_popup_input { padding-bottom: 0 !necessary;}

Obtain For Unfastened
Sign up for the Divi Newlsetter and we can electronic mail you a replica of without equal Divi Touchdown Web page Structure Pack, plus lots of alternative wonderful and loose Divi sources, pointers and tips. Apply alongside and you are going to be a Divi grasp very quickly. In case you are already subscribed merely kind on your electronic mail deal with underneath and click on obtain to get right of entry to the structure pack.
You will have effectively subscribed. Please test your electronic mail deal with to verify your subscription and get get right of entry to to loose weekly Divi structure packs!
To import the structure for your web page, merely extract the zip report and drag the json report into the Divi Builder.
Let’s get to the educational we could?
What You Want to Get Began
To get began, it is very important have the next:
- The Divi Theme put in and lively
- A brand new web page created to construct from scratch at the entrance finish (visible builder)
- Photographs for use for mock content material
After that, you are going to have a clean canvas to begin designing in Divi.
Enforcing the “Get Began Right here” CTA Design in Divi
The elemental concept in the back of this design is to transport the content material of a bit upward when soaring over the phase. To try this we want to be certain that our phase has a hard and fast peak with overflow hidden. This may increasingly conceal the CTA choices prior to the hover state. Then we will use margin to put our modules and peak padding to transport the content material into view on hover.
Let’s get started with the phase.
Developing the Phase
To kick issues off, create an ordinary phase with a one-column row. Then prior to we upload any modules, let’s replace the phase settings.
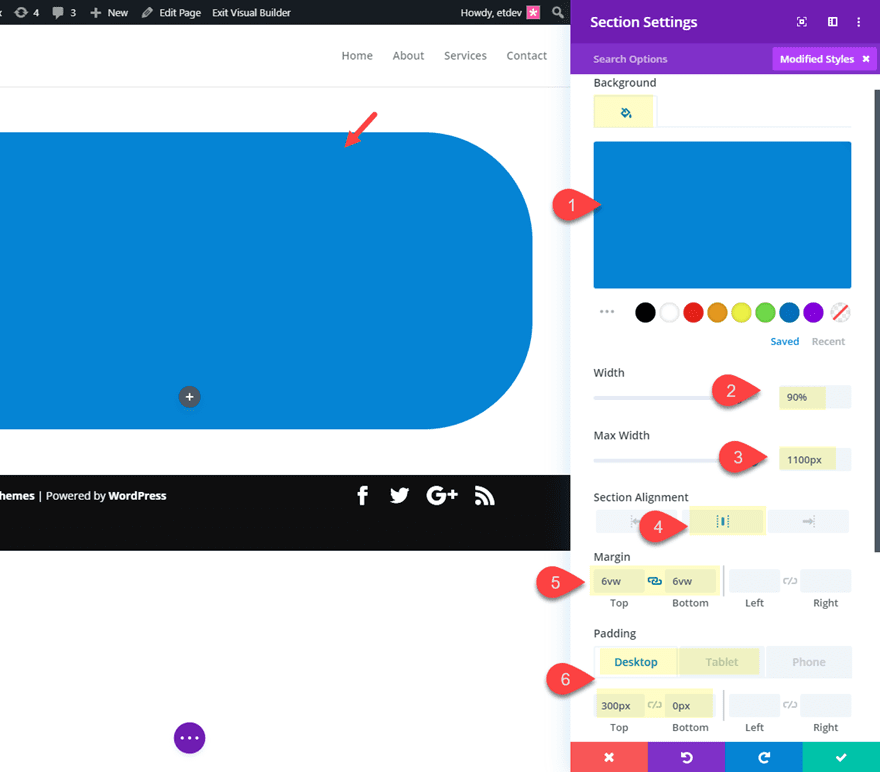
Open the phase settings and replace the next:
Background Colour:#2b87da
Width: 90%
Max Width: 1100px
Phase Alignment: heart
Margin: 6vw peak, 6vw backside (simply to provide it slightly room to respire)
Padding (desktop): 300px peak, 0px backside
Padding (pill): 0px peak, 15% backside
Then upload some rounded corners. This may increasingly create our button-like design every time we give the phase a max peak.
Rounded Corners: 140px (desktop), 20px (hover), 10px (pill)
Then give it a field shadow (see screenshot).
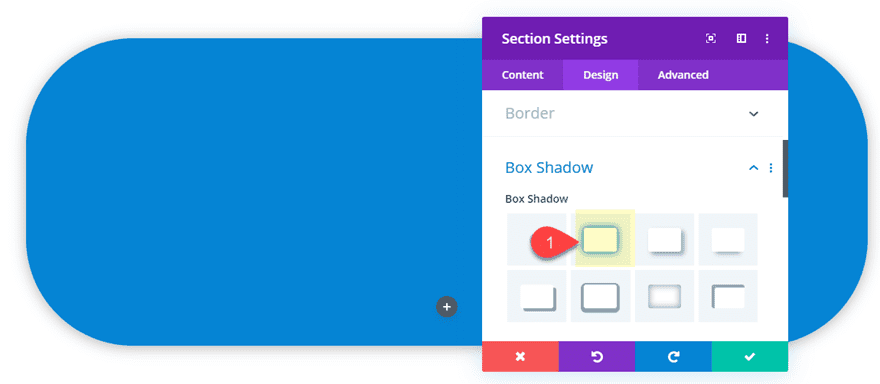
We aren’t going so as to add all the settings important for the overall design at this level. We’ll want to come again and provides it a hard and fast peak and a hover impact. However for now let’s upload the content material.
Developing the First Row of Content material
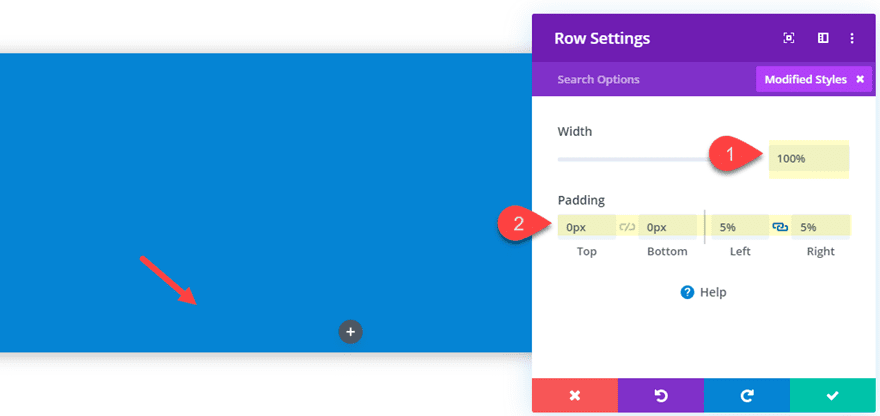
Open the settings for the only column row you created and replace the next:
Width: 100%
Padding: 0px peak, 0px backside, 5% left, 5% proper
Inside of the only column row, upload a textual content module.
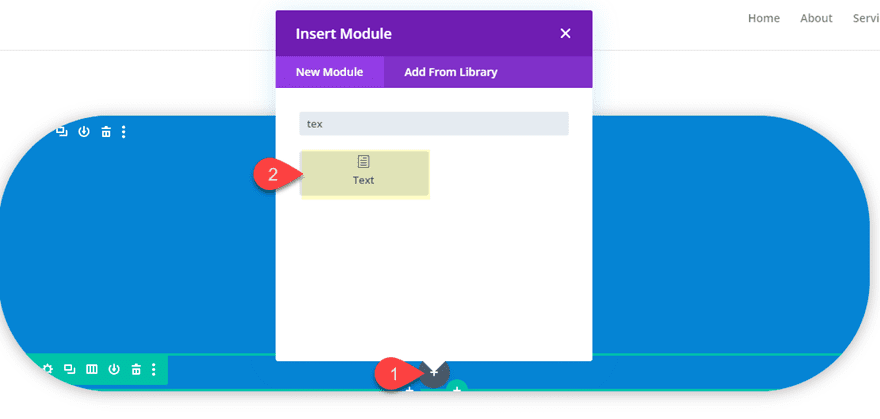
Then upload the next h2 heading to the frame content material.
Get Began Right here...

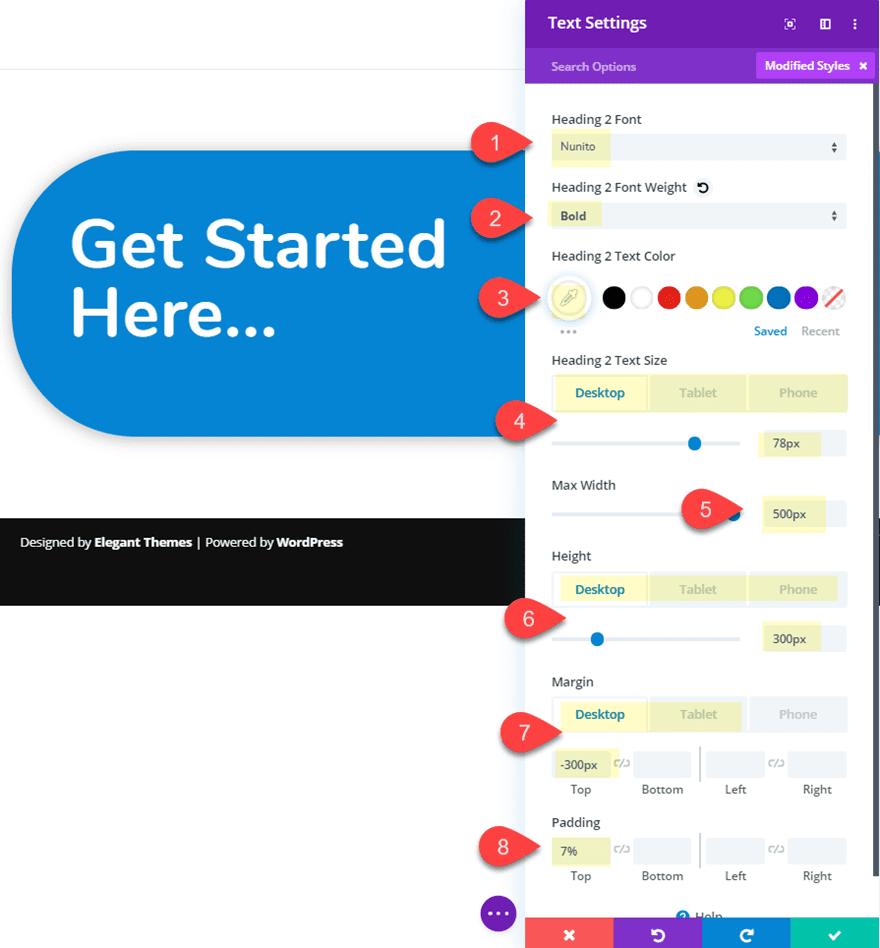
Replace the design settings as follows:
Heading 2 Font: Nunito
Heading 2 Font Weight: Daring
Heading 2 Textual content Colour: #ffffff
Heading 2 Textual content Dimension: 78px(desktop and pill), 46px(telephone)
Max Width: 500px
Top: 300px(desktop), auto (pill and get in touch with)
Margin: -300px peak (desktop), 0px peak (pill and get in touch with)
Padding: 7% peak
The 300px peak and the -300px peak margin brings the textual content module as much as fill the 300px peak padding of the phase. Later every time we remove the highest phase padding on hover, the textual content module will scroll upward above the phase.
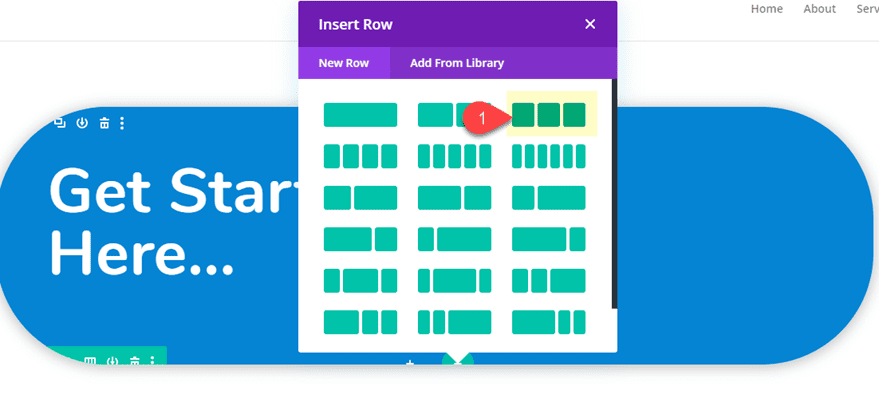
Developing the 2d Row of Content material
The second one row of content material is the place we can upload our CTA choices. Cross forward and upload a brand new row with a three-column structure.
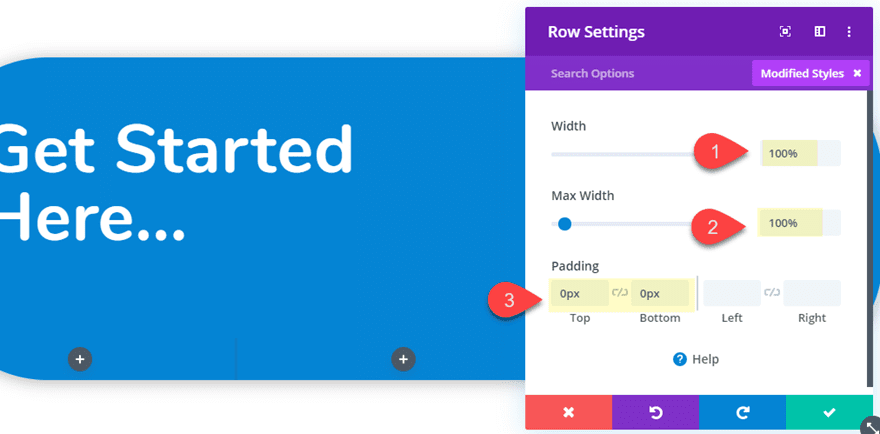
Then replace the row settings as follows:
Width: 100%
Max Width: 100%
Padding: 0px peak, 0px backside
Then upload a blurb module in column 1.
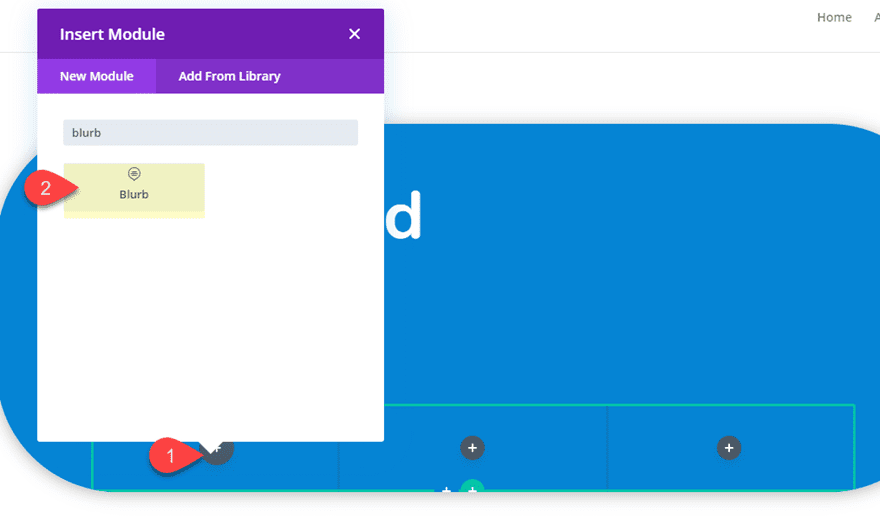
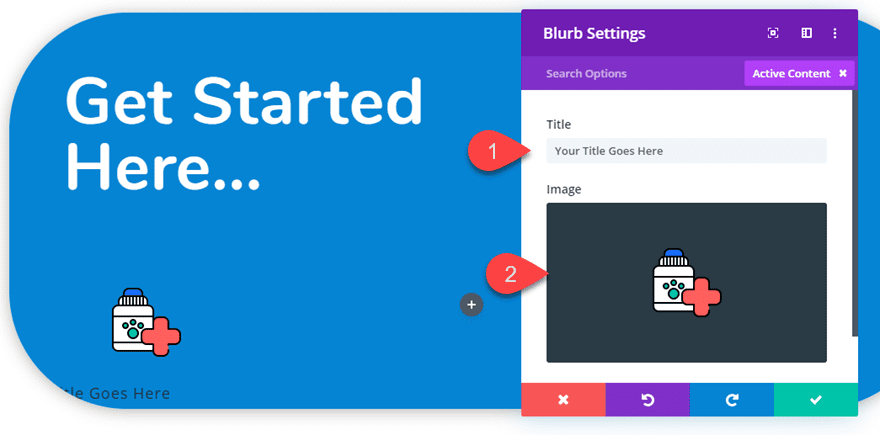
Then replace the blurb settings as follows:
Take out the default frame textual content and depart the Identify.
Then Upload a picture icon (90 X 90). Or you’ll use an ordinary Divi icon if you wish to have.
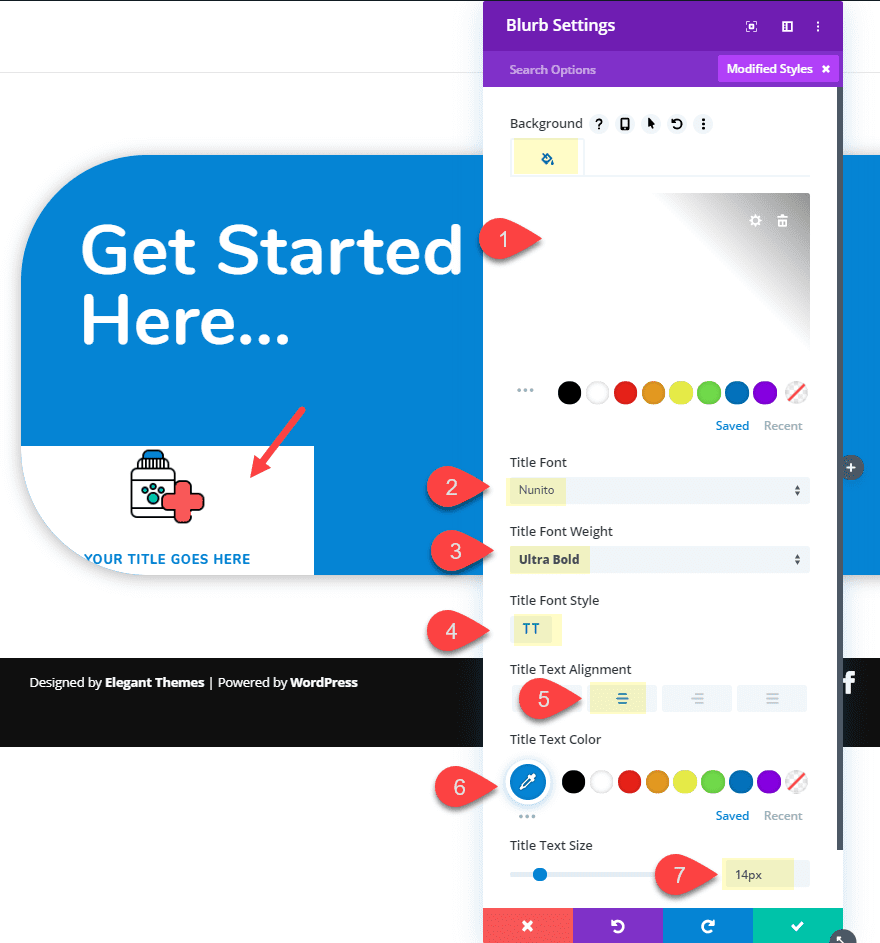
Upload a background and replace the design of the name textual content.
Background Colour: #ffffff
Identify Font: Nunito
Identify Font Weight: Extremely Daring
Identify Font Taste: TT
Identify Textual content Alignment: Heart
Identify Textual content shade: #2b87da
Identify Textual content Dimension: 14px
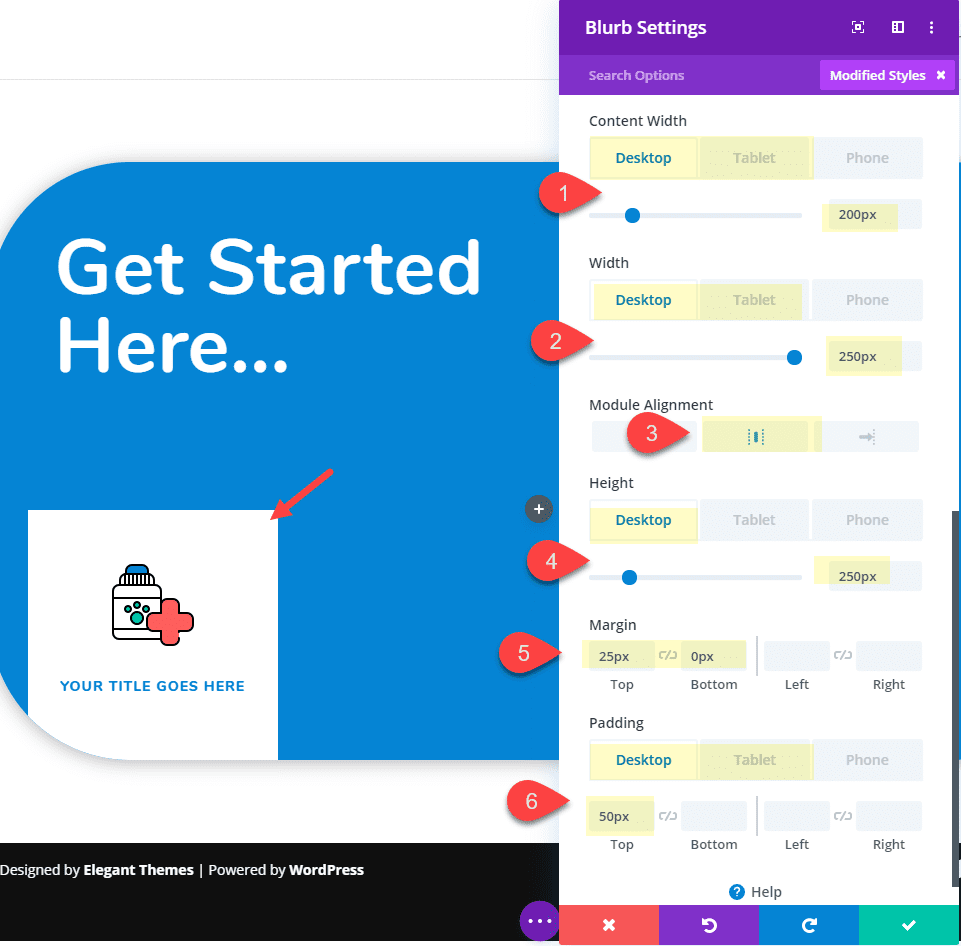
Sooner than we will make the blurbs round, first we want to give the blurb an equivalent peak and width. Then we will use spacing to align the blurb and blurb content material within the heart.
Content material Width: 200px(desktop), 250px(pill)
Width: 250px (desktop), 300px (pill)
Module Alignment: heart
Top: 250px (desktop), 300px (pill)
Margin: 25px peak, 0px backside
Padding: 50px peak (desktop), 75px peak (pill and get in touch with)
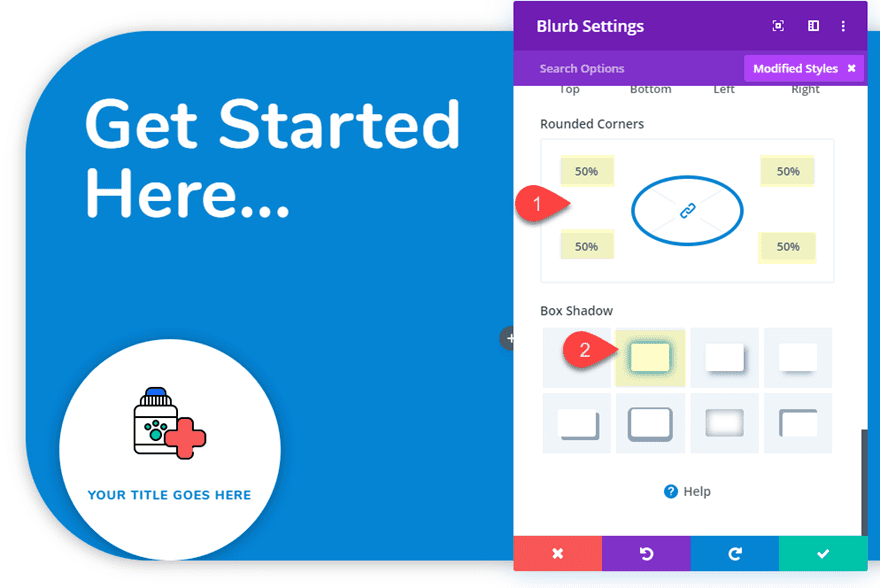
To finish the circle design, give the blurb a rounded nook and a field shadow.
Rounded Corners: 50%
Field Shadow: see screenshot
That looks after our first blurb. To create the following two. Replica the blurb and paste it into column 2 and column 3. Then replace the picture icon for each and every. It will have to appear to be the next:
Ultimate Touches to the Phase
To finish the “Get Began” CTA design, we want to replace the phase slightly extra. Replace the next phase settings:
Top: 300px (desktop), auto (pill and get in touch with)
Horizontal Overflow: hidden
Vertical Overflow: hidden
This may increasingly stay the phase the similar peak because the content material in row 1 and row 2. Hiding the overflow will stay the content material in row 2 hidden till we carry it up into view on hover.
To carry the row 2 content material into view, we want to take out the highest padding of the phase on hover.
Padding (hover): 0px peak
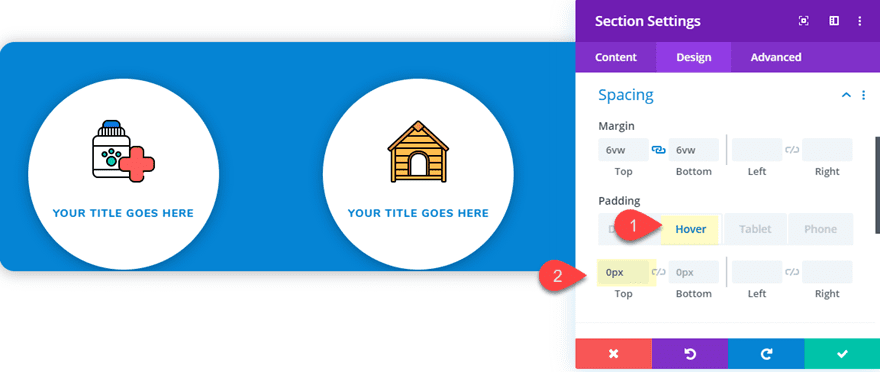
Now take a look at the end result thus far. The content material will scroll as much as divulge the content material in row 2 which presentations the 3 CTA choices.
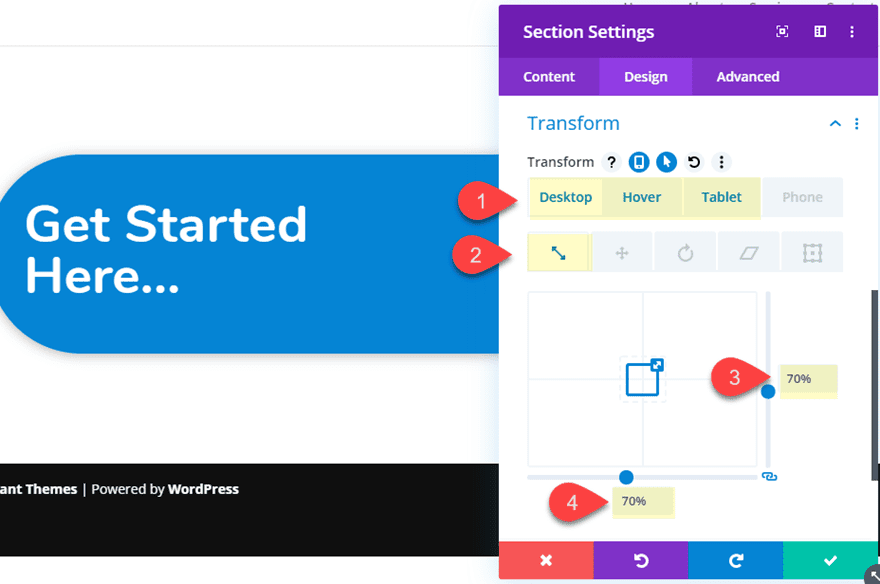
To make the phase seem extra like a button, we will use the develop into choices to scale it down after which carry it again to common measurement on hover. Replace the next develop into choices for the phase.
Develop into Scale (desktop): 70%
Develop into Scale (hover): 100%
Develop into Scale (pill): 100%
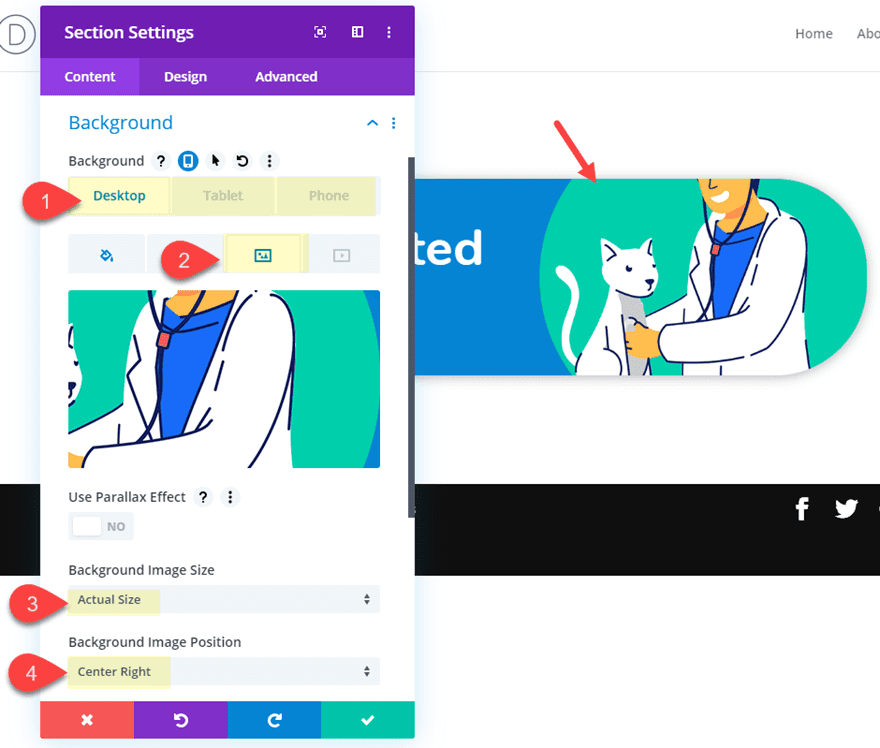
Now upload a background symbol graphic (500 X 500) to take in the precise measurement of the phase.
Background Symbol: insert symbol
Background Symbol Dimension: precise measurement
Background Symbol Place: Heart Proper (desktop), Most sensible proper (pill), Most sensible left (telephone)
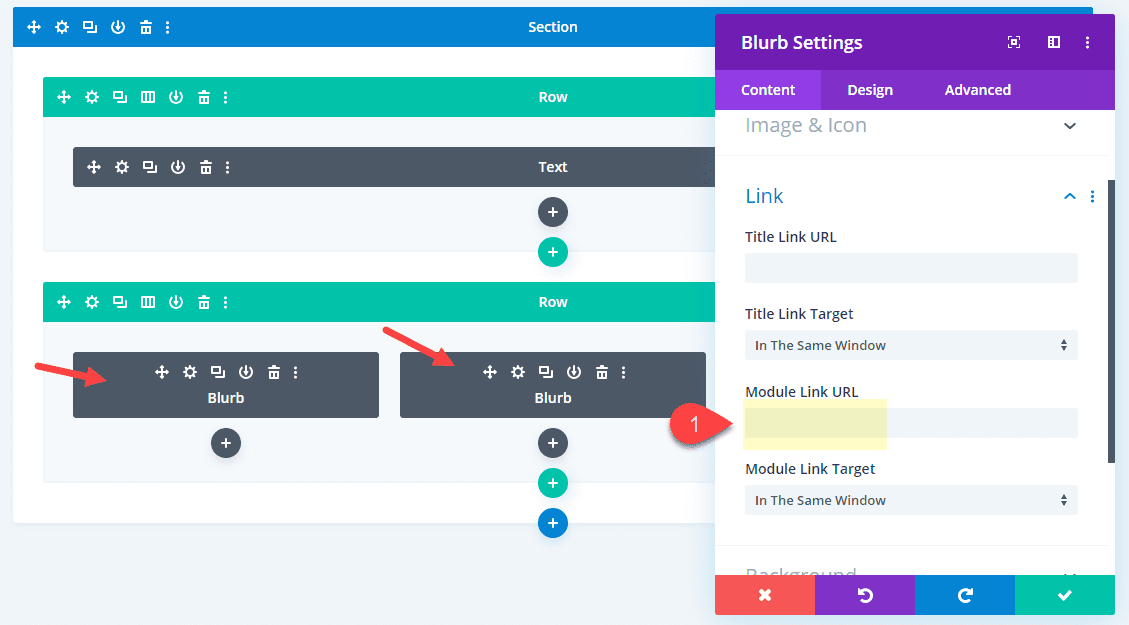
Including Hyperlink URLs to the Blurbs and Scaling them on Hover
Since our blurbs are in reality serving as circle buttons, we want to upload module hyperlink URLs to each and every of the blurbs. You are going to in fact want to upload your personal to suit your wishes.
For the reason that blurbs are hidden within the visible builder, toggle the wireframe view mode and replace each and every of the blurb settings with the module hyperlink URL.
Then keep in wireframe view mode and use multiselect to choose all 3 blurbs. And open the settings of one of the most blurbs to replace the component settings for all 3. Then replace the develop into choice as follows:
Develop into Scale (hover): 105%
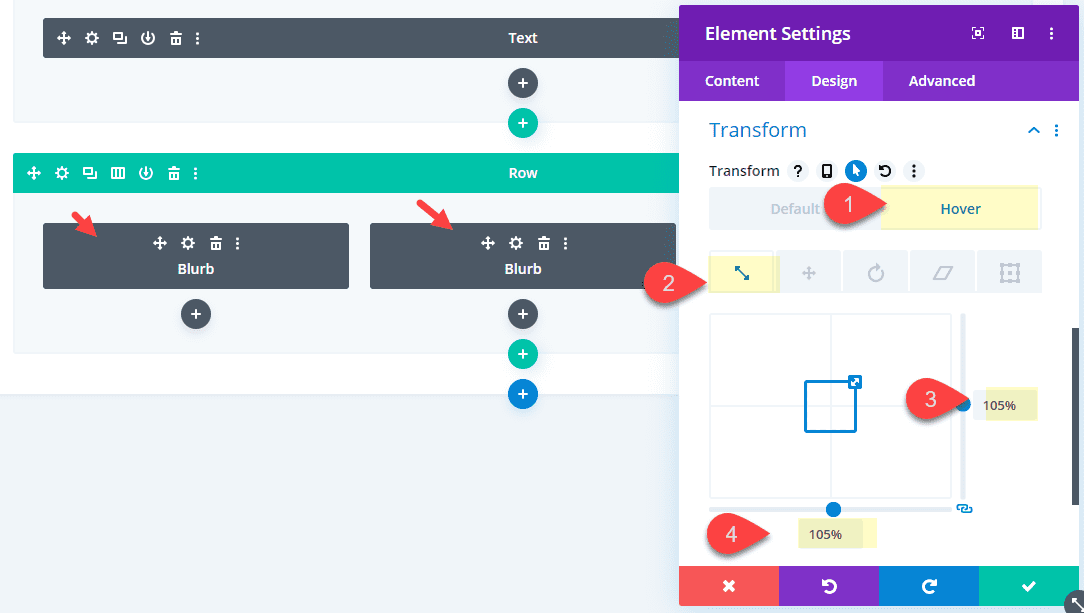
That’s it!
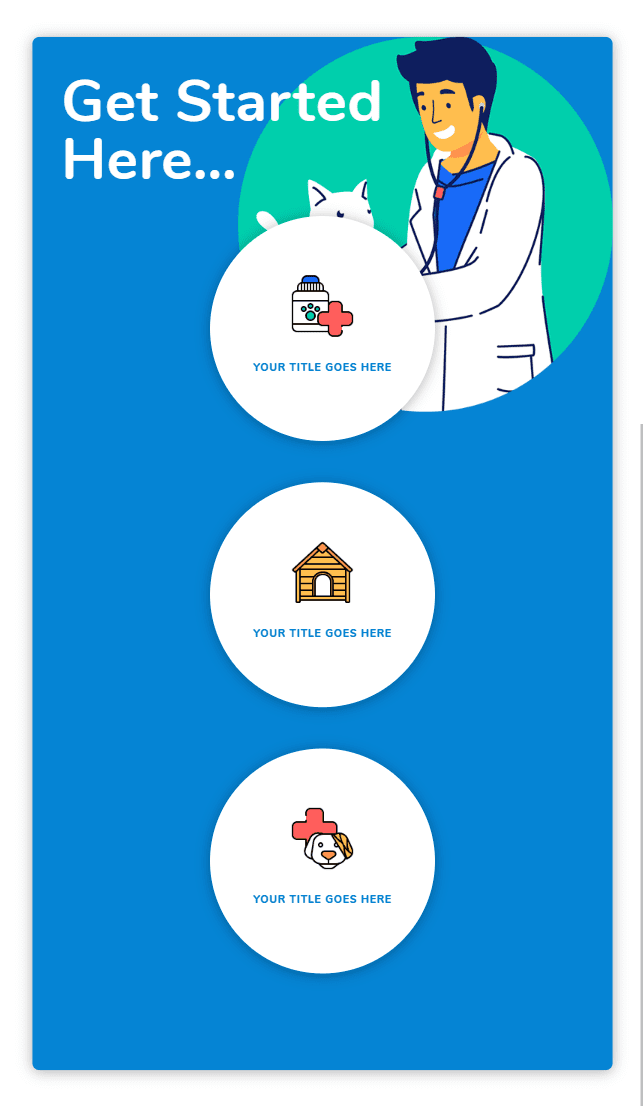
The Ultimate Outcome
Let’s take a look at the overall design of the “Get Began” CTA.
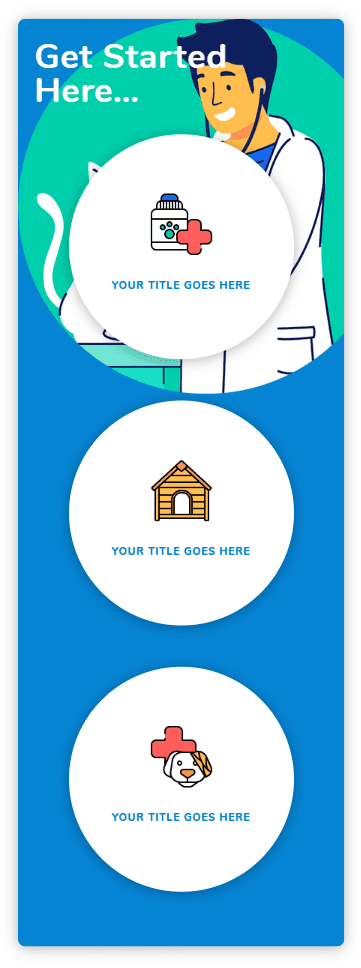
And this is the design on pill and get in touch with.
Ultimate Ideas
The “Get Began” CTA is commonplace on the internet as of late. Confidently, this educational will let you take it to the following stage. And, don’t be afraid to consider another tactics to make use of this capability. Consider it. You’ll upload any content material you wish to have to the phase!
Be at liberty to percentage your ideas within the feedback underneath.
I look ahead to listening to from you.
Cheers!
The publish Creating a “Get Started” CTA that Reveals Multiple Options on Hover gave the impression first on Elegant Themes Blog.
WordPress Web Design