As you understand by means of now, Divi has a ton of design settings that let you create distinctive hover results for any Divi part (sections, rows, or modules). Typically, a hover impact is remoted to only one part. For instance, should you upload a grow to be rotate assets to a module on hover, that rotation will turn on when soaring over the module. Alternatively, should you upload an extra hover impact to the row containing the module, this provides every other layer of hover results when soaring over the module. This opens the door for some uniquely summary hover results.
On this educational, we can discover grow to be more than one parts for summary hover results the use of Divi’s integrated settings. And because we can be the use of rows slightly in a different way for this design, I’ll display you create a grid format in your rows so you’ll show off those hover results in a gallery (if you wish to have).
Let’s get began.
Contents
- 1 Sneak Peek
- 2 Obtain the Turn out to be A couple of Components on Hover Structure for FREE
- 3 Obtain For Unfastened
- 4 You’ve effectively subscribed. Please take a look at your e-mail cope with to substantiate your subscription and get get admission to to loose weekly Divi format packs!
- 5 Getting Began
- 6 Summary Hover Results for an Symbol
- 7 Summary Hover Results for a Name to Motion (instance 1)
- 8 Summary Hover Results for a Name to Motion (instance 2)
- 9 Making a Grid Structure for Your Rows
- 10 Ultimate Ideas
Sneak Peek


Obtain the Turn out to be A couple of Components on Hover Structure for FREE
To put your arms at the designs from this educational, you’ll first wish to obtain it the use of the button beneath. To achieve get admission to to the obtain it is very important subscribe to our Divi Day by day e-mail record by means of the use of the shape beneath. As a brand new subscriber, you’ll obtain much more Divi goodness and a loose Divi Structure pack each Monday! Should you’re already at the record, merely input your e-mail cope with beneath and click on obtain. You are going to now not be “resubscribed” or obtain further emails.
@media simplest display screen and ( max-width: 767px ) {.et_bloom .et_bloom_optin_1 .carrot_edge.et_bloom_form_right .et_bloom_form_content:sooner than, .et_bloom .et_bloom_optin_1 .carrot_edge.et_bloom_form_left .et_bloom_form_content:sooner than { border-top-color: #ffffff !essential; border-left-color: clear !essential; }
}.et_bloom .et_bloom_optin_1 .et_bloom_form_content button { background-color: #f92c8b !essential; } .et_bloom .et_bloom_optin_1 .et_bloom_form_content .et_bloom_fields i { coloration: #f92c8b !essential; } .et_bloom .et_bloom_optin_1 .et_bloom_form_content .et_bloom_custom_field_radio i:sooner than { background: #f92c8b !essential; } .et_bloom .et_bloom_optin_1 .et_bloom_border_solid { border-color: #f7f9fb !essential } .et_bloom .et_bloom_optin_1 .et_bloom_form_content button { background-color: #f92c8b !essential; } .et_bloom .et_bloom_optin_1 .et_bloom_form_container h2, .et_bloom .et_bloom_optin_1 .et_bloom_form_container h2 span, .et_bloom .et_bloom_optin_1 .et_bloom_form_container h2 sturdy { font-family: “Open Sans”, Helvetica, Arial, Lucida, sans-serif; }.et_bloom .et_bloom_optin_1 .et_bloom_form_container p, .et_bloom .et_bloom_optin_1 .et_bloom_form_container p span, .et_bloom .et_bloom_optin_1 .et_bloom_form_container p sturdy, .et_bloom .et_bloom_optin_1 .et_bloom_form_container shape enter, .et_bloom .et_bloom_optin_1 .et_bloom_form_container shape button span { font-family: “Open Sans”, Helvetica, Arial, Lucida, sans-serif; } p.et_bloom_popup_input { padding-bottom: 0 !essential;}

Obtain For Unfastened
Sign up for the Divi Newlsetter and we can e-mail you a duplicate of without equal Divi Touchdown Web page Structure Pack, plus heaps of different wonderful and loose Divi sources, guidelines and tips. Apply alongside and you’ll be a Divi grasp very quickly. In case you are already subscribed merely kind on your e-mail cope with beneath and click on obtain to get admission to the format pack.
You’ve effectively subscribed. Please take a look at your e-mail cope with to substantiate your subscription and get get admission to to loose weekly Divi format packs!
To import the format for your web page, merely extract the zip record and drag the json record into the Divi Builder.
Let’s get to the academic we could?
Getting Began
For this educational, you’ll want the next:
- The Divi Theme put in and lively
- A couple of photographs. I’m the use of photographs from our premade layouts available from inside the Divi Builder
As soon as you are prepared, move for your WordPress Dashboard. Then create a brand new web page (Pages > Upload New), give your web page a name, and deploy the Divi Builder. Make a selection the choice “Construct from Scratch”.
Now your clean canvas awaits!
Summary Hover Results for an Symbol
This primary design will mix the skew grow to be hover results at the row and the picture module to create a fanning impact to our symbol on hover. With the exception of taking a look cool, this impact too can function a useful UI interplay that shall we the person know that by means of clicking the picture, you’ll see extra photographs. So you have to use the picture as a hyperlink for your gallery web page should you sought after.
Right here’s do it.
First create a brand new common phase with a one-column row.
Then upload a picture module to the row.
Subsequent, upload add a picture to the module.
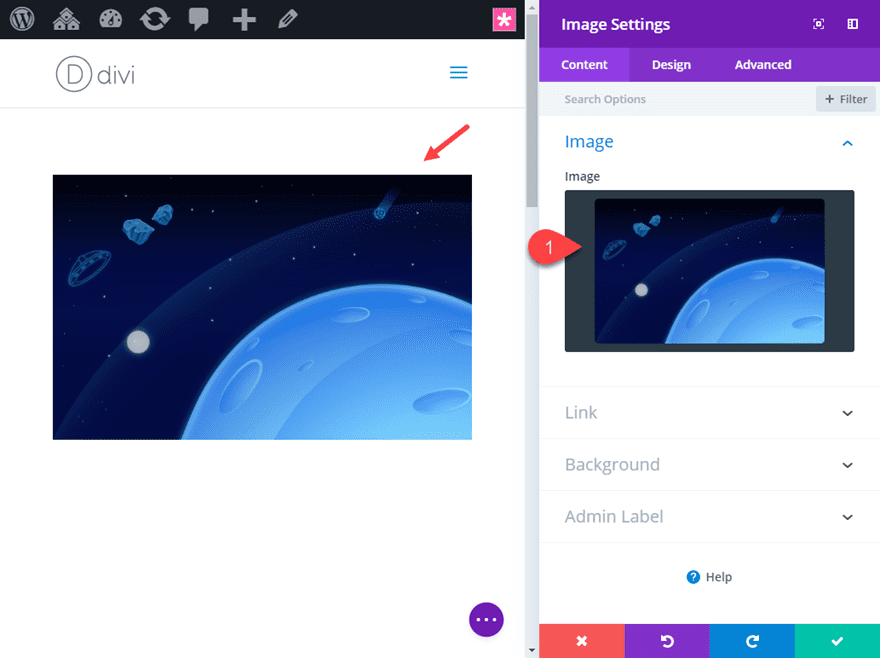
Upload Symbol Module Hover Results
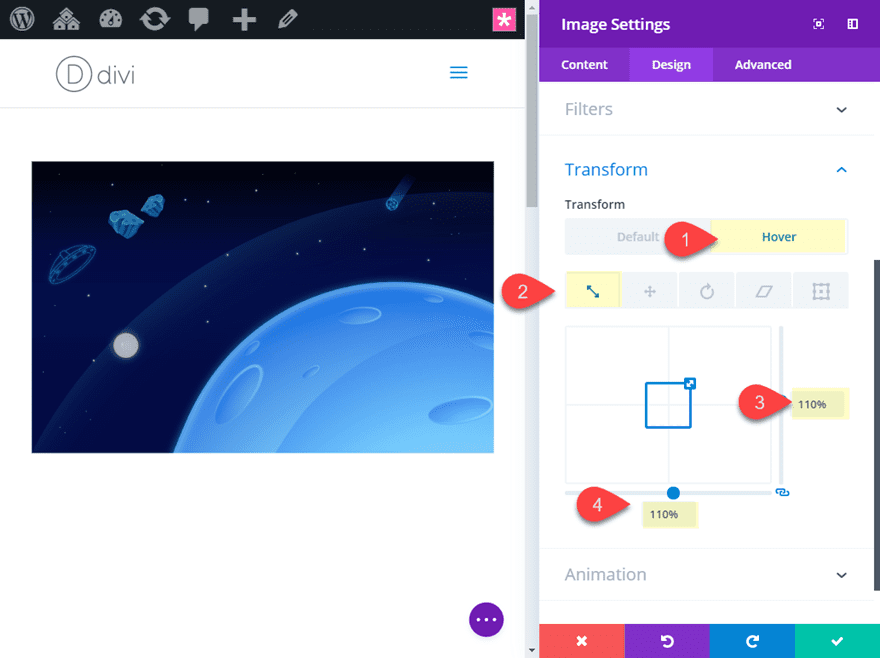
Now we will upload a couple of grow to be hover results to the picture that can scale rotate and skew the picture. To do that move to the grow to be choices and replace the next:
Turn out to be Scale X and Y axis: 110%
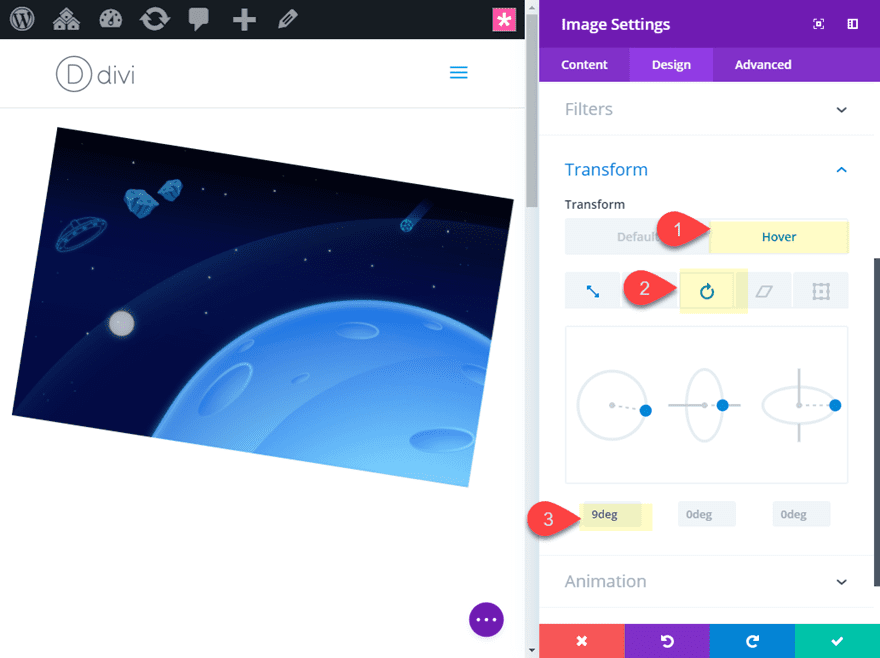
Turn out to be Rotate Z axis: 9deg
Turn out to be Skew X and Y axis: 3deg
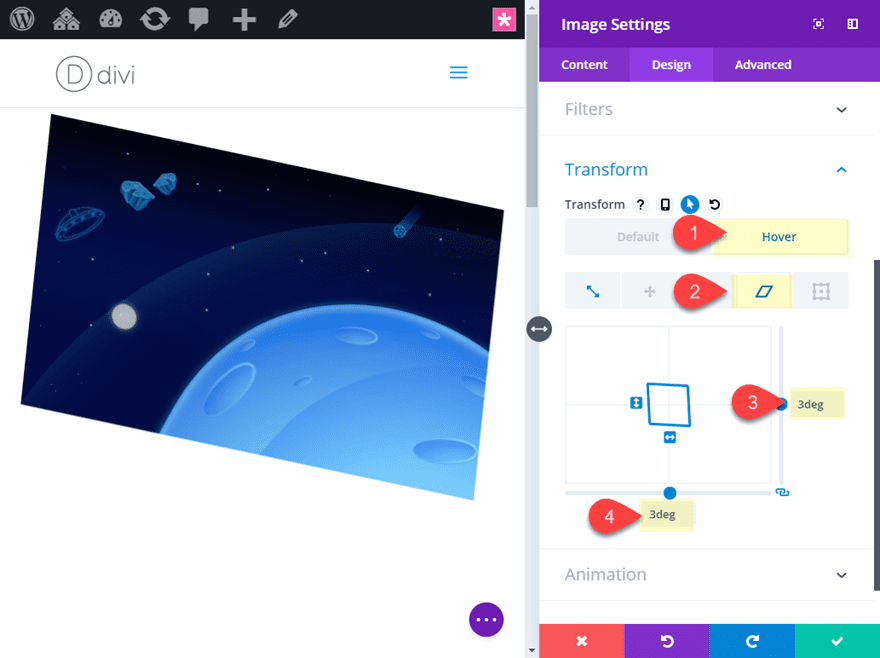
That’s it! Beautiful easy. Now we wish to customise the row so as to add every other hover impact that can turn on when soaring over the weather.
Row Settings
To ensure that this design to paintings, the row will wish to be the similar dimension as the picture inside of it in order that the hover space would be the identical for each. This may increasingly permit us so as to add other hover results for each the module and the row that can turn on when soaring over the module (or on this case the picture). This works as a result of soaring over a module inside a row will turn on the hover results the similar means it will should you hover over the row. And, as a result of now we have a distinct hover impact at the module, each hover results will turn on when soaring over the module. This permits us to make use of a mix of summary hover results the use of field shadow, grow to be skew, and grow to be rotate to each the row and the module.
We have already got our module hover results for our symbol in position, now we wish to modify the dimensions of our row. Relying at the dimension of the picture, the module will have to span the overall width of the row already so technically there isn’t a wish to modify the width of the row. However for this case, I’ll shrink the row as a way to make room for our hover results.
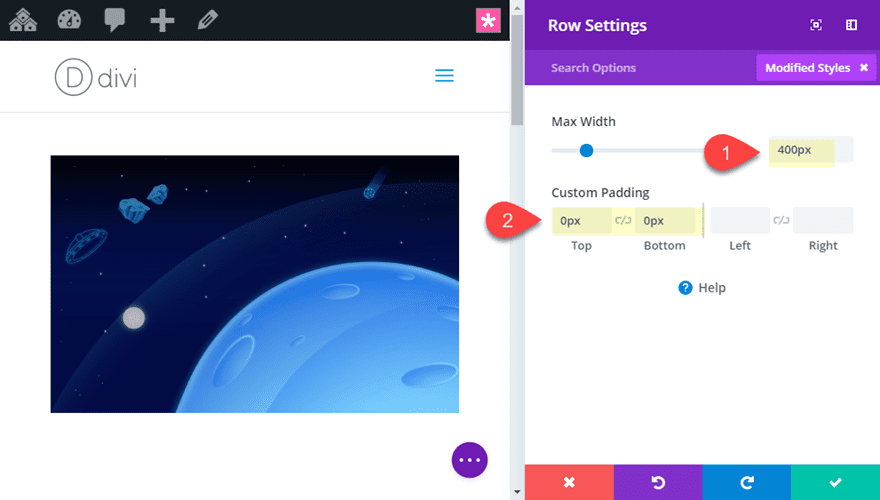
Replace the row settings as follows:
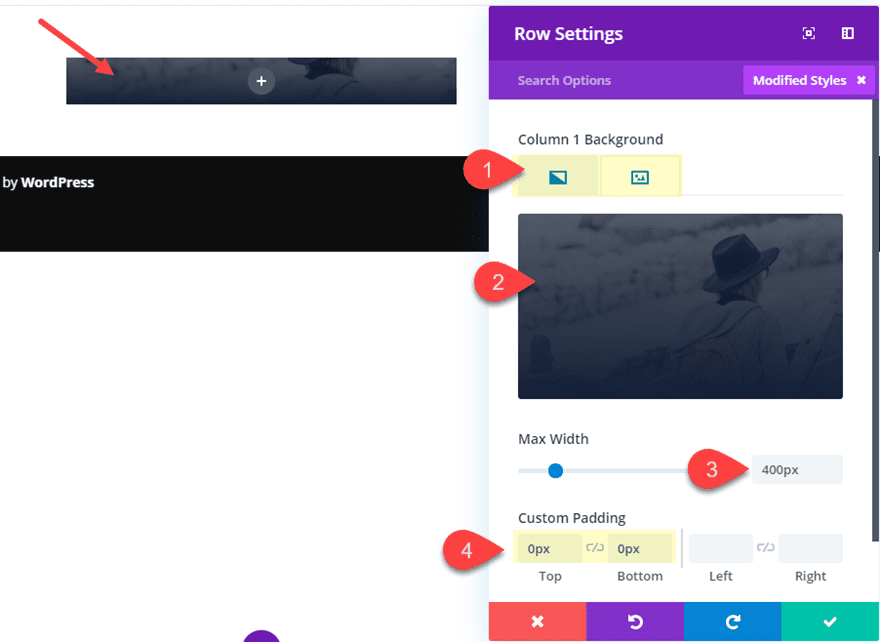
Max-width: 400px
Since we wish the peak of our row to check the picture inside of it, we wish to do away with the default height and backside padding:
Customized Padding: 0px height, 0px backside
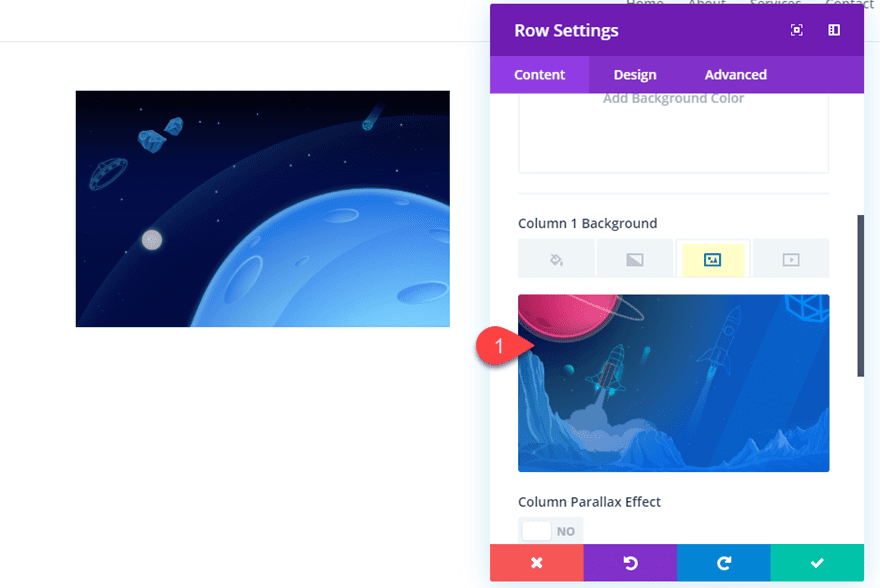
Now we wish to upload a background symbol to the row column. This background symbol will come into sight on every occasion the picture module grow to be hover impact skews and rotates.
Column 1 Background Symbol: [enter image]
Proceed to replace the row with a field shadow on hover as follows:
Field Shadow: see screenshot
Field Shadow Horizontal Place: 0px (default), -30px (hover)
Field Shadow Vertical Place: 0px (default), -15px (hover)
Shadow Colour: #002f66

This field shadow provides the impact of every other symbol showing at the back of the row background symbol which can seem after we upload our grow to be hover results that can rotate and skew the background symbol into view.
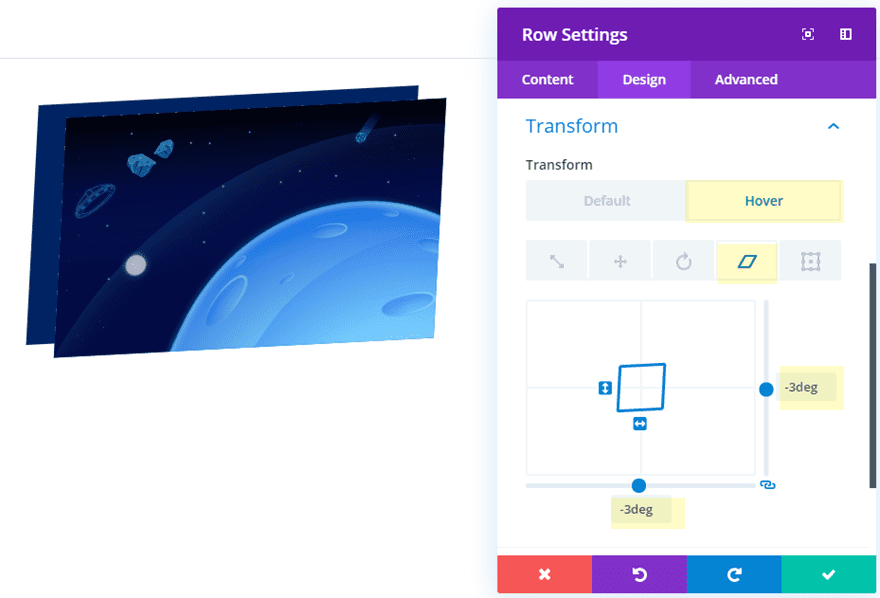
In the end, we’re in a position so as to add a skew grow to be assets so as to add an extra hover impact for the row.
Turn out to be Skew X and Y axis: -3deg
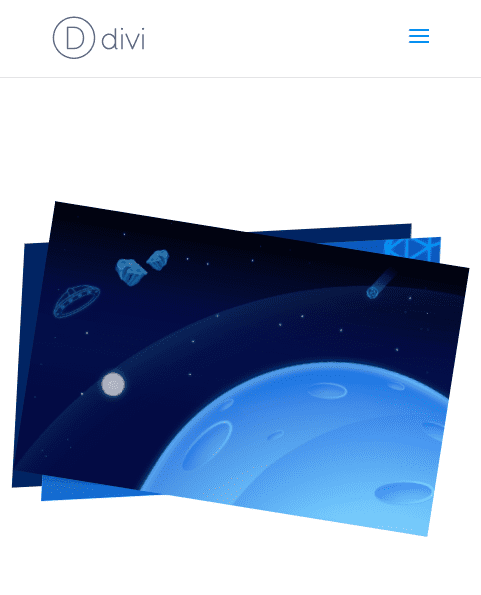
Ultimate End result
Here’s the overall end result.
And it’ll scale well on cell as neatly.
Summary Hover Results for a Name to Motion (instance 1)
Row Settings
Create a brand new common phase with a one column row.
Then replace the row settings as follows:
Column 1 Background Gradient Left Colour: rgba(34,43,58,0.71)
Column 1 Background Gradient Proper Colour: #222b3a
Background Symbol: [insert image]
Max Width: 400px
Customized Padding: 0px height, 0px backside
We can be circling again to the row settings to finish our summary hover results in just a little, however for now, let’s get our name to Motion Module added to the row.
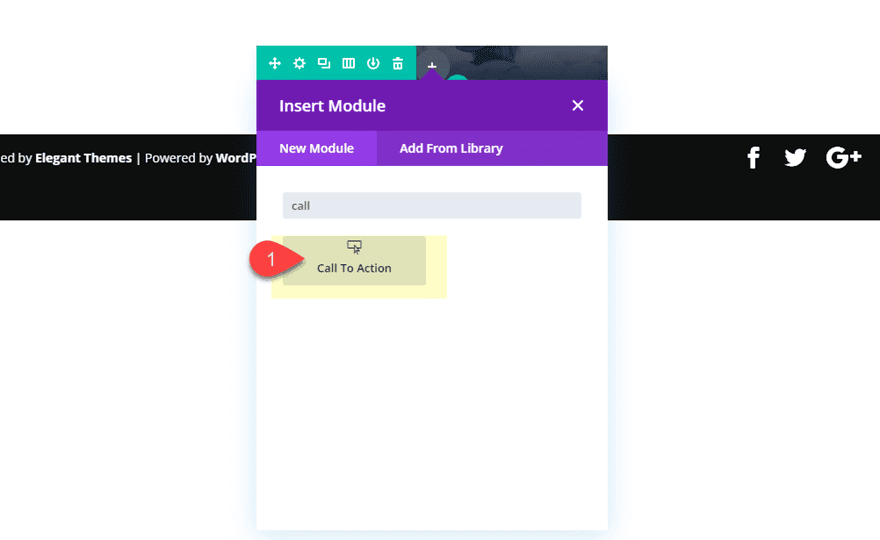
Name to Motion Module Settings
Open the Name to Motion Module settings and replace the content material as follows:
Identify: Shuttle With Issues
Button Textual content: Click on Right here
Content material: For a restricted time simplest
Button Hyperlink URL: # (simply to turn on the button for now)
Use Background Colour: NO
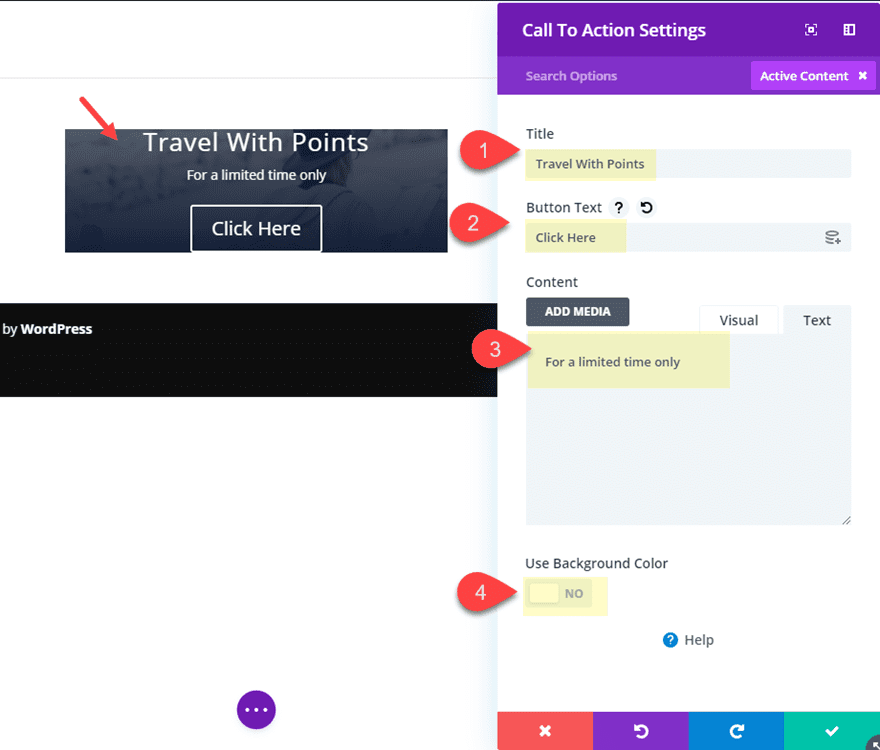
Then replace the design environment for the textual content and spacing of the module.
Identify Font: Gilda Show
Button Textual content Dimension: 16px
Button Textual content Colour: #ffb238
Button Background Colour: rgba(0,0,0,0)
Button Border Width: 0px
Customized Padding: 20% height, 20% backside
Now upload a border to the module.
Border Width: 2px
Border Colour: #222b3a

That looks after our default design. Now it’s time for the thrill phase. Bear in mind, as a result of our row and module are necessarily the similar dimension (top and width), the hover space would be the identical for each. In different phrases, the hover results we upload to the row and module will each turn on when soaring over the weather. This permits us to make use of a mix of summary hover results the use of field shadow, grow to be skew, and grow to be rotate to each the row and the module.
Let’s get started with the row hover results.
Row Hover Results
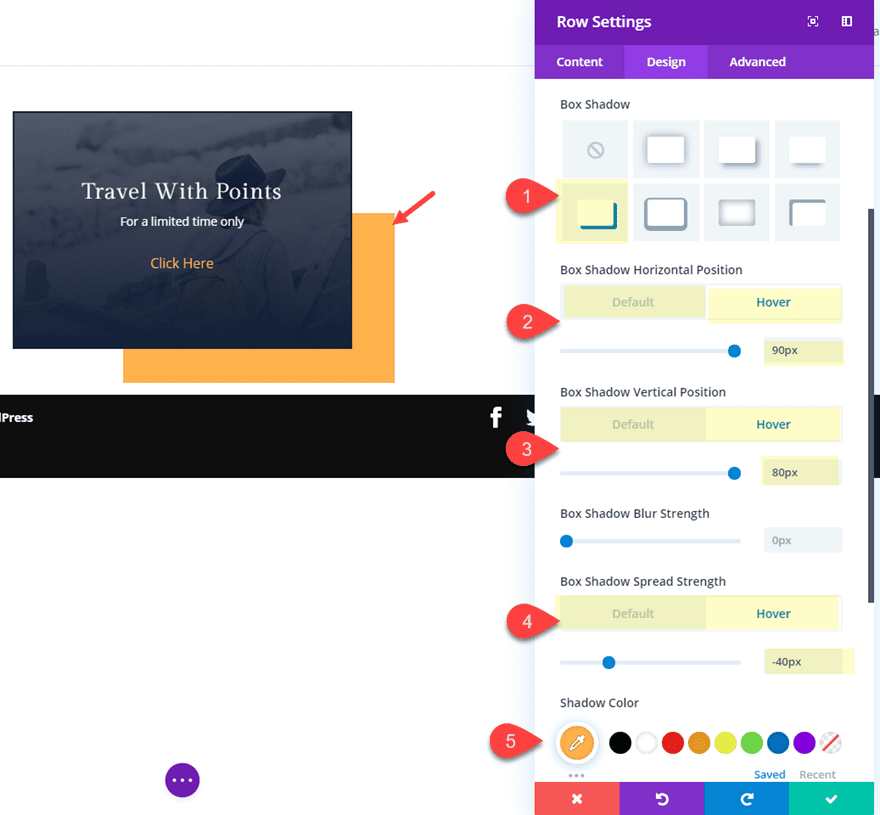
First, we will upload a field shadow on hover to our row. Open the row settings and replace the next:
Field Shadow: see screenshot
Field Shadow Horizontal Place: 0px (default), 90px (hover)
Field Shadow Vertical Place: 0px (default), 80px (hover)
Field Shadow Unfold Power: 0px (default), -40px (hover)
Shadow Colour: #ffb238
Remember the fact that the field shadow can even inherit the grow to be choices we can be including subsequent.
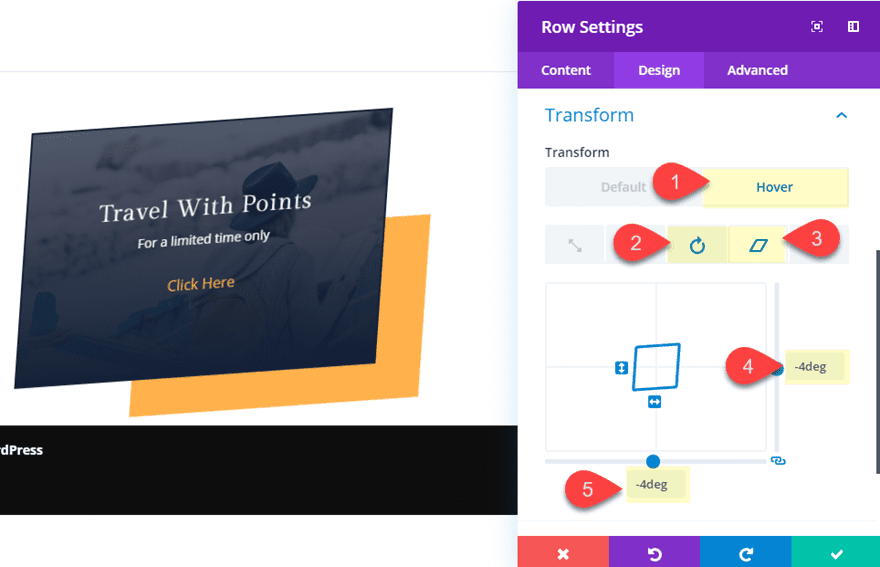
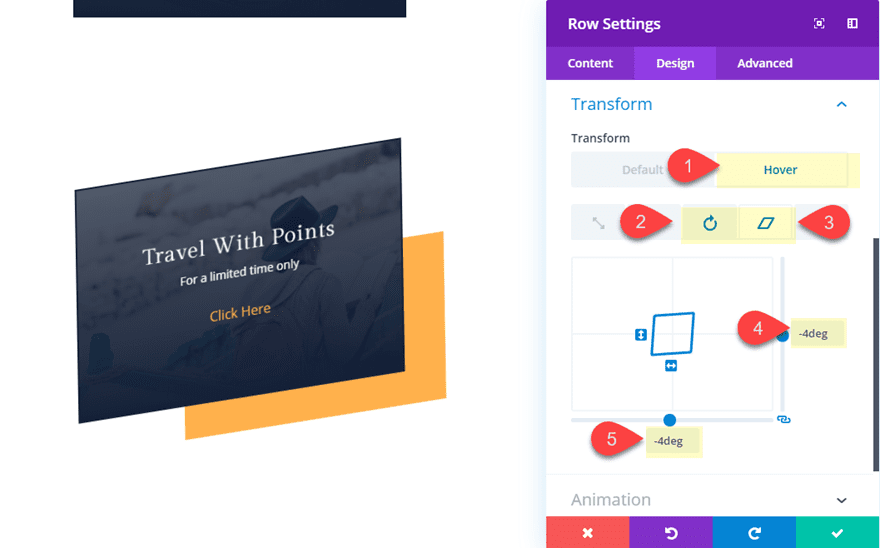
Now let’s upload a rotate and skew grow to be assets on hover.
Turn out to be Rotate X axis (hover): 10deg
Turn out to be Skew X axis (hover): -4deg
Turn out to be Skew Y axis (hover): -4deg
That looks after the row hover results. Now we wish to upload the hover impact to the Name to Motion Module that can whole the design.
Name to Motion Module Hover Results
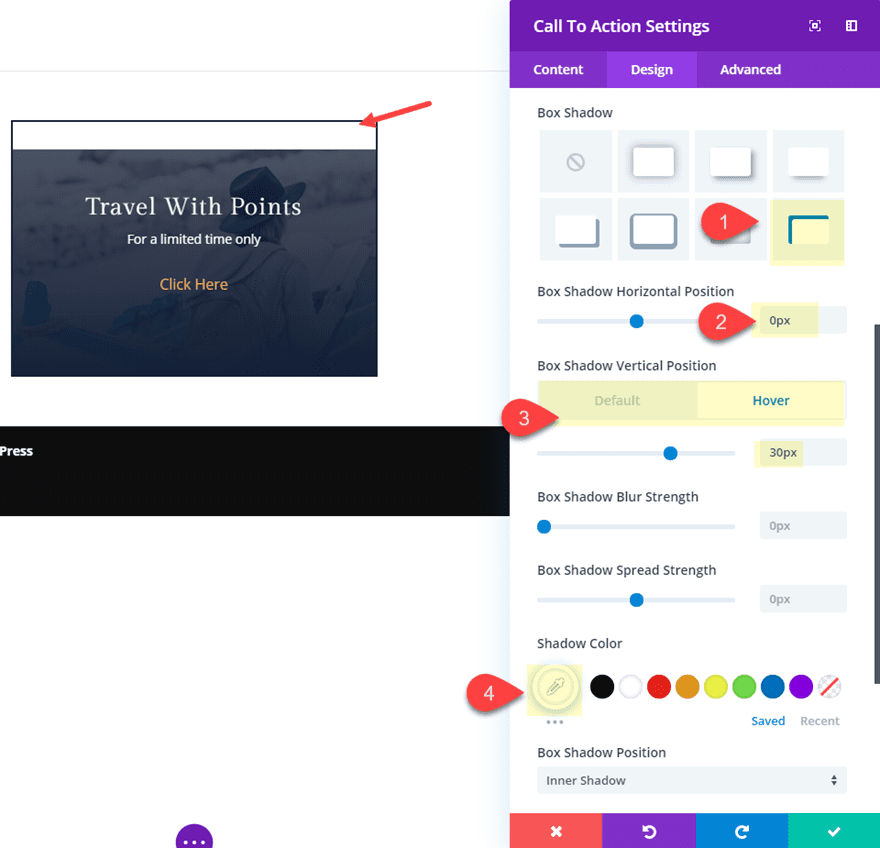
Open the decision to motion module settings and provides it a field shadow hover impact as follows:
Field Shadow: see screenshot
Field Shadow Horizontal Place: 0px
Field Shadow Vertical Place: 0px (default), 30px (hover)
Shadow Colour: #ffffff
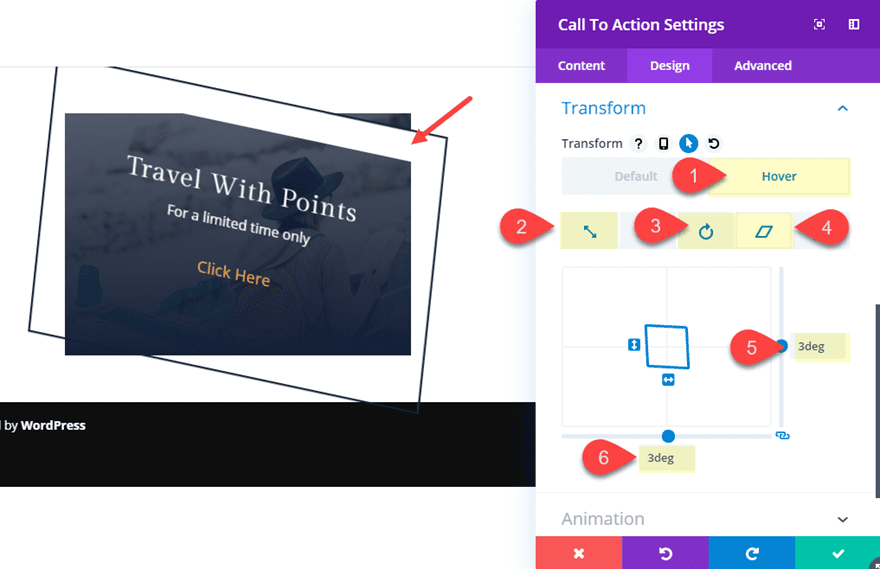
In the end, upload a scale, rotate and skew grow to be assets on hover as follows:
Turn out to be Scale X and Y Axis (hover): 115%
Turn out to be Rotate Z axis (hover): 9deg
Turn out to be Skew X axis (hover): 3deg
Turn out to be Skew Y axis (hover): 3deg
Expanding the dimensions of the module the use of scale on hover will assist decrease the danger of the person soaring over simply the row part as a substitute of the module.
Ultimate End result
Here’s the overall results of the summary hover impact. Understand how each the row hover results and the module hover results turn on on hover to skew the weather in for an summary design.
Here’s what the hover impact will seem like on cell. Alternatively, since maximum cell browsers require a faucet to turn on the hover impact, you could need to disable the hover impact on cell to keep away from the person having to double faucet if you’re the use of the module as a hyperlink.

Summary Hover Results for a Name to Motion (instance 2)
To jumpstart the design this subsequent summary hover impact, let’s replica the phase containing our first instance. Now all we wish to do is make some minor changes to the design and hover results for a novel design.
Replace Row Settings
First, replace the row settings as follows:
Turn out to be Rotate Z axis: -5deg
Turn out to be Skew X and Y axis: -4deg
Replace Name to Motion Module Settings
Now let’s tweak the module settings as follows:
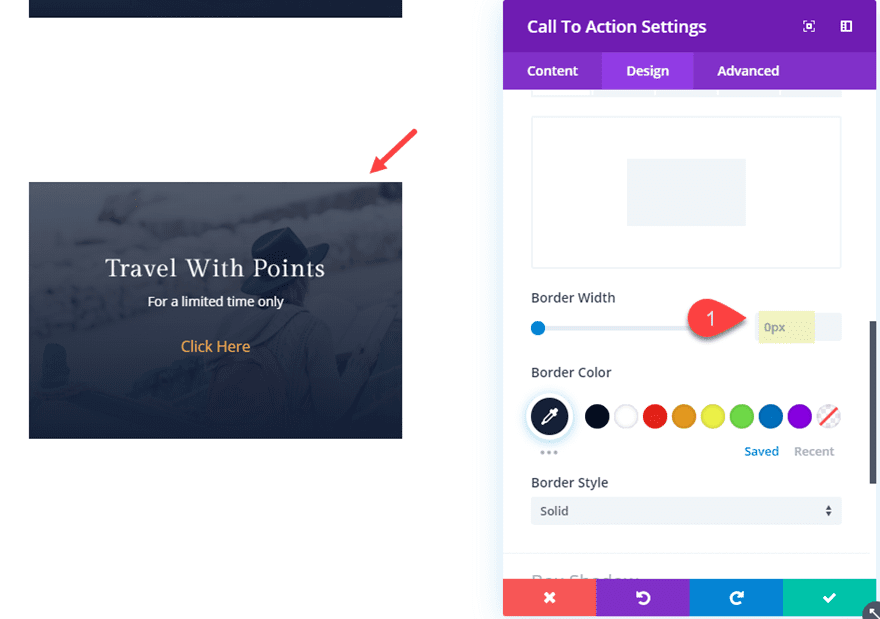
First, take out the border…
Border width: 0px
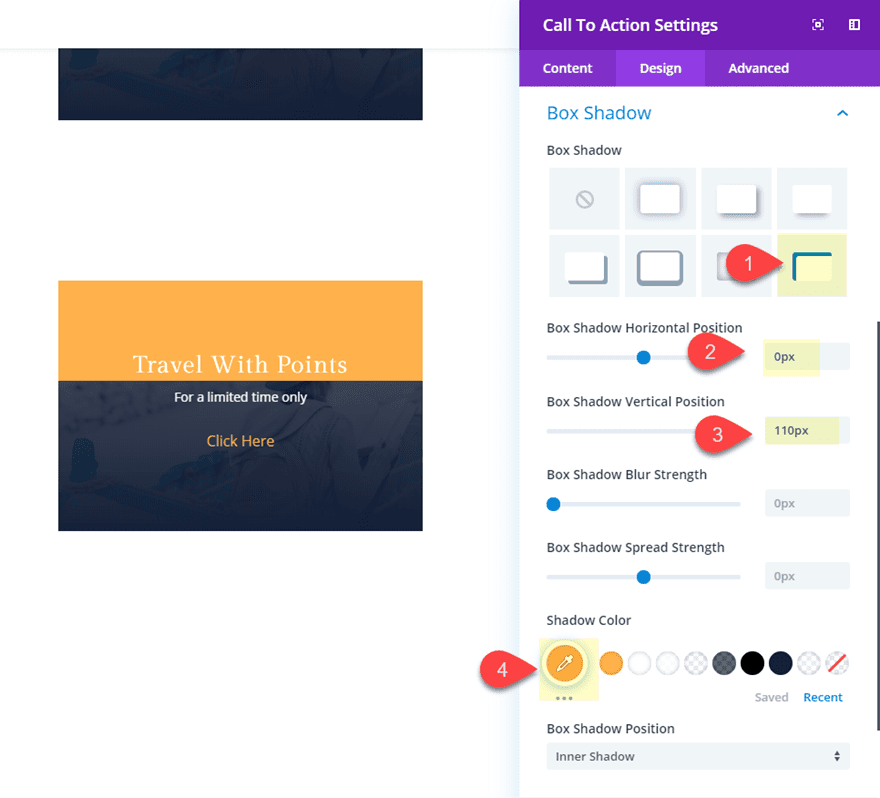
Then replace the field shadow as follows:
Field Shadow Horizontal place: 0px
Field Shadow Vertical Place: 110px
(be certain and disable the hover impact inherited from the former design you duplicated)
Shadow Colour: #ffb238
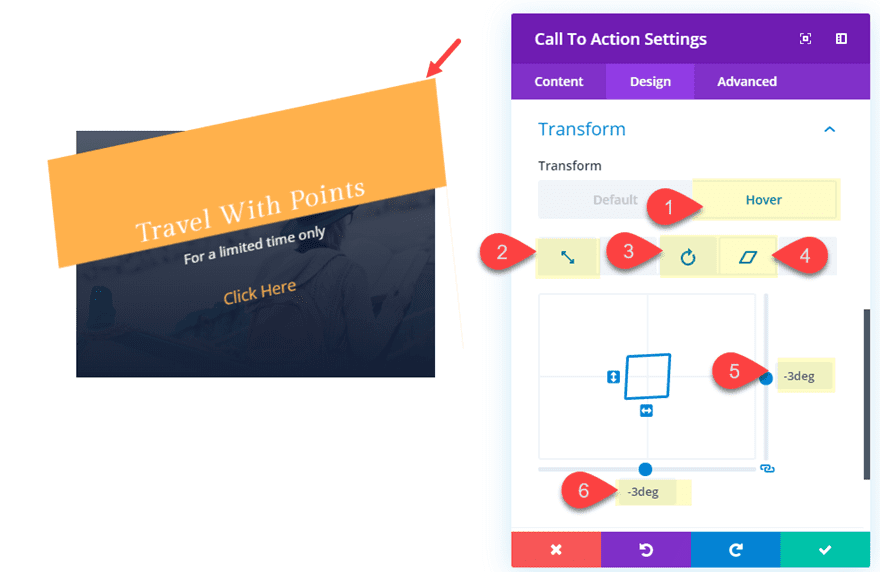
Now we will replace our grow to be assets hover results. Right here we’re principally lowering the dimensions just a little and including detrimental values to our earlier rotate and skew grow to be homes to transport the part in the other way on hover.
Replace the next grow to be choices:
Turn out to be Scale X and Y Axis (hover): 110%
Turn out to be Rotate Z axis (hover): -9deg
Turn out to be Skew X axis (hover): -3deg
Turn out to be Skew Y axis (hover): -3deg
Making a Grid Structure for Your Rows
As a result of this design calls for the father or mother row to wrap across the module and feature the similar top and width, you don’t actually be capable to create a column format like you possibly can generally, Alternatively, you’ll use the flex assets to align your rows horizontally in a grid format.
To do that, first replica the row containing your module a few occasions so that you’ve 3 rows in a single phase.
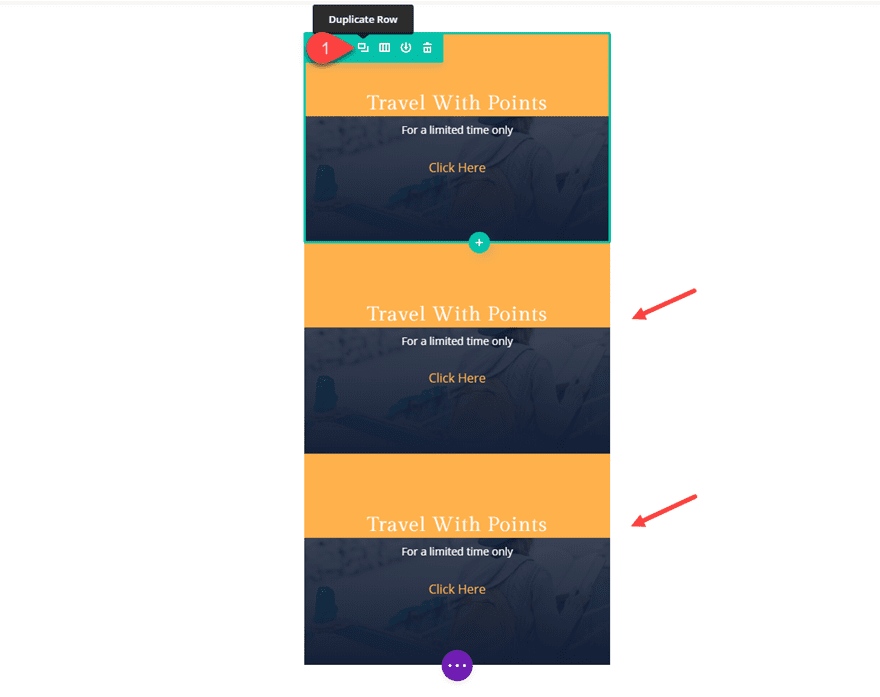
Then upload a customized margin to each and every of the rows:
Customized Margin: 50px height, 50px backside
Then open the phase settings and easily upload the next customized CSS to the Major Component.
show: flex;
flex-wrap: wrap;
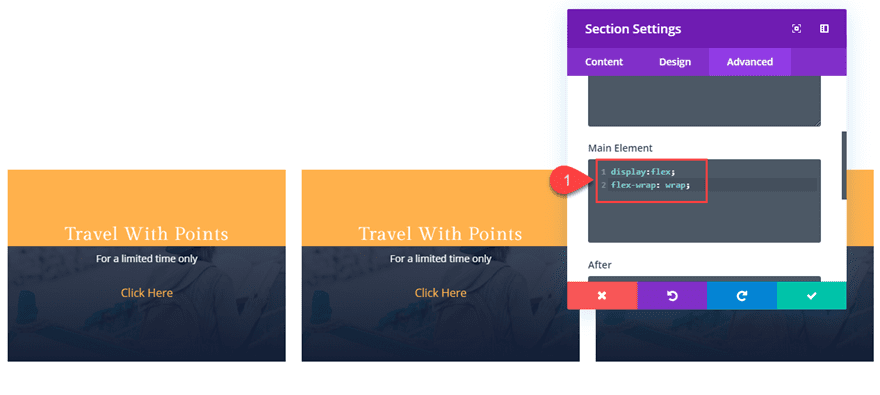
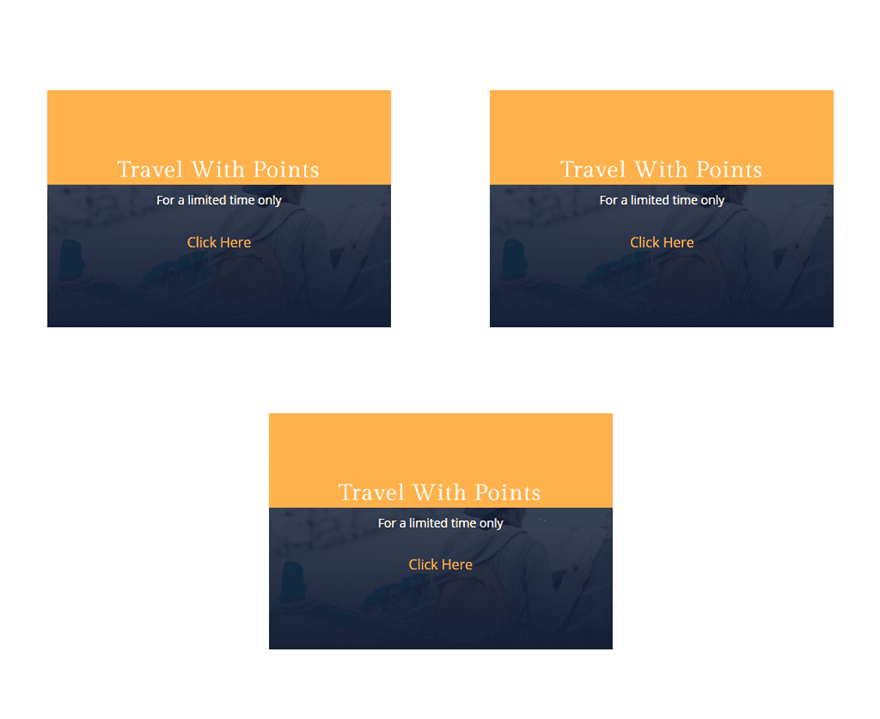
Now you might have 3 columns of rows that can reply along with your browser dimension.

Ultimate Ideas
Reworking more than one parts on hover does supply every other stage of creativity you’ll discover. The examples on this educational the place intended to turn you what’s imaginable, however be happy to tweak the designs in your personal venture. As it’s possible you’ll be expecting, you’ll get beautiful wacky if you wish to have. However you’ll even be just a little extra conservative to create a delicate interplay design part like the picture module instance on this educational.
I stay up for listening to from you within the feedback.
Cheers!
The publish How to Transform Multiple Elements for Abstract Hover Effects in Divi gave the impression first on Elegant Themes Blog.
WordPress Web Design