The use of toggles for your internet web page is a good way to prepare your content material in a blank and concise method. It will assist spice up the person enjoy via slicing down on scrolling and giving the person extra regulate over what they need to see for your web page. A web based eating place menu is a superb instance the place toggles can paintings neatly. A person can simply to find the menu merchandise they prefer and click on the article for more info.
On this educational, I’m going to turn you ways create some intuitive and cell pleasant toggles to your eating place menu the use of Divi toggles. I’ll even display you ways optimize your toggle for cell and embed Divi symbol galleries within your toggle content material to show off surprising footage of explicit dishes.
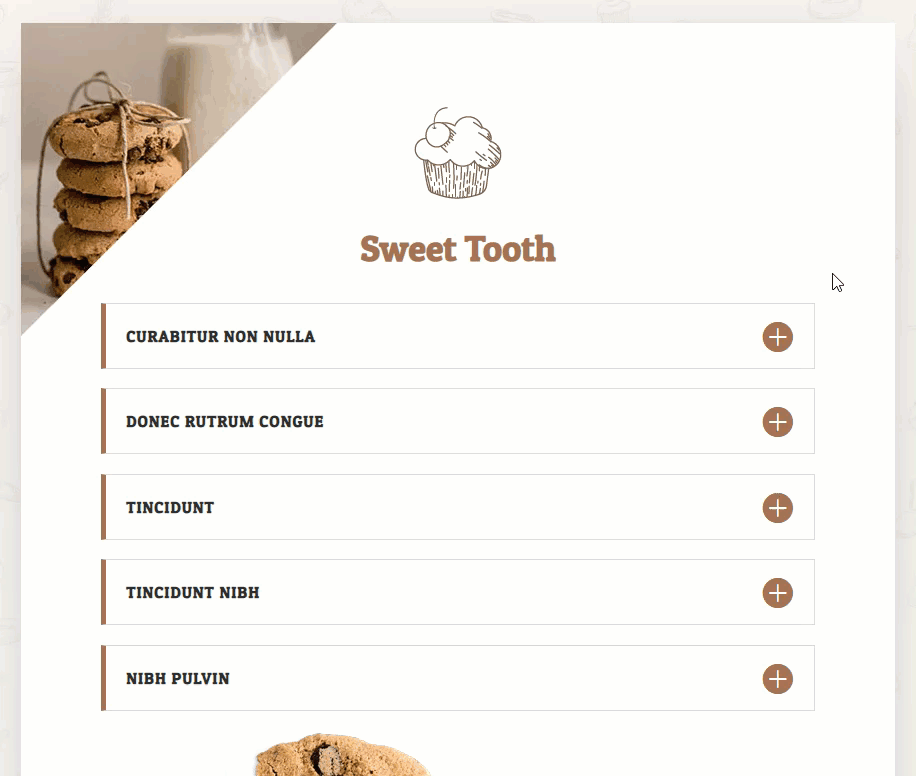
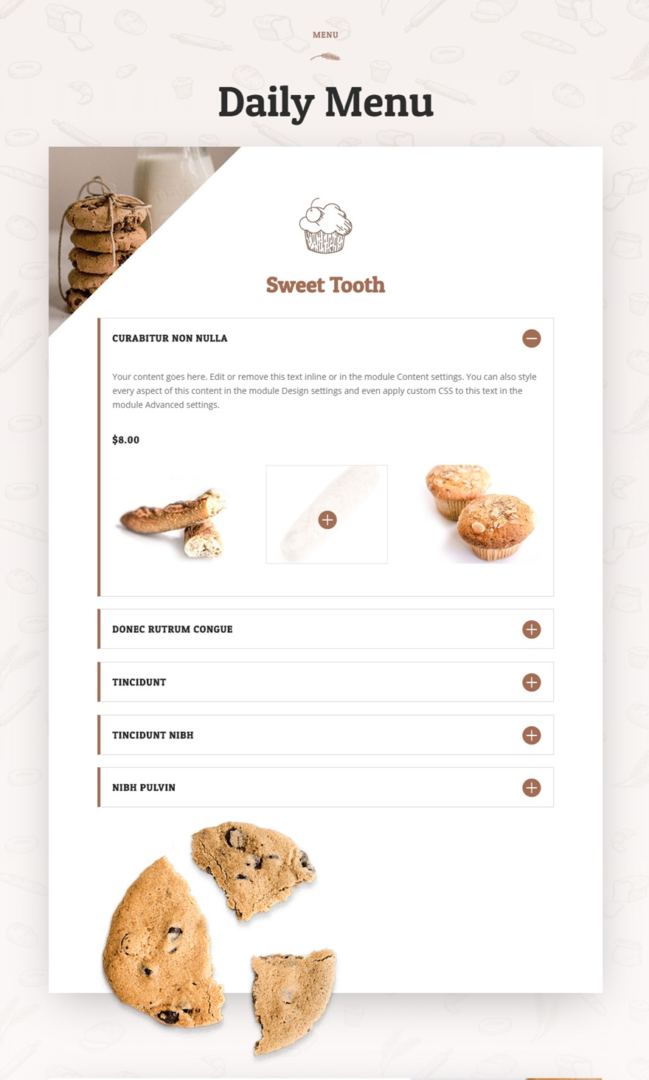
Here’s a sneak peek of the sooner than and after for the eating place menu design we will be able to be construction.
Prior to
After
Getting Began
Changing WordPress Gallery Show with Divi Gallery Show
Divi permits you to change the default WordPress Gallery show with a Divi Gallery show. So each time you create a WordPress gallery and embed it on your web page, the gallery be displayed like a gallery the use of the Divi Gallery Module. This lets you upload Divi symbol galleries to any module within the Divi Builder (extra in this later). To enforce this transformation, navigate to Divi > Theme Choices. Underneath the Common tab, click on to permit the Divi Gallery choice.
Surroundings Your Theme Accessory Colour (non-compulsory)
Since we will be able to be placing a Divi gallery right into a toggle module, the icon colour that displays whilst you hover over a picture within the gallery will robotically inherit the accessory colour you will have set for the Divi theme. You’ll be able to set the theme accessory colour out of your WordPress Dashboard via navigating to Divi > Theme Customizer > Common Settings > Format Settings. Underneath Format Settings, replace the theme get admission to colour to the next:
Theme Accessory Colour: #a06d51
That is the colour that can fit the Bakery Menu Format we will be able to be the use of for this educational.
Updating the Default Toggle Icon Measurement within the the Module Customizer (non-compulsory)
For this design, I believed it could be useful to show a bigger toggle icon when the use of the Divi Toggle module. You’ll be able to alternate the default measurement of the Toggle Module via navigating to Divi > Module Customizer. Then choose the Toggle Module from the checklist and replace the icon measurement as follows:
Toggle Icon Measurement: 32
Putting in place your New Web page with the Bakery Menu Web page Format
For starters, it is important to create a brand new web page, give your web page a name, and deploy the Divi Builder. Choose the choice “Make a selection a Premade Format”.
From the burden from library popup, make a choice the Bakery Format Pack after which click on to make use of the Bakery Menu Web page Format.
As soon as the structure has been loaded to the web page, post your web page. Then click on the button “Construct on Entrance Finish”. after which post your web page. Then click on to construct at the entrance finish.
As soon as accomplished, you are prepared to start out designing the menu!
Imposing the Customized Eating place Menu Design with Divi Toggles and Symbol Galleries
Designing a Menu Merchandise Toggle
With the Divi Builder lively at the entrance finish, upload a Toggle module beneath the textual content module with the subheading that reads “Candy Enamel”.
For now, you’ll be able to go away the default mock content material used for the Name and Frame Content material. However, it is important to upload a value for the menu merchandise within the frame content material of the tab. Click on the Textual content tab (as a substitute of Visible) and upload the next html beneath the present default textual content.
$8.00
Then get started updating the toggle settings as follows:
Icon Colour: #a06d51
Open Toggle Textual content Colour: #333333
Closed Toggle Textual content Colour: #333333
Closed Toggle Background Colour: #ffffff
Name Font: Patua One
Name Font Weight: Daring
Name Font Taste: TT
Name Letter Spacing: 1px
Name Line Top: 4em
Customized Padding: 0px most sensible, 0px backside
With a purpose to build up the clickable house of the toggle name, the name line peak is greater and the highest and backside padding is taken out.
Now let’s upload a left border to our toggle.
Left Border Width: 5px
Left Border Colour: #a06d51
Including an Symbol Gallery to the Toggle Module
As discussed previous, whilst you permit the Divi Gallery choice within the Divi Theme Choices, a WordPress Gallery embed will take at the taste of a Divi Gallery. This lets you embed a Divi-styled symbol gallery to any module. For this case, we need to upload some photographs within the toggle module to show some photographs of a specific eating place menu merchandise. To try this, open the toggle settings and click on the Upload Media button above the content material field.
Within the Media Library popup, choose the Create Gallery tab at the left. Then choose the picture(s) you wish to have to make use of for the gallery and click on “Create a New Gallery”.
At the Edit Gallery phase of the popup, forget about the gallery settings since the Divi Gallery types will override those WordPress Gallery settings. Then click on the Insert Gallery button.
This puts a gallery shortcode throughout the toggle module content material. If you wish to have the gallery to be displayed after the present frame textual content, you’ll want to position the shortcode after the content material.
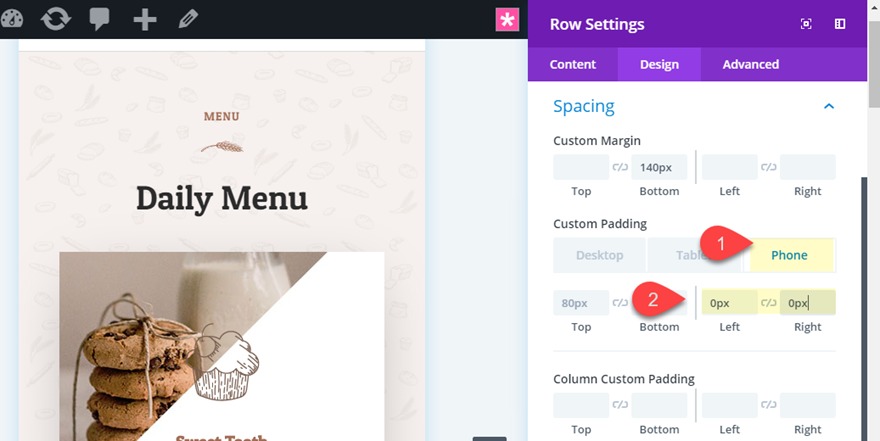
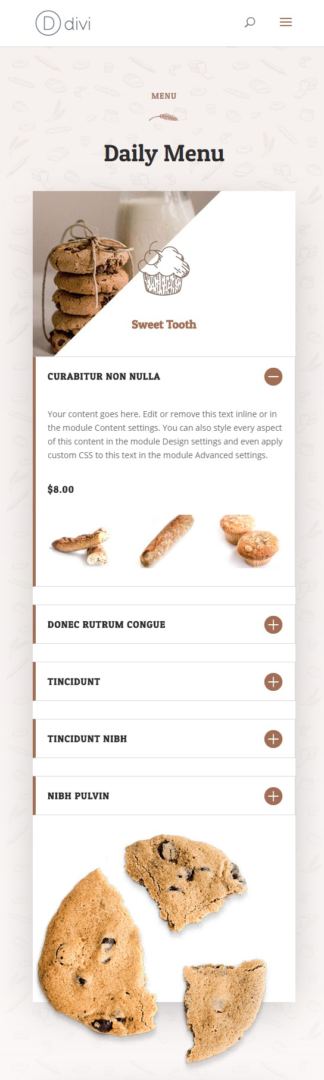
Adjusting the Row Padding for Smartphone
The content material gets beautiful tight with the present spacing of the premade structure. We want to replace the row settings to create extra space on smartphone. To try this, open the settings of the row containing your eating place menu toggles and replace the next:
So as to add extra Menu Pieces, merely reproduction the Toggle module and replace the content material with new textual content and symbol galleries as wanted. After that, you’ll be able to delete the unique menu pieces that got here with the premade structure.
Ultimate Outcome
Now Let’s take a look at the general results of the design.
Converting the Collection of Columns within the Gallery
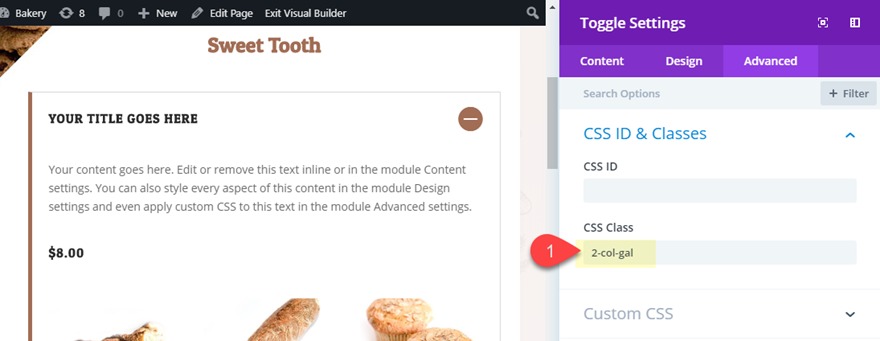
By means of default, the gallery have a structure that continues to be 3 columns on all browser widths and gadgets. Alternatively, with the lightbox impact, customers will be capable of see a bigger model when clicking at the gallery merchandise. So, the smaller photographs can nonetheless paintings. However, if you wish to alternate the selection of columns, you’ll be able to all the time upload a small snippet of CSS. For this case, I’m going to switch the gallery to show photographs into two columns. To try this, first open the toggle settings and upload a customized CSS Elegance as follows:
CSS Elegance: 2-col-gal
Then open web page settings and upload the next Customized CSS:
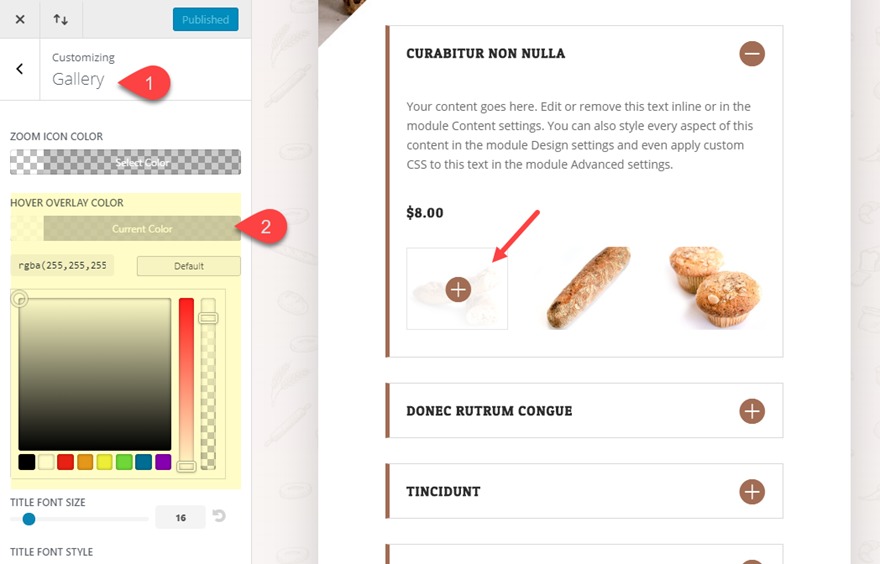
Converting the Symbol Gallery overlay colour within the Module Customizer
If you wish to alternate the colour of your gallery merchandise hover overlay with no need to make use of customized CSS, you’ll be able to alternate the default settings for the Gallery Module within the Module Customizer. To try this, navigate to Divi > Module Customizer. Then click on the Gallery Module and alter the hover overlay colour to no matter you wish to have.
Ultimate Ideas
Confidently, this educational sparks some inspiration for use the Divi Toggle Module to create some superior eating place menus. As an advantage, you might have discovered a brand new trick to embed some Divi galleries into any module you wish to have (no longer simply toggles). The one limitation is customizing the selection of columns your need show on your gallery embed. Alternatively, you’ll be able to upload a small snippet of customized CSS to place you heading in the right direction.
I sit up for listening to from you within the feedback.