Knockout textual content photographs can open up numerous alternatives for designing distinctive headers in Divi. Making a knockout textual content impact can simply be completed the use of a photograph editor like Photoshop the use of the integrated knockout mixing choice. Principally this permits you to create photographs with clear textual content (showing to be knocked out of the picture).
And knockout textual content photographs are in reality amusing to make use of in Divi. Since the symbol textual content is clear, you’ll be able to upload any more or less background in the back of the textual content for distinctive designs.
On this educational, I’m going to turn you easy methods to create a picture with a knockout textual content impact the use of Photoshop. Then I’ll additionally quilt easy methods to use the picture in Divi to create a wonderful header in mins.
Inspiration for this design comes from one in all our favourite Divi websites over at Marx Creative.
Contents
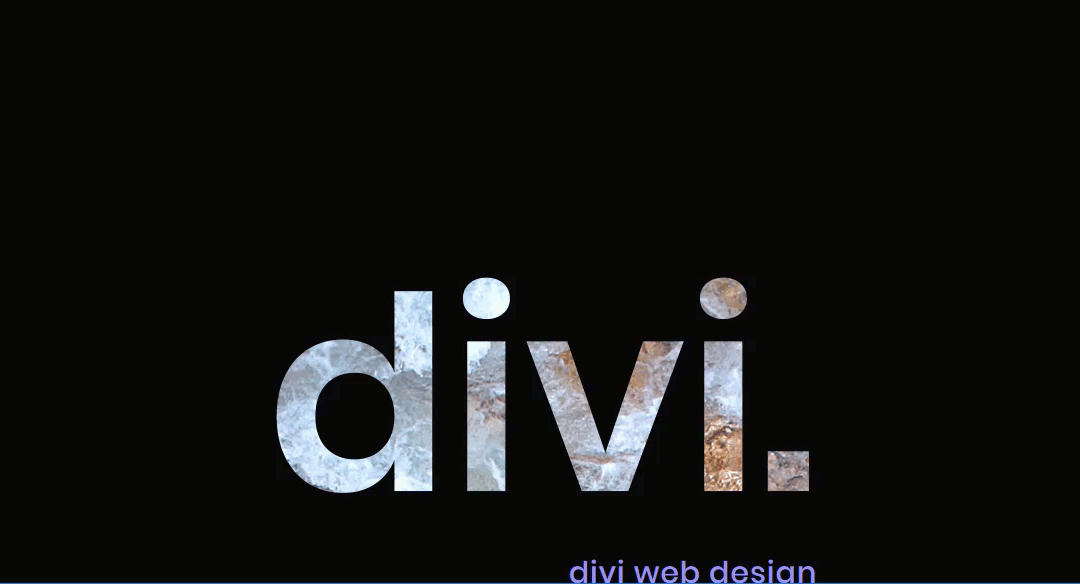
Sneak Peek
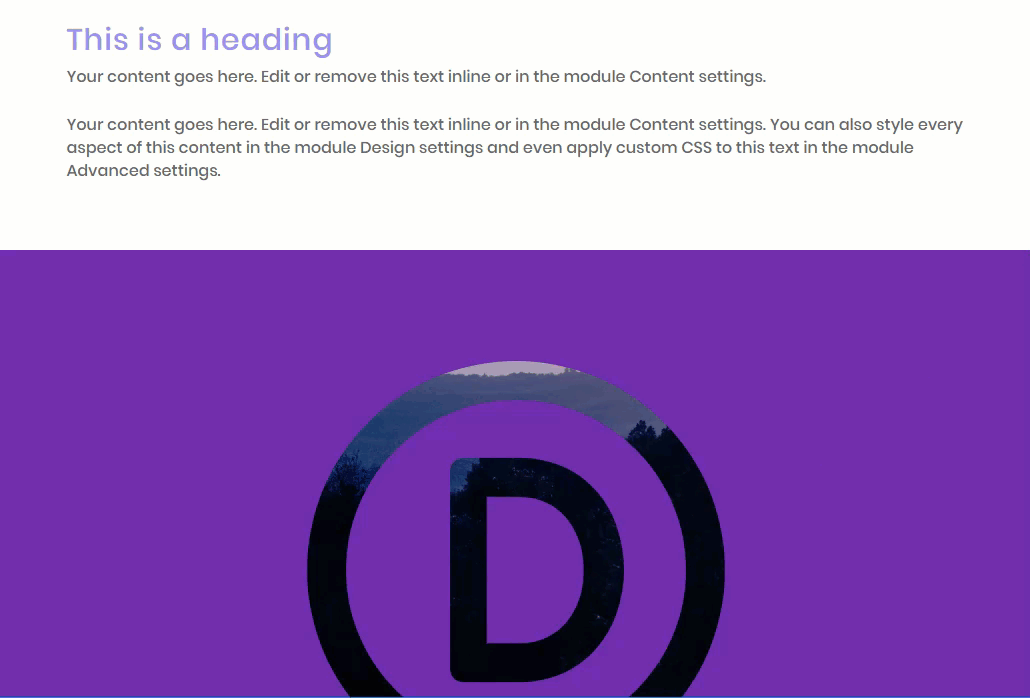
Here’s a sneak peek on the design we will be able to be developing on this educational.
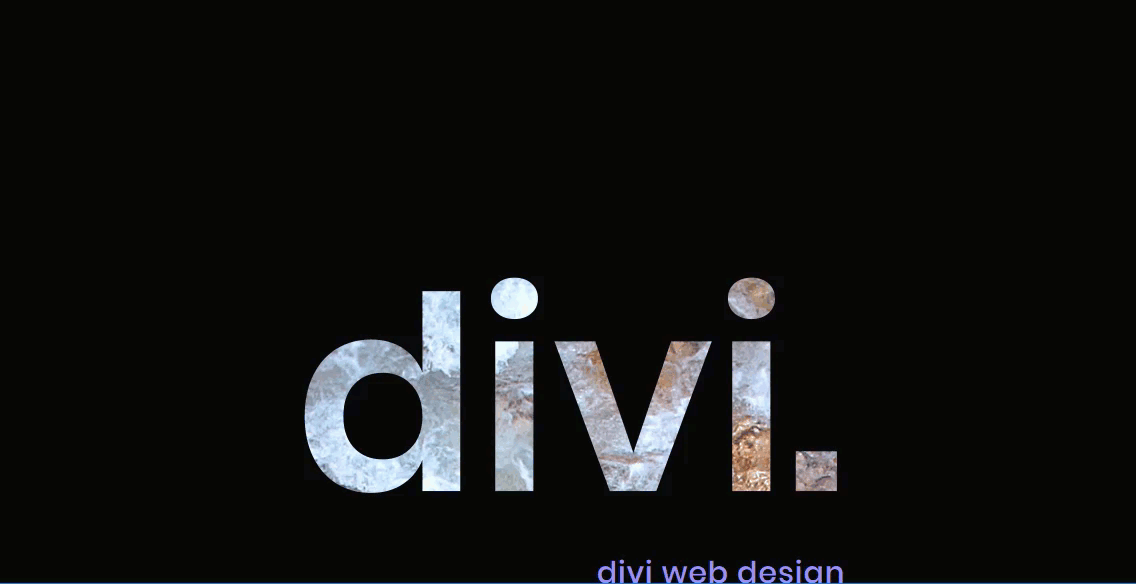
Right here the general design with the CSS parallax impact set for the picture module background symbol.
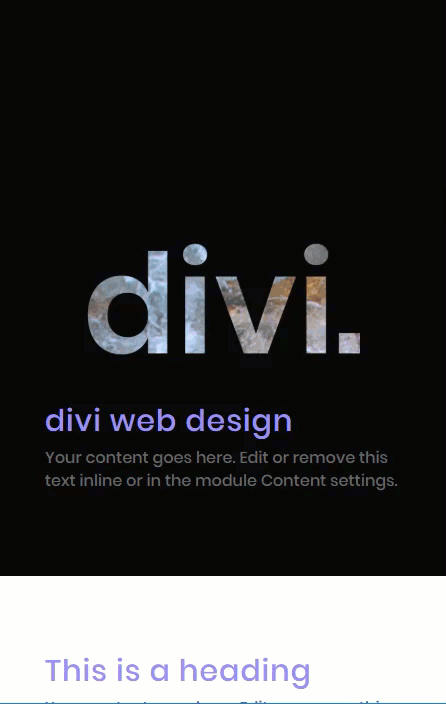
Here’s what it seems like on cell.
Learn how to Create a Knockout Textual content Symbol The use of Photoshop
Subscribe To Our Youtube Channel
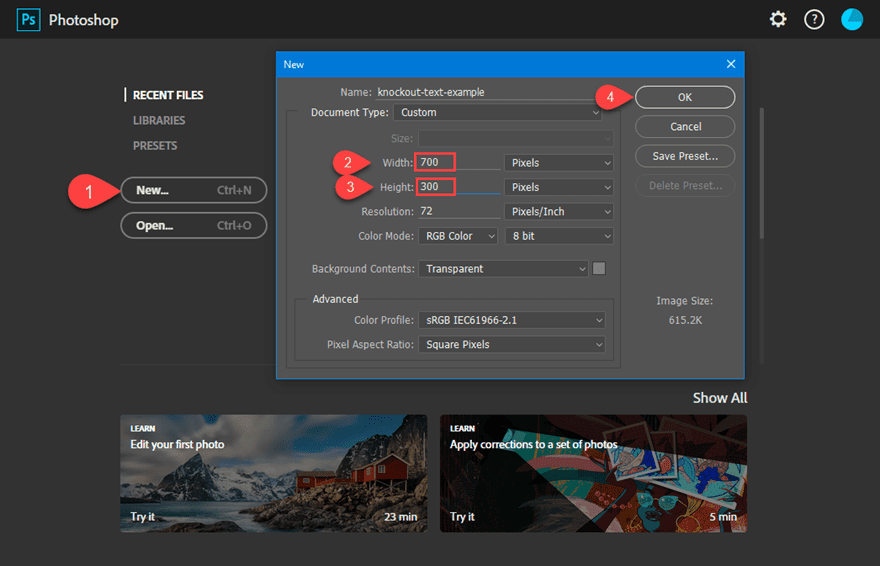
To create a knockout textual content symbol in Photoshop, first create a brand new file and set the size to a 700px width and a 300px peak.
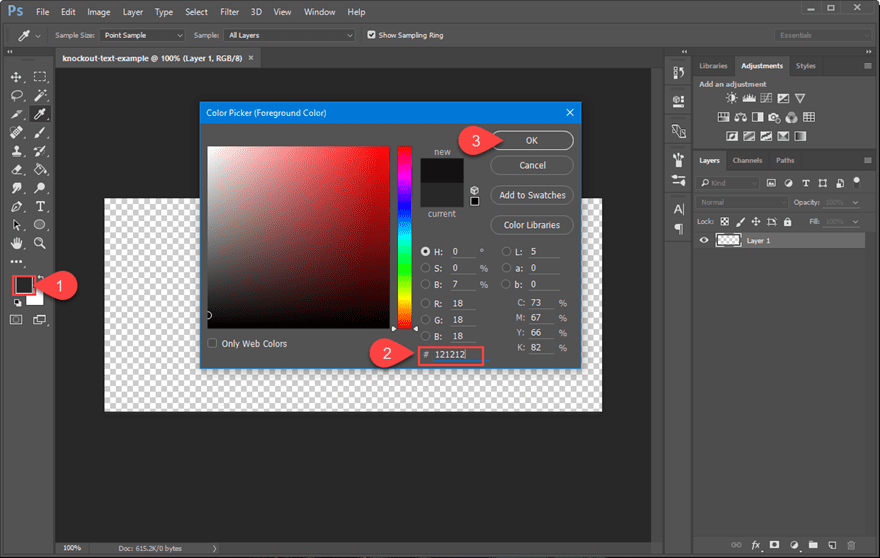
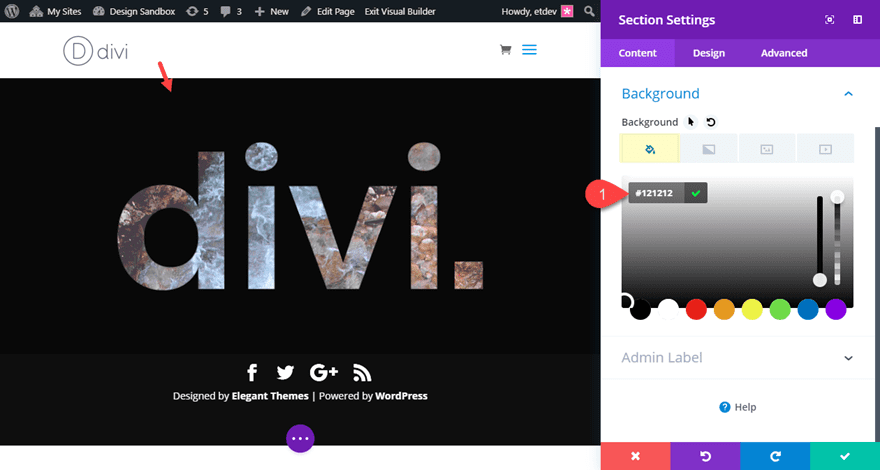
Subsequent, click on at the foreground colour (or eyedropper instrument) and set the foreground colour to #121212.
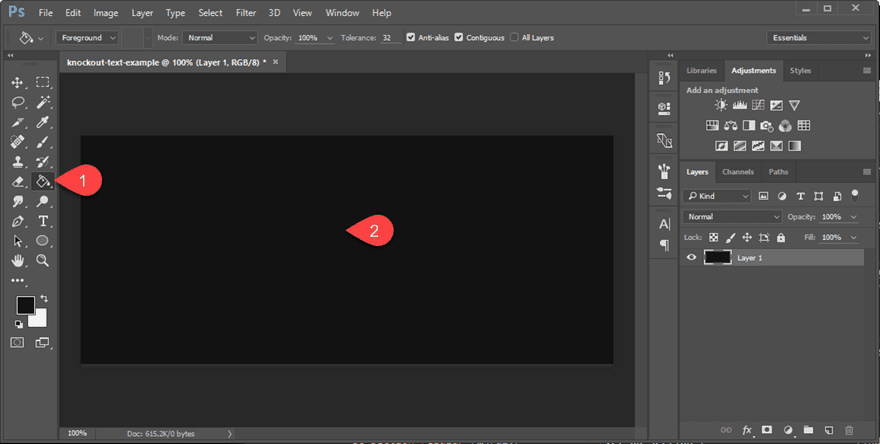
Use the paint bucket instrument to paint all of the layer. This may function the background colour of the picture.
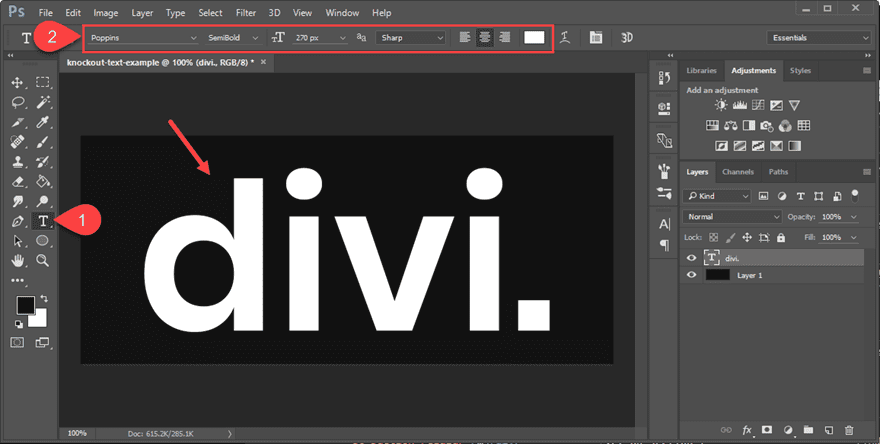
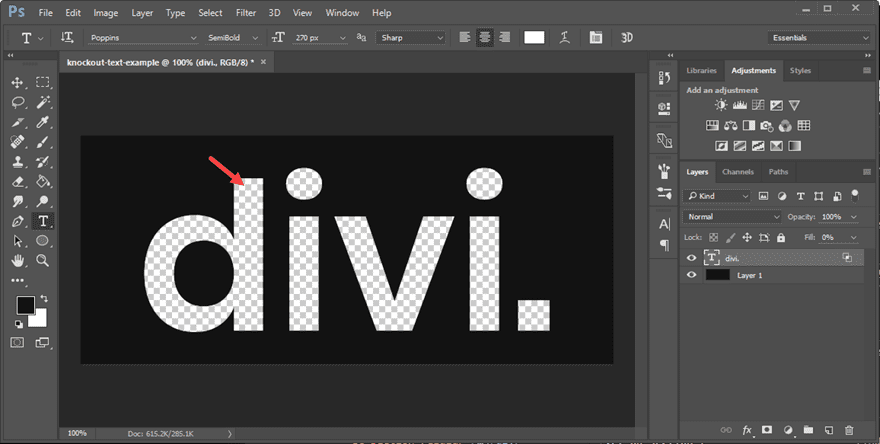
Now it’s time to upload our textual content to the picture. Use the Horizontal Sort Instrument so as to add a brand new textual content layer over the background layer. You’ll be able to design the textual content then again you need the use of the textual content choices on the best. For this case, I’m the use of the next:
Font: Poppins
Font Weight: semi-bold
Colour: #ffffff (this can also be anything else for the reason that textual content will transform clear)
Textual content length: 260px
Textual content Alignment: middle
Then kind within the textual content you need (I’m the use of “Divi.”) and middle the textual content field over the background layer.
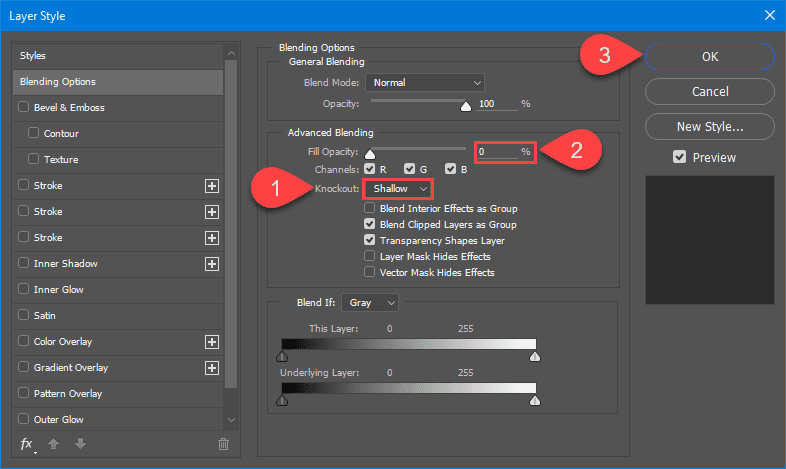
Proper click on at the layer with the textual content and make a selection “Mixing Choices” from the proper click on menu.
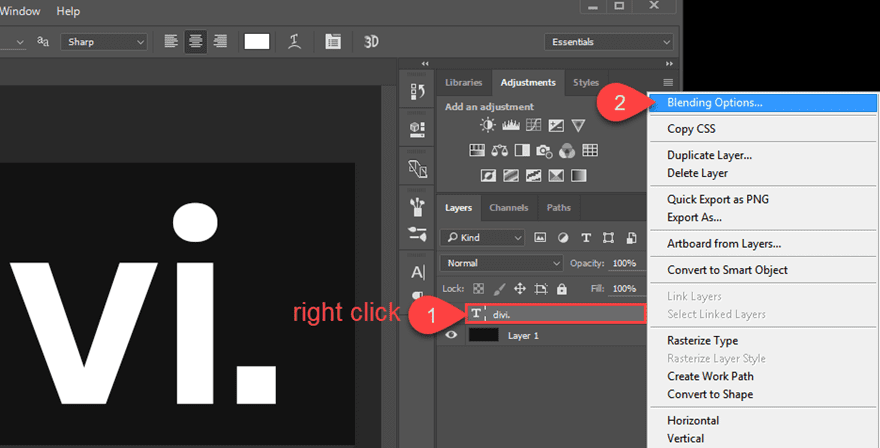
Underneath the Complicated Mixing phase, to find the knockout choice and make a selection Shallow from the dropdown menu.
Then set the Fill Opacity method to 0%.
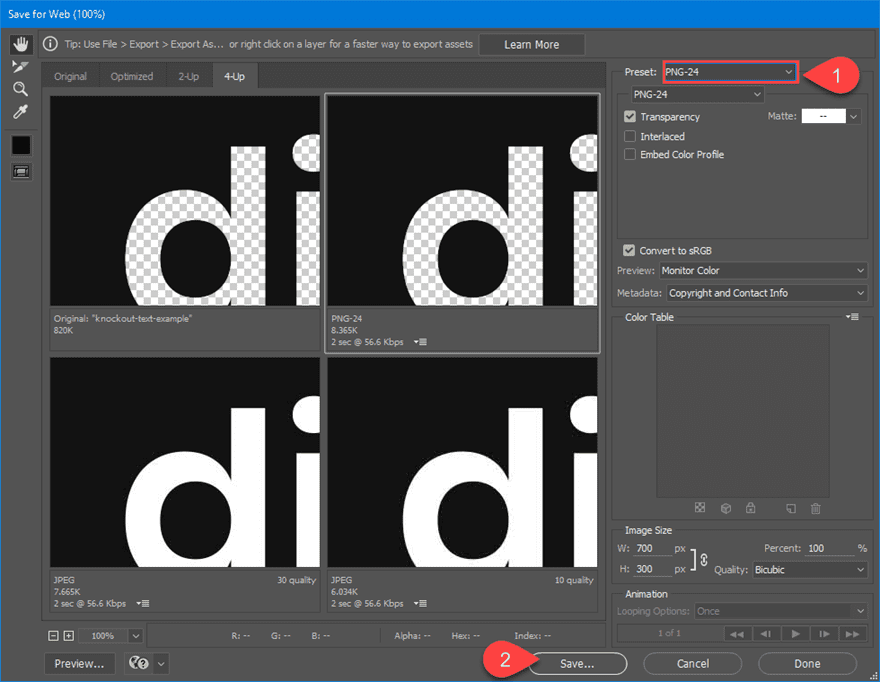
Export the document via deciding on Report > Export > Save for Internet (Legacy).
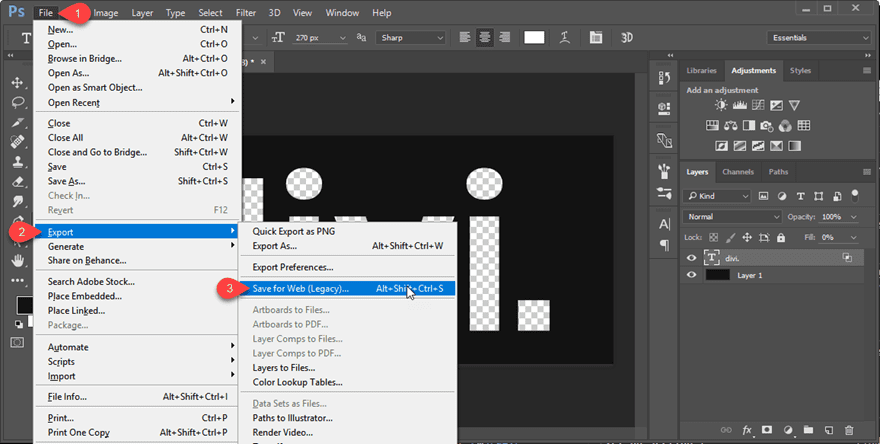
Make sure to save the document as a png so as to keep the transparency within the symbol.
The use of the Knockout Textual content Symbol to Create a Header in Divi
Now that your symbol is in a position, you’ll be able to start designing you header in Divi.
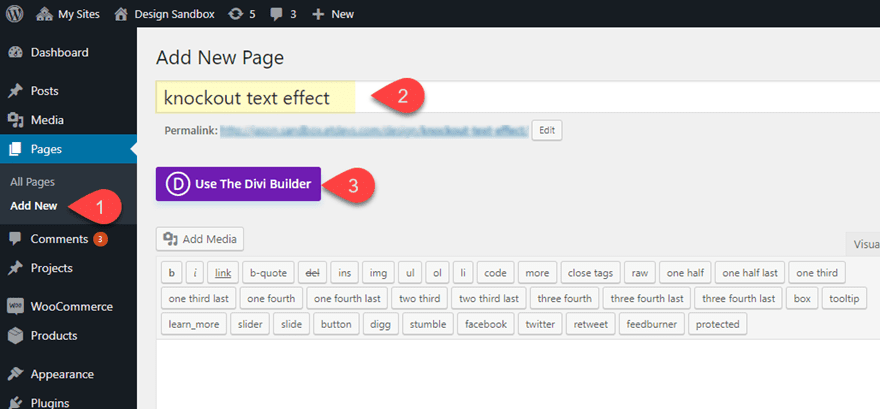
Create a New Web page
First, create a brand new web page. Give your web page a identify and click on to make use of the Divi Builder.
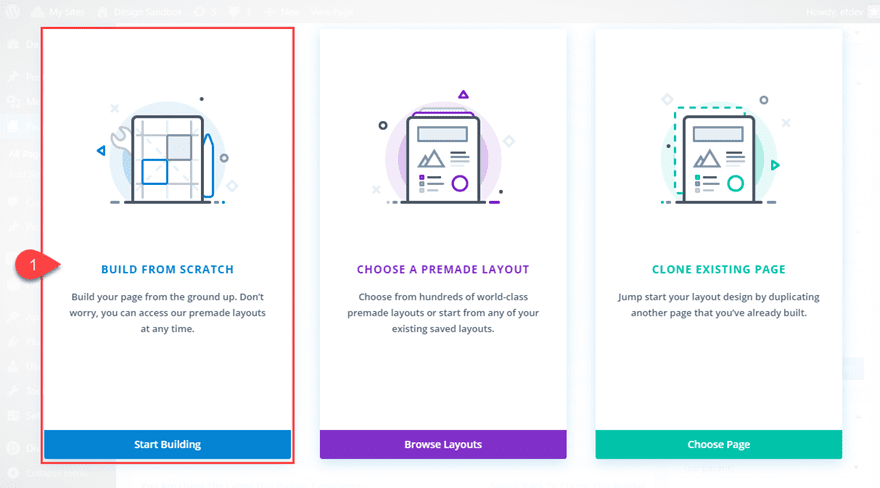
Make a choice the method to “Construct From Scratch”.
Create the Header Design
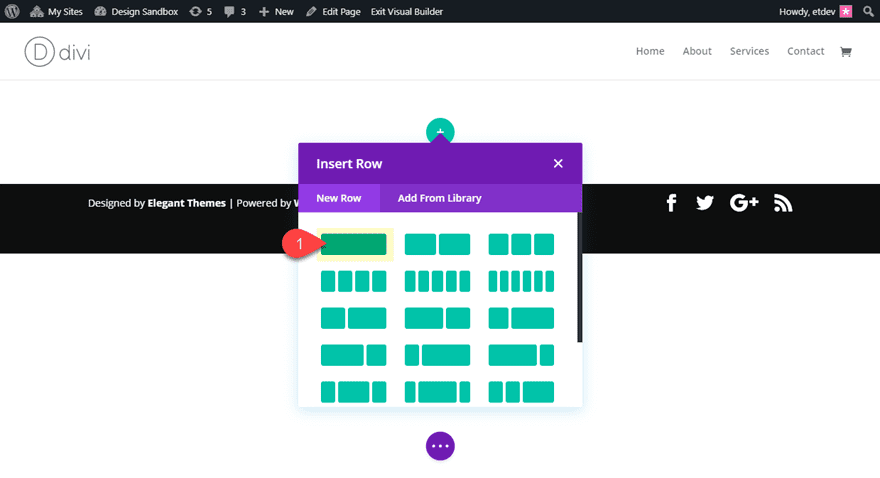
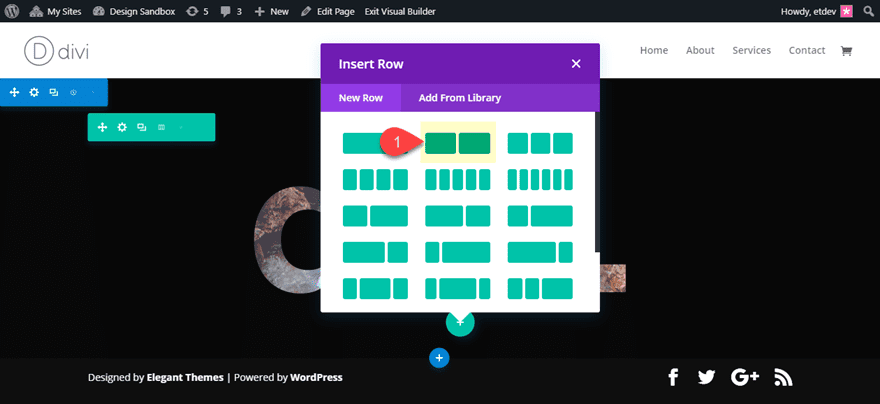
Then, create a normal phase with a one-column row.
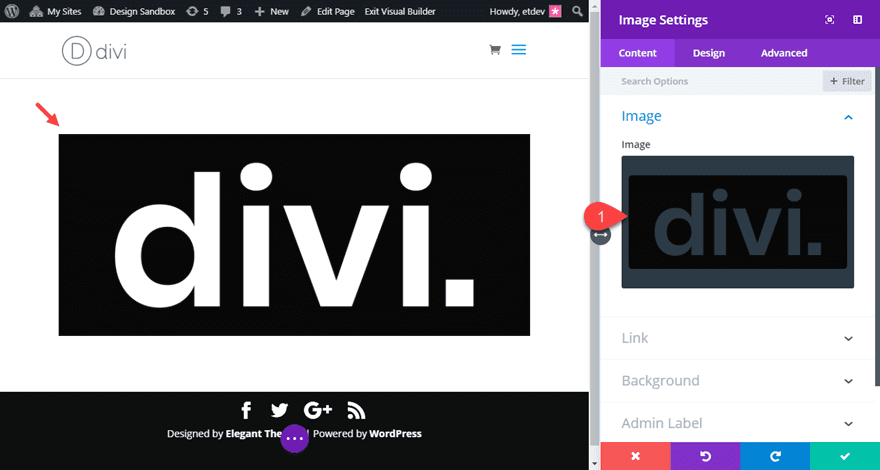
After that, upload a picture module to the row.
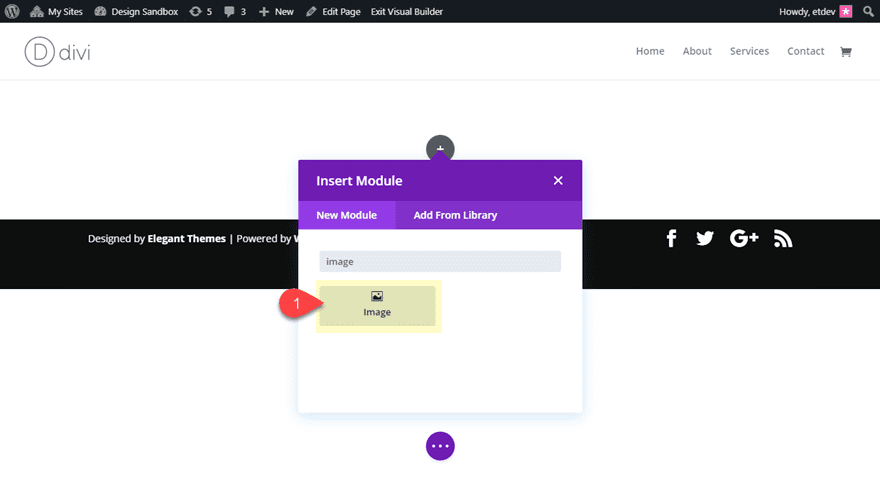
Add the knockout symbol you simply created to the picture module.
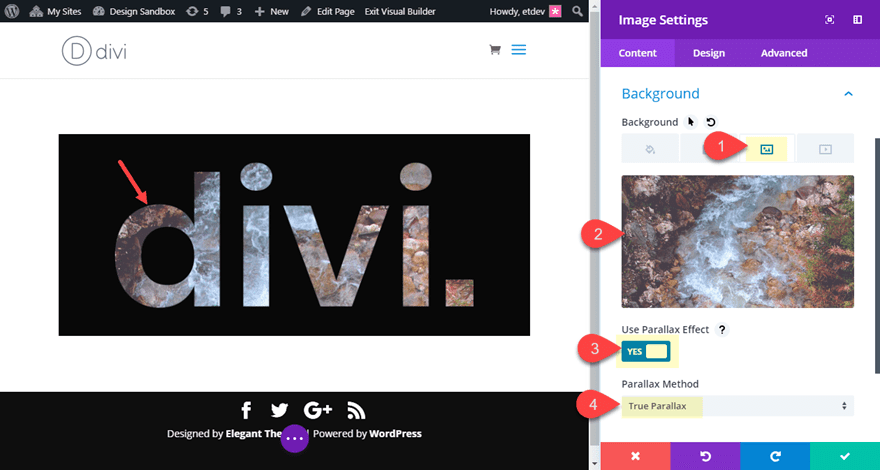
Subsequent, upload a background symbol to the picture module with a parallax impact (True Parallax or CSS).
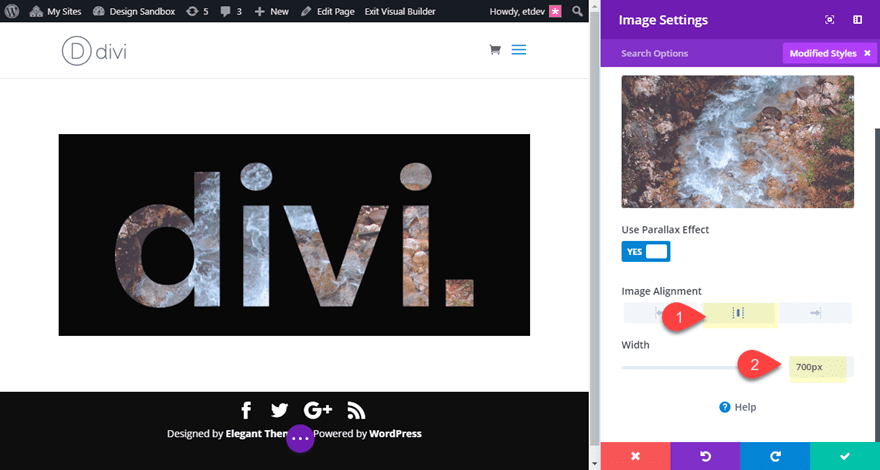
Make the picture middle aligned and provides the picture a customized width that fits the width of the particular symbol.
- Symbol alignment: middle
- Width: 700px
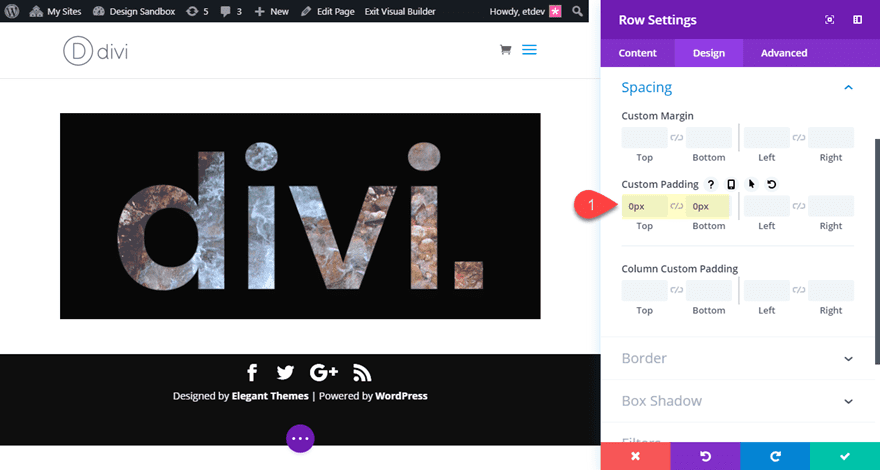
Replace the row settings as follows:
- Customized Padding: 0px best, 0px backside
Give the phase the similar background colour you used when developing the knockout symbol. Open the phase settings and replace the next:
- Background Colour: #121212
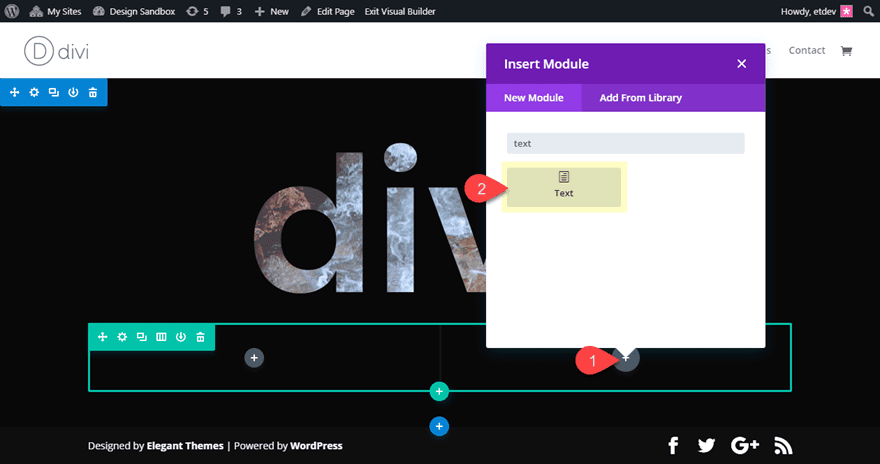
So as to add some further header textual content, first upload a brand new two-column row.
Then, upload a textual content module to column2.
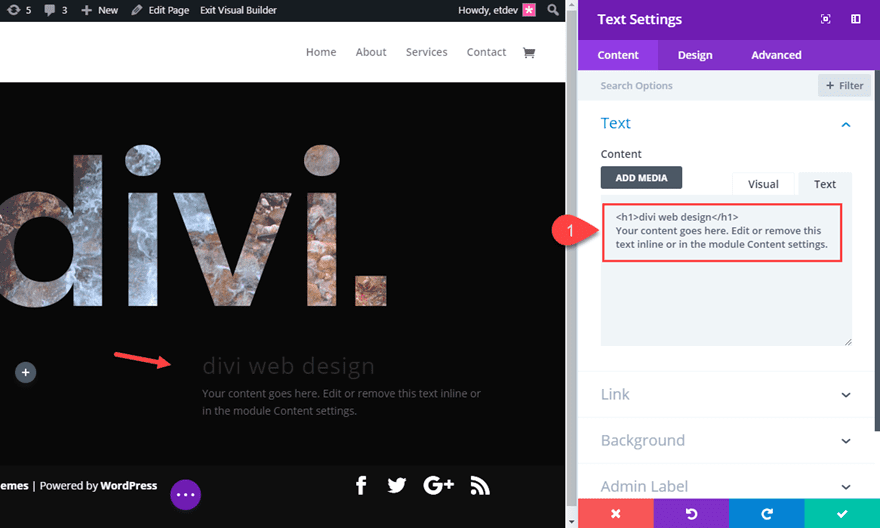
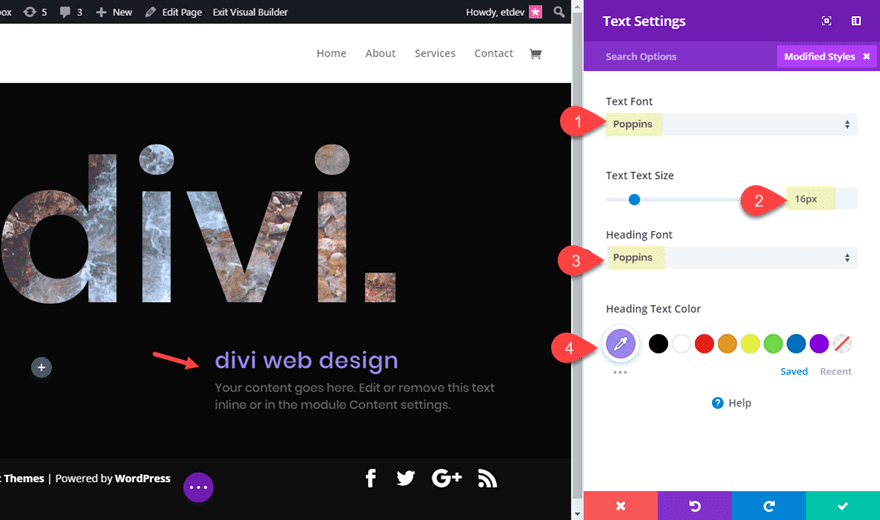
Replace the Textual content Module Content material as follows:
divi internet design
Your content material is going right here. Edit or take away this newsletter inline or within the module Content material settings.
Then replace the design settings as follows:
- Textual content Font: Poppins
- Textual content Textual content Dimension: 16px
- Heading Font: Poppins
- Heading Textual content Colour: #9b89f4
The textual content font suits the font used for the knockout textual content symbol.
That’s it! Now you may have a singular header design with a knockout textual content impact.
Ultimate Consequence
Right here the general design with the real parallax impact set for the picture module background symbol.
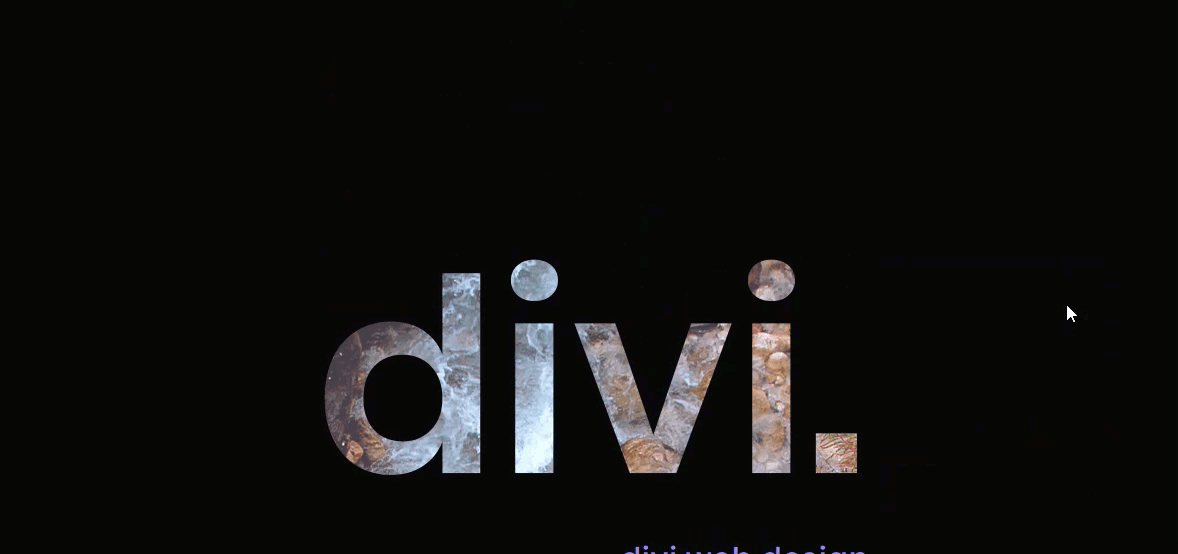
Right here the general design with the CSS parallax impact set for the picture module background symbol.
Here’s what it seems like on cell.
Making a Knockout emblem symbol in Photoshop
The knockout impact can be carried out to photographs as neatly. As an example, you’ll be able to create a knockout emblem symbol. To do that, create a brand new file in Photoshop. Come up with base layer the colour of your selection. Then drag your emblem into the file to create a brand new layer. Be sure your emblem is a png with a clear background. Then middle the brand inside the file.
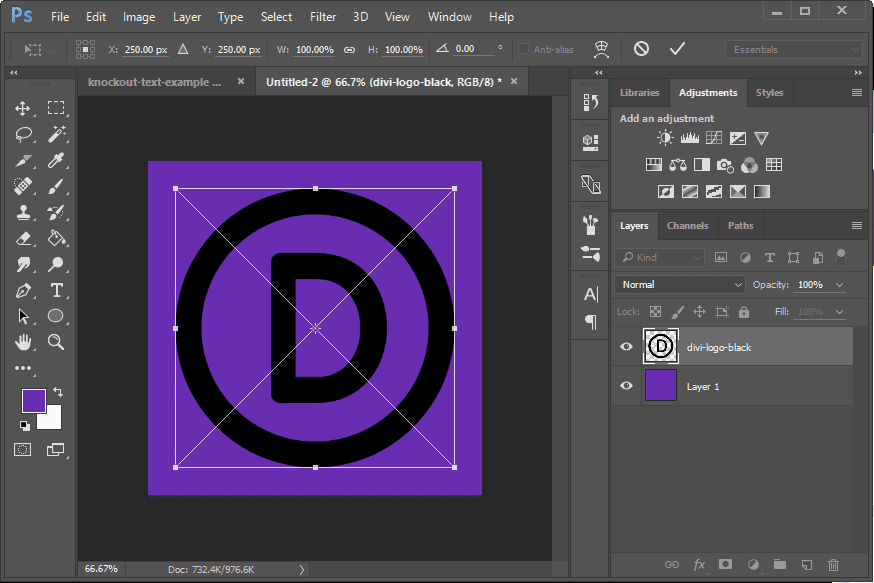
Select the Magic Wand Instrument. Then hang shift and click on at the other parts that make up your emblem.

With the weather decided on, proper click on at the emblem symbol layer and make a selection “Mixing Choices”.
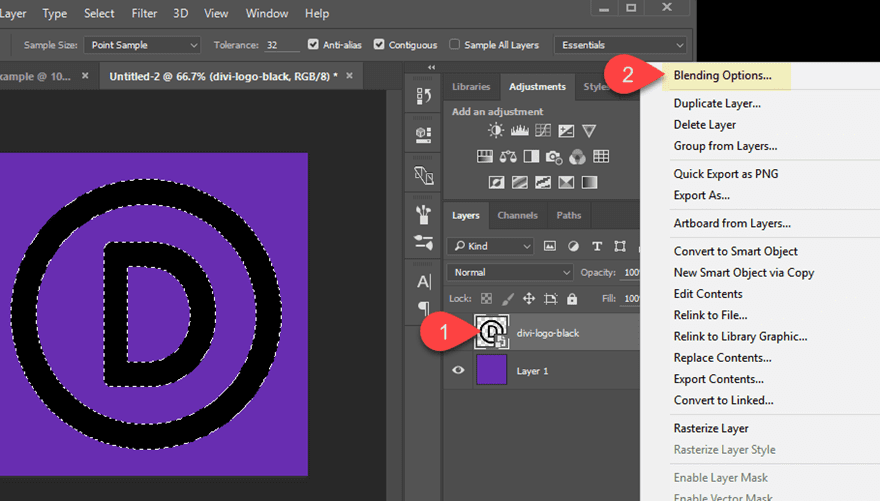
Underneath the Complicated Mixing phase, to find the knockout choice and make a selection Shallow from the dropdown menu.
Then set the Fill Opacity method to 0%.
Export the document as a png. Then observe the similar steps so as to add the knockout emblem symbol to you web page header the use of the Divi Builder.
Here’s an instance of what a knockout emblem will seem like.
Ultimate Ideas
Making a knockout textual content or emblem symbol is in reality no longer that onerous to do with a photograph editor like Photoshop. And, after you have that knockout symbol, you’ll be able to use it to create a singular header to your Divi website online. Divi has such a lot of integrated choices for including customized backgrounds that can display thru your knockout symbol transparency. I’m hoping this may assist encourage you to create some gorgeous designs to your subsequent mission.
I sit up for listening to from you within the feedback.
Cheers!
.divi_cta{background-color: #8f43ee; colour: #fff; font-size: 20px; font-weight: formidable; padding: 20px; text-align: middle; show: block; text-decoration: none; border-radius: 4px;}.divi_cta:hover{text-decoration:none;background-color:#7d37d6;}.divi_cta_red{background-color:#db1c1c;}.divi_cta_red:hover{background-color:#c51a1a;}
The put up How to Create Knockout Text Images for Stunning Divi Headers seemed first on Elegant Themes Blog.
WordPress Web Design