Have you ever ever considered growing a wholly horizontal web page that makes use of swipe and anchor hyperlinks to navigate? Smartly, if in case you have and didn’t precisely understand how to method it, that is the best put up for you. We’re going to turn you the way to create a wholly horizontal swipe web page the use of Divi. This method truly is helping you are making your site stand proud of others and suits the internet design developments of 2019. The end result we’ll create will glance nice throughout all display screen sizes.
Let’s get to it!
Contents
- 1 Preview
- 2 Manner
- 3 Let’s Get started Recreating
- 3.1 Upload New Phase
- 3.2 Upload Row #1
- 3.3 Upload Blurb Module to Column 1
- 3.4 Upload Textual content Module to Column 2
- 3.5 Upload Button Module to Column 2
- 3.6 Upload Blurb Module to Column 3
- 3.7 Upload Row #2
- 3.8 Upload Textual content Module to Column 1
- 3.9 Clone Textual content Module & Position in Column 2
- 3.10 Clone Row #1 3 Instances
- 3.11 Clone Row #2 3 Instances
- 3.12 Upload CSS ID & CSS Code to Phase
- 3.13 Conceal Scrollbar
- 4
- 5 Preview
- 6 Ultimate Ideas
Preview
Earlier than we dive into the educational, let’s take a snappy take a look at the end result throughout other display screen sizes.
Desktop
Cellular
Manner
- We’ll create all the web page the use of one part most effective
- We’re turning that part right into a horizontal grid the use of a couple of CSS code traces on the finish of the educational
- The horizontal grid will position every some of the rows in a horizontally-placed column
- You get to make a decision what number of horizontal columns a bit accommodates
- On this case, we’ll make use of four other columns that’ll every consist of two rows
- You’ll be able to alter the selection of horizontal columns you create and resolve what number of rows every some of the part columns include
- We’re additionally the use of anchor hyperlinks to lend a hand folks navigate throughout the other part columns
- On best of that, we’re including a clean scroll and a bit scroll snapping impact that’ll simple the navigation in your guests
Let’s Get started Recreating
Upload New Phase
Background Colour
Create a brand new web page and upload a standard part to it. Open the part settings and alter the background colour.
- Background Colour: #ffffff

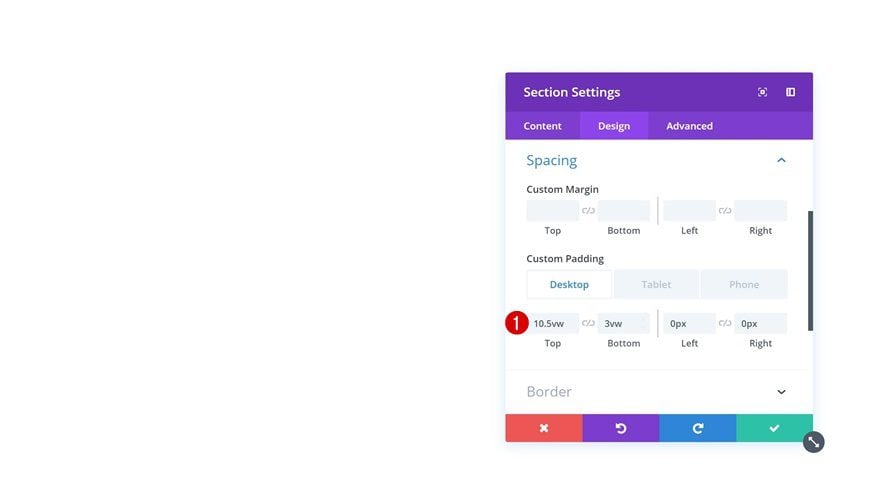
Spacing
Then, move to the spacing settings and upload some customized padding throughout other display screen sizes.
- Best Padding: 10.5vw (Desktop), 15vw (Pill), 10vw (Telephone)
- Backside Padding: 3vw (Desktop & Pill), 10vw (Telephone)
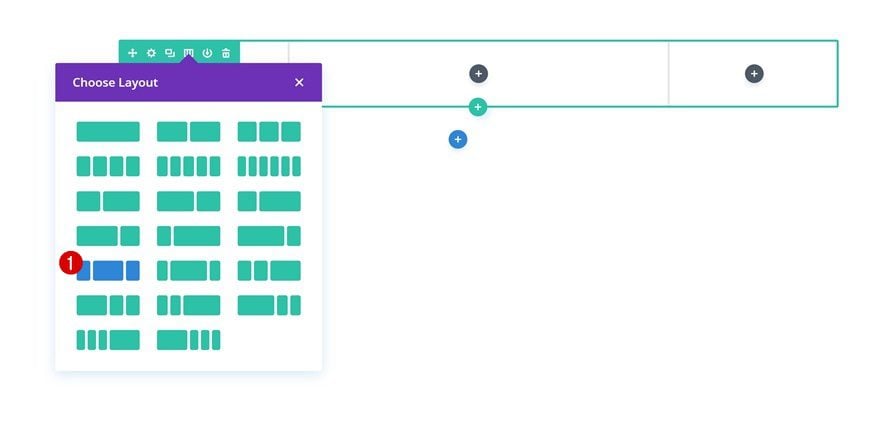
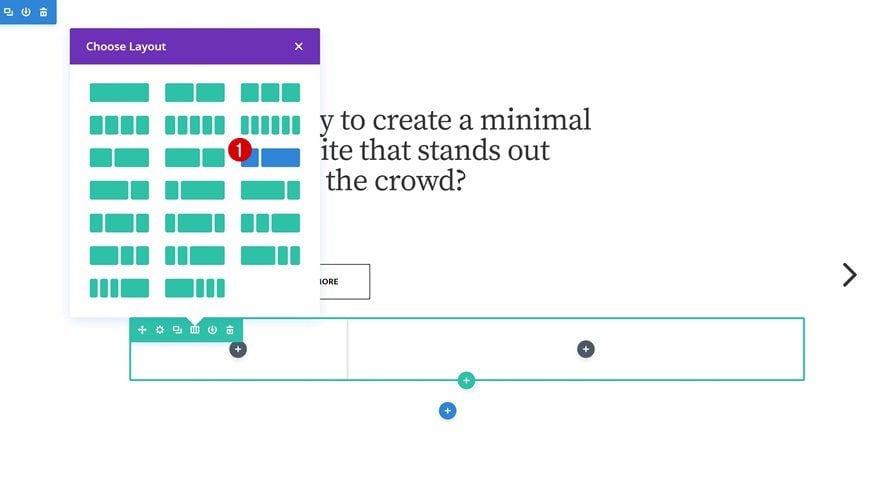
Upload Row #1
Column Construction
Proceed by way of including a brand new row the use of the next column construction:
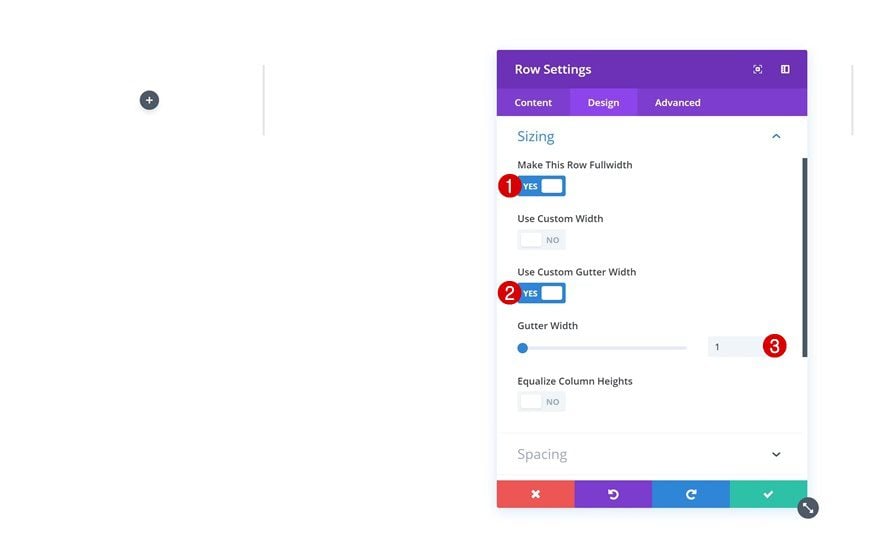
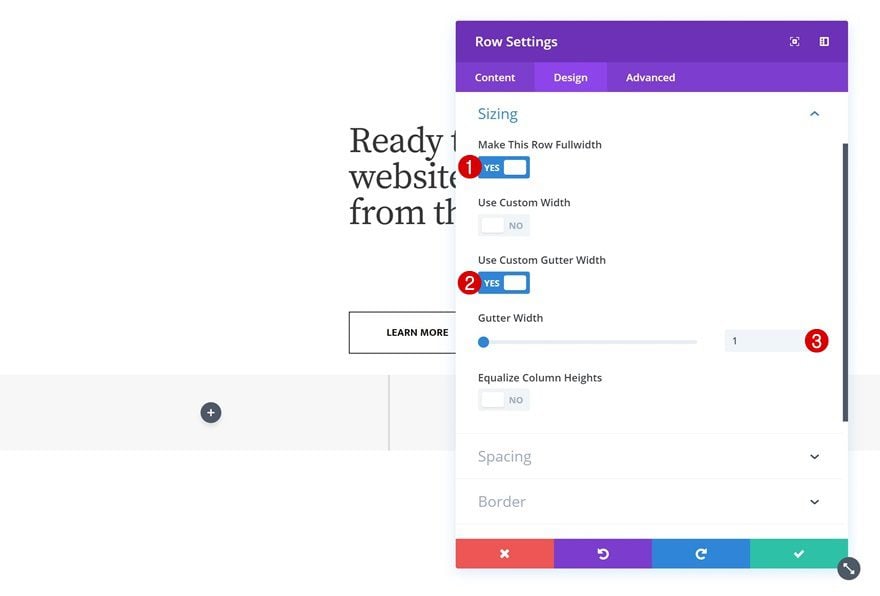
Sizing
With out including any modules but, open the row settings and make allowance the row to absorb all the width of the display screen.
- Make This Row Fullwidth: Sure
- Use Customized Gutter Width: Sure
- Gutter Width: 1
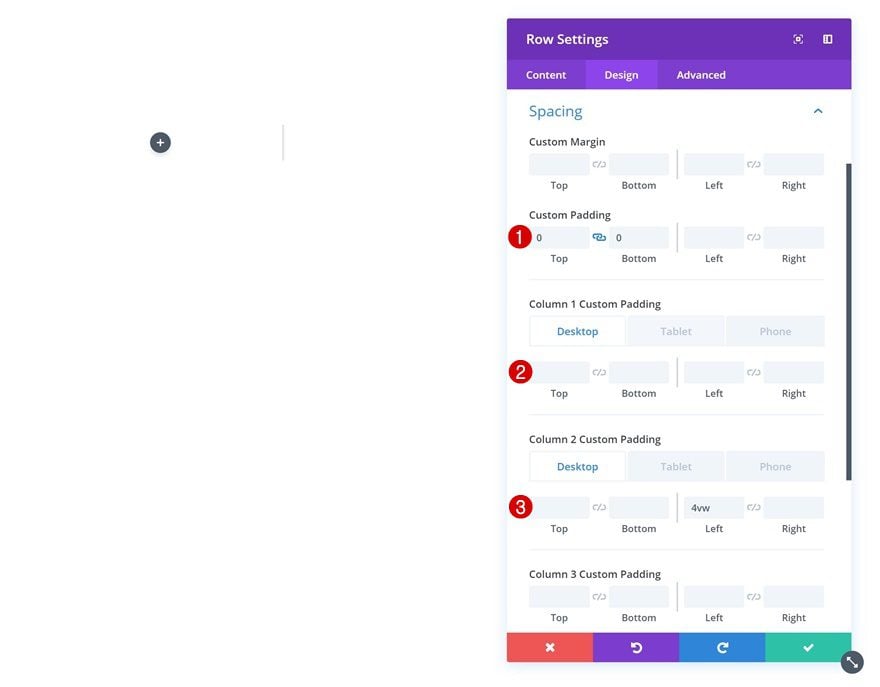
Spacing
Move to the spacing settings subsequent and make some adjustments throughout all other display screen sizes.
- Best Padding: 0px
- Backside Padding: 0px
- Left Padding: 6vw (Pill & Telephone)
- Proper Padding: 6vw (Pill & Telephone)
- Column 1 Backside Padding: 15vw (Pill & Telephone)
- Column 2 Left Padding: 4vw (Desktop), 0vw (Pill & Telephone)
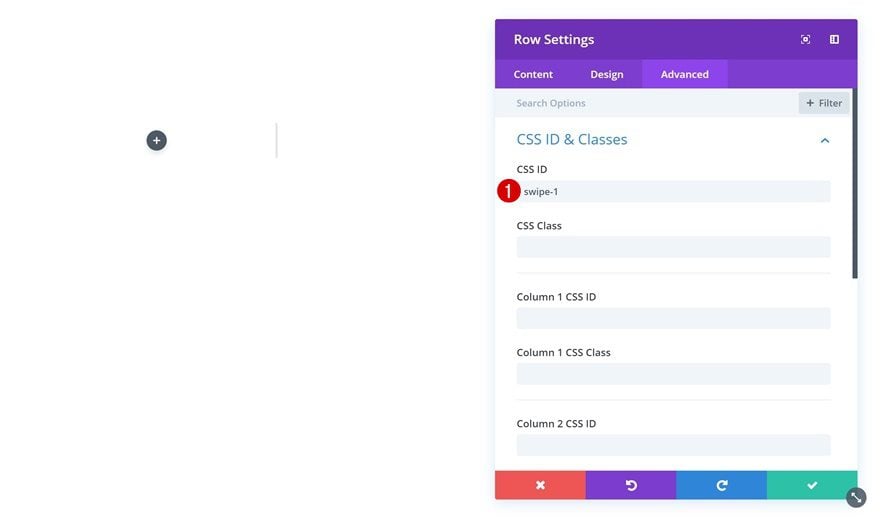
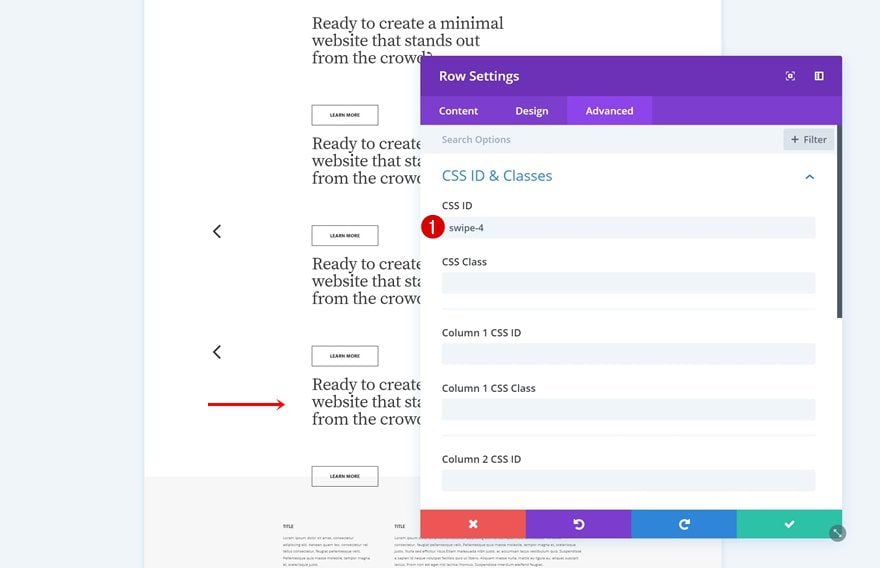
CSS ID
We’ll wish to assign a CSS ID to the primary row of every some of the part columns we create. This may lend a hand us create the anchor arrows later in this put up.
- CSS ID: swipe-1
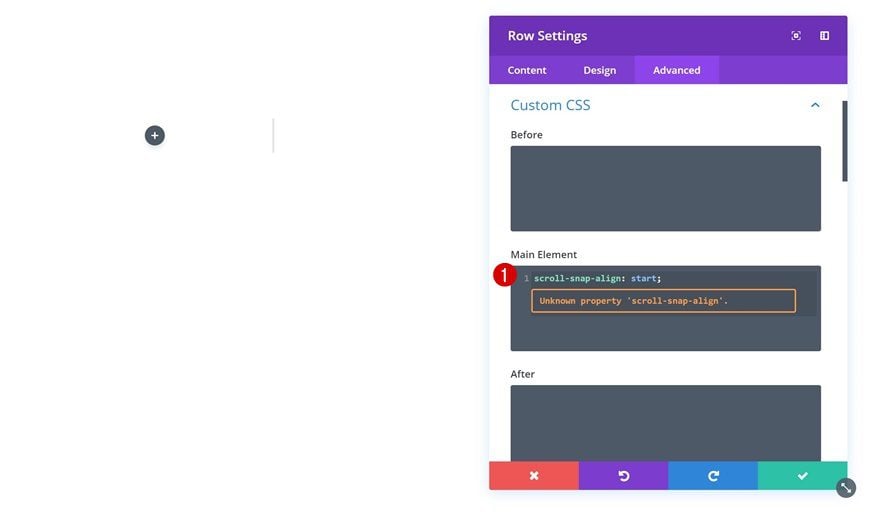
Customized CSS
As discussed within the method part of this put up, we’re additionally making use of a clean scroll and snapping impact to the mechanism. As a way to do this, we’ll wish to upload a unmarried line of CSS code to the primary row of every some of the horizontal columns we create.
scroll-snap-align: get started;
Upload Blurb Module to Column 1
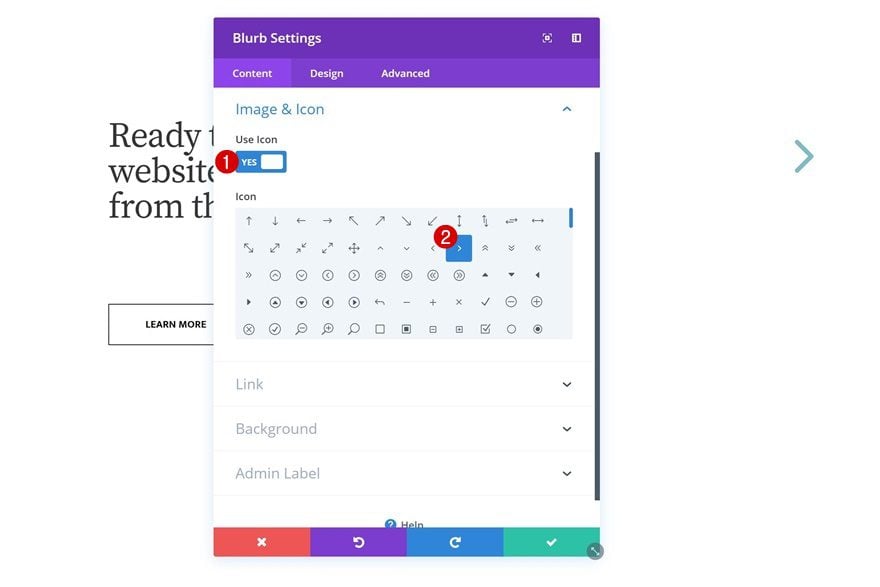
Make a choice Icon
We will be able to now get started including modules! Get started with a Blurb Module in column 1. Open the module settings and make a selection a left arrow icon.
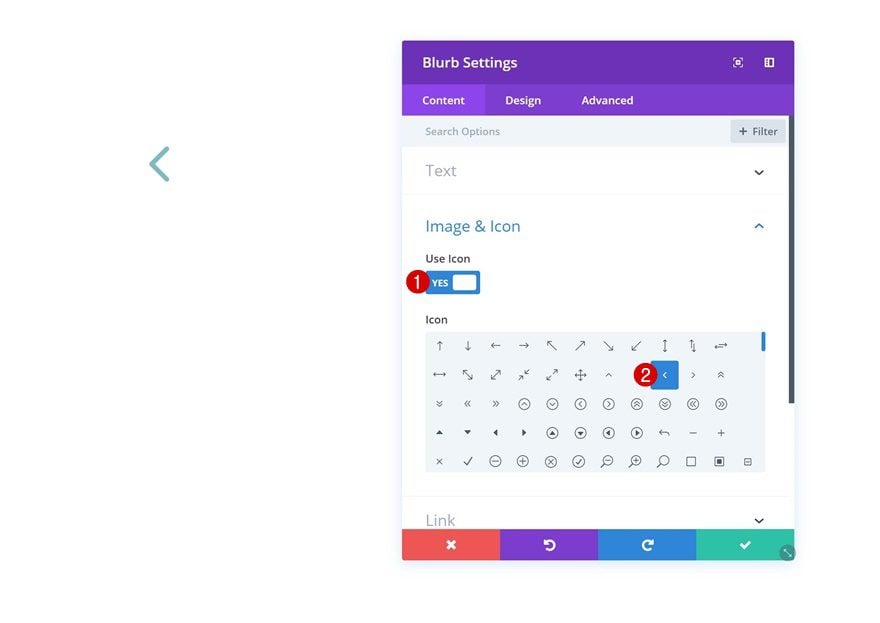
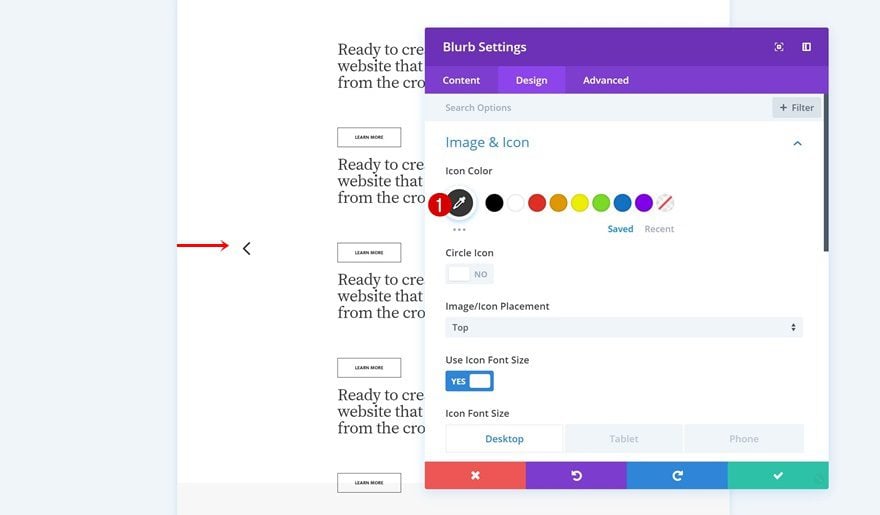
Icon Settings
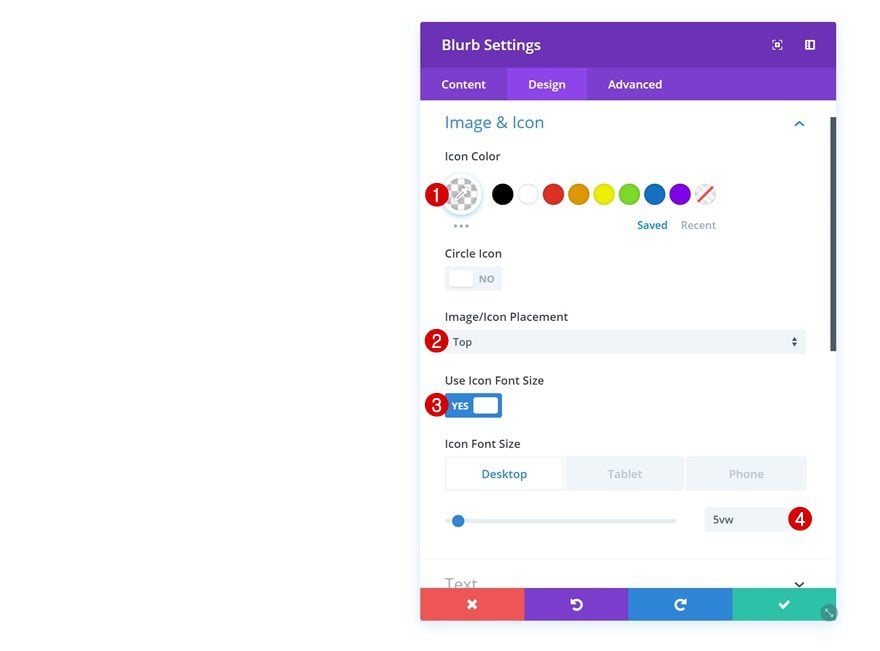
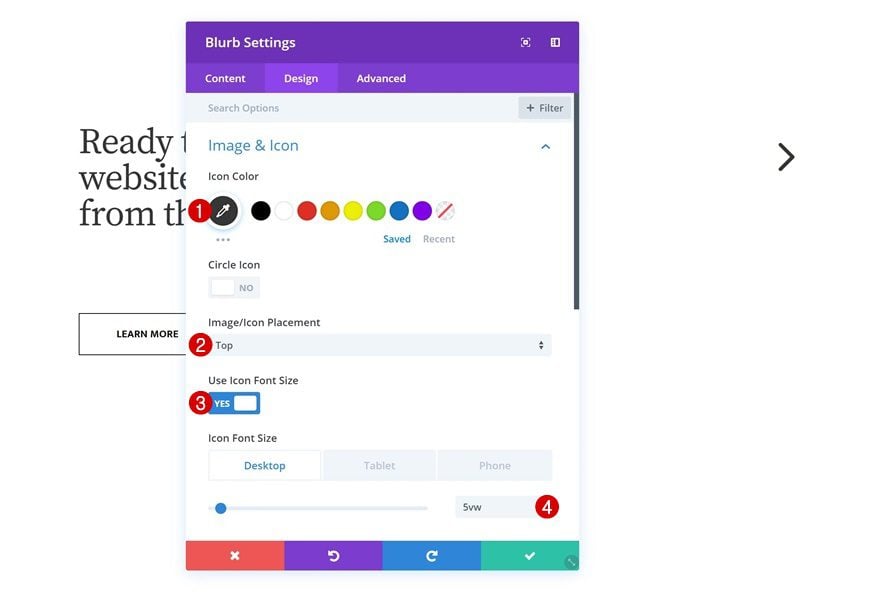
Then, move to the design tab and make some adjustments to the semblance of the icon.
- Icon Colour: rgba(255,255,255,0)
- Symbol/Icon Placement: Best
- Use Icon Font Dimension: Sure
- Icon Font Dimension: 5vw (Desktop), 13vw (Pill), 21vw (Telephone)
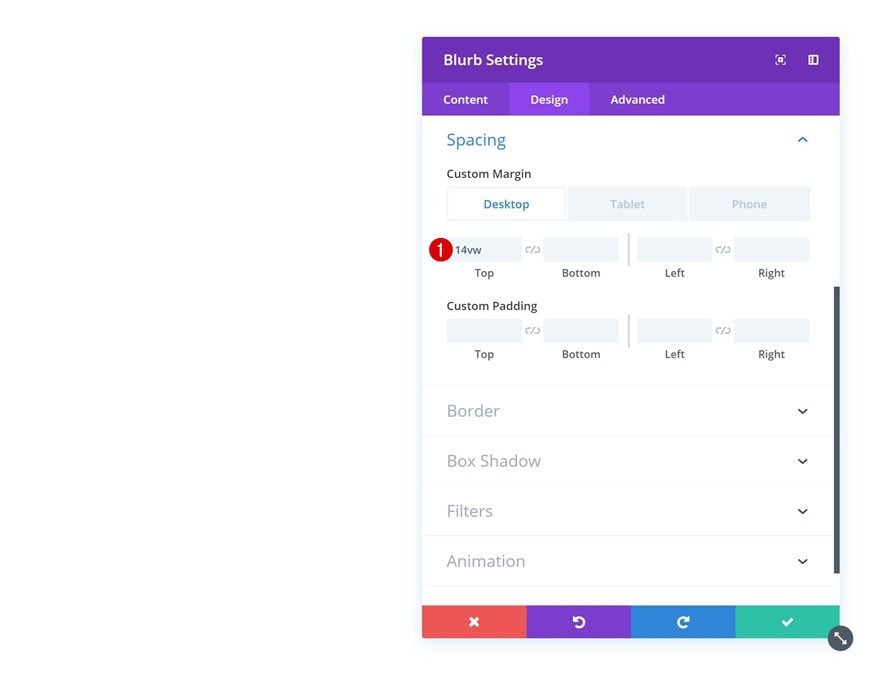
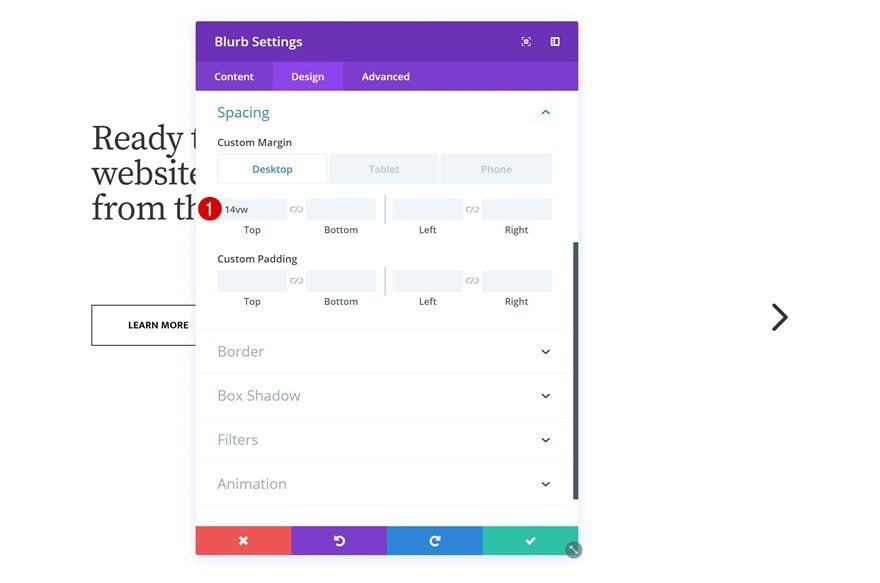
Spacing
Upload some customized margin values subsequent.
- Best Margin: 14vw (Desktop), -11vw (Pill), -17vw (Telephone)
- Left Margin: 60vw (Pill & Telephone)
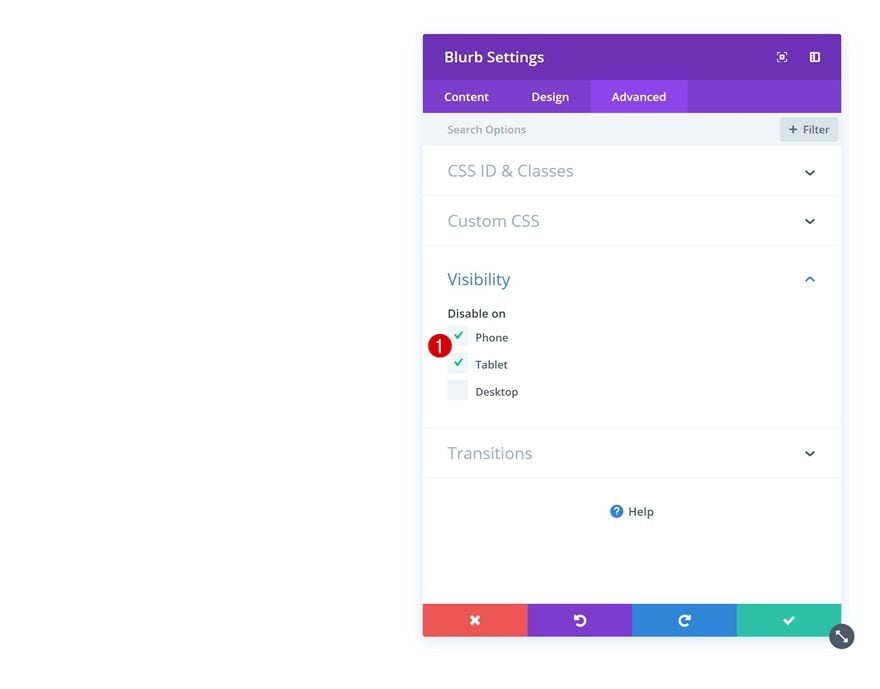
Visibility
We’re additionally hiding the module on smaller display screen sizes.
Upload Textual content Module to Column 2
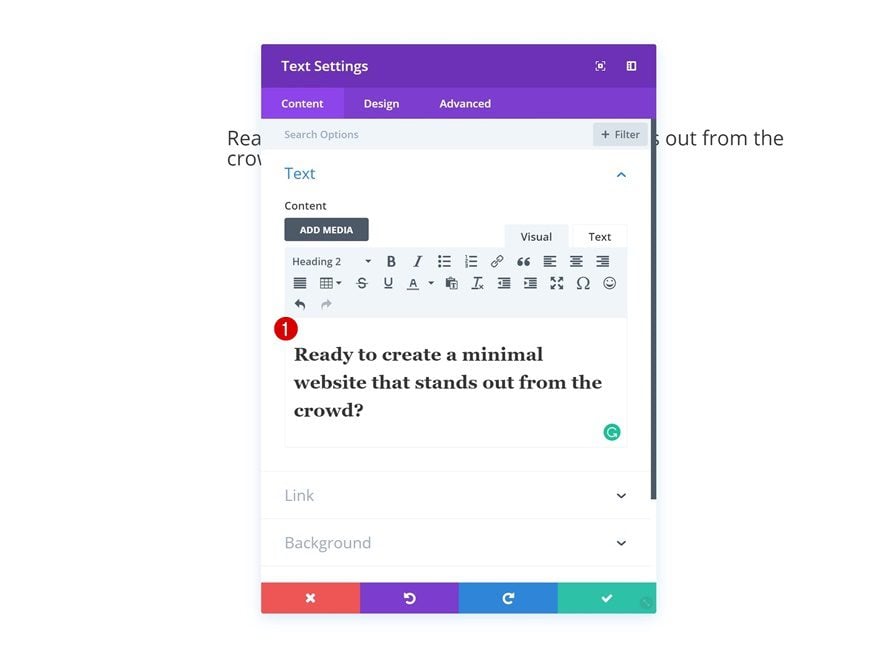
Upload H2 Content material
The following module we want is a Textual content Module in column 2. Upload some H2 content material.
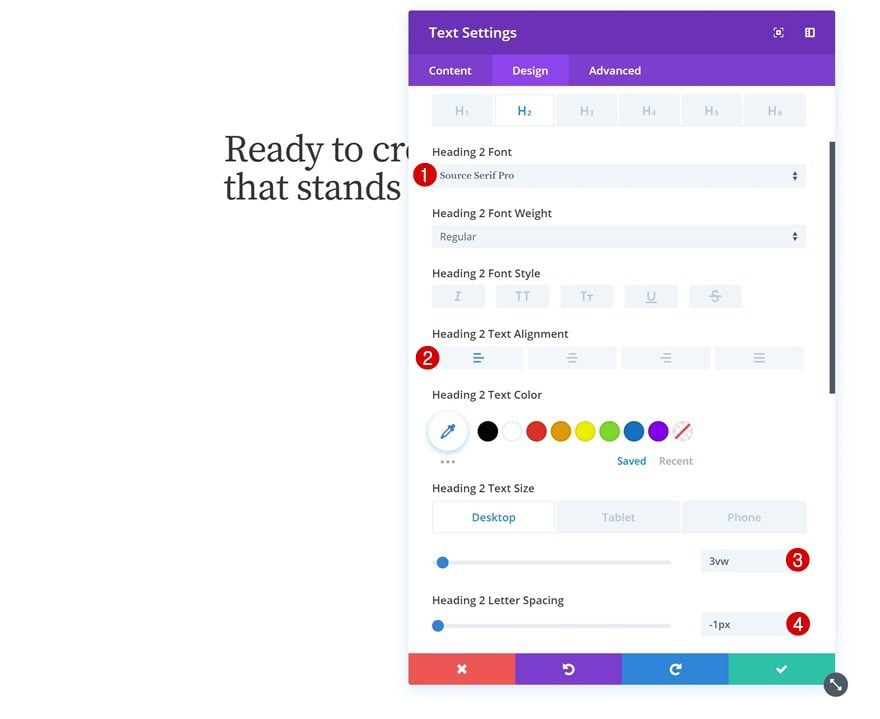
H2 Textual content Settings
Then, move to the design tab and alter the H2 textual content settings.
- Heading 2 Font: Supply Serif Professional
- Heading 2 Textual content Alignment: Left
- Heading 2 Textual content Dimension: 3vw (Desktop), 7vw (Pill & Telephone)
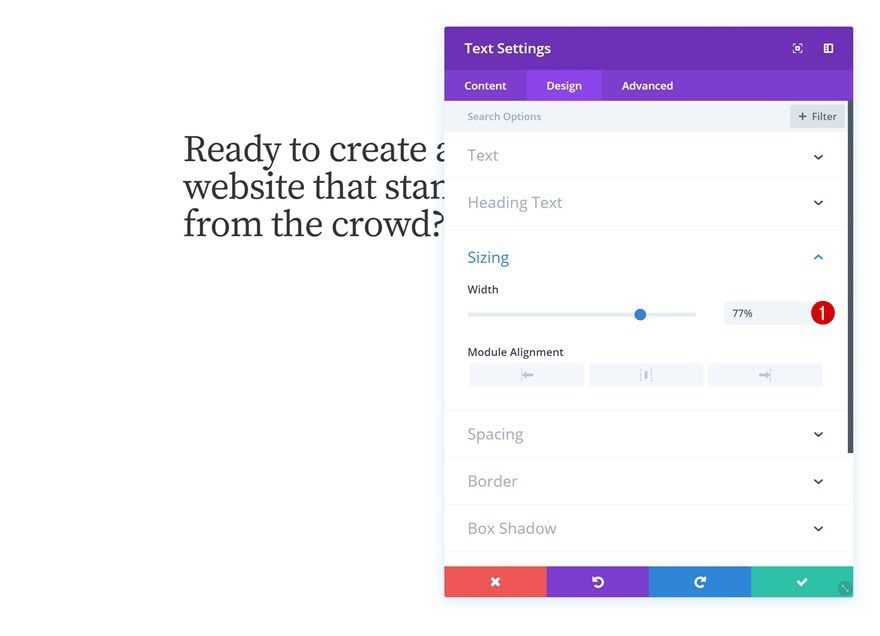
Sizing
Adjust the width within the sizing settings subsequent.
- Width: 77%
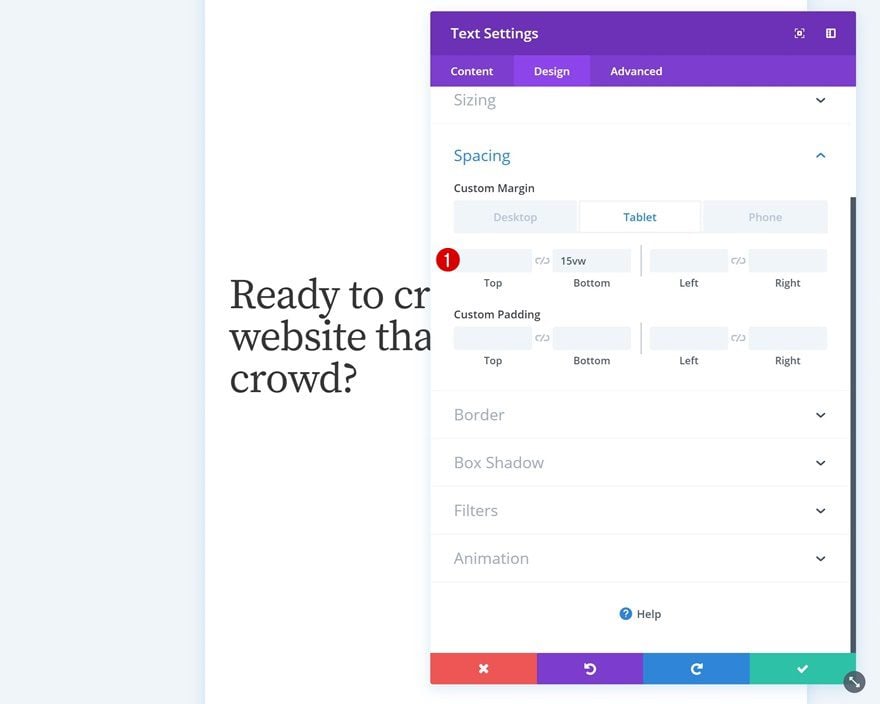
Spacing
And upload some backside margin for smaller display screen sizes.
- Backside Margin: 15vw (Pill & Telephone)
Upload Button Module to Column 2
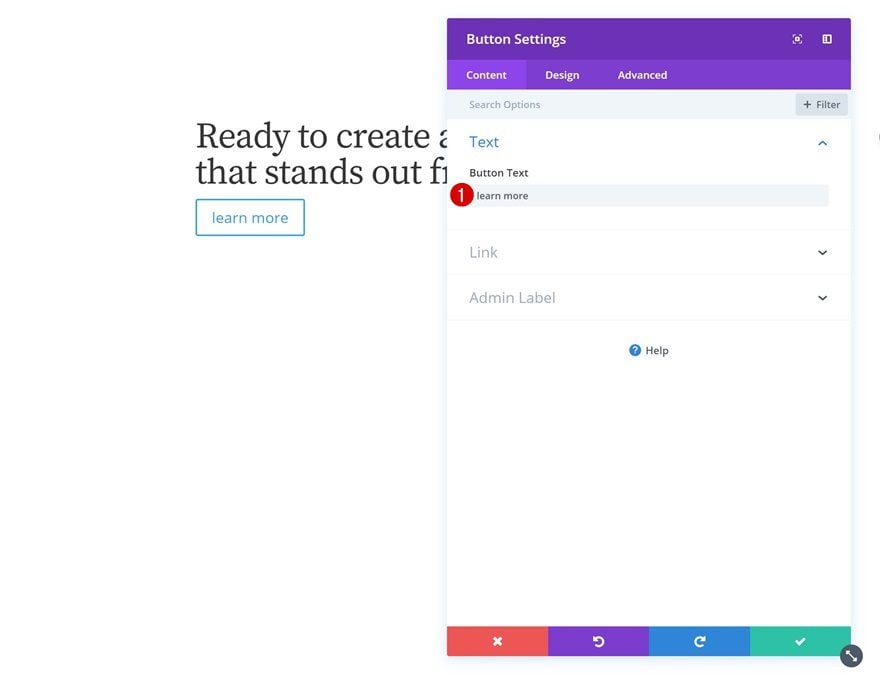
Upload Content material
Proper under the Textual content Module you’ve added, move forward and upload a Button Module. Input some replica.
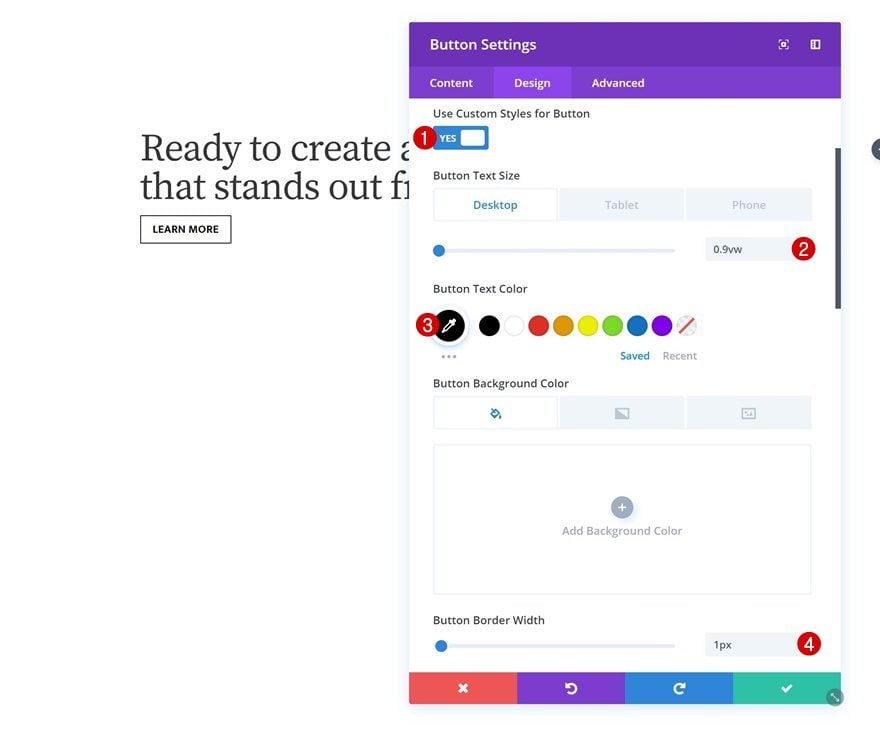
Button Settings
Then, move to the design tab and alter across the button settings.
- Use Customized Kinds for Button: Sure
- Button Textual content Dimension: 0.9vw (Desktop), 2vw (Pill), 3.5vw (Telephone)
- Button Textual content Colour: #000000
- Button Border Width: 1px
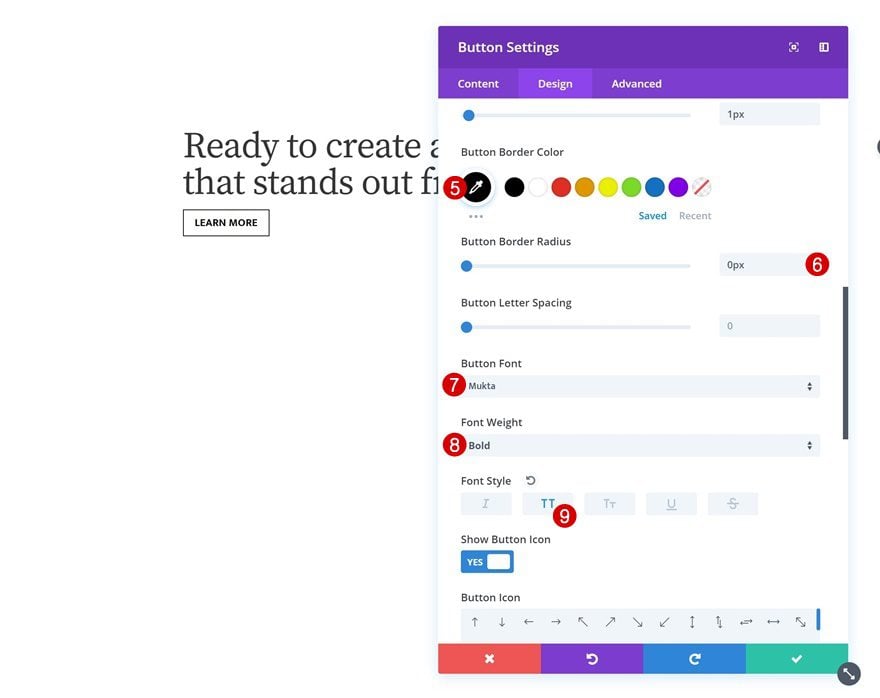
- Button Border Colour: #000000
- Button Border Radius: 0px
- Button Font: Mukta
- Font Weight: Daring
- Font Taste: Uppercase
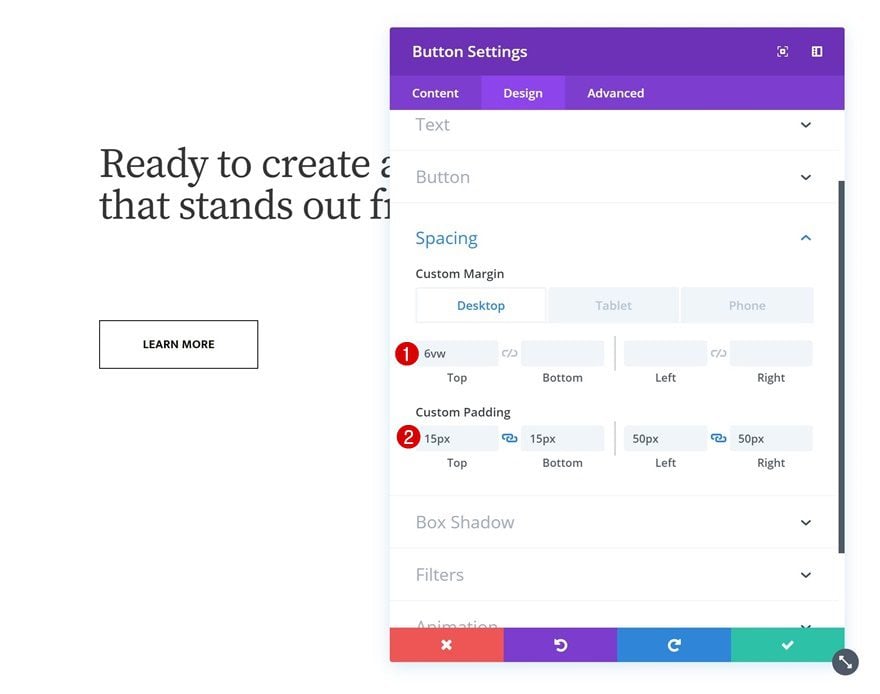
Spacing
Upload some customized margin and padding subsequent.
- Best Margin: 6vw (Desktop), 4vw (Pill & Telephone)
- Best Padding: 15px
- Backside Padding: 15px
- Left Padding: 50px
- Proper Padding: 50px
Upload Blurb Module to Column 3
Make a choice Icon
The following and closing module we want on this row is some other Blurb Module in column 3. Make a choice an icon of your selection.
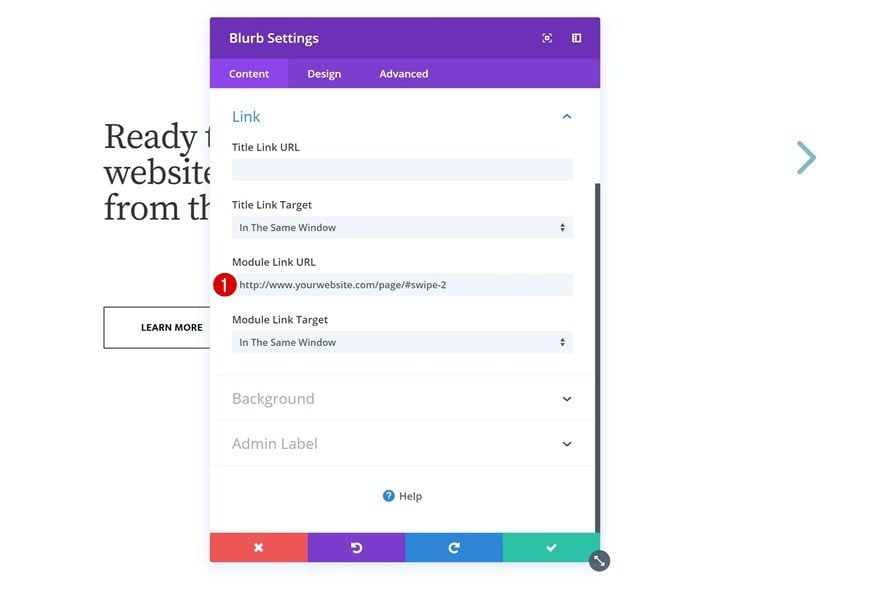
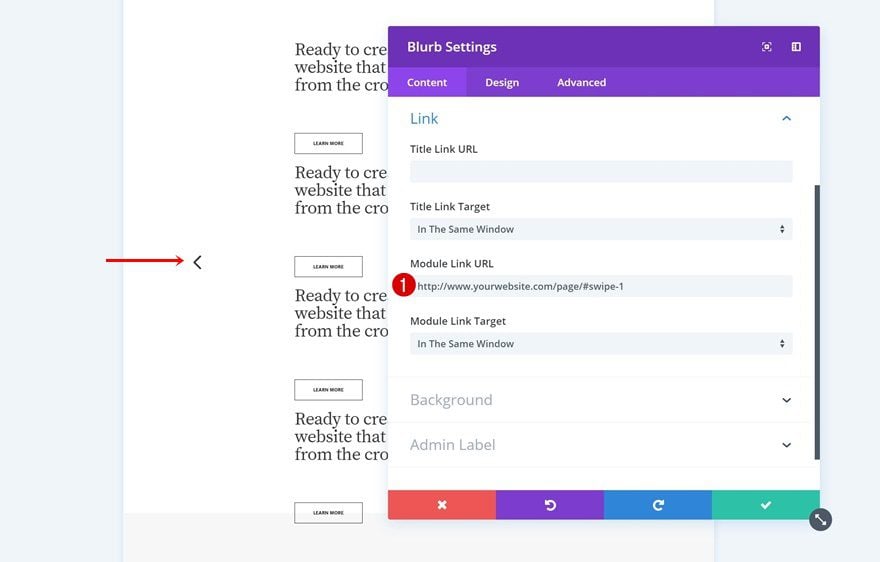
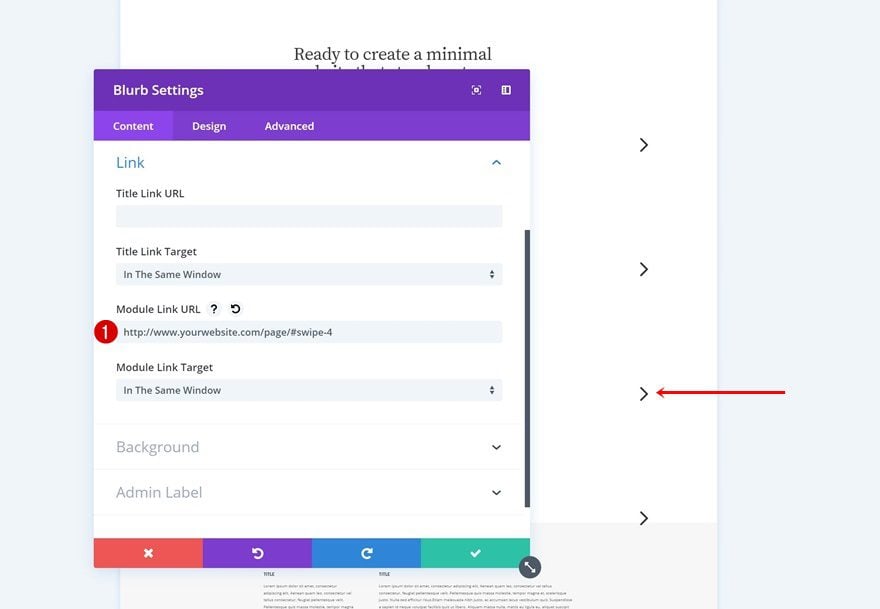
Hyperlink
Then, move to the hyperlink settings and upload a hyperlink that’ll lead guests to the second one horizontal column of the part.
- Module Hyperlink URL: https://www.yourwebsite.com/web page/#swipe-2
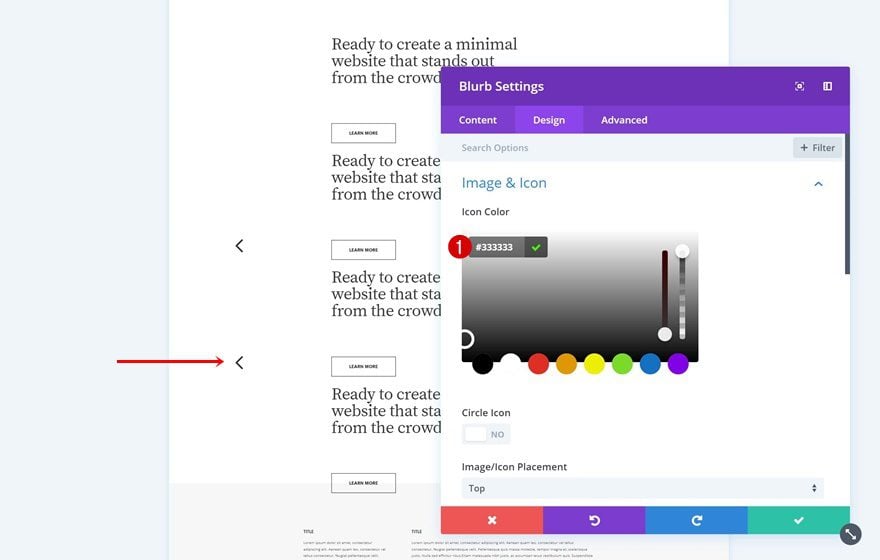
Icon Settings
Move forward and alter the icon settings too.
- Icon Colour: #333333
- Symbol Icon Placement: Best
- Use Icon Font Dimension: Sure
- Icon Font Dimension: 5vw (Desktop), 13vw (Pill), 21vw (Telephone)
Spacing
Proceed by way of including some customized best and left margin throughout other display screen sizes.
- Best Margin: 14vw (Desktop), -11vw (Pill), -17vw (Telephone)
- Left Margin: 60vw (Pill & Telephone)
Upload Row #2
Column Construction
The second one row we want uses the next column construction:
Background Colour
With out including any modules but, open the row settings and alter the background colour.
- Background Colour: #f7f7f7

Sizing
Adjust the sizing settings subsequent.
- Make This Row Fullwidth: Sure
- Use Customized Gutter Width: Sure
- Gutter Width: 1
Spacing
Together with the customized padding and margin values within the spacing settings.
- Best Margin: -3.5vw (Desktop), -10vw (Pill), -17vw (Telephone)
- Best Padding: 8vw (Desktop), 15vw (Pill), 20vw (Telephone)
- Backside Padding: 8vw (Desktop), 15vw (Pill), 20vw (Telephone)
- Left Padding: 24vw (Desktop), 5vw (Pill & Telephone)
- Proper Padding: 24vw (Desktop), 5vw (Pill & Telephone)
- Column 1 Proper Padding: 2vw (Desktop), 0vw (Pill & Telephone)
- Column 2 Left Padding: 2vw (Desktop), 0vw (Pill & Telephone)

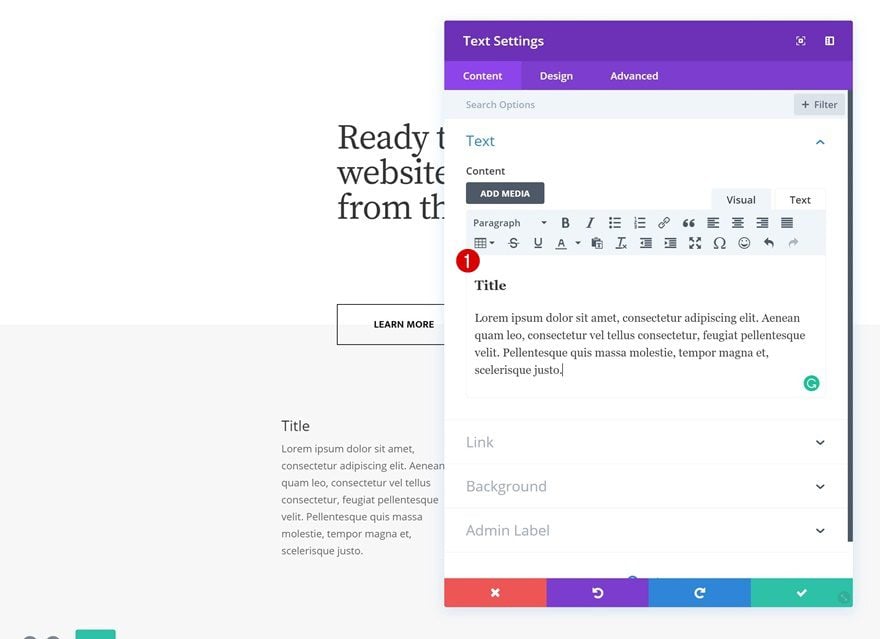
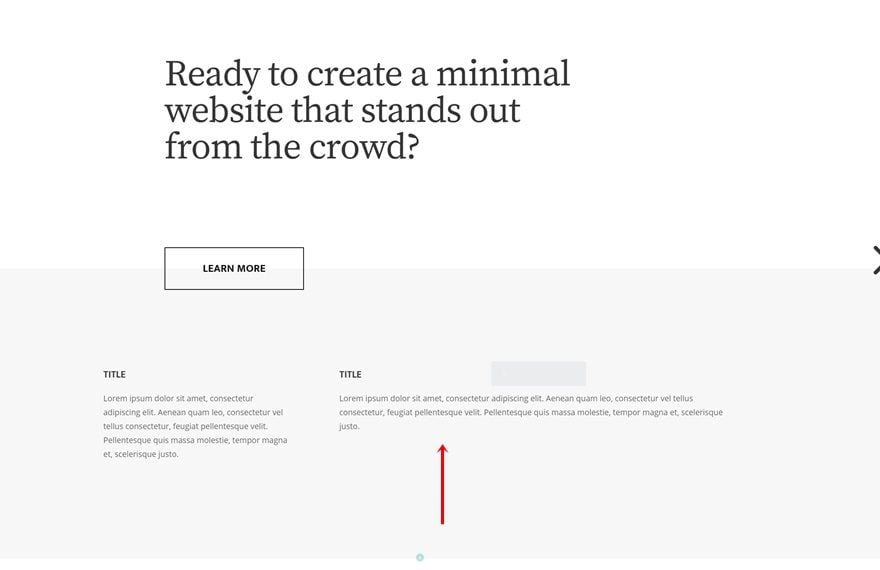
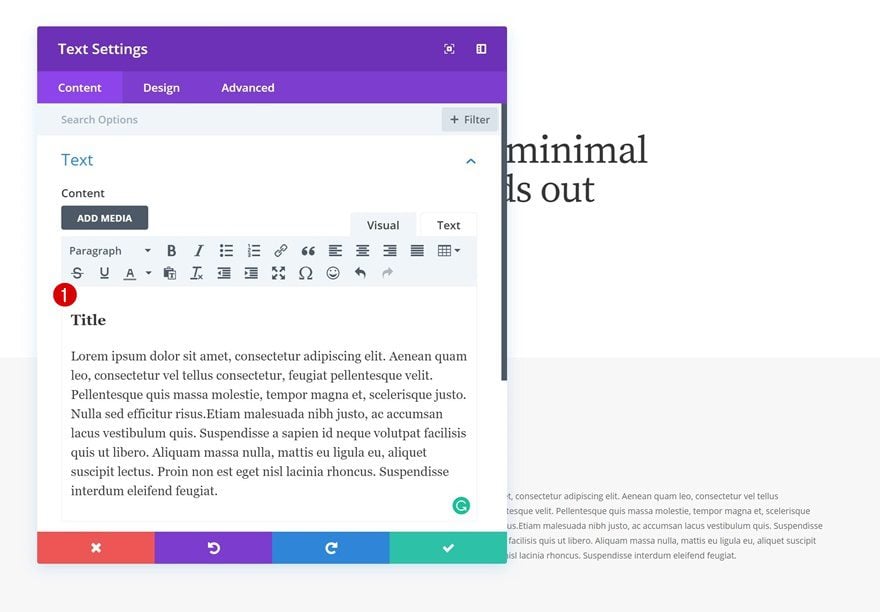
Upload Textual content Module to Column 1
Upload Content material
Move forward and upload a Textual content Module to the primary column. Input some replica of your selection (together with an H3 name).
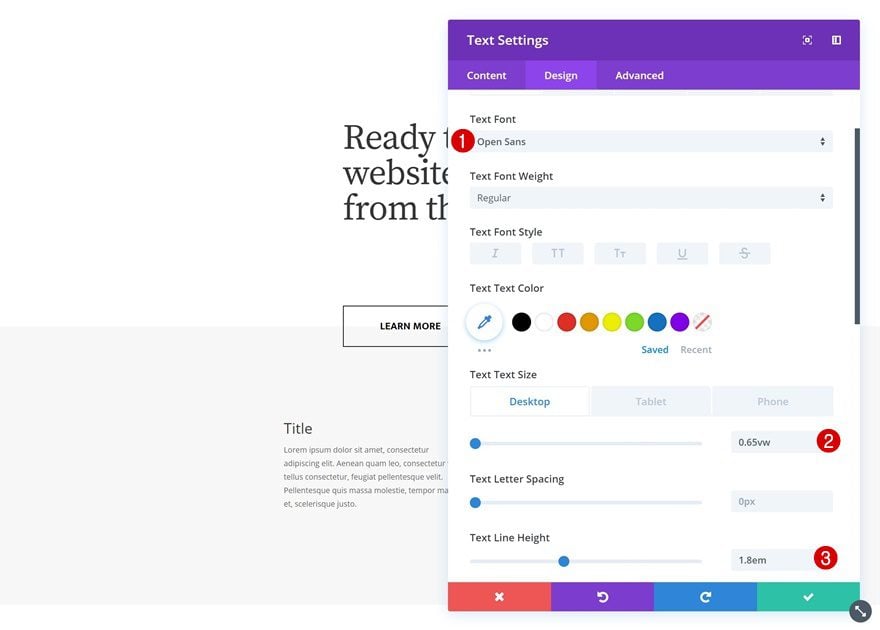
Textual content Settings
Move to the design tab and alter the textual content settings.
- Textual content Font: Open Sans
- Textual content Dimension: 0.65vw (Desktop), 1.8vw (Pill), 2.7vw (Telephone)
- Textual content Line Top: 1.8em
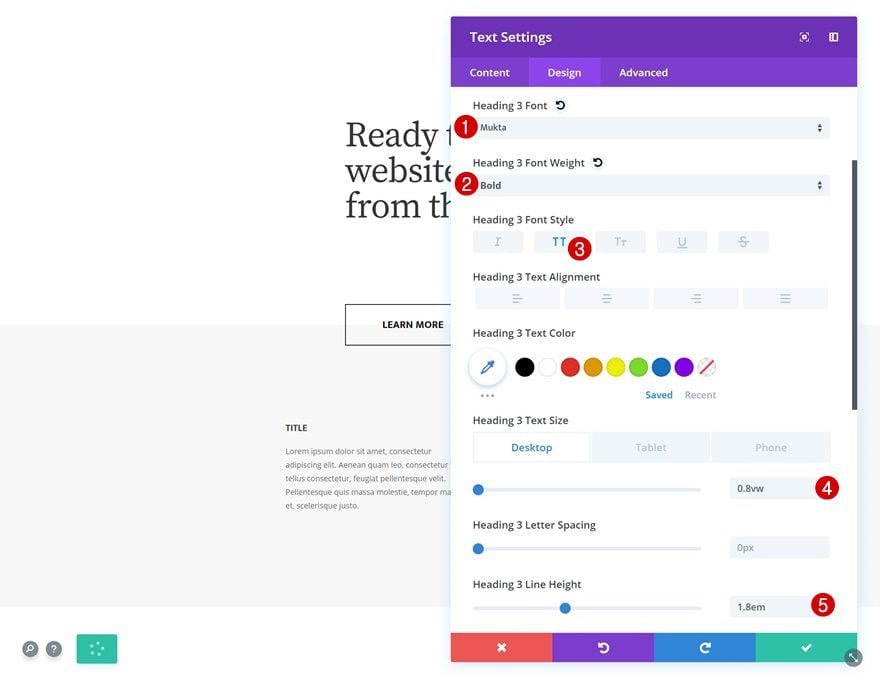
H3 Textual content Settings
Together with the H3 textual content settings.
- Heading 3 Font: Mukta
- Heading 2 Font Weight: Daring
- Heading 3 Font Taste: Uppercase
- Heading 3 Textual content Dimension: 0.8vw (Desktop), 3vw (Pill), 4vw (Telephone)
- Heading 3 Line Top: 1.8em
Spacing
Upload some backside margin for smaller display screen sizes too.
- Backside Margin: 5vw (Pill & Telephone)

Clone Textual content Module & Position in Column 2
When you’re executed enhancing the Textual content Module in column 1, you’ll be able to clone it and position the reproduction in the second one column.
Trade Content material
You should definitely trade the content material.
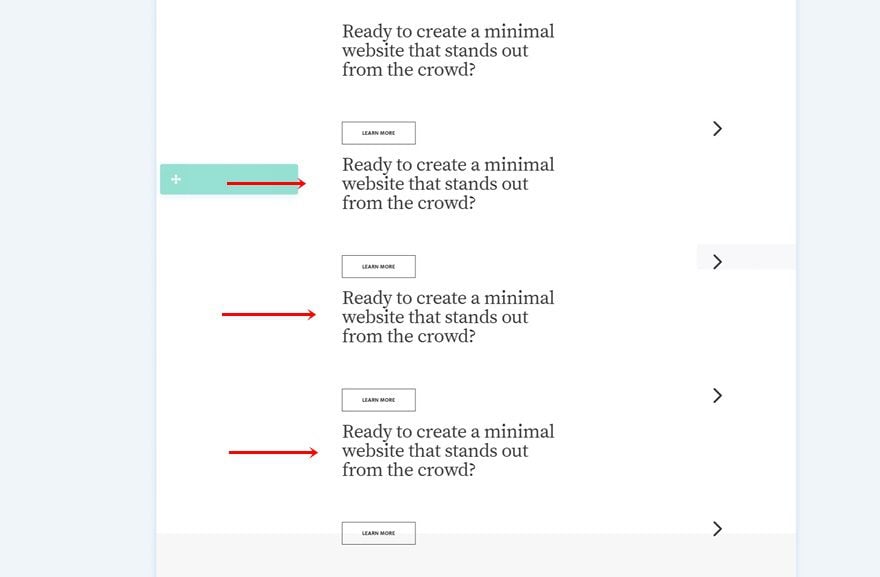
Clone Row #1 3 Instances
As soon as each your rows are executed, you’ll be able to clone the primary row three times.
Trade Reproduction #1
Trade Row CSS ID
We’ll wish to trade the CSS ID of the primary reproduction.
- CSS ID: swipe-2

Trade Blurb Module’s (Column 1) Icon Colour
Together with the primary Blurb Module’s colour.
- Icon Colour: #333333
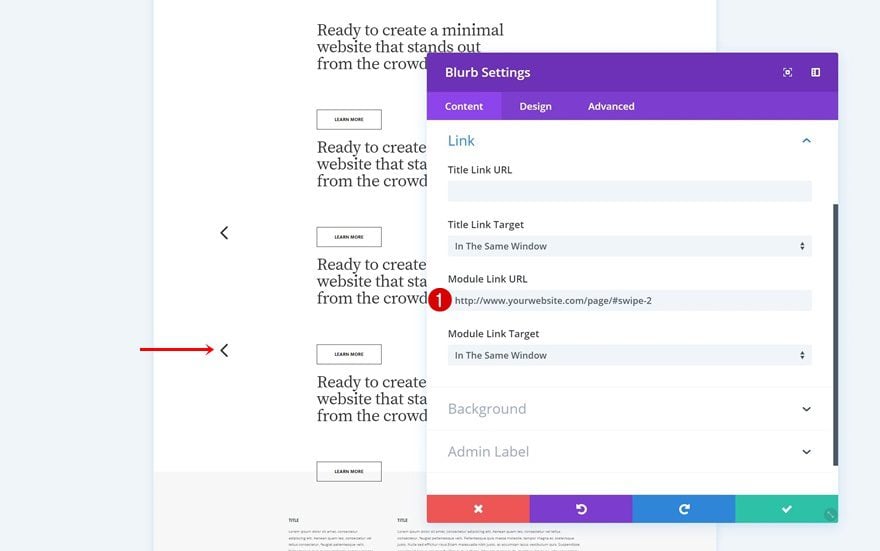
Trade Each Blurb Modules’ Hyperlinks
To make the anchor hyperlinks paintings, you’ll have to modify the hyperlink of every some of the arrows accordingly:
- Module Hyperlink URL: https://www.yourwebsite.com/web page/#swipe-1
- Module Hyperlink URL: https://www.yourwebsite.com/web page/#swipe-3

Trade Reproduction #2
Trade Row CSS ID
Trade the CSS ID of the second one reproduction.
- CSS ID: swipe-3

Trade Blurb Module’s (Column 1) Icon Colour
Together with the icon colour of the primary Blurb Module.
- Icon Colour: #333333
Trade Each Blurb Modules’ Hyperlinks
And once more, trade the hyperlinks of every Blurb Module accordingly:
- Module Hyperlink URL: https://www.yourwebsite.com/web page/#swipe-2
- Module Hyperlink URL: https://www.yourwebsite.com/web page/#swipe-4
Trade Reproduction #3
Trade CSS ID
Trade the CSS ID of the 3rd row reproduction too.
- CSS ID: swipe-4
Trade Blurb Module’s (Column 2) Icon
And make a selection some other icon for the Blurb Module in column 3.

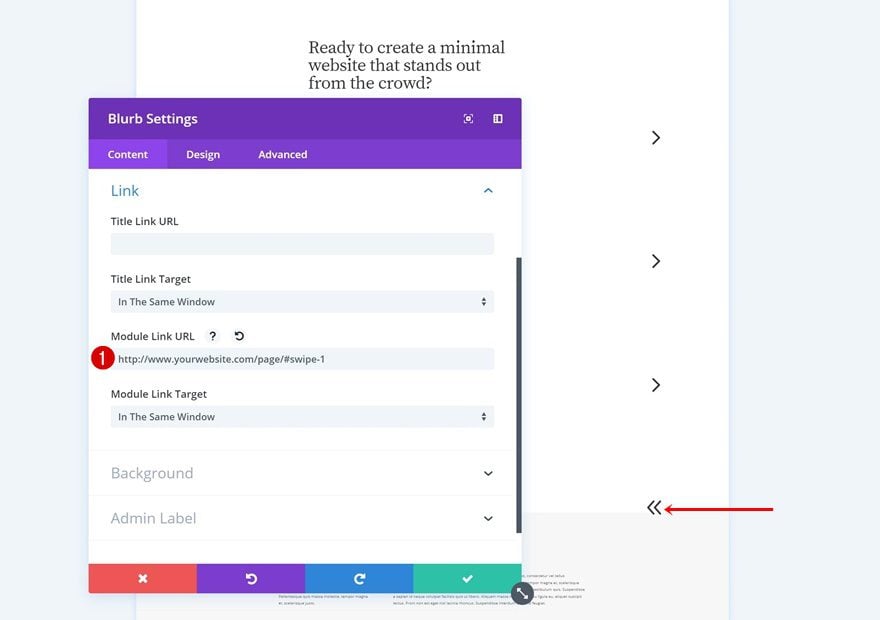
Trade Blurb Module’s (Column 2) Hyperlink
Ensure that on click on, the customer shall be redirected to the primary part column by way of enhancing the Module Hyperlink URL accordingly:
- Module Hyperlink URL: https://www.yourwebsite.com/web page/#swipe-1
Clone Row #2 3 Instances
Directly to the following row. Clone this row 3 times as neatly.
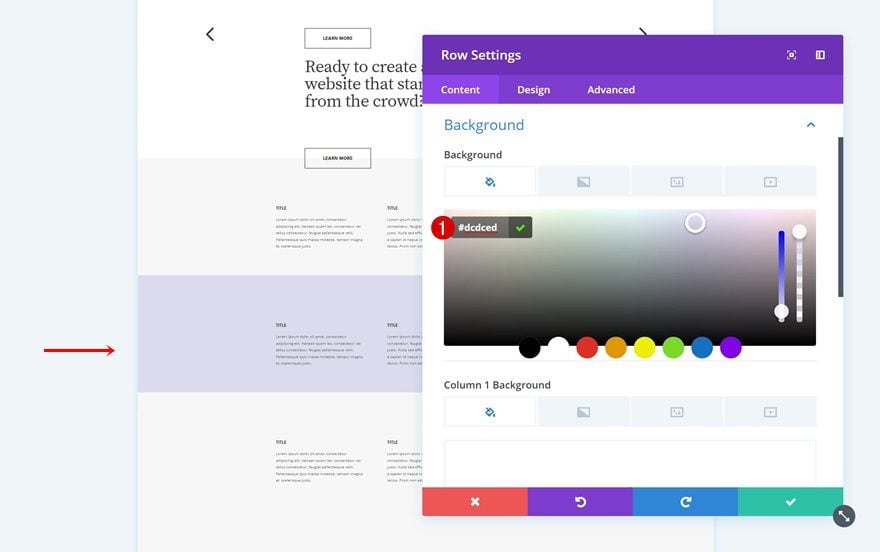
Trade Row Background Colour of Reproduction #1
Trade the background colour of the primary reproduction.
- Background Colour: #dcdced
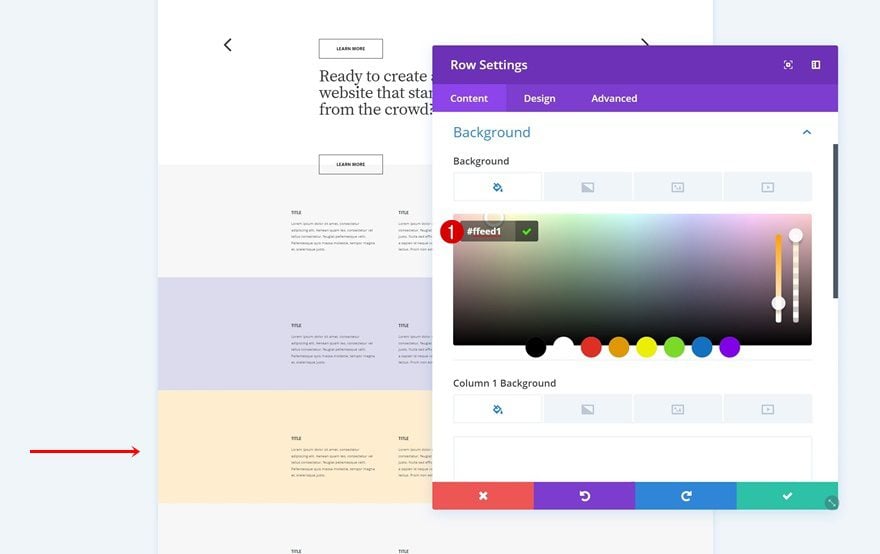
Trade Row Background Colour of Reproduction #2
The second one reproduction uses the next background colour:
- Background Colour: #ffeed1
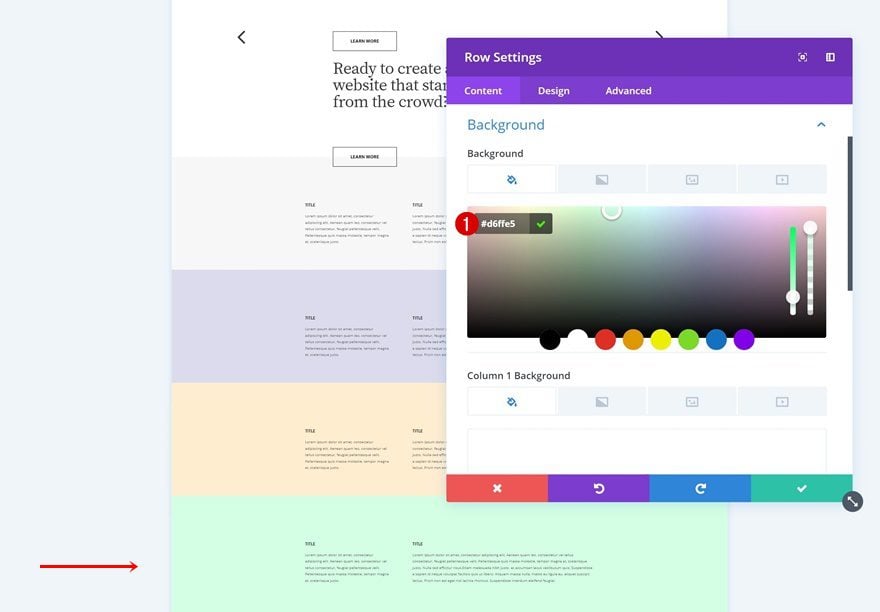
Trade Row Background Colour of Reproduction #3
Trade the background colour of the 3rd row reproduction too.
- Background Colour: #d6ffe5
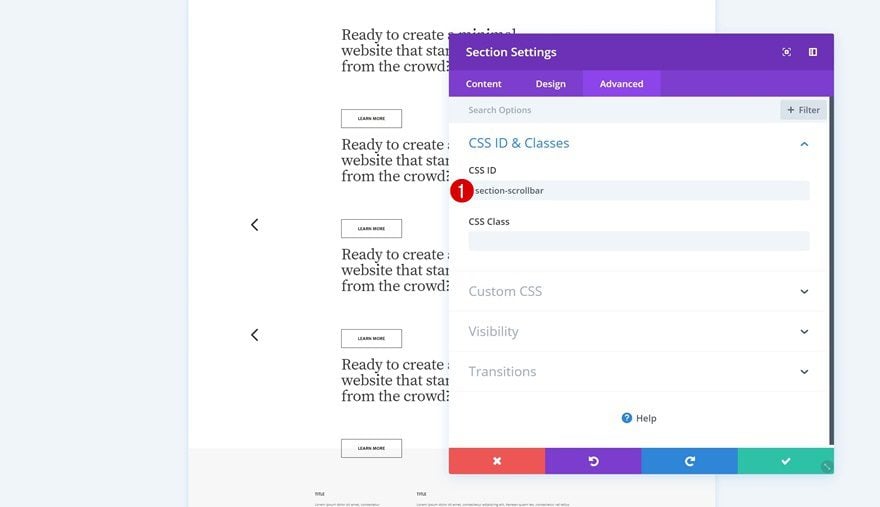
Upload CSS ID & CSS Code to Phase
Now that we’ve got all of the rows we want, we will make the magic occur. Upload a CSS ID to all the part. Later in this put up, we’ll use this CSS ID to cover the scrollbar.
- CSS ID: section-scrollbar
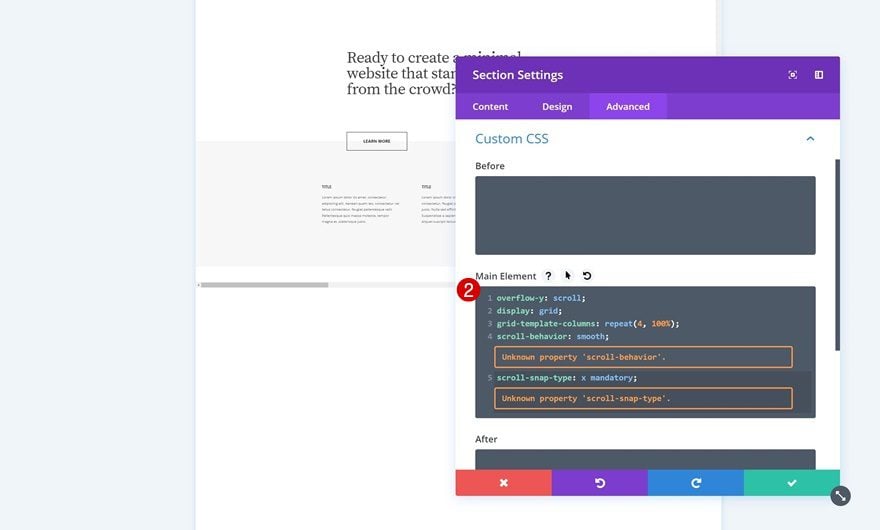
Then, move to the Customized CSS choices and upload some traces of CSS code to the principle part.
overflow-y: scroll;
show: grid;
grid-template-columns: repeat(4, 100%);
scroll-behavior: clean;
scroll-snap-type: x obligatory;
The extra part columns you need to create, the extra columns you’ll have so as to add within the CSS code. So, say as an example you need to have the similar construction however permit 7 swipes as an alternative of four, you’ll have to change the grid template columns CSS code line accordingly:
grid-template-columns: repeat(7, 100%);
However be mindful that you simply’ll have so as to add extra rows in the event you’re expanding the column quantity. So on this case, if you need two rows to look consistent with part column, you’ll want 14 rows.
Conceal Scrollbar
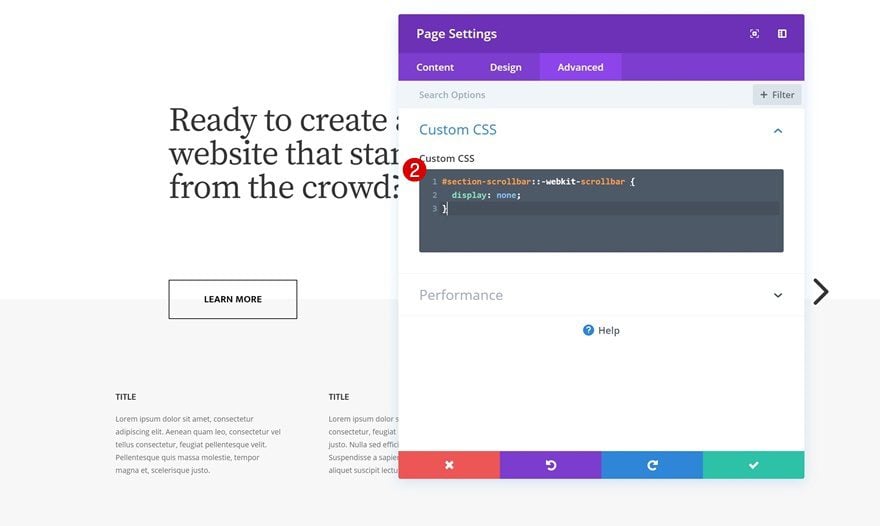
You’ll be able to additionally select to cover the scrollbar by way of the use of the part CSS ID and including the next traces of CSS code to the web page settings:
#section-scrollbar::-webkit-scrollbar {
show: none;
}
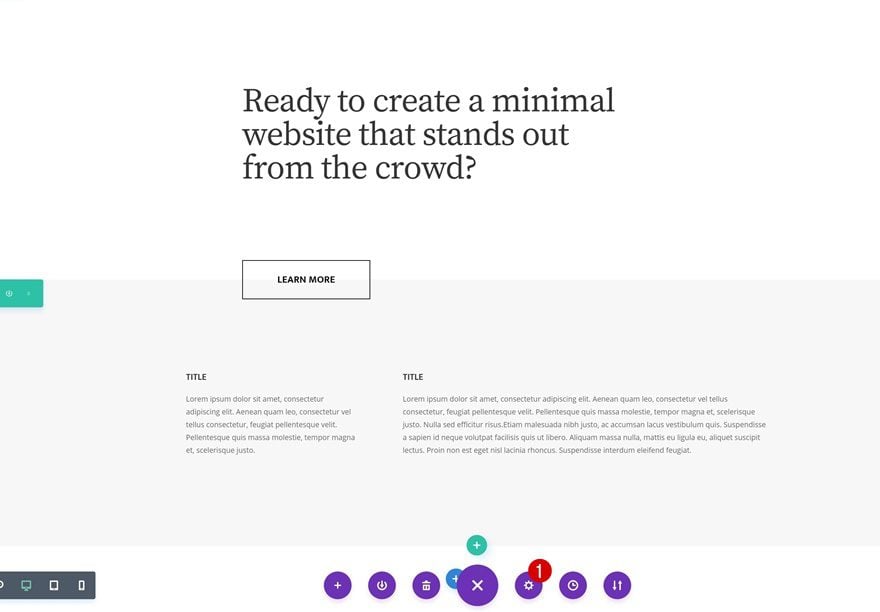
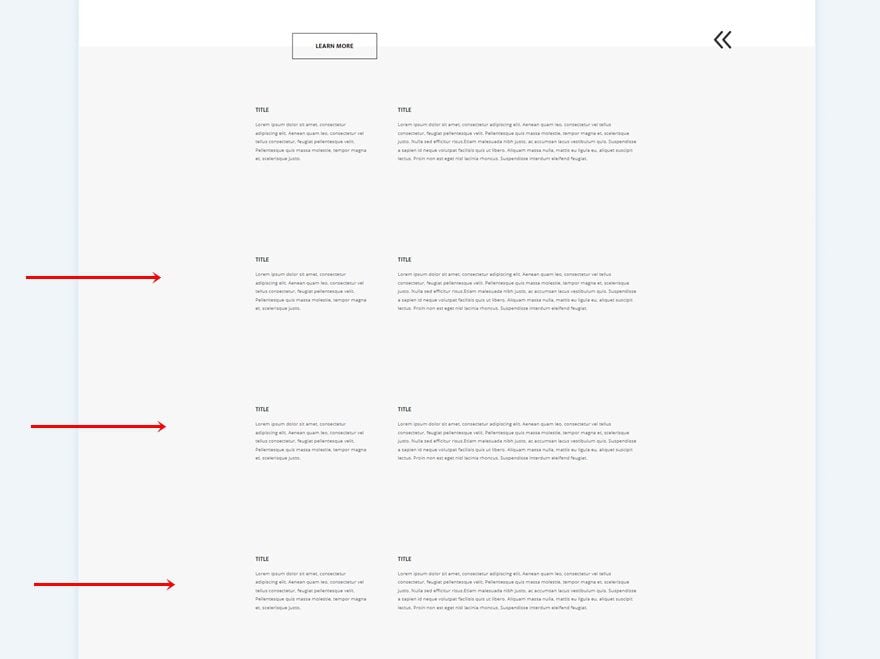
Preview
Now that we’ve long past thru all of the steps, let’s take a last take a look at the end result on other display screen sizes.
Desktop
Cellular
Ultimate Ideas
When designing web pages with Divi, the simplest factor to do is construct downwards. However simply because it’s the simplest factor to do, doesn’t imply you’re restricted to that choice. You’ll be able to create a wholly horizontal swipe web page as neatly. On this instructional, we’ve proven you the way to succeed in some surprising horizontal swipe internet design the use of Divi. If in case you have any questions or ideas, be sure you depart a remark within the remark part under!
The put up How to Create an Entirely Horizontal Swipe Page with Divi gave the impression first on Elegant Themes Blog.
WordPress Web Design