When you’re promoting to consumers in Poland, then no longer providing bills thru Przelewy24 (P24) is most likely costing you gross sales. It’s the maximum depended on native cost way, however many website house owners to find the combination complicated.
I’ve observed many companies lose Polish consumers on the ultimate step as a result of they didn’t be offering a well-known native financial institution switch possibility.
On this information, I’ll stroll you during the two absolute best techniques to simply accept Przelewy24 bills in WordPress. Whether or not you want a easy cost shape or a complete WooCommerce setup, I’ll display you the way to get it completed with no developer.

Contents
- 1 💡Fast Resolution: Easy methods to Settle for Przelewy24 Bills in WordPress
- 2 Why Settle for Przelewy24 (P24) Bills on Your WordPress Website?
- 3 ✅ What You’ll Want Earlier than You Get started Accepting Przelewy24 Bills
- 4 Manner 1: Settle for Przelewy24 Bills with WP Easy Pay (Simple Fee Shape Advent)
- 5 Manner 2: Settle for Przelewy24 Bills in WooCommerce with FunnelKit Fee Gateway for Stripe
- 6 Bonus Tricks to Beef up Your Checkout Revel in
- 7 Ceaselessly Requested Questions About Accepting Przelewy24 Bills in WordPress
💡Fast Resolution: Easy methods to Settle for Przelewy24 Bills in WordPress
TL;DR: To just accept Przelewy24 bills in WordPress, I like to recommend the usage of WP Easy Pay for easy cost bureaucracy or FunnelKit for WooCommerce retail outlets. Each strategies use Stripe to care for Polish financial institution transfers, offering a well-known and speedy checkout enjoy on your consumers.
Why Settle for Przelewy24 (P24) Bills on Your WordPress Website?
Including Przelewy24 on your WordPress website is a great transfer in the event you’re promoting to consumers in Poland. It makes checkout sooner, smoother, and extra devoted for native consumers.
So, what precisely is Przelewy24? Merely put, it’s a well-liked Polish cost gateway that we could other folks pay right away thru their financial institution accounts or native virtual wallets.
It’s depended on through hundreds of thousands throughout Poland and is supported through Stripe, making it best for eCommerce retail outlets, carrier bills, or any website concentrated on Polish consumers.

Right here’s what makes it so helpful on your website:
- Builds Believe with Polish Consumers: Other folks really feel assured paying with a well-known, native possibility.
- Accelerates Checkout: Bills occur right away, lowering deserted carts.
- Reduces Further Transaction Prices: The use of Przelewy24 thru equipment like WP Easy Pay mean you can keep away from upper charges charged through any other cost gateways.
- Boosts Conversions: A smoother, related checkout approach extra finished gross sales.
Now that you realize why Przelewy24 works so smartly, let’s have a look at the 2 absolute best techniques to set it up in WordPress.
✅ What You’ll Want Earlier than You Get started Accepting Przelewy24 Bills
Earlier than I soar into the educational, right here’s what I like to recommend having waiting to make the setup easy:
| Requirement | Why You Want It |
|---|---|
| Lively WordPress Website with SSL & Dependable Internet hosting | Bills require a protected (HTTPS) website and internet hosting that may care for transactions safely. |
| Stripe Account | Stripe processes Przelewy24 bills, so it’s crucial for each setup strategies. |
| Legitimate Financial institution Account Hooked up to Stripe | Stripe will procedure the Przelewy24 cost and robotically convert and deposit the finances into your native checking account. |
| A WordPress Fee Plugin | Make a selection the process that matches your website: • WP Easy Pay – nice for non-WooCommerce websites and easy one-off bills. • FunnelKit Fee Gateway for Stripe – best possible for complete WooCommerce retail outlets with a couple of merchandise.. |
When you haven’t arrange your WordPress website but, I like to recommend testing our information on beginning a WordPress web page.
Now, let’s get Przelewy24 running for your website. You’ll be able to use the hyperlinks underneath to leap to the process of your selection:
Manner 1: Settle for Przelewy24 Bills with WP Easy Pay (Simple Fee Shape Advent)
In case you have carrier pages, subscriptions, donations, or any website that doesn’t run a complete on-line retailer, then WP Easy Pay is the absolute best Stripe plugin for accepting Przelewy24 bills..
It comes with a ready-to-use Przelewy24 cost shape template, so you’ll be able to get started accepting bills right away with out putting in a complete buying groceries cart. I’ve examined it totally, and this is a speedy and dependable device that even a newbie can arrange.

Listed below are simply one of the crucial the reason why I like WP Easy Pay:
- No Further Transaction Charges – With the Professional model, you most effective pay Stripe’s usual processing charges. The loose model provides an additional 3% rate on best of Stripe’s fees. Upgrading is a huge plus if you wish to keep away from additional prices and maximize your earnings.
- Fast, Newbie-Pleasant Setup – I used to be ready to get a cost shape reside in underneath quarter-hour.
- Customizable Fee Paperwork – You’ll be able to regulate fields, styling, and cost choices to check your website.
- Helps One-Time and Habitual Bills – Easiest for donations, subscriptions, or carrier charges.
- Integrated Przelewy24 Template – The whole lot you want for P24 is able to move, which makes setup tremendous easy.
With WP Easy Pay, you get a competent answer that permits you to get started accepting P24 bills nearly right away. For extra information about it, you’ll be able to check out our whole WP Easy Pay overview.
Step 1: Set up and Turn on WP Easy Pay
The very first thing you want to do is set up the WP Easy Pay plugin for your WordPress website..
You’ll be able to get started through signing up at the WP Easy Pay web page. Simply click on the ‘Get WP Easy Pay Now’ button and practice the directions.

📍Word: The Przelewy24 cost shape is most effective to be had in WP Easy Pay Professional. Whilst the loose model is excellent for trying out elementary Stripe bills, you’ll want the Professional plan to create an absolutely purposeful Przelewy24 shape..
I’ve examined each, and the Professional model makes setup sooner, smoother, and is helping scale back transaction charges.
When you’ve signed up, you want to put in and turn on the plugin for your WordPress website. If you want a refresher, our information on putting in a WordPress plugin walks you thru it step-by-step.
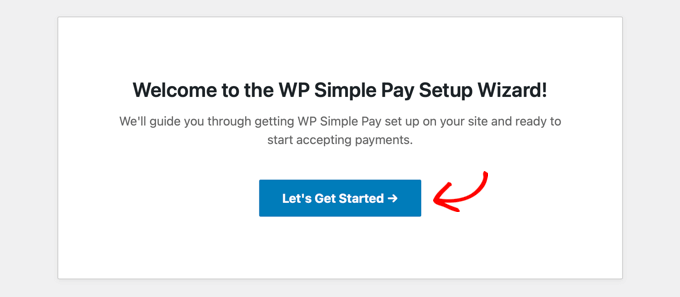
After activation, the WP Easy Pay Setup Wizard will release robotically. Simply click on ‘Let’s Get Began’ to start out.
Subsequent, you’ll be requested to go into your license key. You’ll be able to to find this key on your WP Easy Pay account dashboard..
Coming into it unlocks the Professional options, which can be required if you wish to settle for bills with decrease charges or different complex choices like subscriptions or direct debit.

Step 2: Attach WP Easy Pay to Stripe
After putting in WP Easy Pay, the next move is to attach it on your Stripe account. Since WP Easy Pay processes Przelewy24 bills thru Stripe, your website received’t be capable to settle for bills till this connection is whole.
When you don’t have a Stripe account but, don’t concern. You’ll be able to create one proper from the plugin setup.
I went thru this myself, and the method is fast and easy.

As soon as hooked up, Stripe handles the entire cost processing at the back of the scenes, so that you don’t have to regulate any advanced banking setups.
After that, WP Easy Pay will information you thru configuring elementary settings like e mail notifications.
I love surroundings this up in an instant as it makes positive I am getting indicators when a cost is going thru or if there’s a subject. You’ll be able to customise which notifications to obtain and select the e-mail deal with the place they’ll be despatched.

As soon as this is completed, you’re waiting to transport on to making your first Przelewy24 cost shape.
Step 3: Create a Przelewy24 Fee Shape
Now that WP Easy Pay is put in and hooked up to Stripe, it’s time to create your first Przelewy24 cost shape. That is the step that we could your consumers pay the usage of P24.
Get started through going to WP Easy Pay » Fee Paperwork out of your WordPress dashboard and clicking ‘Create Your Fee Shape’..
When you nonetheless see the setup wizard, you’ll be able to additionally click on the button there.

Within the template library, search for the ‘Przelewy24 Fee Shape’ template..
I love this template as it robotically preselects Przelewy24 because the cost way, so that you don’t must configure it manually.
When you don’t see it in an instant, use the hunt bar to search out it temporarily.

As soon as you choose the template, you’ll land within the shape editor. Start through giving your shape a transparent identify and outline. That is what your consumers will see at checkout.
Then select the shape sort. I generally move with ‘On-site cost shape’, which assists in keeping consumers for your website to finish bills. However you’ll be able to additionally make a choice ‘Stripe Checkout shape’ in the event you choose an off-site drift.
Then, I counsel checking the ‘Unsolicited mail & Fraud Coverage’ field. It provides CAPTCHA on your shape, protective it from malicious bots.

Subsequent, arrange the cost main points through switching to the ‘Fee’ segment from the left..
Right here, you’ll input the fee on your product, carrier, or donation and make a choice the forex. Przelewy24 helps each PLN (Polish Złoty) and EUR, so make sure that your forex is ready to this sort of choices.
You’ll be able to additionally select whether or not this can be a one-time cost or a subscription. For subscriptions, you’ll be able to create a couple of tiers. For instance, a Fundamental Plan at one value and a Top rate Plan at a better value.

After surroundings the fee, scroll all the way down to the ‘Fee Strategies’ segment simply to make sure that ‘Przelewy24’ is checked off.
Because you used the template, it must already be decided on for you.
You’ll be able to additionally allow further choices, like bank cards, SEPA, Klarna, or Alipay, so your consumers have extra flexibility in how they pay..

After that, transfer to the ‘Shape Fields’ segment. That is the place you make a decision what knowledge to gather from consumers.
For a easy carrier or virtual product, identify and e mail is also sufficient, however for occasions or products and services requiring billing data, you’ll be able to upload fields like deal with.
You’ll be able to drag, drop, upload, or take away fields to customise the shape precisely how you want it.

Step 4: Post Your Przelewy24 Fee Shape in WordPress
As soon as your Przelewy24 cost shape is waiting, it’s time to make it survive your website.
WP Easy Pay permits you to put up the shape in two techniques: as a standalone cost web page or embedded inside an current web page or submit.
To create a devoted cost web page, transfer to the ‘Fee Web page’ tab on your shape editor and test the ‘Allow a devoted cost web page’ field.
From right here, you’ll be able to customise the web page through surroundings a permalink, opting for a colour scheme, including what you are promoting brand, or together with footer textual content.

Whilst you’re proud of the setup, click on ‘Post.’
You’ll be able to now discuss with your website to peer the Przelewy24 cost shape reside and waiting for purchasers.

If you want to upload the shape to an current web page, that’s simple too. After saving your shape, open the WordPress web page or submit the place you wish to have the cost shape to look.
Click on the ‘Upload Block’ (+) button, seek for the ‘WP Easy Pay’ block, and make a choice the cost shape you simply made from the dropdown.

As soon as added, click on ‘Replace’ or ‘Post’ at the web page to save lots of your adjustments.
Whether or not you employ a devoted web page or embed the shape in an current web page, your Przelewy24 cost shape is now reside and waiting to begin accepting bills in an instant.

Manner 2: Settle for Przelewy24 Bills in WooCommerce with FunnelKit Fee Gateway for Stripe
When you’re operating a WooCommerce retailer and wish to settle for Przelewy24 bills proper at checkout, I like to recommend the usage of FunnelKit Fee Gateway for Stripe.
I’ve totally examined it, and it really works easily with WooCommerce, letting consumers pay with P24 with out leaving your retailer.

The plugin is totally loose, beginner-friendly, and integrates at once together with your current Stripe account, so that you don’t want any difficult setups.
Plus, with FunnelKit, your checkout procedure remains easy. It offers consumers a well-known native cost possibility whilst maintaining the whole lot protected and dependable.
Step 1: Get ready Your WooCommerce Retailer
Earlier than you’ll be able to settle for Przelewy24 bills with FunnelKit, your WooCommerce retailer must be arrange and waiting..
When you haven’t created your retailer but, I like to recommend testing our whole information to putting in WooCommerce for step by step directions.
As soon as your retailer is lively, there’s one key surroundings to test: the shop forex. Przelewy24 helps EUR or PLN (Polish Złoty), so you want to verify your WooCommerce retailer is ready to this sort of.
To set your retailer forex, move to WooCommerce » Settings » Normal, scroll to the ‘Foreign money choices’, and make a choice ‘Polish Złoty’ (PLN) from the dropdown.

Then, click on ‘Save Adjustments’ to retailer your settings.
Step 2: Set up FunnelKit Fee Gateway and Hook up with Stripe
Along with your WooCommerce retailer waiting, the next move is to put in FunnelKit Fee Gateway for Stripe and fix it on your Stripe account so you’ll be able to settle for Przelewy24 bills.
Out of your WordPress dashboard, move to Plugins » Upload New, then seek for ‘FunnelKit Stripe Gateway’. When you to find the plugin, click on ‘Set up’ after which ‘Turn on.’

After activation, you’ll see a urged to attach your Stripe account.
Click on the ‘Get started Onboarding Wizard’ button to start out the setup.

This may occasionally open a brand new window the place you’ll be able to click on ‘Connect to Stripe.’
Log in on your Stripe account the usage of your registered e mail and password.
Then, practice the activates to make sure your account with the 6-digit code Stripe sends on your e mail or telephone.
As soon as verified, make a choice the Stripe account you wish to have to make use of and click on ‘Attach.’

Subsequent, you’ll see a listing of to be had cost gateways.
Be certain ‘Stripe Przelewy24 (P24)’ is enabled, then click on ‘Save and Proceed.’

The plugin will robotically arrange webhooks to care for notifications from Stripe.
Simply click on ‘Setup Webhook Now’ and practice the directions.

In any case, the plugin might urged you to allow categorical checkout choices like Apple Pay or Google Pay. Those are non-compulsory however make checkout sooner and more uncomplicated for purchasers.
As soon as the whole lot is hooked up, FunnelKit will robotically pull on your Stripe account main points, together with your connection ID, webhook URL, and secret keys.

At this level, your WooCommerce retailer is able to get started accepting Przelewy24 bills.
Step 3: Allow and Configure Stripe Przelewy24 in WooCommerce
Now that FunnelKit is hooked up to Stripe, the next move is to allow Przelewy24 at checkout. Out of your WordPress dashboard, move to the WooCommerce » Settings » Bills web page.
Scroll down the checklist of to be had gateways and click on ‘Organize’ subsequent to ‘Stripe Przelewy24 (P24) Gateway.’

At the subsequent display screen, test the ‘Allow Stripe Przelewy24 (P24) Gateway’ field.
This turns on P24 as a cost possibility on your WooCommerce retailer, letting your consumers pay at once at checkout.

As soon as enabled, it’s time to configure the settings.
Get started through giving your cost possibility a identify—that is what your consumers will see at checkout. Then, upload an outline to offer a bit extra element, which seems underneath the identify.
Subsequent, set the ‘Promoting location(s)’. If you select ‘Promote to precise international locations’, make sure that to make a choice Poland, since Przelewy24 is an area Polish cost way.
After filling in those main points, scroll down and click on ‘Save adjustments.’

Step 4: Take a look at Your Przelewy24 Checkout in WooCommerce
When you’ve stored your adjustments, it’s time to peer the Przelewy24 cost gateway in motion. I all the time counsel trying out earlier than going reside to verify the whole lot works easily.
Cross on your WooCommerce retailer and open the checkout web page with a take a look at services or products. You must now see Przelewy24 indexed as a cost possibility along another strategies you enabled.

Choose Przelewy24 at checkout and position your order..
Doing this is helping ascertain that bills are processed as it should be thru Stripe and that the checkout drift is easy on your consumers.
As soon as the take a look at cost is going thru effectively, your WooCommerce retailer is absolutely waiting to simply accept Przelewy24 bills in reside transactions.
Knowledgeable Tip: Since many of us in Poland pay the usage of cellular banking apps, I extremely counsel trying out your checkout on a smartphone. You need to verify the financial institution variety buttons are simple to click on on small monitors so that you don’t lose gross sales.
Bonus Tricks to Beef up Your Checkout Revel in
After you’ve added Przelewy24 on your WordPress website or WooCommerce retailer, you’ll be able to do a couple of additional issues to make the checkout procedure even smoother..
Listed below are one of the crucial guidelines I like to recommend:
- Be offering More than one Fee Choices: Let consumers pay with P24, bank cards, or different well-liked strategies at the identical shape or checkout web page. This pliability is helping spice up conversion charges.
- Safely Transfer From Take a look at Mode to Are living Mode: Run a couple of take a look at transactions first to make sure the whole lot works as it should be, then allow reside bills to keep away from any surprises.
- Track P24 Transactions in Stripe: Test a hit and failed bills, refunds, and different transaction main points the usage of Stripe’s dashboard to stick on best of your gross sales.
- Stay a Submit-Setup Tick list: Ascertain your bureaucracy show as it should be. Be sure that emails are despatched, that currencies are set correctly, and checkout flows are easy. A snappy test like this prevents doable problems.
Those easy steps assist ensure that your checkout is speedy, dependable, and user-friendly, giving your consumers self belief to finish their bills.
Ceaselessly Requested Questions About Accepting Przelewy24 Bills in WordPress
Even after putting in Przelewy24 for your WordPress website or WooCommerce retailer, I remember the fact that it’s possible you’ll nonetheless have some questions..
To make issues more uncomplicated, I’ve put in combination solutions to the commonest questions I am getting about accepting P24 bills, so you’ll be able to troubleshoot temporarily and hopefully.
Does Przelewy24 paintings with out WooCommerce?
Sure, Przelewy24 works with out WooCommerce. You’ll be able to settle for P24 bills on any WordPress website the usage of WP Easy Pay, which gives a ready-made Przelewy24 cost shape template.
This technique is perfect for carrier pages, donations, occasions, or any website that doesn’t run a complete on-line retailer.
Is Przelewy24 to be had thru Stripe?
Sure, Przelewy24 is to be had thru Stripe. Each WP Easy Pay and FunnelKit for WooCommerce use Stripe to procedure P24 bills securely. This integration makes positive transactions are speedy and dependable whilst maintaining buyer cost main points secure.
Does WP Easy Pay fee additional charges?
No, WP Easy Pay itself doesn’t upload additional charges when the usage of the Professional model—you most effective pay Stripe’s usual processing charges..
At the loose plan, there’s an extra 3% rate on best of Stripe’s fees, which will upload up over the years.
Can I settle for P24 on a non-Polish web page?
Technically, you’ll be able to upload Przelewy24 to a web page out of doors Poland, however your consumers nonetheless desire a Polish checking account to finish bills. P24 is designed in particular for the Polish marketplace, so it really works absolute best when your target market is in Poland.
What forex does P24 use?
Przelewy24 bills are processed in PLN (Polish Złoty) and EUR. Be certain your WordPress or WooCommerce retailer is ready to this sort of currencies to keep away from any cost mistakes.
You’ll be able to regulate this in WooCommerce » Settings » Normal » Foreign money choices.
Is it secure to simply accept P24 bills?
Sure, accepting Przelewy24 bills is secure. All P24 transactions undergo Stripe, which makes use of robust encryption and fraud coverage. I like to recommend enabling choices like CAPTCHA or different anti-fraud equipment in WP Easy Pay for additonal safety.
Which banks enhance Przelewy24 bills?
Przelewy24 is supported through over 165 primary banks in Poland, together with mBank, PKO BP, Santander, and ING. It additionally works with well-liked virtual wallets like BLIK, making it obtainable to nearly each on-line client within the nation.
What’s the cut-off date for inquiring for money back on Przelewy24 bills?
You’ll be able to generally factor money back for Przelewy24 transactions inside 180 days of the unique cost date. Refunds are processed thru Stripe and despatched again at once to the buyer’s checking account or authentic cost way.
I am hoping this newsletter helped you learn to settle for Przelewy24 bills in WordPress. You might also wish to see our instructional on accepting Bancontact bills and our information on necessary on-line cost statistics.
When you appreciated this newsletter, then please subscribe to our YouTube Channel for WordPress video tutorials. You’ll be able to additionally to find us on Twitter and Fb.
The submit I Discovered Out Easy methods to Simply Settle for Przelewy24 Bills in WordPress first gave the impression on WPBeginner.
WordPress Maintenance