Revealing module content material on hover will have some useful advantages. 1) It may be a good way to have a extra compact or chic design of your internet web page to begin with. 2) It saves area. 3) It could possibly trap customers to have interaction together with your web page. 4) It seems to be cool :). The fundamental thought is to turn just a portion of the module content material (like a teaser) which makes it attractive for guests to hover over to peer extra. When they do hover over the module, all of the content material is published with a easy hover impact that opens and closes like a shutter.
On this instructional, I’m going to turn you ways you’ll be able to divulge module content material with a shutter taste hover impact the usage of the Divi builder.
Contents
Sneak Peek
Here’s a fast take a look at what we can be development in combination.

Getting Began
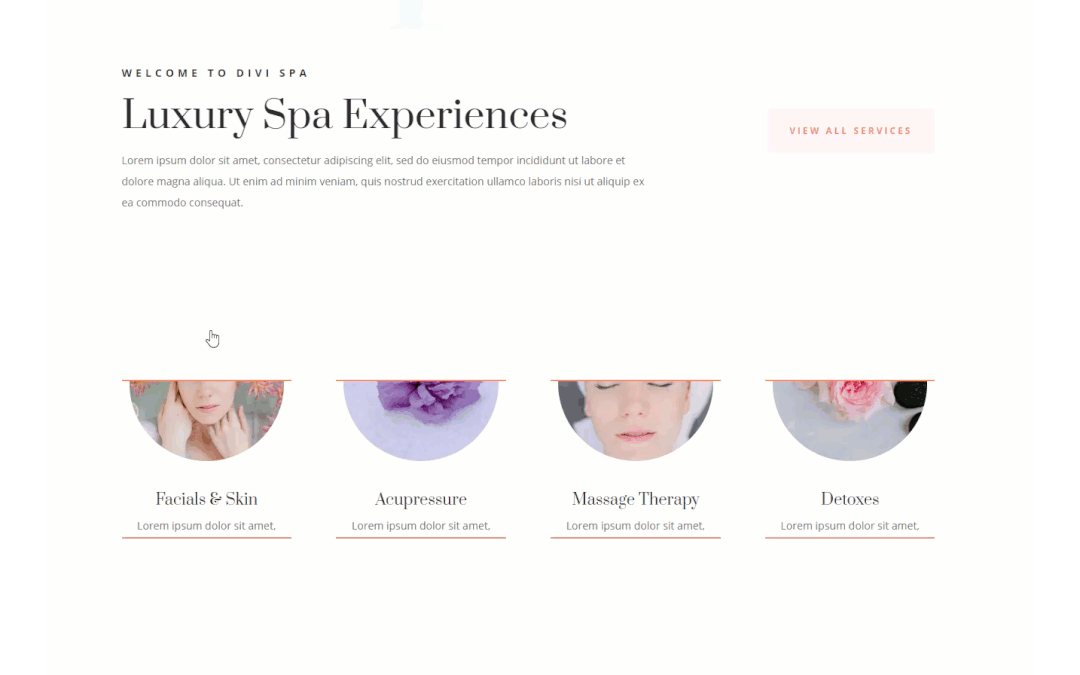
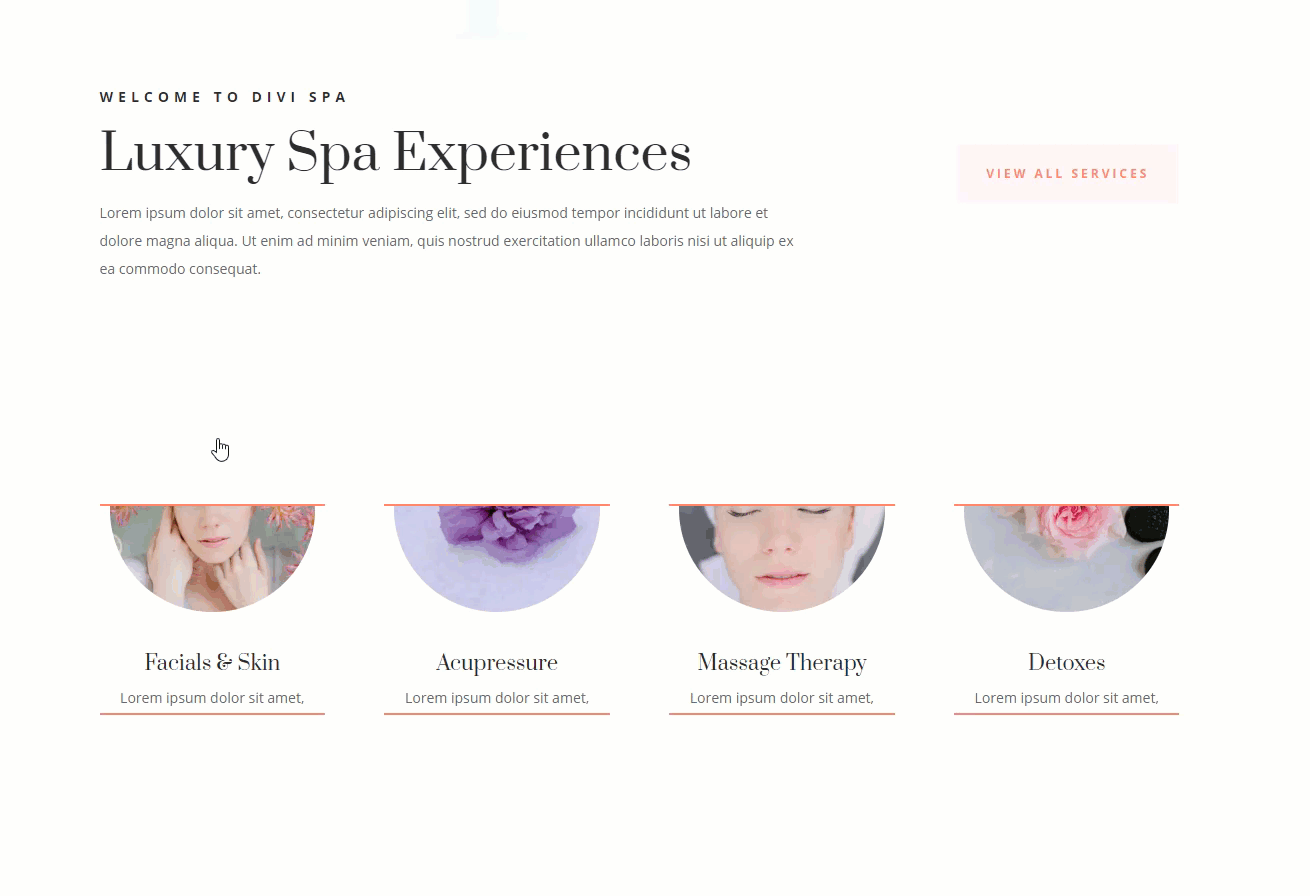
To get began, create a brand new web page, come up with web page a identify after which deploy the Divi Builder to construct at the entrance finish. Make a selection the “Select a Premade Format” choice. Then from the Divi Library popup, make a choice the Day Spa Format pack and click on to make use of the Touchdown Web page Format.

As soon as the structure is loaded onto the web page, you’re ready to start out!
Including Dividers to the highest and backside of the Blurb
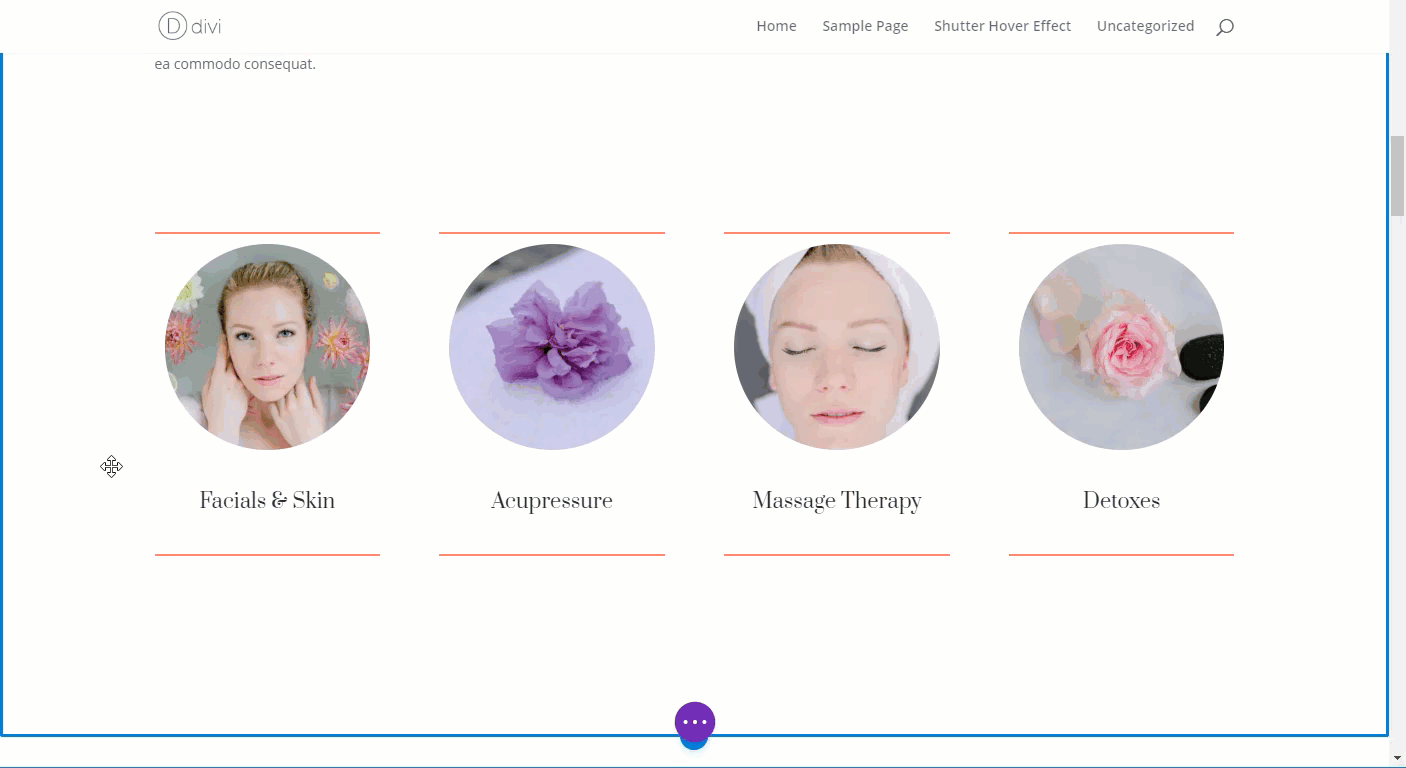
Scroll down the web page to the phase Titled “Luxurious Spa Stories” with the 4 blurbs. We can be the usage of the row with the 4 blurbs to kickstart the design.
Including the First Divider
Our first step is so as to add dividers above and under the blurb module as a way to cover our blurb content material in the back of. You’ll be able to bring to mind those dividers as of shutters of a window that can open and shut on hover.
Upload a divider module above the blurb within the first column and replace the next:
Background colour: #ffffff
Colour (of divider): #ffffff
Divider Weight: 100px
Peak: 100px
Customized margin: 0px backside
The white background fits the background of our phase since we don’t need to see it. Be certain the divider weight and top are the similar.

Including the 2d (orange) Divider
Subsequent, create any other divider at once beneath the divider you simply created and replace the next:
Colour: #ff7a6b
Divider Weight: 2px
Peak: 2px
Customized margin: 0px backside
Then leap over to the content material tab and provides the divider an admin label “orange divider”. This may increasingly lend a hand distinguish the divider from the former (white) divider once we use the wireframe mode to duplicate and paste the divider into the opposite columns.

Save your web page.
Copying and Pasting the Dividers Across the Blurbs
Now we’re able to duplicate and paste our dividers above and under each and every of the blurbs in each and every of the columns. To make this procedure slightly more uncomplicated, deploy the wireframe mode by way of opening the settings menu on the backside of the web page and clicking the wireframe icon. (or use shft + w)
In wireframe mode, in finding the row containing the blurbs and the dividers we simply created. Then reproduction and paste the divider and orange divider above and under each and every of the blurbs in order that the overall end result looks as if this.

Subsequent, return to the desktop view (shft + w) to complete the design. You web page will have to seem like this.

Customizing the Blurb Modules
Now that you’ve got all the dividers in position, it’s time to edit our blurb modules with a couple of taste changes together with a customized margin to create the shutter taste hover impact.
First, use multiselect to choose all 4 blurb modules. To do that merely hang ctrl (or cmd) and click on on each and every module. Then open the settings of one of the most modules to deploy the component settings modal.
Underneath the content material tab, upload a couple of traces of mock content material.

Then disable the picture field shadow altogether.

To create the shutter hover impact, we wish to upload unfavorable most sensible and backside margins to cover the content material in the back of the dividers by way of default. Then we set the margins to 0px to show the content material on hover. To do that upload the next spacing.
Customized Margin (default): -100px most sensible, -65px backside
Customized Margin (hover): 0px most sensible, 0px backside
Customized Padding (hover): 10px most sensible, 10px backside

Chances are you’ll wish to regulate the unfavorable margin values relying on how a lot content material you have got. As an example, chances are you’ll wish to have extra unfavorable margin for longer textual content content material.
Now take a look at the end result to this point.
Understand the highest and backside of each and every module is hidden in the back of the dividers till you hover over them.

Cleansing Up the Shutter Hover Impact
Vertically Centering the Modules
These days, the shutter hover impact pushes the remainder of the content material down the web page with each and every hover. This reasons some web page motion that can be distracting. Plus, the hover motion best is going in a downward path which isn’t a real shutter impact. We wish the content material to open each upward and downward from the middle. To perform this we wish to do the next:
Open the row settings and equalize the column heights.

Then move to the complex tab and input the next customized CSS beneath the Primary Part:
align-items: middle;

This may increasingly ensure the modules keep vertically focused inside the column, giving us that upward and downward shutter impact.
Giving the Row a Fastened Peak
To prevent the hover impact from pushing down the web page content material under, we wish to prevent the row from rising in top with each and every hover. To do that we will have to set a set top to our row on desktop. For the reason that top will likely be constant, it is important to be sure that the peak of the row is prime sufficient to house for the peak of the blurb content material in its hover state. On the other hand, you don’t need to make it too prime as a result of you’ll go away an excessive amount of clean area above and under the modules. On this instance, I’m going to set the row top to 600px. However, since we best need the constant top set on desktop best, we wish to upload some CSS to our web page settings the usage of a media question.
Here’s what you wish to have to do.
To start with, within the row settings, give your row a CSS ID:
CSS ID: fixed-height

Then open the web page settings (beneath the complex tab) and upload the next Customized CSS:
@media (min-width: 980px) {
#fixed-height {
  top: 600px;
}
}
This provides your row a set top of 600px on desktop and forestalls the hover impact from pushing the remainder of the web page content material downward.

That’s it!
The Ultimate End result
Take a look at the overall design.

And here’s the shutter hover impact.
It may well be a good suggestion to disable the hover impact on cell. To do this, all you wish to have to do is about the customized margin for each and every blurb module as follows:
Customized Margin (pill): 0px most sensible, 0px backside
Ultimate Ideas
This shutter hover impact is an inventive approach to tease your target market to seem for more info about your other products and services. And with the magic of Divi and a couple of snippets of CSS, the overall result’s beautiful chic. I’m positive there are lots of extra packages to this shutter hover impact since you’ll be able to use any module you need. Be happy to discover some thrilling new designs of your personal, and don’t hesitate to percentage them with us. I look ahead to listening to from you within the feedback.
Cheers!
The submit How to Reveal Content with a Shutter Hover Effect in Divi gave the impression first on Elegant Themes Blog.
WordPress Web Design