
Many internet sites get lots of tourists from cellular units. This ends up in the query of whether or not or no longer your designs are sufficiently optimized for smaller display sizes. With Divi, a design this is constructed for a desktop revel in finally ends up being right away responsive as smartly. However simply because one thing is responsive doesn’t imply it’s optimized as smartly.
If cellular is your major supply of tourists, it will probably truly assist to begin designing and construction from a cellular point of view as a substitute of a desktop one. On this put up, we’ll display you precisely how to try this. After going via some pointers and tips that you simply must have in mind, we’ll additionally recreate an instance from scratch that takes the following pointers into consideration.
Let’s get to it!
Contents
- 1 Preview
- 2 Manner
- 2.1 1. Transfer Over to Cell View Proper After Including a New Web page
- 2.2 2. Permit Responsive Choices for Every Design Component & Adjust the Cell Values First
- 2.3 3. Take away Default Area Between Columns & Upload Padding Manually if Wanted
- 2.4 4. Position 2 or 3 Columns Subsequent to Every Different to Create a Horizontal Design
- 2.5 5. Adjust Desktop & Pill Perspectives Alongside the Method or Afterwards
- 3 Let’s Get started Recreating the Instance!
- 3.1 Upload New Phase
- 3.2 Upload Row #1
- 3.3 Upload Textual content Module to Row
- 3.4 Upload Divider Module to Row
- 3.5 Upload Row #2
- 3.6 Upload Textual content Module to Column 1
- 3.7 Upload Divider Module to Column 1
- 3.8 Upload Button Module to Column 1
- 3.9 Upload Symbol Module to Column 2
- 3.10 Clone Row #2
- 3.10.1 Exchange Row Background Colour
- 3.10.2 Take away Column 2 Background Colour
- 3.10.3 Upload Column 1 Background Colour
- 3.10.4 Exchange Modules in Columns
- 3.10.5 Exchange Icon in Symbol Module
- 3.10.6 Upload Clear out to Symbol Module
- 3.10.7 Exchange Row Alignment
- 3.10.8 Exchange Row Border
- 3.10.9 Exchange Textual content Colour of Textual content Module in Column 2
- 3.10.10 Exchange Button Background Colour
- 3.11 Clone Each Rows
- 3.12 Adjust Replica #1
- 3.13 Adjust Replica #2
- 4 Preview
- 5 Ultimate Ideas
Preview
As discussed prior to, we’ll get started off through going over some pointers and tips. Afterwards, we’ll recreate an instance from scratch that uses the following pointers. Let’s check out the end result.
Cell
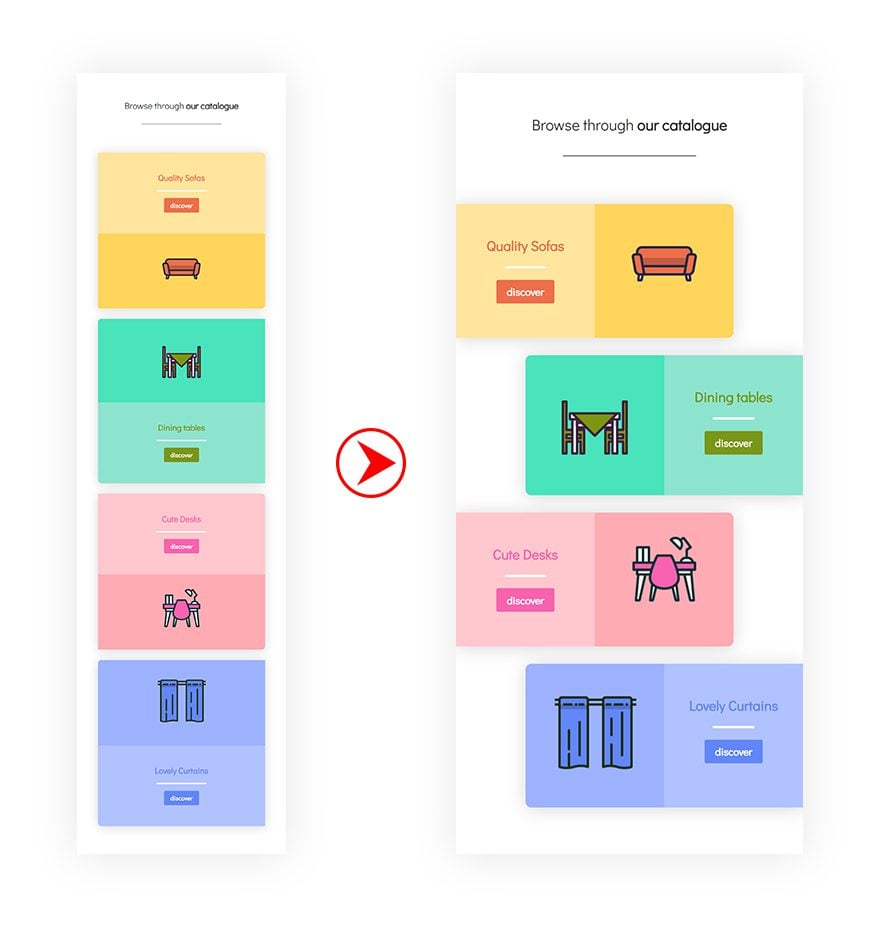
Desktop
Manner
1. Transfer Over to Cell View Proper After Including a New Web page
The very first thing you wish to have to do, after including a brand new web page, is instantly switching over to cellular view. This may help you create a design this is mobile-oriented and correct.
2. Permit Responsive Choices for Every Design Component & Adjust the Cell Values First
Whenever you get started designing no matter design you’re going for, you’ll wish to permit the responsive choices for design parts. This contains however isn’t restricted to textual content measurement, padding and margin. The primary values you’ll upload would be the cellular values (as a substitute of the desktop ones) to verify the design is optimized for cellular first.
3. Take away Default Area Between Columns & Upload Padding Manually if Wanted
To create extra horizontal area, it’s additionally really helpful to take away the entire default customized padding between columns. If wanted, you’ll all the time upload the padding manually to every column or design component and make a choice for your self how a lot distance you wish to have there to be.
4. Position 2 or 3 Columns Subsequent to Every Different to Create a Horizontal Design
The responsive construction in Divi is vertically-oriented. Which means that modules and columns seem beneath every different. This, alternatively, calls for extra vertically scrolling. Relying at the design your running on, making a extra horizontal waft can truly make the adaptation.
5. Adjust Desktop & Pill Perspectives Alongside the Method or Afterwards
Even supposing you’re designing for a mobile-first function, it’s essential to stay the opposite perspectives so as as smartly. Responsive choices which are integrated inside every design component will assist you to achieve this. You’ll make a choice to change those values afterwards or all through the designing procedure.
Let’s Get started Recreating the Instance!
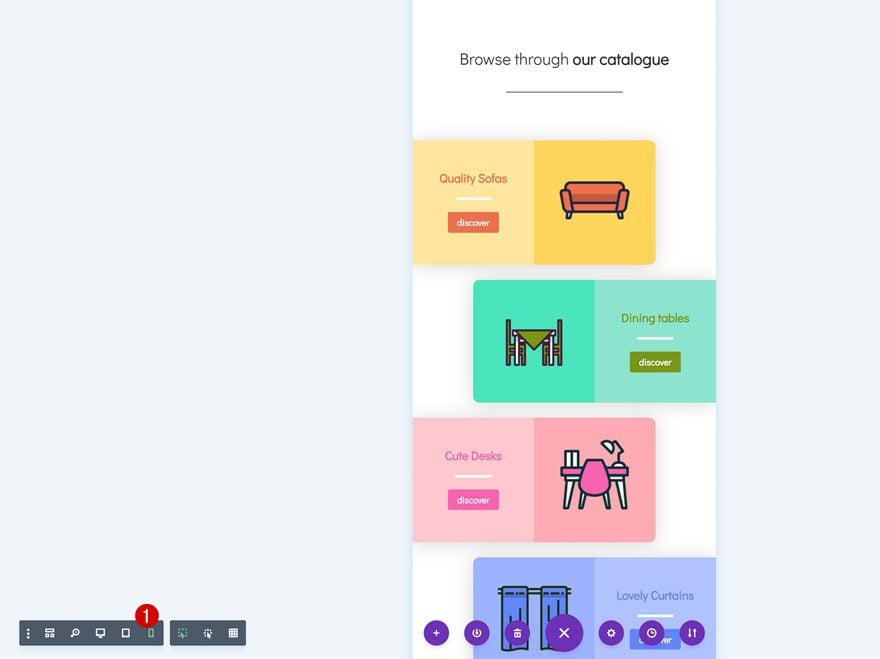
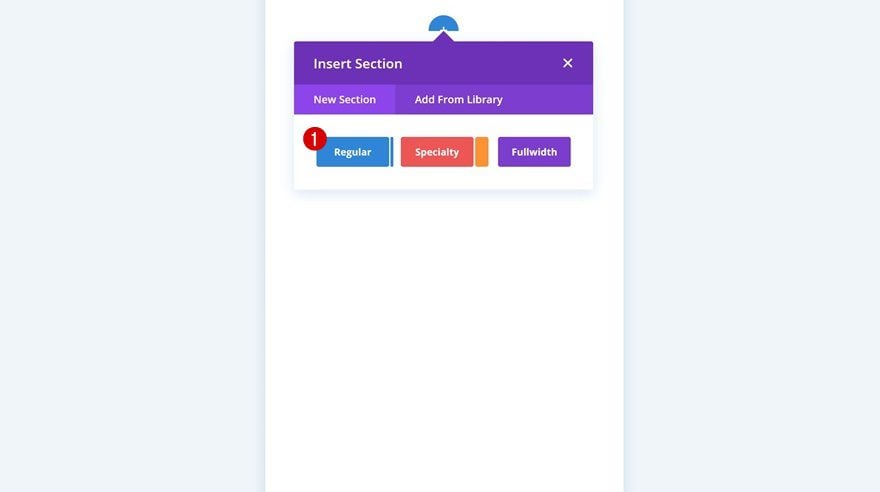
Upload New Phase
Open a brand new web page, transfer over to cellular view and upload a brand new phase to get began.
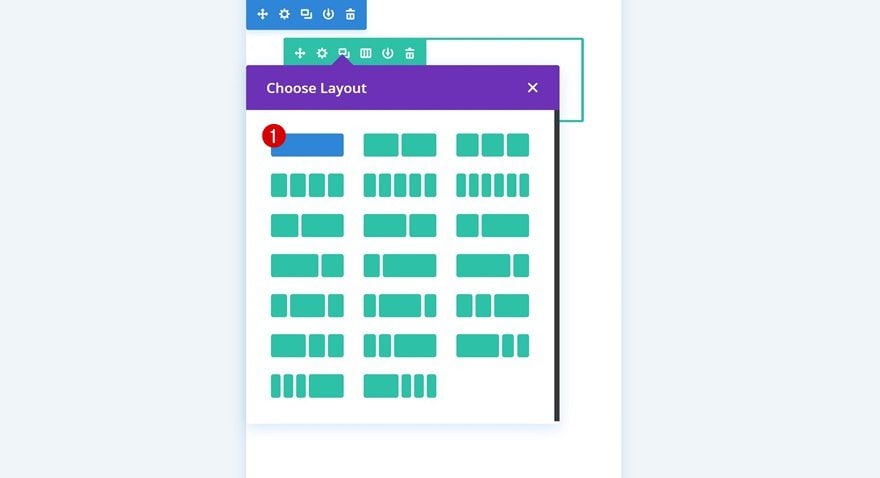
Upload Row #1
Column Construction
Proceed through including a brand new row in your phase the usage of the next column construction:
Upload Textual content Module to Row
Upload H2 Content material
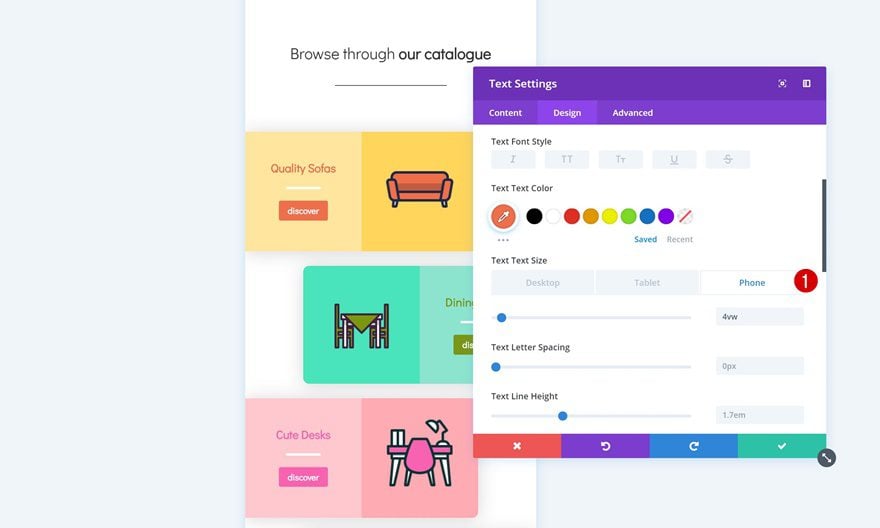
Upload a Textual content Module to the column of your row and input some H2 name content material.
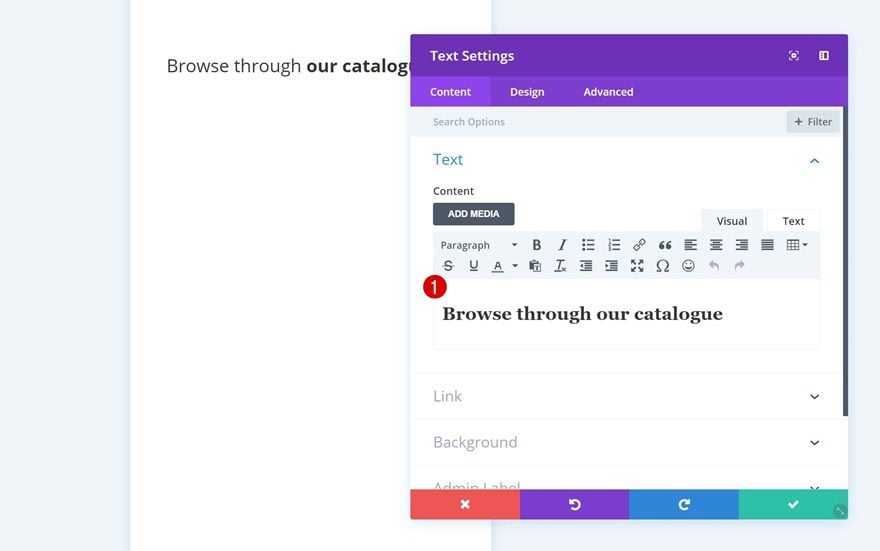
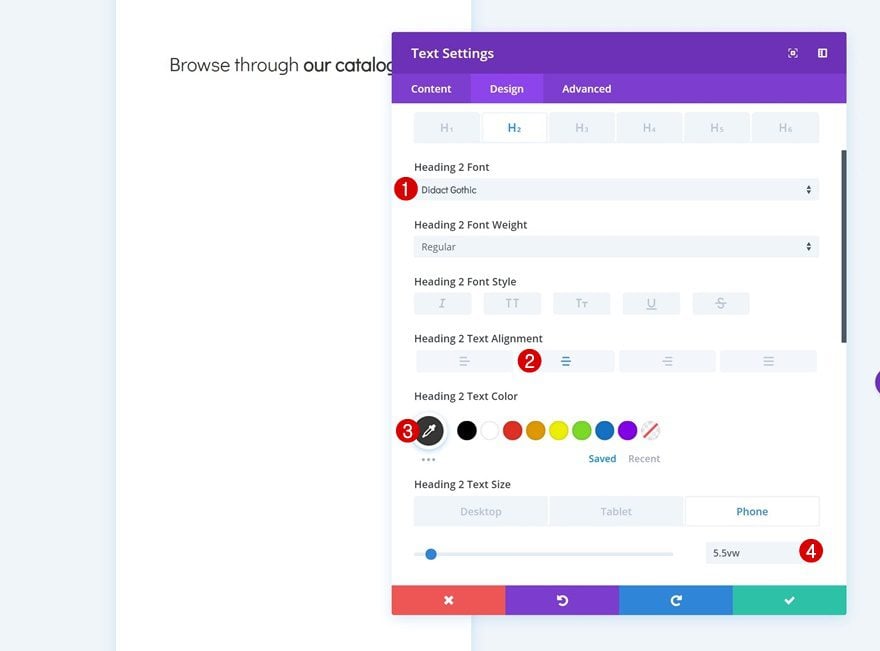
H2 Textual content Settings
Then, pass to the heading textual content settings and alter the semblance of the name.
- Heading 2 Font: Didact Gothic
- Heading 2 Textual content Alignment: Heart
- Heading 2 Textual content Colour: #333333
- Heading 2 Textual content Dimension: 5.5vw (Telephone), 5vw (Pill), 2vw (Desktop)
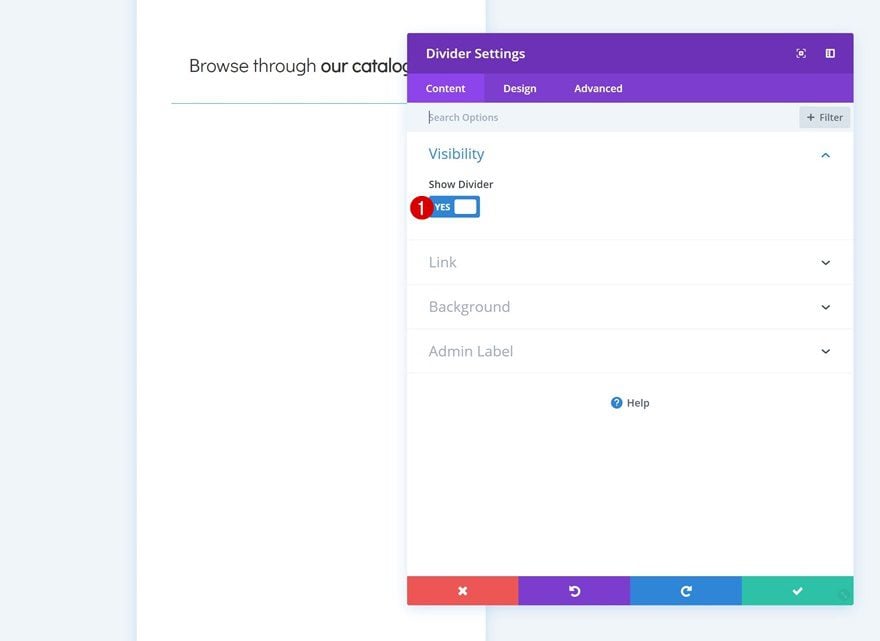
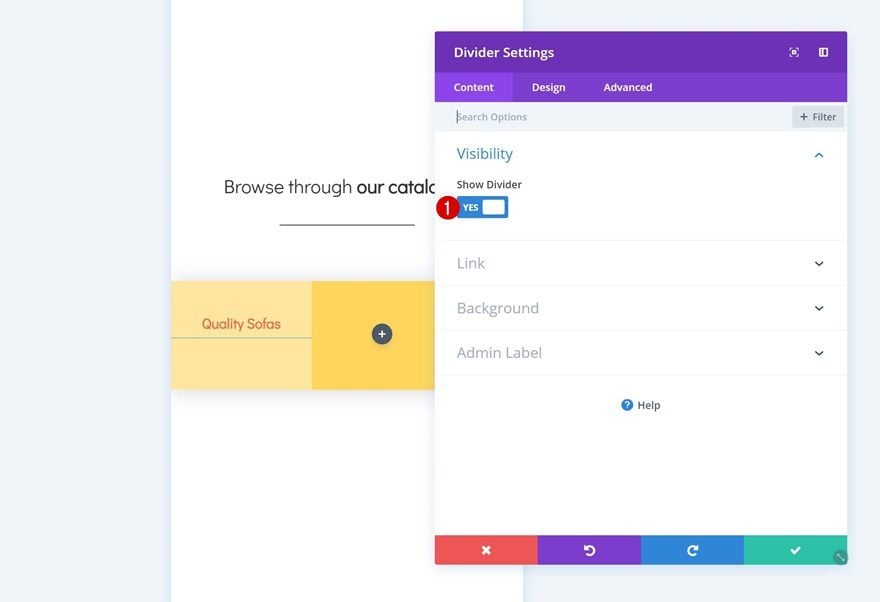
Upload Divider Module to Row
Visibility
Proper beneath the Textual content Module you’ve added, pass forward and upload a Divider Module. Be certain that the ‘Display Divider’ possibility is enabled.
- Display Divider: Sure
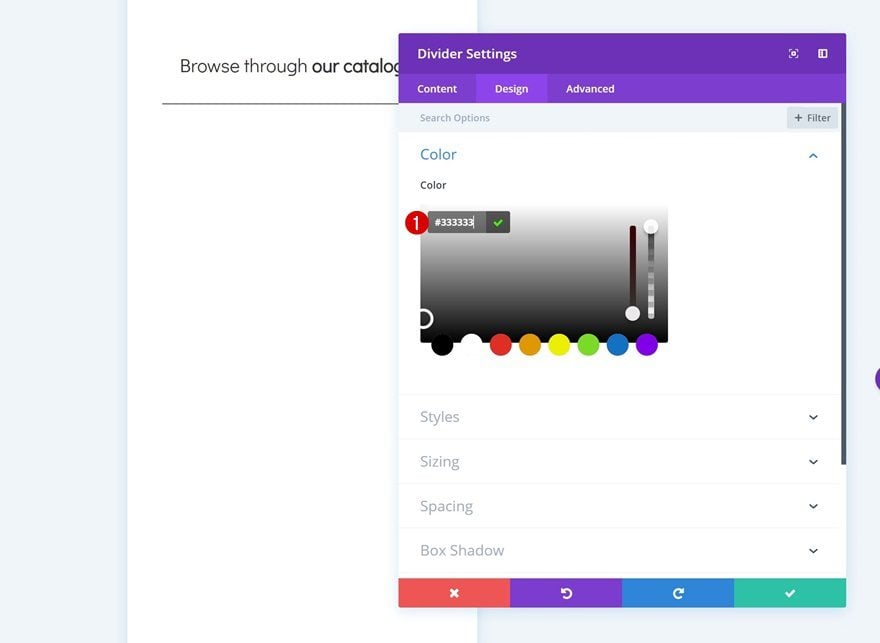
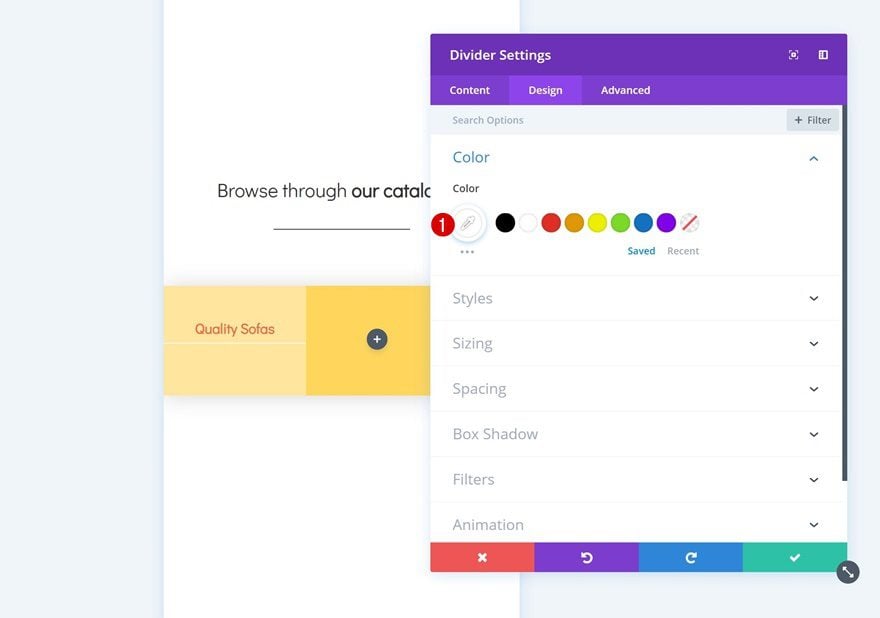
Colour
Then, pass to the design tab and alter the colour of the divider.
- Colour: #333333
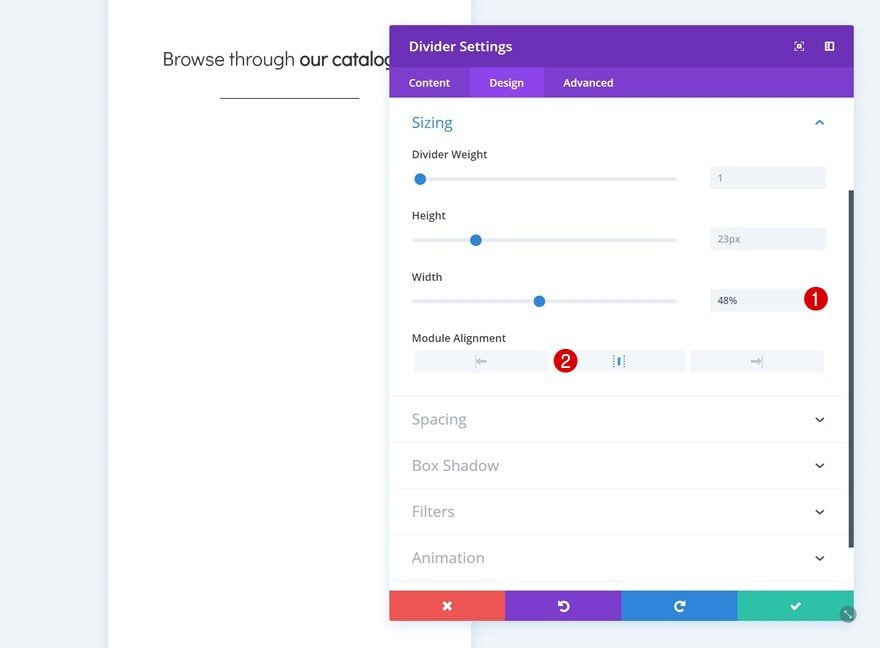
Sizing
Adjust the sizing settings as smartly.
- Width: 48%
- Module Alignment: Heart
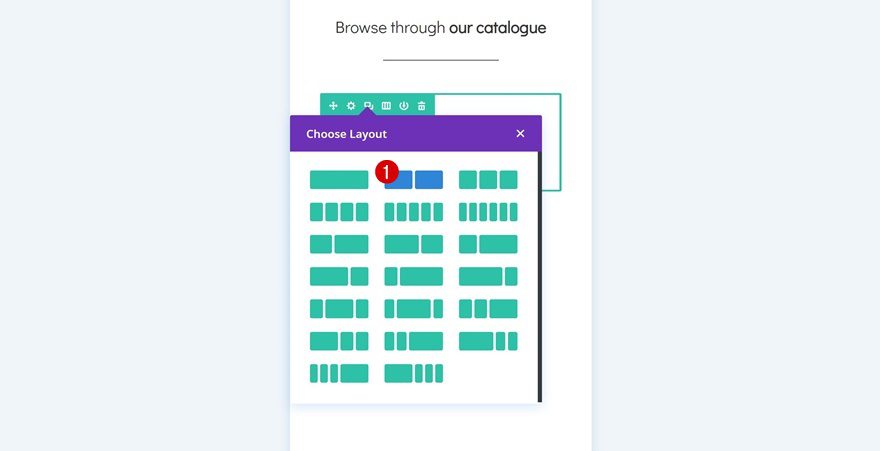
Upload Row #2
Column Construction
Proceed through including any other row to the phase the usage of the next column construction:
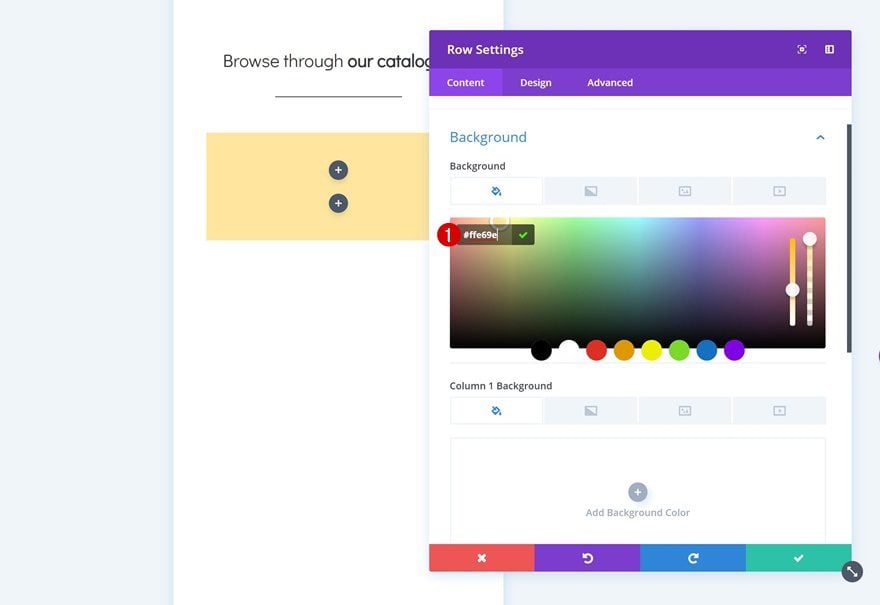
Background Colour
With out including any modules but, open the row settings and upload a background colour to the row.
- Background Colour: #ffe69e
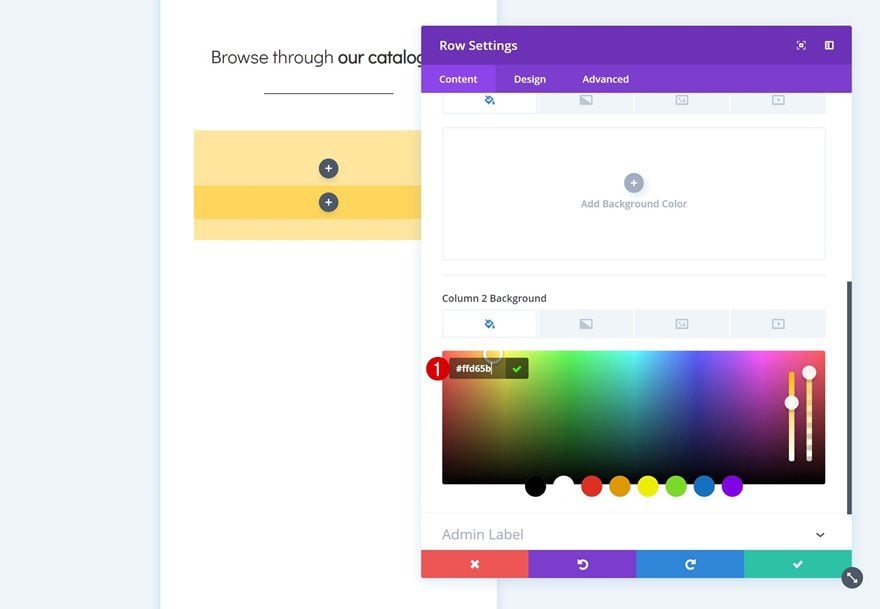
Column 2 Background Colour
Upload a background colour to the second one column of the row as smartly.
- Column 2 Background Colour: #ffd65b
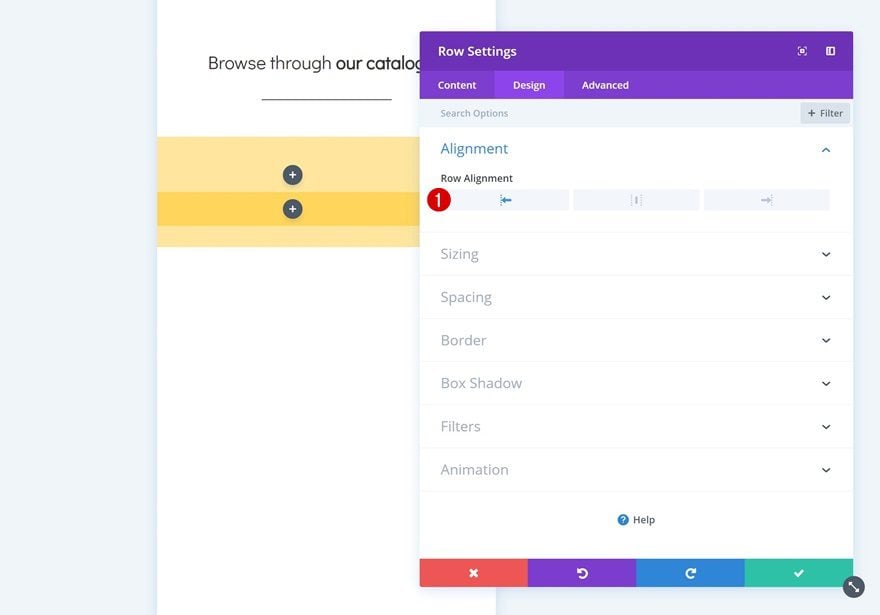
Alignment
Then, trade the row alignment.
- Row Alignment: Left
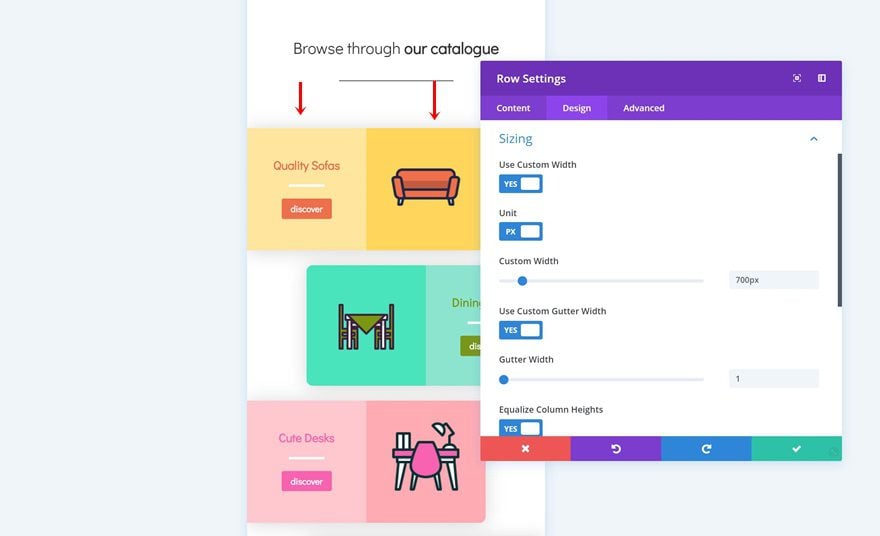
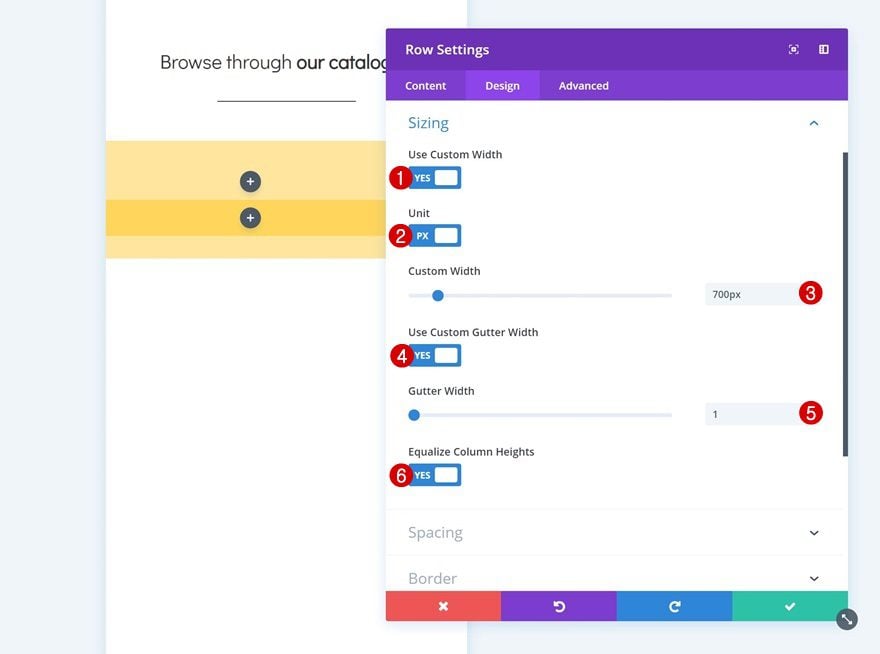
Sizing
Open the sizing settings subsequent. Right here, we’ll wish to take away all of the default area between columns. We’re additionally the usage of customized width for the column to make it glance excellent on desktop.
- Use Customized Width: Sure
- Unit: PX
- Customized Width: 700px
- Use Customized Gutter Width: Sure
- Gutter Width: 1
- Equalize Column Heights: Sure
Spacing
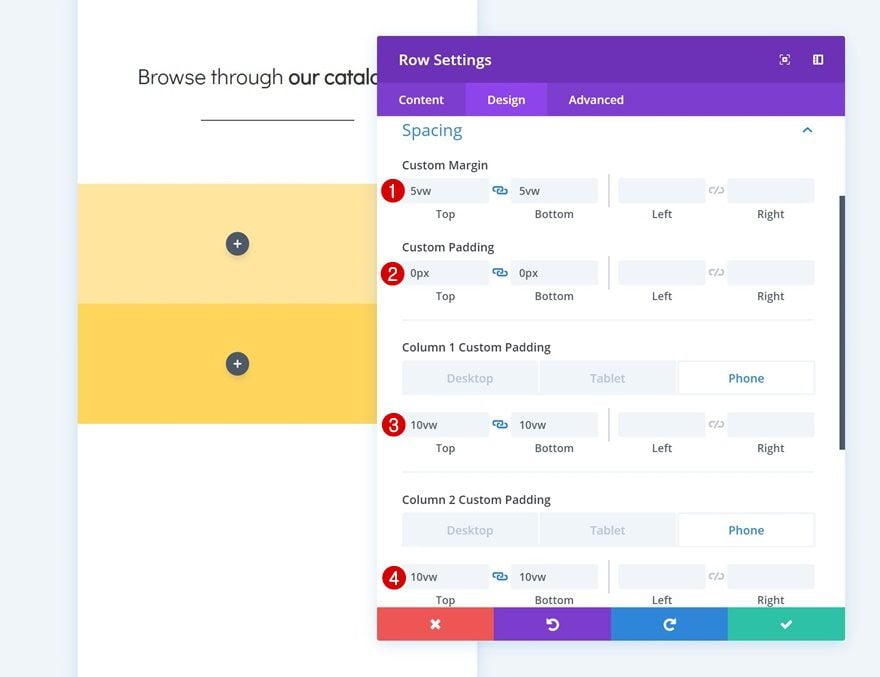
Proceed through going to the spacing settings and upload some customized margin and padding values manually.
- Most sensible Margin: 5vw
- Backside Margin: 5vw
- Most sensible Padding: 0px
- Backside Padding: 0px
- Column 1 Most sensible Padding: 10vw (Telephone), 8vw (Pill), 4vw (Desktop)
- Column 1 Backside Padding: 10vw (Telephone), 8vw (Pill), 4vw (Desktop)
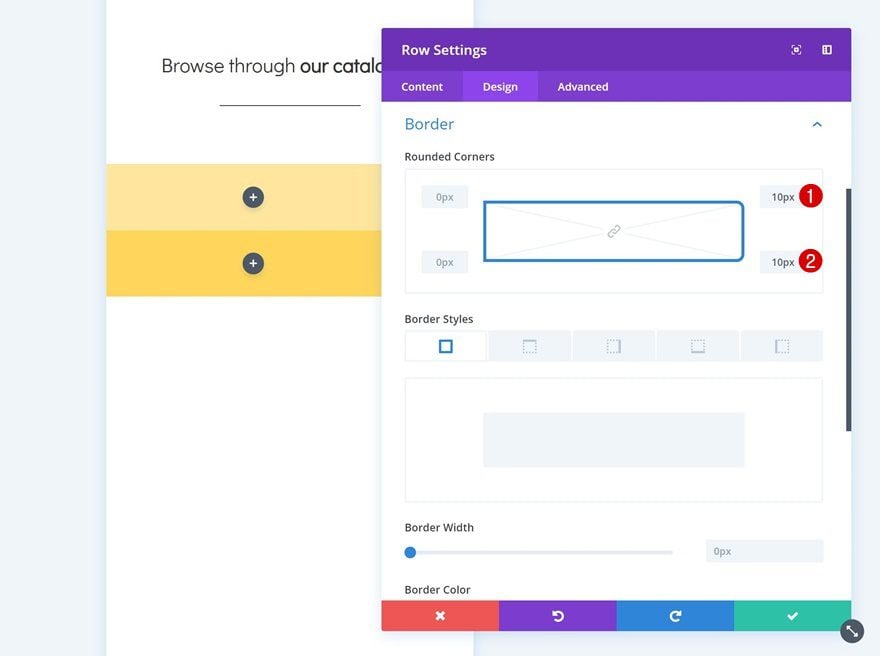
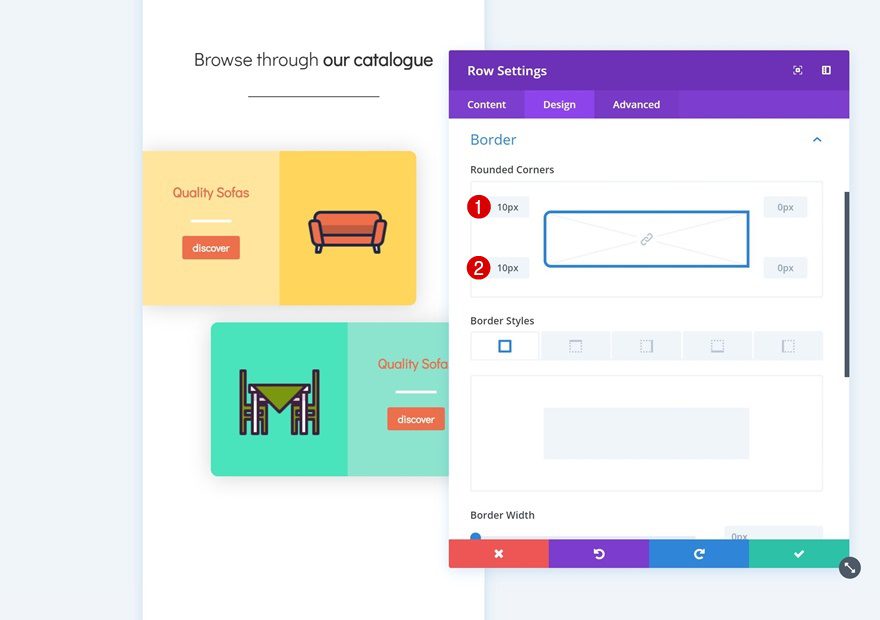
Border
Upload some rounded corners to the row as smartly.
- Most sensible Proper: 10px
- Backside Proper: 10px
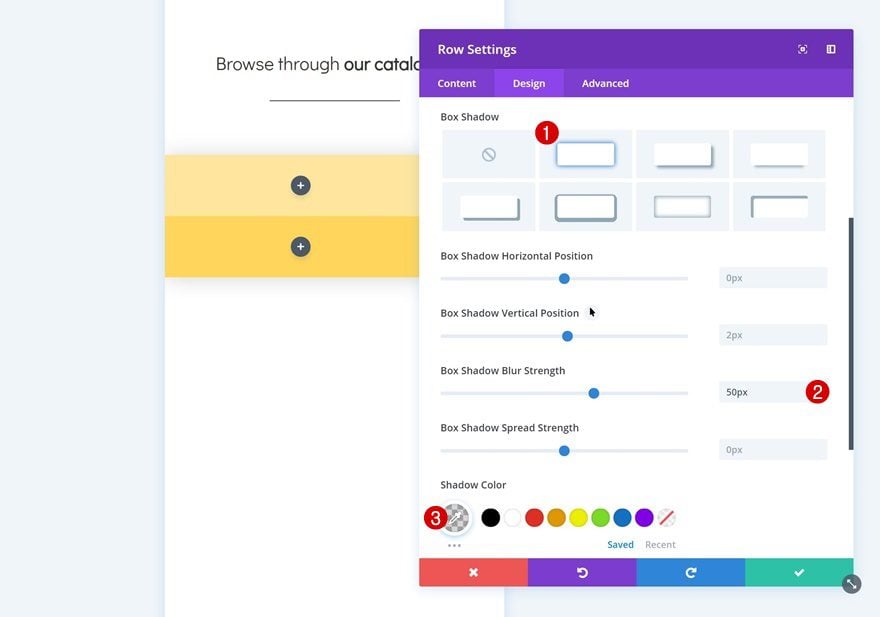
Field Shadow
And provides it a refined field shadow too.
- Field Shadow Blur Power: 50px
- Shadow Colour: rgba(0,0,0,0.16)
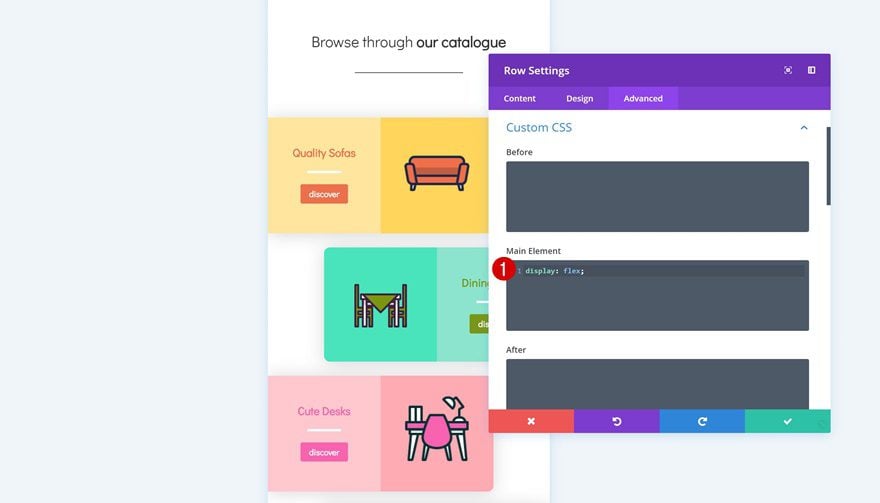
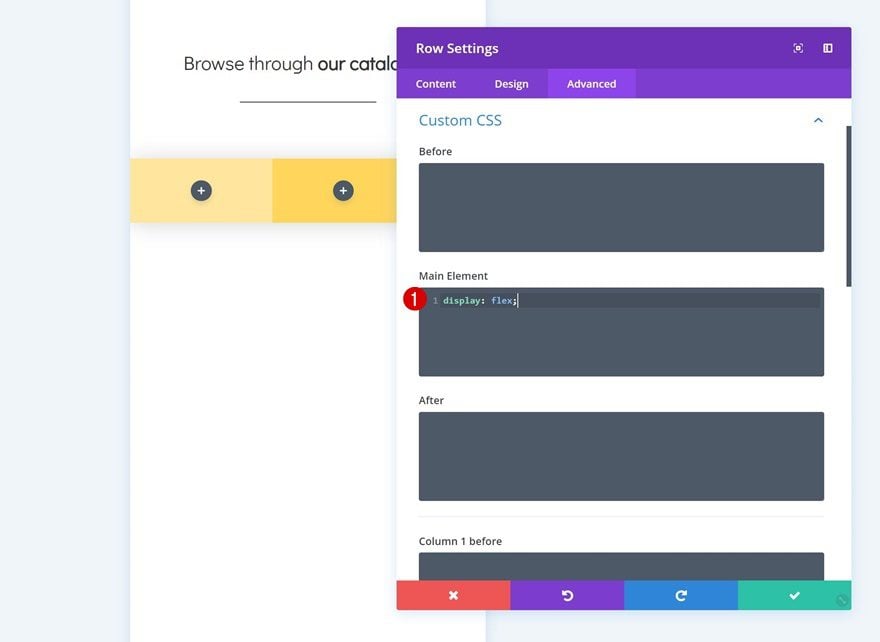
Customized CSS
Remaining however no longer least, we’re going to put the columns subsequent to one another on smaller display sizes to verify we’re taking complete good thing about the horizontal area we have now. Pass to the complicated tab and upload a unmarried line of CSS code to the principle component.
show: flex;
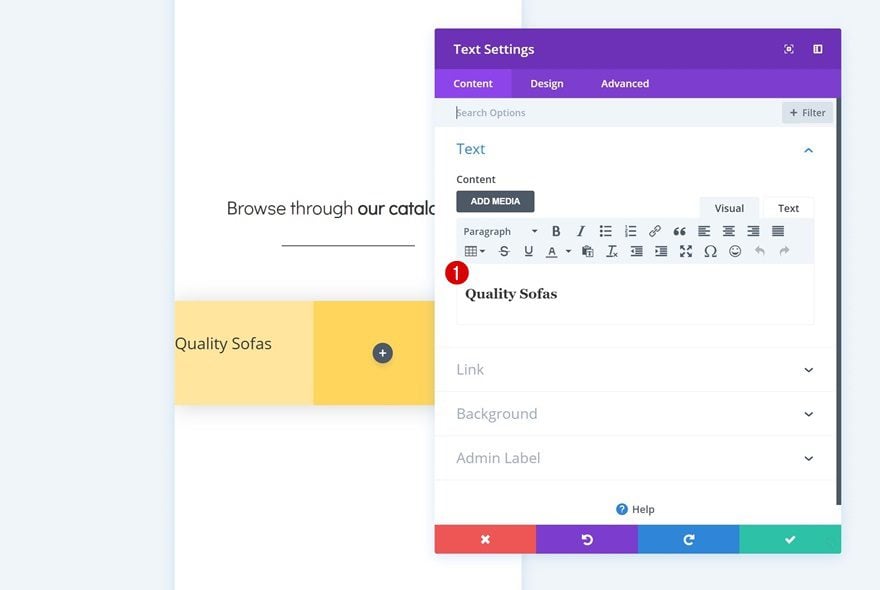
Upload Textual content Module to Column 1
Upload H3 Content material
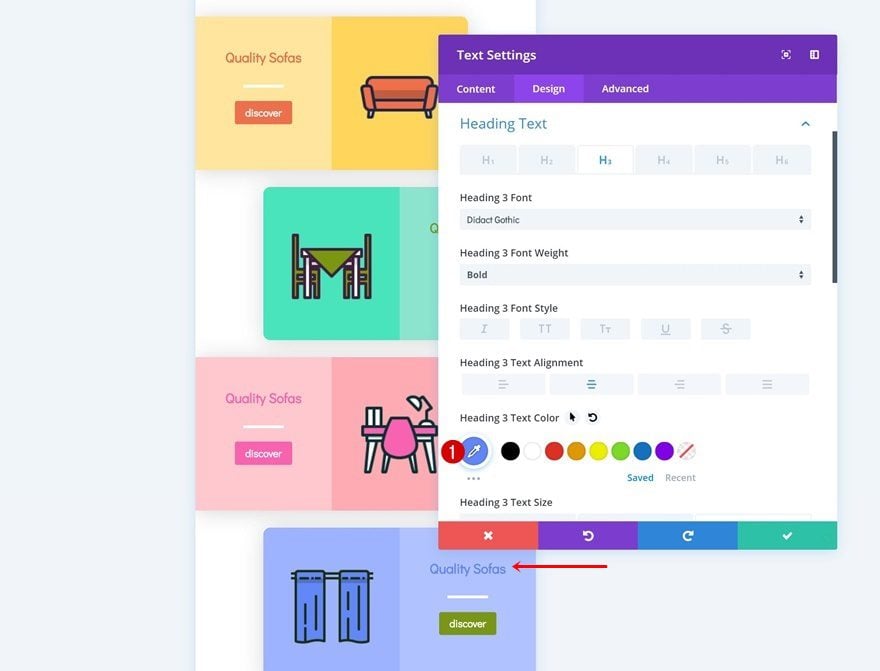
Time to begin including modules! Upload a name Textual content Module to the primary column and input some H3 content material.
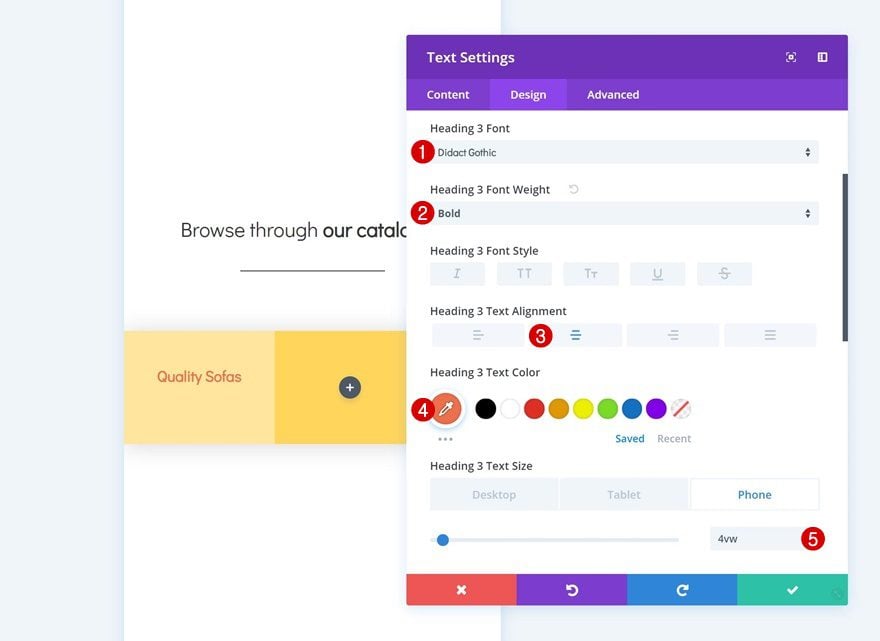
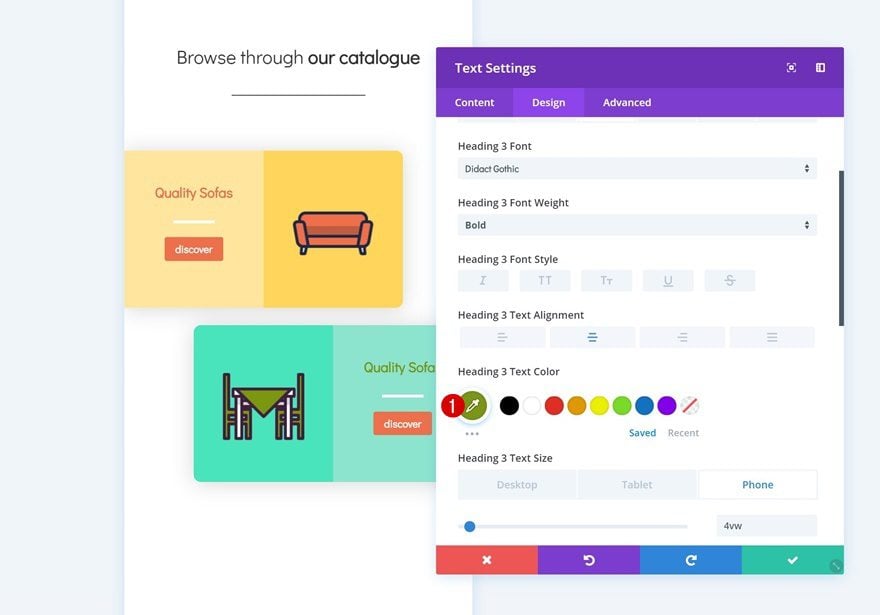
H3 Textual content Settings
Then, pass to the design tab and alter the heading textual content settings.
- Heading 3 Font: Didact Gothic
- Heading 3 Font Weight: Daring
- Heading 3 Textual content Alignment: Heart
- Heading 3 Textual content Colour: #ee6f49
- Heading 3 Textual content Dimension: 4vw (Telephone), 3vw (Pill), 1.5vw (Desktop)
Upload Divider Module to Column 1
Visibility
Upload a Divider Module subsequent. Be certain that the ‘Display Divider’ possibility is enabled.
- Display Divider: Sure
Colour
Then, trade the colour of the divider.
- Colour: #ffffff
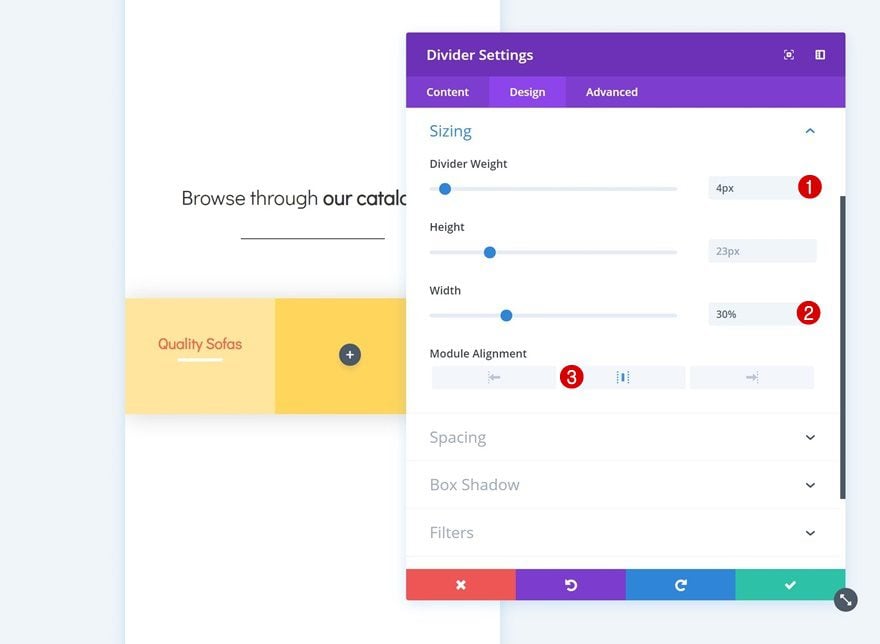
Sizing
Together with the sizing settings.
- Divider Weight: 4px
- Width: 30%
- Module Alignment: Heart
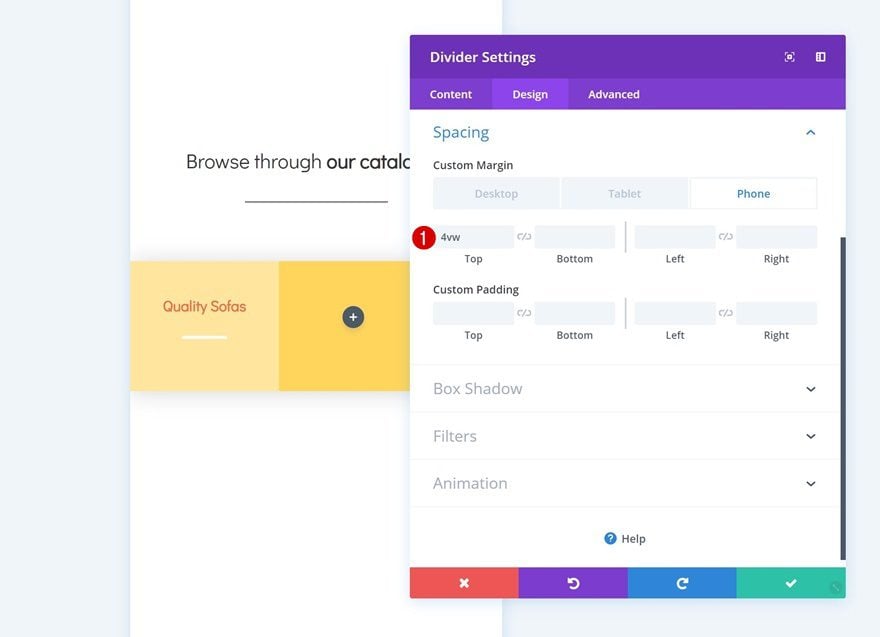
Spacing
Upload some customized best margin to the module too.
- Most sensible Margin: 4vw (Telephone), 2vw (Pill), 1.5vw (Telephone)
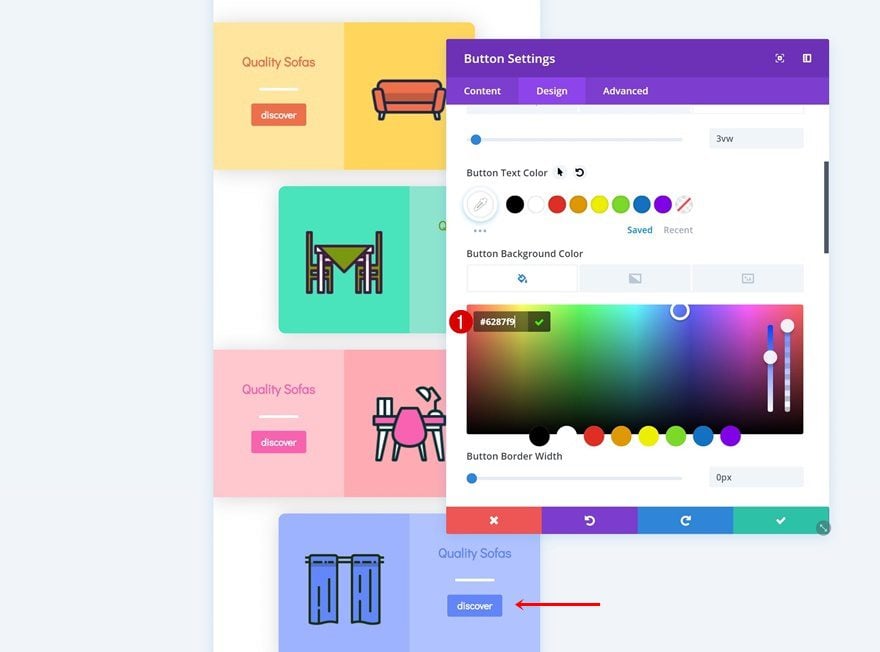
Upload Button Module to Column 1
Upload Replica
The following and final module wanted within the first column is a Button Module. Input some reproduction.

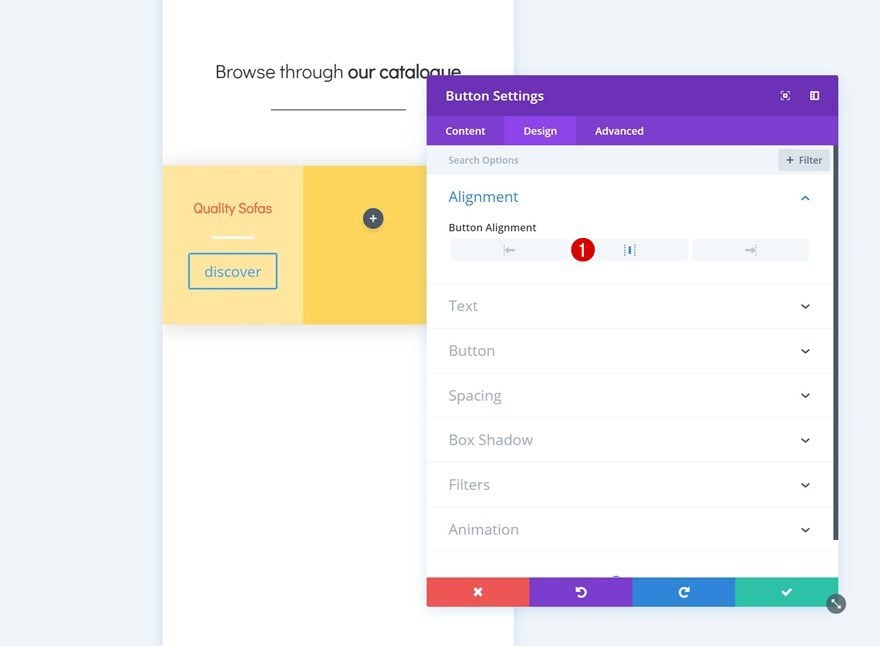
Alignment
Then pass to the design tab and alter the button alignment.
- Button Alignment: Heart
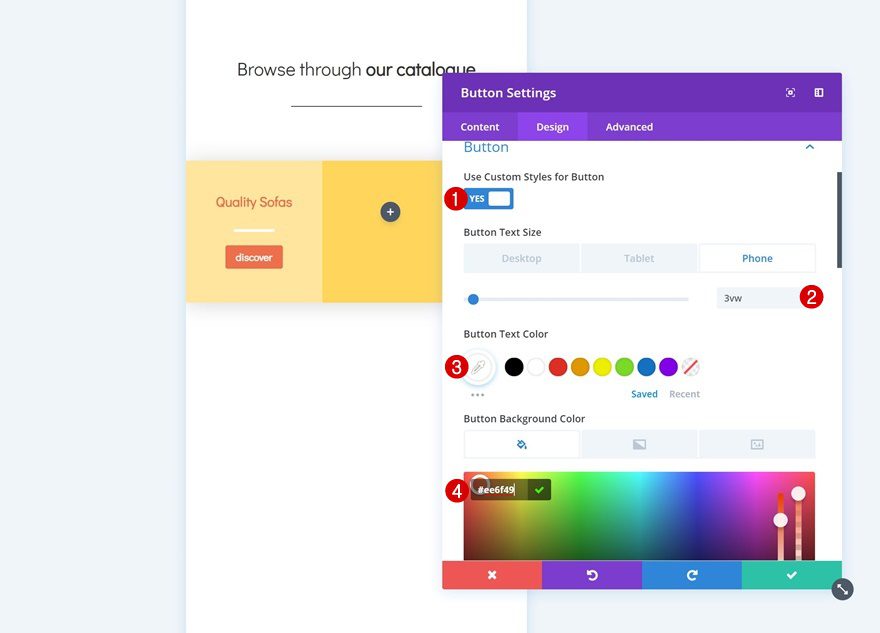
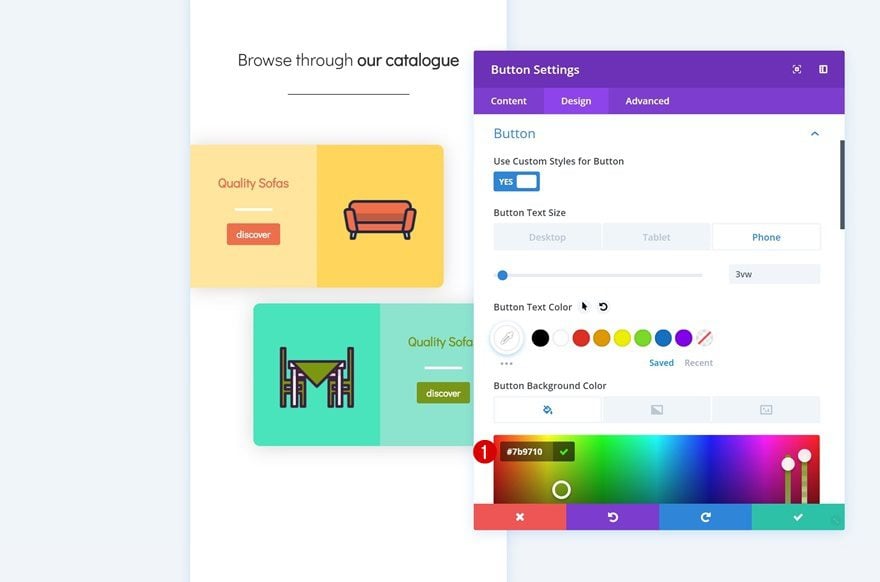
Button Settings
Adjust the semblance of the button within the button settings as smartly.
- Use Customized Kinds for Button: Sure
- Button Textual content Dimension: 3vw (Telephone), 2vw (Pill), 1.5vw (Desktop)
- Button Textual content Colour: #ffffff
- Button Background Colour: #ee6f49
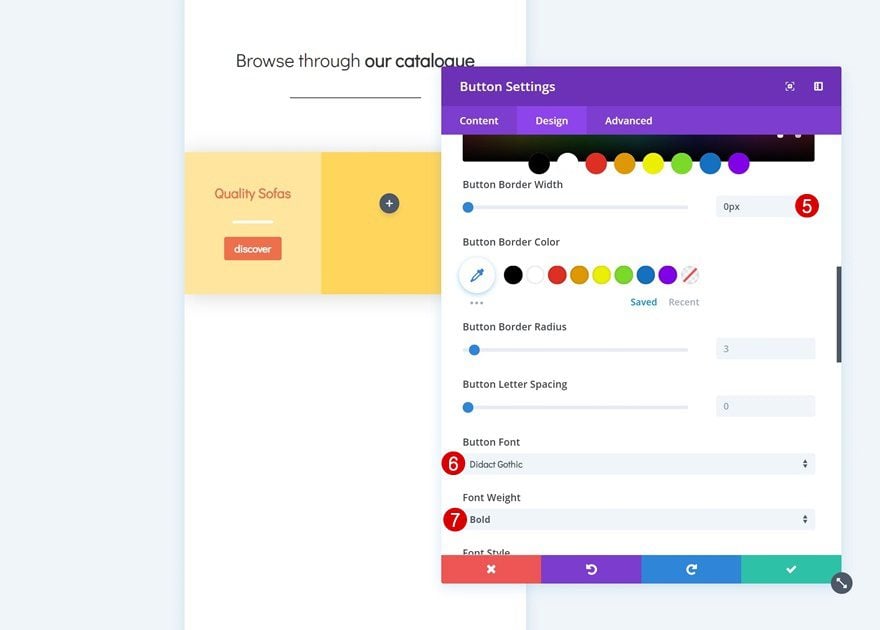
- Button Border Width: 0px
- Button Font: Didact Gothic
- Font Weight: Daring
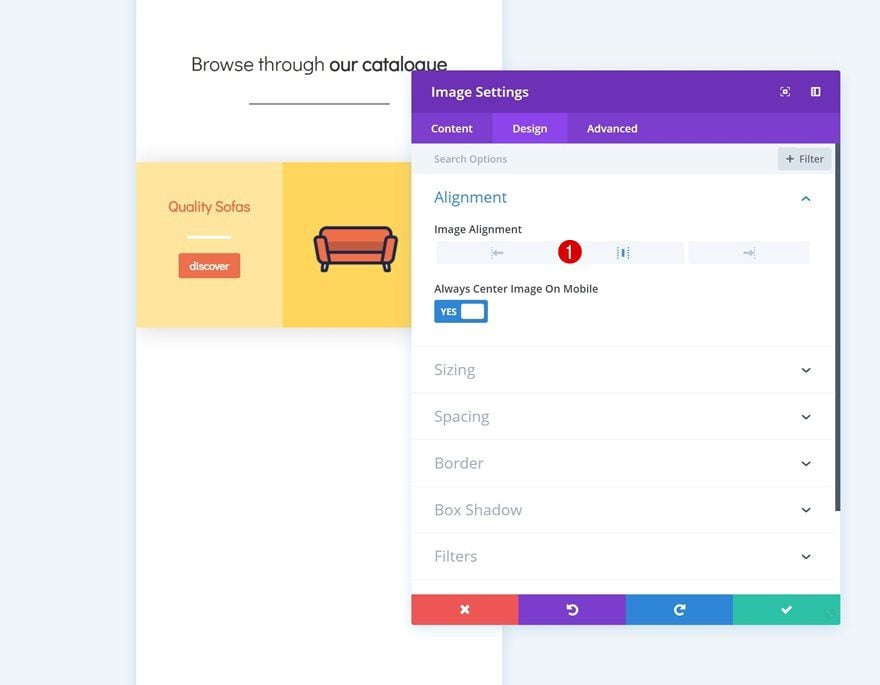
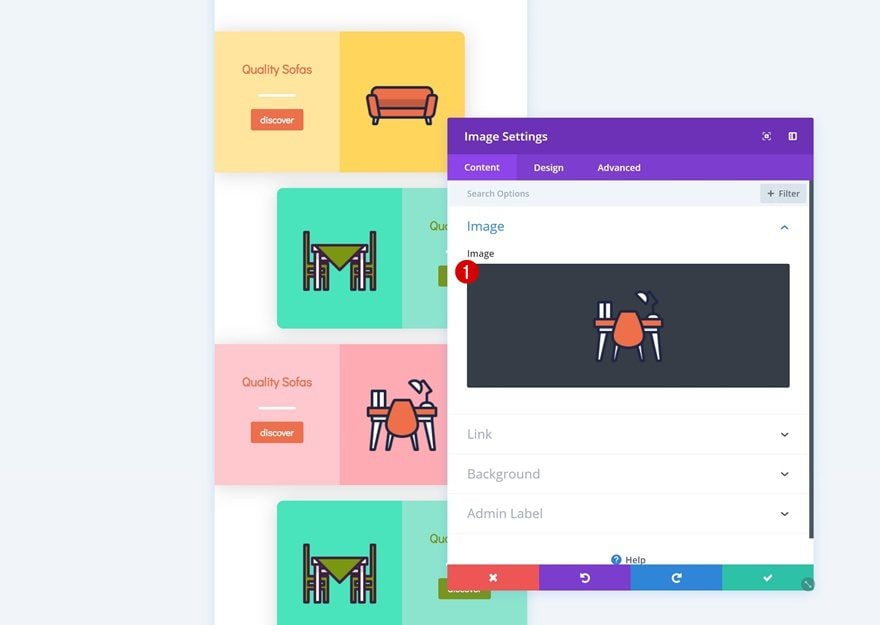
Upload Symbol Module to Column 2
Add Icon
The one module we’ll want in column 2 is an Symbol Module. You’ll use any symbol of your selection, however if you wish to use the very same icons that have been used on this instance, you’ll pass to the Furniture Store Layout Pack and obtain them on the finish of the put up.
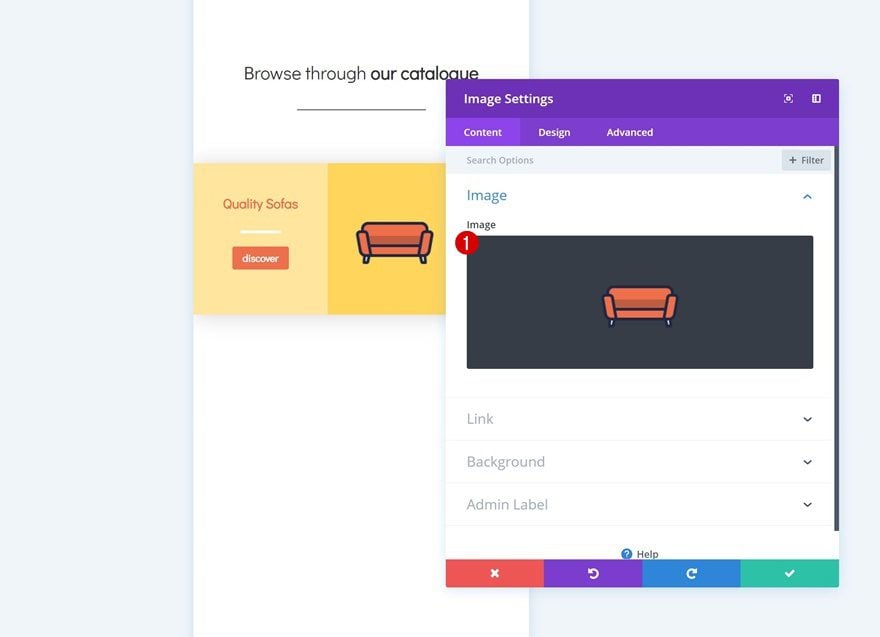
Alignment
Then, pass to the design tab and alter the picture alignment.
- Symbol Alignment: Heart
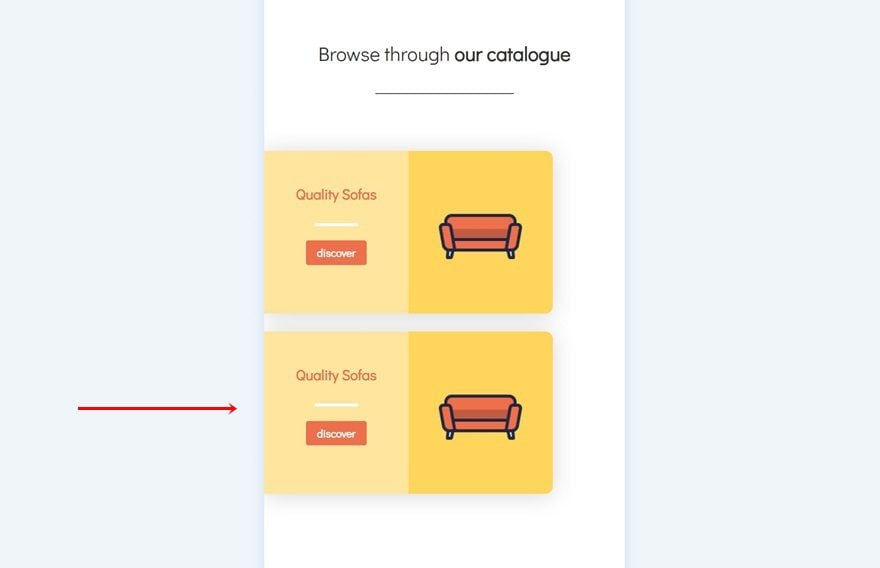
Clone Row #2
Whenever you’re achieved editing the row, you’ll pass forward and clone it.
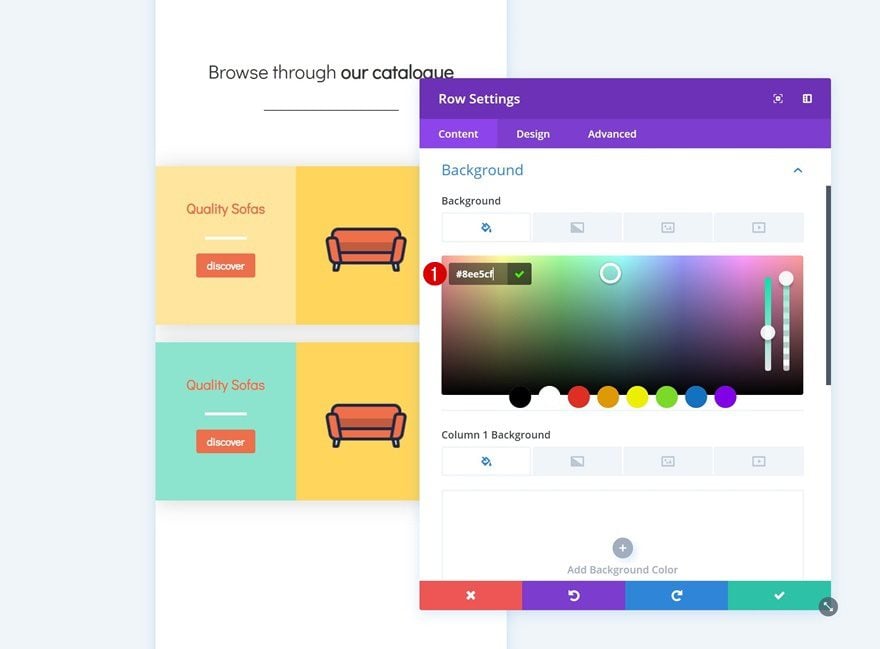
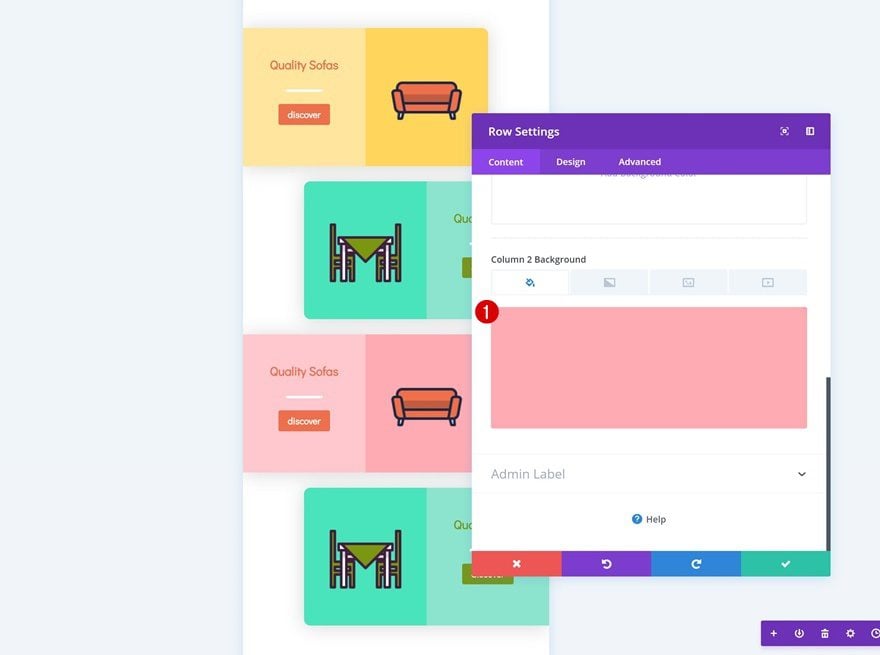
Exchange Row Background Colour
We’ll want to make some adjustments to this reproduction, beginning with the row background colour.
- Background Colour: #8ee5cf
Take away Column 2 Background Colour
Proceed through casting off the column 2 background colour.
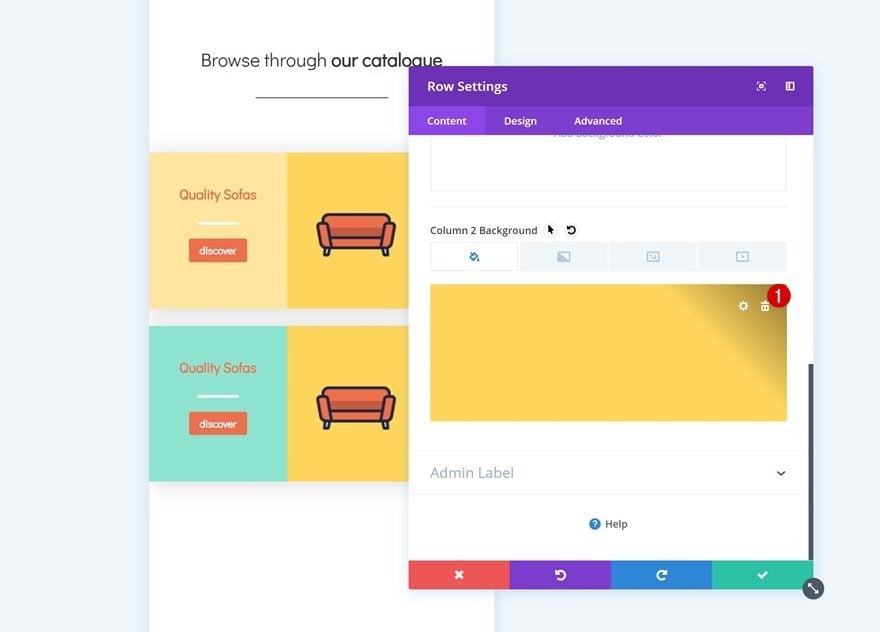
Upload Column 1 Background Colour
We’re including a background colour to the primary column as a substitute.
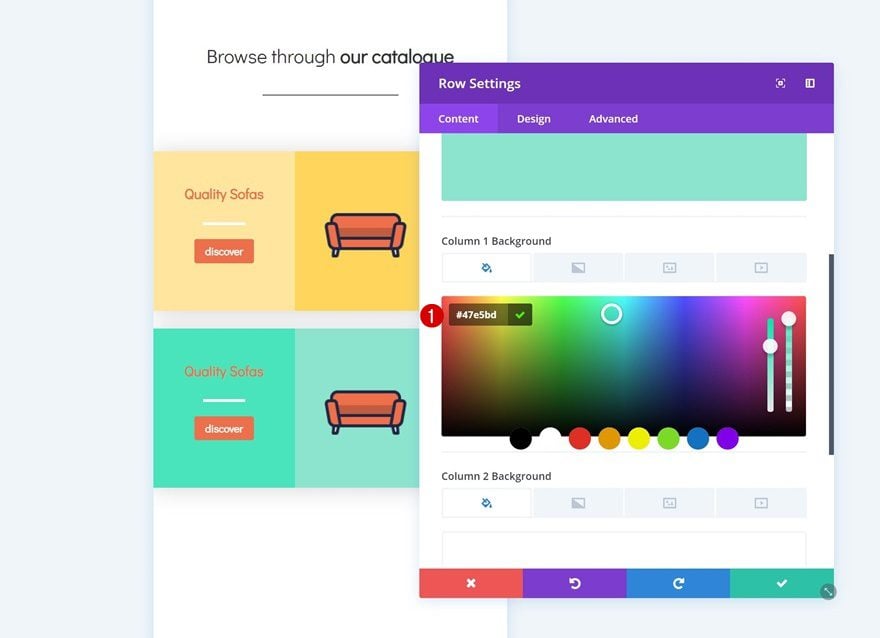
- Column 1 Background Colour: #47e5bd
Exchange Modules in Columns
We’re additionally switching columns for the modules.

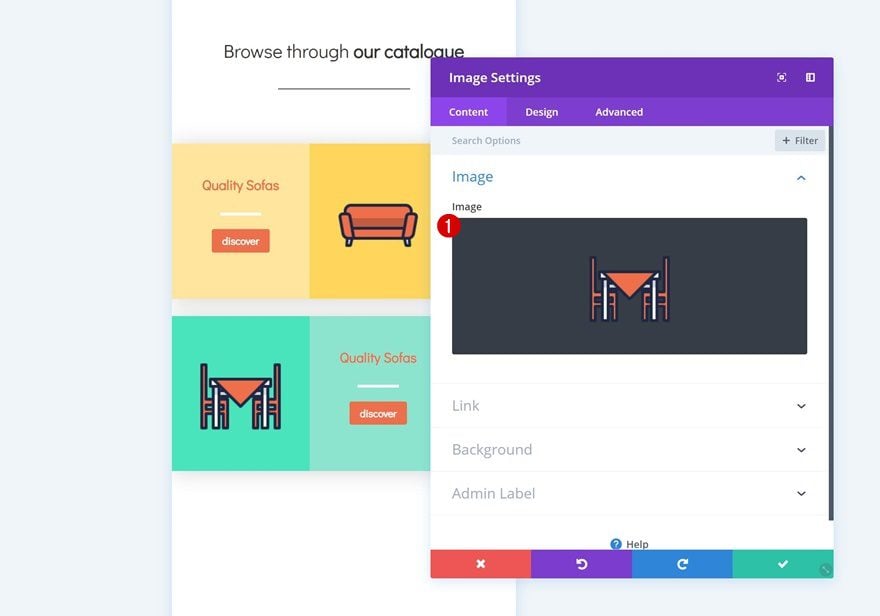
Exchange Icon in Symbol Module
Then, trade the icon within the Symbol Module.
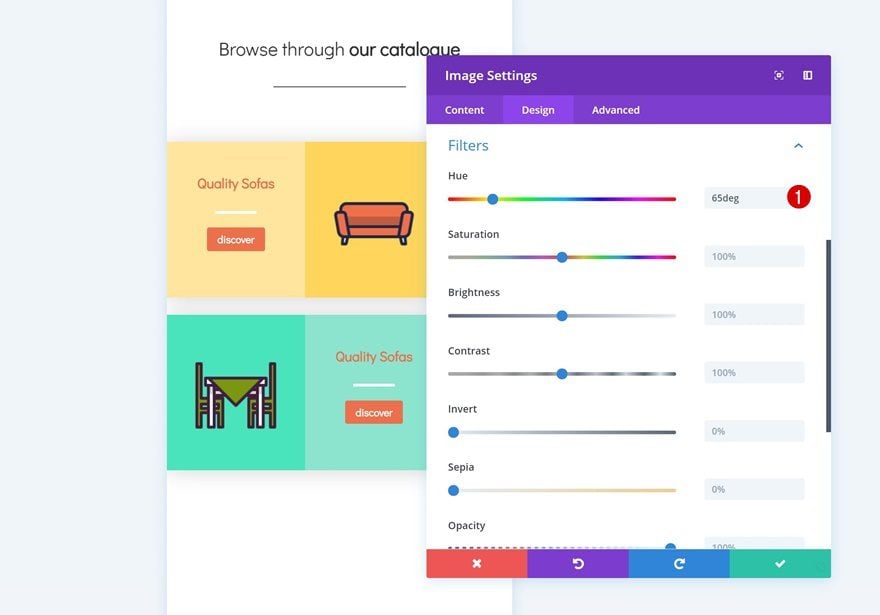
Upload Clear out to Symbol Module
And make it fit with the brand new row and column background colours through converting the hue within the filters settings.
- Hue: 65deg
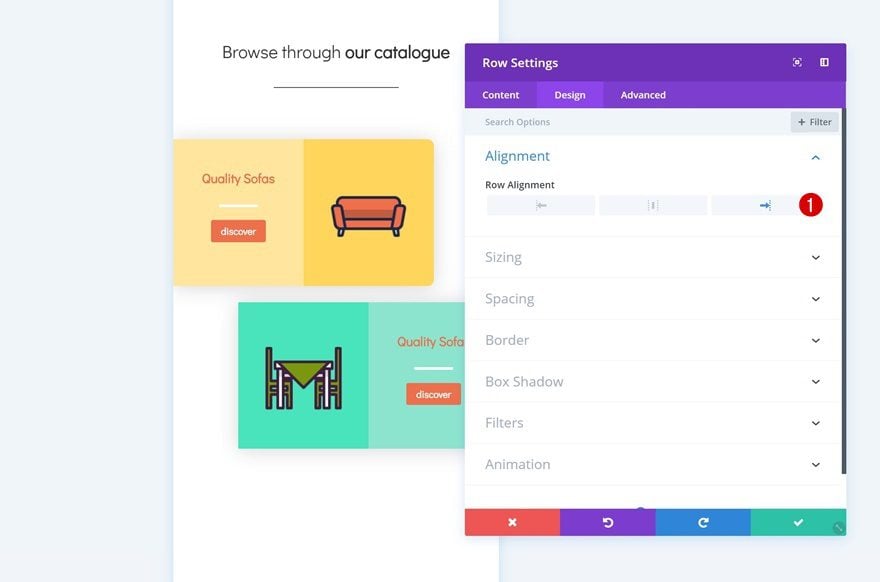
Exchange Row Alignment
Exchange the row alignment subsequent.
- Row Alignment: Proper
Exchange Row Border
Together with the rounded corners.
- Most sensible Left: 10px
- Backside Left: 10px
Exchange Textual content Colour of Textual content Module in Column 2
We’re additionally the usage of any other textual content colour for the Textual content Module in column 2.
- Heading 3 Textual content Colour: #7b9710
Exchange Button Background Colour
And we’re the usage of that very same colour for the button background.
- Button Background Colour: #7b9710
Clone Each Rows
Now that we have got each side of the row, we will be able to clone either one of them as much as as repeatedly as we want and position them so as.

Adjust Replica #1
Exchange Row Background Colour
We’ll get started through converting the row background colour of the primary reproduction.
- Background Colour: #ffc9cf

Exchange Column Colour
Then, we’ll alter the column 2 background colour as smartly.
- Column 2 Background Colour: #ffadb6
Exchange Icon in Symbol Module
Exchange the icon within the Symbol Module to any other one in every of your selection.
Upload Clear out to Symbol Module
And alter the hue within the filters settings to make it fit with the brand new row and column background colours.
- Hue: 309deg

Exchange Textual content Colour
We’re converting the textual content colour too.
- Heading 3 Textual content Colour: #f862b0

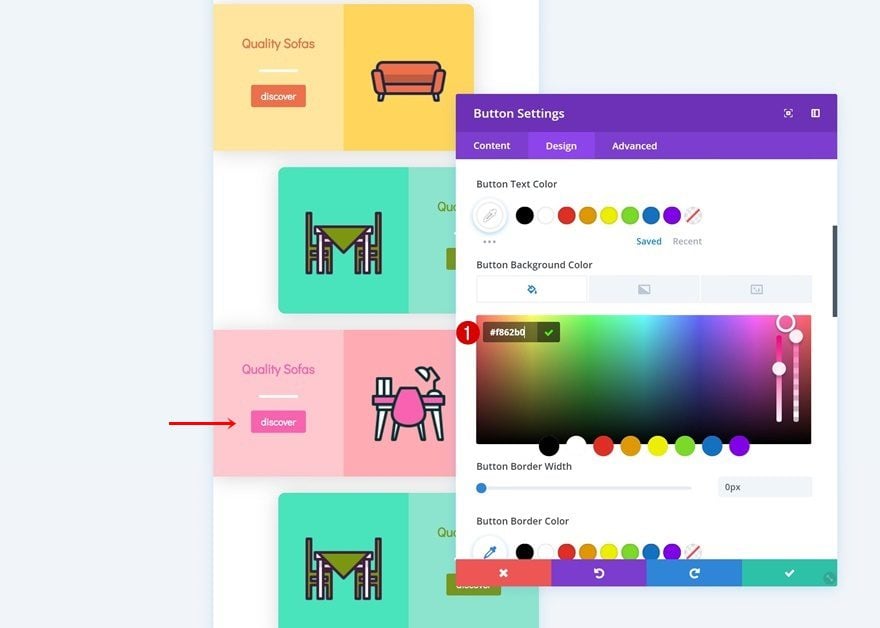
Exchange Button Background Colour
And we’re the usage of that very same colour for the button background.
- Button Background Colour: #f862b0
Adjust Replica #2
Exchange Row Background Colour
Directly to the following and final reproduction! Exchange the row background colour.
- Background Colour: #b2c4ff

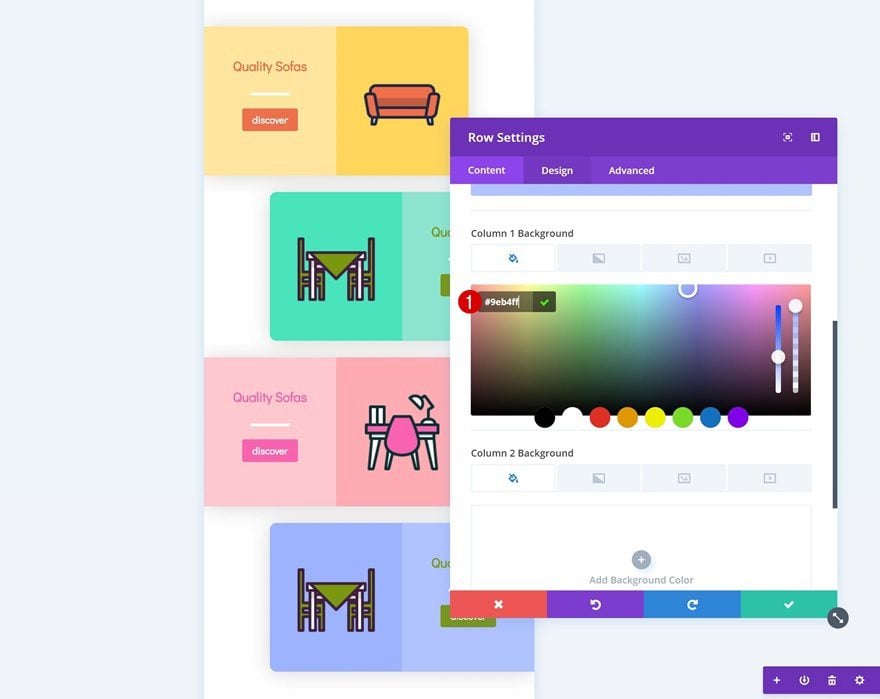
Exchange Column Colour
Do the similar factor for the column 1 background colour.
- Column 1 Background Colour: #9eb4ff
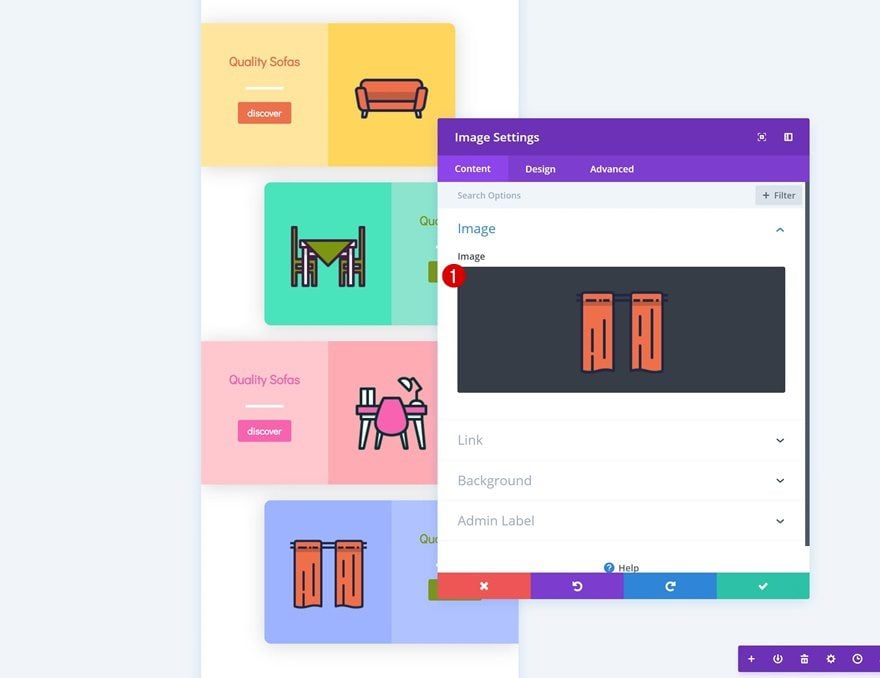
Exchange Icon in Symbol Module
Then, trade the icon this is getting used.
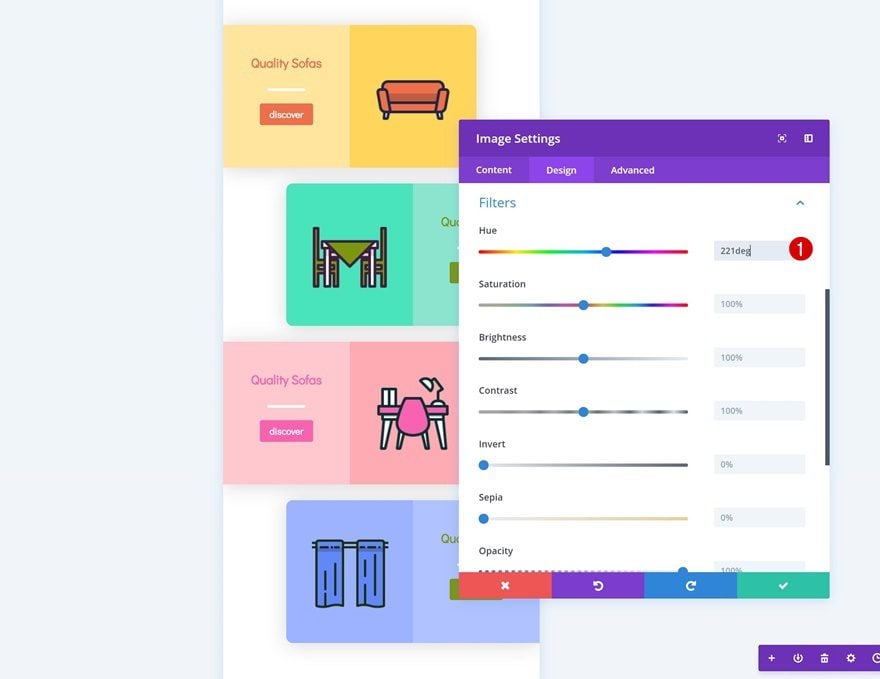
Upload Clear out to Symbol Module
Together with the hue within the filters settings of the Symbol Module.
- Hue: 221deg
Exchange Textual content Colour
Adjust the textual content colour of the Symbol Module subsequent.
- Heading 3 Textual content Colour: #6287f9
Exchange Button Background Colour
And use that very same colour for the button background.
- Button Background Colour: #6287f9
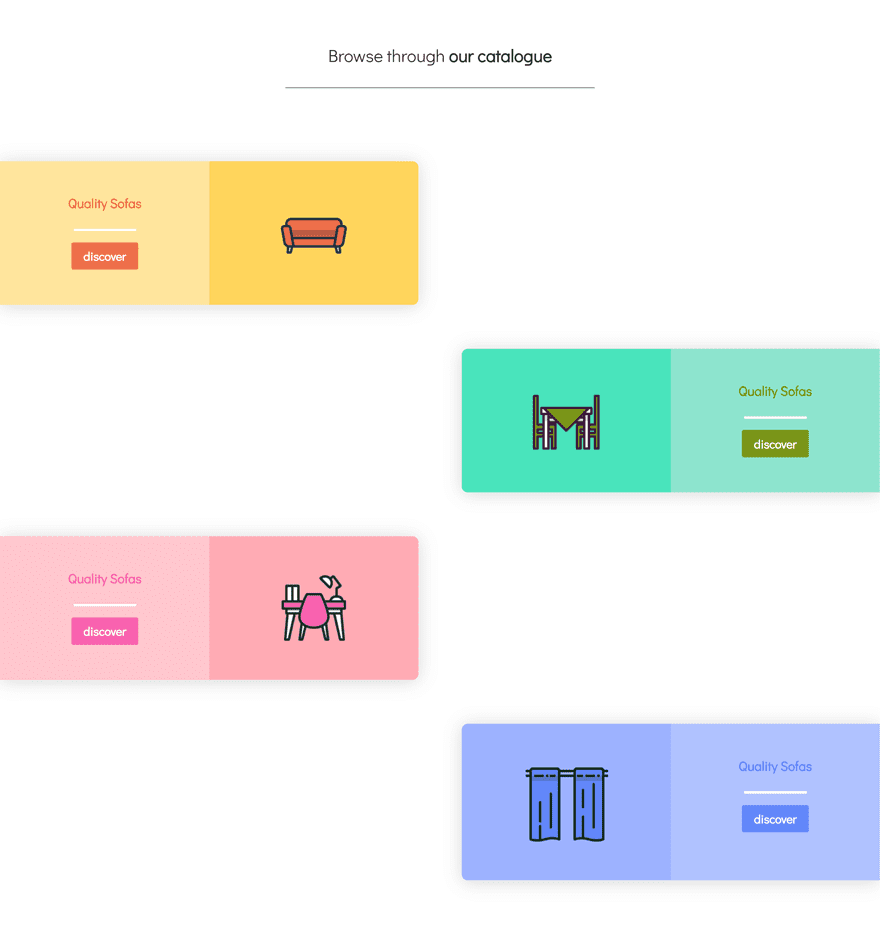
Preview
Now that we’ve long gone via all of the steps, let’s take a last take a look at the end result.
Cell
Desktop
Ultimate Ideas
In case your major supply of tourists comes from cellular units, it’s essential to optimize the whole thing for that individual display measurement. With Divi, the whole thing turns into right away responsive. However simply because one thing is responsive, doesn’t imply it’s optimized for that individual display measurement as smartly. Differently to means designing for mobiles is through beginning your design from a mobile-first point of view. On this put up, we’ve shared some pointers and tips on how to try this. Afterwards, we’ve recreated an instance that lives as much as those regulations and lets in us to create a shocking result. When you’ve got any questions or tips, be sure you depart a remark within the remark phase beneath!
The put up How to Create Mobile-First Designs with Divi seemed first on Elegant Themes Blog.
WordPress Web Design