
Are you on the lookout for a solution to again up your WordPress website to Dropbox?
This can be a very best safety follow to steadily again up your website and retailer it in a separate location, like Dropbox. This fashion, you’ll simply repair your content material, plugins, databases, and necessary settings if there’s a safety breach or one thing is going fallacious.
On this article, we will be able to display you how you can again up a WordPress website to Dropbox.
Contents
Why Again Up a WordPress Website to Dropbox?
Whether or not you’re working a small WordPress web page, an eCommerce retailer, or some other form of web page, then developing common backups is very important.
A backup is a duplicate of your web page that comes with necessary information, folders, databases, website content material, issues, plugins, and different knowledge.
With backups, you’re going to have a duplicate of your web page or able in case of a deadly error or safety vulnerability. Then, you’ll repair your web page to its earlier state in only some clicks.
Storing your WordPress backups to your laptop’s arduous disk or web page server may also be dangerous. In case your arduous disk fails or the web page server will get compromised, you’re going to lose your whole backups.
That’s why storing backups in a couple of places is a great follow, together with cloud garage services and products like Dropbox.
Dropbox is a well-liked file-hosting provider that permits you to retailer and again up information to the cloud. The most productive phase is that you’ll get right of entry to, save, and proportion those information from any place.
That being mentioned, let’s see how you can again up WordPress to Dropbox.
Connecting Your WordPress Website to Dropbox
The best way to create WordPress backups and save them in Dropbox is by means of the usage of the Duplicator plugin. It’s the most efficient WordPress backup plugin this is beginner-friendly and lets you again up, migrate, and clone your web page.
Plus, the Duplicator plugin simply integrates with other cloud services and products like Dropbox, Google Pressure, Amazon S3, OneDrive, FTP, and SFTP – SSH.
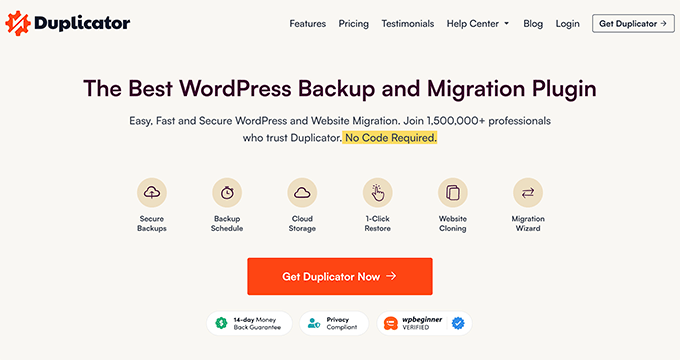
Observe: We will be able to use the Duplicator Professional plugin for this instructional as it comprises cloud garage integrations. There may be a unfastened model of Duplicator you’ll use to create website backups, however it doesn’t will let you robotically retailer the ones backups in Dropbox.
First, it is very important set up and turn on the Duplicator Professional plugin. If you wish to have lend a hand, then please see our information on how you can set up a WordPress plugin.
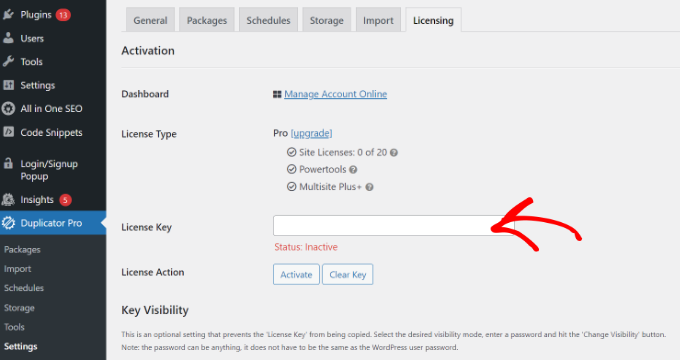
Upon activation, you wish to have to go to Duplicator Professional » Settings from the WordPress admin panel and click on the ‘Licensing’ tab.
Subsequent, it is very important input your license key and click on the ‘Turn on’ button. You’ll simply to find the license key for your Duplicator account space.
Subsequent, it is very important attach your Dropbox account with Duplicator.
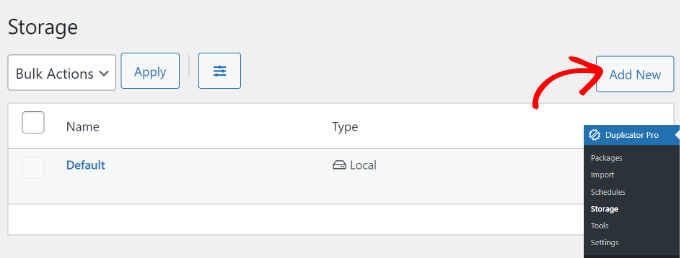
Merely move to Duplicator Professional » Garage out of your WordPress dashboard. Right here, you’re going to see your native garage possibility, the place the backups can be saved by means of default.
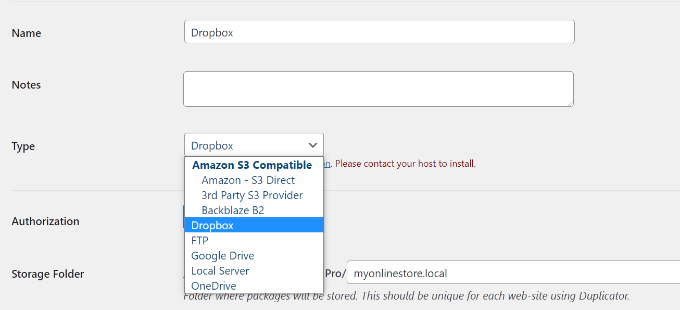
Cross forward and click on the ‘Upload New’ button so as to add Dropbox.
After that, you’ll input a reputation to your new garage possibility so it’s simply recognizable. As an example, we will be able to identify it ‘Dropbox’.
Subsequent, you will have to click on the ‘Sort’ dropdown menu and choose the ‘Dropbox’ possibility.
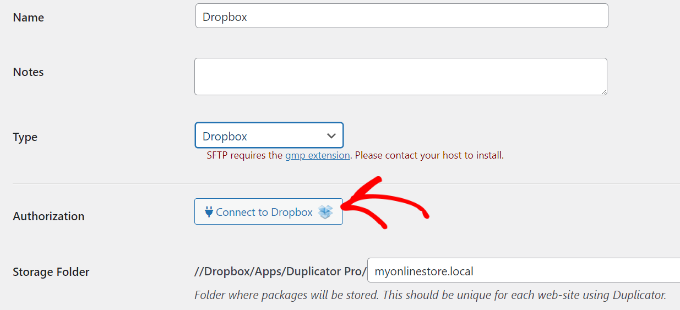
From right here, you’re going to see new settings to your garage possibility.
Cross forward and click on the ‘Connect with Dropbox’ button.
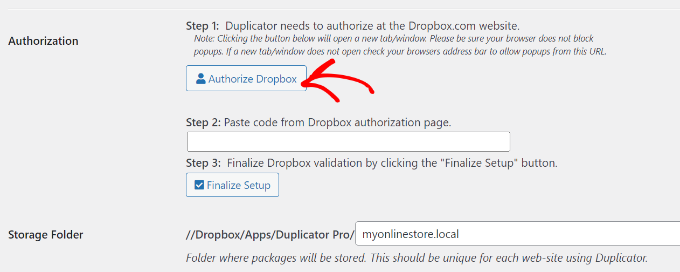
After clicking the button, extra settings will seem within the Authorization phase.
First, it is very important click on the ‘Authorize Dropbox’ button.
Subsequent, a brand new window or tab will open. Merely log in on your Dropbox account.
You’ll use your Google or Apple account to check in or input the e-mail and password you used when signing up for Dropbox.
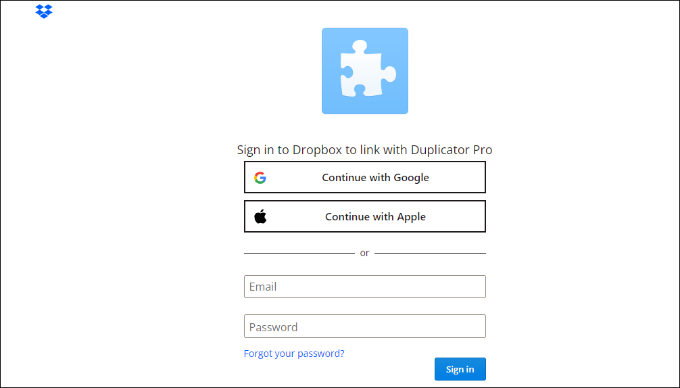
As soon as you’re logged in, it is very important permit get right of entry to on your Dropbox account.
Cross forward and click on the ‘Permit’ button.

Subsequent, Dropbox will display you an authorization code.
Merely reproduction this code.
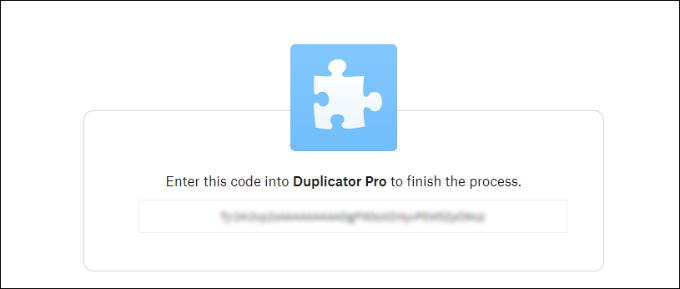
You’ll now go back to the browser tab or window the place you’re configuring the Duplicator Professional garage settings.
Cross forward and input the code into the ‘Step 2: Paste code from Dropbox authorization web page’ box.
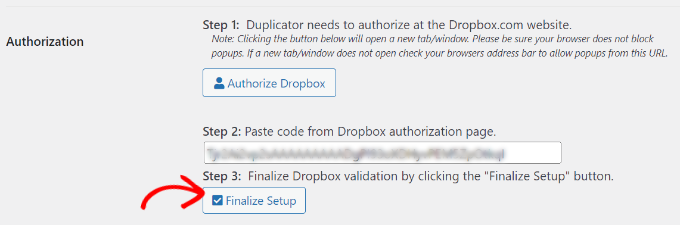
As soon as that’s achieved, merely click on the ‘Finalize Setup’ button.
You could have now effectively added Dropbox as a cloud garage strategy to save your WordPress backups.
Making a Dropbox Backup of Your WordPress Web page
The next move is to create a backup of your WordPress weblog or web page and put it aside to Dropbox.
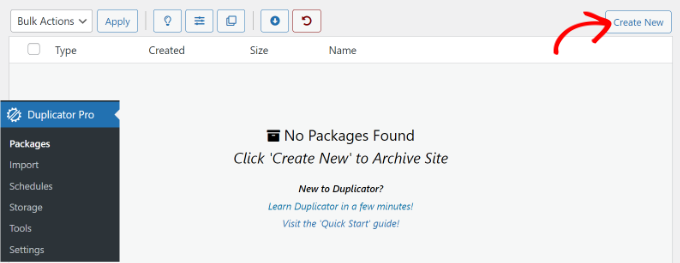
To start out, move to Duplicator Professional » Programs from the WordPress admin panel and click on the ‘Create New’ button.
Subsequent, it is very important input a reputation to your bundle.
Duplicator can even provide the possibility to choose a template. We suggest preserving it as ‘Unassigned’ as a result of it’s going to stay the settings from the remaining scan/construct.
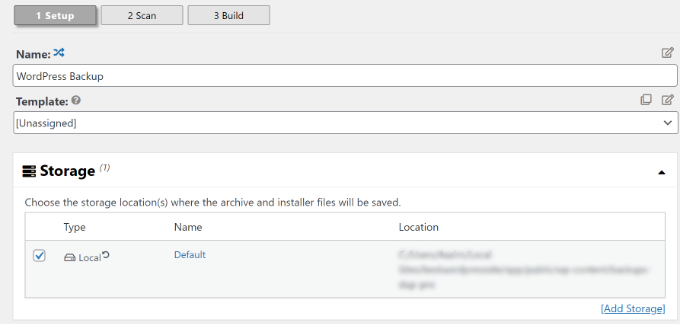
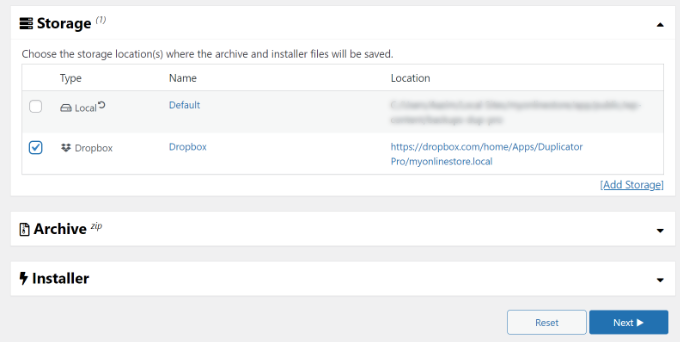
After that, you’ll enlarge the ‘Garage’ phase.
Right here, it is very important choose ‘Dropbox’ because the garage strategy to retailer your WordPress backup.
You’ll additionally exchange the ‘Archive’ settings sooner than backing up your website. Via default, the plugin will bundle your website’s content material, plugins, issues, databases, and all different information.
Then again, you’ll customise your backup by means of deciding on which a part of your website to again up. For example, chances are you’ll archive handiest the WordPress database.

When you find yourself achieved, merely click on the ‘Subsequent’ button on the backside.
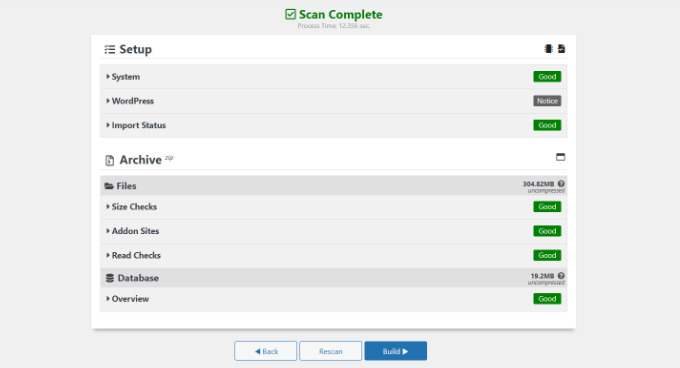
At the subsequent display screen, Duplicator will scan your web page and take a look at if the whole thing is okay sooner than making a backup. You’ll see a understand or a caution for any problems that wish to be resolved sooner than backing up your website.
As soon as the whole thing tests out, merely click on the ‘Construct’ button.
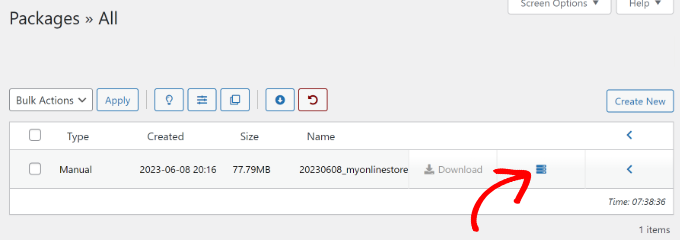
The plugin will take a couple of seconds or mins to create a backup bundle. The time depends upon the dimensions of the information and folders.
As soon as the bundle is able, it’s going to be stored in Dropbox. You’ll view the Dropbox location by means of clicking the ‘Garage’ icon.
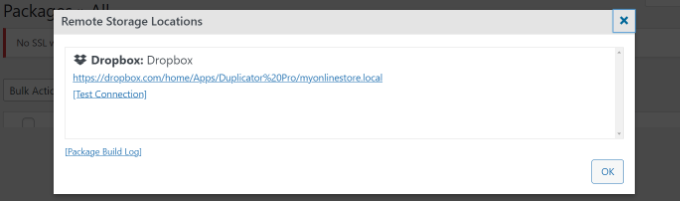
A brand new window will now open with the positioning.
You’ll merely click on at the hyperlink to view your WordPress backup within the Dropbox dashboard.
Scheduling WordPress Backups to Dropbox (Professional Plugin Best)
With Duplicator Professional, you’ll time table common web page backups and retailer them in Dropbox.
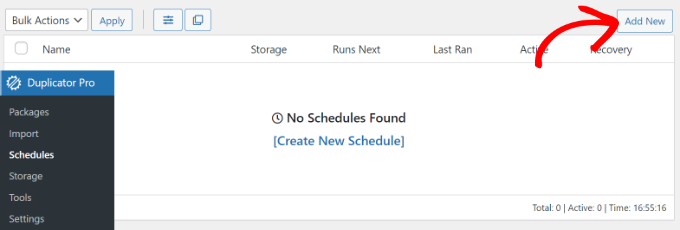
First, it is very important move to Duplicator Professional » Schedules from the WordPress dashboard and click on the ‘Upload New’ button.
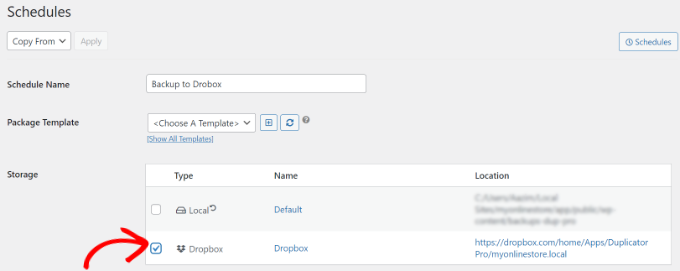
At the subsequent display screen, you’ll input a reputation to your backup time table and choose a template. We suggest the usage of the default template in order that your whole web page information, folders, and databases are subsidized up.
After that, choose ‘Dropbox’ because the garage location to your backups.
Subsequent, it is very important scroll down and make a choice when the plugin will have to robotically create a backup.
You’ll choose whether or not you’d love to construct a bundle hourly, day-to-day, weekly, or per thirty days. For example, if you choose the weekly possibility, then you’ll make a choice which day to time table the backup.
There may be an possibility to select the beginning time to your time table. Finally, be sure that the ‘Allow This Agenda’ possibility is checked in order that your time table is energetic.
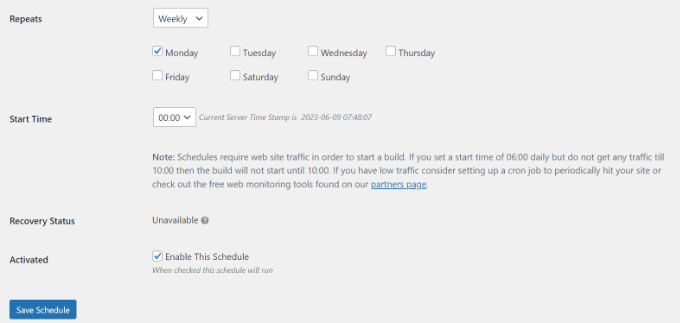
As soon as you’re achieved, merely click on the ‘Save Agenda’ button.
Restoring a WordPress Backup From Dropbox
Now that you’ve scheduled common backups, you’re going to at all times have a duplicate of your website in Dropbox. This fashion, you’ll simply repair the backup if there’s a deadly error, information loss, or safety breach.
To revive your website, you’re going to first wish to open your Dropbox account and head to the Duplicator Professional folder.
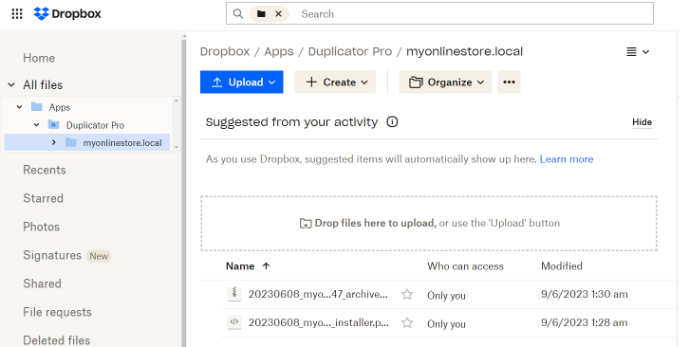
Subsequent, choose the web page backup you wish to obtain.
Merely click on the three dotted icons after which choose the ‘Obtain’ possibility.
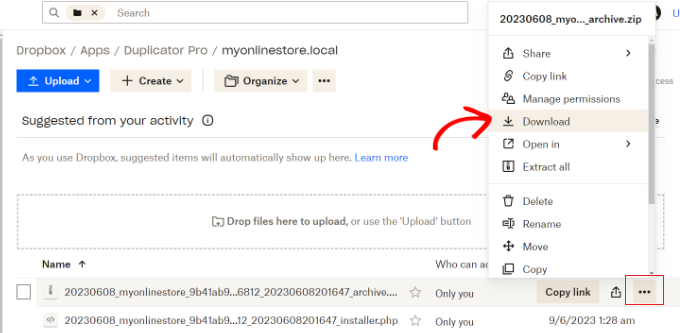
From right here, you’ll save the zip dossier to your laptop.
After that, you will have to move on your WordPress dashboard and head to Duplicator Professional » Import. Cross forward and click on the ‘Make a choice Document’ button.
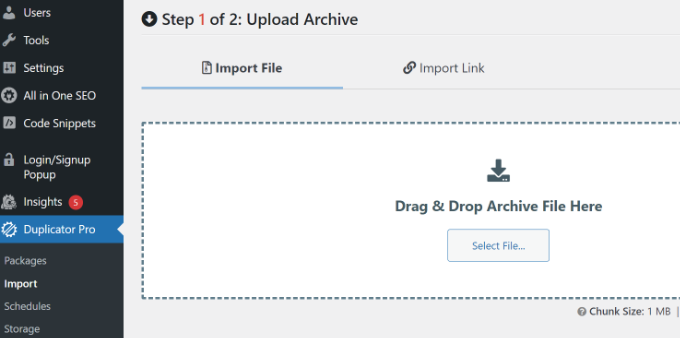
Subsequent, you’ll choose the zip dossier out of your laptop to revive the web page backup.
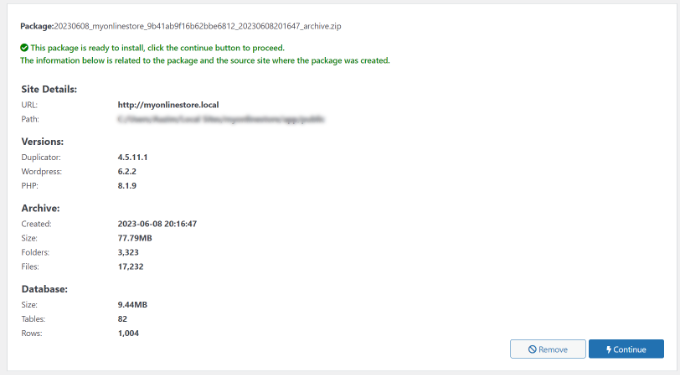
As soon as the dossier is uploaded, you’ll scroll down to look the bundle main points. Merely click on the ‘Proceed’ button.
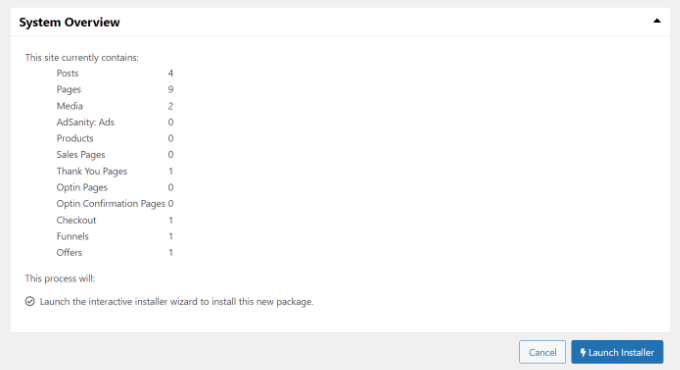
At the subsequent display screen, you’re going to see an summary of your bundle. For example, it’s going to display the collection of posts, pages, media information, plugins, and extra which might be within the backup.
Cross forward and click on the ‘Release Installer’ button.
While you click on the button, the Duplicator installer wizard will release.
First, it is very important make a choice an Set up Sort to your bundle. Cross forward and choose the ‘Repair unmarried website’ possibility.
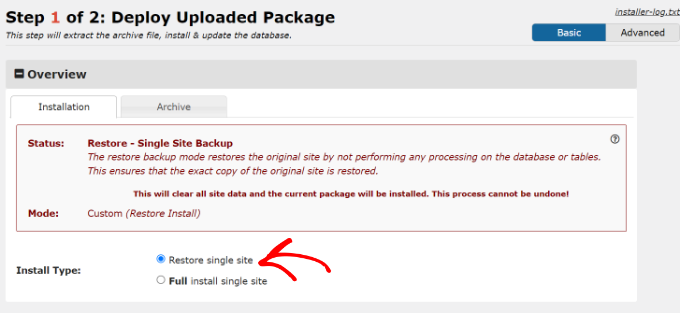
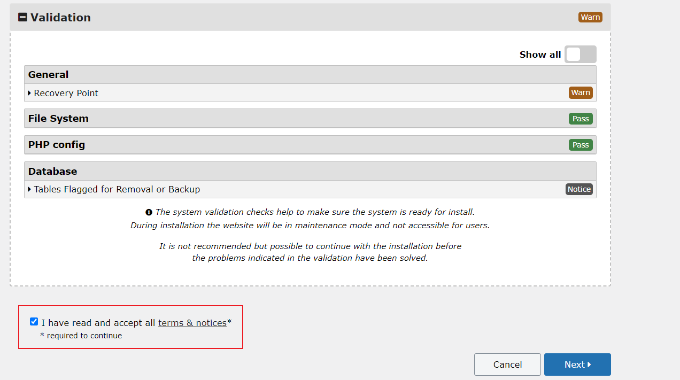
Subsequent, you’ll scroll all the way down to view the Validation checkpoints and ensure the machine is able to set up the backup. If there are any warnings or notices, then you definitely will have to unravel them sooner than restoring the backup.
As soon as that’s achieved, click on the checkbox for ‘I’ve learn and authorised all phrases & notices’ and click on the ‘Subsequent’ button.
A popup will now open with set up affirmation main points.
You’ll click on the ‘OK’ button to transport ahead.

The plugin will now extract archive information from the bundle.
As soon as the extraction is done, you’re going to see the set up effects. To finish the backup, you will have to click on the ‘Admin Login’ button and log again in on your website to finalize the set up.
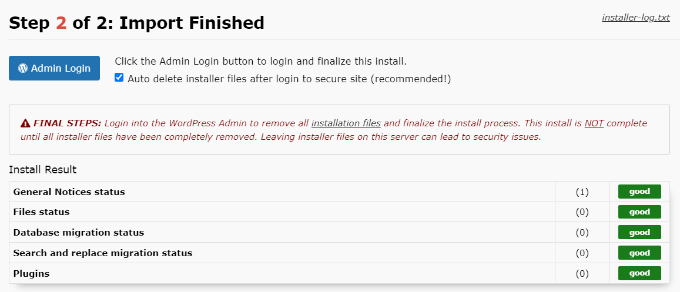
You could have now effectively restored your web page backup from Dropbox.
We are hoping this text helped you discover ways to again up a WordPress website to Dropbox. You might also wish to see our information to WordPress safety and our knowledgeable selections for the very best are living chat tool for small companies.
If you happen to preferred this text, then please subscribe to our YouTube Channel for WordPress video tutorials. You’ll additionally to find us on Twitter and Fb.
The submit How you can Again up a WordPress Website to Dropbox (Step by means of Step) first seemed on WPBeginner.
WordPress Maintenance