You don’t have to regulate most of the 800 million WordPress websites on the internet earlier than you search for techniques to release new websites successfully.
Cloning an current WordPress configuration is one approach to rise up and working temporarily, and shoppers of Kinsta’s Controlled WordPress Web hosting carrier know that’s simply finished inside our user-friendly MyKinsta dashboard.
What’s extra, you’ll be able to clone WordPress websites at scale the use of your favourite utility building applied sciences and the Kinsta API. On this instructional, we’re the use of that API and React, one of the standard JavaScript libraries, to turn how that works.
Contents
What You’re Development
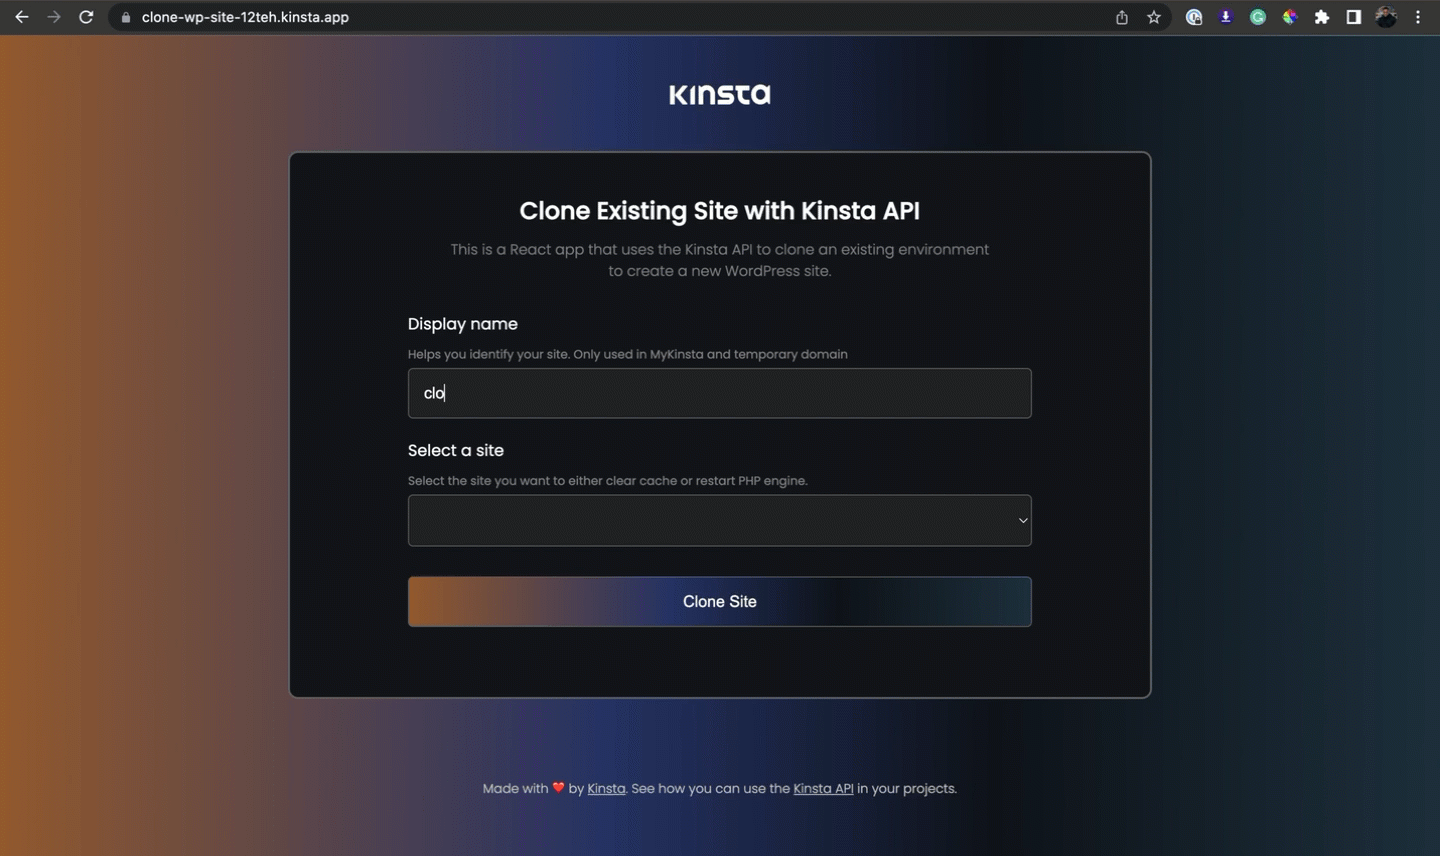
Right here’s the situation: You’re a WordPress building company with a number of websites that can be utilized as starter templates. The React utility for cloning WordPress websites we’re construction looks as if this:
Necessities
To apply this instructional, you’ll want a fundamental figuring out of HTML, CSS, and JavaScript and a few familiarity with React. Additionally, you’ll want Node.js and npm (the Node Package deal Supervisor) or yarn put in for your pc. The point of interest of this undertaking is construction a WordPress-cloning utility the use of React and the Kinsta API slightly than the main points of UI advent and styling.
Surroundings Up the Building Atmosphere
You’ll be able to create a React utility from scratch and broaden your personal interface, or you’ll be able to take hold of the Git starter template discussed above by means of following those steps:
- Seek advice from this undertaking’s GitHub repository.
- Choose Use this template > Create a brand new repository to duplicate the starter code right into a repository inside your GitHub account. (Test the field to come with all branches.)
- Pull the repository on your native pc and turn to the starter-files department the use of the command:
git checkout starter-files
- Set up the essential dependencies by means of working the command
npm set up
As soon as the set up is entire, you’ll be able to release the undertaking for your native pc with npm run get started. This opens the undertaking at http://localhost:3000/.
Figuring out the Mission Recordsdata
The src folder is the center of a React utility, because it incorporates the JavaScript wanted by means of webpack. Within the folder is App.js, the place the 2 routes for this undertaking are configured.
Throughout the src folder are the subfolder elements and pages. The elements folder incorporates reusable elements, such because the Header.jsx and Footer.jsx, used within the House.jsx and Operations.jsx pages.
Your center of attention this is imposing the common sense in House.jsx and Operations.jsx, since styling and routing can also be present in our GitHub starter recordsdata.
House.jsx has a sort with two fields: the identify of the website you’re growing and a make a selection box that lists the WordPress websites discovered for your MyKinsta account (this listing is fetched by the use of the Kinsta API).
When the shape’s publish button (Clone website) is clicked, an object that incorporates an operation_id assets is returned. This ID and show identify will likely be handed as direction parameters to Operations.jsx, the place the standing of the cloning operation is reported. The interface can even come with hyperlinks to get admission to the WordPress admin login and the website’s house web page.

The use of the Kinsta API to Clone a WordPress Website
Inside of House.jsx, 3 API requests will likely be made to the Kinsta API. The primary request is to get a listing of websites for your Kinsta account. This will likely be saved in a state after which iterated to the make a selection box. This request will likely be made instantly after the web page renders the use of the useEffect hook.
The second one and 3rd requests are made as soon as the Clone website button is clicked. The second one request will get the surroundings ID of the website you wish to have to clone. The 3rd request makes use of that setting ID and the website’s show identify to start up cloning of the website.
Interacting With the Kinsta API in React
On this instructional, you have interaction with two endpoints of the Kinsta API:
/websites: This may go back a listing of all websites, request a website setting ID, and after all clone an current website./operations: That is used to get the operation standing. As an example, when the website cloning operation is in growth, you’ll be able to use this endpoint to programmatically observe the standing of the operation to resolve when it’s completed.
To engage with the Kinsta API, you want your corporate ID (can also be present in MyKinsta underneath Corporate > Billing Main points > Corporate ID) and an API key. Right here’s how one can create a Kinsta API key.
After you have those credentials, it’s absolute best to retailer them securely as setting variables for your React utility. To arrange the surroundings variables, create a .env record within the root folder of your undertaking. Inside of this record, upload the next traces:
REACT_APP_KINSTA_COMPANY_ID = 'YOUR_COMPANY_ID'
REACT_APP_KINSTA_API_KEY = 'YOUR_API_KEY'
To get admission to those setting variables inside your undertaking, you’ll be able to use the syntax procedure.env.THE_VARIABLE. As an example, to get admission to the REACT_APP_KINSTA_COMPANY_ID, you could possibly use procedure.env.REACT_APP_KINSTA_COMPANY_ID.
Clone an Current Website With Kinsta API
Let’s get started by means of fetching the listing of all websites when House.jsx renders the use of the useEffect Hook and storing them in a state. To succeed in this, import the useEffect and useState Hooks and create a state to retailer the array of websites that will likely be fetched:
import { useState, useEffect } from 'react';
const [sites, setSites] = useState([]);
Subsequent, use the useEffect Hook to question the Kinsta API the use of the JavaScript Fetch API. First, create two consistent variables to retailer the headers and the Kinsta API URL. That is finished to keep away from repetition since you’ll ship a couple of request to the Kinsta API in this web page:
const KinstaAPIUrl = 'https://api.kinsta.com/v2';
const headers = useMemo(() => {
    go back {
        Authorization: `Bearer ${procedure.env.REACT_APP_KINSTA_API_KEY}`
    };
}, []);
Within the code above, the useMemo Hook memoizes the headers object in order that it doesn’t wish to be re-evaluated on each render since its price is continuous. Now you’ll be able to create the API request:
useEffect(() => {
    const fetchAllSites = async () => {
        const question = new URLSearchParams({
            corporate: procedure.env.REACT_APP_KINSTA_COMPANY_ID,
        }).toString();
        const resp = look ahead to fetch(
            `${KinstaAPIUrl}/websites?${question}`,
            {
                approach: 'GET',
                headers
            }
        );
        const information = look ahead to resp.json();
        setSites(information.corporate.websites);
    };
    fetchAllSites();
}, [headers]);
Within the code above, an asynchronous serve as fetchAllSites is created. Inside of this serve as, you first outline the question parameter (your corporate ID) fetched out of your .env record. Then, you are making a GET request to the /websites endpoint of the Kinsta API the use of the question parameter. The reaction is then saved within the websites state you created previous. In any case, you name fetchAllSites to start up the fetching procedure.
Let’s now incorporate the values saved within the websites state by means of looping thru them to populate the make a selection box. The show identify will likely be proven to the consumer, whilst the website ID will likely be used as the choice price. This fashion, when the shape is submitted, the chosen website’s ID can be utilized to question for setting main points:
Choose the website you wish to have to both transparent cache or restart PHP engine.
Let’s continue to maintain the shape submission and retrieve values from the shape. To do that, you want to create state variables for each and every enter box:
const [selectedSiteId, setSelectedSiteId] = useState('');
const [displayName, setDisplayName] = useState('');
Subsequent, bind the shape fields to their respective state values by means of including the price and onChange attributes to each and every enter component. That is what the shape will appear to be:
Within the code above, each and every enter component has the price characteristic set to the corresponding state variable, and the onChange characteristic is used to replace the state price when the consumer interacts with the enter fields.
To maintain the shape submission, connect an onSubmit technique to the shape component. As an example:
Outline the handleSubmission approach, which comes to making two API requests to the Kinsta API. The primary request retrieves the surroundings ID of the website to be cloned, and the second one request plays the clone operation.
Let’s start with retrieving the surroundings ID. Within the handleSubmission approach, create an asynchronous serve as to maintain this request. The serve as will ship a GET request to the /websites endpoint, appending the chosen website’s ID, adopted by means of the /environments endpoint:
const handleSubmission = async (e) => {
    e.preventDefault();
    const fetchEnvironmentId = async (siteId) => {
        const resp = look ahead to fetch(
            `${KinstaAPIUrl}/websites/${siteId}/environments`,
            {
                approach: 'GET',
                headers
            }
        );
        const information = look ahead to resp.json();
        let envId = information.website.environments[0].identification;
        go back envId;
    }
    let environmentId = look ahead to fetchEnvironmentId(selectedSiteId);
}
Above, fetchEnvironmentId is an asynchronous serve as that sends a GET request to the Kinsta API. It fetches the environments of the chosen website and extracts the surroundings ID from the reaction. The surroundings ID is saved within the envId variable after which returned. When calling the serve as, we assign its go back price to the envId variable.
At this level, you’ll be able to clone an current website with the Kinsta API as a result of you’ve gotten the crucial details about the supply website: corporate ID, show identify, and setting ID.
Throughout the handleSubmission approach, create a serve as known as cloneExistingSite to maintain this API request. This request will likely be to the /websites/clone endpoint. In contrast to the former requests, the headers for this request are other as a result of you want to specify the Content material-Sort as utility/json. Moreover, this can be a POST request, so you want to incorporate a request frame containing the payload you wish to have to ship to the API. Right here’s how the request will likely be structured:
const handleSubmission = async (e) => {
    e.preventDefault();

    // fetch setting Identification

    const cloneExistingSite = async (env_Id) => {
        const resp = look ahead to fetch(
            `${KinstaAPIUrl}/websites/clone`,
            {
                approach: 'POST',
                headers: {
                    'Content material-Sort': 'utility/json',
                    Authorization: `Bearer ${procedure.env.REACT_APP_KINSTA_API_KEY}`
                },
                frame: JSON.stringify({
                    corporate: `${procedure.env.REACT_APP_KINSTA_COMPANY_ID}`,
                    display_name: displayName,
                    source_env_id: env_Id,
                })
            }
        );
        const information = look ahead to resp.json();
        navigate(`/operations/${displayName}/${information.operation_id}`)
        console.log(information);
    }
    cloneExistingSite(environmentId);
}
On this code, the request frame is built the use of JSON.stringify() to transform the payload object right into a JSON string. The reaction is then saved within the information variable. The use of the useNavigate approach from the react-router-dom library the displayName and operation_id is handed as direction parameters. Make sure you import the useNaviagte approach and instantiate it:
// Import the specified approach
import { useNavigate } from 'react-router-dom';

// Instantiate the useNavigate approach
const navigate = useNavigate();
Now, whilst you fill out the shape and click on the Clone website button, a brand new website will start the cloning procedure, which might be visual for your MyKinsta dashboard. Alternatively, we wish to observe the website cloning operation programmatically inside the customized UI. You maintain this in Operations.jsx the use of the knowledge despatched by the use of the direction.
Imposing Operation Standing Test With Kinsta API
In Operations.jsx, retrieve the operation ID from the direction the use of the useParams approach from react-router-dom. This ID will likely be used to make an API request on every occasion the Test Website Standing button is clicked.
First, import the useParams approach and use it to instantiate the displayName and operationId variables:
// Import the useParams library
import { useParams } from 'react-router-dom';

// Instantiate the paramters
const { displayName, operationId } = useParams();
Subsequent, create a state to retailer the operation standing when the request is made:
const [operationData, setOperationData] = useState({ message: "Operation in growth." });Within the code above, the state is initialized with a default message, which will likely be displayed till the Test Website Standing button is clicked. Upload an onClick match to the Test Website Standing button and speak to the checkOperation approach when the button is clicked:
Now, create the checkOperation serve as to make the operation request to the Kinsta API. Retailer the headers and KinstaAPIUrl constants in variables, after which use them within the API request:
const KinstaAPIUrl = 'https://api.kinsta.com/v2';
const headers = useMemo(() => {
    go back {
        Authorization: `Bearer ${procedure.env.REACT_APP_KINSTA_API_KEY}`
    };
}, []);

const checkOperation = async () => {
    const resp = look ahead to fetch(
        `${KinstaAPIUrl}/operations/${operationId}`,
        {
            approach: 'GET',
            headers
        }
    );
    const information = look ahead to resp.json();
    setOperationData(information);
};
Within the code above, a GET request is distributed to the /operations endpoint with the operation ID, and the reaction is saved within the operationData state. Now, you’ll be able to use the knowledge inside the markup:
{operationData.message}..
In any case, the displayName information handed by the use of the direction will likely be used to build the URL for the brand new website and the WordPress admin URL. Each hyperlinks will open in a brand new tab.
With those adjustments, Operations.jsx will retrieve the operation ID from the direction, make an API request when the button is clicked, show the operation standing, and supply hyperlinks to the WordPress admin and website URL in line with the displayName information.
Deploy Your Utility To Kinsta
To deploy your utility to Kinsta’s Utility Web hosting platform, you want to push the undertaking on your most well-liked Git supplier. When your undertaking is hosted on both GitHub, GitLab, or Bitbucket, you’ll be able to continue to deploy to Kinsta.
To deploy your repository to Kinsta, apply those steps:
- Log in to or create your Kinsta account at the MyKinsta dashboard.
- At the left sidebar, click on Packages after which click on Upload carrier.
- Choose Utility From the dropdown menu to deploy a React utility to Kinsta.
- Within the modal that looks, make a choice the repository you wish to have to deploy. When you have a couple of branches, you’ll be able to make a selection the required department and provides a reputation on your utility.
- Choose probably the most to be had information heart places from the listing of 25 choices.
- Kinsta robotically detects the beginning command on your utility.
In any case, it’s now not protected to push out API keys to public hosts like your Git supplier. When web hosting, you’ll be able to upload them as setting variables the use of the similar variable identify and price specified within the .env record.

Whenever you start up the deployment of your utility, it starts the method and usually completes inside a couple of mins. A a success deployment generates a hyperlink on your utility, like https://clone-wp-site-12teh.kinsta.app/.
Abstract
The Kinsta API gives the versatility to create customized consumer interfaces for managing WordPress websites, together with the power to clone current websites and organize quite a lot of sides of your WordPress setting.
On this article, you’ve gotten realized how one can broaden an utility that allows website cloning out of doors of MyKinsta.
How are you the use of Kinsta API? What options and endpoints do you want to look added to the API? Proportion them within the remark phase!
The publish How To Clone a WordPress Website The use of the Kinsta API and React gave the impression first on Kinsta®.
WP Hosting