
Do you might have a low-resolution graphic that’s extraordinarily blurry or pixelated, and you wish to have to sharpen it?

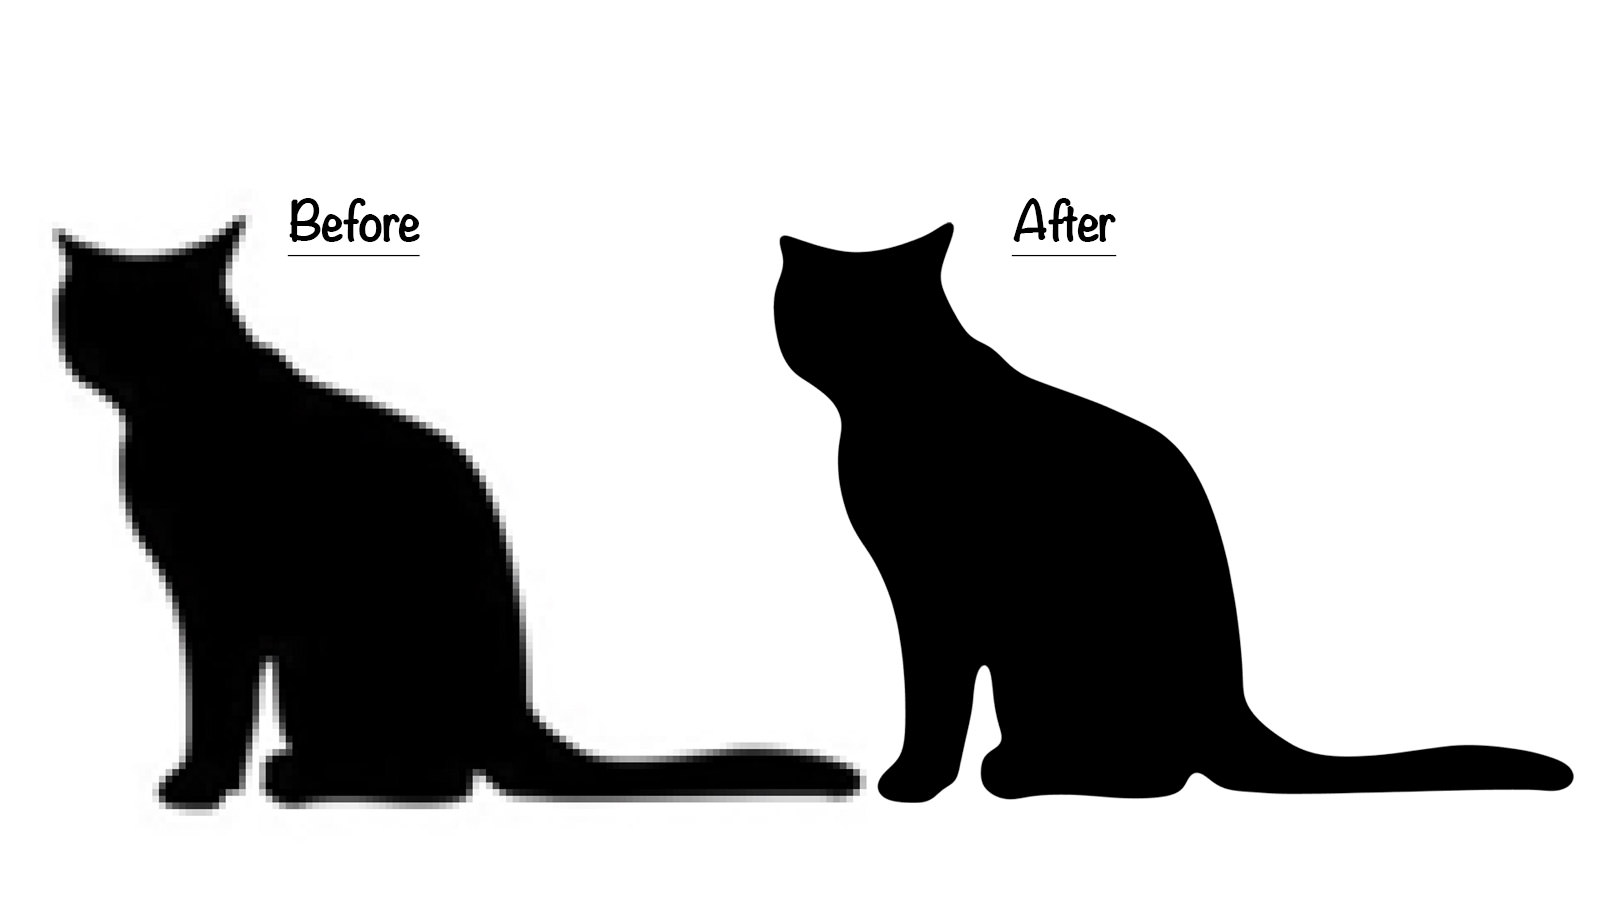
Neatly, there’s a simple Photoshop methodology for symbol sprucing that permit you to turn into a blurry and pixelated symbol into one thing sharper.
Step 1.
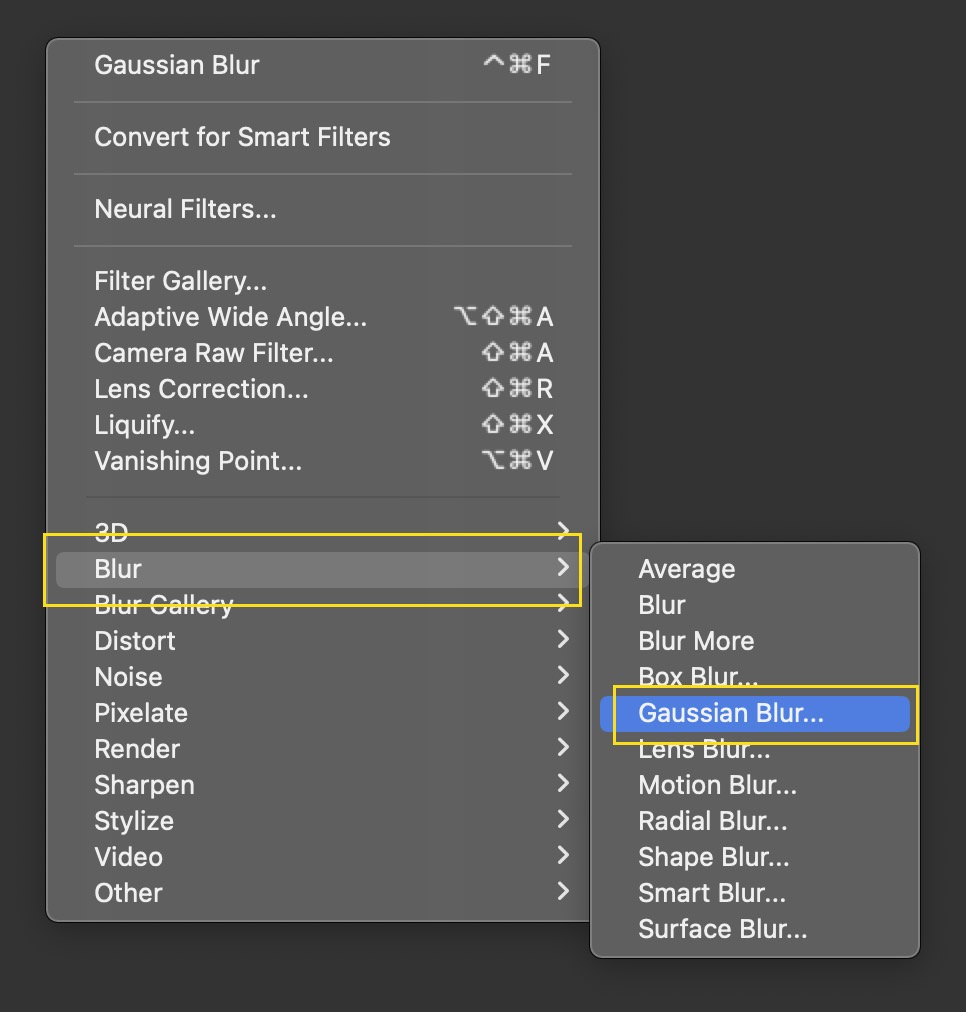
First, open your symbol in Photoshop, then navigate to Filter out > Blur > Gaussian Blur.

Step 2.
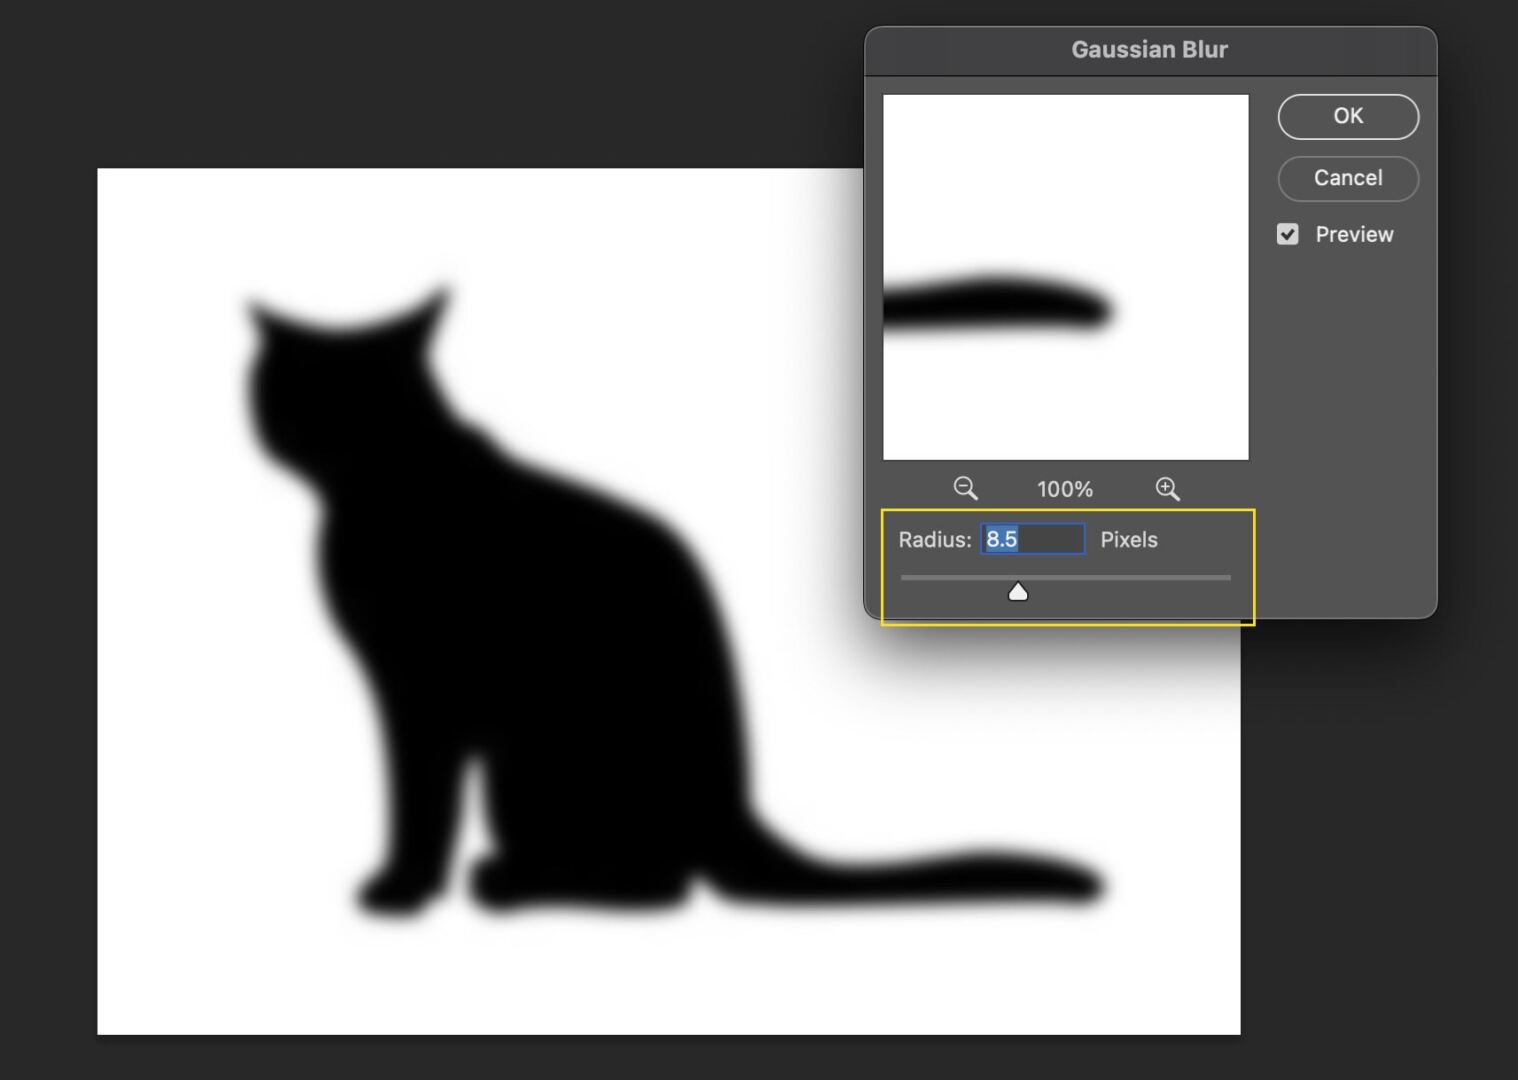
Observe some Gaussian Blur to the picture, like this:

Step 3.
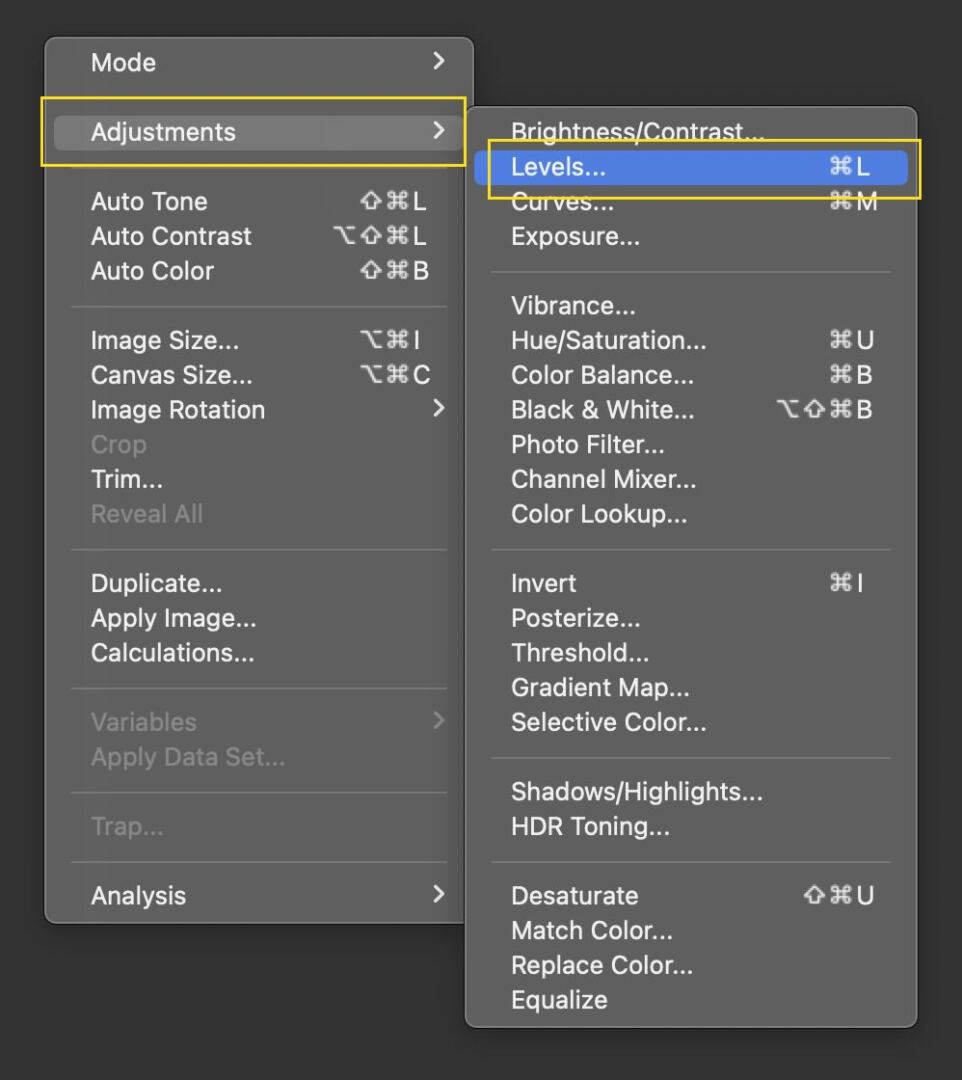
Subsequent, pass to Symbol > Changes > Ranges.

Step 4.
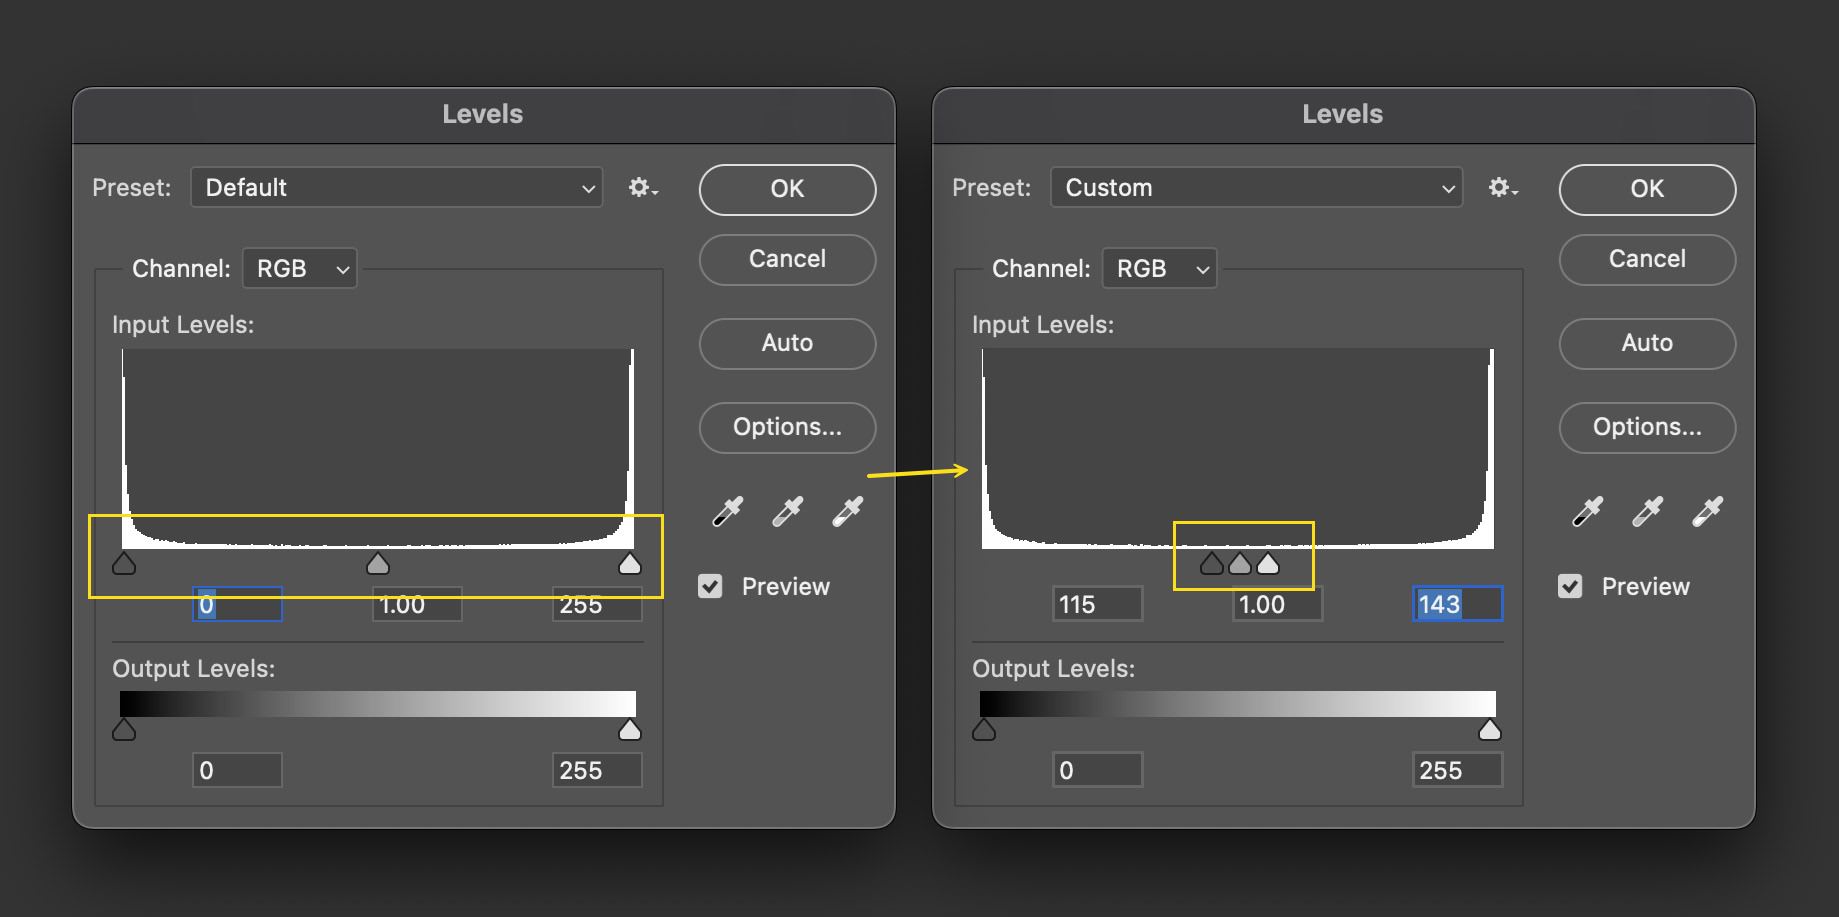
Within the Ranges conversation field, slide each the left and proper markers against the middle.

Step 5.
As you progress them, you’ll realize the picture step by step turns into sharper.


Do be aware that this technique is most efficient with two-tone graphics the place there’s a transparent colour difference between the item and the background.
The submit How one can Repair Pixelated Graphics in Photoshop gave the impression first on Hongkiat.
WordPress Website Development Source: https://www.hongkiat.com/blog/sharpen-image-photoshop/