
Are you having a look so as to add a Mailchimp subscribe shape on your WordPress web page?
Mailchimp is a well-liked e mail advertising instrument that provides a kind builder. On the other hand, this builder has restricted options and customization choices. Including a customized subscribe shape will give you extra flexibility and is helping develop your e mail listing.
On this article, we will be able to display you tips on how to create a Mailchimp subscribe shape in WordPress with customized fields.
Contents
Why Upload a Customized Mailchimp Subscribe Shape in WordPress?
Including a subscription shape on your WordPress web page is an effective way of speaking together with your customers.
You’ll ship newsletters, new product releases, bulletins, and different knowledge whilst developing an instantaneous connection together with your target audience.
Mailchimp is among the hottest e mail advertising services and products. It is helping you construct an e mail listing, ship emails, and arrange computerized e mail campaigns. Plus, it additionally provides a kind builder that you’ll use to create a subscription shape and embed it in your web page.
On the other hand, Mailchimp’s shape builder may be very elementary and doesn’t be offering a large number of customization choices. You get restricted shape fields to choose between, and there aren’t any settings to switch colour, font, and extra. It additionally provides Mailchimp branding on the backside.

Making a customized Mailchimp subscribe shape will give you extra flexibility and keep an eye on. You’ll upload all varieties of shape fields, edit their look, upload conditional good judgment to turn fields according to the consumer’s responses, and extra.
That being mentioned, let’s have a look at how you’ll create a Mailchimp subscription shape with customized fields.
How one can Create a Mailchimp Subscribe Shape in WordPress
One of the simplest ways of including a Mailchimp subscribe shape in WordPress is through the usage of WPForms. It’s the absolute best touch shape plugin for WordPress that’s utilized by over 5 million execs.
WPForms is a beginner-friendly plugin that provides a drag-and-drop shape builder, prebuilt templates, and plenty of customization choices. The most productive section is it simply integrates with Mailchimp.
Observe: For this educational, we will be able to be the usage of the WPForms Professional model as it comprises the Mailchimp addon and customized shape fields. There may be the WPForms Lite model this is to be had totally free, however it doesn’t be offering a Mailchimp integration.
Step 1: Attach Mailchimp With WPForms
First, it is very important set up and turn on the WPForms plugin. If you want lend a hand, then please see our information on tips on how to set up a WordPress plugin.
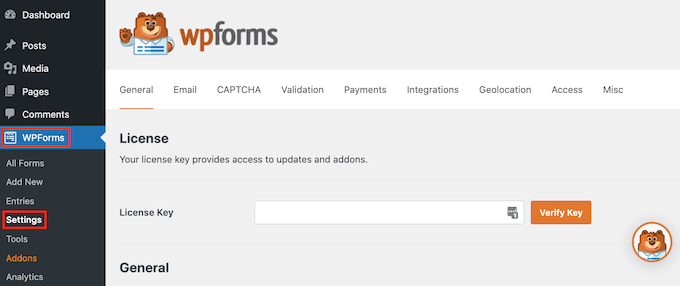
Upon activation, it is very important pass to WPForms » Settings and upload the license key. You’ll to find the important thing for your WPForms account space.
After coming into the license key, pass forward and click on the ‘Test Key’ button.
Subsequent, it is very important set up the Mailchimp addon.
You’ll do this through going to WPForms » Addons from the WordPress admin panel. From right here, navigate to the Mailchimp addon and click on the ‘Set up Addon’ button.

The addon will have to now set up and turn on.
As soon as that’s finished, merely pass to WPForms » Settings out of your WordPress dashboard and turn to the ‘Integrations’ tab.
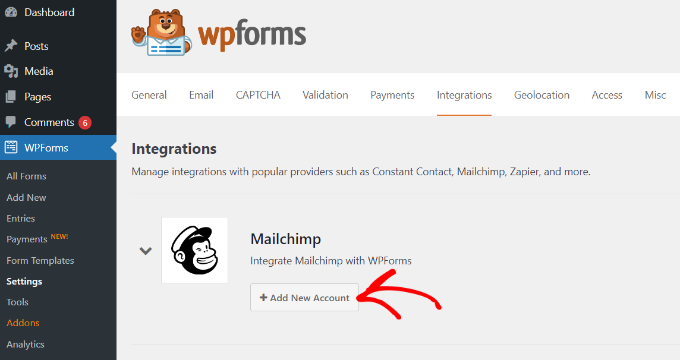
Subsequent, you’ll extend the Mailchimp settings after which click on the ‘+ Upload New Account’ button beneath Mailchimp.
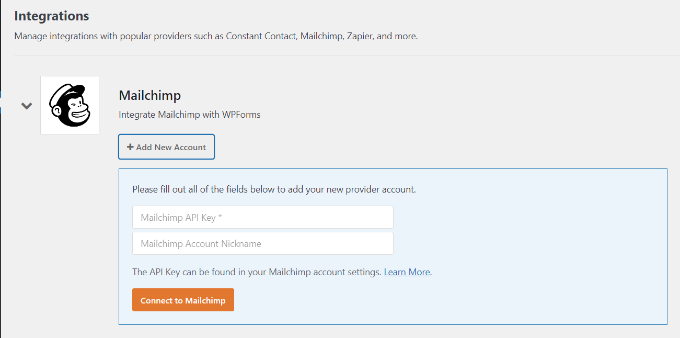
Once you do this, you’re going to see extra choices. To combine Mailchimp, you will have to input the API key and account nickname. This will likely permit WPForms to be in contact together with your Mailchimp account.
Developing Mailchimp API Keys for WPForms Integration
To create an API key to attach WPForms, you’re going to first wish to log in on your Mailchimp account.
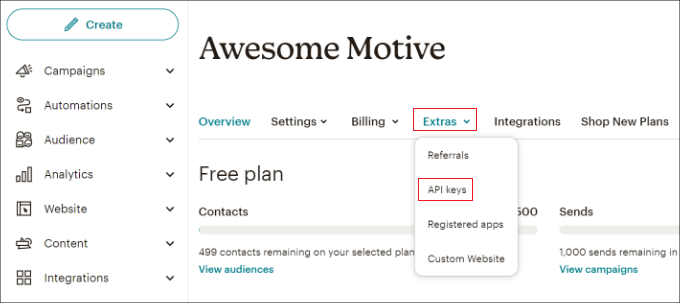
As soon as you might be logged in, merely click on in your avatar within the most sensible proper nook and make a choice the ‘Account & billing’ possibility.
At the subsequent web page, you’re going to see other account settings.
Merely click on the ‘Extras’ dropdown menu after which make a choice the ‘API keys’ possibility.
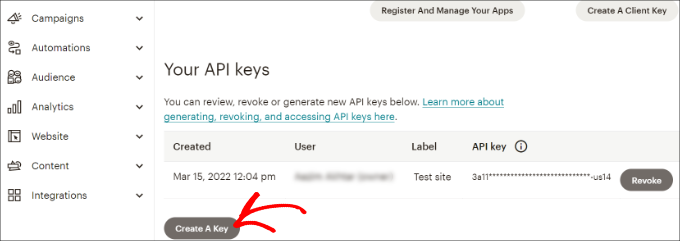
Subsequent, you’ll replica an present API key to make use of on your WPForms integration.
If you happen to haven’t generated a key prior to now, then merely click on the ‘Create A Key’ button.
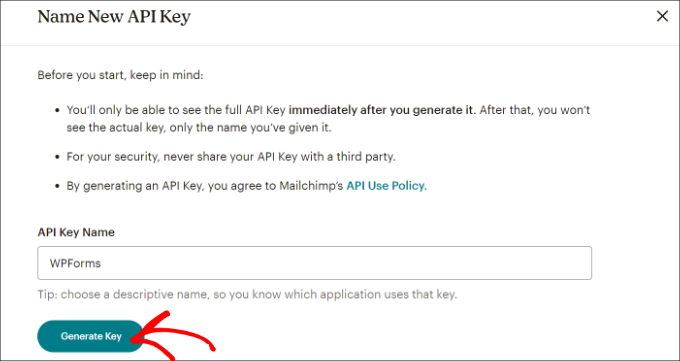
After that, you’ll input a reputation on your new API key.
As soon as that’s finished, simply click on the ‘Generate Key’ button.
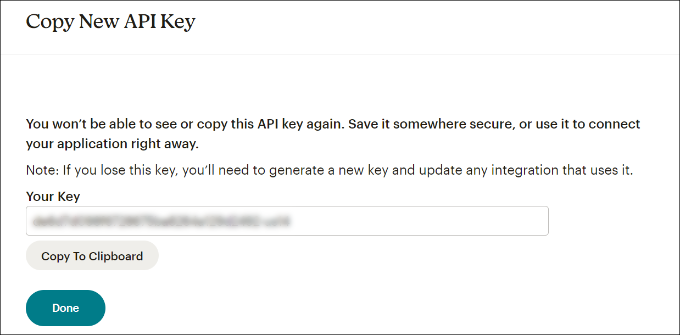
Subsequent, you’re going to see the brand new API key.
Pass forward and replica the important thing and click on the ‘Accomplished’ button.
You’ll now go back to the browser tab or window together with your WPFroms integration settings.
From right here, merely paste the important thing into the ‘API Key’ box. You’ll additionally upload a Mailchimp account nickname to keep in mind which account you might be attached to.
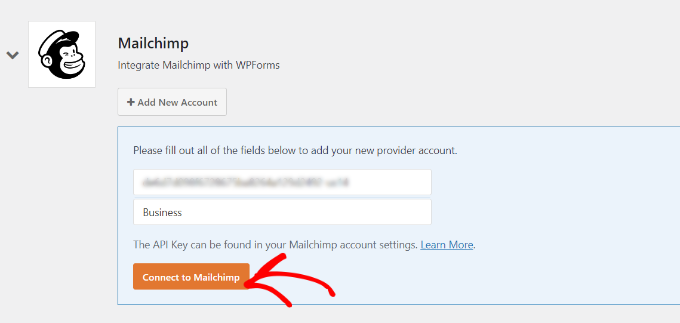
After coming into the important thing, pass forward and click on the ‘Hook up with Mailchimp’ button.
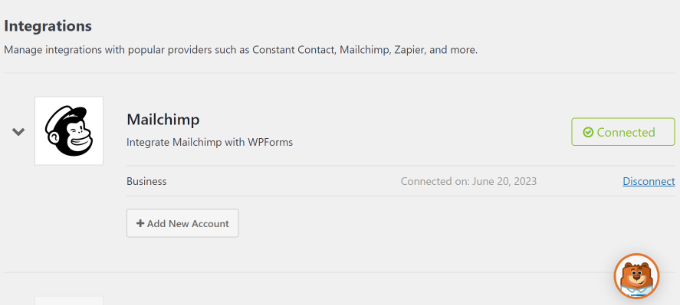
You will have to now see a inexperienced ‘Hooked up’ button subsequent to the Mailchimp settings, appearing that the e-mail advertising instrument is effectively built-in with WPForms.
Step 2: Design a Mailchimp Subscribe Shape With Customized Fields
Now that you’ve built-in Mailchimp with WPForms, the next move is to create a subscription shape with customized fields.
First, it is very important pass to WPForms » Upload New from the WordPress dashboard. Subsequent, you’ll input a reputation on the most sensible and make a choice a kind template.
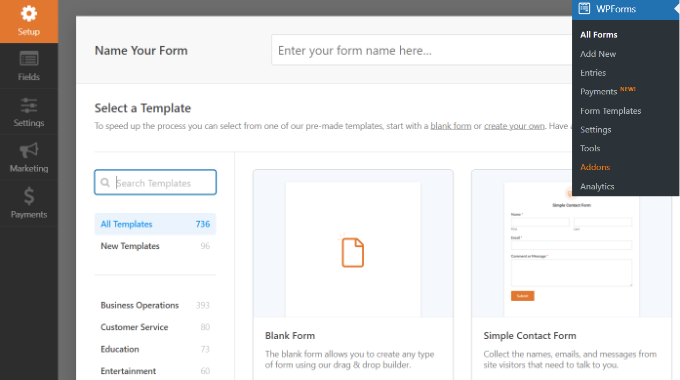
WPFomrs provides plenty of prebuilt shape templates, so you’ll temporarily pick out one and customise it.
It even provides shape templates for Mailchimp. As an example, you’ll create a signup touch shape, e-newsletter signup shape, or e mail advertising shape.
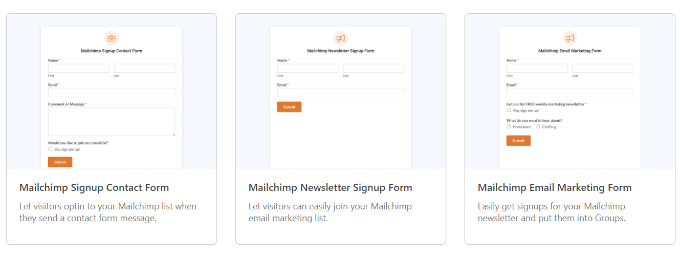
For this educational, we will be able to select the Mailchimp E-newsletter Signup Shape template.
At the subsequent display screen, you’re going to see the WPForms drag-and-drop shape builder. Right here, you’ll customise the shape and upload customized fields from the menu at the left.
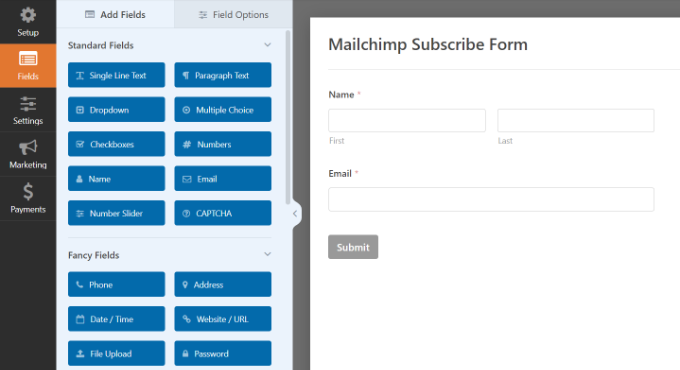
The default shape template will include a Identify and Electronic mail box.
On the other hand, you’ll merely drag any shape box and drop it onto the template. There are fields so as to add textual content, dropdown choices, more than one selection, telephone quantity, deal with, date and time, web page, password, and extra.
As an example, if you’re the usage of a trade telephone provider, then you’ll upload a Telephone box. This will likely let you ship SMS messages or succeed in out to subscribers by the use of telephone calls.
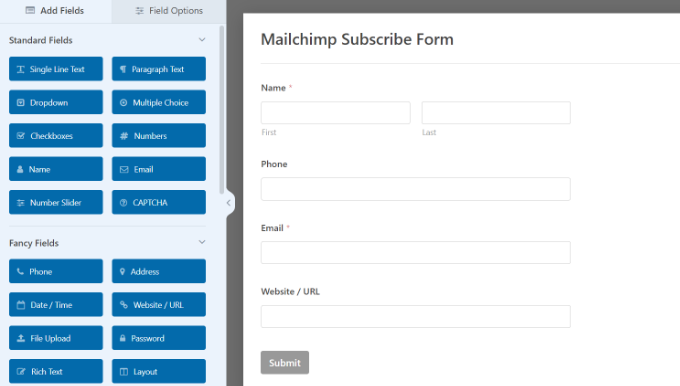
You’ll upload a checkbox box and make allowance customers to make a choice their pursuits. This manner, you’ll section your subscribers and ship them centered emails.
Subsequent, you’ll additional edit each and every shape box within the template. Merely select a box, and you’re going to see extra choices within the left panel.
As an example, we modified the choices within the Checkboxes shape box.
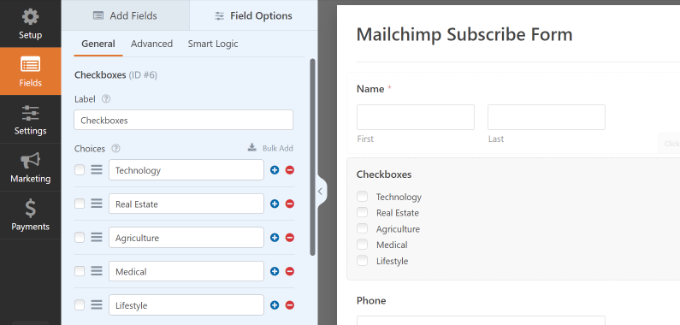
You’ll additionally edit the label of the shape box, make it a required box, upload photographs to the checkbox choices, and extra.
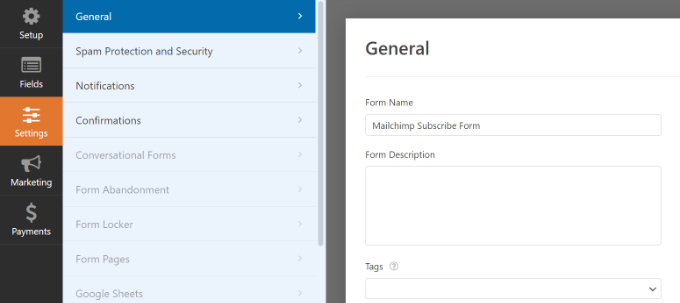
After getting completed including customized shape fields, transfer to the ‘Settings’ tab from the left menu. Within the Basic settings, you’ll alternate the shape’s identify and outline, upload tags, edit the publish button textual content, and extra.
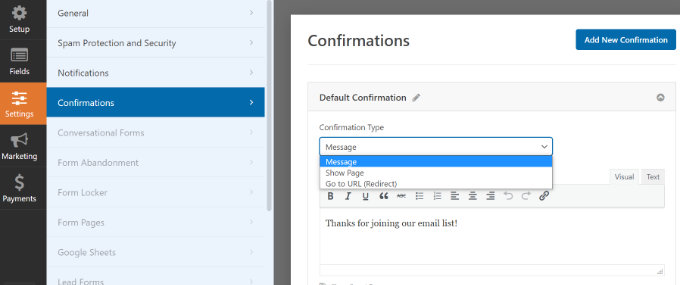
Subsequent, you’ll transfer to the ‘Confirmations’ tab and select what subscribers will see when they publish a kind.
WPForms means that you can display a message, a selected web page like a thanks web page, or redirect customers to a URL.
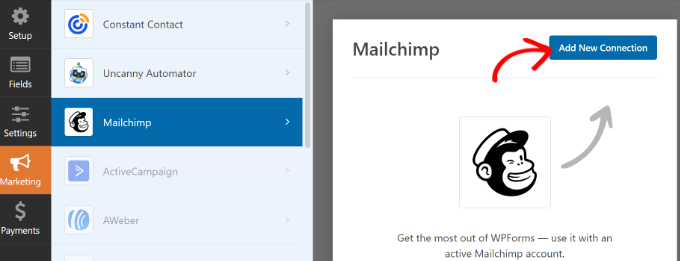
After that, you’ll pass to the ‘Advertising’ tab from the left panel after which make a choice Mailchimp.
From right here, merely click on the ‘Upload New Connection’ button.
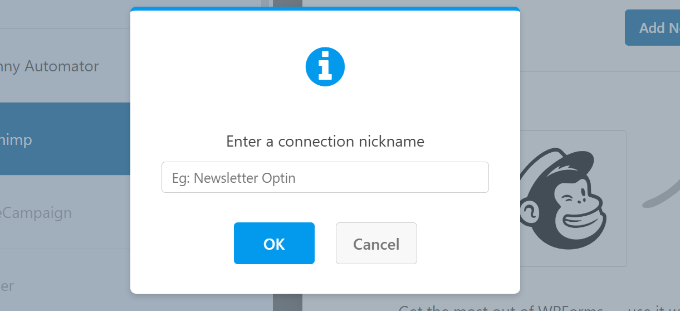
Subsequent, a small popup will open the place it is very important input the Mailchimp nickname.
After coming into it, pass forward and click on the ‘OK’ button.
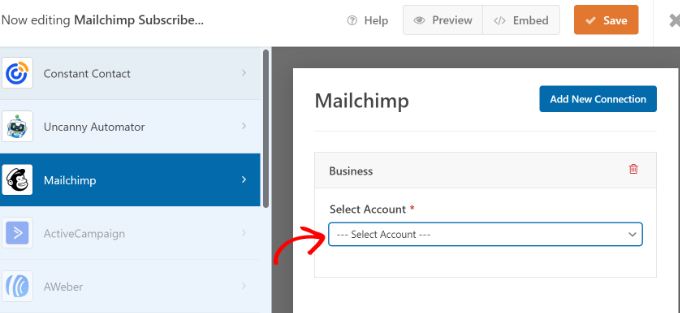
Subsequent, you’ll pick out the Mailchimp account that you just attached to previous.
Merely click on the ‘Make a choice Account’ dropdown menu and select your account.
After that, extra choices will seem.
You’ll pass forward and make a choice the target audience from the dropdown menu to which the brand new subscribers will likely be added.
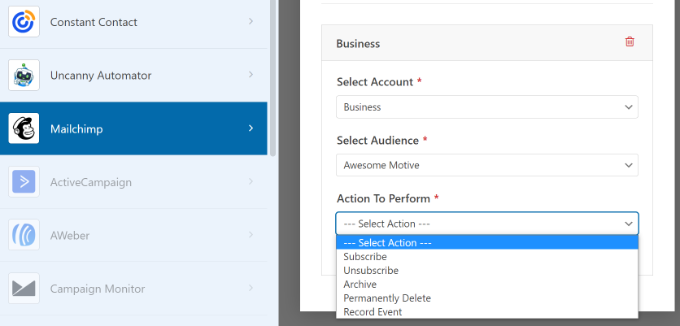
There are other movements to choose between, however we will be able to make a choice the ‘Subscribe’ possibility for this educational. This will likely upload the consumer as a brand new touch on your Mailchimp account.
Subsequent, you’ll scroll down to look further settings. As an example, there may be an possibility to select the WPForms box the place customers can input their e mail addresses.
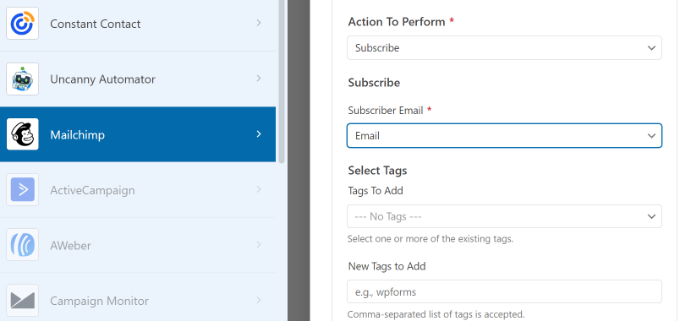
You even have choices so as to add tags to new subscribers and a word to the consumer’s profile.
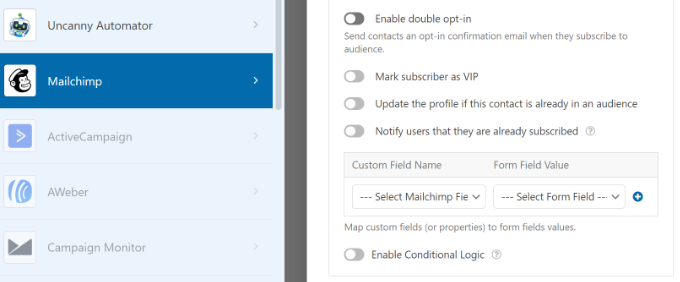
If you happen to scroll down additional, then you’re going to see extra not obligatory settings. As an example, you’ll allow double opt-in, mark the subscriber as VIP, replace their profile if the touch is already in an target audience, and extra.
Now, you’re ready so as to add your Mailchimp subscribe shape on your WordPress weblog or web page.
Within the WPForms shape builder, you’re going to see an ‘Embed’ possibility on the most sensible. Pass forward and click on at the ‘Save’ button to retailer your adjustments, after which click on the ‘Embed’ button.
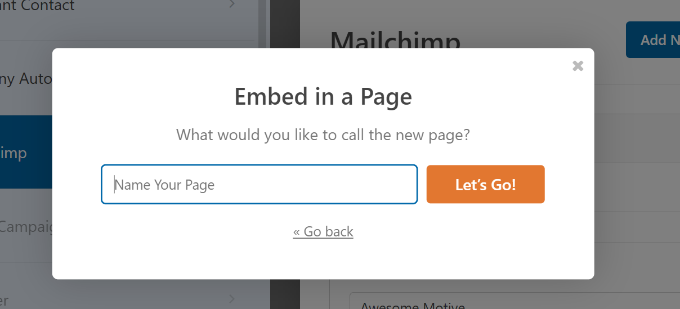
Subsequent, a popup will open the place it is very important make a choice an present web page or create a brand new web page.
For this educational, we will be able to use the ‘Create New Web page’ possibility.

After that, it is very important input a reputation on your new web page.
As soon as that’s finished, merely click on the ‘Let’s Pass!’ button.
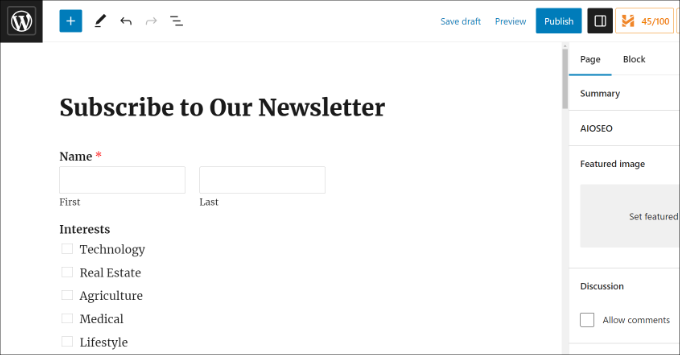
Subsequent, you’re going to see a preview of your shape within the WordPress content material editor.
You’ll then click on the ‘Submit’ button on the most sensible to make your Mailchimp subscribe shape reside.
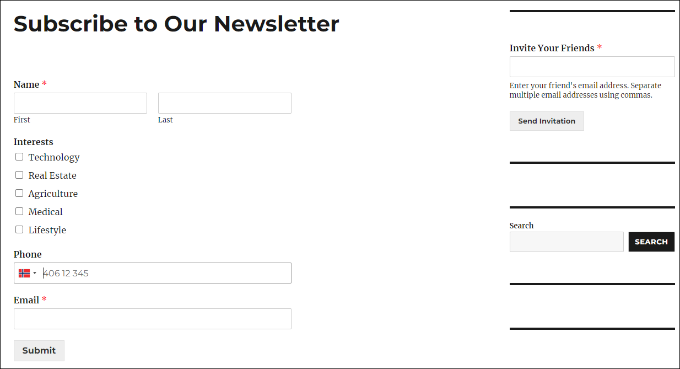
You will have now effectively created a Mailchimp subscribe shape with customized fields.
You’ll pass forward and seek advice from your web page to look the shape in motion.
You’ll additionally do much more with Mailchimp and WordPress. As an example, you’ll combine it with OptinMonster and display your subscribe paperwork in popup campaigns.
To be told extra, please see our final information to the usage of Mailchimp and WordPress.
We are hoping this text helped you discover ways to create a Mailchimp subscribe shape in WordPress with customized fields. You might also need to see our information on simple tactics to develop your e mail listing quicker and our skilled selections for the will have to have WordPress plugins to develop your web page.
If you happen to preferred this text, then please subscribe to our YouTube Channel for WordPress video tutorials. You’ll additionally to find us on Twitter and Fb.
The put up How one can Create a Mailchimp Subscribe Shape in WordPress With Customized Fields first seemed on WPBeginner.
WordPress Maintenance