
Divi’s inbuilt Overflow Choices make is tremendous easy so as to add overflow css homes (ie. visual, hidden, scroll) to any component at the web page. That is useful for developing distinctive designs and scrollable content material comfortably. On this submit, I’m going to move via what those overflow choices in reality do. And, I’ll stroll via 3 useful tactics to make use of overflow by yourself Divi website online.
Let’s get began.
Contents
- 1 Working out Divi’s Overflow Choices
- 2 3 Useful Tactics to Use Divi’s Overflow Choices in Divi
- 3 Overflow
- 4 Ultimate Ideas
Working out Divi’s Overflow Choices

Divi’s overflow choices let you set the css overflow assets of a component to one of the most following values:
- Default – The default worth is visual (see underneath).
- Visual – The overflowing content material will stay visual and now not transform clipped when extending out of doors the field. Since that is the default environment in Divi, you’re going to hardly ever want to choose it.
- Scroll – Overflowing content material can be hidden, however customers will have the ability to scroll during the hidden content material both vertically or horizontally.
- Hidden – Overflowing content material out of doors the field can be hidden (with out the facility to scroll)
- Auto – This feature will interact scroll capability every time important (ie. the content material extends past the field). This is able to turn out to be useful for designs with a suite top or width that want to have scrolling functions on smaller browsers.
Divi has an overflow choice for each horizontal and vertical overflow permitting you to set other assets values for each and every. This is useful for when you wish to have so as to add vertical scroll capability to a component however you don’t need a scrollbar to look horizontally as neatly.
Listed here are a couple of fast illustrations taken from the designs on this instructional that will help you know the way overflow choices paintings.
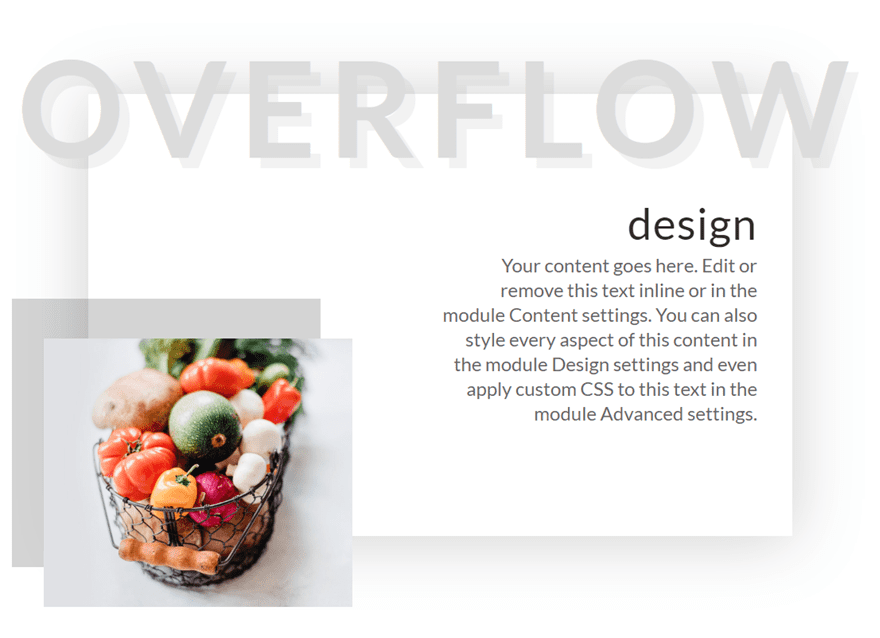
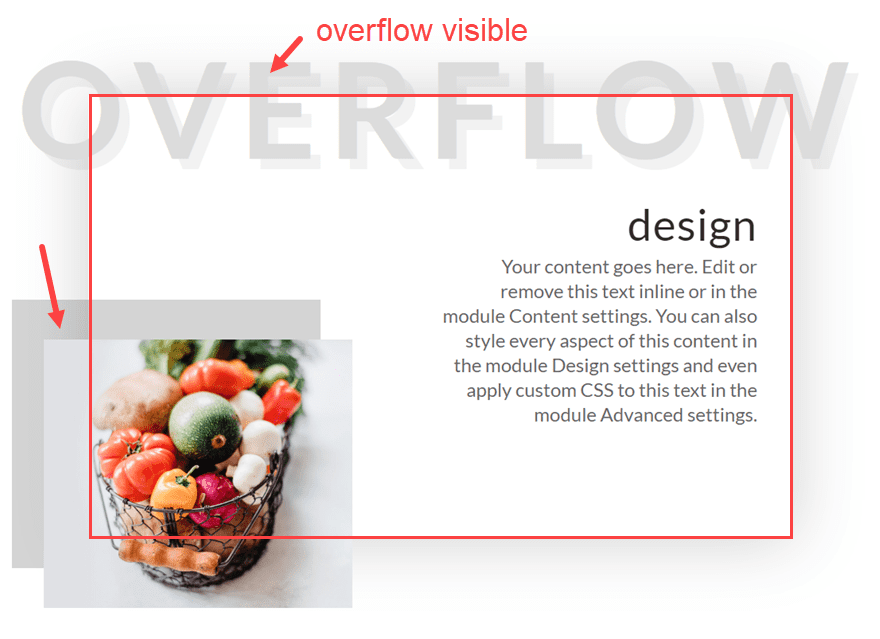
Overflow Visual (default)
On this instance, the content material that has been located out of doors of the row container stays visual, which is the default environment for all parts in Divi.
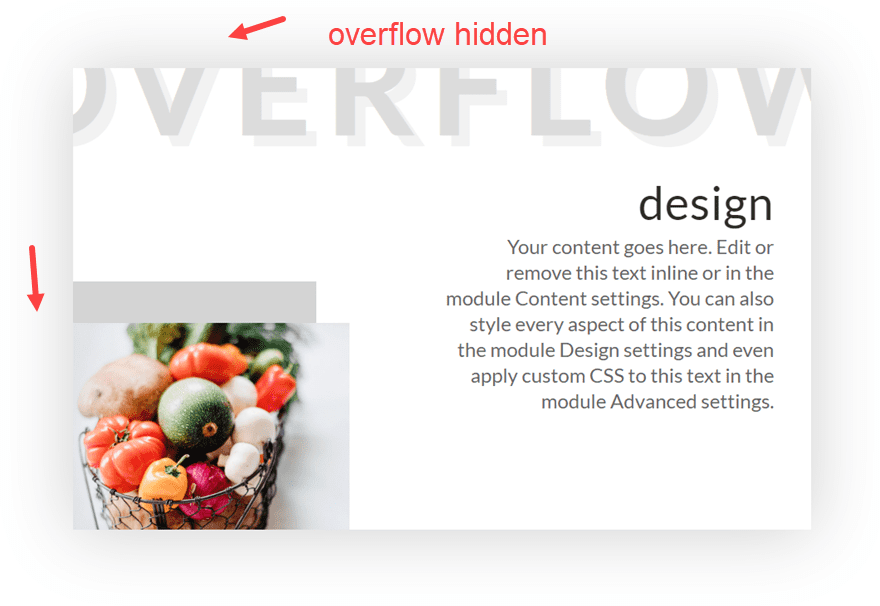
Overflow Hidden
When you upload the overflow hidden assets to the row, the content material out of doors of the field turns into clipped and hidden from view solely.
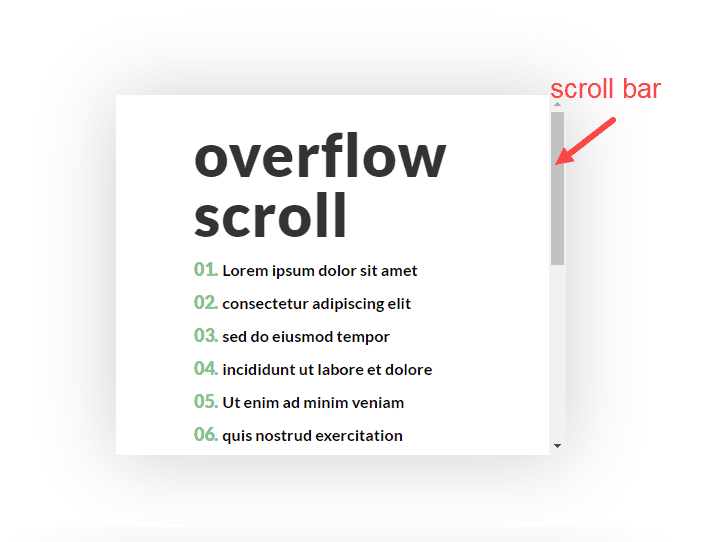
Overflow Scroll
The usage of overflow scroll lets you conceal the content material out of doors the field container (similar to overflow hidden). The primary distinction is {that a} scroll bar seems permitting the person to scroll during the content material that exists past the boundaries of the container.
For instance, here’s a textual content module with a top of 400px. The content material of the textual content module extends past the textual content module however stays visual through default.
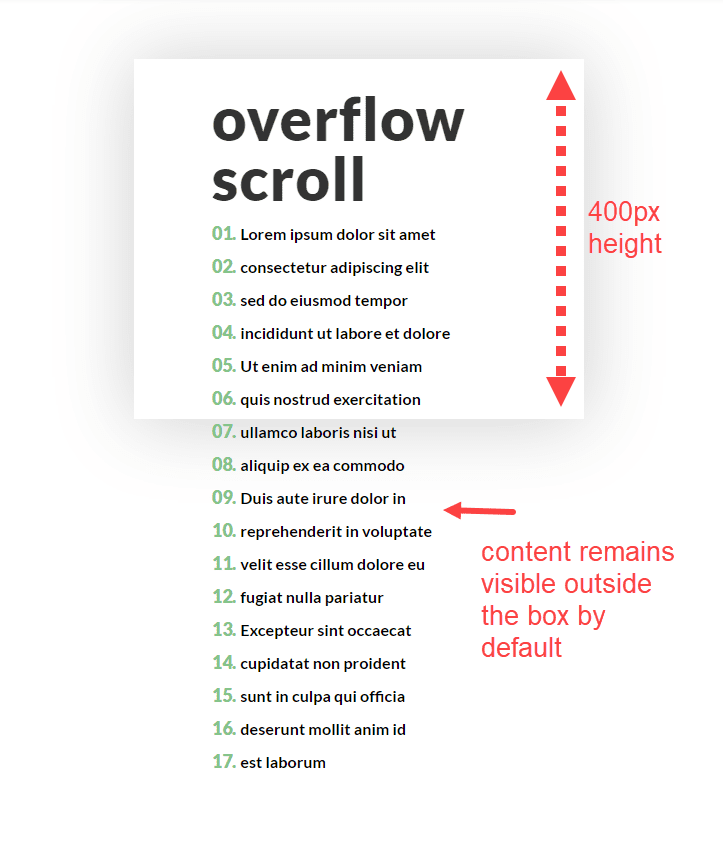
However when you upload the vertical overflow scroll assets to the textual content module, the scroll bar seems permitting the person to scroll during the hidden content material.
Now that you recognize the overflow choices slightly higher, let’s dive in to development some running examples of useful tactics to make use of them in actual lifestyles.
3 Useful Tactics to Use Divi’s Overflow Choices in Divi
#1 The usage of Overflow Hidden to Clip Overflowing Content material for Distinctive Designs
To know the way to make use of the overflow hidden assets, we’re going to create a snappy instance design with overflowing textual content and an overflowing symbol. Then we can see how the design adjustments when environment our row to overflow hidden.
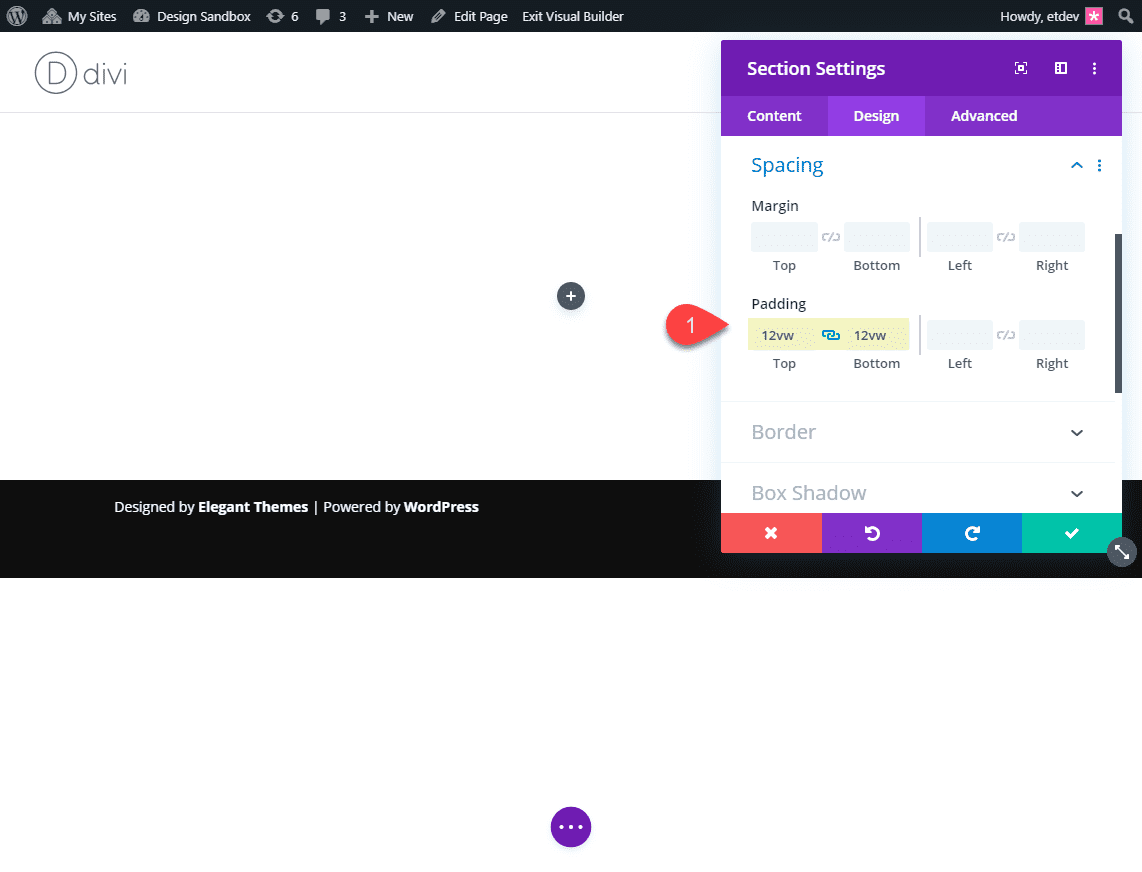
First, create an ordinary phase with a one column row. Sooner than we commence including modules, let’s give the phase the next padding:
Customized Padding: 12vw best, 12vw backside
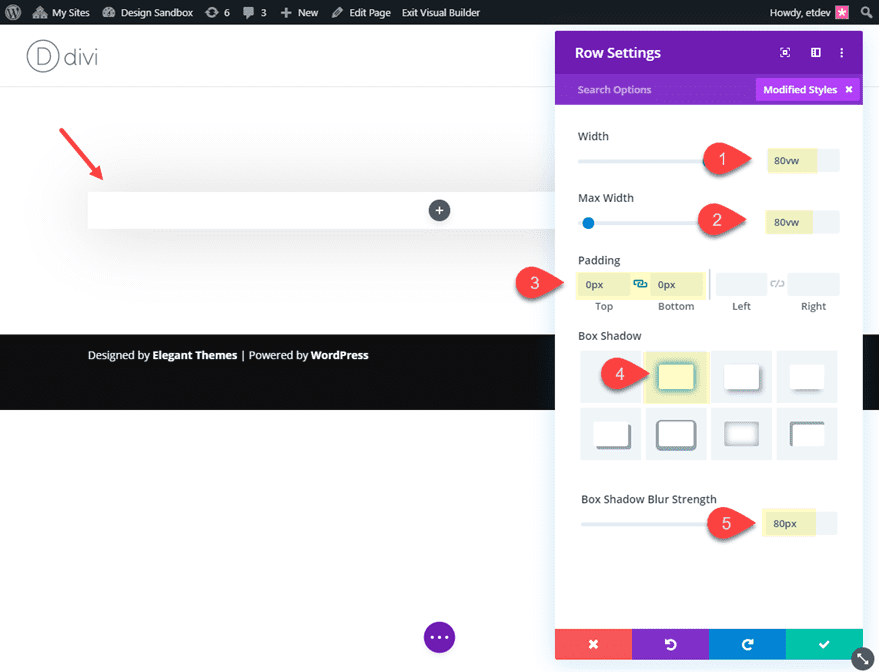
Then replace the row settings as follows:
Width: 80vw
Max Width: 80vw
Padding: 0px best, 0px backside
Field Shadow: see screenshot
Field Shadow Blur Energy: 80px
Then upload a textual content module to the row and replace the next textual content module settings:
First upload an h2 heading within the content material field as follows:
Overflow
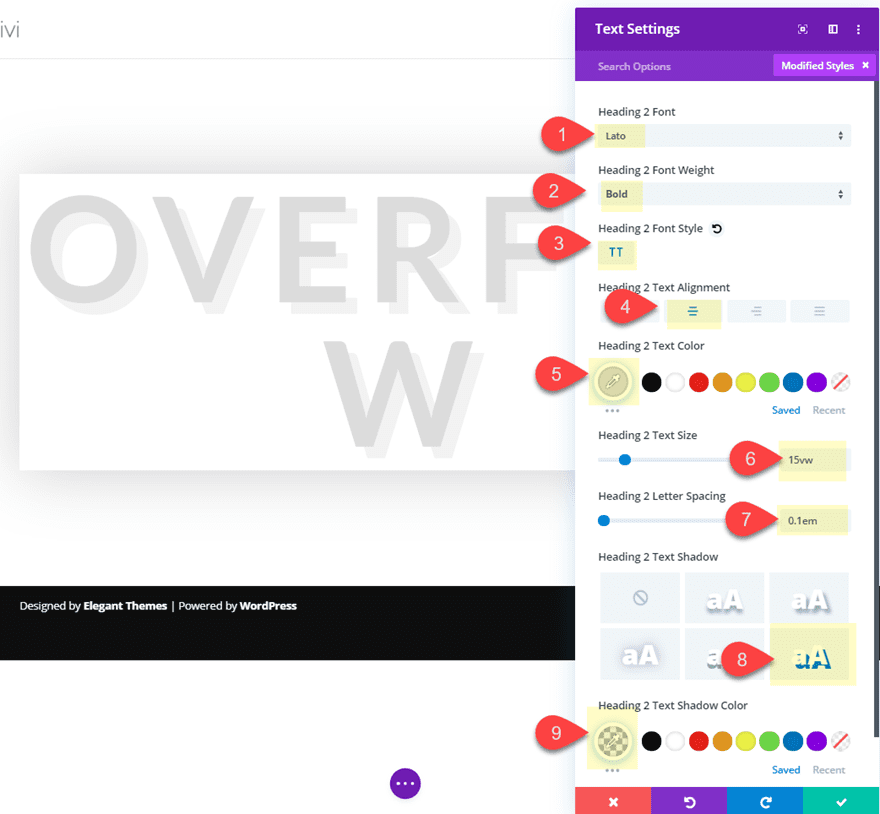
Then replace the design settings as follows:
Heading 2 Font: Lato
Heading 2 Font Weight: Daring
Heading 2 Font Taste: TT
Heading 2 Textual content Alignment: middle
Heading 2 Textual content Colour: #dddddd
Heading 2 Textual content Measurement: 15vw
Heading 2 Letter Spacing: 0.1em
Heading 2 Textual content Shadow: see screenshot
Heading 2 Textual content Shadow Colour: rgba(0,0,0,0.05)
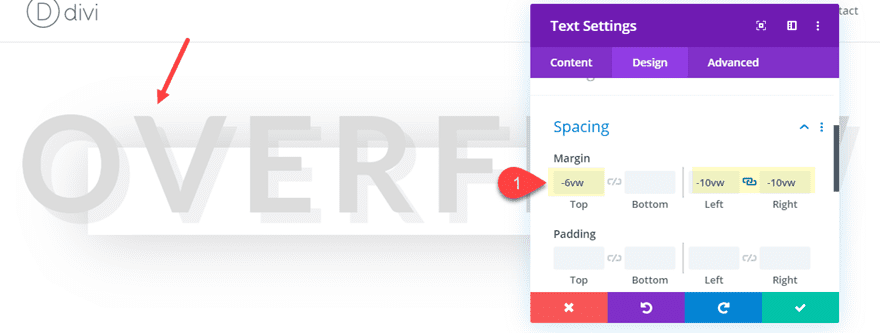
Now, to make the textual content overflow the row content material space, we want to use customized margins. Upload the next customized margin to the textual content module to make it overflow above the row (vertically) and on each and every aspect of the row (horizontally).
Margin: -6vw best, -10vw left, -10vw proper
Subsequent, upload any other textual content module underneath the only you simply created and replace the next:
Content material:
design
Your content material is going right here. Edit or take away this newsletter inline or within the module Content material settings. You'll additionally taste each side of this content material within the module Design settings or even follow customized CSS to this newsletter within the module Complicated settings.
(By means of the best way, code snippets like this are an effective way to make the most of the overflow scroll choice.)
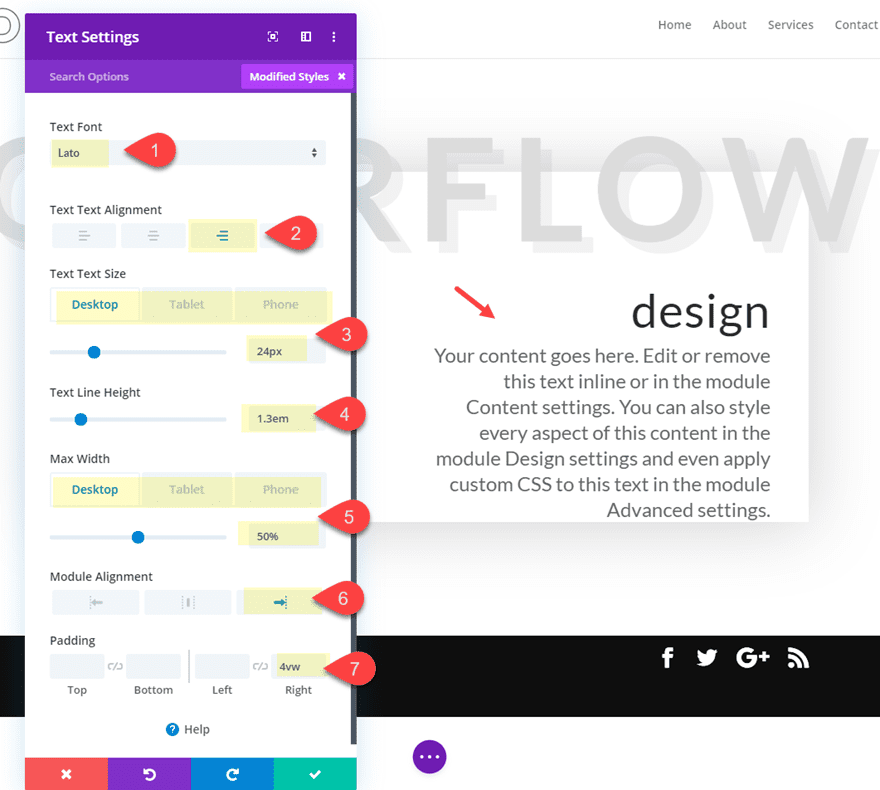
Textual content Font: Lato
Textual content Textual content Alignment: proper
Textual content Textual content Measurement: 24px (desktop), 16px (telephone)
Textual content Line Peak: 1.3em
Max Width: 50%
Module Alignment: proper
Padding: 4vw proper
Now, let’s upload a picture that overflows out of doors the row. Create a brand new symbol module underneath the 2 textual content modules after which add a picture of your selection.
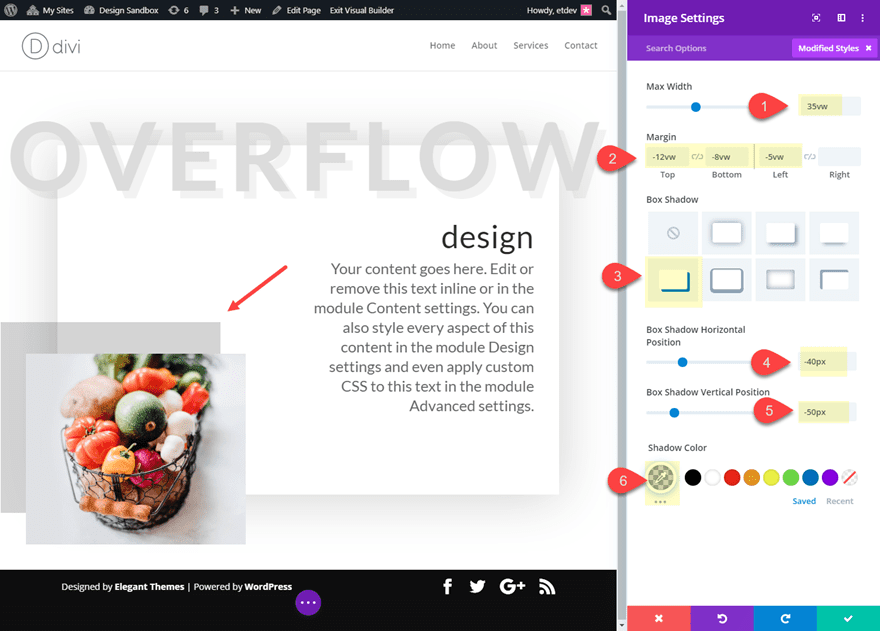
Then replace the picture settings as follows:
Max Width: 35vw
Margin: -12vw best, -8vw backside, -5vw left
Field Shadow: see screenshot
Field Shadow Horizontal Place: -40px
Field Shadow Vertical Place: -50px
Shadow Colour: rgba(0,0,0,0.17)
Design with Row set to Overflow Visual (default)
Now let’s take a look at the design retaining our row overflow set to visual (the default).
As you’ll see, this default overflow visual choices is superb for developing some stunning and trendy designs.
Design with Row set to Overflow Hidden
Now let’s see what occurs once we use the Overflow Hidden assets for the row. Open the row settings and replace the next:
Horizontal Overflow: hidden
Vertical Overflow: hidden

This is the outcome.
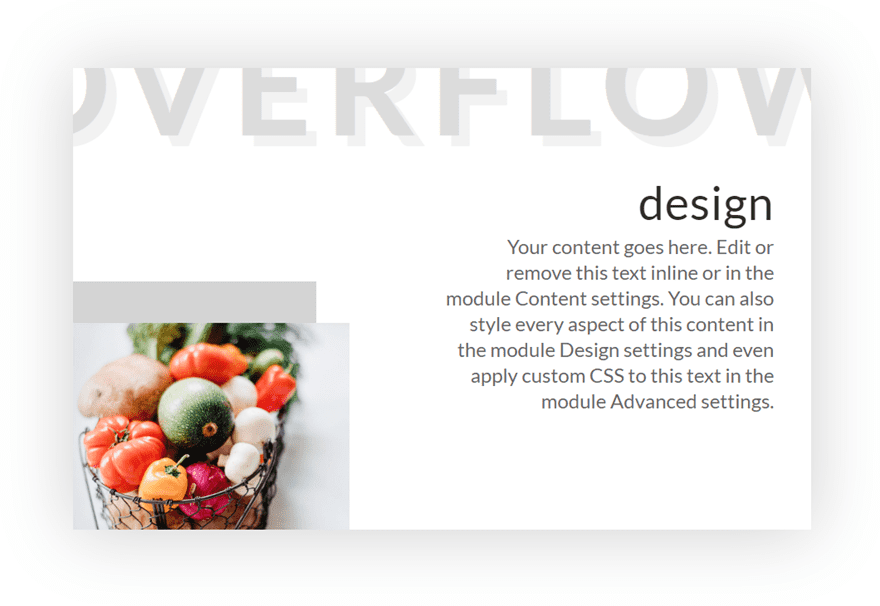
As you’ll see, the overflowing content material (the highest heading and the picture) is now clipped and hidden to create a singular design. And with this setup, you’ll simply make the most of the become choices to scale and transfer the weather round to get the design excellent.
#2 The usage of Overflow Scroll to Permit Customers to Scroll Via Content material Vertically
This subsequent instance introduces vertical overflow scroll. This overflow choice is useful for including scrollable content material to lists of hyperlinks or assets. You’ll flip any module or row right into a container for scrollable content material. Right here’s how you can do it with a textual content module.
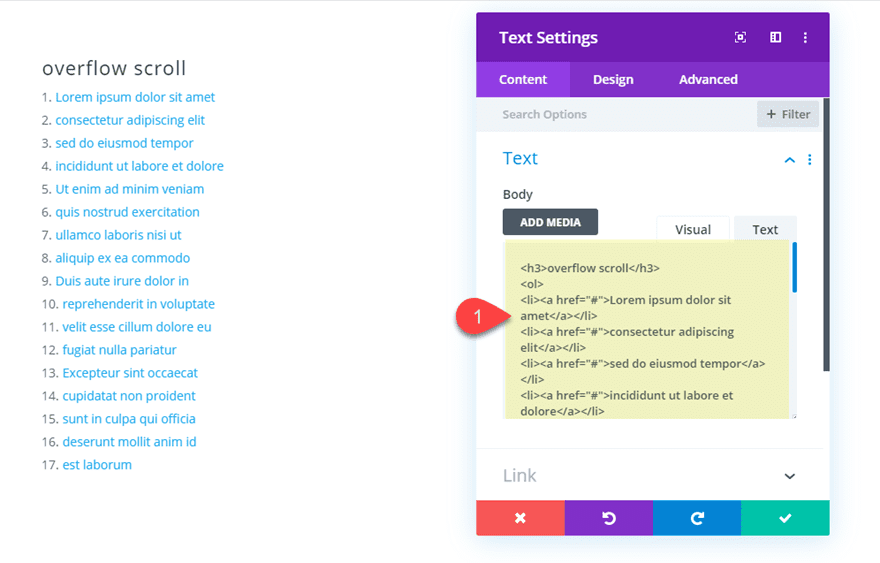
Create an ordinary phase with a one-column row. Then upload a textual content module with the next content material:
overflow scroll
- Lorem ipsum dolor sit amet
- consectetur adipiscing elit
- sed do eiusmod tempor
- incididunt ut labore et dolore
- Ut enim ad minim veniam
- quis nostrud exercitation
- ullamco laboris nisi ut
- aliquip ex ea commodo
- Duis aute irure dolor in
- reprehenderit in voluptate
- velit esse cillum dolore eu
- fugiat nulla pariatur
- Excepteur sint occaecat
- cupidatat non proident
- sunt in culpa qui officia
- deserunt mollit anim id
- est laborum
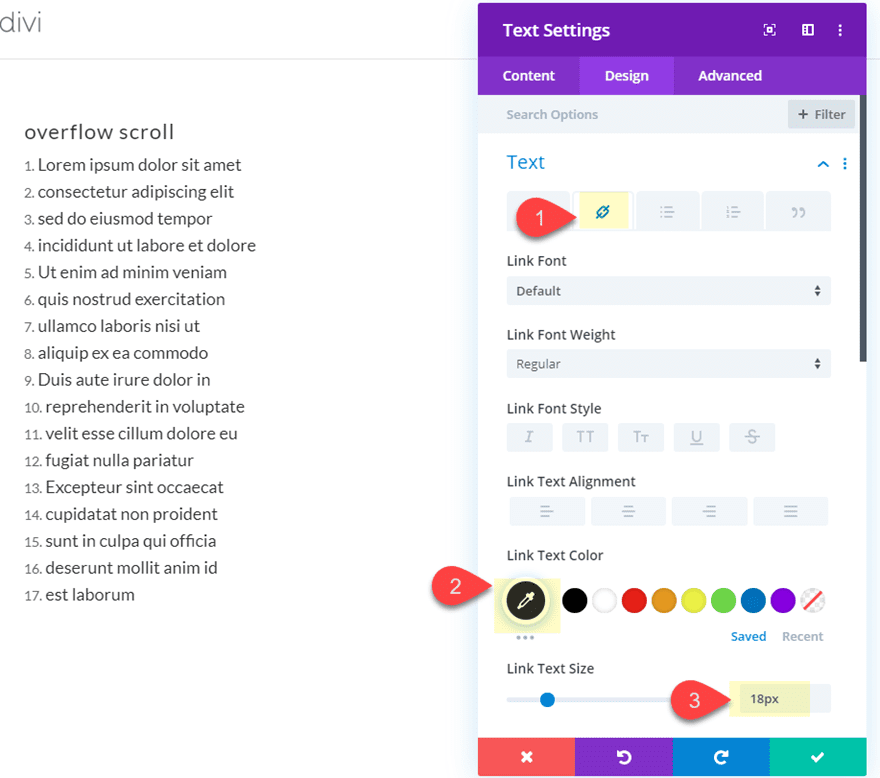
Then replace the textual content module design settings as follows:
Textual content Font: Lato

Hyperlink Textual content colour: #333333
Hyperlink Textual content Measurement: 18px
Ordered Checklist Textual content Colour:
Ordered Checklist Textual content Measurement: 20px
Ordered Checklist Line Peak: 1.8em
Ordered Checklist Taste Kind: decimal-leading-zero

Heading 3 Font Weight: Extremely Daring
Heading 3 Textual content Measurement: 50px
Max Width: 500px
Padding: 3% best, 3% backside, 8% left, 8% proper
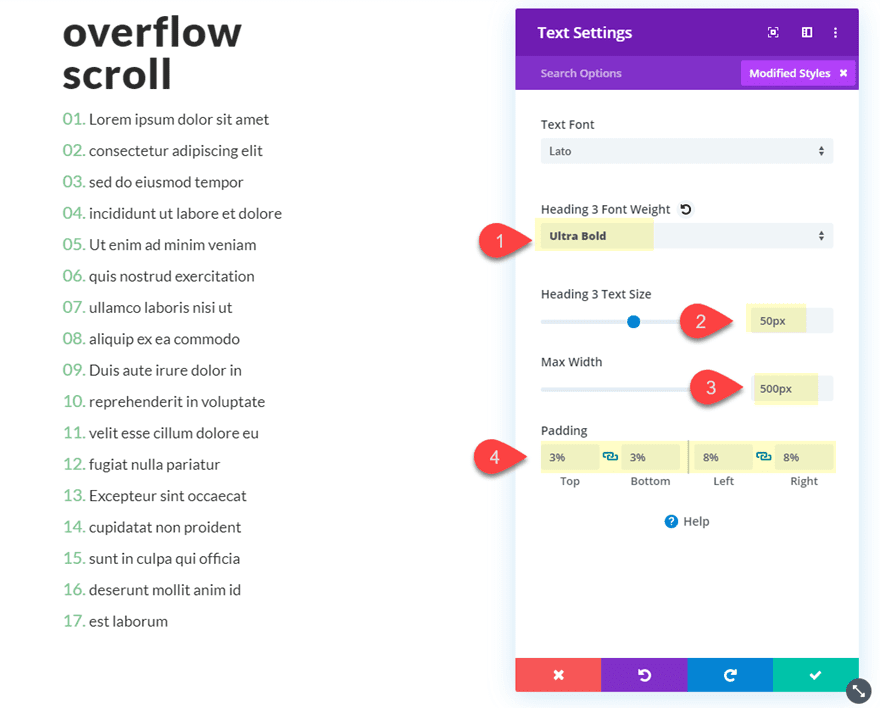
Here’s what the textual content module looks as if earlier than we give in a top and overflow scroll.
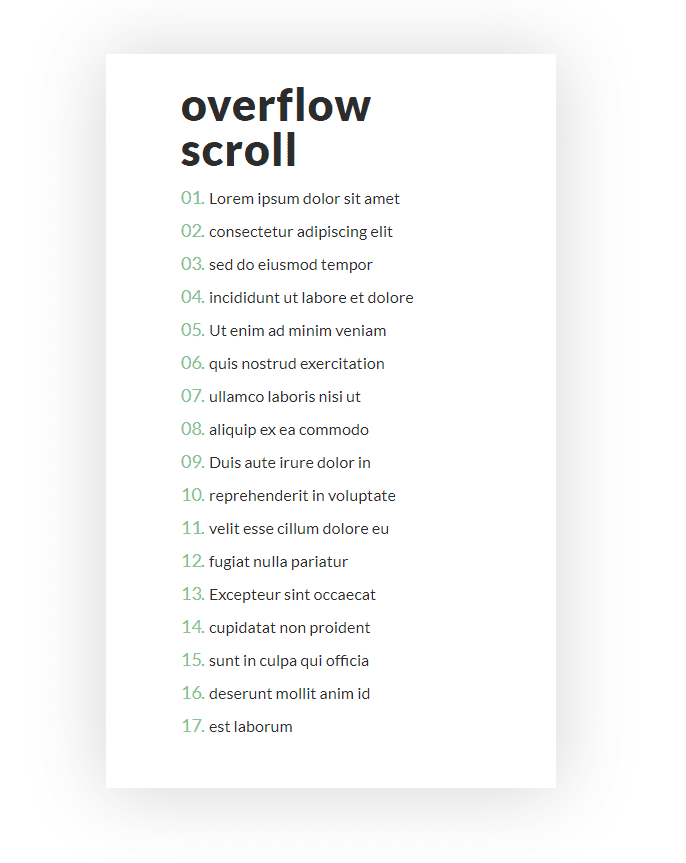
Now, replace the textual content module with a max top of 400px. Because the default overflow worth for the textual content module is visual, you’re going to realize the textual content overflowing underneath the module.
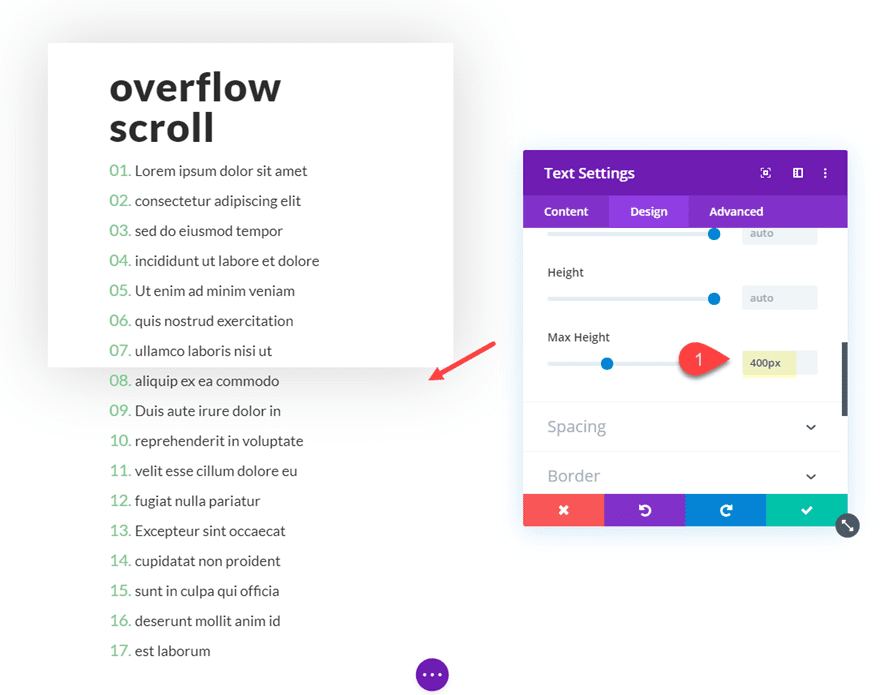
All we want to do now could be set the vertical overflow to scroll as follows:
Vertical Overflow: scroll

This is the overall design.
For extra examples on how you can use vertical overflow scroll for your Divi website online, take a look at those posts:
- How to Create a Scroll Gallery Mockup with Divi’s New Overflow Options
- How to Design a Scrollable Recent Posts Widget Area in Divi
#3 The usage of Overflow Scroll to Permit Customers to Scroll Via Content material Horizontally
The usage of overflow scroll for horizontal scrolling is otherwise to stay your content material out there from one concise location. Plus, it is usually an effective way to include side-swiping capability on cell and not using a plugin.
To turn you how you can do it, we’re going to construct a snappy instance in combination.
First, create an ordinary phase with a one column row.
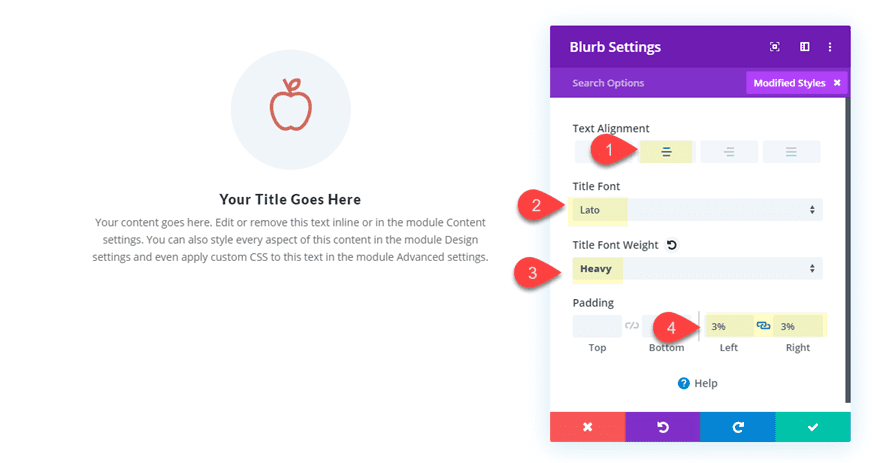
Then upload a blurb module to the row.
You’ll change the default symbol with a brand new symbol or icon. Then replace the design settings with a couple of tweaks:
Textual content Alignment: middle
Name Font: Lato
Name Font Weight: Heavy
Padding: 3% left, 3% proper
Replica the blurb module 5 occasions so that you’ve got a complete of 6 blurbs to your row column.
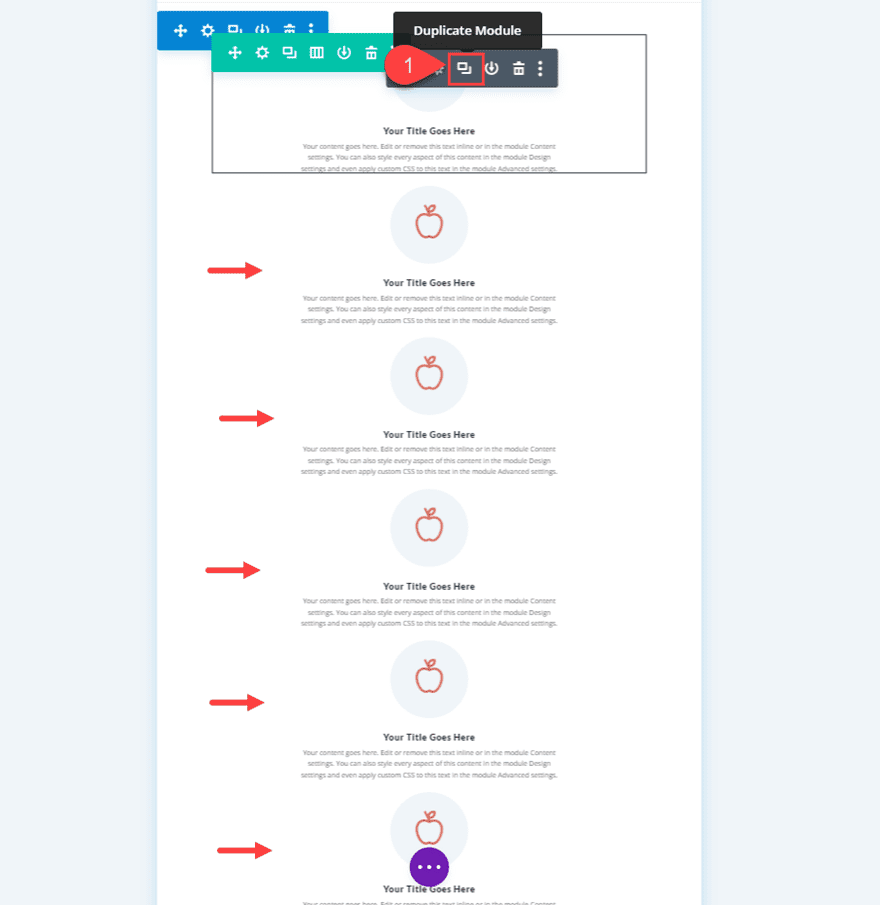
Then replace the row settings with the next customized CSS to the Column Primary Component.
show: grid;
grid-template-columns: repeat(6, 50%);
This may increasingly give your column of blurbs right into a horizontal grid structure with 6 columns each and every with a width this is 50% of the container (or on this case the row). Which means two blurbs/columns will occupy the gap within the row. The opposite 4 modules will lengthen out of doors the row to the suitable aspect. That is the place the overflow scroll assets is useful. Replace the next overflow choice:
Horizontal Overflow: Scroll
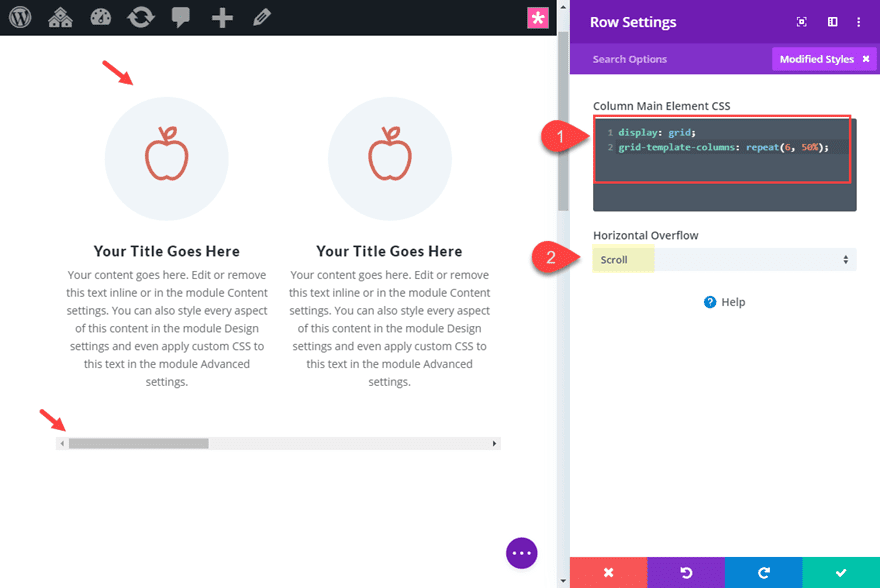
Now you’ll modify the width of the row as wanted and the 2 blurbs will all the time line up effectively. This is the overall design.
I added a field shadow to the row so you’ll see the field of content material a little bit higher. Realize how two blurbs will show to begin with till the person scrolls to the suitable.
For more information, take a look at the entire submit on creating horizontal swipe cards.
Ultimate Ideas
Overlapping parts and positioning parts out of doors of the everyday grid structure is turning into extra commonplace in this day and age. Most commonly, that is completed purely for design functions. Working out how you can use Divi’s overflow choices will mean you can know the way to cover or display content material out of doors of a container to create those distinctive designs. And, figuring out overflow scroll may even turn out to be useful for including scrollable content material for your web page.
I’m hoping this text has helped shed some mild at the overflow assets and the way you’ll use it on your subsequent Divi venture.
I sit up for listening to from you within the feedback.
Cheers!
The submit 3 Helpful Ways to Use Overflow Options in Divi gave the impression first on Elegant Themes Blog.
WordPress Web Design