Searching for a fab method to show off photographs in your subsequent Divi site? Stay on studying, as a result of on this put up, we’re going to maintain 3 symbol turn into hover results that may lend a hand raise the full feel and look of your web page. You’ll be capable of practice the A to Z sport procedure of 3 other examples or even obtain them for fast use. The principle objective of this instructional is inspiring you to mix Divi’s new turn into choices with the already-existing choices in the market to create gorgeous internet design.
Let’s get to it!
Contents
- 1 Preview
- 2 Obtain The Symbol Change into Hover Results for FREE
- 3 Obtain For Loose
- 4 You may have effectively subscribed. Please take a look at your electronic mail cope with to verify your subscription and get get right of entry to to unfastened weekly Divi format packs!
- 5 Common Steps
- 6 Recreate Instance #1
- 7 Recreate Instance #2
- 8 Recreate Instance #3
- 9 Preview
- 10 Ultimate Ideas
Preview
Earlier than we dive into the academic, let’s take a snappy take a look at the end result of all 3 examples throughout other display screen sizes.
Desktop
Instance #1
Instance #2
Instance #3
Cell
Instance #1
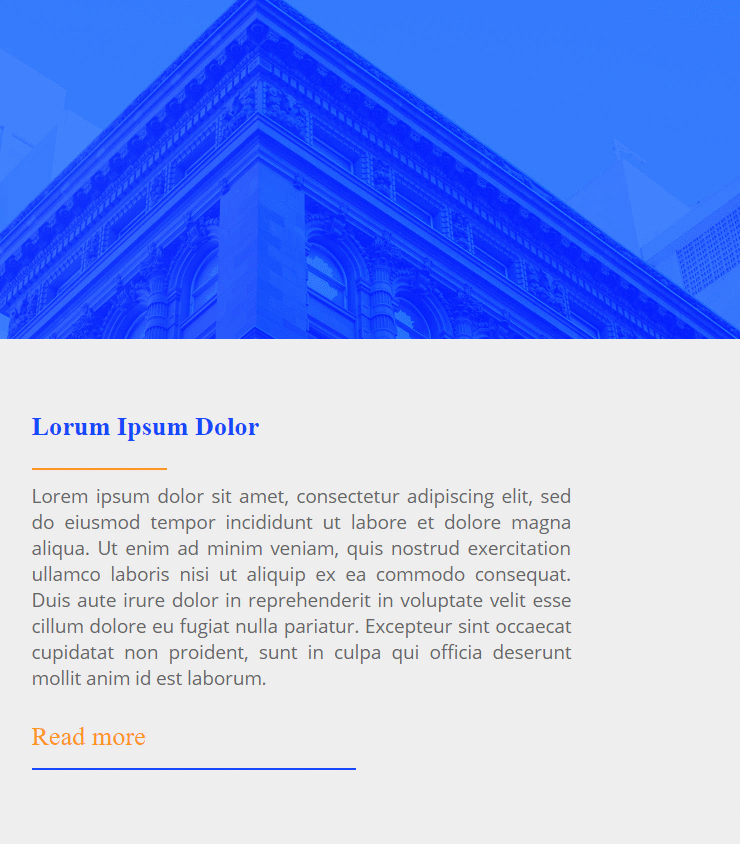
Instance #2

Instance #3
Obtain The Symbol Change into Hover Results for FREE
To put your palms at the unfastened symbol turn into hover results, you are going to first wish to obtain them the use of the button underneath. To achieve get right of entry to to the obtain it is very important subscribe to our Divi Day by day electronic mail listing through the use of the shape underneath. As a brand new subscriber, you are going to obtain much more Divi goodness and a unfastened Divi Structure pack each Monday! In case you’re already at the listing, merely input your electronic mail cope with underneath and click on obtain. You’re going to now not be “resubscribed” or obtain further emails.
@media most effective display screen and ( max-width: 767px ) {.et_bloom .et_bloom_optin_1 .carrot_edge.et_bloom_form_right .et_bloom_form_content:ahead of, .et_bloom .et_bloom_optin_1 .carrot_edge.et_bloom_form_left .et_bloom_form_content:ahead of { border-top-color: #ffffff !necessary; border-left-color: clear !necessary; }
}.et_bloom .et_bloom_optin_1 .et_bloom_form_content button { background-color: #f92c8b !necessary; } .et_bloom .et_bloom_optin_1 .et_bloom_form_content .et_bloom_fields i { shade: #f92c8b !necessary; } .et_bloom .et_bloom_optin_1 .et_bloom_form_content .et_bloom_custom_field_radio i:ahead of { background: #f92c8b !necessary; } .et_bloom .et_bloom_optin_1 .et_bloom_border_solid { border-color: #f7f9fb !necessary } .et_bloom .et_bloom_optin_1 .et_bloom_form_content button { background-color: #f92c8b !necessary; } .et_bloom .et_bloom_optin_1 .et_bloom_form_container h2, .et_bloom .et_bloom_optin_1 .et_bloom_form_container h2 span, .et_bloom .et_bloom_optin_1 .et_bloom_form_container h2 sturdy { font-family: “Open Sans”, Helvetica, Arial, Lucida, sans-serif; }.et_bloom .et_bloom_optin_1 .et_bloom_form_container p, .et_bloom .et_bloom_optin_1 .et_bloom_form_container p span, .et_bloom .et_bloom_optin_1 .et_bloom_form_container p sturdy, .et_bloom .et_bloom_optin_1 .et_bloom_form_container shape enter, .et_bloom .et_bloom_optin_1 .et_bloom_form_container shape button span { font-family: “Open Sans”, Helvetica, Arial, Lucida, sans-serif; } p.et_bloom_popup_input { padding-bottom: 0 !necessary;}

Obtain For Loose
Sign up for the Divi Newlsetter and we can electronic mail you a duplicate of without equal Divi Touchdown Web page Structure Pack, plus lots of different wonderful and unfastened Divi sources, pointers and tips. Practice alongside and you are going to be a Divi grasp very quickly. In case you are already subscribed merely sort to your electronic mail cope with underneath and click on obtain to get right of entry to the format pack.
You may have effectively subscribed. Please take a look at your electronic mail cope with to verify your subscription and get get right of entry to to unfastened weekly Divi format packs!
Common Steps
Upload New Segment
Spacing
Earlier than we recreate every probably the most examples in my opinion, we’ll undergo some common steps. Upload a brand new common segment for your web page the use of the next margin and padding values:
- Most sensible Margin: 200px
- Backside Margin: 200px
- Most sensible Padding: 0px
- Backside Padding: 0px

Upload New Row
Column Construction
Proceed through including a brand new row the use of the next column construction:

Column 2 Background Colour
With out including any modules but, open the row settings and upload a background shade to the second one column.
- Column 2 Background Colour: #efefef

Sizing
Cross to the sizing settings subsequent and make allowance the row to absorb all of the width of the display screen.
- Use Customized Gutter Width: Sure
- Gutter Width: 1
- Equalize Column Heights: Sure
- Width: 100%
- Max Width: 100%

Spacing
Upload the next customized padding values subsequent:
- Most sensible Padding: 0px
- Backside Padding: 0px
- Column 2 Most sensible Padding: 10vw
- Column 2 Backside Padding: 10vw
- Column 2 Left Padding: 5vw
- Column 2 Proper Padding: 5vw

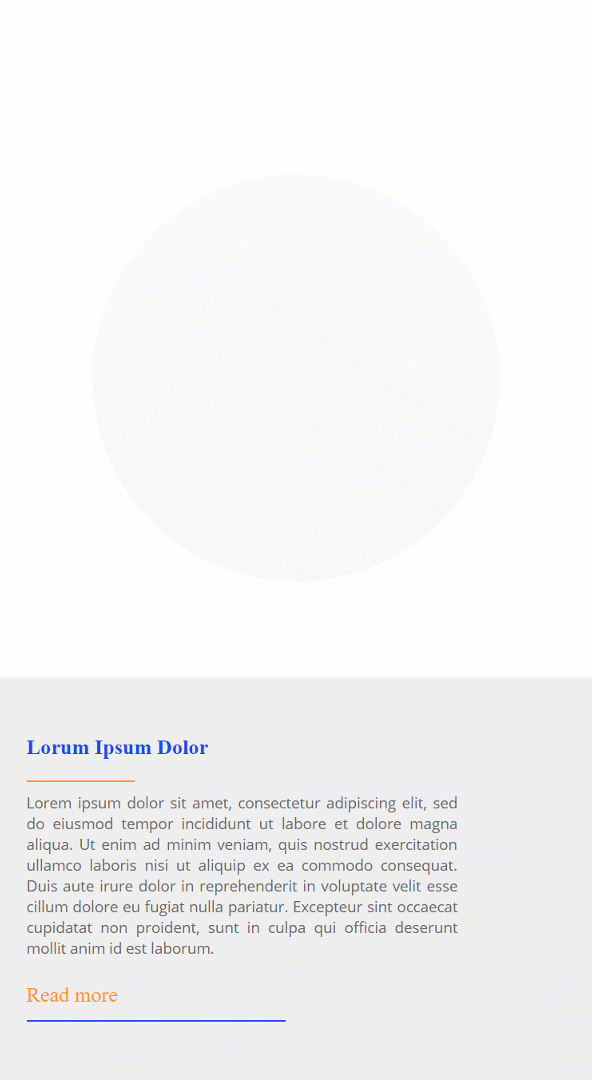
Upload Textual content Module #1 to Column 2
Upload H2 Content material
Time to start out including the quite a lot of modules to column 2, beginning with a Textual content Module. Input some H2 content material of your selection.

H2 Textual content Settings
Transfer directly to the design tab and regulate the H2 textual content settings.
- Heading 2 Font: Occasions New Roman
- Heading 2 Font Weight: Daring
- Heading 2 Textual content Colour: #0f47ff
- Heading 2 Textual content Measurement: 3.5vw

Upload Divider Module to Column 2
Visibility
The following module we’d like in the second one column is a Divider Module. Be certain that the ‘Display Divider’ choice is enabled.
- Display Divider: Sure

Colour
Then, cross to the design tab and alter the divider shade.
- Colour: #ff961e

Sizing
Regulate the sizing values as neatly.
- Divider Weight: 1px
- Width: 20%
- Module Alignment: Left
- Top: 0px

Spacing
And create some area for the module the use of the next height and backside margin values:
- Most sensible Margin: 1vw
- Backside Margin: 1vw

Upload Textual content Module #2 to Column 2
Upload Content material
Directly to the following module, which is some other Textual content Module. Input some paragraph content material of your selection.

Textual content Settings
Transfer directly to the design tab and alter the textual content settings.
- Textual content Font: Open Sans
- Textual content Measurement: 0.7vw (Desktop), 1.7vw (Pill), 2.5vw (Telephone)
- Textual content Line Top: 1.5vw (Desktop), 2.5vw (Pill), 3.5vw (Telephone)
- Textual content Orientation: Justify

Sizing
Regulate the sizing settings as neatly.
- Width: 61% (Desktop), 80% (Pill & Telephone)

Spacing
And upload some customized height and backside margin.
- Most sensible Margin: 2vw
- Backside Margin: 2vw

Upload Textual content Module #3 to Column 3
Upload Content material
Directly to the following and ultimate module we’d like in the second one column, which is some other Textual content Module. We’ll use this module as a button through including some paragraph content material.

Upload Hyperlink
Proceed through including a hyperlink to the CTA.

Textual content Settings
Transfer directly to the design tab and alter the textual content settings accordingly:
- Textual content Font: Occasions New Roman
- Textual content Colour: #ff961e
- Textual content Measurement: 1.5vw (Desktop), 2.5vw (Pill), 3.5vw (Telephone)

Sizing
Trade the width of the module within the sizing settings as neatly.
- Width: 48%

Spacing
Then, cross to the spacing settings and upload some customized padding.
- Most sensible Padding: 1vw
- Backside Padding: 1vw

Border
End the Textual content Module through including a backside border with the next settings:
- Backside Border Width: 1px
- Backside Border Colour: #0f47ff

Clone Segment Two times
While you’re completed customizing the segment and all the parts in it, you’ll cross forward and clone it two times. We’ll use every probably the most sections on our web page to recreate the 3 examples that had been shared originally of this put up.

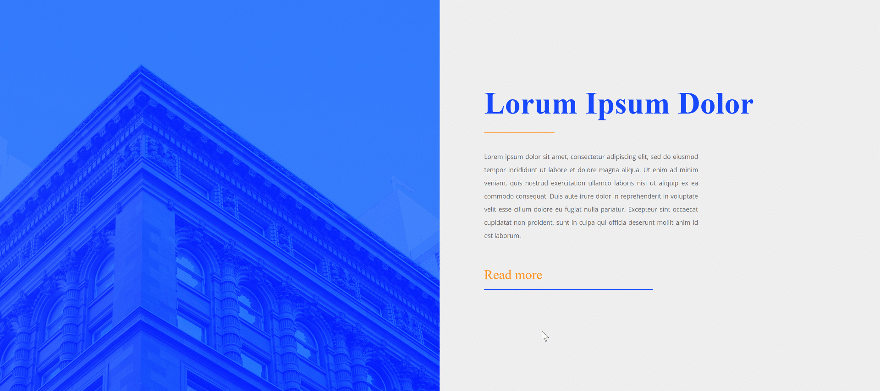
Recreate Instance #1
Upload Symbol Module to Column 1
Depart Symbol Field Empty
Let’s get started with the primary instance! Upload a brand new Symbol Module to the primary column and you should definitely go away the picture field empty.

Default Background Colour
Trade the background shade of the Symbol Module:
- Background Colour: #0f47ff

Hover Background Colour
Regulate the background shade on hover.
- Background Colour: rgba(255,150,30,0.65)

Background Symbol
As a substitute of importing a picture, we’ll upload one to the background as an alternative, accompanied through the next settings:
- Background Symbol Measurement: Duvet
- Background Symbol Place: Middle
- Background Symbol Repeat: No Repeat
- Background Symbol Mix: Comfortable Mild

Spacing
Transfer directly to the spacing settings of the module and upload some customized padding values:
- Display House Under The Symbol: No
- Most sensible Padding: 22vw
- Backside Padding: 22vw

Default Translate Rotate
We’ll additionally rotate the picture on hover. Be certain that the picture seems in its authentic state ahead of soaring through including ‘0deg’ to the best choice.
- Proper: 0deg

Hover Translate Rotate
Trade this price on hover:
- Proper: 180deg

Transitions
To create an instantaneous impact, we’ll take away the transition length:
- Transition Period: 0ms

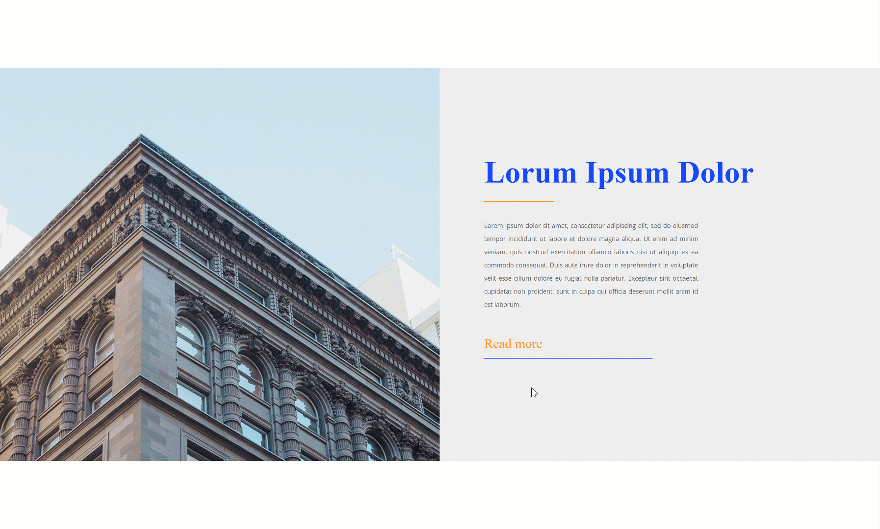
Recreate Instance #2
Upload Symbol Module to Column 1
Depart Symbol Field Empty
Directly to the second one instance! Once more, you should definitely go away the picture field empty.

Default Background Colour
Cross to the background settings and upload the next (utterly clear) background shade:
- Background Colour: rgba(255,255,255,0)

Hover Background Colour
Regulate this colour on hover:
- Background Colour: rgba(0,0,0,0.65)

Background Symbol
We’re, once more, the use of a background symbol as an alternative of importing one to the module itself. Mix the background symbol with the next settings:
- Background Symbol Measurement: Duvet
- Background Symbol Place: Middle
- Background Symbol Repeat: No Repeat
- Background Symbol Mix: Comfortable Mild

Spacing
Then, cross to the spacing settings and regulate the highest and backside padding:
- Display House Under The Symbol: No
- Most sensible Padding: 22vw
- Backside Padding: 22vw

Default Change into Scale
Be certain that the default turn into scale values stay ‘100%’.
- Proper: 100%
- Backside: 100%

Hover Change into Scale
And alter those values on hover to create a scaling impact.
- Proper: 120%
- Backside: 120%

Default Change into Translate
Via default, we’re holding ‘0px’ for the ground choice within the turn into translate settings.
- Backside: 0px

Hover Change into Translate
Regulate this price on hover to reposition the part.
- Backside: 9vw

Transitions
We’re additionally making a moderately quicker transition through converting the transition length within the complicated tab:
- Transition Period: 200ms

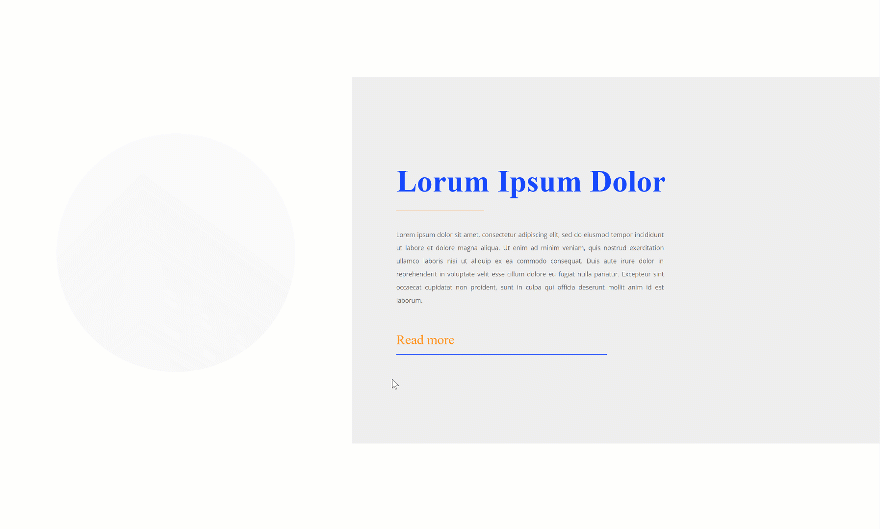
Recreate Instance #3
Trade Column Construction
Directly to the following and ultimate instance! Get started through editing the column construction of the row.

Upload Symbol Module to Column 1
Add 1:1 Symbol
Then, upload an Symbol Module to the primary column. Against this to the primary two examples, we’re going to add a picture with a 1:1 ratio (similar width and peak).

Sizing
Transfer directly to the design tab and power the picture to be fullwidth within the sizing settings.
- Pressure Fullwidth: Sure

Spacing
Take away the distance underneath the picture within the spacing settings subsequent.
- Display House Under The Symbol: No

Default Border
Then, cross to the border settings and upload ‘500vw’ to every probably the most corners. We’re ensuring this price is prime sufficient to hide all display screen sizes.

Hover Border
Take away the rounded corners you’ve added on hover.

Default Filters
Then, cross to the filters settings and ensure those default values are added:
- Saturation: 100%
- Brightness: 46%
- Opacity: 3%

Hover Filters
Permit the hover choice on every probably the most changed settings and use the next values:
- Saturation: 300%
- Brightness: 46%
- Opacity: 100%

Default Change into Scale
Then, cross to the turn into choices and regulate the default turn into scale choices:
- Proper: 68%
- Backside: 68%

Hover Change into Scale
Trade those values on hover.
- Proper: 130%
- Backside: 130%

Default Change into Translate
Transfer directly to the turn into translate values and ensure the default turn into translate values stay the similar:
- Proper: 0px
- Backside: 0px

Hover Change into Translate
Regulate the values on hover.
- Proper: 1vw
- Backside: 8vw

Transitions
Remaining however now not least, building up the transition length within the complicated tab to create a clean transition and also you’re completed!
- Transition Period: 600ms

Preview
Now that we’ve long past via all steps, let’s take a last take a look at the end result throughout other display screen sizes.
Desktop
Instance #1
Instance #2
Instance #3
Cell
Instance #1
Instance #2
Instance #3
Ultimate Ideas
On this put up, we’ve proven you easy methods to get ingenious with the Symbol Module and Divi’s hover and turn into choices. The results we’ve recreated are simply among the many gorgeous chances in the market. You probably have any questions or tips, you should definitely go away a remark within the remark segment underneath!
In case you’re keen to be informed extra about Divi and get extra Divi freebies, you should definitely subscribe to our email newsletter and YouTube channel so that you’ll at all times be probably the most first other folks to grasp and get advantages from this unfastened content material.
The put up 3 Seamless Transform Hover Effects That You Can Apply to Your Images with Divi gave the impression first on Elegant Themes Blog.
WordPress Web Design