
As internet designers we’re all the time taking a look out for brand spanking new techniques so as to add individuality to the internet sites we create. Divi supplies never-ending alternatives to supply distinctive layouts however there are all the time little additions we will be able to come with to carry a design in combination. That is the place CSS pseudo-elements are available in in point of fact to hand.
Contents
What are CSS pseudo-elements?
Put merely, a CSS pseudo-element can also be utilised to taste explicit portions of a component. There are 5 kinds of pseudo-element that do various things. For the aim of this publish we’ll be taking a look at ::ahead of and ::after.
Those two pseudo-elements are used to insert one thing ahead of or after the content material of a component. That is in particular helpful since we will be able to use them so as to add further visible points to current pictures, textual content and anything!
So why would we use those pseudo points? Sooner than and after are ideal for unlocking design probabilities with no need so as to add extra points or modules. Similarly, they’re helpful for including further points with no need to the touch html templates or core theme information.
How do you utilize ahead of and after points with Divi?
If this all sounds just a little complicated up to now, don’t worry! If we had been to make use of ::ahead of and ::after when writing the CSS code from scratch, it will glance just a little like this:
Believe we now have a line of textual content with the category “text-example” – the CSS to taste and customize this line can be:
.text-example {*That is the place you upload the types*}
Now in the event you sought after so as to add and magnificence a ::ahead of or ::after detail, the CSS would appear to be this:
.text-example::ahead of {*That is the place you upload ahead of content material and types*}
.text-example::after {*That is the place you upload after content material and types*}
Thankfully Divi supplies simple get admission to to ::ahead of and ::after pseudo-elements with a lot much less bother. If truth be told, when you have ever spread out the “Complicated” tab for any module so as to add customized CSS code, you’ll have noticed the spaces that we’re relating to.
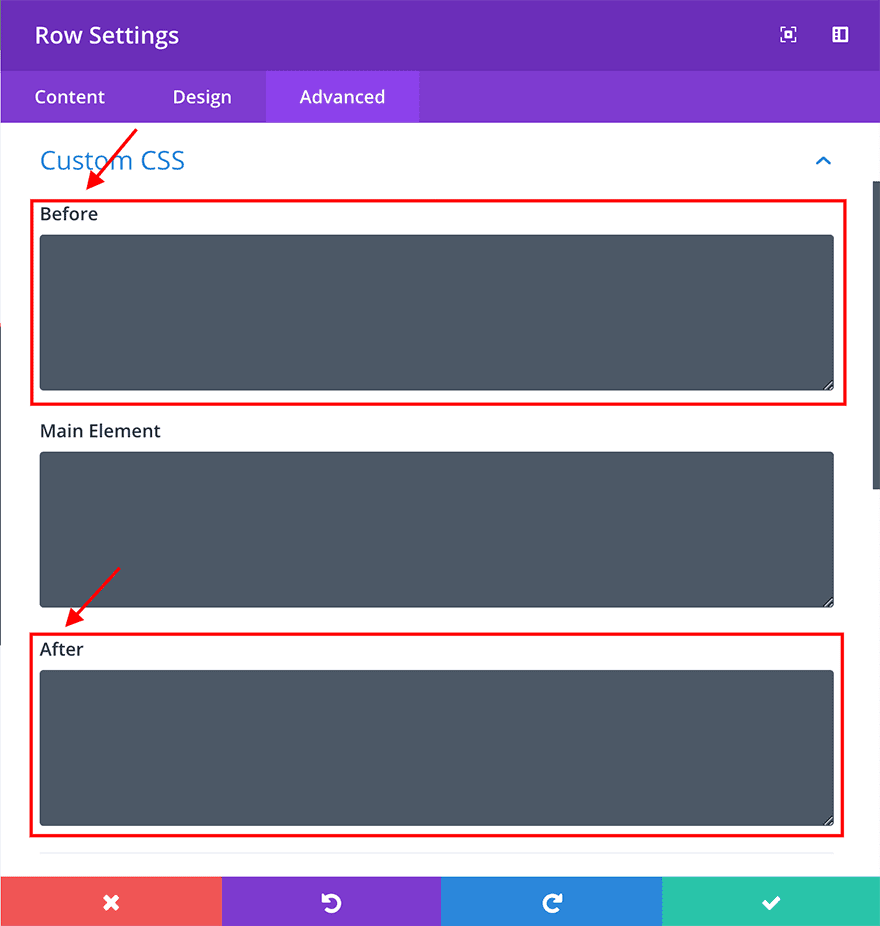
Those containers supply a handy guide a rough shortcut so as to add and customize content material ahead of and after any current Divi module and we will be able to utilise them to create some in point of fact versatile and engaging designs.
Sneak Peek
That is what we’ll be developing on this instructional:
Instance 1
Instance 2

Instance 3

Getting Began
For this instructional we simply desire a replica of the Divi theme and a clean slate. To start with we’ll create a brand new web page and, after including a web page identify, click on at the visible builder.
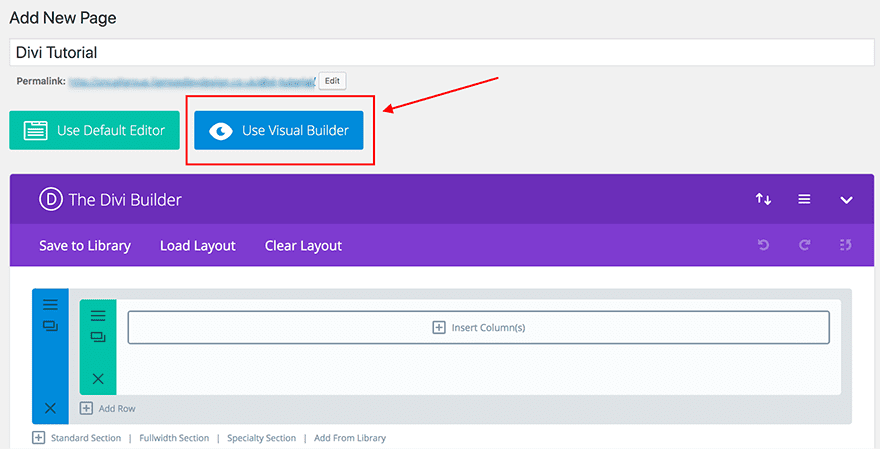
Now we’re able to start out!
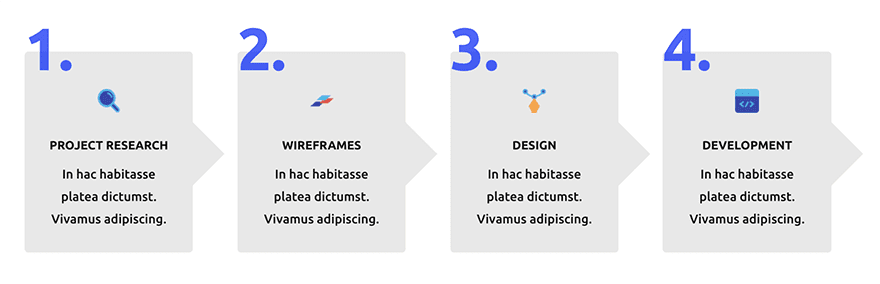
Instance 1: Numbered blurb modules the usage of Pseudo Components
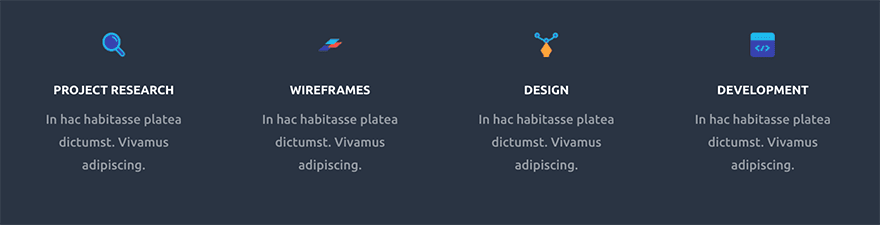
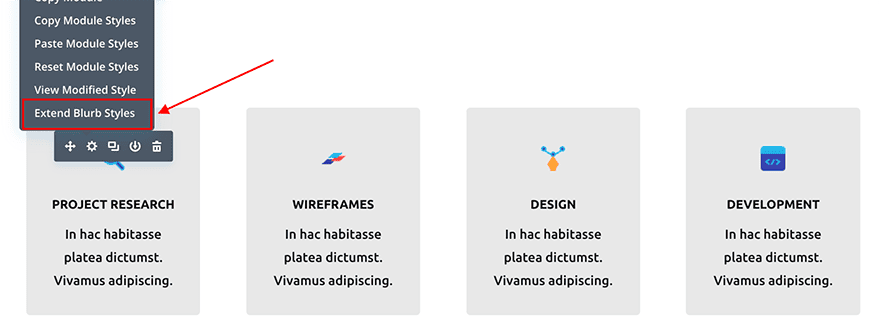
The blurb is most certainly one of the versatile Divi modules at your disposal. On this example we will be able to use pseudo points so as to add numbers ahead of every blurb to create a step-by-step “the way it works” phase. We’ll additionally upload an arrow form to the precise to signify the method.
What we’ll be developing:
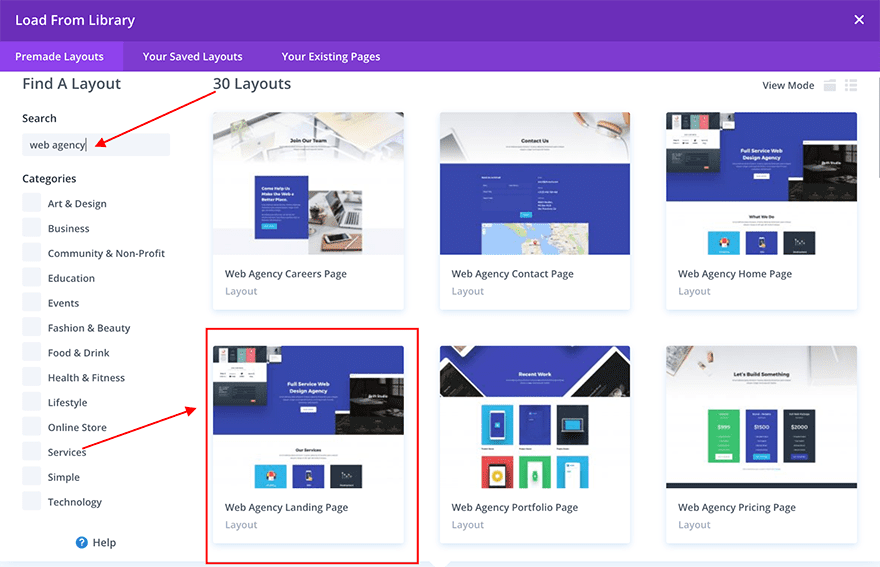
Despite the fact that this design will paintings with any blurb design, we’ve borrowed the blurb phase from the Internet Company Structure. In case you’d like to make use of those as a kick off point you’ll be able to get admission to the Internet Company Touchdown Web page by means of developing a brand new web page and having access to the entrance finish builder.
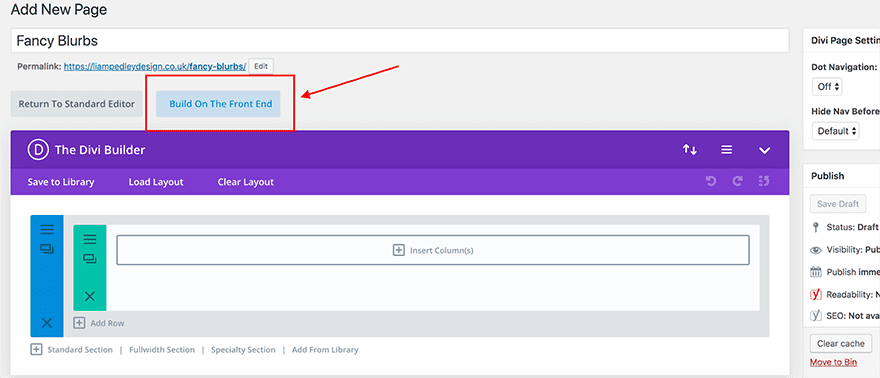
When your web page quite a bit you’ll have an possibility to make use of a premade structure, one in all your stored layouts or construct from scratch. Make a selection premade structure and use the quest bar to seek out “Internet Company” Layouts. The blurb phase on this instructional can also be discovered at the Touchdown Web page.
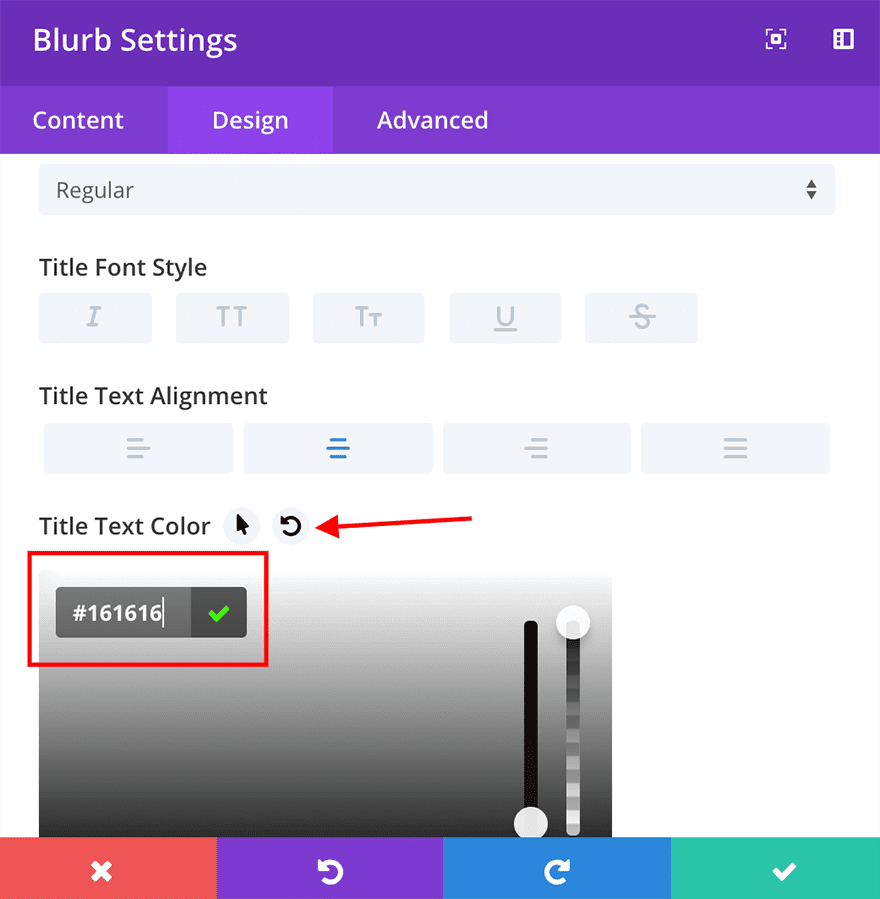
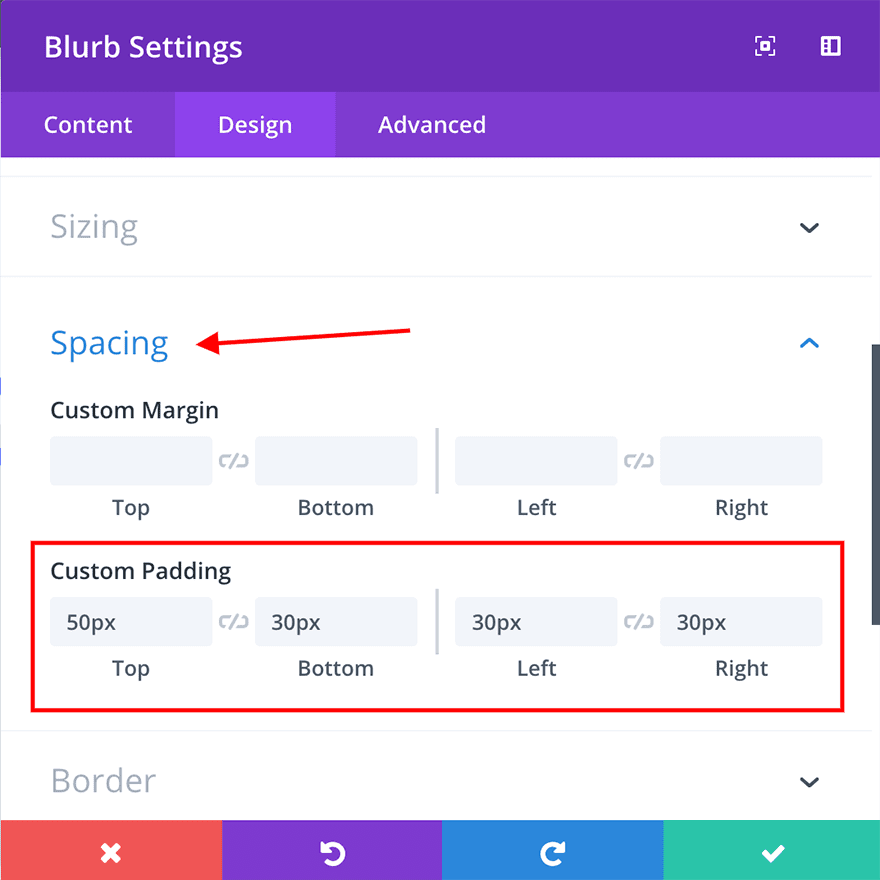
As soon as loaded, the one distinction between the premade structure and our instance is that we’ve modified the background of every blurb, the identify and textual content font color and added just a little padding.
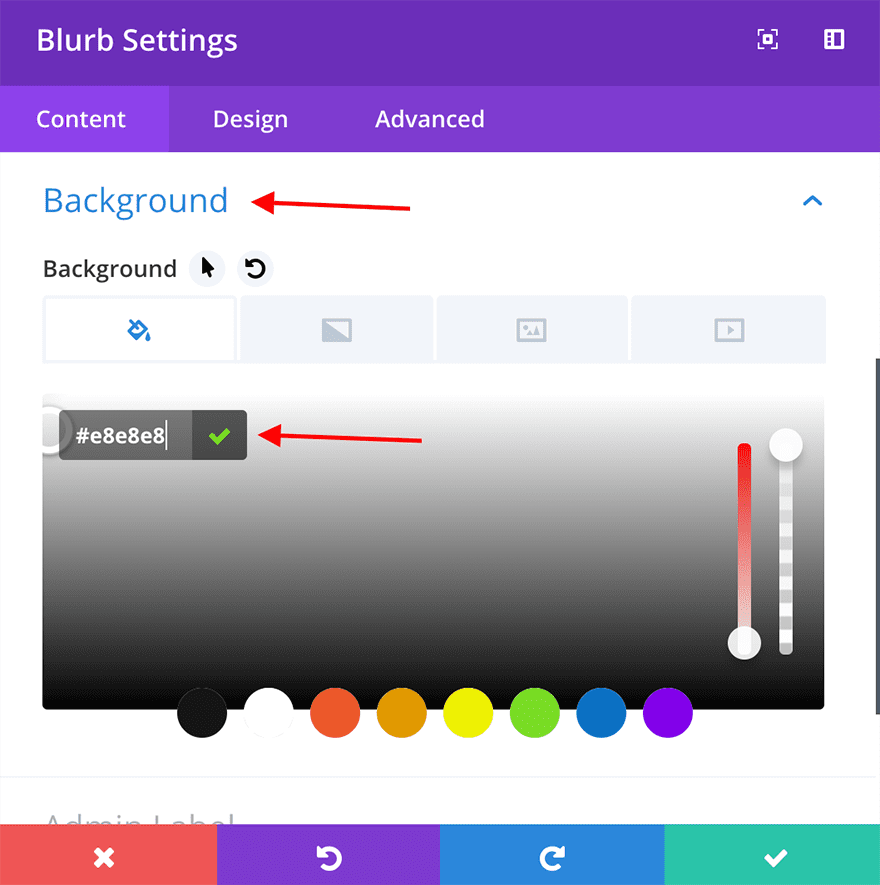
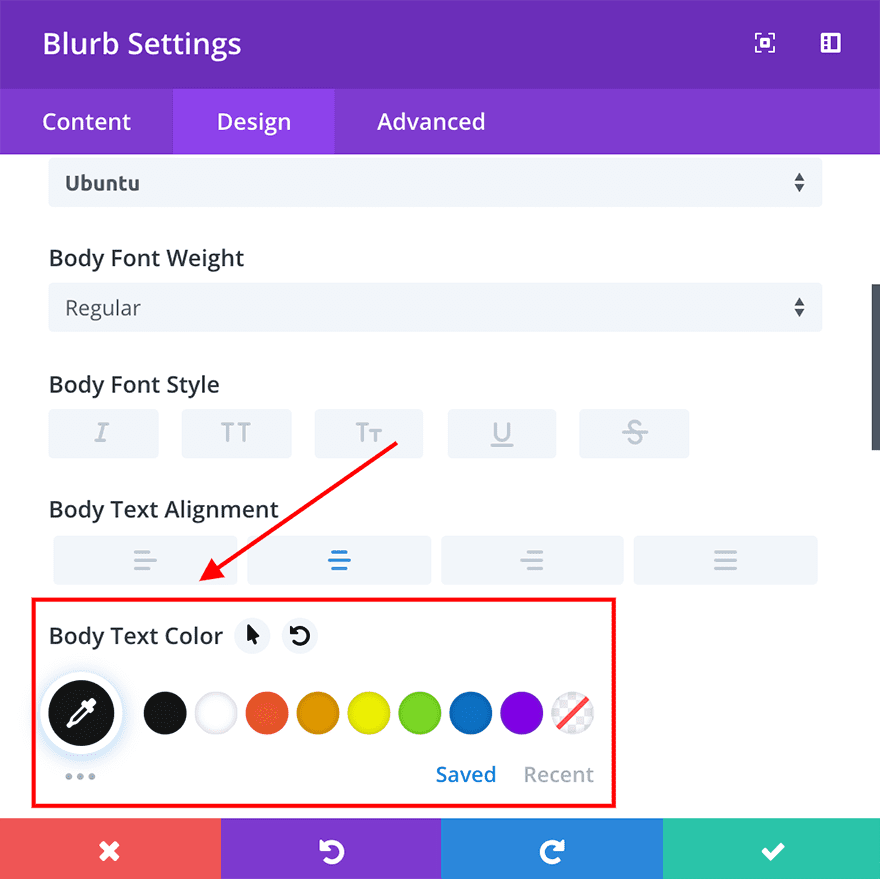
Whenever you’ve modified those settings on one blurb, you’ll be able to correct click on at the module and use the “Lengthen Kinds” to use them to the opposite 3.
Now that we’ve customised our 4 blurb modules to seem as we wish them, it’s time so as to add some code to create the numbered detail. Alternatively for this design to paintings we first want to upload one line of css to the Major Part customized css field.
overflow: visual;
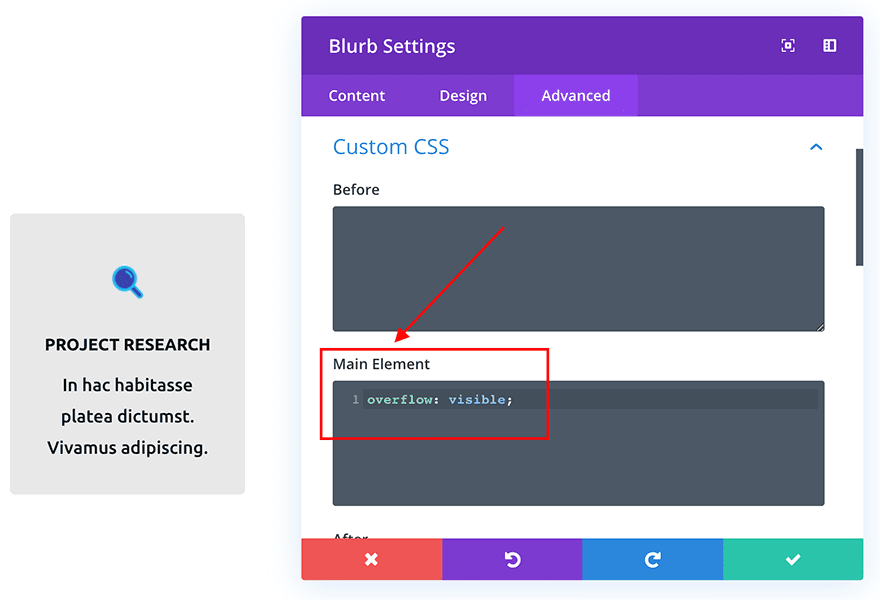
This will likely merely permit any points we create within the subsequent steps to be visual anyplace they overlap the perimeters of our blurb module.
Whenever you’ve performed this, open up the module choices and navigate to the “Complicated Tab”. Throughout the “ahead of” field, upload this CSS snippet:
content material: '1.'; /* Provides the number one. as ahead of content material */
font-weight: daring;
font-size: 80px;
opacity: 0.7; /* Makes the quantity rather clear */
colour: blue; /* Adjustments the colour of the quantity textual content */
place: absolute;
z-index: 9999;
left: 0; /* Positions the content material 0px clear of the left border */
Most sensible:-20px; /* Positions the content material 20px above the highest border */
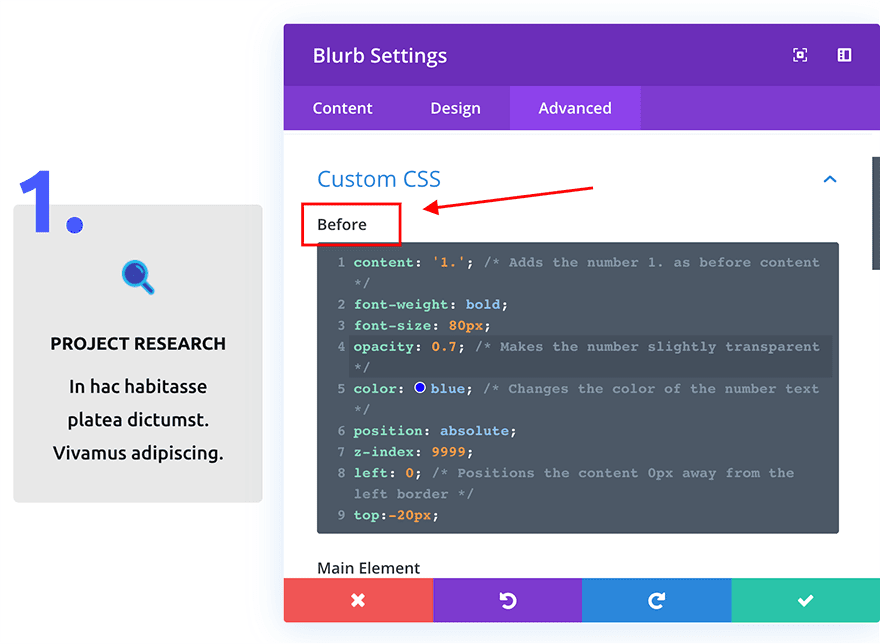
After you have added this code snippet you’ll see the quantity seem to the highest left of the blurb module. You’ll amend the quantity’s place by means of changing the “left:” and “height:” strains or exchange the colour and font length of the quantity inside of this CSS snippet.
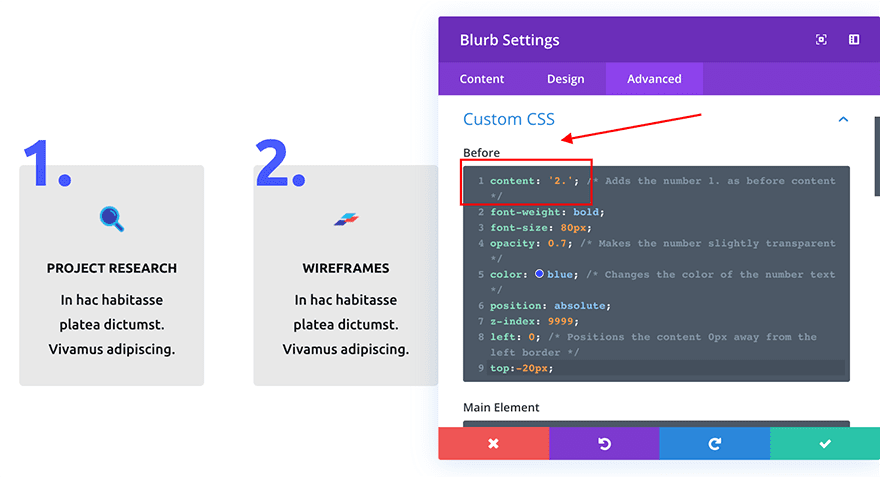
Whenever you’ve finished this for the primary module, move into the 3 new blurb modules and alter the “content material:” line to:
content material: ‘2.’;
content material: ‘3.’;
…and so forth.
Now that we’ve were given our numbers taken care of, we want to upload just a little little bit of css to create the arrow form.
Open every module and input this into the After field throughout the Customized CSS house:
content material: '';
show:block;
peak:60px; /* Dimension of the form */
width:60px; /* Dimension of the form */
place:absolute;
height:40%;
correct:-30px;
z-index: -1;
background-color: #e8e8e8; /* Color of the form */
remodel: rotate(45deg);
-ms-transform: rotate(45deg);
-webkit-transform: rotate(45deg);
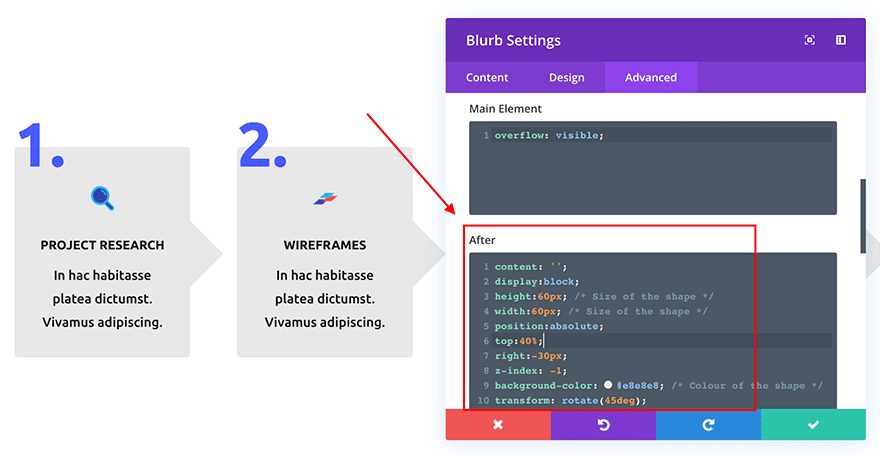
Now your 4 blurbs will have to appear to be this:
Instance 2. Including distinctive shapes in your current modules
This design will depend on easy however efficient little code snippets which might be added to each the ::ahead of and ::after customized CSS containers inside of every textual content module.
The wonderful thing about the usage of pseudo-elements here’s that we will be able to combine distinctive shapes and items to our current modules with no need so as to add any further points or modules to our web page. As a result of those pseudo-elements are contained inside of our current modules, they don’t upload any more room to our designs and stay taking a look nice on all units.
What we’ll be developing:
To create the preliminary structure we want to upload a normal phase with a 3 column row, set to default width. Whenever you’ve performed this, upload a textual content module to probably the most new columns.
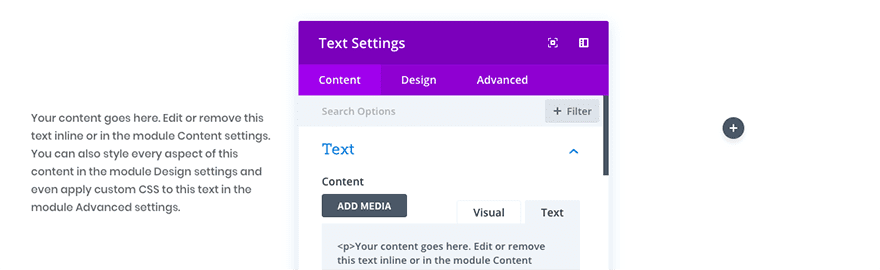
Once more, you’ll be able to taste this newsletter module as you’d like alternatively in case you are following alongside, those are the stairs to reach this design:
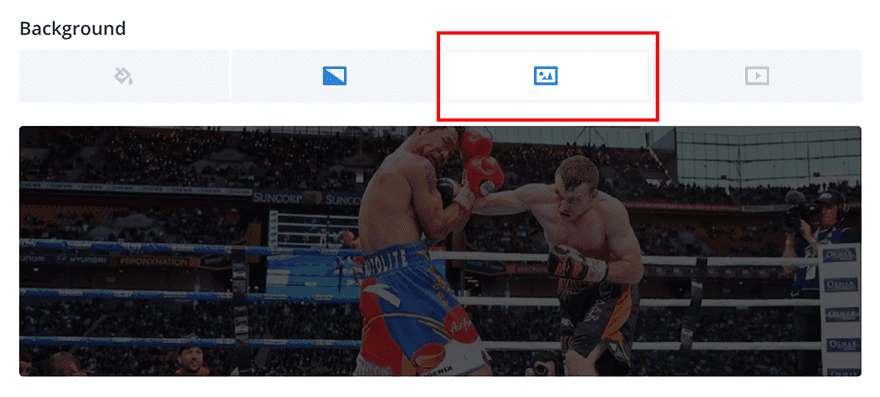
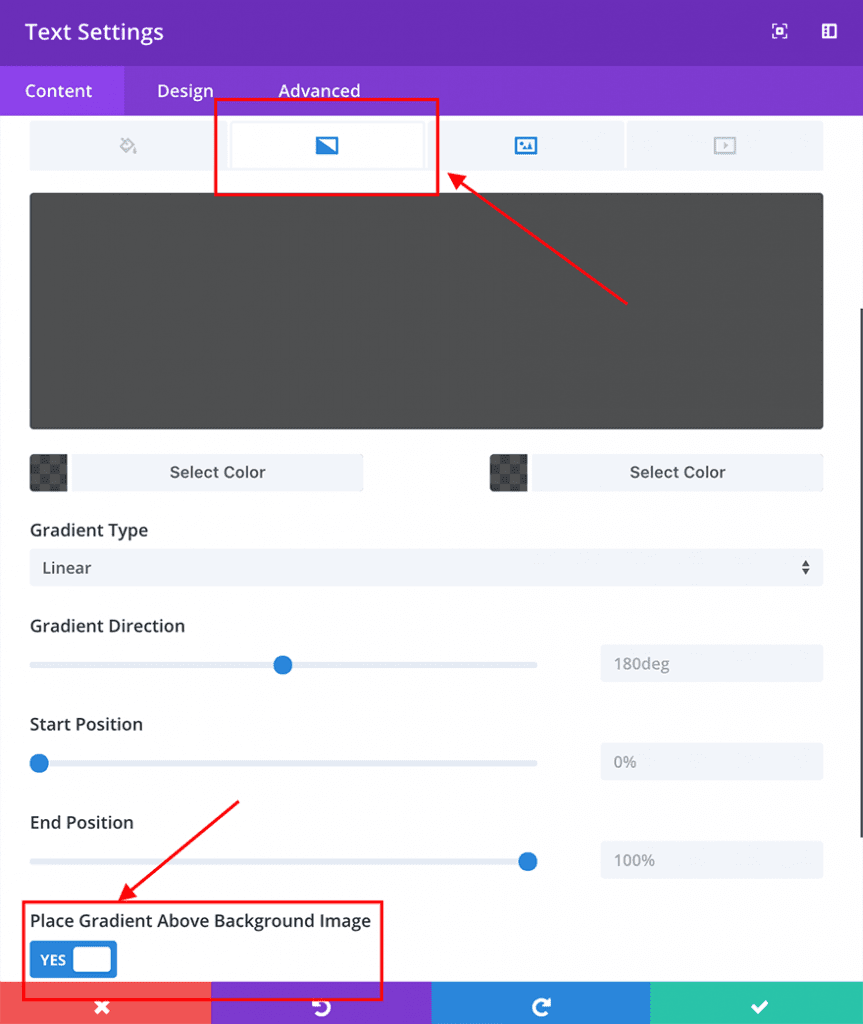
Open the textual content module choices and upload your textual content content material and a background symbol or background color as required. We’ve used an ordinary background symbol with a clear gradient on height:
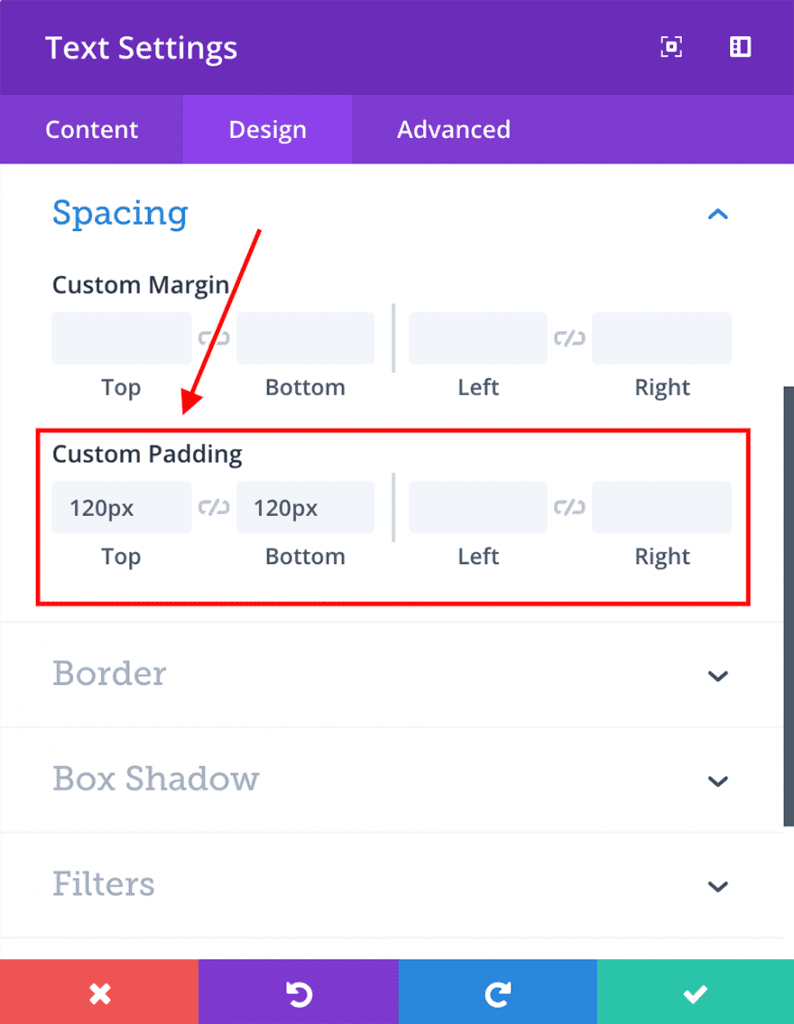
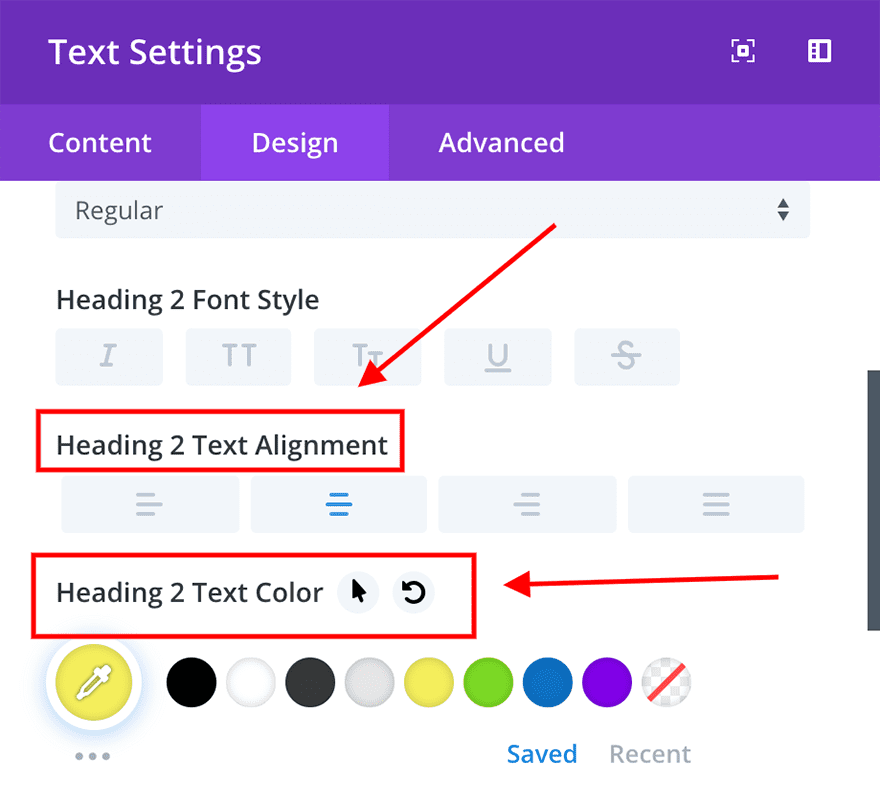
Subsequent, configure the next design choices:
1.Most sensible padding: 120px & Backside padding: 120px
2.Textual content Alignment: heart & Textual content colour: #ffffff
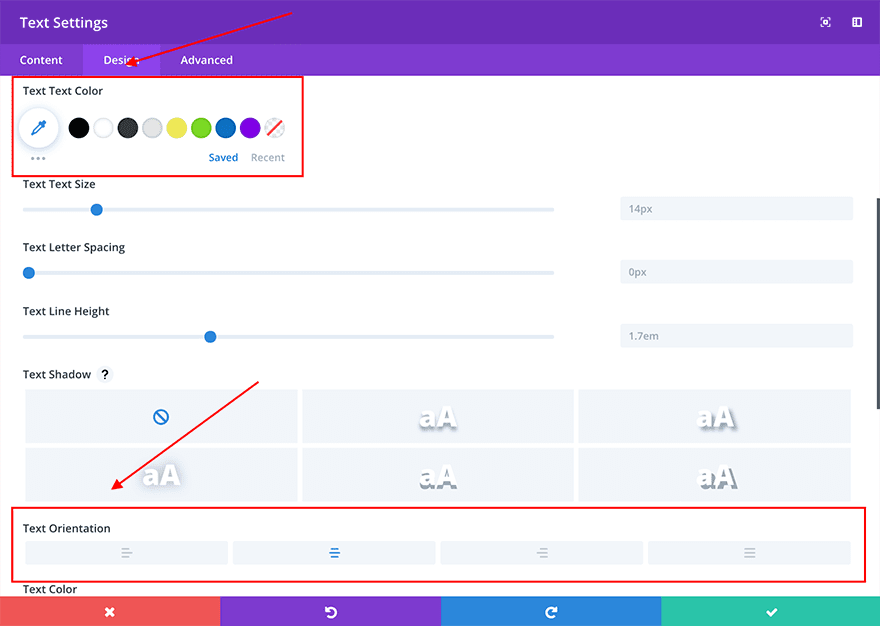
3. Heading Alignment: heart & Heading colour: #f5ee5d

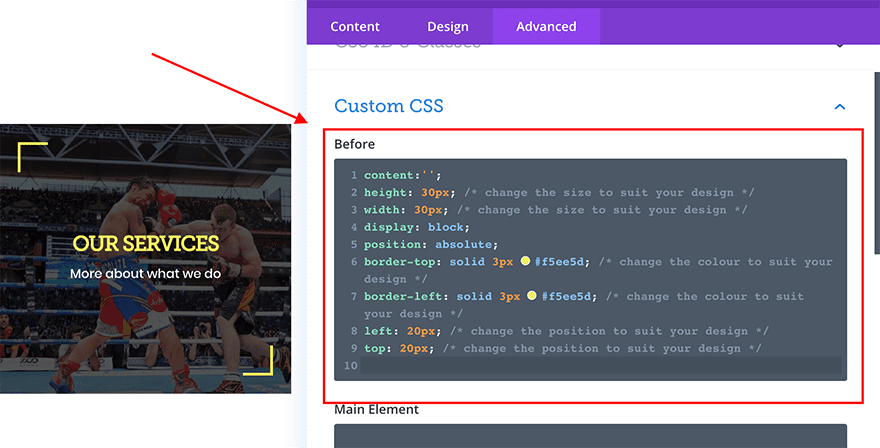
Now that we have got all the visible sides in position to your first textual content module, it’s time to upload the CSS to make the magic occur. Within the Complicated tab of the textual content module, upload the next code to the “ahead of” field:
content material:'';
peak: 30px; /* exchange the scale to fit your design */
width: 30px; /* exchange the scale to fit your design */
show: block;
place: absolute;
border-top: cast 3px #f5ee5d; /* exchange the color to fit your design */
border-left: cast 3px #f5ee5d; /* exchange the color to fit your design */
left: 20px; /* exchange the placement to fit your design */
height: 20px; /* exchange the placement to fit your design */
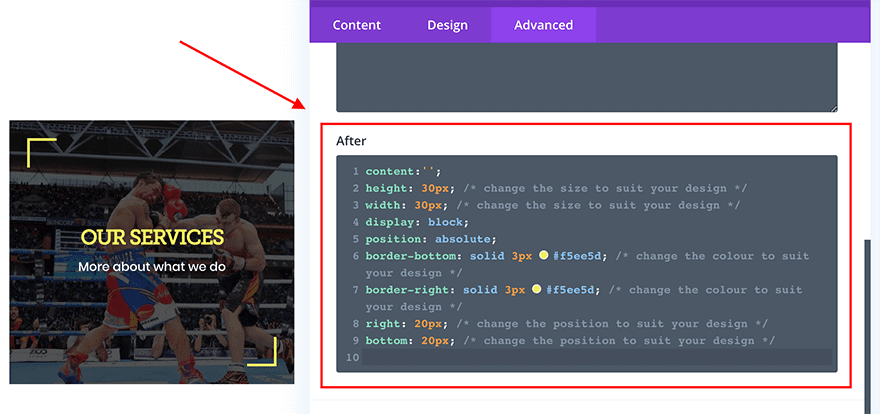
After which upload the next code to the “after” field:
content material:'';
peak: 30px; /* exchange the scale to fit your design */
width: 30px; /* exchange the scale to fit your design */
show: block;
place: absolute;
border-bottom: cast 3px #f5ee5d; /* exchange the color to fit your design */
border-right: cast 3px #f5ee5d; /* exchange the color to fit your design */
correct: 20px; /* exchange the placement to fit your design */
backside: 20px; /* exchange the placement to fit your design */
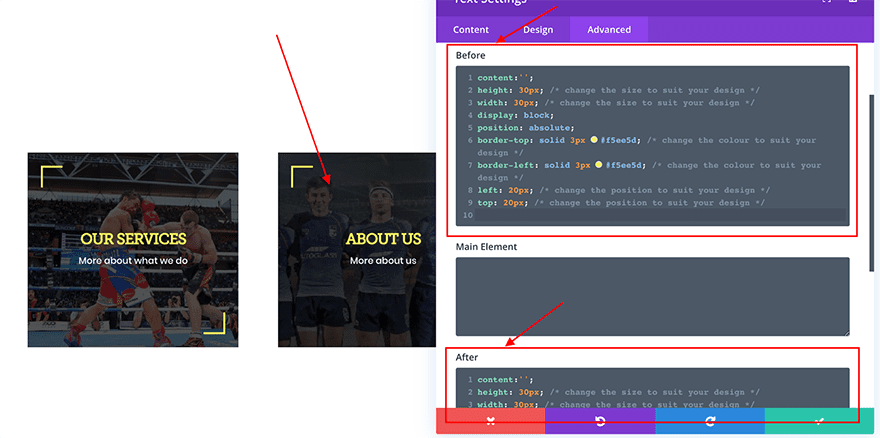
Whenever you’ve added those code snippets to the module you are going to see our fancy new shapes added.
In case you questioning what this CSS does, it’s in truth reasonably easy. All we’re doing is developing a clear sq. this is situated 20px clear of the highest and left (and backside and correct) of the textual content module. We then upload two borders to those squares to create the arrow impact.
While you’re proud of the glance of this primary textual content module, merely replica and paste it to fill the opposite columns and alter the textual content content material, background and types to fit.
The bonus of this technique is that it is going to paintings with just about any Divi module with just a little customisation. If you wish to be extra fancy, check out including some further CSS to rotate, skew and customize the ::ahead of and ::after points even additional. Have amusing!
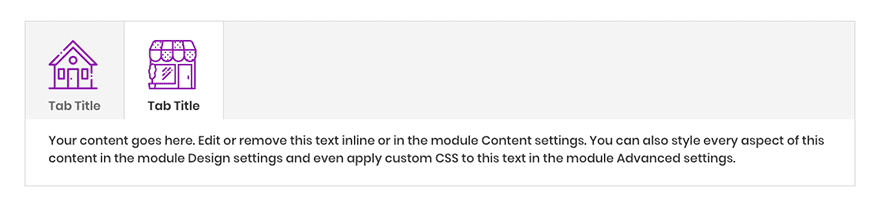
Instance 3. Including icons and outlines to tab titles
Inside this design we will be able to benefit from the power so as to add a picture icon ahead of some current content material in addition to a small textual content description beneath. That is best for customising the Divi tabs module just a little additional than you might be typically in a position to.
Observe – Despite the fact that including content material by the use of css is superb for design, it isn’t readily listed by means of serps (even if Google does in reality index CSS and Javascript content material, it takes for much longer and is unreliable at the present. Serps like Bing and DuckDuckGo don’t index this content material in any respect). Because of this your content material will have to be minimum and also you will have to no longer depend on it to persuade your score possible.
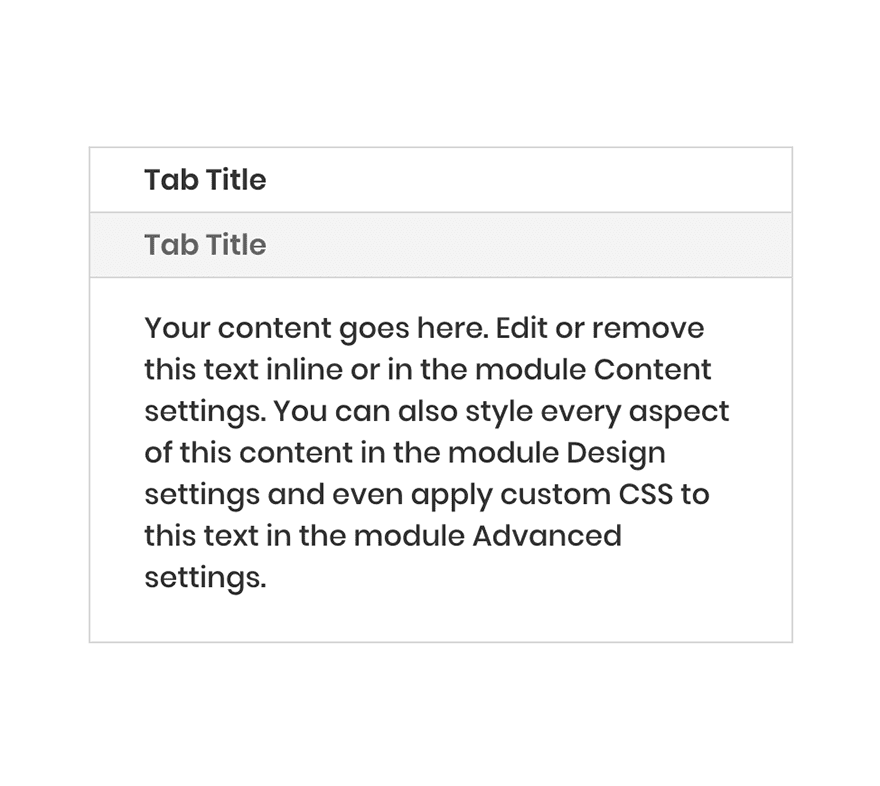
What we’ll be developing:
Initially we want to upload our same old phase and a 1 column row, adopted by means of the Divi tabs module itself. Throughout the tabs module, we most effective want to upload our titles and content material to every tab as we’ll be dealing with the types within the subsequent steps.
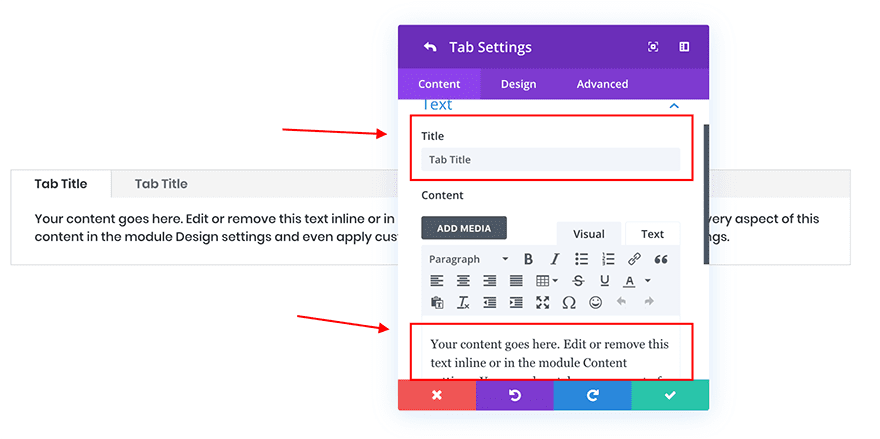
As soon as our content material is in position, we want to start including content material to the ::ahead of detail of the module. Since we can not upload customized CSS to precise tabs the usage of the process we’ve adopted above, we’ll want to accomplish this rather another way.
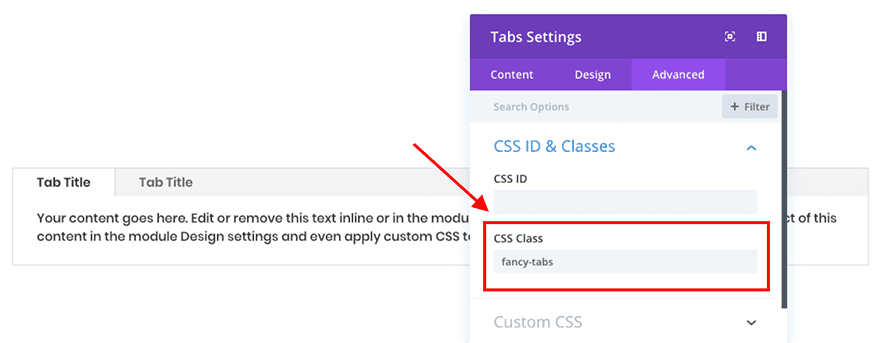
Open up the tabs module choices and throughout the Complicated tab give the module the category “fancy-tabs”.
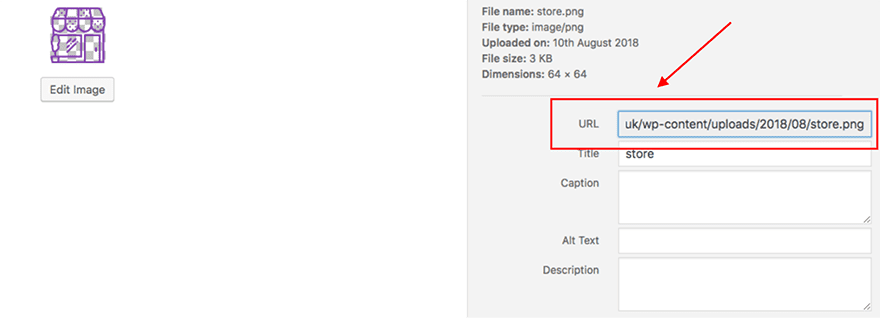
Whenever you’ve added this CSS magnificence we want to do some preparation. So as to add some icons or pictures in your tab titles we clearly want to upload those to WordPress. Cross to the Media tab within the WordPress dashboard and add your preferred icons as you typically would.
Along with your pictures uploaded, we want to click on on every one and replica the URL that WordPress has generated for us. Undergo every of your pictures and replica and paste those URLs right into a record or your preferred notes utility.
With the URL’s of your preferred pictures to hand, move in your Divi Theme Choices throughout the Divi menu within the WordPress Dashboard.
On the backside of this web page you’ll see a field the place you’ll be able to upload your personal customized CSS. It’s inside of this field that we’ll be pasting some CSS code.
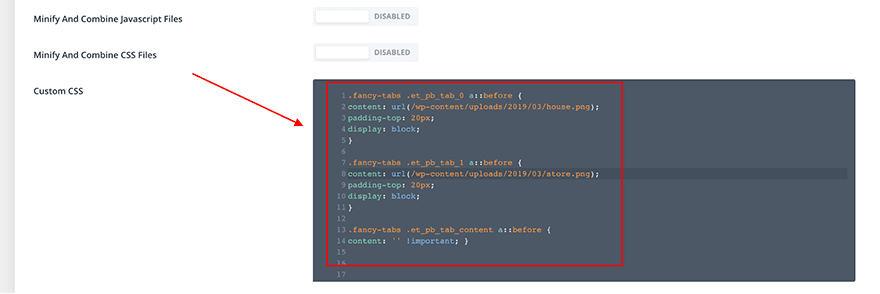
The next snippet will upload the pictures above every tab identify. Merely replica and paste this snippet into the customized CSS field and substitute the content material between (and together with) the asterisks (e.g. *Exchange this with the URL to your first symbol*) with the URLs you famous previous.
.fancy-tabs .et_pb_tab_0 a::ahead of {
content material: url(*Exchange this with the URL to your first symbol*);
padding-top: 20px;
show: block;
}

.fancy-tabs .et_pb_tab_1 a::ahead of {
content material: url(*Exchange this with the URL to your 2nd symbol*);
padding-top: 20px;
show: block;
}

.fancy-tabs .et_pb_tab_content a::ahead of {
content material: '' !necessary; }
In case you go back to the web page together with your tabs module on, you will have to now see that the pictures had been added above every identify – luck!
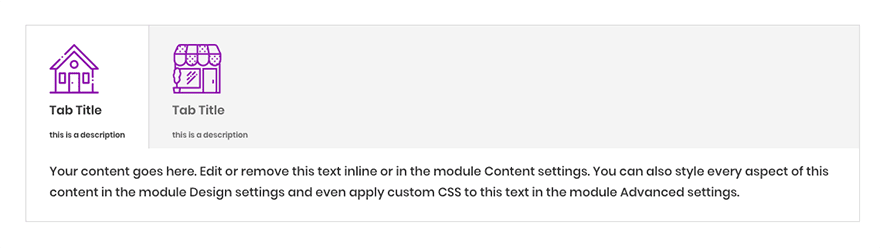
So what about including descriptions? Thankfully that is reasonably easy as neatly. Proper beneath the code you will have simply copied into your customized CSS field, paste the next:
.fancy-tabs .et_pb_tab_0 a::after {
content material: 'this can be a description';
font-size: 10px;
padding-top: 5px;
show: block;
}

.fancy-tabs .et_pb_tab_1 a::after {
content material: 'this can be a description';
font-size: 10px;
padding-top: 5px;
show: block;
}

.fancy-tabs .et_pb_tab_content a::after {
content material: '' !necessary; }
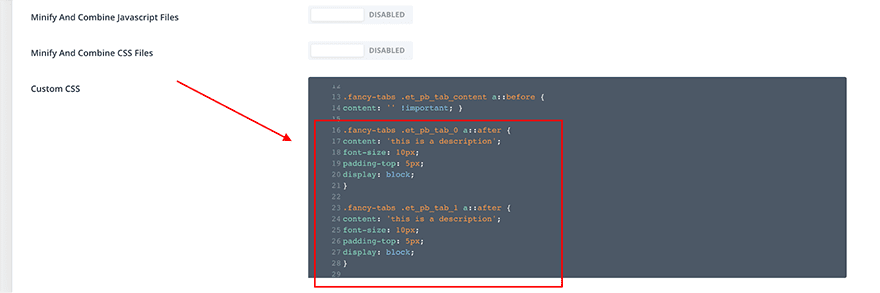
As ahead of together with your pictures, you’ll want to substitute “this can be a description” with your personal content material. Returning to the web page together with your tabs module on you’ll see now we have fancy descriptions too!
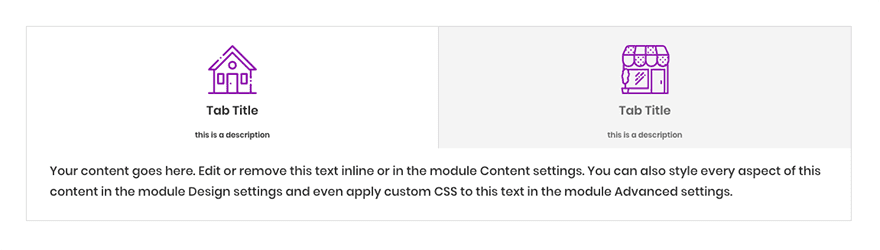
In the end, we simply have to use just a little extra CSS to reach the whole design proven above. Once more, replica the next snippet into the similar customized CSS field:
.fancy-tabs .et_pb_tab_content a:after {
content material: '' !necessary; }

.fancy-tabs .et_pb_tabs_controls li {
width: 50% !necessary;
}
.fancy-tabs .et_pb_tabs_controls li a {
width: 100% !necessary;
text-align: heart;
}

@media (max-width: 768px) {

.fancy-tabs .et_pb_tabs_controls li {
width: 100% !necessary;
}

.fancy-tabs .et_pb_tabs_controls {
padding: 0 !necessary;
}
}
This code facilities your tab textual content and pictures and will increase the width of your tabs to hide all of the module.
We additionally added some CSS to verify the tabs glance excellent on all units – in the event you’d want not to have your tabs complete width and stack on cell, we’ll want to return and encompass the unique CSS code in a media question. Because of this on units the scale of a pill and wider we upload the descriptions and icons, alternatively on smaller units we will be able to revert again to the Divi default styling.
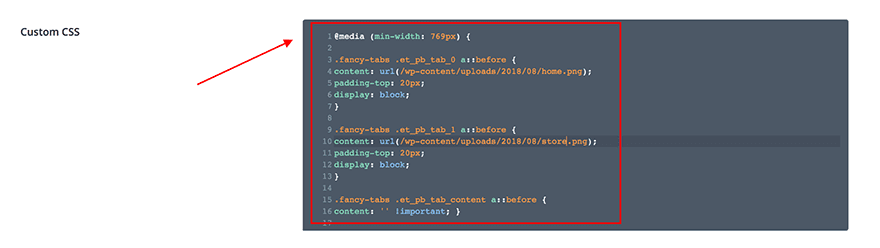
To try this, replica the amended CSS code beneath and paste it into your customized CSS house within the Divi theme choices panel:
@media (min-width: 769px) {

.fancy-tabs .et_pb_tab_0 a::ahead of {
content material: url(*Exchange this with the URL to your first symbol*);
padding-top: 20px;
show: block;
}

.fancy-tabs .et_pb_tab_1 a::ahead of {
content material: url(*Exchange this with the URL to your 2nd symbol*);
padding-top: 20px;
show: block;
}

.fancy-tabs .et_pb_tab_content a::ahead of {
content material: '' !necessary; }

.fancy-tabs .et_pb_tab_0 a::after {
content material: 'this can be a description';
font-size: 10px;
padding-top: 5px;
show: block;
}

.fancy-tabs .et_pb_tab_1 a::after {
content material: 'this can be a description';
font-size: 10px;
padding-top: 5px;
show: block;
}

.fancy-tabs .et_pb_tab_content a::after {
content material: '' !necessary; }
.fancy-tabs .et_pb_tab_content a:after {
content material: '' !necessary; }

.fancy-tabs .et_pb_tabs_controls li {
width: 50% !necessary;
}
.fancy-tabs .et_pb_tabs_controls li a {
width: 100% !necessary;
text-align: heart;
}
}
Including extra tabs
On this example we now have created a tab module that incorporates 2 other tabs, alternatively in observe we infrequently require greater than this. If you’re ready wherein you might be in quest of to create greater than 2 tabs, we will be able to want to amend the code you’ve simply added.
As you’ll be able to see from the snippet, Divi robotically assigns a category to every tab identify – the primary beginning with 0 (.et_pb_tab_0), expanding by means of 1 every time (.et_pb_tab_1, .et_pb_tab_2 and so forth). We’ve already sorted the primary two tabs, so when including extra we will be able to merely replica and paste a bit of the code for each and every new tab:
.fancy-tabs .et_pb_tab_0 a:ahead of {
content material: url(*Exchange this with the URL to your first symbol*);
padding-top: 20px;
}
and alter the quantity within the magnificence (.et_pb_tab_0) to two, 3, 4 and so on. You’ll want to do the similar to your descriptions too.
The general modification we want to make is to regulate yet one more line of CSS. Take the choice of your tabs and divide it by means of 100. Observe down this quantity and navigate to the next phase for your customized CSS:
.fancy-tabs .et_pb_tabs_controls li {
width: 50% !necessary;
}
and switch the 50% together with your resolution. This will likely be sure that your tabs are similarly spaced around the width of the module.
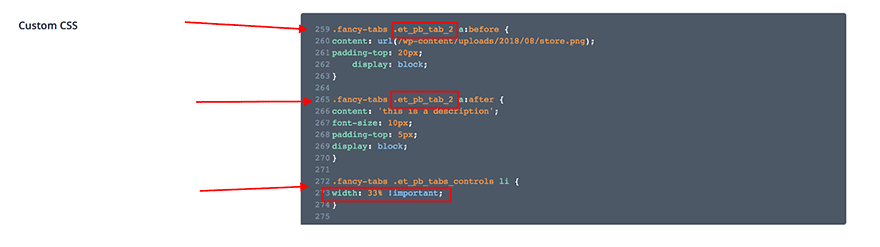
For instance, in case you are developing a 3rd tab, the extra CSS code you wish to have can be as follows:
.fancy-tabs .et_pb_tabs_controls li {
width: 33% !necessary;
}
In last
And there we now have it, 3 nice techniques to utilise CSS ::ahead of and ::after points to create new design probabilities. Confidently this information will encourage you to discover how you’ll be able to use pseudo-elements for your long run creations – the alternatives in point of fact are never-ending!
The publish How to Create Unique Designs Using Before and After Pseudo Elements in Divi seemed first on Elegant Themes Blog.
WordPress Web Design