
Divi’s integrated segment divider kinds have all the time been a well-liked (and easy) method so as to add inventive background designs on your pages. No longer most effective does it supply a handy guide a rough and wonderful option to get a divorce web page content material, it will probably additionally upload an summary background texture to set your site aside. And with the discharge of Divi’s change into choices, there are much more cool issues you’ll be able to do with the ones segment dividers.
On this instructional, I’m going to turn you the right way to use change into choices to design distinctive segment divider backgrounds in Divi.
Let’s get began.
Contents
- 1 Sneak Peek
- 2 Obtain the Segment Divider Background Examples Structure for FREE
- 3 Obtain For Unfastened
- 4 You’ve gotten effectively subscribed. Please test your electronic mail cope with to substantiate your subscription and get get entry to to loose weekly Divi structure packs!
- 5 Getting Began
- 6 Developing Summary Form Backgrounds with Segment Dividers
- 7 About Divi Meetups
- 8 Developing Horizontal Segment Dividers
- 9 Wrapping Up
Sneak Peek
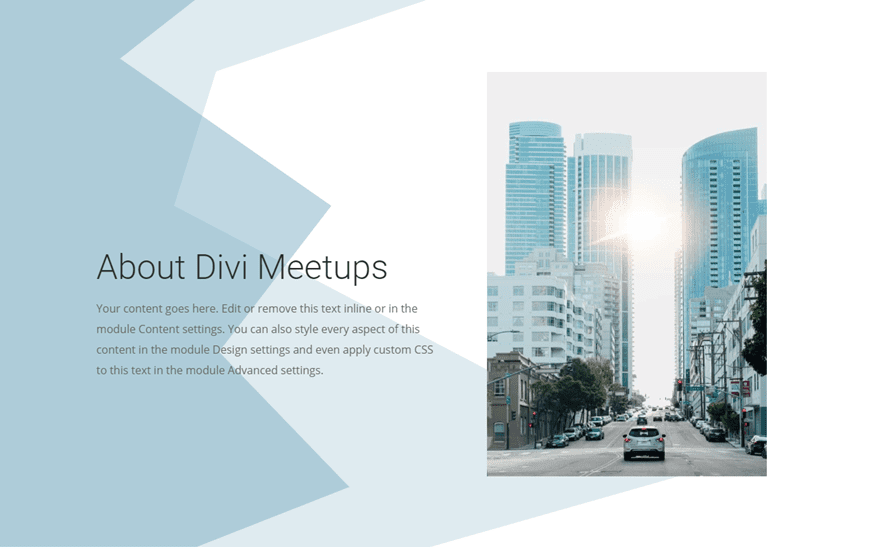
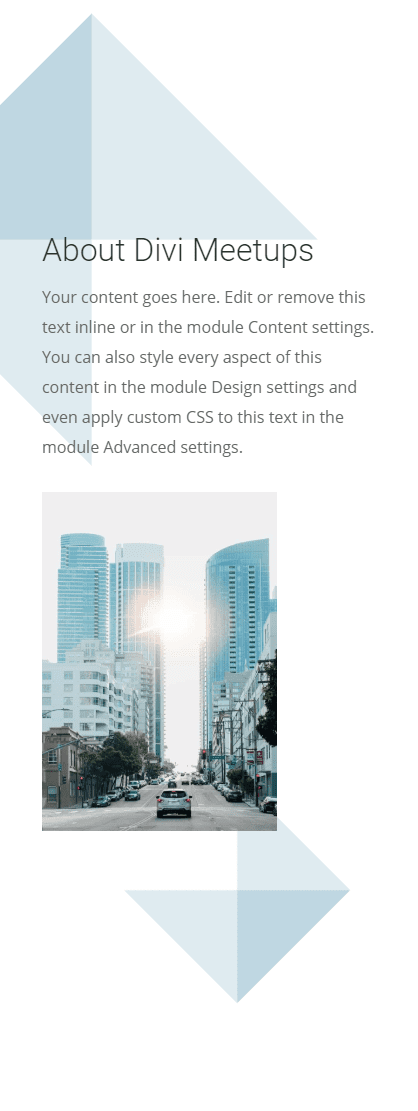
Here’s a sneak peek of the designs that you’re going to have the ability to construct on this instructional.

Obtain the Segment Divider Background Examples Structure for FREE
To put your arms on those instance segment divider backgrounds, you are going to first wish to obtain it the usage of the button under. To achieve get entry to to the obtain it is very important subscribe to our Divi Day by day electronic mail record through the usage of the shape under. As a brand new subscriber, you are going to obtain much more Divi goodness and a loose Divi Structure pack each Monday! If you happen to’re already at the record, merely input your electronic mail cope with under and click on obtain. You’ll no longer be “resubscribed” or obtain additional emails.
@media most effective display and ( max-width: 767px ) {.et_bloom .et_bloom_optin_1 .carrot_edge.et_bloom_form_right .et_bloom_form_content:prior to, .et_bloom .et_bloom_optin_1 .carrot_edge.et_bloom_form_left .et_bloom_form_content:prior to { border-top-color: #ffffff !essential; border-left-color: clear !essential; }
}.et_bloom .et_bloom_optin_1 .et_bloom_form_content button { background-color: #f92c8b !essential; } .et_bloom .et_bloom_optin_1 .et_bloom_form_content .et_bloom_fields i { colour: #f92c8b !essential; } .et_bloom .et_bloom_optin_1 .et_bloom_form_content .et_bloom_custom_field_radio i:prior to { background: #f92c8b !essential; } .et_bloom .et_bloom_optin_1 .et_bloom_border_solid { border-color: #f7f9fb !essential } .et_bloom .et_bloom_optin_1 .et_bloom_form_content button { background-color: #f92c8b !essential; } .et_bloom .et_bloom_optin_1 .et_bloom_form_container h2, .et_bloom .et_bloom_optin_1 .et_bloom_form_container h2 span, .et_bloom .et_bloom_optin_1 .et_bloom_form_container h2 sturdy { font-family: “Open Sans”, Helvetica, Arial, Lucida, sans-serif; }.et_bloom .et_bloom_optin_1 .et_bloom_form_container p, .et_bloom .et_bloom_optin_1 .et_bloom_form_container p span, .et_bloom .et_bloom_optin_1 .et_bloom_form_container p sturdy, .et_bloom .et_bloom_optin_1 .et_bloom_form_container shape enter, .et_bloom .et_bloom_optin_1 .et_bloom_form_container shape button span { font-family: “Open Sans”, Helvetica, Arial, Lucida, sans-serif; } p.et_bloom_popup_input { padding-bottom: 0 !essential;}

Obtain For Unfastened
Sign up for the Divi Newlsetter and we will be able to electronic mail you a duplicate of without equal Divi Touchdown Web page Structure Pack, plus heaps of alternative wonderful and loose Divi sources, pointers and tips. Apply alongside and you are going to be a Divi grasp very quickly. In case you are already subscribed merely kind on your electronic mail cope with under and click on obtain to get entry to the structure pack.
You’ve gotten effectively subscribed. Please test your electronic mail cope with to substantiate your subscription and get get entry to to loose weekly Divi structure packs!
To import the structure on your web page, merely extract the zip report and drag the json report into the Divi Builder.
Now let’s get to the educational lets?
Getting Began
To get began with this instructional, all you want is the Divi Theme and a picture to make use of for the instance content material. We can be construction the design from scratch. All you want to do is create a brand new web page and deploy the Divi builder at the entrance finish. Then you’re ready to move.
Developing Summary Form Backgrounds with Segment Dividers
This primary instance is a actually cool option to create some summary form backgrounds to your content material. Mainly, this comes to customizing an empty segment with a divider and positioning that segment divider any place at the web page in the back of different content material.
Right here’s the right way to do it.
Developing the Content material Segment
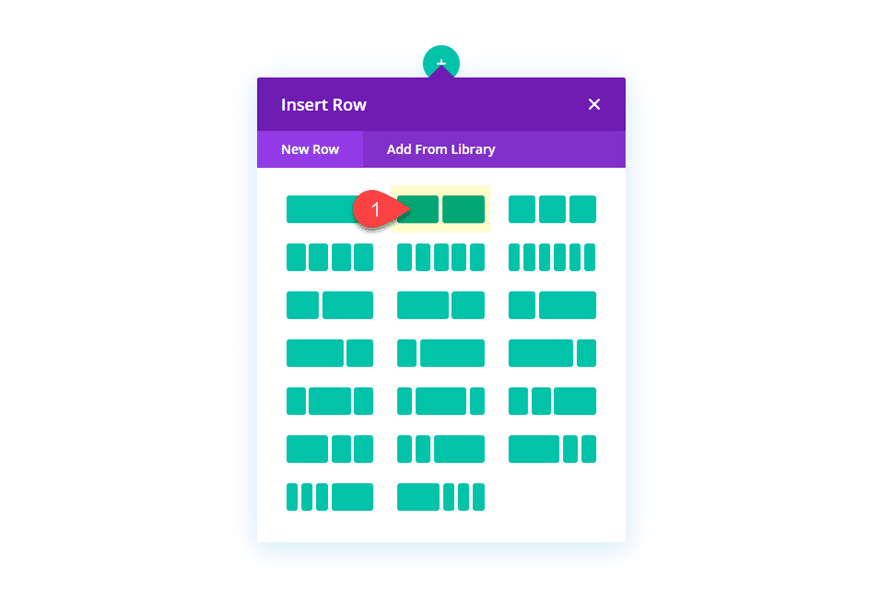
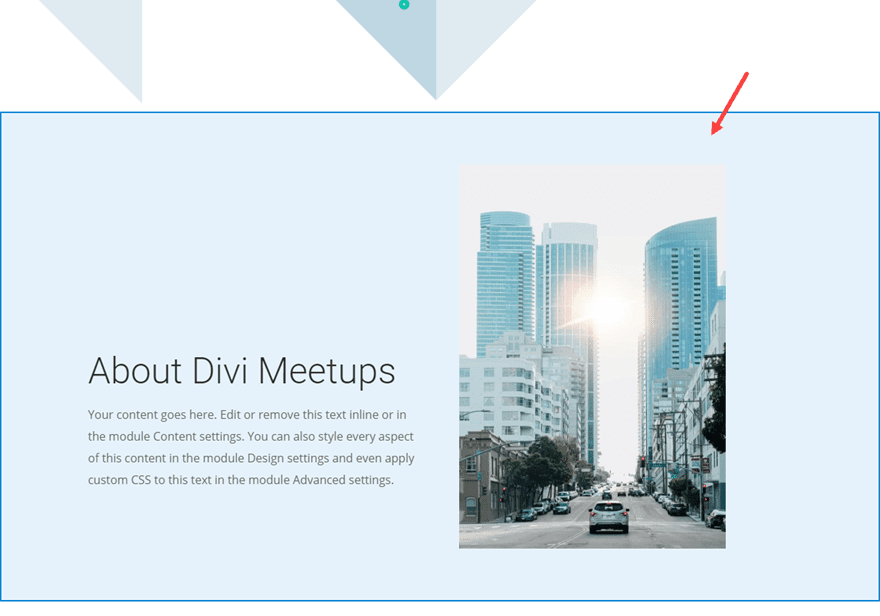
Ahead of we commence including our segment dividers to our web page, let’s first upload some instance content material. Create a brand new common segment with a two-column row.
Upload the Textual content Module
Then upload a textual content module to column 1 with the next mock content material:
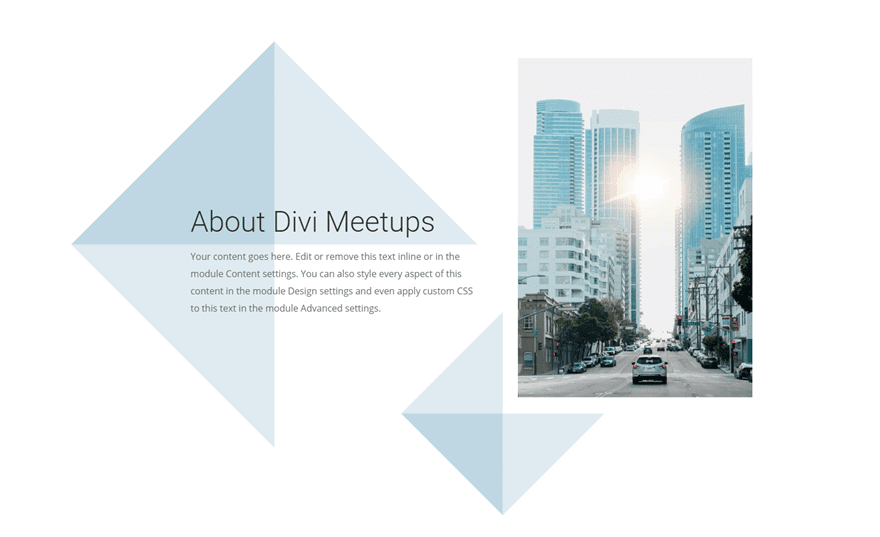
About Divi Meetups
Your content material is going right here. Edit or take away this newsletter inline or within the module Content material settings. You'll be able to additionally taste each facet of this content material within the module Design settings or even follow customized CSS to this newsletter within the module Complex settings
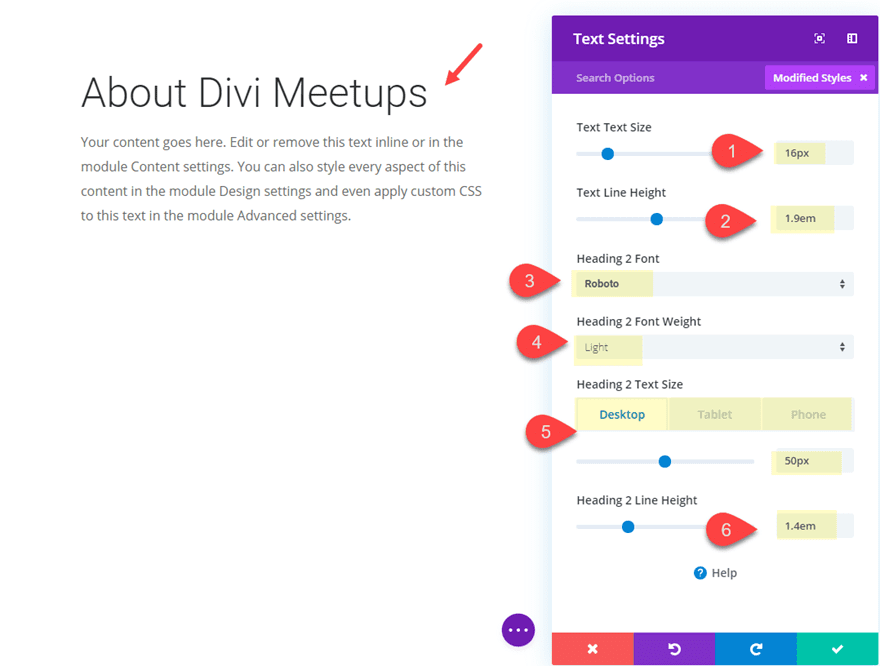
Then replace the design as follows:
Textual content Textual content Measurement: 16px
Textual content Line Top: 1.9em
Heading 2 Font: Roboto
Heading 2 Font Weight: Gentle
Heading 2 Textual content Measurement: 50px (desktop), 40px (pill), 32px (telephone)
Heading 2 Line Top: 1.4em
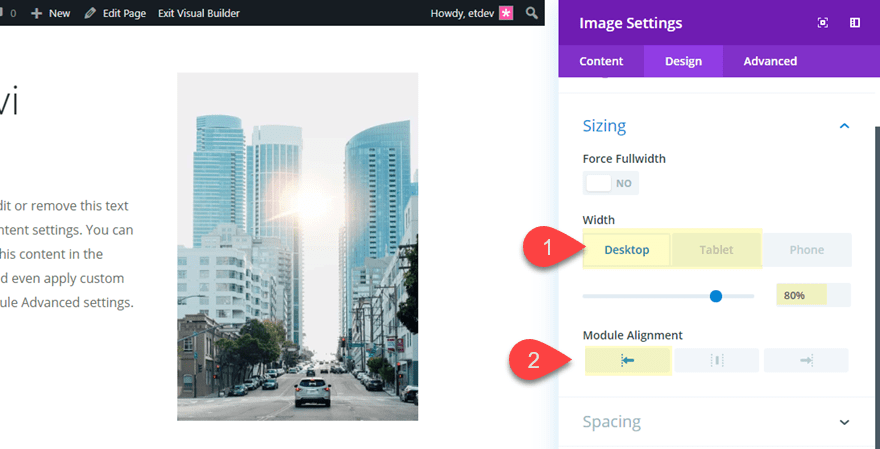
Upload the Symbol Module
Subsequent upload a picture module to column 2 and add the picture you wish to have to show. On this instance I’m the usage of a picture from one among our structure packs this is 800px through 1156px.
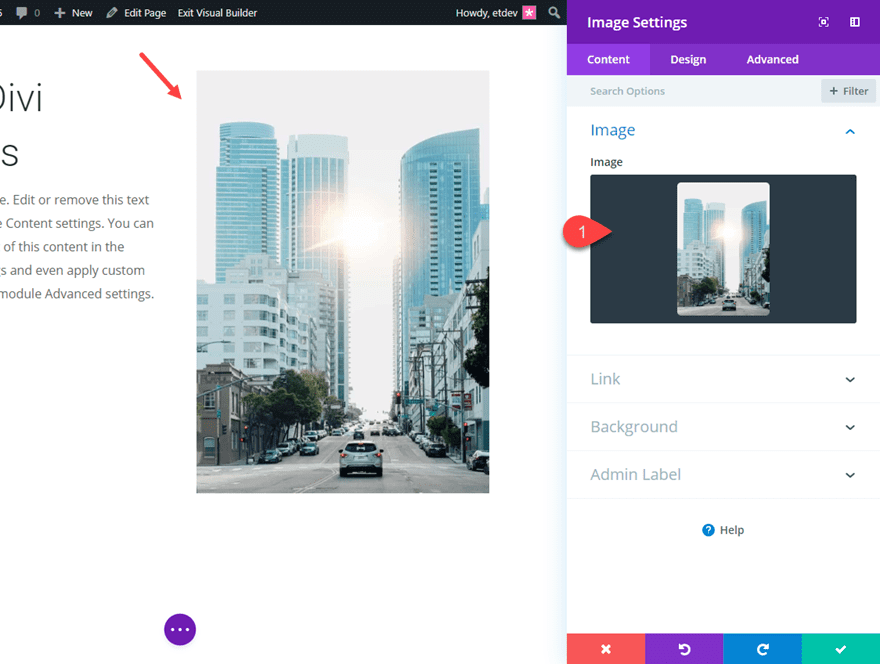
Then alter the width and alignment of the picture as follows:
Width: 80% (desktop), 70% (pill)
Module Alignment: Left
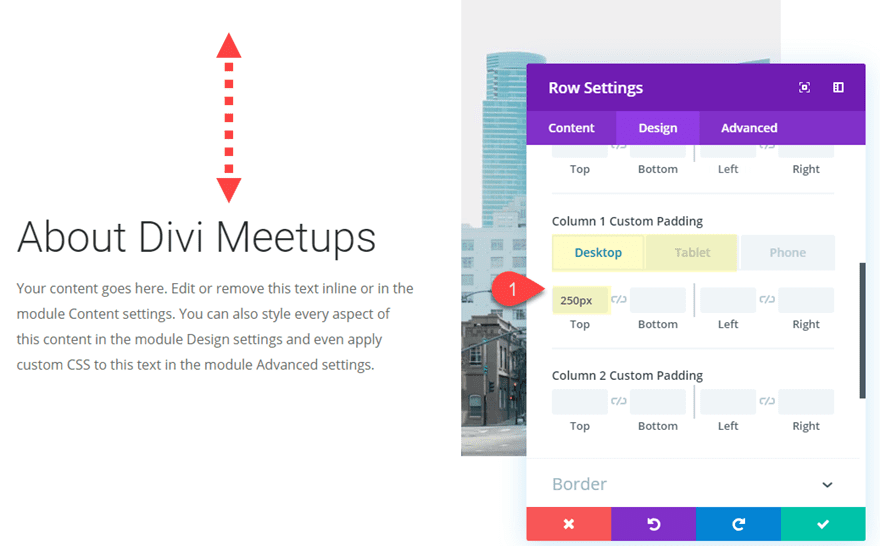
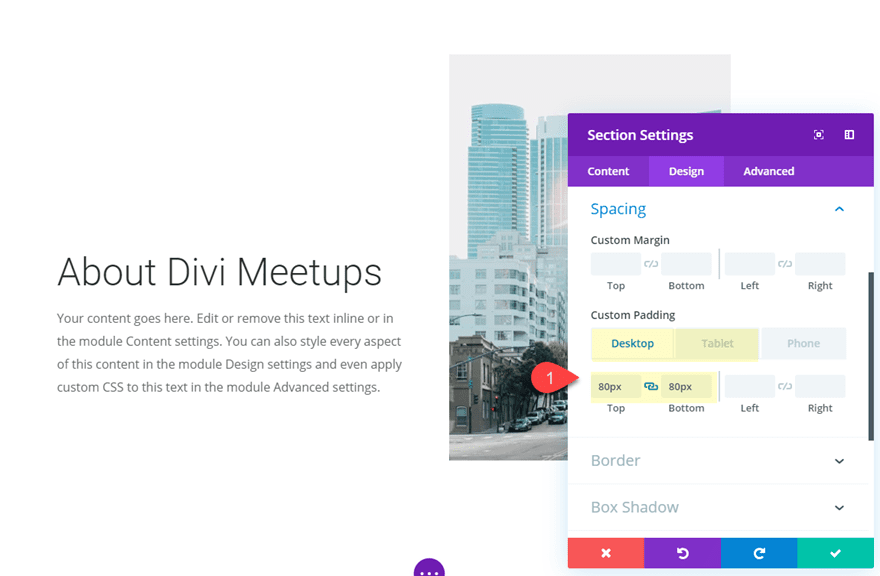
Upload Padding to Column 1
With our textual content and symbol in position, we wish to upload some peak padding to column 1 to deliver down our textual content module. Open the row settings and replace the next:
Column 1 Customized Padding (desktop): 250px peak
Column 1 Customized Padding (pill): 50px peak
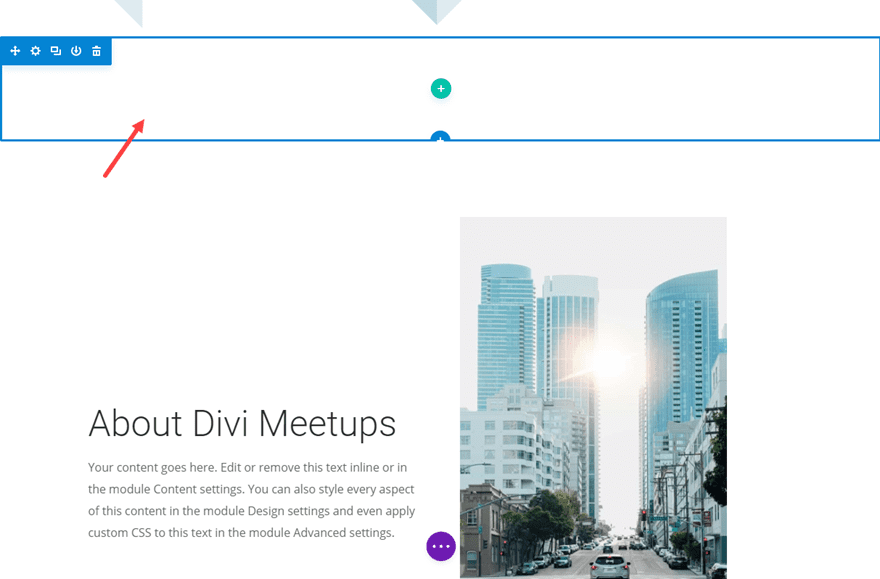
Including Best Segment with Segment Divider
At this level, we’re able so as to add our first segment divider design. To do that we wish to create a brand new segment. So pass forward and create a brand new common segment (don’t upload a column to the segment as a result of we gained’t want one) and drag it above the segment containing our textual content and symbol.
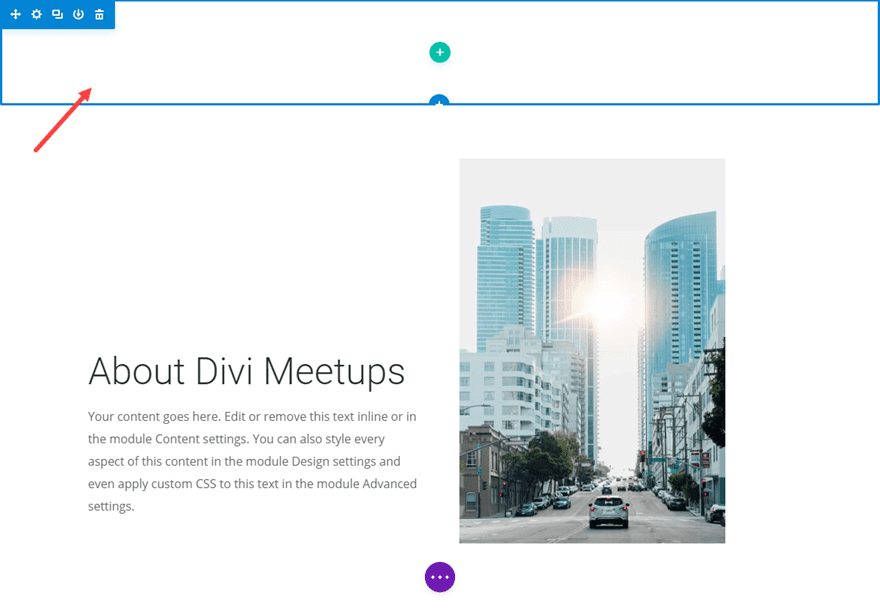
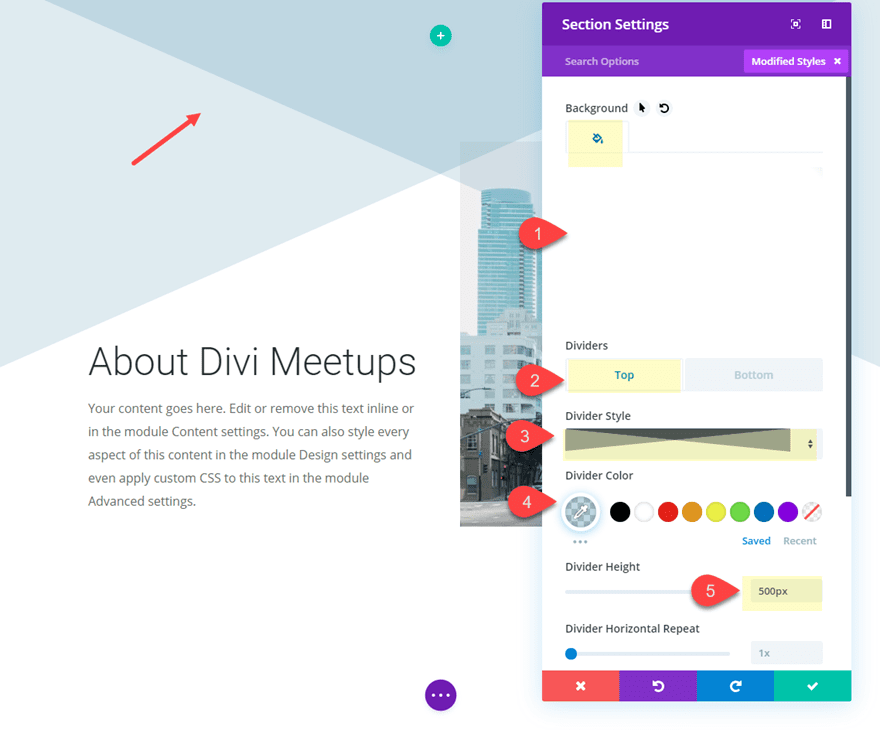
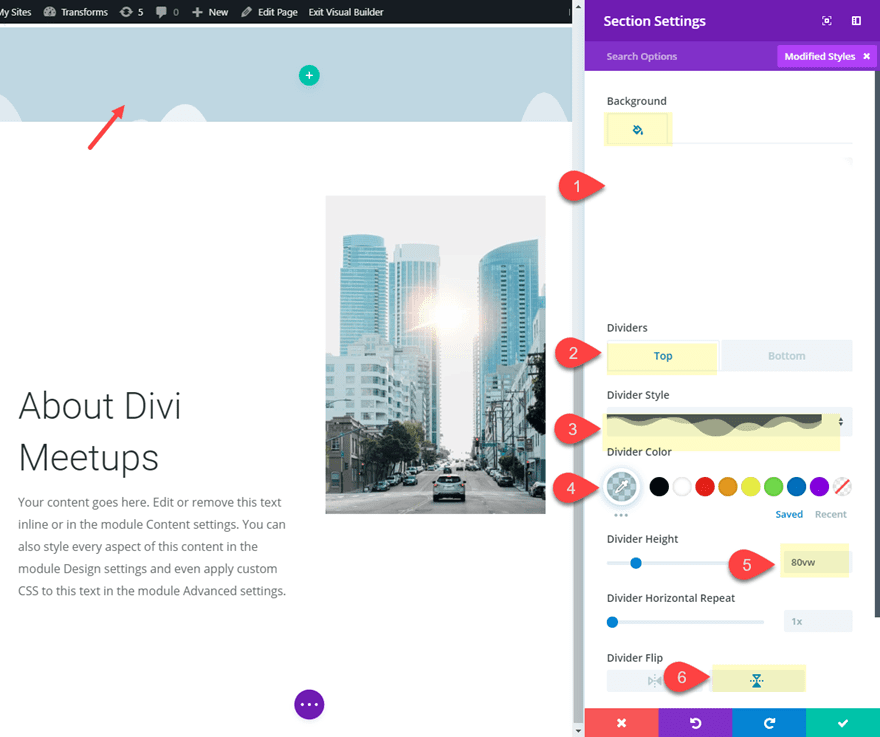
Then give the segment and clear background and a peak divider through updating the next:
Background Colour: rgba(0,0,0,0)
Best Divider Taste: see screenshot
Divider Colour: rgba(120,168,193,0.45)
Divider Top: 500px (desktop), 400px (pill), 300px (telephone)
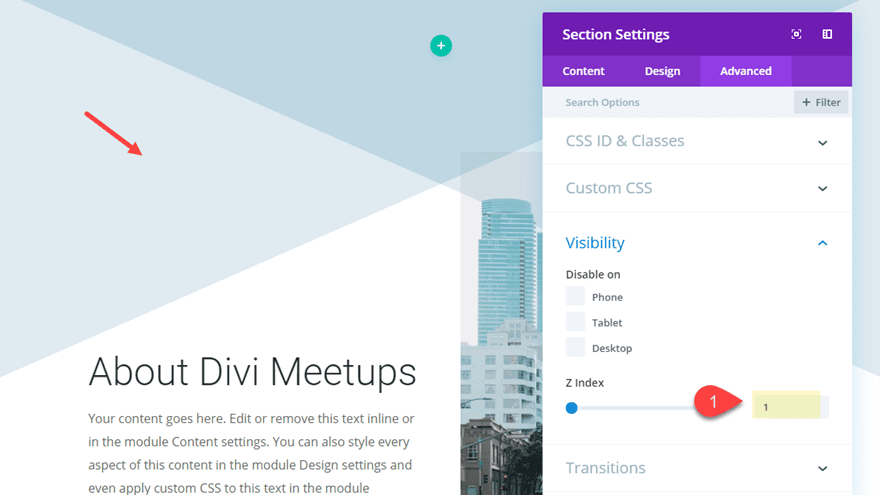
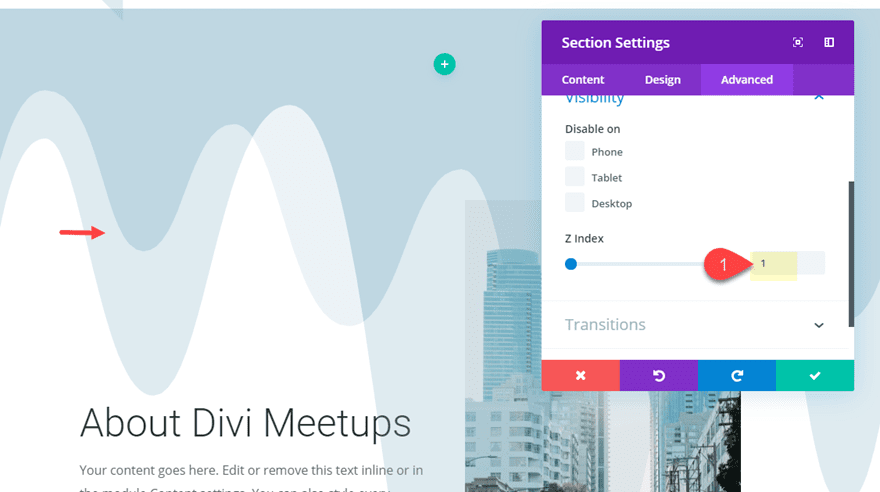
Subsequent, pass to the complicated tab and set the Z Index worth to at least one in order that it’ll keep above the segment under it.
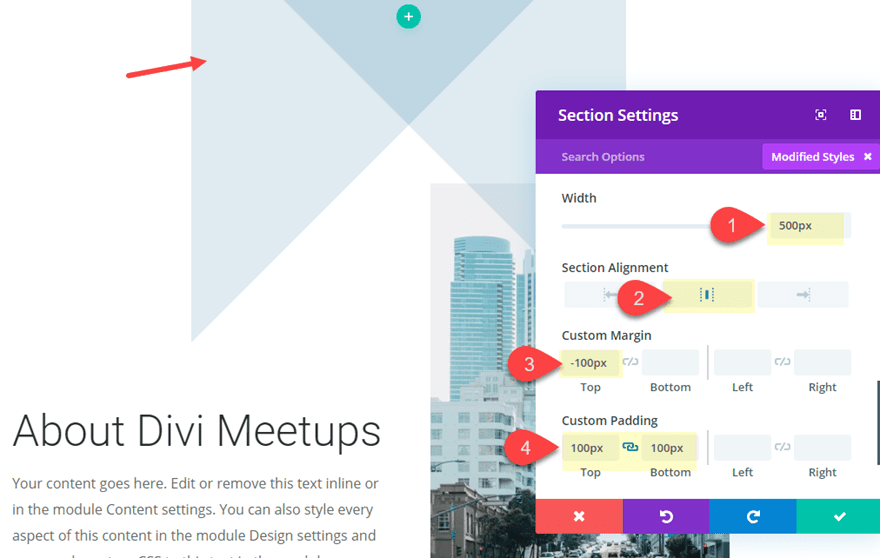
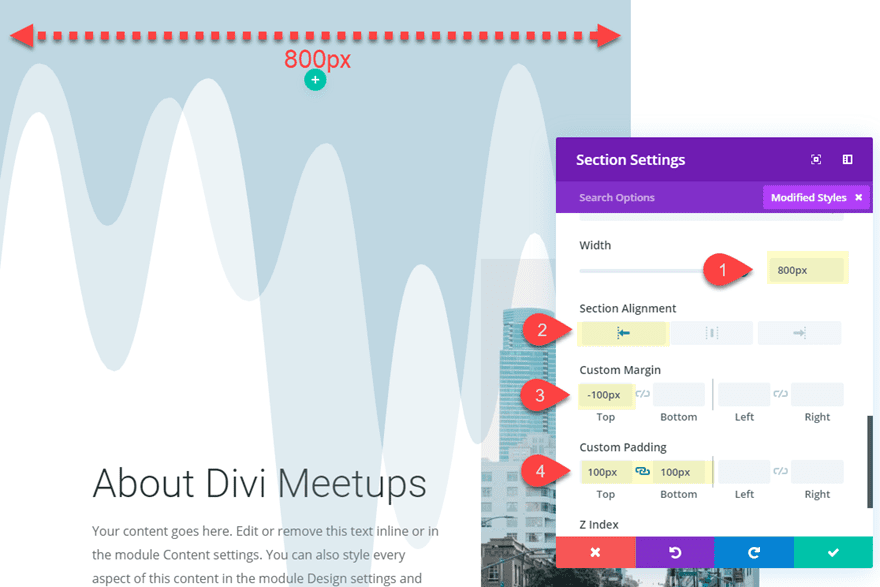
Then replace the scale and spacing of the segment as follows:
Width: 500px (desktop), 400px (pill), 320px (telephone)
Segment Alignment: Middle
Customized Margin: -100px
Customized Padding: 100px peak, 100px backside
Observe that the width equals the peak of the divider we added previous (500px for desktop, 400px for pill, and 320px for telephone). This may give us a superbly sq. design for our segment divider. It is usually essential to shrink the width and divider top to regulate for pill and contact as a result of in case you don’t the segment will skew and ruin the design or motive overflow at the browser viewport.
The customized padding is simply to provide the segment some top in order that we don’t have to regulate the change into translate values as a lot in a while.
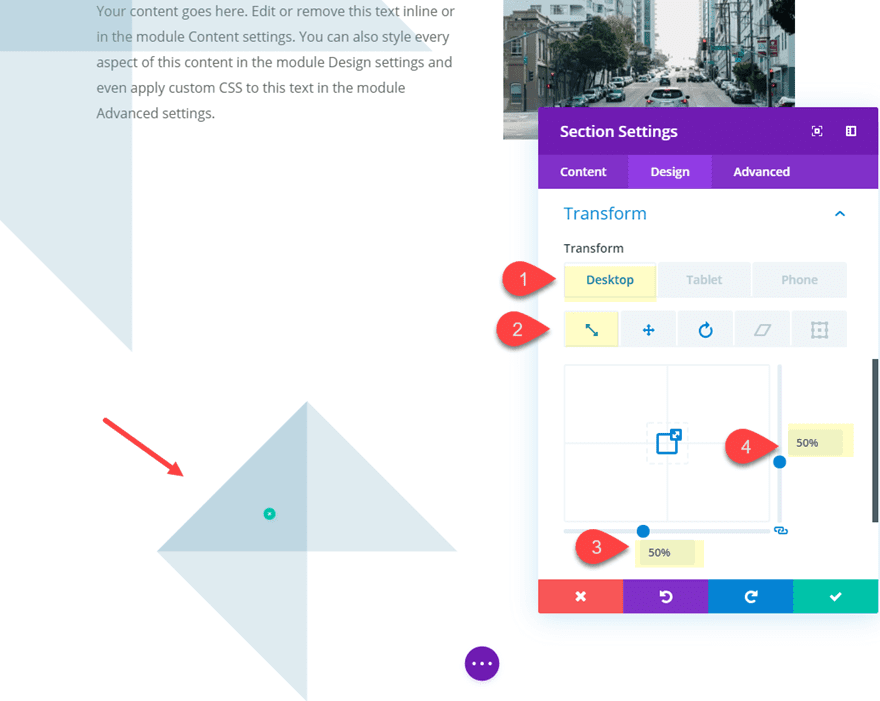
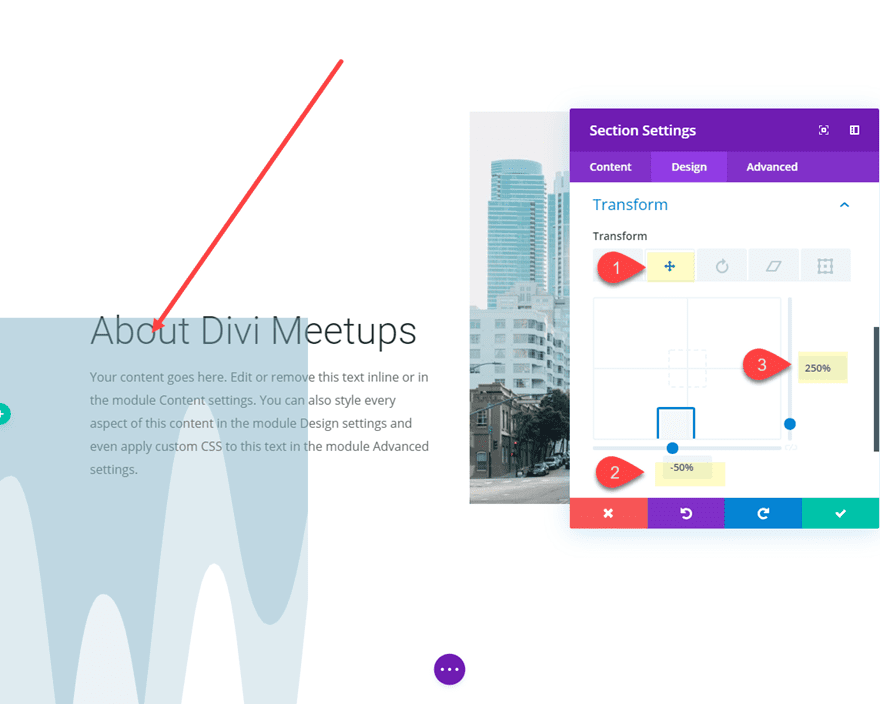
Now that we’ve got our segment design in position, we will be able to use the change into choices to place and rotate the segment divider anywhere we would like it at the web page.
Replace the next:
Become Translate X-axis (desktop): -100%
Become Translate Y-axis (desktop): 200%
Become Translate X-axis (pill): -50%
Become Translate Y-axis (desktop): 100%

Become Rotate Z-axis: -45deg

Reproduction and Paste Segment
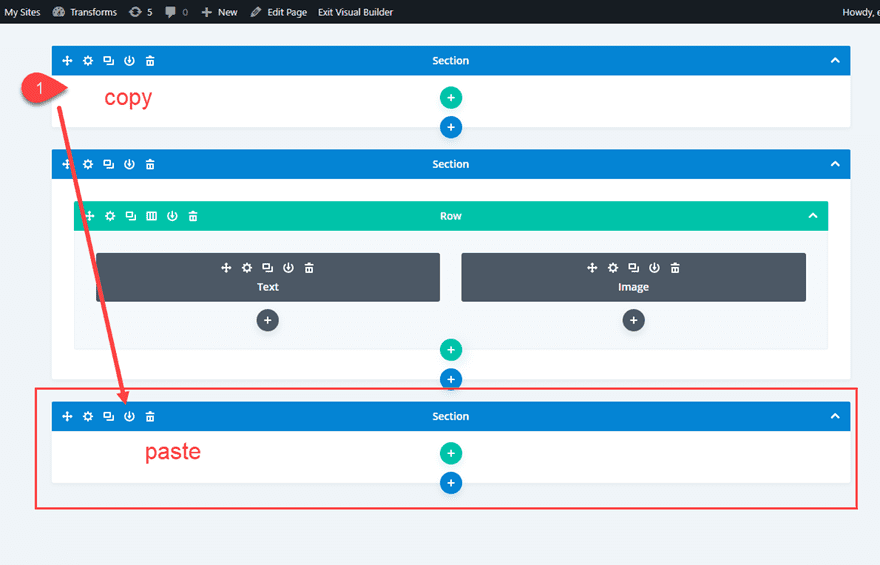
We’re going to upload another segment divider design to the web page. However to get a head get started at the design, deploy the wireframe view mode and replica the highest segment (with the segment divider taste) and paste it under the segment containing the textual content and symbol.
Replace Segment Settings
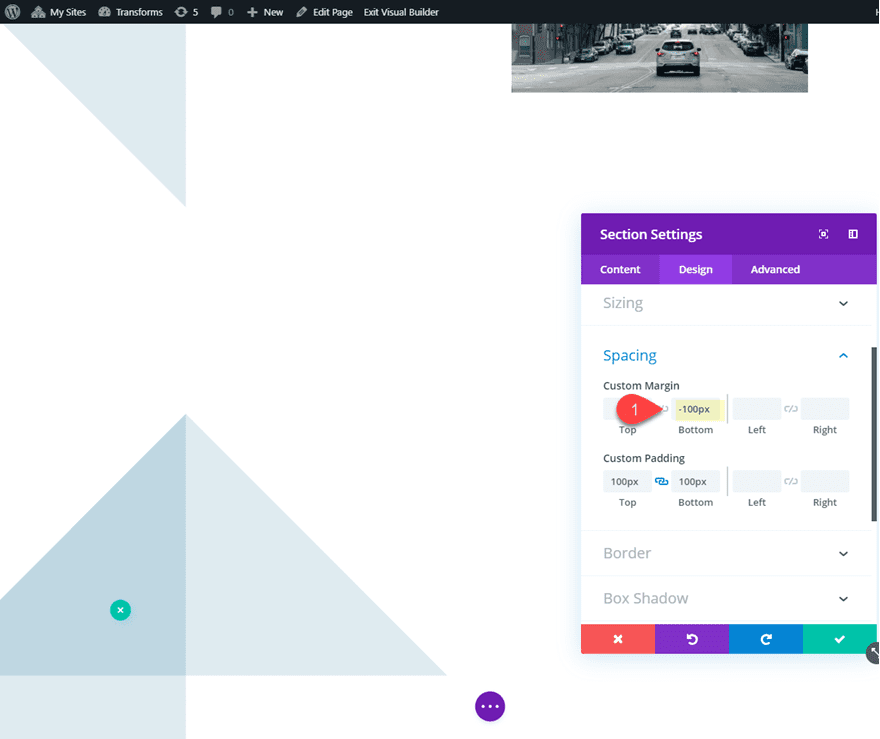
Then replace the customized margin as follows:
Customized Margin: -100px backside
Subsequent we will be able to shrink the scale of the segment the usage of the change into scale possibility as follows:
Become Scale (X and Y axis): 50%
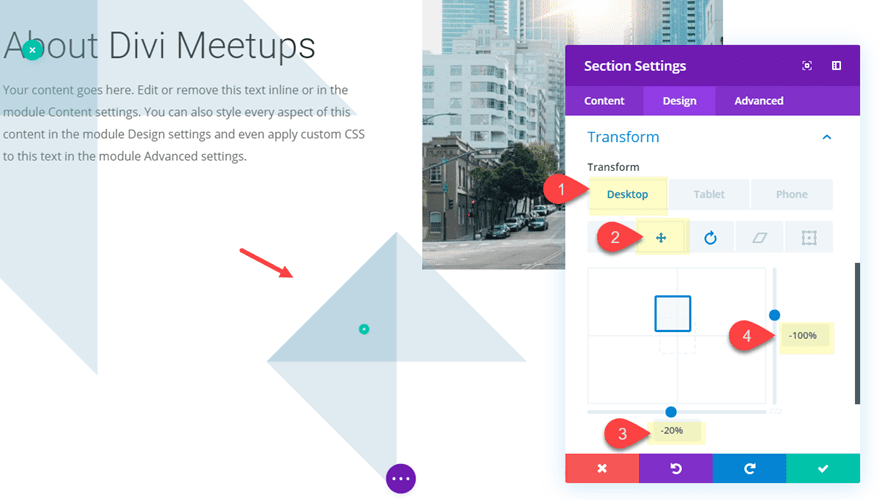
The use of change into translate, we will be able to transfer the segment upward and to the correct as follows:
Become Translate X-axis (desktop): -20%
Become Translate Y-axis (desktop): -100%
Become Translate X-axis (pill): 80%
Become Translate X-axis (pill): 30%
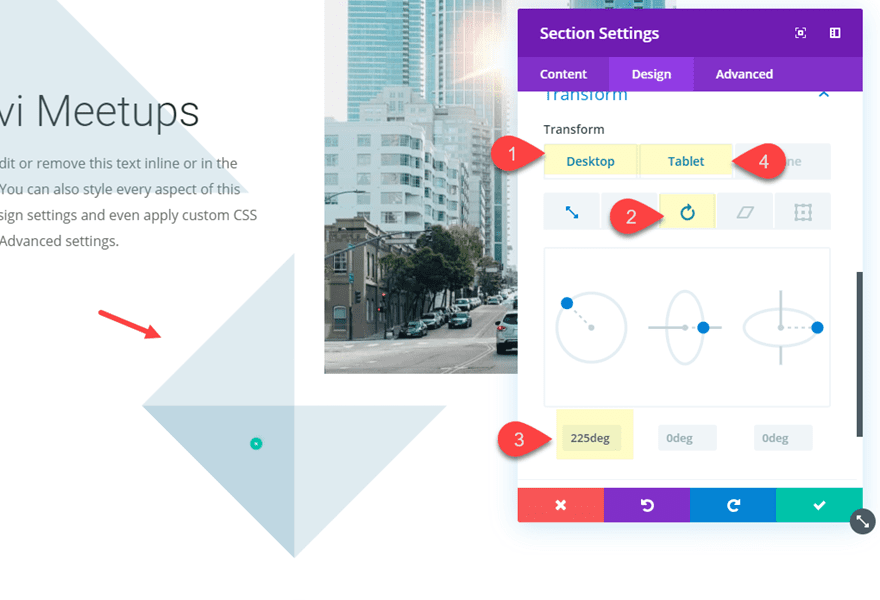
Now rotate the segment as follows:
Become Rotate Z-axis (desktop): 225deg
Become Rotate Z-axis (pill): -225deg
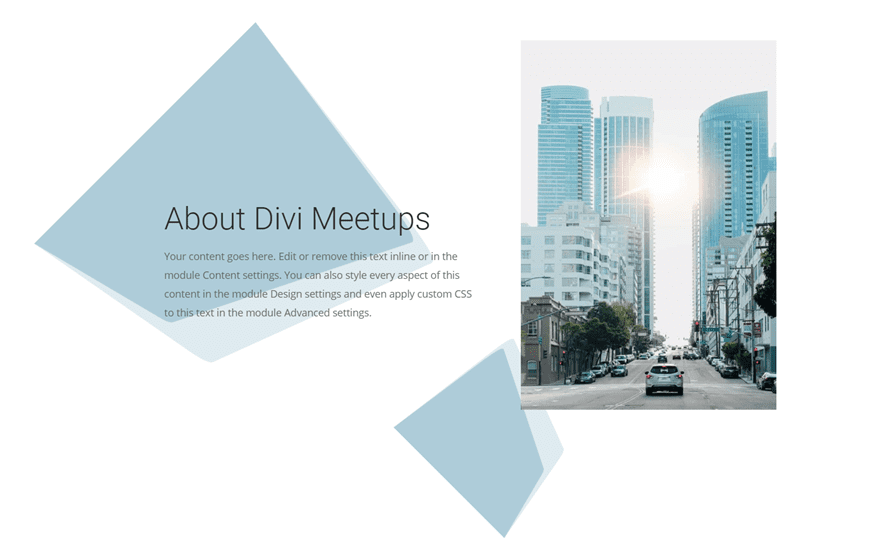
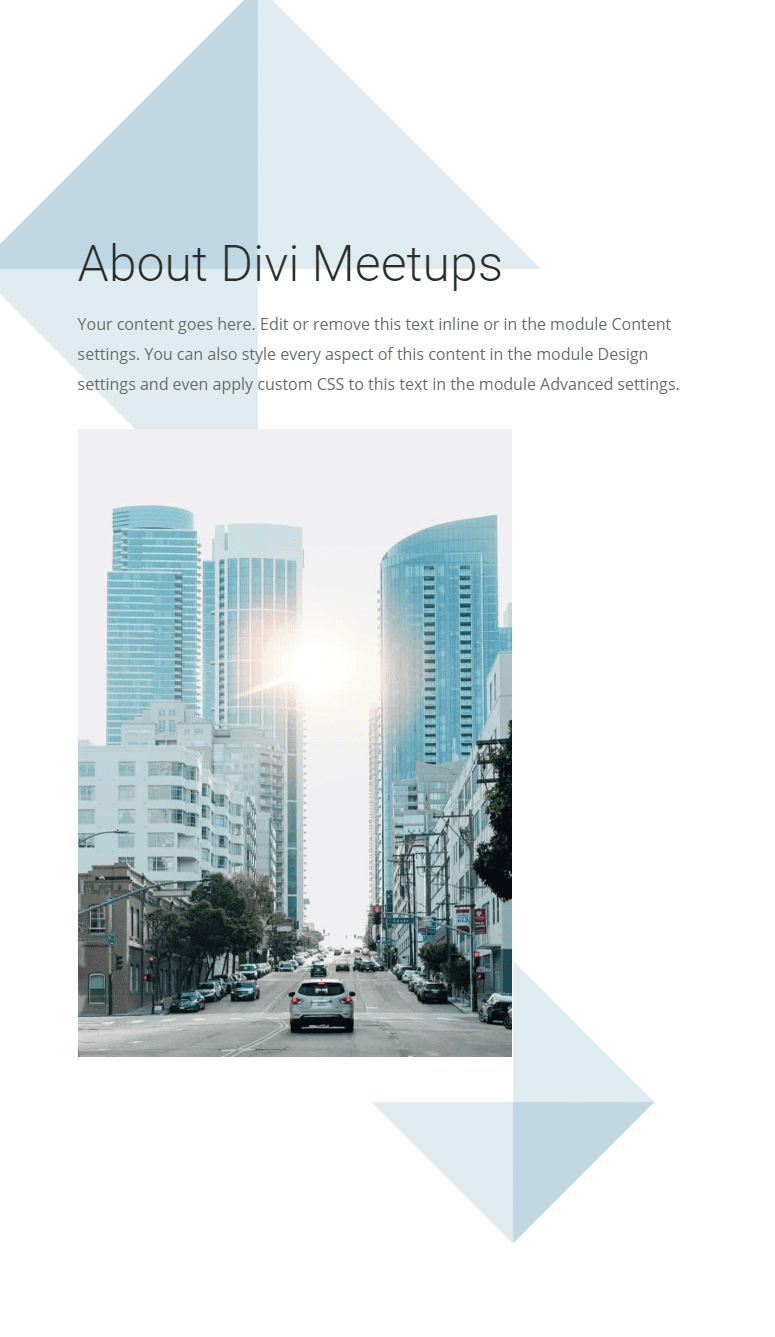
Ultimate Outcome
Let’s take a look at the general end result. Understand how the sections are repositioned on pill and contact for an exquisite design.
And listed here are a couple of examples of various Divider Types the usage of the similar structure. Be at liberty to experiment with other kinds and rotations of your individual.
Developing Horizontal Segment Dividers
Divi’s change into choices additionally let us rotate segment dividers to create horizontal segment divider designs. This may give a novel background for you web page content material.
Right here’s the right way to do it.
Reproduction the Segment with Mock Content material
For this case, we will be able to use the similar segment of content material we created for the primary instance above. Pass forward and replica and paste the segment on the backside of the web page.
Replace Content material Segment
Subsequent, open the segment settings for the duplicated segment and replace the next:
Customized Padding (desktop): 80px peak, 80px backside
Customized Padding (pill): 0px peak
Developing the Horizontal Segment Divider
To create the horizontal segment divider, first create a brand new common segment at once above the content material segment.
Then replace the next:
Background Colour: rgba(0,0,0,0)
Best Divider Taste: see screenshot
Best Divider Colour: rgba(120,168,193,0.45)
Best Divider Top: 80vw
Best Divider Turn: vertical
To verify we will be able to see the segment divider on peak of the segment under it, we wish to replace the Z Index to at least one.
Subsequent we wish to give our segment a customized width and spacing as follows:
Width: 800px
Segment Alignment: left
Customized Margin: -100px peak
Customized Padding: 100px peak, 100px backside
The width of the segment (800px) will develop into the peak of the segment as soon as it rotates to function a horizontal segment divider. So it’s possible you’ll wish to alter this top relying at the quantity of content material you’ve gotten within the segment under it.
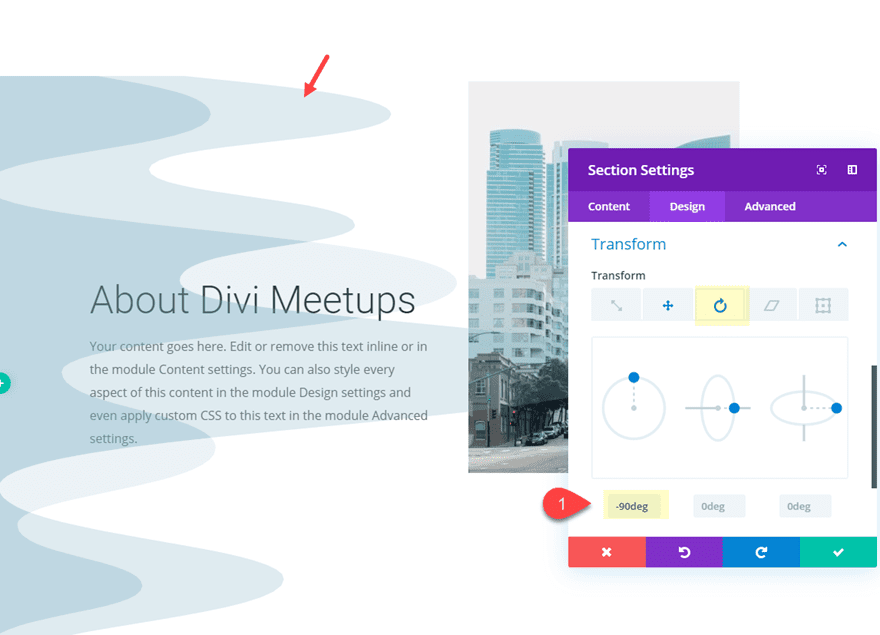
Now we’re able to place and rotate the segment the usage of change into choices as follows:
Become Translate X-axis: -50%
Become Translate Y-axis: 250%
Become Rotate Z-axis: -90deg
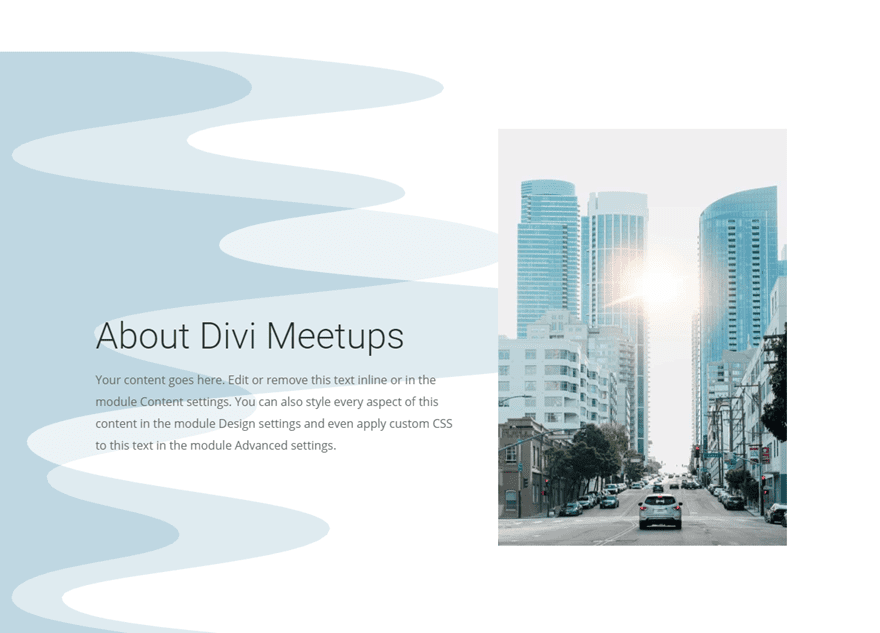
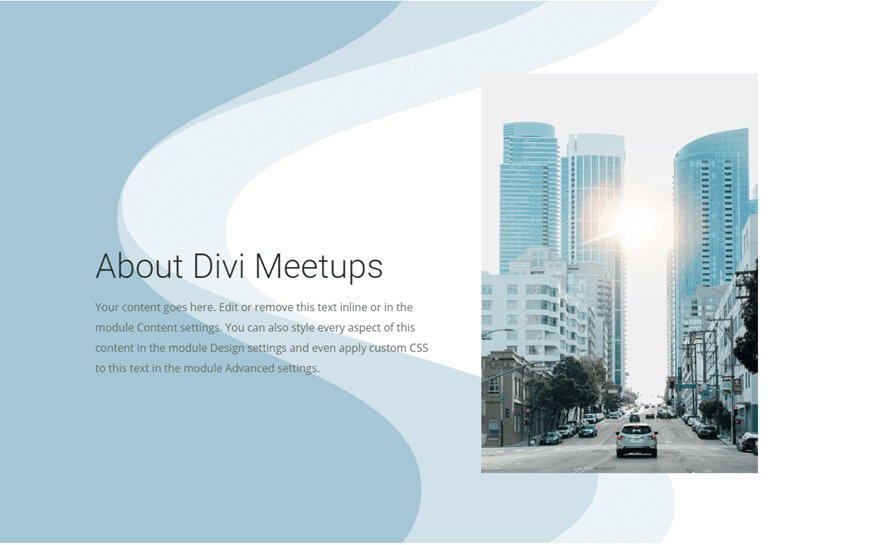
Ultimate Outcome
Here’s the general results of the design.
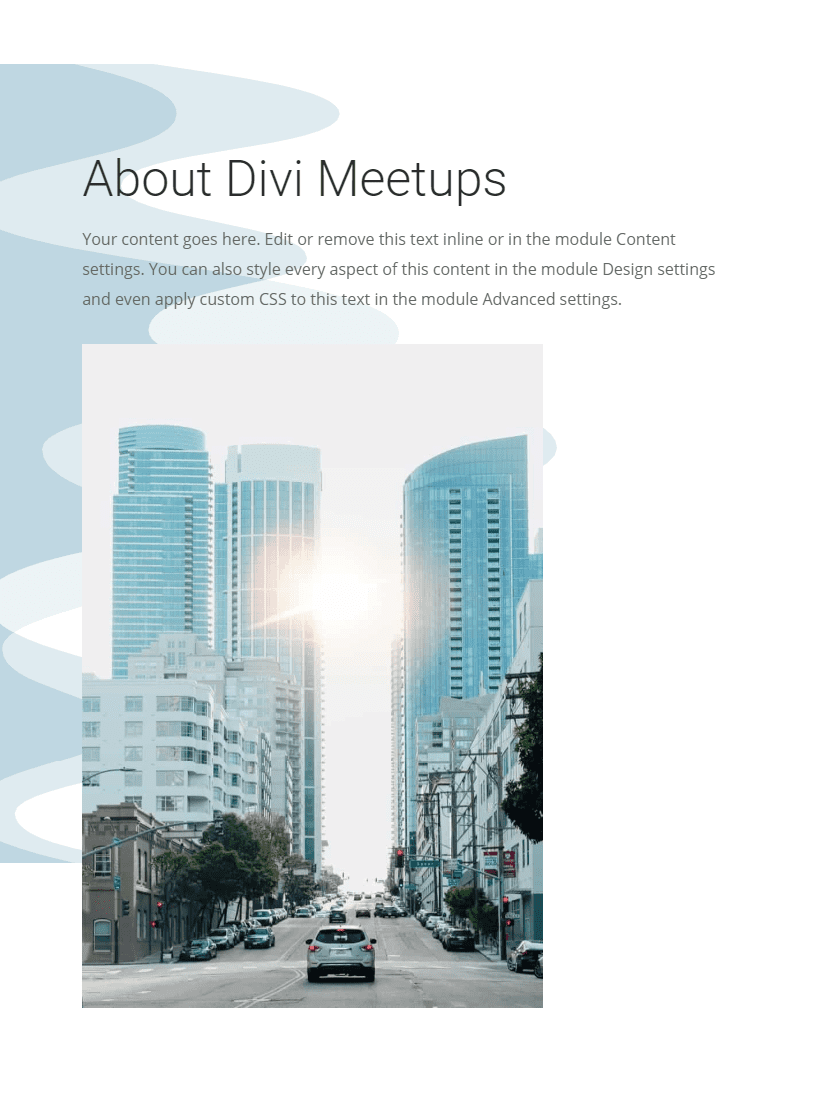
And listed here are a couple of extra examples of various divider kinds the usage of the similar structure.
Wrapping Up
There’s all the time room for extra concepts on the right way to upload distinctive design on your site. With Divi’s change into choices and simple to design segment dividers, you’ll be able to do a little lovely inventive issues. Confidently, the examples on this instructional will encourage you to create some segment divider backgrounds to deliver a contemporary new spin for your subsequent challenge.
I stay up for listening to from you within the feedback.
Cheers!
The put up How to Use Transform Options to Design Unique Section Divider Backgrounds in Divi gave the impression first on Elegant Themes Blog.
WordPress Web Design