
When making a web site, we need to exhibit our services and products with transparent calls to motion (CTA’s). If you will create a extra distinctive design to your buttons, it additionally is helping so as to add hover results to keep away from any confusion about whether or not or now not your buttons are clickable.
On this educational, we’re going to turn you find out how to design sections to exhibit featured services and products with transparent and distinctive CTA’s. We’ll even display you find out how to use integrated Divi design choices so as to add an expandable hover impact for your CTA’s.
Contents
Sneak Peek
Here’s a little sneak peek of the design we will be able to be growing on this publish.

What You Want
The one design device you’re going to want as of late is Divi. We’re going to be the use of the Divi Builder design choices so as to add some inventive spacing, borders, and buttons to create a refreshing and well-balanced design.
The way to Create a Distinctive Increasing CTA Phase with Divi
Subscribe To Our Youtube Channel
Designing the Phase
Create a brand new web page and deploy the visible builder to get began. By way of default, Divi can have a bit with a one-column row in a position so that you can edit. This may occasionally paintings for what we want to get began. Click on to replace the segment settings and replace the choices as follows.
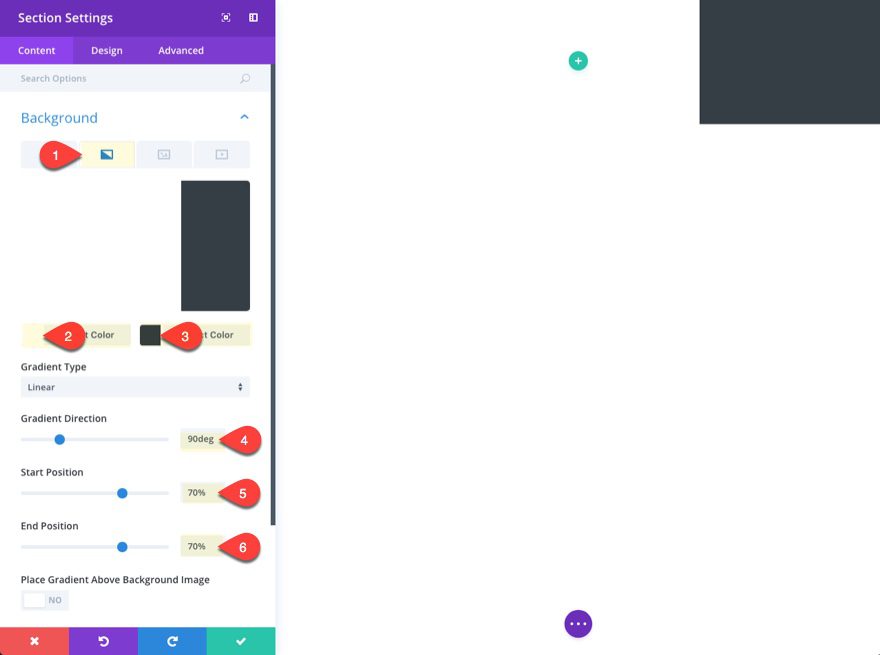
Beneath the content material tab, click on the gradient background tab and input the next:
Left Gradient Colour: #ffffff
Proper Gradient Colour: #353e45
Gradient Course: 90deg
Get started Place: 70%;
Finish Place: 70%;
This may occasionally create the darkish blue shade best at the proper facet of the segment background that may function the suitable facet of our body for the segment content material.
Tip: So long as you choose the tip place to be equivalent to or not up to the beginning place of the gradient, you’ll create an unblended distinction of the 2 gradient colours. The 90deg gradient course makes it a superbly vertical line of department.
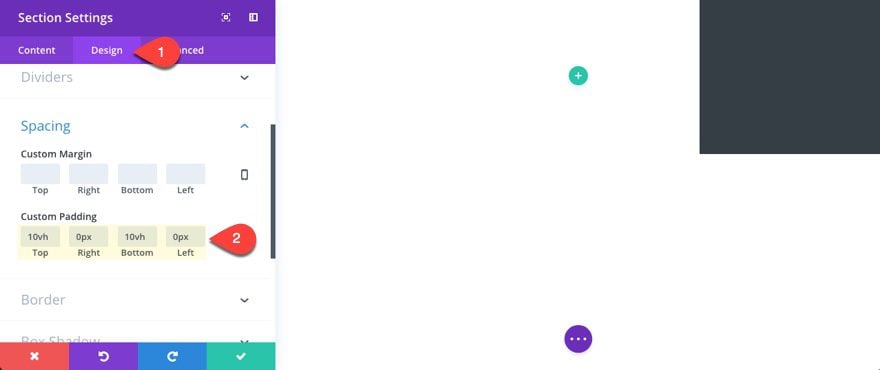
Subsequent we want to pass to the design tab and upload some customized padding that may glance nice and paintings nicely on all units.
Customized Padding: 10vh Best, 0px Proper, 10vh Backside, 0px Left
Notice: 10vh stands for 10 p.c of the viewport top (vh) of the browser. This may occasionally modify well when adjusting your browser to other heights with no need to present a separate price to our cellular units.
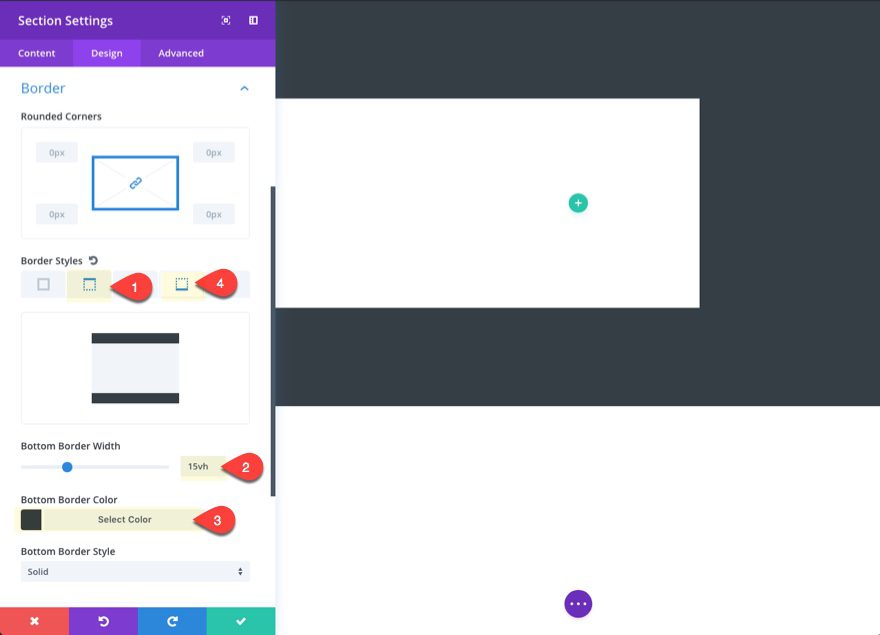
To create the highest and backside of our segment body design, we’re going to upload a best and backside border to our segment.
Click on the Best Border taste tab and upload the next:
Best Border Width: 15vh
Best Border Colour: #353e45
Then click on the Backside Border taste tab and upload the next:
Backside Border Width: 15vh
Backside Border Colour: #353e45
Save settings.
Designing the Phase Row
Now we’re in a position to customise our Row. Click on to edit the row settings and provides your row background symbol with a gradient overlay.
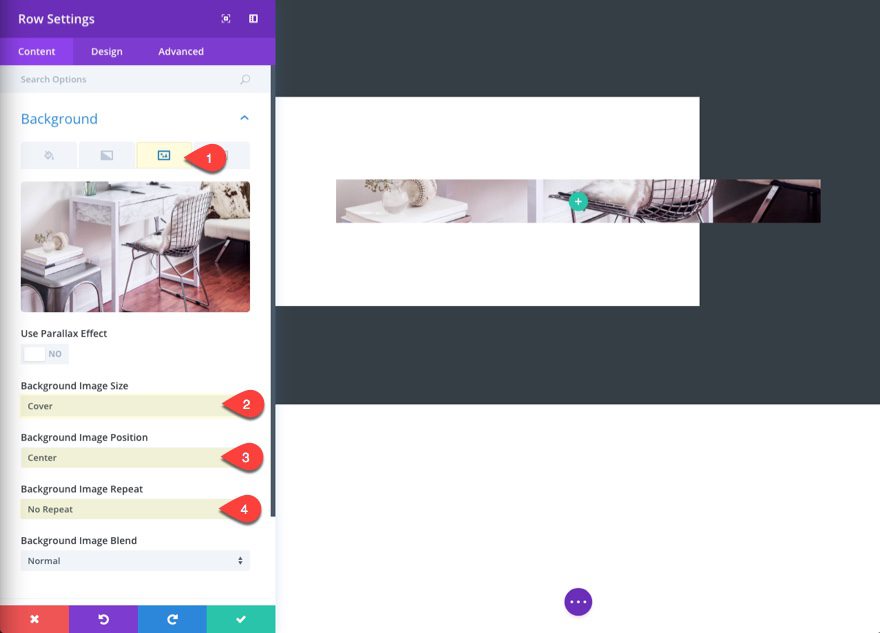
First, click on the background symbol tab and add your symbol. It must be round 1920px through 1200px. Then replace the next:
Background symbol Measurement: Duvet
Background Symbol Place: Heart
Background Symbol Repeat: No Repeat
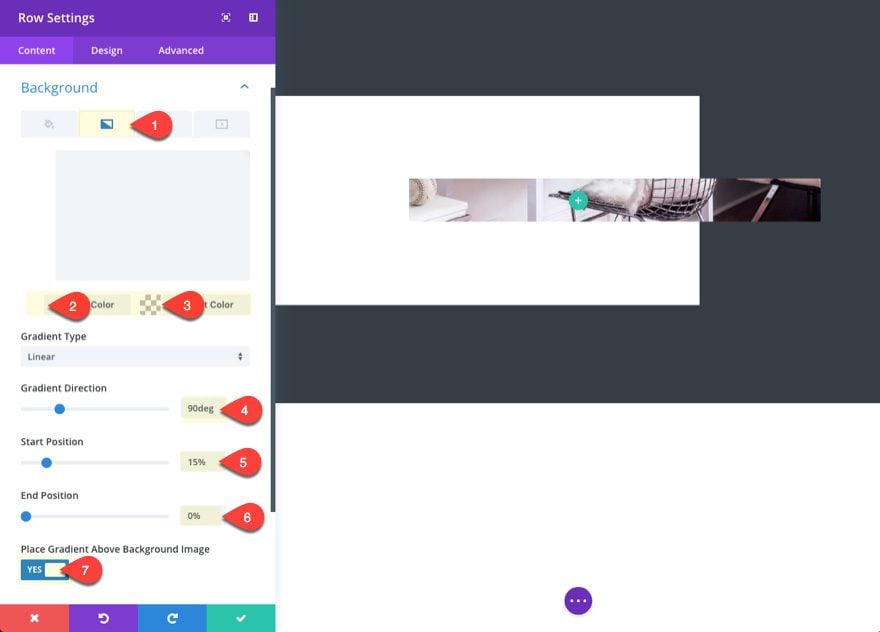
Then click on the background gradient tab and input the next:
Left Gradient Colour: #ffffff
Proper Gradient Colour: rgba(255,255,255,0)
Gradient Course: 90deg
Get started Place: 15%
Finish Place: 0%
Position Gradient Above Background Symbol: YES
This creates a white overlay best on 15% of the row at the left facet.
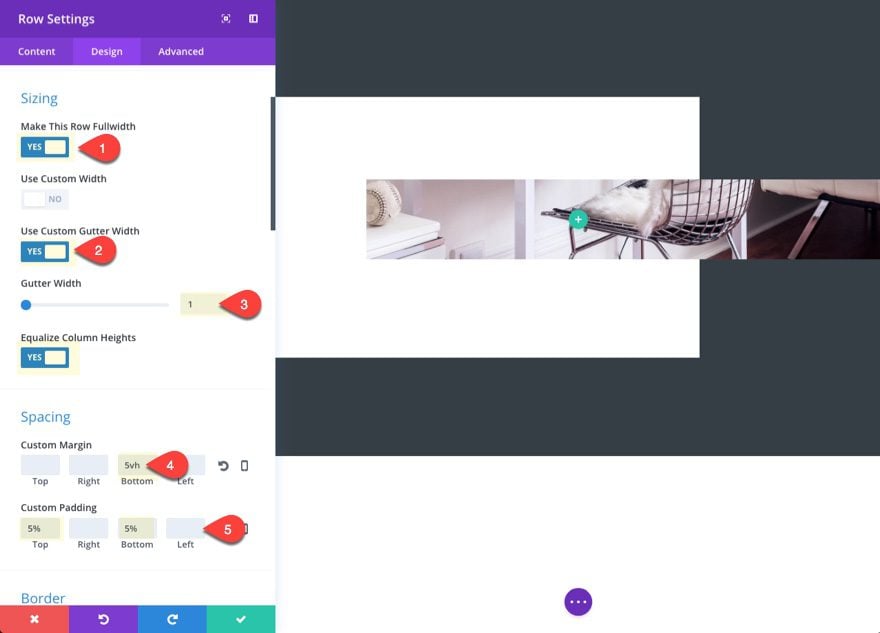
Now pass over to the design tab and provides your row some customized sizing and spacing.
Make this row fullwidth: YES
Use Customized Gutter Width: YES
Gutter Width: 1
Equalize Column Top: YES
Customized Margin: 5vh
Customized Padding: 5% Best, 5% Backside
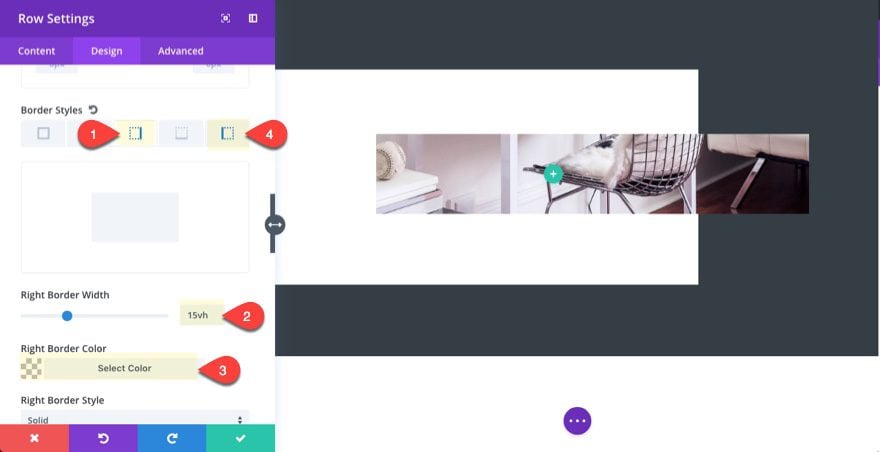
Subsequent, upload some clear borders to regulate the width of the row.
Proper Border Width: 15vw
Proper Border Colour: rgba(255,255,255,0)
Left Border Width: 5vw
Left Border Colour: #ffffff
Save Settings.
Developing Your Increasing CTA
Upload Your Column Construction and Design Your Button Module
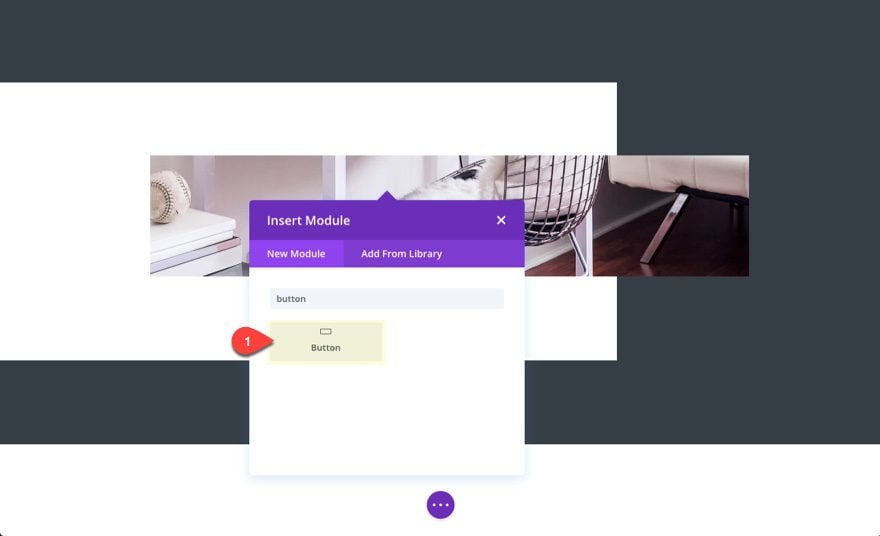
Now that your row settings are in position, upload a two-thirds one-third construction for your row after which upload a button module to the left two-thirds column.
Replace the next choices:
Button Textual content: Our Tasks
Button URL: [enter url]
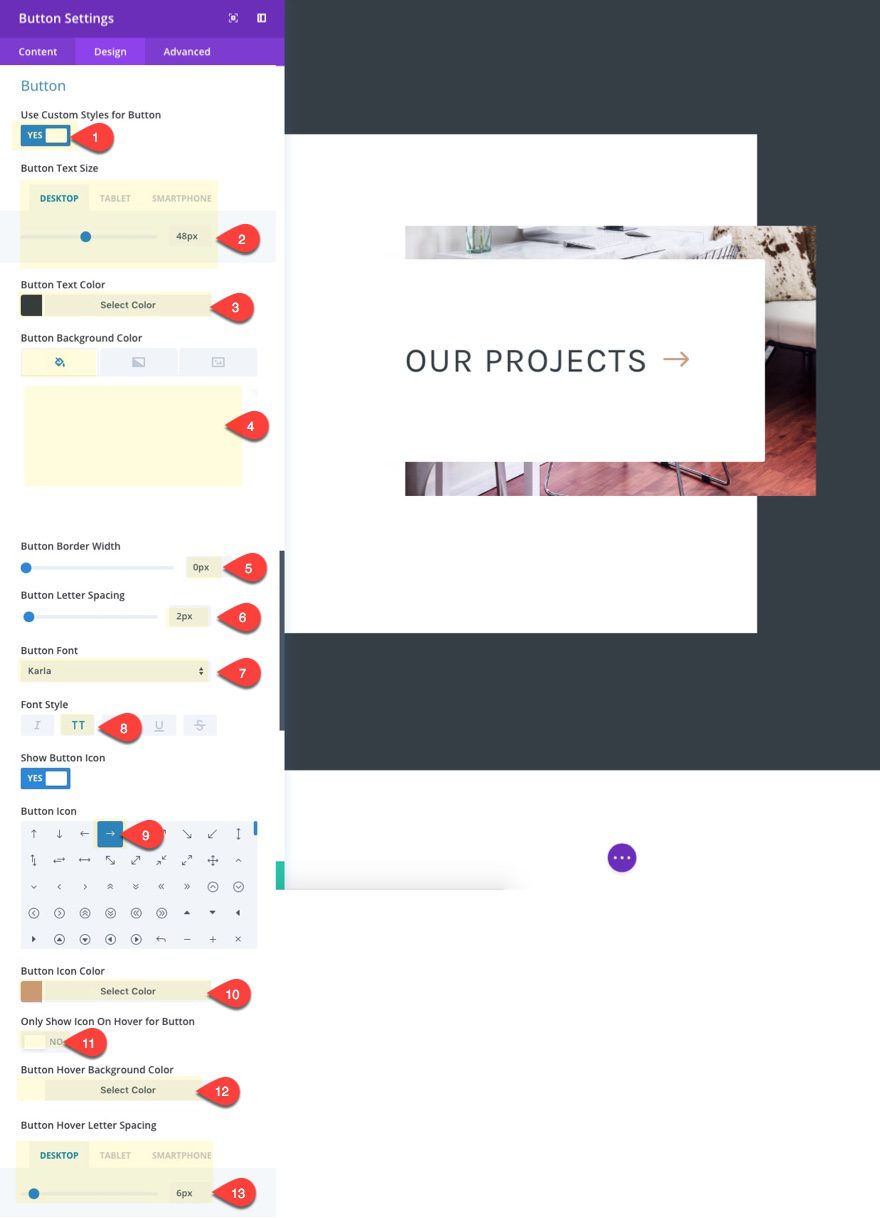
Use Customized Types for Button: YES
Button Textual content Measurement: 48px (desktop), 30px (pill), 18px (smartphone)
Button Textual content Colour: #353e45
Button Background Colour: #ffffff
Button Border Width: 0px
Button Letter Spacing: 2px
Button Font: Karla
Font Weight: Daring
Font: Taste: TT
Button Icon: see screenshot
Button Icon Colour: #cb9d85
Button Hover Letter Spacing: 6px (desktop), 3px (pill), 2px (smartphone)
The important thing to this design is to make use of the button hover letter spacing to cause the increasing impact when a person hovers over the button. I lowered the values on cellular to minimize the increasing distance.
Then upload some customized padding and a field shadow for your button to complete off the design.
Customized Padding: 15% Best, 24% Proper, 15% Backside, 15% Left
The suitable padding is about to twenty-five%. This may occasionally exchange with every button relying at the quantity/length of button textual content. It is important to modify this price for every button to verify all of the buttons line up and seem to be the similar width at the web page.
Field Shadow: see screenshot
Field Shadow Horizontal Place: 58px
Field Shadow Vertical Place: 0
Field Shadow Blur Energy: 80px
Field Shadow Unfold Energy: -43px
Shadow Colour: rgba(0,0,0,0.5)
The important thing to the field shadow design is to regulate the horizontal place and unfold energy in order that the shadow doesn’t display at the left facet of the button.

Reposition the Button Icon
So as to add a completion to our button, I’m going to reposition my button arrow icon in order that it at all times hugs the suitable facet of the button. That means you’ll upload buttons with other textual content and the arrow will at all times line up well at the proper facet. To do that, pass to the complicated tab and upload the next customized CSS within the After enter field:
proper: 30px;
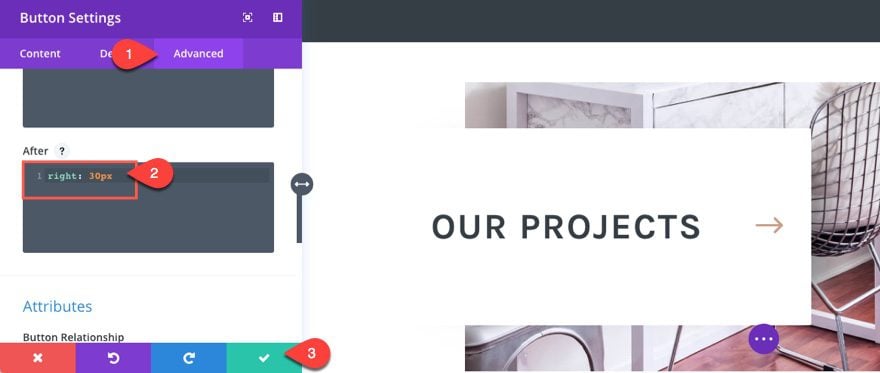
Now let’s take a look at outcome at the reside web page.

Including Extra Sections is Simple
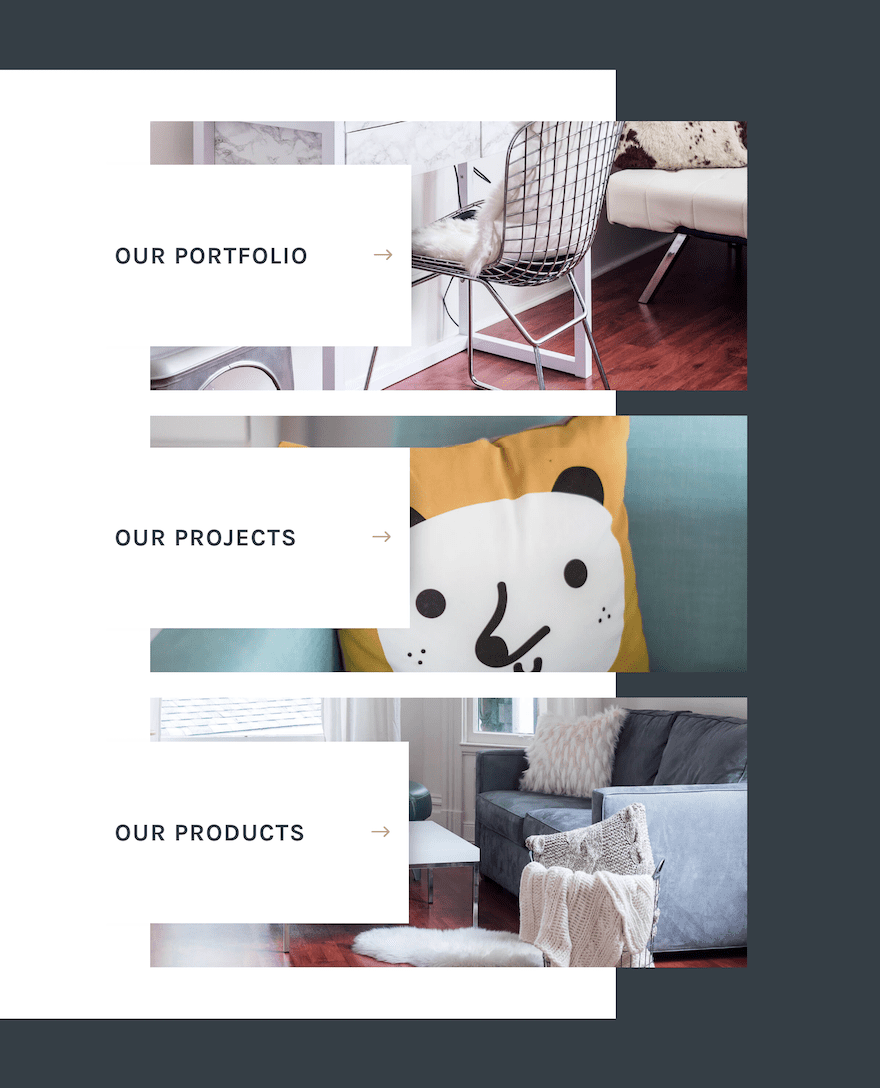
All it’s a must to do with the intention to create extra sections in your web page is replica the row. So, to create two extra sections, replica the row two times after which replace the row background symbol, button textual content. You’re going to additionally want to replace the suitable padding share price to your button with the intention to ensure that the buttons keep the similar width.
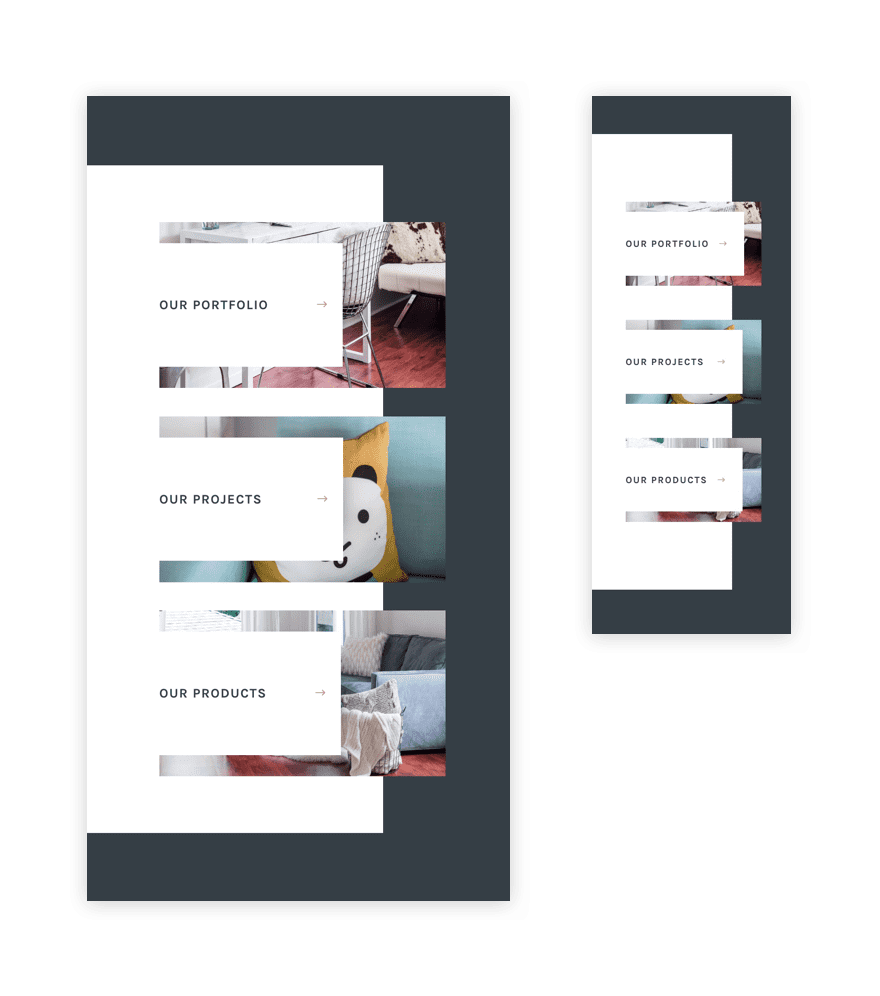
This is the overall outcome with all 3 sections.
Works nice on cellular too!
Here’s what the format seems like on desktop and cellular:
Ultimate Ideas
You’ll be able to create some lovely wonderful CTA sections the use of a few of these design tactics on this educational. The customized spacing and borders create distinctive framing to your segment and rows that glance blank and modify splendidly on all browsers. And the increasing hover impact created with the letter spacing is an effective way to get one of those microinteraction with no need to make use of further code.
I’m hoping this evokes you to create stunning calls to motion by yourself web page.
I stay up for listening to from you within the feedback.
.divi_cta{background-color: #8f43ee; shade: #fff; font-size: 20px; font-weight: daring; padding: 20px; text-align: heart; show: block; text-decoration: none; border-radius: 4px;}.divi_cta:hover{text-decoration:none;background-color:#7d37d6;}.divi_cta_red{background-color:#db1c1c;}.divi_cta_red:hover{background-color:#c51a1a;}
The publish How to Create a Unique Expanding CTA Section with Divi gave the impression first on Elegant Themes Blog.
WordPress Web Design