
Through the years, Kinsta has made important development in streamlining site control by the use of the MyKinsta dashboard. This robust dashboard permits customers to control their websites and carry out more than a few movements, together with restarting the PHP engine and clearing their web site’s cache.
Alternatively, the creation of Kinsta API takes site control to an entire new stage. Builders can now leverage the ability of Kinsta API to support the control procedure, create customized interfaces, or even construct scheduler programs to automate crucial duties.
This instructional delves into the arena of Kinsta API and explains find out how to construct a React utility for scheduling crucial upkeep duties like PHP engine restarts and cache clearing with the Kinsta API.
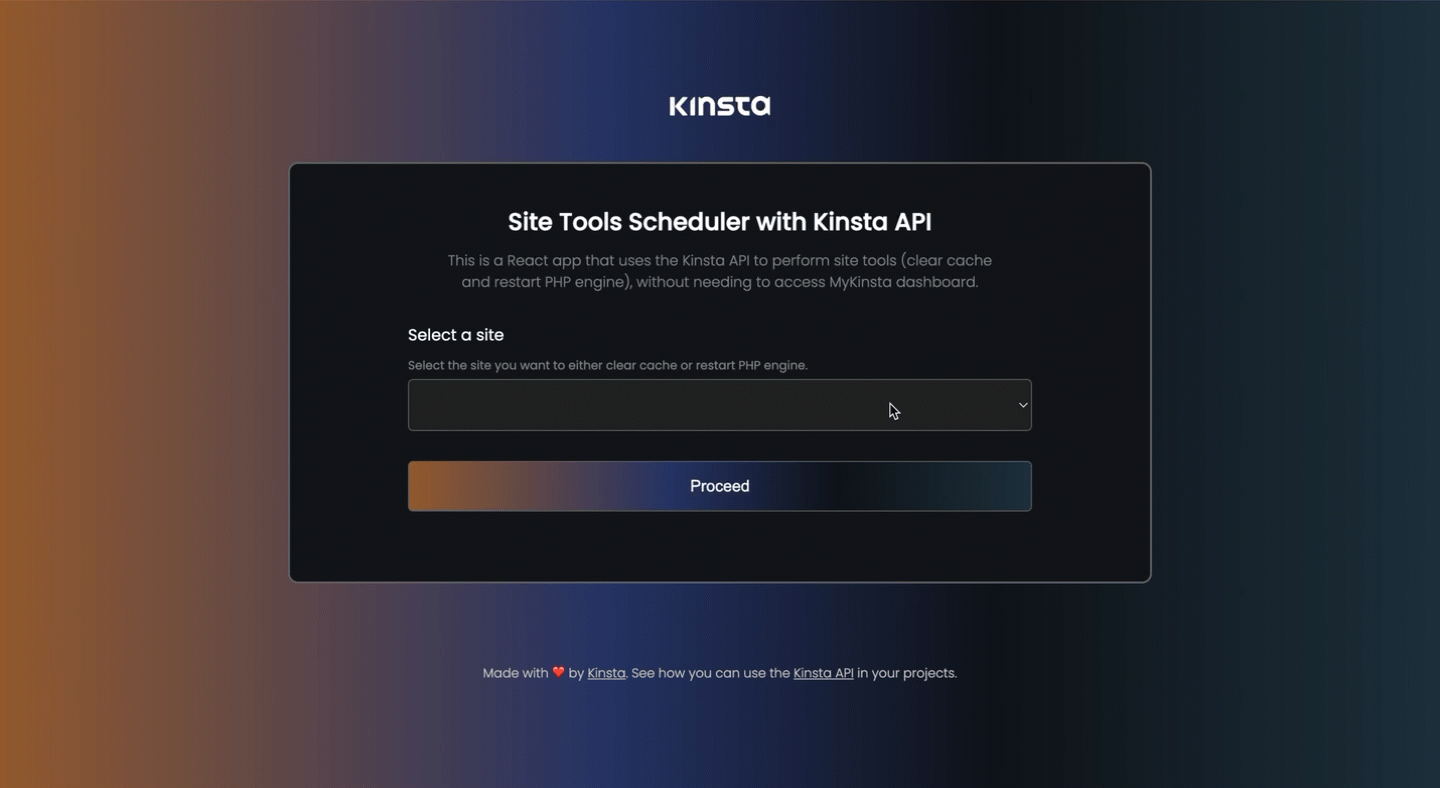
Right here’s a are living demo of the web site instruments scheduler utility.
Figuring out the Kinsta API
The Kinsta API is an impressive software that lets you have interaction with Kinsta’s Controlled WordPress Webhosting platform programmatically. It will probably lend a hand automate more than a few duties associated with the products and services supplied by way of Kinsta, together with web site advent, retrieving web site data, getting the standing of a web site, and a lot more.
To make use of Kinsta’s API, you should have an account with no less than one WordPress web site, utility, or database in MyKinsta. You additionally want to generate an API key to authenticate and get entry to your account during the API.
To generate an API key:
- Pass on your MyKinsta dashboard.
- Navigate to the API Keys web page (Your identify > Corporate settings > API Keys).
- Click on Create API Key.
- Make a selection an expiration or set a customized get started date and collection of hours for the important thing to run out.
- Give the important thing a singular identify.
- Click on Generate.

After developing an API key, reproduction it and retailer it someplace protected (You’ll be able to use a password supervisor), as that is the handiest time it’s published inside of MyKinsta. You’ll be able to generate more than one API keys — they’re indexed at the API Keys web page. If you want to revoke an API key, click on Revoke subsequent to the only you wish to have to revoke.
How To Use Kinsta’s Website Equipment With Kinsta API
The Kinsta web site software is a suite of instruments to be had to Kinsta customers to help them in managing their WordPress websites. Those instruments are to be had via MyKinsta (WordPress Websites > sitename > Equipment), however now not all are supported by way of the Kinsta API at the moment. Our crew is repeatedly running on including the following options, carefully following and being attentive to comments as Kristof Siket, Building Workforce Lead for Kinsta API, stocks:
Consumer comments drives the prioritization of characteristic publicity. The present plan doesn’t absolutely duvet the Equipment web page; as an alternative, options are in accordance with consumer requests and comments accumulated. If you happen to consider a selected software or endpoint must be integrated within the Kinsta API, be at liberty to ship for your comments.
As a way to make the most of the web site instruments supplied by way of Kinsta, it is important to procure the surroundings ID of your web site. Every web site on MyKinsta has no less than one surroundings, each and every with a singular ID. To retrieve the surroundings ID, you’ll leverage the Kinsta API by way of first acquiring your Website ID after which using it as a parameter to get entry to the corresponding surroundings knowledge.
To retrieve your web site ID, you’ll use the /websites endpoint, which returns a listing of your websites. After getting received the web site ID, you’ll retrieve the surroundings ID by way of creating a GET request to the /websites endpoint, specifying the ID, and appending the /environments endpoint.
This is an instance code snippet that demonstrates how to succeed in this the use of JavaScript Fetch API:
const siteId = 'YOUR_site_id_PARAMETER'; // Exchange together with your exact web site ID
const resp = anticipate fetch(
    `https://api.kinsta.com/v2/websites/${siteId}/environments`,
    {
        means: 'GET',
        headers: {
            Authorization: 'Bearer ' // Exchange together with your exact API key/token
        }
    }
);
const knowledge = anticipate resp.json();
console.log(knowledge);
Within the above code, you outline the siteId variable together with your web site’s ID. Then, you are making a fetch request to the Kinsta API’s endpoint for retrieving the environments of the required web site. Make sure you come with the API key within the Authorization header.
After receiving the reaction, the information is logged to the console, which comprises your surroundings(s) main points, together with the ID:
{
    "web site": {
        "environments": [
            {
                "id": "54fb80af-576c-4fdc-ba4f-b596c83f15a1",
                "name": "first-site",
                "display_name": "First site",
                "is_blocked": false,
                "id_edge_cache": "54fb80af-576c-4fdc-ba4f-b596c83f15a1",
                "is_premium": false,
                "domains": [],
                "primaryDomain": {},
                "ssh_connection": {}
            }
        ]
    }
}
Now that you know the way to get entry to your surroundings ID, let’s use Kinsta’s web site instruments programmatically.
Restarting PHP Engine With Kinsta API
To restart the PHP engine of your web site with the Kinsta API, you employ the /websites/instruments/restart-php endpoint. This calls for you to cross the surroundings ID because the frame the use of a POST request.
The code underneath demonstrates find out how to accomplish this the use of JavaScript and the Fetch API:
const restartPHPEngine = async () => {
  const resp = anticipate fetch(
    `https://api.kinsta.com/v2/websites/instruments/restart-php`,
    {
      means: "POST",
      headers: {
        "Content material-Kind": "utility/json",
        Authorization: "Bearer "
      },
      frame: JSON.stringify({
        environment_id: "e.g. 54fb80af-576c-4fdc-ba4f-b596c83f15a1"
      })
    }
  );

  // Parse the reaction as JSON
  const knowledge = anticipate resp.json();
  console.log(knowledge);
};
Within the code underneath, a restartPHPEngine serve as is outlined. On this serve as, the Fetch API is used to make a POST request to the Kinsta API.
The fetch serve as takes in two parameters: the URL of the API endpoint (https://api.kinsta.com/v2/websites/instruments/restart-php) and an object containing the configuration for the fetch request. The configuration contains the means, headers, and frame.
The frame box is the place you cross the payload of the request, which is the surroundings ID. You utilize JSON.stringify to transform the article right into a JSON string. Exchange the environment_id price with the real ID of our environment you wish to have to restart. As soon as the request is distributed, the reaction knowledge is logged to the console.
Construction a Scheduler Utility To Deal with Control Equipment With Kinsta API
With the creation of the Kinsta API, you’ll now construct customized interfaces that supply remarkable flexibility. One such instance is a scheduler utility that lets you agenda duties to be brought about at explicit occasions. Consider scheduling cache clearance or PHP restarts to happen routinely in the dark in a selected location, making sure optimum efficiency.
Getting Began
To observe in conjunction with this mission, it’s essential have a fundamental figuring out of HTML, CSS, and JavaScript and a few familiarity with React. The primary focal point of this mission is to exhibit the usage of the Kinsta API, so this text does now not delve into the main points of UI advent or styling, and different common sense.
To streamline the mission setup procedure, a starter mission has been ready for you. Apply those steps to get began:
1. Create a Git repository the use of this template on GitHub. Make a choice Use this template > Create a brand new repository to replicate the starter code into a brand new repository inside of your GitHub account, and make sure you test the field to come with all branches.
2. Pull the repository on your native laptop and turn to the starter-files department the use of the command underneath:
git checkout starter-files3. Set up the important dependencies by way of working the command npm set up. As soon as the set up is whole, you’ll release the mission to your native laptop with npm run get started. This opens the mission at http://localhost:3000/.
Figuring out the Undertaking Recordsdata
Inside the src folder of this mission are two major subfolders: parts and pages. The parts folder comprises reusable parts, such because the Header and Footer, applied on all pages (House, Operations, Equipment, Agenda).
On this mission, your number one focal point is imposing the common sense at the House and Equipment pages, because the styling, routing, and different common sense are already accomplished.
The House web page has a kind that lists the entire websites to your MyKinsta account. On every occasion this web page renders, the useEffect hook straight away retrieves a listing of your entire websites and populates them in a choose shape box. Every web site’s ID is used as the worth for the corresponding choice.

When a web site is chosen at the House web page, the handleSubmission serve as is brought about. On this serve as, the Kinsta API is used to retrieve the web site’s surroundings ID. Then, cross this ID as a course parameter to the Equipment web page, the place you’ll have get entry to to accomplish more than a few duties associated with the chosen web site.
The Equipment web page is the place you’ll carry out duties for the chosen web site, akin to clearing the web site’s cache, restarting the PHP engine, or scheduling explicit duties.

To accomplish any of those movements at the Equipment web page, you require the surroundings ID. Therefore, it’s handed as a course parameter to this web page. Whilst you begin movements akin to clearing the web site’s cache or restarting the PHP engine, you might be routinely redirected to the Operations web page. Right here, you’ll observe the development of your operation by way of the use of its assigned ID.

Whilst you agenda a job, you might be navigated to the Agenda web page, which shows detailed details about the scheduled process.

As soon as the scheduled time is reached, the precise operation commences, routinely redirecting you to the Operations web page, the place you’ll observe the operation’s development.
Interacting With the Kinsta API in React
With the consumer interface (UI) now in position, the next move is to deal with the shape submission at the House web page and retrieve your decided on web site’s surroundings ID by the use of the Kinsta API sooner than navigating the consumer to the Equipment web page with the ID as a course parameter.
To engage with the Kinsta API, you want your corporate ID and API key. When making API calls in a mission that can be hosted at the cloud, your credentials, just like the API key, must be saved safely to keep away from any type of compromise.
You’ll be able to retailer them securely as surroundings variables for your React utility by way of making a .env record within the root folder of your mission. On this record, upload the next traces:
REACT_APP_KINSTA_COMPANY_ID = 'YOUR_COMPANY_ID'
REACT_APP_KINSTA_API_KEY = 'YOUR_API_KEY'
To get entry to those surroundings variables inside of your mission, you’ll use the syntax procedure.env.THE_VARIABLE. As an example, to get entry to the REACT_APP_KINSTA_COMPANY_ID, you might use procedure.env.REACT_APP_KINSTA_COMPANY_ID.
Fetch Atmosphere ID With Kinsta API in React
Within the House web page, when a web site is chosen and the publish button is clicked, the handleSubmission serve as is brought about. This serve as makes use of the Fetch API (or your most well-liked HTTP request means) to make a GET request to the Kinsta API. Upon finishing the request, you retrieve the surroundings ID and cross it as a course parameter to the Equipment web page.
To keep away from repeating the headers and Kinsta API URL in each and every API name, let’s retailer the headers and KinstaAPIUrl as constants.
const KinstaAPIUrl = 'https://api.kinsta.com/v2';
const headers = useMemo(() => {
    go back {
        Authorization: `Bearer ${procedure.env.REACT_APP_KINSTA_API_KEY}`
    }
}, [])
The KinstaAPIUrl variable shops the bottom URL for the Kinsta API. The headers consistent is created the use of the useMemo hook to make certain that the headers object is handiest created as soon as and does now not exchange between renders. It contains the Authorization header, which comprises the Kinsta API key fetched from the surroundings variables.
const handleSubmission = (e) => {
    e.preventDefault();

    const fetchEnvironmentId = async (siteId) => {
        const resp = anticipate fetch(
            `${KinstaAPIUrl}/websites/${siteId}/environments`,
            {
                means: 'GET',
                headers
            }
        );

        const knowledge = anticipate resp.json();
        let envId = knowledge.web site.environments[0].identification;
        navigate(`/instruments/${envId}`)
    }
    fetchEnvironmentId(selectedSiteId);
}
Within the code above, an asynchronous serve as (fetchEnvironmentId) is created, which takes the siteId received from the chosen web site and passes it to the API endpoint to retrieve the surroundings main points.
As soon as the reaction is won, extract the surroundings ID from the information (you will have a couple of surroundings: staging or are living — so they’re all saved in an array, let’s use the are living surroundings for this demo) and use the navigate serve as (already imported and instantiated for you) to redirect the consumer to the Equipment page with the surroundings ID as a course parameter.
Observe: Most of these routes are already configured within the App.js record.
Restart PHP With Kinsta API in React
At the Equipment Web page, there are two web site instruments, each and every having two buttons to both carry out the operation straight away or agenda the operation (the purposes were created, and onClick occasions were connected to all buttons for you). This instructional will handiest give an explanation for the restart PHP web site software because it’s similar to clean cache—the one distinction is the endpoint.
To restart the PHP engine or carry out any web site software operation, you want the surroundings ID, which is already handed to the Equipment web page as a course parameter. The next move can be to retrieve this parameter, retailer it in a variable, after which ship a request to the Kinsta API.
const { envId } = useParams();Earlier than you continue, similar to you probably did within the House web page, to keep away from repetition, the request headers and API URL were saved as consistent variables since they don’t exchange.
const KinstaAPIUrl = 'https://api.kinsta.com/v2';
const headers = useMemo(() => {
    go back {
        'Content material-Kind': 'utility/json',
        Authorization: `Bearer ${procedure.env.REACT_APP_KINSTA_API_KEY}`
    }
}, [])
When the Restart button is clicked, the restartEngine serve as can be known as. On this serve as, let’s ship a POST request to the Kinsta API, which takes the surroundings ID because the payload:
const restartEngine = async () => {
    const resp = anticipate fetch(
        `${KinstaAPIUrl}/websites/instruments/restart-php`,
        {
            means: 'POST',
            headers,
            frame: JSON.stringify({
                environment_id: envId
            })
        }
    );
    const knowledge = anticipate resp.json();
    navigate(`/operations/${knowledge.operation_id}`);
}
On every occasion the code above is administered, it’s going to routinely cause a PHP engine restart to your web site. If you happen to test your web site’s MyKinsta dashboard straight away, you’ll understand this notification on the most sensible of your web page:

You’ll be able to test this programmatically the use of the /operations endpoint of the Kinsta API. Within the code above, as soon as this request is a hit, you might be routinely navigated to the Operations web page along the operation ID as a course parameter the place you’ll test the operation standing. Make sure you test the operations web page to look how that is treated.
How To Agenda a Process With Kinsta API in React
Scheduling a job with JavaScript approach you want to calculate the estimated time for the duty to happen in milliseconds, using the setTimeout serve as.
At the Equipment web page, when the agenda button is clicked, a modal seems with two shape fields. Those fields permit you to make a choice the specified date and time for the operation to happen. The entered knowledge is used to calculate the whole time, in milliseconds, from the present second till when the operation is predicted to start out.

To perform this, extract the day, month, and 12 months from the date box by way of passing the date right into a new Date object, after which retailer each and every in separate variables.
let 12 months = new Date(scheduleDate).getFullYear();
let month = new Date(scheduleDate).getMonth();
let day = new Date(scheduleDate).getDate();
Subsequent, let’s extract the hour and minute from the time box:
let timeArray = scheduleTime.break up(":");
let hour = parseInt(timeArray[0]);
let minute = parseInt(timeArray[1]);
With those values received, you’ll calculate the anticipated time in milliseconds:
const now = new Date();
let eta_ms = new Date(12 months, month, day, hour, minute, 0, 0).getTime() - now;
At this level, you will have the anticipated time in milliseconds. You’ll be able to now create a setTimeout serve as that triggers on the specified date and time:
setTimeout(serve as () {
    restartEngine();
}, eta_ms);
Within the code above, the restartEngine() serve as is named when the required time is reached to restart the PHP engine.
Right here’s what the entire code will seem like:
const schedulePhpEngineRestart = async (e) => {
    e.preventDefault();

    let 12 months = new Date(scheduleDate).getFullYear();
    let month = new Date(scheduleDate).getMonth();
    let day = new Date(scheduleDate).getDate();

    let timeArray = scheduleTime.break up(":");
    let hour = parseInt(timeArray[0]);
    let minute = parseInt(timeArray[1]);

    const now = new Date();
    let eta_ms = new Date(12 months, month, day, hour, minute, 0, 0).getTime() - now;

    setTimeout(serve as () {
        restartEngine();
    }, eta_ms);

    let date = `${day}-${month + 1}-${12 months}`;
    let time = `${hour}:${minute}`;
    navigate(`/agenda/${date}/${time}`);
}
Whilst you agenda a job, you’ll be navigated to the agenda web page the place you’ll view information about the agenda. When the scheduled time is reached, the setTimeout serve as can be known as, routinely navigating to the operations web page to trace the standing of the operation.
At this level, you will have effectively applied the agenda capability and brought about the Kinsta API to restart your web site’s PHP engine. You’ll be able to do the similar to clean your web site’s cache.
How To Deploy Your React Utility with Kinsta
To deploy your React mission to Kinsta’s utility web hosting, you want to push the mission on your most well-liked Git supplier. When your mission is hosted on both GitHub, GitLab, or Bitbucket, you'll continue to deploy to Kinsta.
To deploy your repository to Kinsta, observe those steps:
- Log in to or create your Kinsta account at the MyKinsta dashboard.
- At the left sidebar, click on “Programs” after which click on “Upload carrier”.
- Make a choice “Utility” From the dropdown menu to deploy a React utility to Kinsta.
- Within the modal that looks, make a choice the repository you wish to have to deploy. In case you have more than one branches, you'll choose the specified department and provides a reputation on your utility.
- Make a choice one of the crucial to be had knowledge heart places from the checklist of 25 choices. Kinsta routinely detects the beginning command to your utility.
In any case, it’s now not protected to push out API keys to public hosts like your Git supplier. When web hosting, you'll upload them as surroundings variables the use of the similar variable identify and price specified within the .env record.

When you begin the deployment of your utility, it starts the method and generally completes inside of a couple of mins. A a hit deployment generates a hyperlink on your utility, like http://site-tools-scheduler-6u1a5.kinsta.app/.
Abstract
With Kinsta API you'll maintain routine duties to your WordPress websites much more successfully. And within the close to long term, you’ll have the ability to do much more.
On this article, you will have discovered find out how to profit from Kinsta API by way of construction a React utility from scratch — hosted on Kinsta as neatly — that lets you agenda PHP restart and clean the web site’s cache via a pleasing dashboard that you'll additionally clone and customise to your personal use case.
How are you the use of Kinsta API? What options want to see added/uncovered subsequent?
The put up Agenda Your Upkeep Duties With Kinsta API (Transparent Cache, Restart PHP Engine) seemed first on Kinsta®.
WP Hosting