Your information is necessary, be it monetary data, memorable footage, or paintings information. And one of the best ways to safe your information is by way of developing information backups and steer clear of harm because of injuries and screw ups.
For a Home windows 11 PC consumer, there are lots of tactics to backup your information and information. We’ve coated how one can backup and repair Home windows registry prior to now, we’ve additionally shared some unfastened backup equipment in your PC.
On this submit, I can information you how one can create a backup of your information after which repair them the usage of two Home windows local equipment, Document Historical past and Backup and Repair.
Contents
Desk of content material:
- Document Historical past
- Again up by means of Document Historical past
- Repair by means of Document Historical past
- Repair a dossier by means of Document Historical past
- Exclude folders from Document Historical past
- Configure Document Historical past’s complicated settings
- Transparent areas utilized by Document Historical past
- Backup and Repair
The “Document Historical past” characteristic
Document Historical past is among the options that have been offered with Home windows 8. This can be a file-based and snapshot-based backup mechanism that backs up all information and folders saved beneath your consumer account.
This contains Library and consumer account folders together with Desktop, Paperwork, Downloads, Tune, Footage, Movies, and many others.
Essentially the most attention-grabbing a part of Document Historical past is that it permits you to briefly test the older variations of a dossier and repair it (extra like the revision historical past characteristic of Google Doctors or Microsoft Phrase).
Again up and repair by means of Document Historical past
Let’s get started with how one can allow Document Historical past to again up and repair information in Home windows 11. To begin with, you want a transportable arduous disk or pen pressure of ok space for storing for the usage of Document Historical past.
As an example, when you have 10 GBs of information saved on your laptop, then you definately will have to get a transportable pressure of no less than 20 GB capability.
The reason is, it retail outlets more than one variations of every dossier, so you want larger pressure.
Again up information by means of Document Historical past
- Plug within the transportable arduous pressure or pen pressure in on your laptop.
- Within the seek bar at the Taskbar or within the Get started menu, seek for
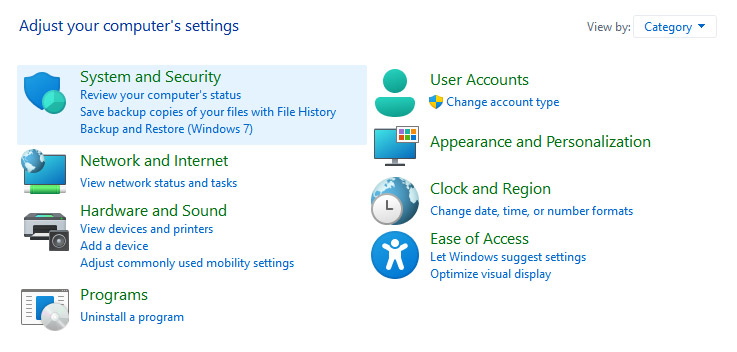
keep an eye on paneland click on at the first end result named Keep an eye on Panel. - Below Gadget and Safety within the Keep an eye on Panel’s house web page, click on on Save backup copies of your information with Document Historical past.
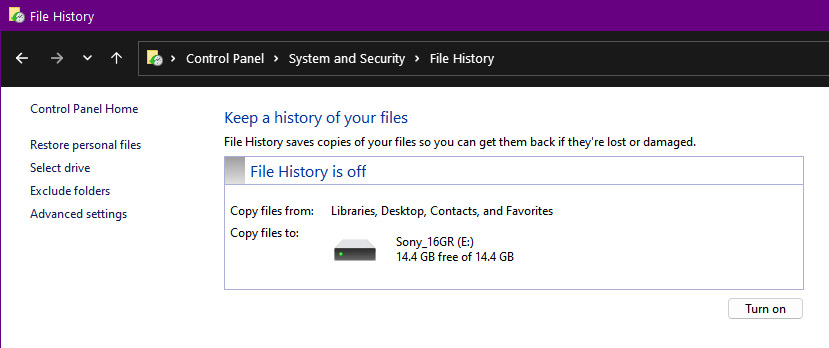
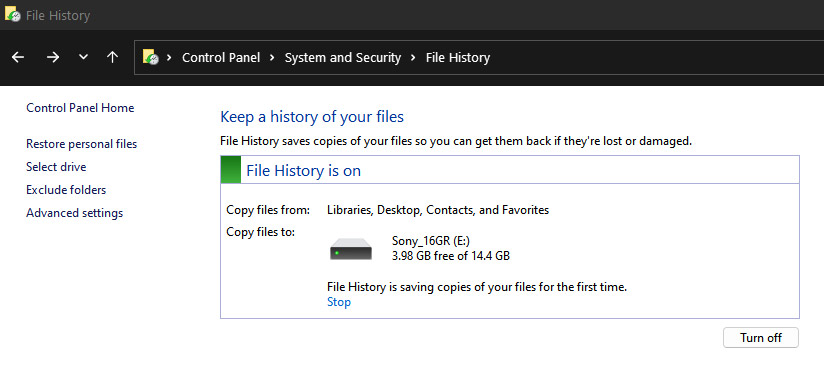
- Click on at the Activate button on the backside correct to allow Document Historical past.


Repair information by means of Document Historical past
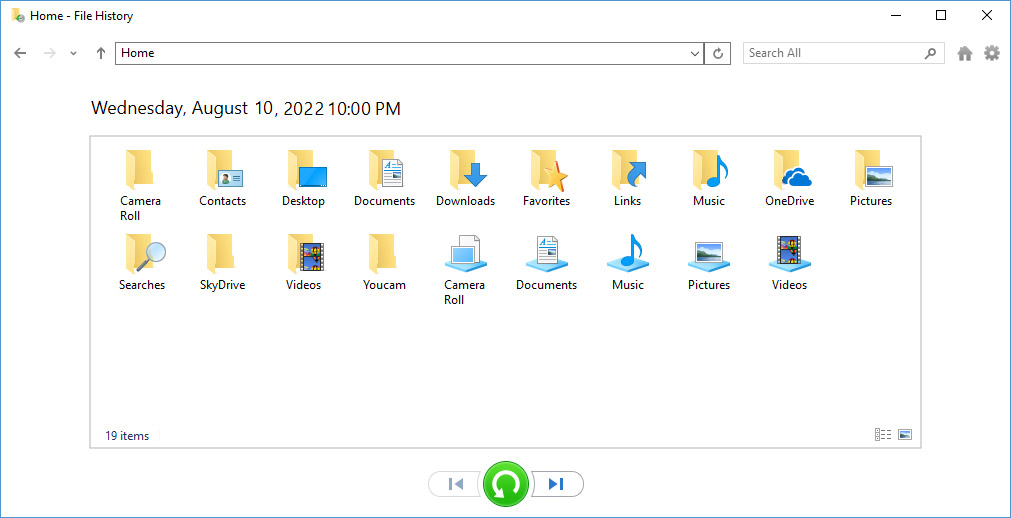
- At the Document Historical past display, click on on Repair private information from the choices within the left.
- Select some of the backups and click on the fairway repair icon to revive it.


Repair a dossier by means of Document Historical past
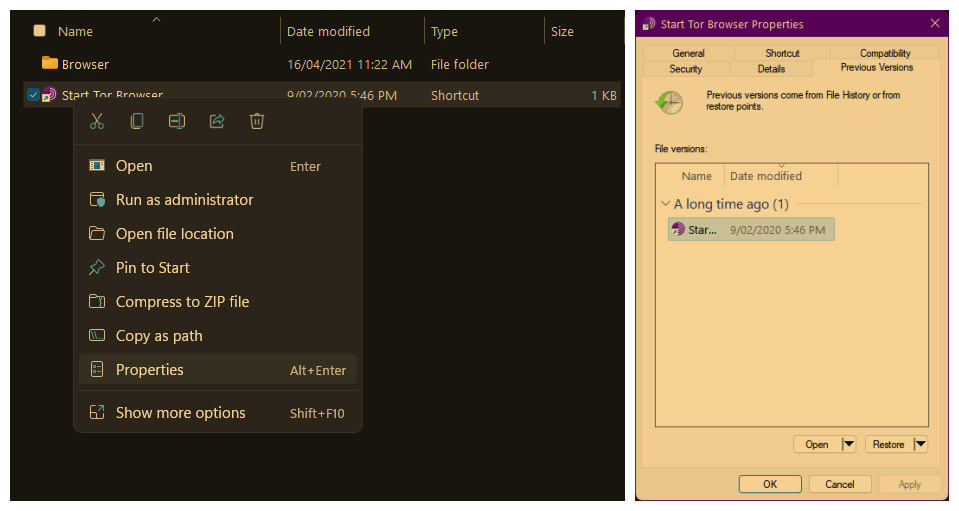
- Within the Document Explorer, navigate to a dossier, right-click it, and click on Homes.
- Transfer to the Earlier Variations tab, make a selection a model, and click on Repair.

Configure Document Historical past choices
Document Historical past additionally provides a number of configurations to customise it in step with your wishes.
You’ll exclude folders you wish to have to avoid backups, configure backup settings like when to again up and what number of backups to stay, and test and transparent space for storing utilized by Document Historical past.
Practice the stairs in beneath sections:
Exclude folders from Document Historical past
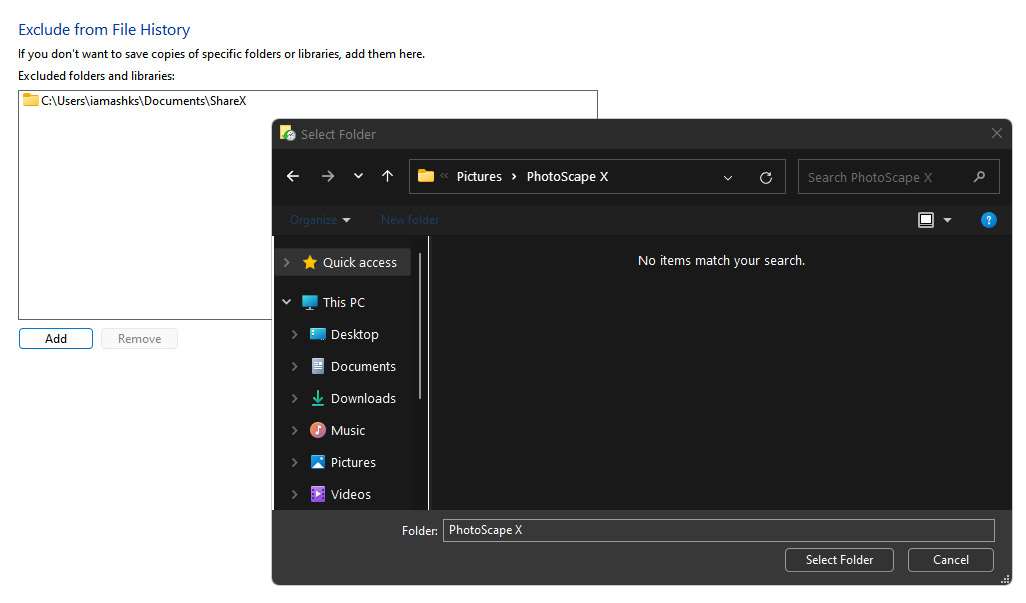
- At the Document Historical past display, click on on Exclude folders within the left.
- Below Exclude from Document Historical past, click on the Upload button, then navigate to the folder you wish to have to exclude, and in the end, click on Make a choice Folder.
- Repeat the remaining step for as many folders as you’d love to exclude.

Configure Document Historical past complicated settings
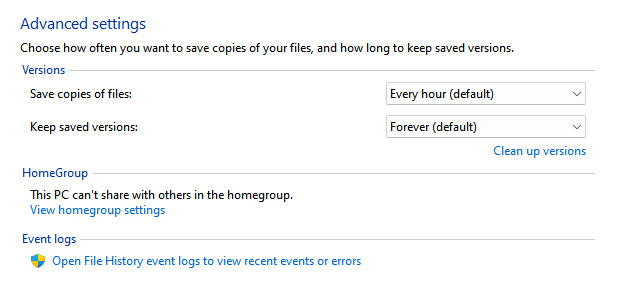
- At the Document Historical past display, click on on Complex settings within the left.
- For Save copies of information, make a selection a frequency in step with your wishes. I recommend Each and every hour or much less for delicate information else Each and every 12 hours or extra.
- For Stay stored variations, make a selection a frequency in step with your wishes. I recommend 1 12 months or extra for delicate information else 6 months or much less. If you select a protracted frequency right here, you are going to desire a bigger-sized garage pressure for Document Historical past.

Transparent area utilized by Document Historical past
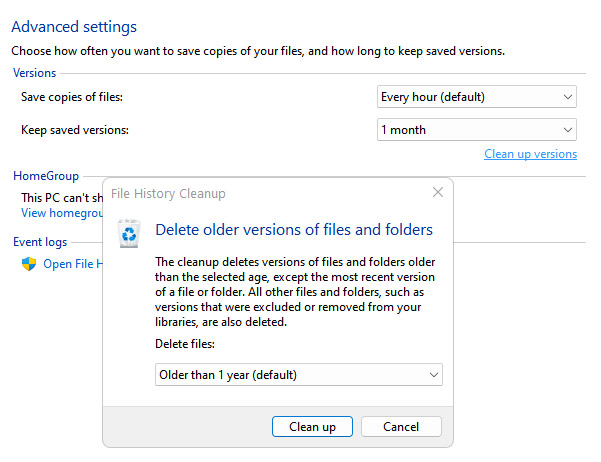
- At the Document Historical past display, click on on Complex settings within the left.
- Click on Transparent up variations within the middle-right of the display, then make a selection some of the choices beneath Document Historical past Cleanup, and in the end, click on Blank up.

The “Backup and Repair” characteristic
Backup and Repair – aka Backup and Repair (Home windows 7) — is the older but extra robust backup choice filled with a number of additional sweets.
I particularly like its characteristic referred to as Gadget Symbol that backs up the entire gadget together with the boot partition of Home windows, enabling you to repair in case of a gadget failure too.
Again up and Repair information
Let’s get started with an academic on enabling Backup and Repair to again up and repair information in Home windows 11. It’s more straightforward to allow and use if in comparison to Document Historical past.
To begin with, you want a transportable arduous disk or pen pressure of ok space for storing for the usage of Backup and Repair.
As an example, when you have 100 GB of information saved on your laptop, you will have to get a transportable pressure of no less than 120-150 GB capability.
The reason is Gadget Symbol takes extra space, so you want larger pressure.
Again up information by means of Backup and Repair
- Within the seek bar at the Taskbar or within the Get started menu, seek for
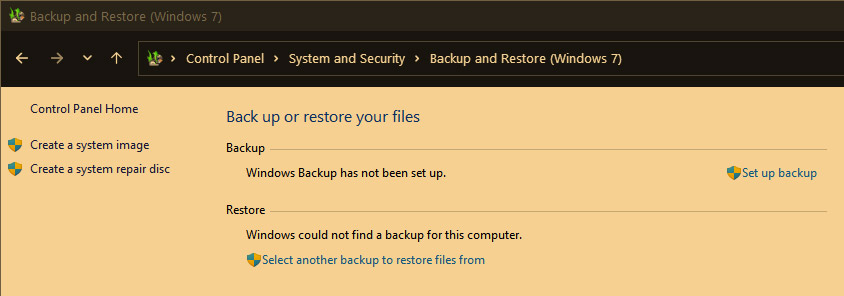
keep an eye on paneland click on at the first end result named Keep an eye on Panel. - Below Gadget and Safety, click on Backup and Repair (Home windows 7).
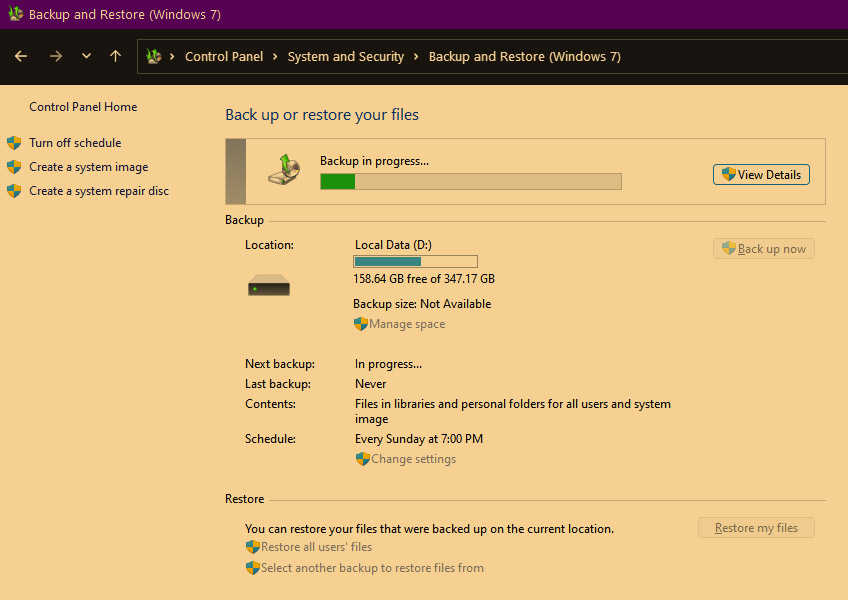
- Below Again up or repair your information, click on Arrange backup at the correct.
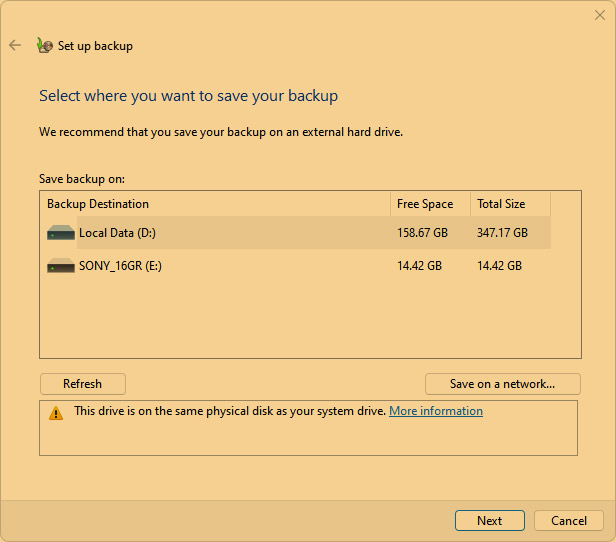
- Below Save backup on, make a selection a backup vacation spot and click on Subsequent. I recommend the usage of a transportable arduous disk with abundant quantity of unfastened area.
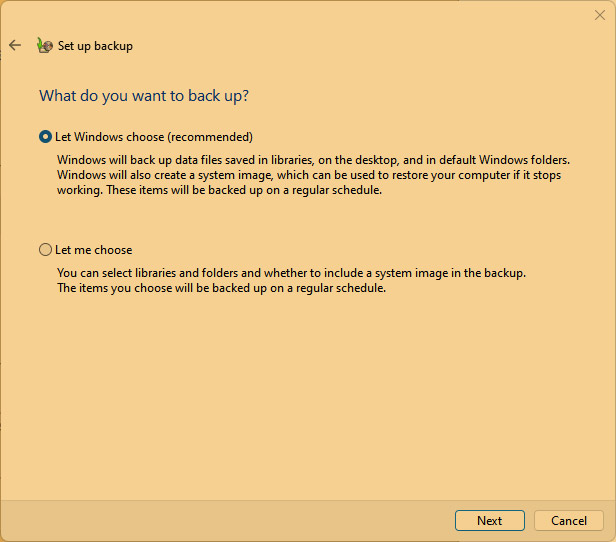
- Select Let Home windows make a selection (really helpful) right here and click on Subsequent.
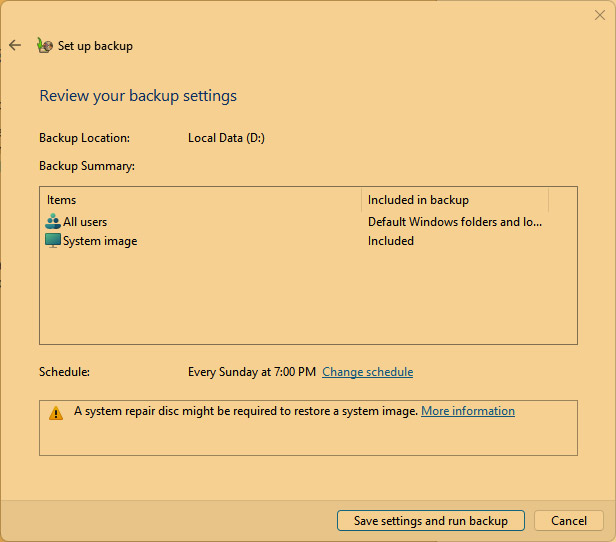
- Evaluation your backup settings and click on Save settings and run backup.
- Home windows will get started developing the backup for the primary time, which would possibly absorb to a couple hours to days relying at the quantity of the knowledge. As soon as the primary backup is finished, Home windows will again up incessantly in step with the set time table.


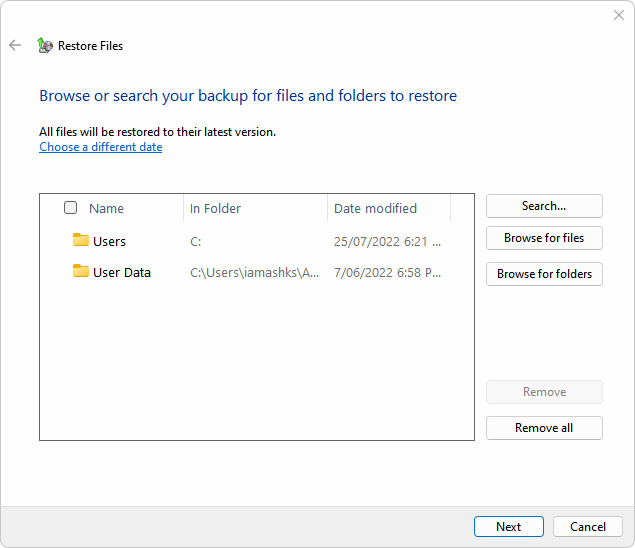
Repair information by means of Backup and Repair
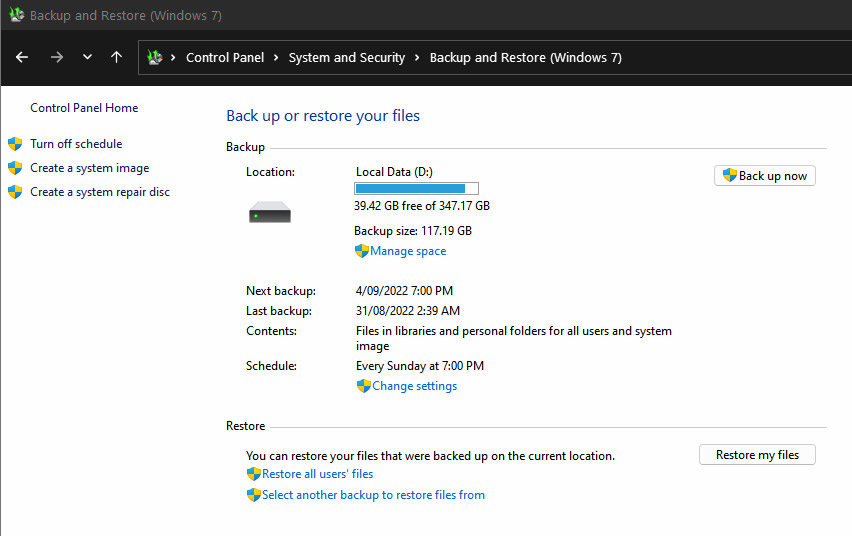
- Below Again up or repair your information, click on the Repair my information button.
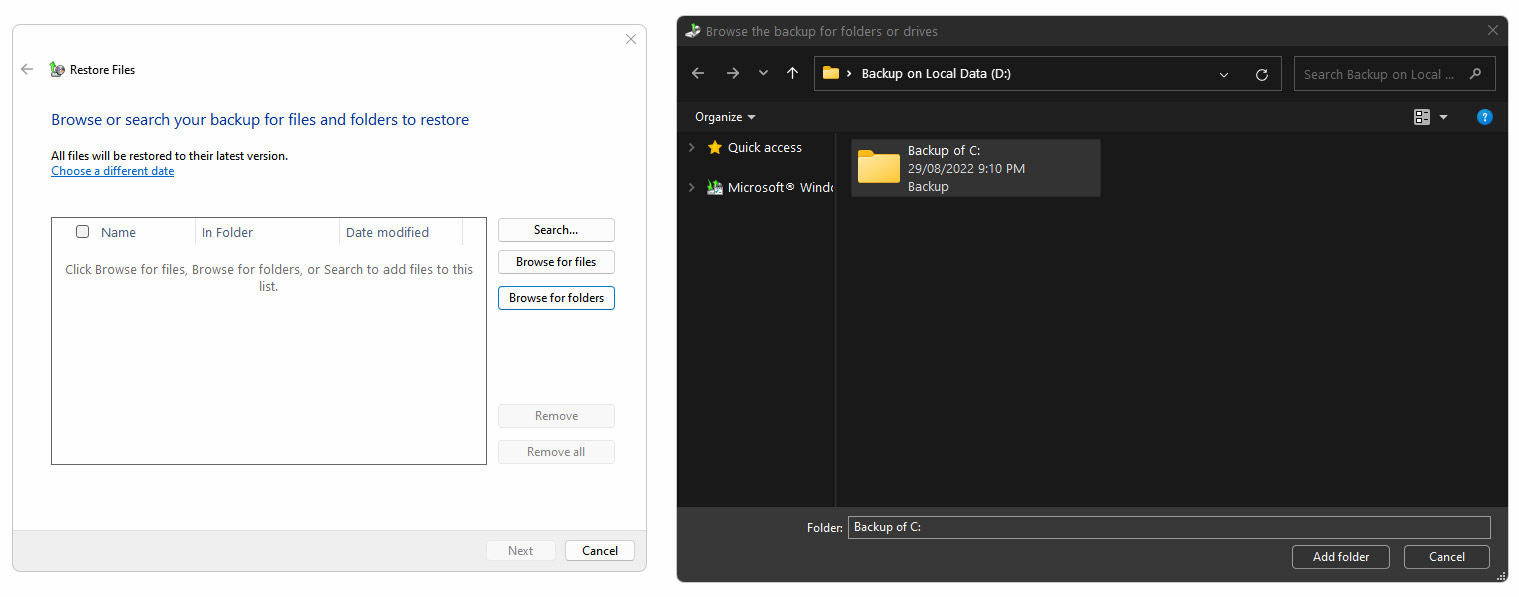
- Click on the Browse for folders button and make a selection a folder, then click on Upload folder. Repeat this step till all folders proven beneath Browse the backup for folders or drives are added and proven beneath Repair information.
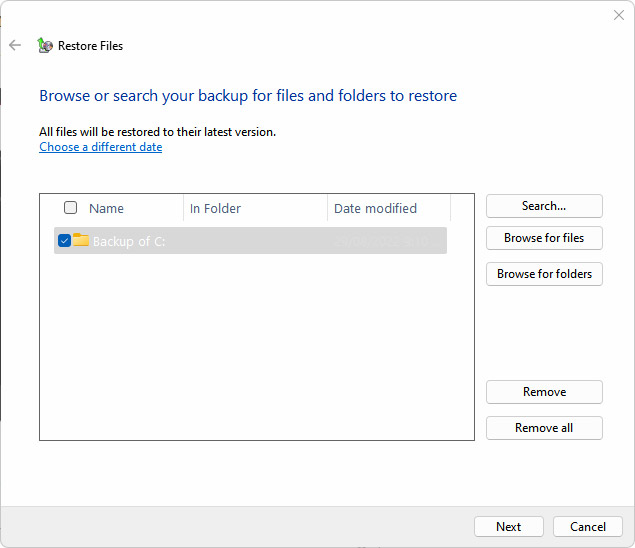
- Below Repair information, click on Subsequent after which click on Repair to revive all information.


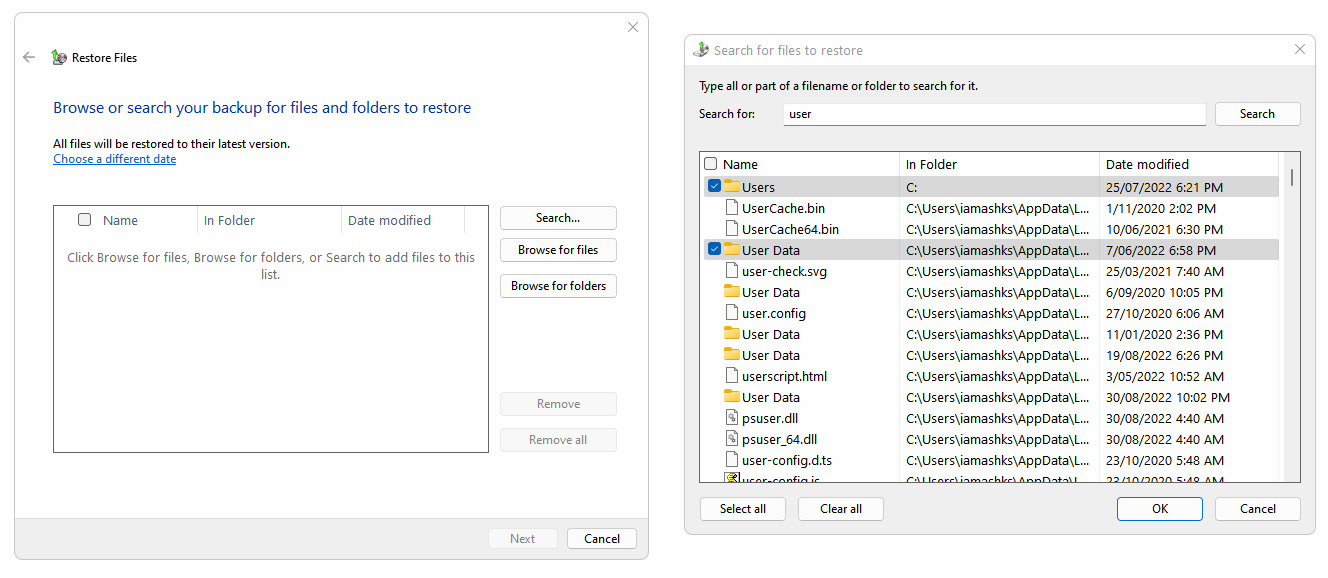
Repair a dossier by means of Backup and Repair
- Below Again up or repair your information and click on the Repair my information button.
- Click on the Seek button, then seek for information or folders, then make a selection all information or folders you wish to have to revive, then click on OK. Repeat this step if wanted.
- Below Repair information, click on Subsequent, then click on Repair to revive selected information.


Configure Backup and Repair choices
Backup and Repair additionally provides configuration choices like Document Historical past to modify its settings and test and transparent space for storing utilized by Backup and Repair.
You’ll use its choices to delete dossier and folder backups in addition to Gadget Photographs.
Alternate Backup and Repair settings
- Below Again up or repair your information > Backup, click on Alternate settings.
- Practice the on-screen directions which might be very similar to the stairs proven beneath the Again up information by means of Backup and Repair phase given above.
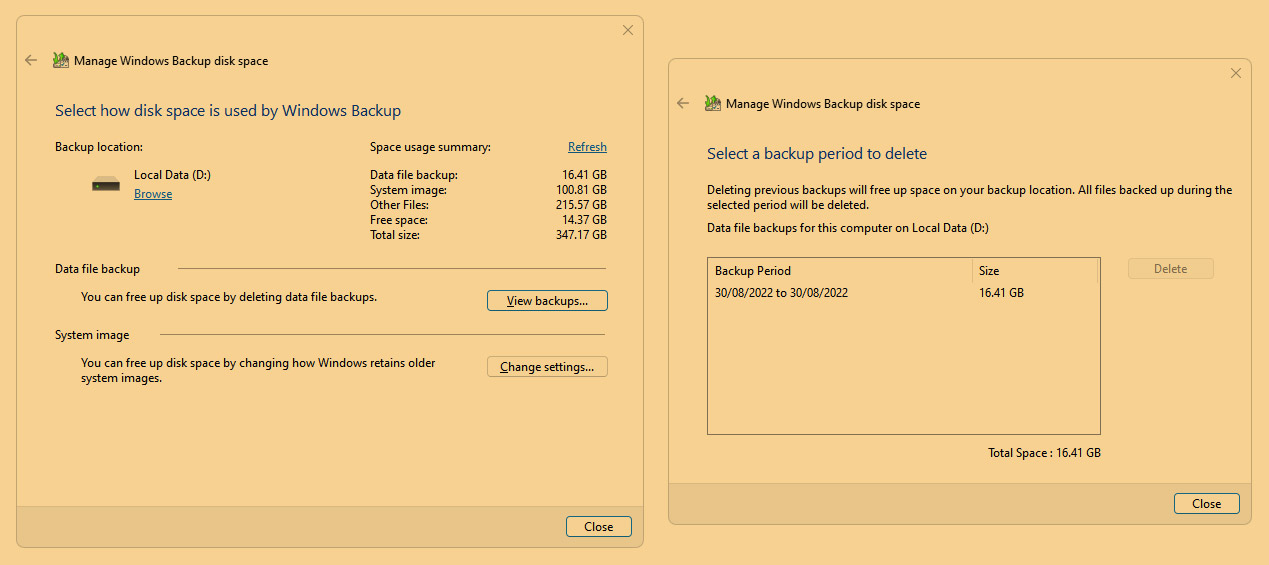
Transparent area utilized by Backup and Repair
- Below Again up or repair your information > Backup, click on Set up area.
- Click on View backups, make a selection a backup, and click on the Delete button. Repeat this step for the entire previous backups you might be positive you don’t want now.
- Click on Alternate settings, make a selection Stay simplest the newest gadget symbol and reduce area utilized by backup, then click on the OK button. Do observe that this surroundings will delete all previous gadget pictures with the exception of the newest one.


Hope this information lets you safeguard your necessary information from doable loss. I recommend somebody will have to have no less than two ranges of backups with redundancy, i.e., you’ve two forms of backups and two copies of every of the ones backups.
With the choices given in this record, you’ll use Document Historical past and Backup and Repair in Home windows 11 to create two forms of backups.
Then, you’ll set up two copies of every kind — 4 backups in general for a disaster-proof plan.
The submit The way to Create and Repair Backup in Home windows 11 seemed first on Hongkiat.
WordPress Website Development Source: https://www.hongkiat.com/blog/backup-restore-win11/